


-
karenhassellAsked on May 27, 2017 at 7:09 PM
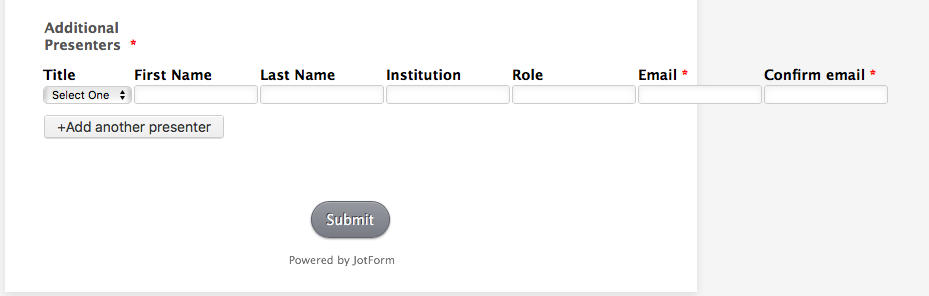
I am using the configurable list to add multiple presenters to a conference proposal form.
As you can see, the list extends beyond the edge of the form and looks silly.
What I would like: title, first name and last name on one line. Name of Institution on a second line. Role on a third line. Email on a fourth line.
Is this possible?
Thanks in advance for your help.
-
Kevin Support Team LeadReplied on May 27, 2017 at 7:29 PM
Yes, it is possible to display the widget in multiple lines, but some CSS code is required. Please, allow me some time to work on the needed CSS code, I will get back to you as soon as possible.
-
karenhassellReplied on May 27, 2017 at 8:43 PMthank you so much!
KH
Karen Hassell, Ed.D.
Educational Consultant
karen.hassell@icloud.com
254-722-7550
... -
Kevin Support Team LeadReplied on May 27, 2017 at 9:00 PM
Please, inject this code to your widget, that will display the widget fields like you want:
th {
display: none;
}
tr {
display: block;
}
.col1:before, .col2:before, .col3:before, .col4:before,.col5:before,.col6:before,.col7:before {
font-weight: bold;
display: block;
}
/* Naming the fields*/
td.col1:before {
content:"Title";
}
td.col2:before {
content:"First Name";
}
td.col3:before {
content:"Last Name";
}
td.col4:before {
content:"Institution";
}
td.col5:before {
content:"Role";
}
td.col6:before {
content:"Email";
}
td.col7:before {
content:"Confirm email";
}
/* Positioning the fields in multiple columns*/
td.col4 {
display: block;
position: relative;
top: 3px !important;
margin-left: 0px;
}
td.col5 {
display: block;
position: relative;
top: 3px !important;
margin-left: 0px;
}
td.col6 {
display: block;
position: relative;
top: 2px !important;
margin-left: 0px;
}
td.col7 {
display: block;
position: relative;
top: -38px !important;
margin-left: 127px;
}
td.col8 {
display: block;
position: relative;
top: -62px !important;
margin-left: 255px;
}
button.add {
position: relative;
margin-top: -45px;
display: block;
}
To add the code to the widget, simply click on the field, wizard icon and paste the code under the Custom CSS tab:

Here's my cloned form of yours where you can see how the code will work: https://form.jotformpro.com/71467501018956
Hope this helps.
-
karenhassellReplied on May 27, 2017 at 10:43 PMThis is EXACTLY what I wanted. Thank so very much!
Please pass along my thanks!
KH
Karen Hassell, Ed.D.
Educational Consultant
karen.hassell@icloud.com
254-722-7550
... -
Kevin Support Team LeadReplied on May 27, 2017 at 11:13 PM
You're most welcome Karen.
I'm glad to know it worked as you wanted.
Please, if there is anything else that we can assist you, do let us know, we will be happy to help.
- Templates
- Integrations
- INTEGRATIONS
- See 100+ integrations
- FEATURED INTEGRATIONS
 PayPal
- Slack
- Google Sheets
- Mailchimp
- Zoom
- Dropbox
- Google Calendar
- Hubspot
- Salesforce
- See more Integrations
- Products
- PRODUCTS
- Form Builder
- Jotform Enterprise
- Jotform Apps
- Store Builder
- Jotform Tables
- Jotform Inbox
- Jotform Mobile App
- Jotform Approvals
- Report Builder
- Smart PDF Forms
- PDF Editor
- Jotform Sign
- Jotform for Salesforce Discover Now
- Support
