


-
visitsAsked on April 8, 2019 at 10:28 AM
Is it possible to get a step by step guide to set up the below, as this would work for my need?
JotForm SupportWelvinAnswered on January 09, 2019 at 12:46 PMYou have configured your form to have a widget for time selection. Unfortunately, this won't work with Zapier. It will require you to have an actual Date field (DateTime in our form builder). When using a DateTime field, you cannot limit the number of sessions per day as well as the time.
I've got it to work with DateTime. If you'd like this setup, let me know. Here's a screenshot the ICS file that is sent to the submitter of the form:
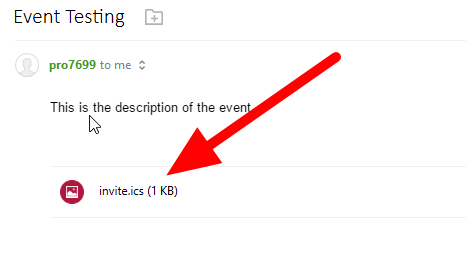
You can try this on my form here https://form.jotform.com/90084601281955. You'll get the ICS file after 15 minutes. I'm on the free plan with Zapier, and 15 minutes is the interval for each Zap to trigger.
-
Welvin Support Team LeadReplied on April 8, 2019 at 12:38 PM
I'm sorry, I have to redo and check steps to make sure nothing has changed since MS Outlook has just released a Beta version of this method. The steps below are still for Office 365 Calendar since I figured you cannot attach the ICS file for MS Outlook Calendar.
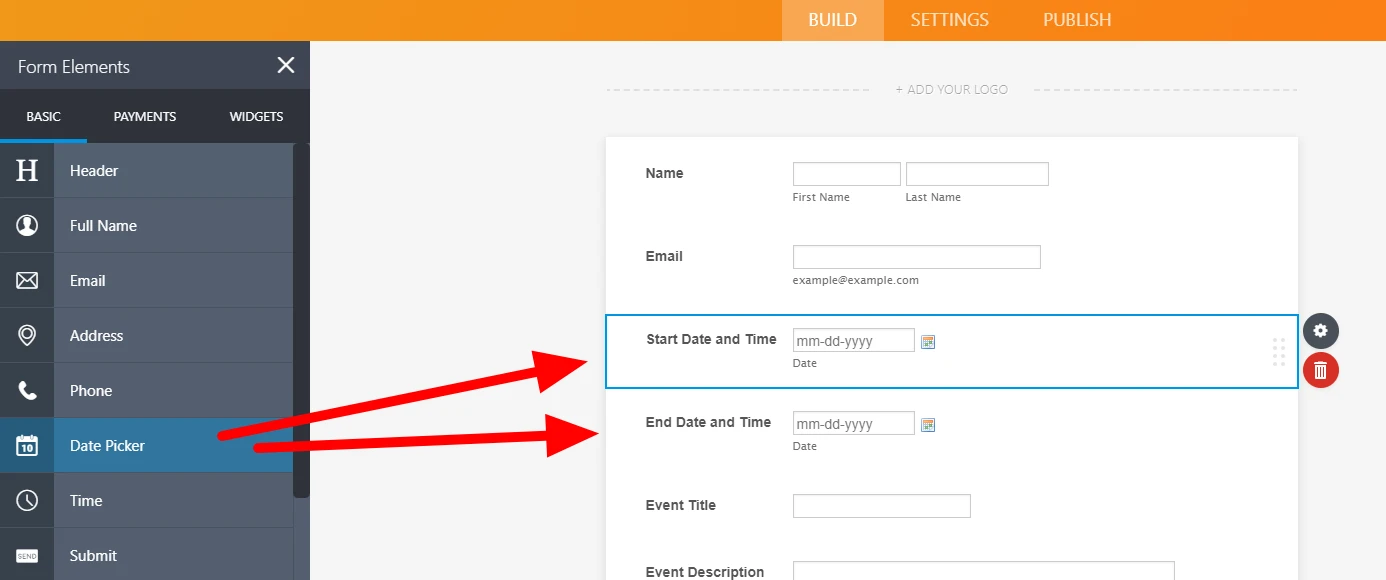
1. The first step you need to do is to create the form with all relevant fields. The date field needs to be the Date Picker, this is vital to the integration.
2. The second step is to go and create a Zap on your Zapier account. Adding your Jotform and selecting the form is straightforward, so I'm sure you can do this.
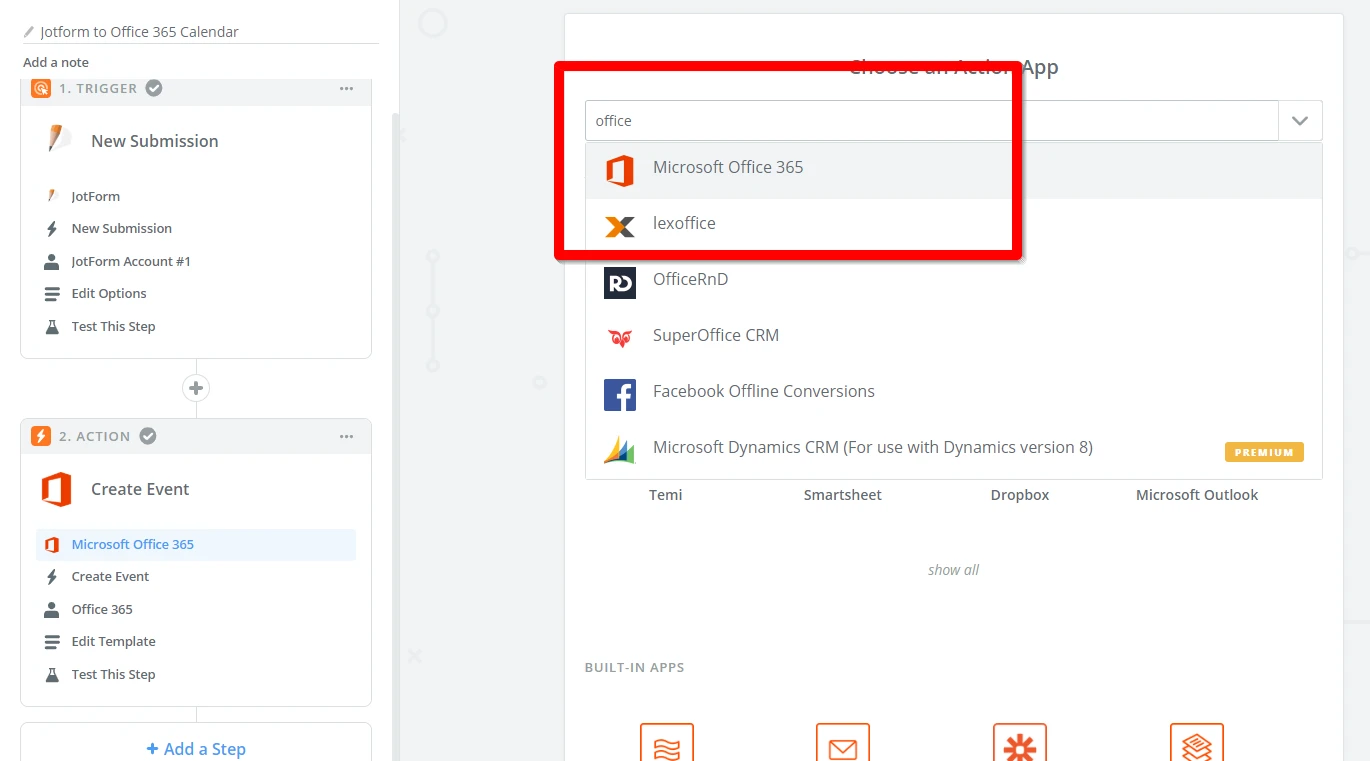
3. In the Action section, you should select Office 365.
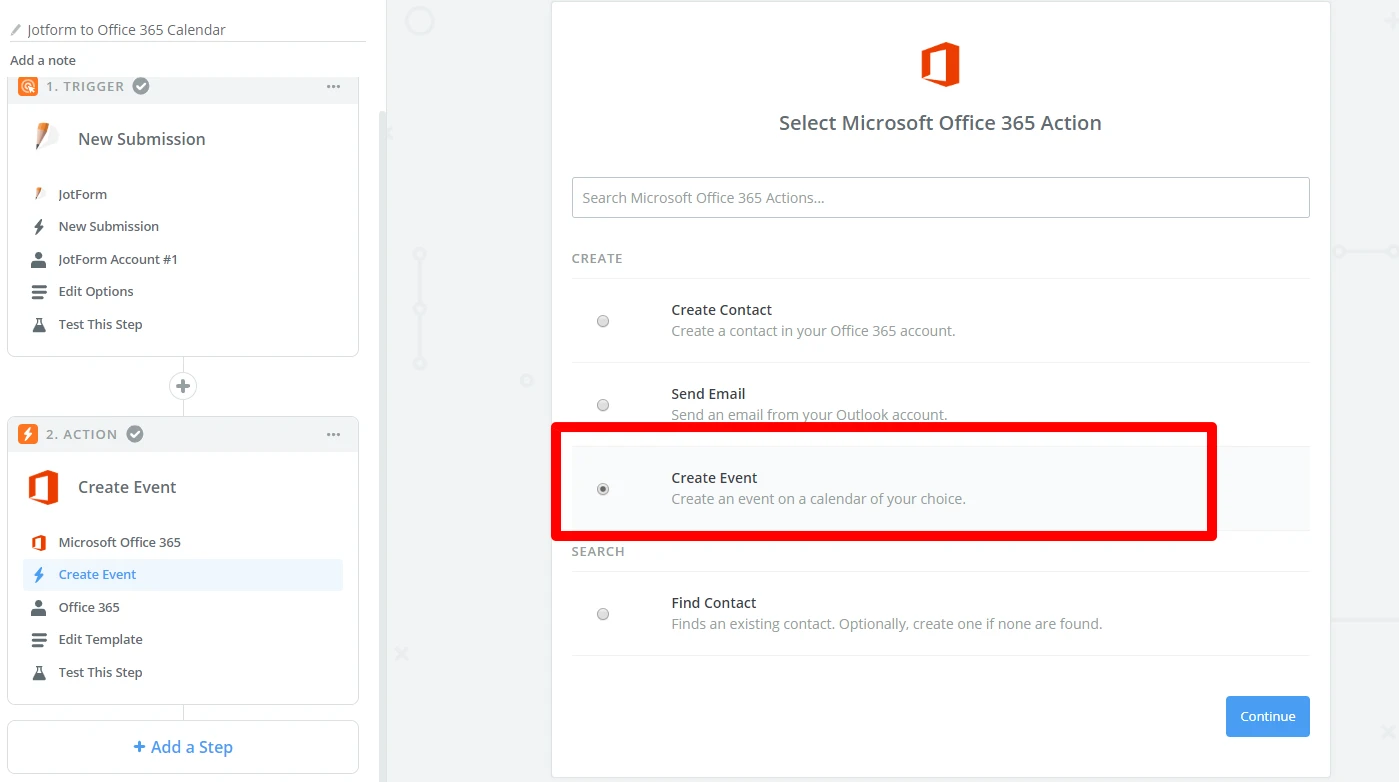
4. From the list of options, choose Create Event:
5. It will ask you to connect your Office 365 account in the next step.
6. This is a crucial part because you need to map the fields. Please see the image below:
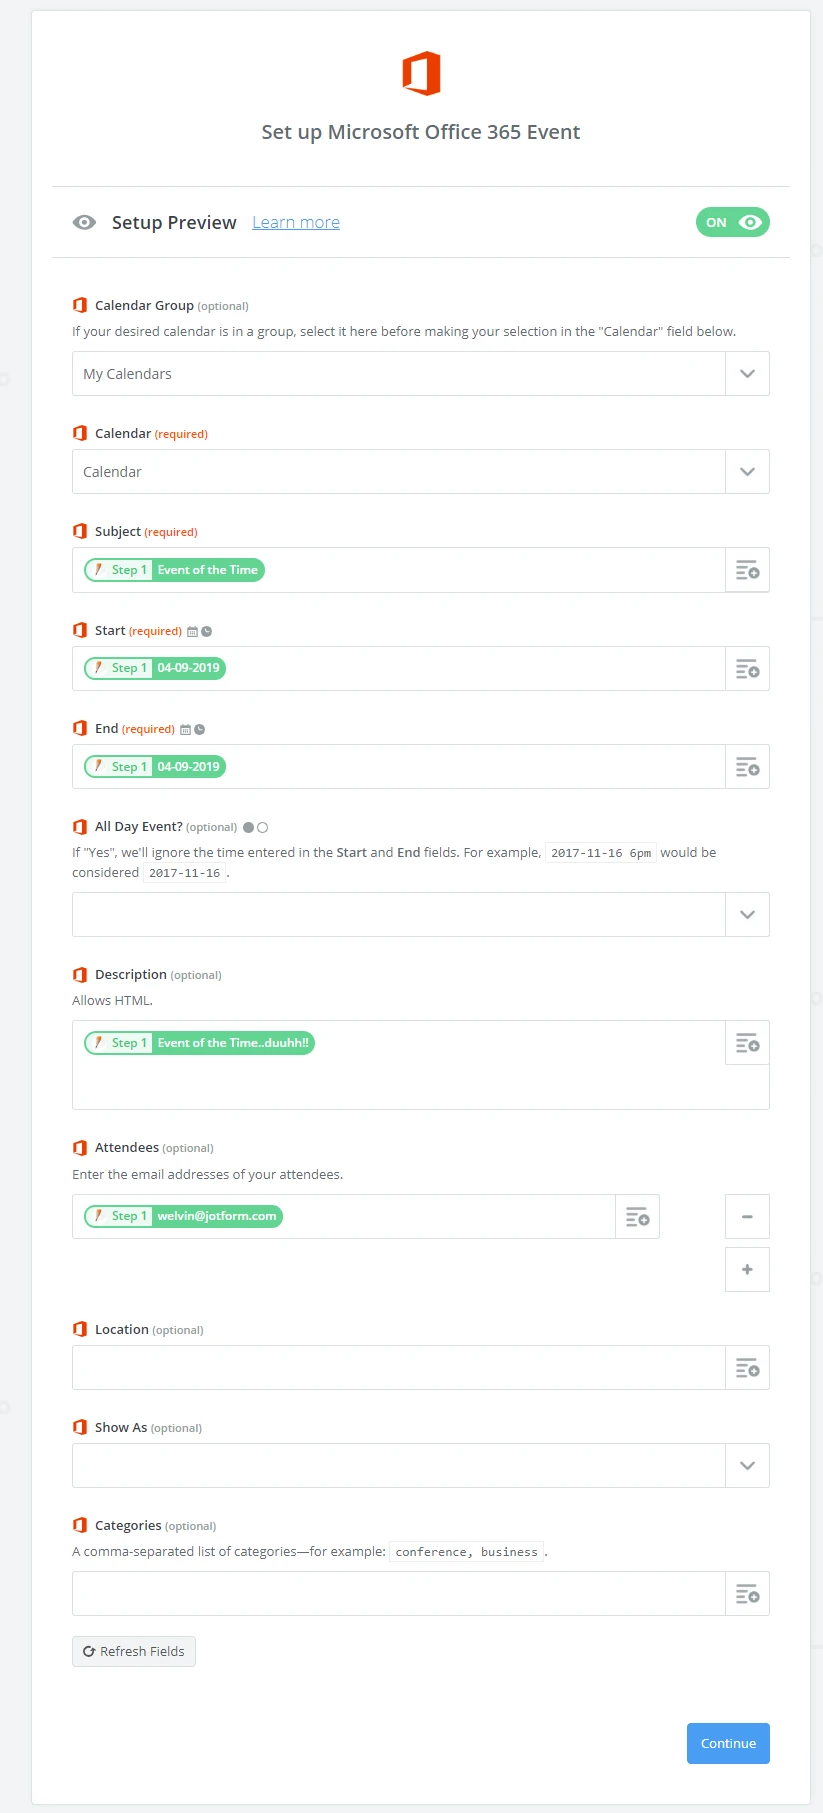
From the image above;
a. You can choose to select a Calendar Group or leave that part empty since that is optional.
b. The Calendar is required, so you need to select a Calendar from the list. I've chosen my one and only calendar. If you have many, you should see the list in the dropdown.
c. Subject is required. This is mapped to the Short Text entry.
d. Start Date is required. This is the Date Picker as per the above instruction.
e. End Date is required. Still a Date Picker field.
f. All Day Event is optional. Choose Yes if it's all day event, leave empty or set to No if needed.
g. Description is optional. I've mapped this field to a Long Text Entry.
h. Attendees. Although optional, this is required to select an email field because this is used to send the ICS file. Please select the email field from your form.
i. The location is optional as well as the last fields.
7. You need to send a test to make sure that the integration is working for you. It should show a success message. Otherwise, an error will show up telling you to correct the field.
I hope that helps. Please let us know if you have questions.
- Templates
- Integrations
- INTEGRATIONS
- See 100+ integrations
- FEATURED INTEGRATIONS
 PayPal
- Slack
- Google Sheets
- Mailchimp
- Zoom
- Dropbox
- Google Calendar
- Hubspot
- Salesforce
- See more Integrations
- Products
- PRODUCTS
- Form Builder
- Jotform Enterprise
- Jotform Apps
- Store Builder
- Jotform Tables
- Jotform Inbox
- Jotform Mobile App
- Jotform Approvals
- Report Builder
- Smart PDF Forms
- PDF Editor
- Jotform Sign
- Jotform for Salesforce Discover Now
- Support

