


-
Steve_SessionsAsked on February 16, 2022 at 4:08 PM
Hello-
How do I create a multi step workflow/approval process?
Once person fills out the first page.
A different person fills out the remaining pages.
Each page is a different step in the process.
How do I enable filling out each page of the form as part of the process for each step, instead of only the first step can fill out the whole form?
Thx
-
Kat JotForm SupportReplied on February 16, 2022 at 5:06 PM
Hi there,
Happy to help!
We can certainly achieve this, but I have a couple of clarifying questions first.
1) Will the emails of the people that need to fill out step 2 & 3 be the same each time or will they have different emails for each submission?
2) Do you want any of the respodents to be able to see the previously submitted pages? (ie. Step 2 sees Step 1 and Step 3 sees everything)?
3) In reference to above, would you like to have the people in Step 2 and/or Step 3 be able to change any of the previously submitted information?
4) Finally, are you wanting an Approval aspect to this workflow at all?
We look forward to your response and appreciate the clarification in advance!
-
Kat JotForm SupportReplied on February 16, 2022 at 5:07 PM
Hi again,
My apologies: #4 should read: Finally, are you wanting an Approval aspect to this workflow at all? If so, will the approvals be in each step or at the final step?
We continue to look forward to your response!
-
Steve_SessionsReplied on February 16, 2022 at 5:14 PM
My answers below, thanks.
1) Will the emails of the people that need to fill out step 2 & 3 be the same each time or will they have different emails for each submission?
A) For this example all emails would be the same.
2) Do you want any of the respodents to be able to see the previously submitted pages? (ie. Step 2 sees Step 1 and Step 3 sees everything)?
A) Yes. Step 1 sees only step 1. But after that I want each step to see current and all previous steps.
3) In reference to above, would you like to have the people in Step 2 and/or Step 3 be able to change any of the previously submitted information?
A) Would be nice but not needed.
4) Finally, are you wanting an Approval aspect to this workflow at all? If so, will the approvals be in each step or at the final step?
A) We want to be able to easily see what step it is in. So if that can be achieved without approvals, then they are not needed for this example.
Thanks
-
Irish_MReplied on February 16, 2022 at 6:32 PM
Great!
Here are the steps for you to achieve it:
- Build your form or if you already have one, use that.
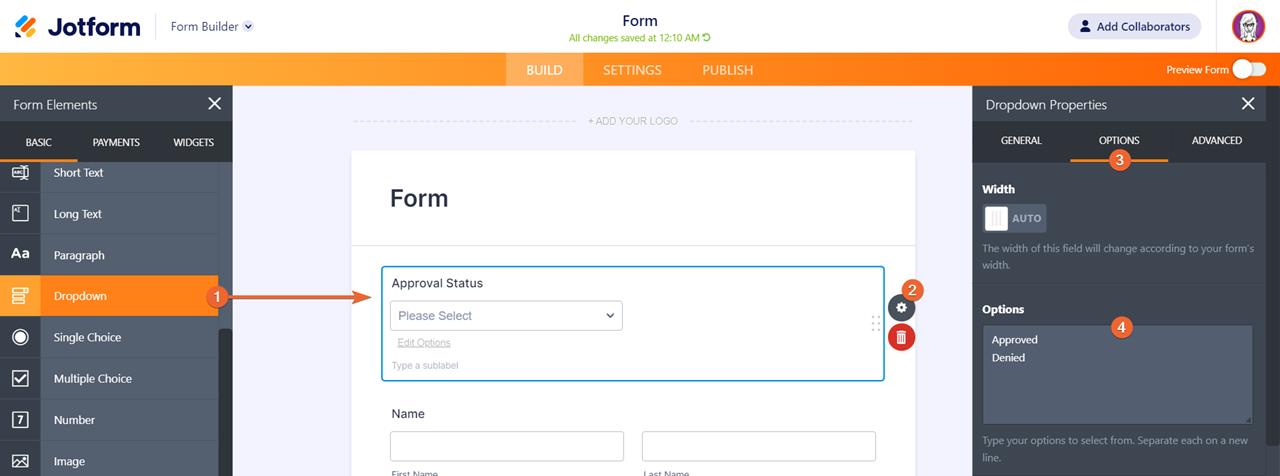
- Add a Dropdown element to your form. Set the Dropdown options as Approved|Denied.
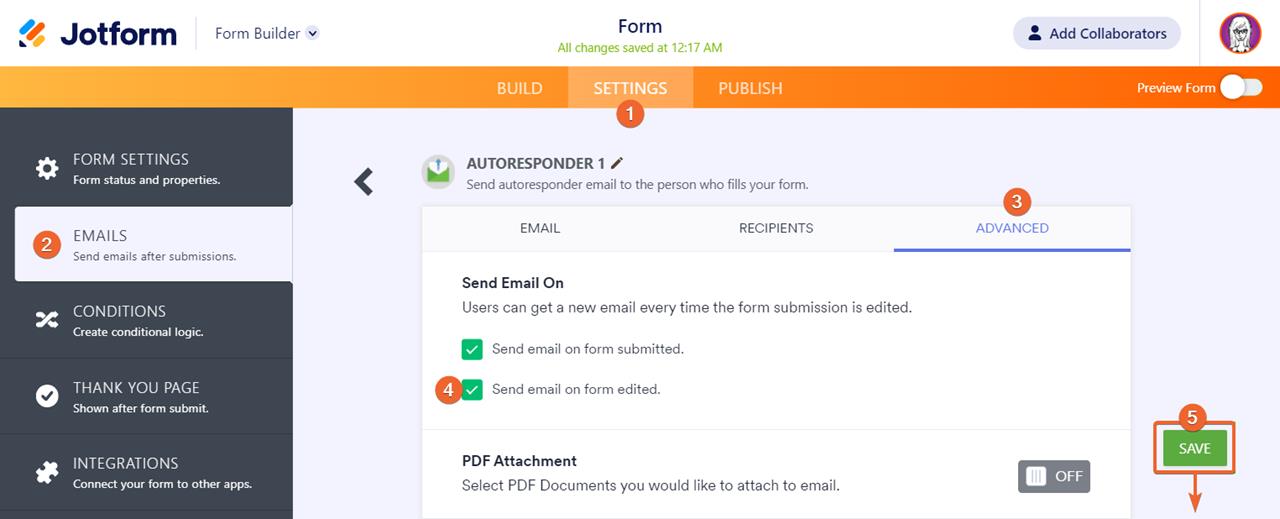
- Let’s move on to emails. Set up your Email Notifications and Autoresponders at your discretion. If you need different email templates when someone reviews a submission, approves it, denies it, etc, it’s all up to you. These templates will then be used later on with your Conditions.
- One important feature that needs to be enabled on your Autoresponders is the Send on Edit option. Ensure that this is enabled so your customers will receive the Autoresponder upon editing their submission.
- Add the Edit Submission Link to the email template that would be sent to the person in charge of deciding the approval.

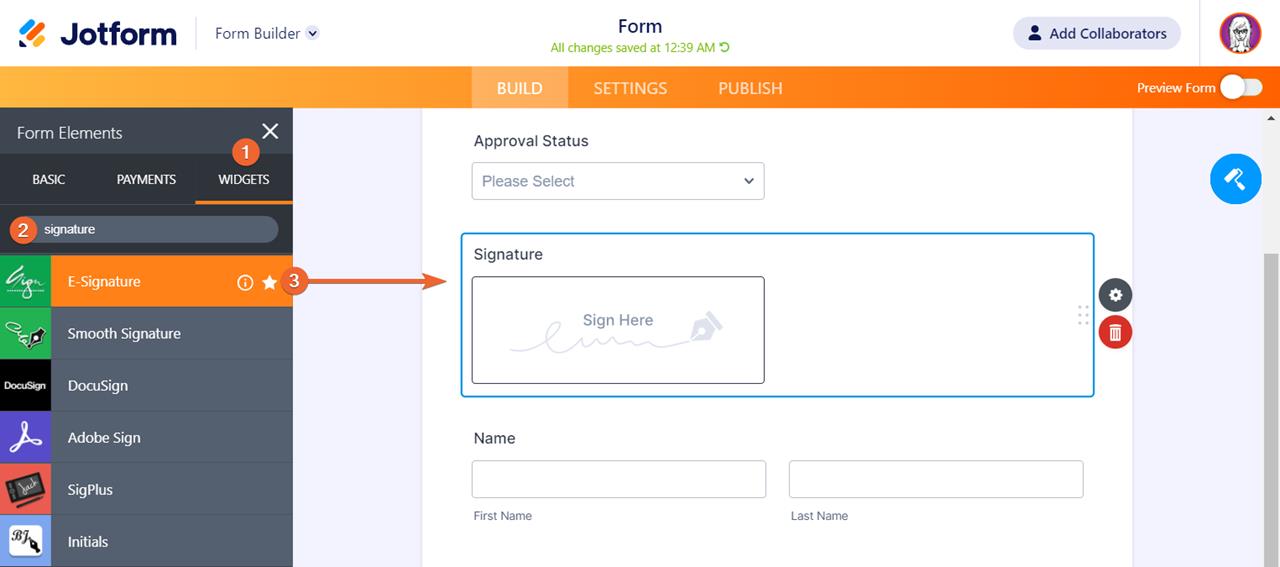
- It’s time to add the widgets. If your approval process requires an e-signature from the boss or manager who approves the submission, then add your preferred signature widget.
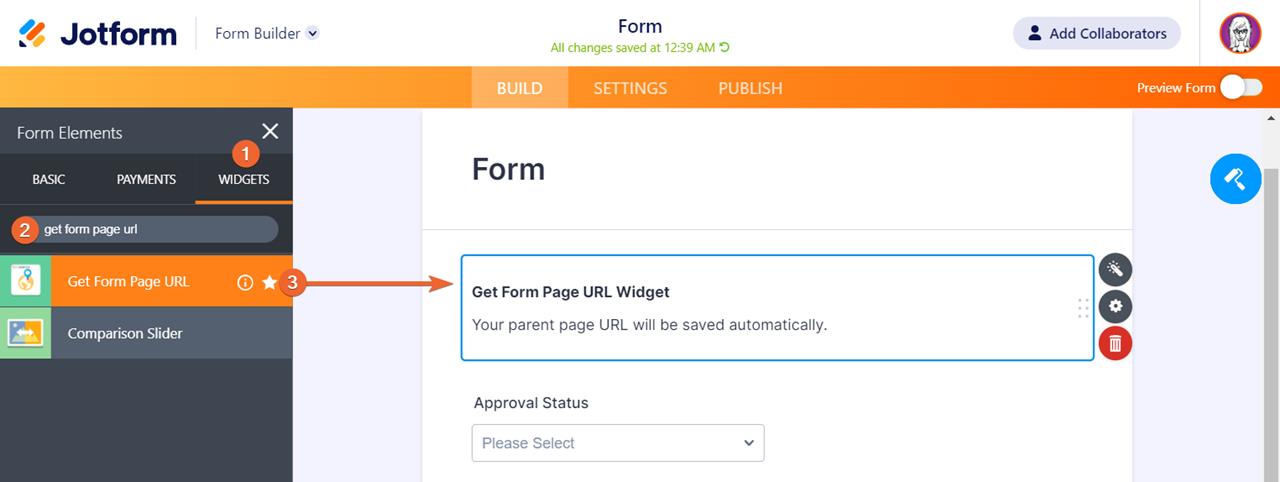
- Next, add the Get Form Page URL widget.
- Lastly, set up your Conditions. Since this part highly depends on how you want the process to work, we’ll lay down some possible scenarios and the needed Conditions to make them happen:
To send the Autoresponder template to the customer if he has been approved, add a Change E-Mail Recipient condition:
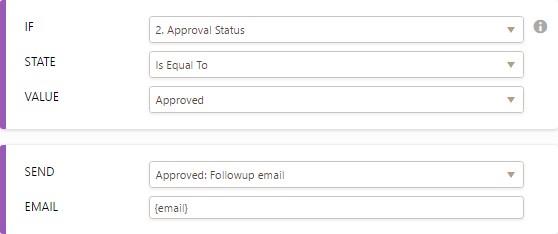 If the Dropdown field’s value is equal to “Approved”, then send the Approved email template to the respondent.
To send the Autoresponder template to the customer if he has been denied, add a Change E-Mail Recipient condition:
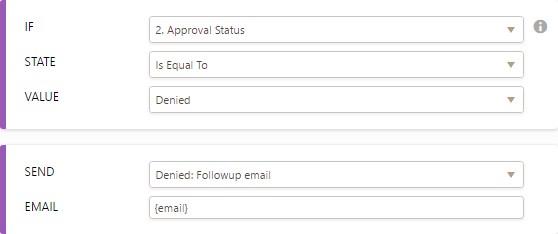 If the Dropdown field’s value is equal to “Denied”, then send the Denied email template to the respondent.
You may visit the whole article here.
-
Steve_SessionsReplied on February 18, 2022 at 10:04 AM
Can someone look at my questions again? It looks like the answers provided are for different questions.
None of them match up with my questions, and I don't see how they answer my question.
Thanks
-
Irish_MReplied on February 18, 2022 at 10:41 AM
Apologies for the previous message.
To achieve what you wanted, here's how:
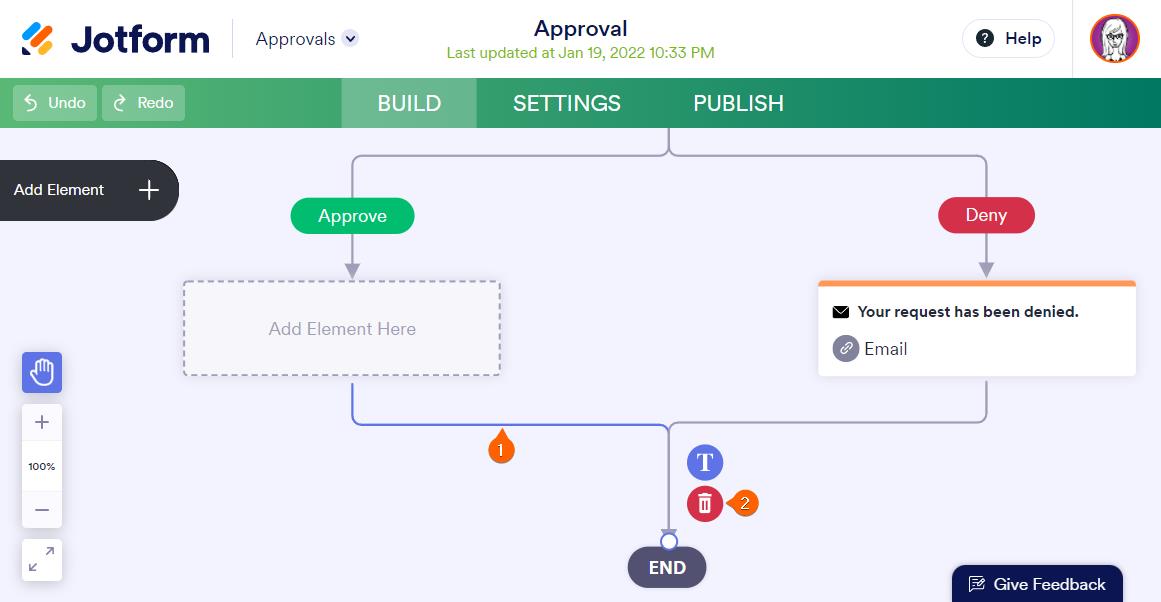
Modify the Default “One Step Approval” Workflow
- Start by deleting the Send Email element under the “Approve” outcome.

Also, delete the link under it so we could create a new outcome later on.
- Open the Element panel.

- Replace the deleted Send Email with an Approval element.
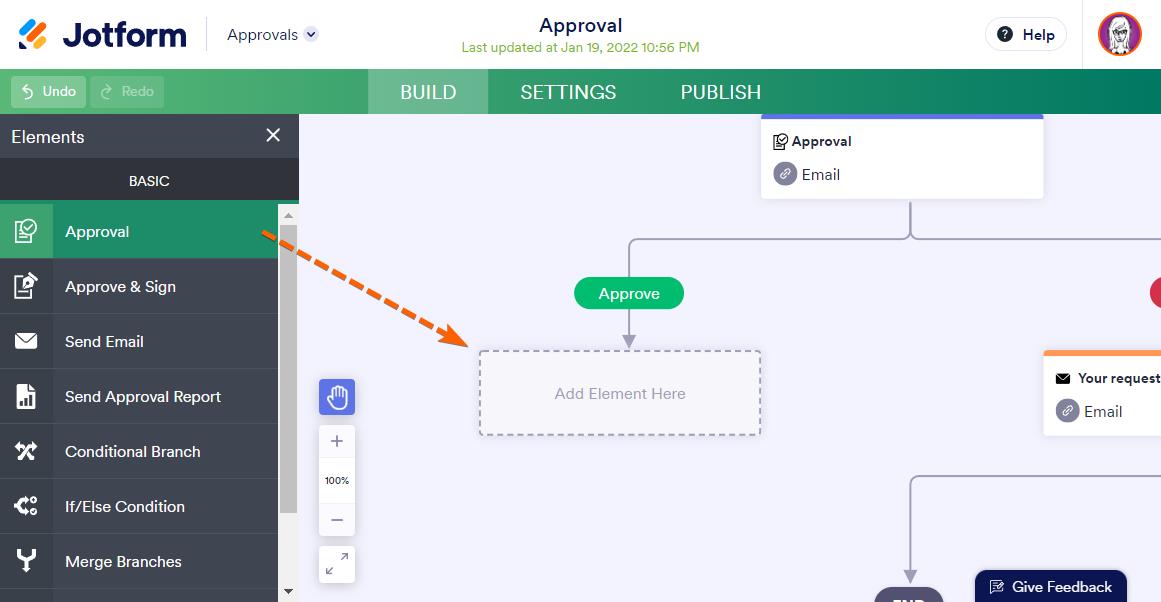
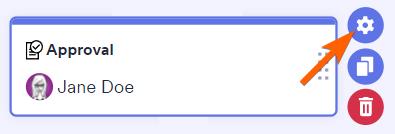
You can then edit the new Approval element’s properties by clicking on the gear icon. In the Approval Properties panel, you can add the approver’s email, rename the element, and configure other options.
Once you’ve created and set up a new Approval element, you need to set up the outcomes.
Here's the link on how to set up the outcome:
- Templates
- Integrations
- INTEGRATIONS
- See 100+ integrations
- FEATURED INTEGRATIONS
 PayPal
- Slack
- Google Sheets
- Mailchimp
- Zoom
- Dropbox
- Google Calendar
- Hubspot
- Salesforce
- See more Integrations
- Products
- PRODUCTS
- Form Builder
- Jotform Enterprise
- Jotform Apps
- Store Builder
- Jotform Tables
- Jotform Inbox
- Jotform Mobile App
- Jotform Approvals
- Report Builder
- Smart PDF Forms
- PDF Editor
- Jotform Sign
- Jotform for Salesforce Discover Now
- Support


