


-
BeautyLounge_StudioAsked on September 29, 2022 at 11:21 PM
Is it possible to do the following:
- Create a PDF of a contract using a form to capture the specifics (I understand how to do this already)
- Send an email to the client with the PDF attached (I understand how to do this as well)
- Provide a "sign and approve" button on the email to the client which will also capture the client's signature
- Counter-sign the form and provide an updated PDF to the client
As mentioned, I know how to do steps 1 and 2 but am having trouble finding a solution for steps 3 and 4. The approval flows seem to be mostly for "internal" members who have access to JotForm. I'm trying to make it simple for clients who will NOT have access to JotForm to be able to sign after I've created a contract for them, and then allow me to counter-sign to complete the process. I don't really want them to go through the original form which I think is what will happen if I use the "request update" feature.
Please advise, thank you.
-Ken
-
Rahul JotForm SupportReplied on September 30, 2022 at 1:12 AM
Hi Ken,
Thanks for reaching out to Jotform Support. We are working on a new feature for the Sign document but it's still in beta tests. However, you could try our Approval flow to achieve your requirements. The Approver can still sign and approve without having a Jotfom account. To do this, you just need to disable the option Login required for approver:
You might also want to check out the guides about How to Create an Approval Flow in Jotform and A General Approach on Building an Approval Process Workflow.
Let us know if you have any other questions.
-
BeautyLounge_StudioReplied on September 30, 2022 at 1:27 AM
I actually tried the approval flow but there were 2 issues:
- Even with the login disabled, the approver seems to have access to see all the other entries which I wouldn't want. Ideally, they should only see the entry that is associated with their email.
- When I clicked the approve button from the email, it didn't actually approve anything and move it along. The status said it was still waiting for the client email to approve, even though I clicked the link from the client email.
Any ideas? Maybe I'm missing a setting somewhere?
-
BeautyLounge_StudioReplied on September 30, 2022 at 1:30 AM
Oh, one other issue. The signature on the approval chain doesnt seem like it can be used in a PDF summary either. I had initially created a signature field on the main form, but the approval signature isn't accessible as an item to be put onto the PDF as far as I can tell.
-
Nikola JotForm SupportReplied on September 30, 2022 at 2:53 AM
Hi Ken,
The first two issues you reported happened because you were logged into your Jotform account when you tried to approve submissions using your other email. Approvers can't only see an entry that is associated with their email. You should log out from your Jotform account while testing the form as a user or use another browser where you are not logged in.
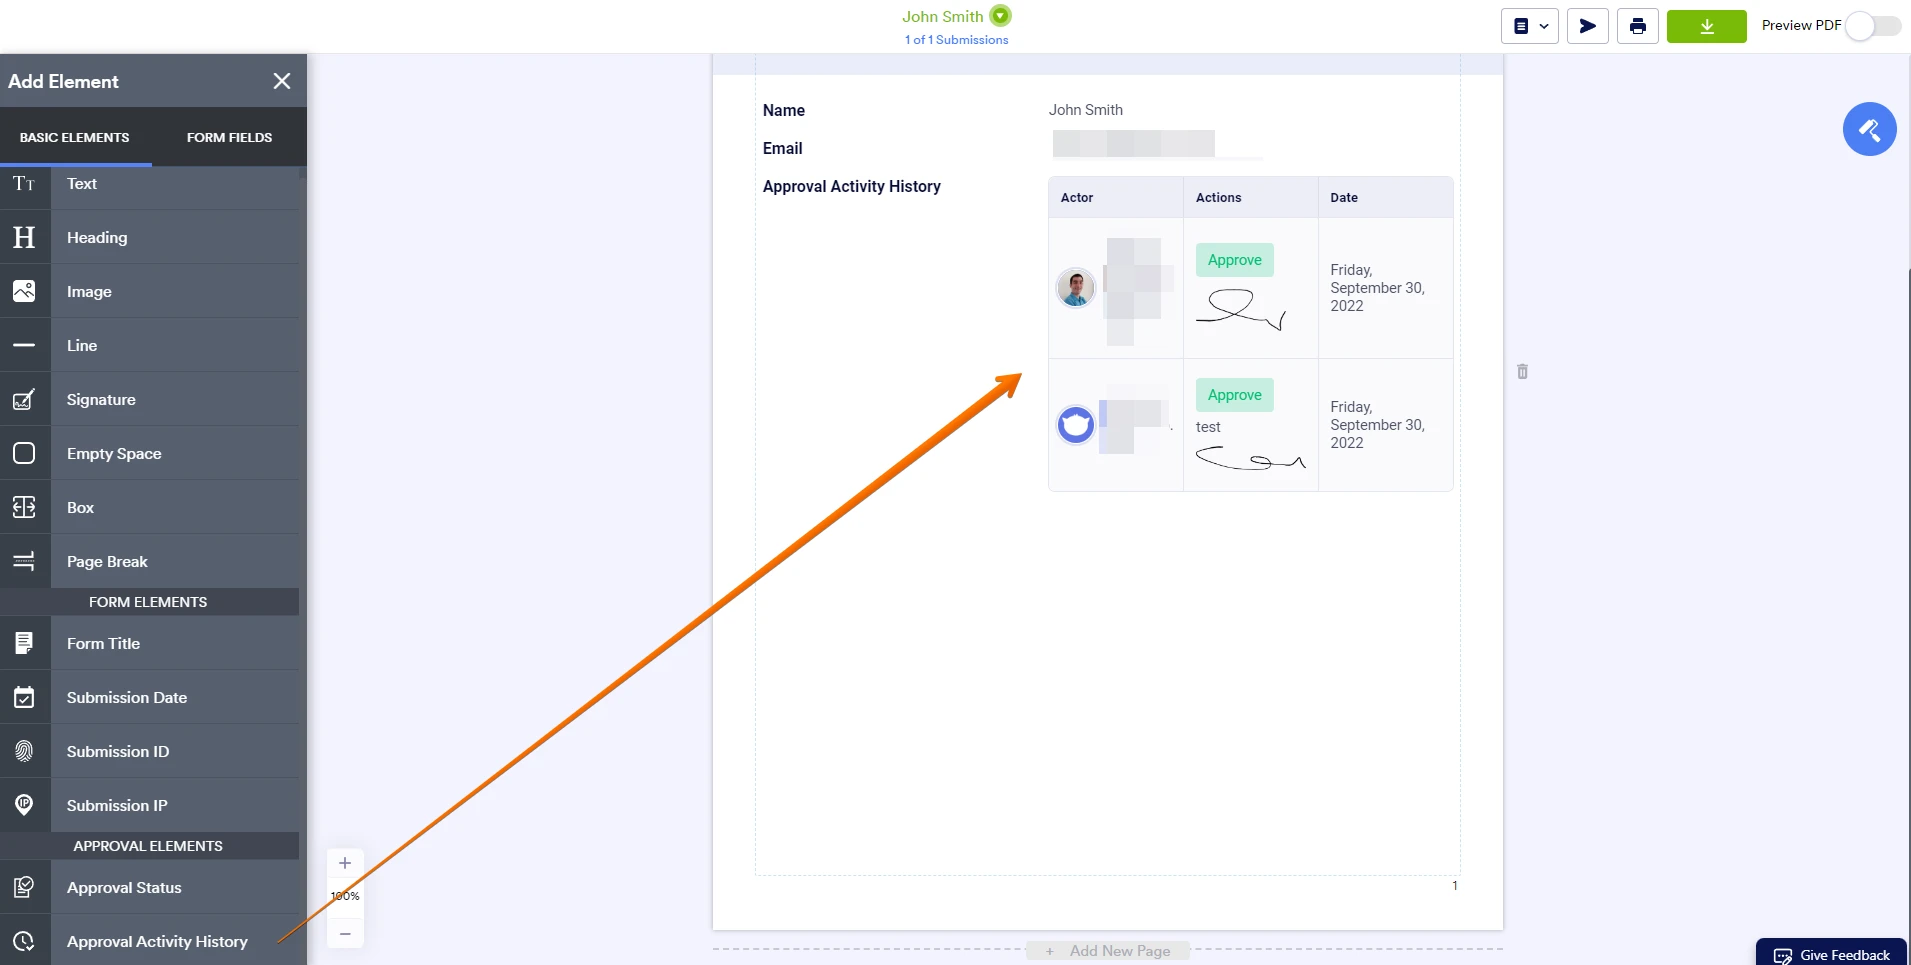
You can add Approval Activiti History to your PDF. This will show signatures in PDF.
Let us know if you have any other questions.
-
BeautyLounge_StudioReplied on October 1, 2022 at 3:24 PM
Thank you, I logged out and was able to see just the approval tied to the recipient. Appreciate your help!
-
Edward_EReplied on October 4, 2022 at 4:28 AM
Hi BeautyLounge,
Thanks for using Jotform. We have great news for you. We’ve recently launched Jotform Sign, a powerful e-signature product that allows anyone to collect legally binding, E-Sign- and UETA-compliant signatures. Jotform Sign’s easy-to-use user interface and automated workflows differentiate it from other e-signature tools.
We’ve created a short guide that explains the main aspects of Jotform Sign.
1. Creating a Signable Document
- Go to your My Documents page and click on Create Sign Document.
- Next, you can upload your own document, or you can use the Demo Document to test it out.
- Then, you can add more documents, or you can continue by clicking on the Create Signable Document button.
- You’ll be redirected to the Jotform Sign Builder page.
Please note that, after creating your document, you can let the system detect fillable fields automatically by clicking on the Detect Fields button, or you can manually add fields from the menu on the left after dismissing the popup message.
2. Adding Fields Manually
- In the Jotform Sign Builder, click on the Add Fields + button on the left side of the screen.
- All you need to do is drag and drop elements from the menu that opens on the left into your document. Although there’s no limit to the number of elements you can add, having too many fields might negatively affect the performance of your document.
3. Editing Fields
- In the Jotform Sign Builder, select the related field and click on the gear icon below the field.
- In the menu that comes up, you can make changes to the field. For example, you can change the Field Name, and you can set options based on the element you’re using.
4. Assigning Fields
- You can easily assign, edit, add, and delete roles just by clicking on the Assign Field To button.
- After clicking on it, a window will open. When it does, you can make your changes.
5. Changing the Document Title
- In the Jotform Sign Builder, click on Settings in the green navigation bar at the top of the page.
- Under the General Settings tab, you can edit the document’s title in the Document Title text area.
6. Customizing the Email Settings
- In the Jotform Sign Builder, click on Settings in the green navigation bar at the top of the page.
- Then, click on Email Settings.
- In the Email Settings section, you can edit both the Email Subject and Email Message.
After completing the steps above to customize the email settings, your email will look like the one below:
7. Publishing the Document
- In the Jotform Sign Builder, click on Send in the green navigation bar at the top of the page.
- In the Send To Sign section, you can easily send your document so people can sign it.
- All you need to do is enter a name and email address in the related fields.
- Then, click on Send To Sign.
You can also see a list of your Sent Documents as well at the bottom of the Send section:
In addition, you can send Reminder Emails, set an Expiration Date, add a CC recipient, and enable signer delegation under the Options tab:
8. Tracking Documents
- Go to your My Documents page and select your document.
- Then, click on Signed Documents.
- This will automatically redirect you to the Jotform Sign Inbox.
- In the Jotform Sign Inbox, you can see all of your documents. They may be listed under several tabs, such as Waiting for My Signature, Waiting for Others, Completed, Canceled, and Declined.
Give it a try and let us know how it goes. We’d love to hear your feedback about Jotform Sign.
- Templates
- Integrations
- INTEGRATIONS
- See 100+ integrations
- FEATURED INTEGRATIONS
 PayPal
- Slack
- Google Sheets
- Mailchimp
- Zoom
- Dropbox
- Google Calendar
- Hubspot
- Salesforce
- See more Integrations
- Products
- PRODUCTS
- Form Builder
- Jotform Enterprise
- Jotform Apps
- Store Builder
- Jotform Tables
- Jotform Inbox
- Jotform Mobile App
- Jotform Approvals
- Report Builder
- Smart PDF Forms
- PDF Editor
- Jotform Sign
- Jotform for Salesforce Discover Now
- Support


