


-
JapanWorldAsked on June 5, 2015 at 7:02 PM
Hello this is how it is now

This is how I want it to be

I hope someone can help me with the css code.
Thank you so much. New to Jotform and liking it very much so far.
-
JanReplied on June 6, 2015 at 12:27 AM
Based on the screenshot, you would like to to separate the passport no. field, issuing country and date of expiry on another row? Am I right?
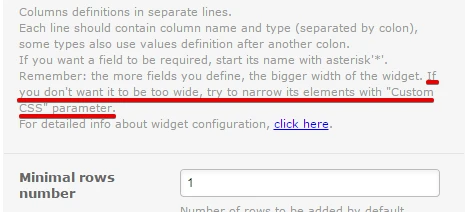
Unfortunately, this configurable list widget are using table elements. If the widget is too wide, you can only narrow it so it will fit in your form.
Please confirm if you want to just decrease the width of each column so it will fit in your form. Thank you.
-
JapanWorldReplied on June 6, 2015 at 7:40 AM
Thank you for your prompt response. Even if we decrease the width of the columns, I do not think they will fit on one line. There are 7 columns and the date columns take a lot of space.
Ideally, I would like to have 2 rows as in the screen shot.
Thanks again.
-
JanReplied on June 6, 2015 at 10:50 AM
You can do that through the use of CSS. But please take note that if you do this, the widget field will become very complicated. I cloned your form and then customize the CSS of the widget. Please check this demo form. Take note that the header will be just text and not a column with a background color.
1. Click the "Wizard Icon".

2. Scroll down on the "Custom CSS", erase what's on the custom CSS.

3. Add these custom CSS code.
#list > tbody > tr:first-child {
display: none;
}
td.col1:before {
content: "Surname*";
display: block;
}
td.col2:before {
content: "Given Names*";
display: block;
}
td.col3:before {
content: "Sex*";
display: block;
}
td.col4:before {
content: "Date of Birth*";
display: block;
}
td.col5:before {
content: "Passport No.*";
display: block;
}
td.col6:before {
content: "Issuing Coutry*";
display: block;
}
td.col7:before {
content: "Date of Expiry*";
display: block;
}
td.col5 {
float: left;
left: -500px;
position: relative;
top: 70px;
}
td.col6 {
float: left;
left: -373px;
position: relative;
top: 32px;
}
td.col7 {
float: left;
left: -245px;
position: relative;
top: -8px;
}
tr {
height: 110px;
}
If you need more than this, then you will need to just download the full form source code and edit the HTML or CSS or hire a developer to achieve what you want.
Thank you.
-
JapanWorldReplied on June 8, 2015 at 7:11 PM
Thank you I will try that. However my form has disappeared !!! Not a big deal, I will rebuid it.
-
jonathanReplied on June 8, 2015 at 8:26 PM
Thank you for updating us.
Contact us again anytime should you need further assistance.
Regards,
-
JapanWorldReplied on June 9, 2015 at 12:37 AM
This is working, however I no longer have the option to remove - a line in the list after adding extra lines. Thank you again.
-
Chriistian Jotform SupportReplied on June 9, 2015 at 3:05 AM
Hi jodtours,
Can you please try to add this custom CSS code to the widget so that the delete button for each line will be displayed?
td.col8.buttonsColumn {
float: left;
left: 0px;
position: relative;
top: -50px;
}
Do let us know if you need further assistance.
Regards.
-
JapanWorldReplied on June 9, 2015 at 12:41 PM
Thank you. This works perfect. I am now doing some testing and the configurable list does not render well on firefox. Seems to work fine on IE and Chrome. Here is screenshot.
Help much appreciated.

-
CarinaReplied on June 9, 2015 at 1:51 PM
I will make further tests and will get back to you as soon as I have more details.
Let us know if we can assist you further.
-
JapanWorldReplied on June 9, 2015 at 5:24 PM
Thank you.
-
JapanWorldReplied on June 9, 2015 at 7:20 PM
I have now just found another issue. The calendar pop up does not display properly.
Help !!
-
CarinaReplied on June 9, 2015 at 8:19 PM
We are almost there:

The first calendar is behind content I will try to bring it to the front.
You can clone the demo form:
http://form.jotformpro.com/form/51597190980970?
Let us know if we can assist you further.
- Templates
- Integrations
- INTEGRATIONS
- See 100+ integrations
- FEATURED INTEGRATIONS
 PayPal
- Slack
- Google Sheets
- Mailchimp
- Zoom
- Dropbox
- Google Calendar
- Hubspot
- Salesforce
- See more Integrations
- Products
- PRODUCTS
- Form Builder
- Jotform Enterprise
- Jotform Apps
- Store Builder
- Jotform Tables
- Jotform Inbox
- Jotform Mobile App
- Jotform Approvals
- Report Builder
- Smart PDF Forms
- PDF Editor
- Jotform Sign
- Jotform for Salesforce Discover Now
- Support


