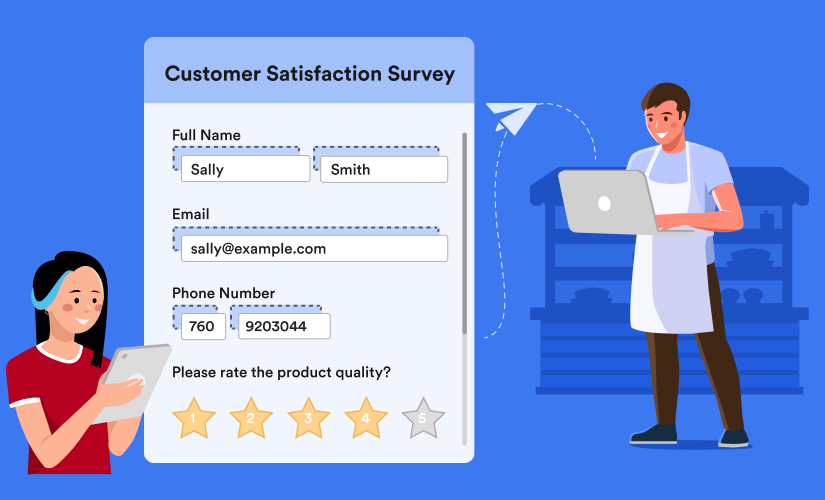
Question fatigue — we’ve all been there. You’re buying something from your favorite company or registering for next semester’s courses or doing an annual emergency contact list update for work, and there are just so many questions. And they’re all required? Forget it. You don’t really need that jacket, do you?
But when even some of that information is already filled in for you, you’re less likely to walk away in frustration. You’re also less likely to make a critical mistake, like buying that jacket in the wrong size.
Now, with Jotform Prefill you can save your clients and customers the same trouble. Our new prefill options give you a number of ways to pre-populate forms with data you already have, increasing engagement and decreasing opportunities for potentially risky data errors. Match fields from your favorite CRM, Jotform Tables, and previous submissions to create pre-populated forms with unique URLs.
In Announcing Jotform Prefill, we tell you everything you need to know about these prefill options. In addition to providing you with a demo of how to find and use the tools, we share use cases and best practices for each different option, including
- Streamlining lead activity by syncing with CRMs like Salesforce and HubSpot
- Manually pre-populating forms to create a cleaner, more efficient user experience
- Quickly updating data by pulling in previous responses from Jotform Tables or forms
Check it out below!
Introduction
00:00
Art West:
Hello, everyone, my name is Art West, and I’m the senior Social Media Manager here at Jotform. Thanks for joining us for today’s webinar, and now we are seeing the Jotform Prefill. We’re very excited to roll out Prefill, which has been a popular request for several years from Jotform. Our presenter today is Morgan Ziontz, our webinar manager. We also have David Wilson from our support on the line. And we’ll be hearing from hearing during our Q&A at the end of the session. One quick item of note that comes up in a lot of questions is that Jotform prefill, as part of our integrated product line, is 100% free for existing Jotform customers.
Agenda
00:00:46
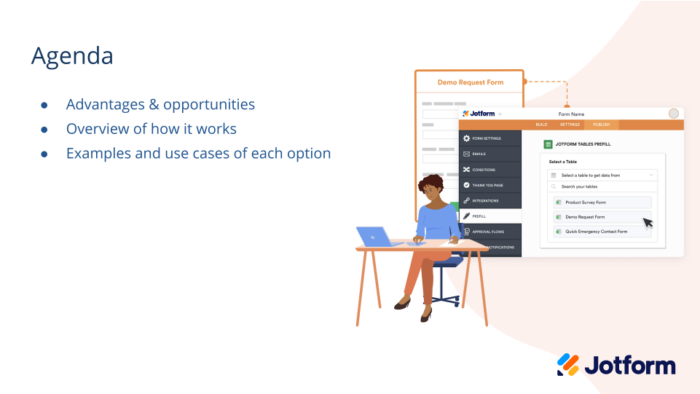
Here’s our agenda for today, Morgan is going to start with a broad overview of the benefits and mechanics of prefill. Then share some use cases and examples along with demos of each option. We’ll close with our Q&A. I know Morgan has incorporated a number of your registration questions into today’s session already. But if you have questions as we go, feel free to enter them into the Q&A, and we’ll get through as many as we can at the end of the session. Without further ado, I’ll turn things over to Morgan.
Advantages & Opportunities
00:01:16
Morgan Ziontz:
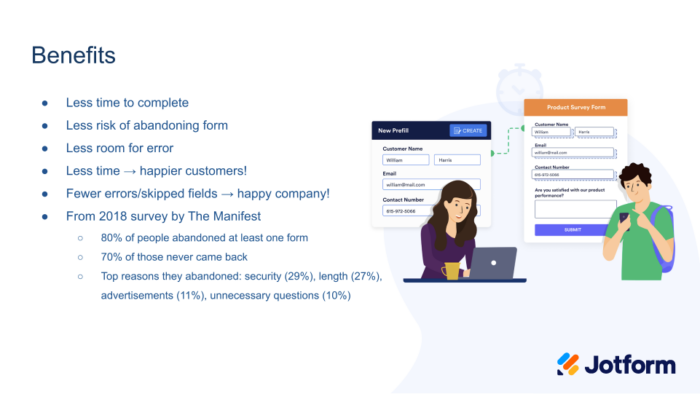
Awesome. Thank you Art. Hi everybody, welcome. Thanks for joining us today. I wanted to kick off today’s session with some data about how people feel about filling out forms, and surveys say they don’t feel great about it overall. In this 2018 survey by the Manifest, they found that 80% of respondents reported walking away from a form and 70% of those said that their final action was to just not return. They entirely ditched form. So that’s about 56% of people saying that they entirely ditched form. The top reason was security. But when you look at the reasons that are related to how inconvenient the form was, for them, a combined 37% cited length or unnecessary questions as their reason for walking away. Of course, here at Jotform, we’re not going to tell you not to do forms, forms are essential in many quick cases, and important in unknown, almost all cases, nearly everything. But we do want to try to make it easier for you to get to that data. And it makes sense that offering to provide people with a prefilled form, even if it’s only partially filled out, will make it easier for them to increase the barrier that is keeping them from filling out the data. So it leads to happier customers, which can lead to higher conversion rates for you.
Data Accuracy
00:04:52
Prefill forms can also increase data accuracy. So anytime somebody doesn’t have to fill out a field, especially a repeated field, is one more opportunity to make sure your data is as clean and clear as possible.
So we have some statistics here, one around that quantitative data out with a personal example. I have switched insurance providers recently. And so I’ve had to see a couple of new doctors, a handful of new doctors. Each one of them even though they have a perfectly functioning computer system with all my information, each one is requiring new patient paperwork, and that has been, as you can imagine, very frustrating to fill out, eight pages of paperwork with the same fields over and over again. When it came time to see the third doctor, I decided I just was not answering questions that didn’t pertain specifically to that visit. And I managed to list the wrong apartment number on my form, something I’ve written out hundreds of times. So two Cardinal Sins of form filling there. I made a mistake and skipped a bunch of fields. If we think about our experiences, it’s easy to come up with an instance where you felt the same, felt that form fatigue or that question fatigue, whatever you want to call it. Hopefully that drives you to make sure you’re creating the best experience possible for your end users, whoever they may be. I know for me, one of the things I try to do is make sure our webinar registrations are as short as possible with only name and email required. I am very passionate about webinars and I like to attend webinars too. But even I’ve walked away from webinars because there’s been too much required data. So really, all this to say, having current complete and correct data can be essential to gaining customers and keeping them in many cases in many different ways. That is kind of the thesis statement here today. That’s the key of prefill.
Data Security
00:04:50
I promise I’m not going to be on slides for too much longer. I know that was a long intro on one slide. But I do also want to address data security. If we go back to that survey that I quoted, security, again, was the number one reason that people walked away from these forms. Of course, security is very important to Jotform as well, for both how we feel about you, and in the experience we want you to be able to create for your end users.
We keep data secure with Prefill, by creating token generated unique URLs for each user or each unique form so that personal sensitive information isn’t being exposed to third parties. For those of you who are enterprise users, and already using your single sign-on providers to share data, that’s also a really secure option. In addition to these two options of how data gets shared, when it comes to the fields that you can populate with prefill. Using the tool,
you’ll see that nearly all fields are supported, but there are some that aren’t. And among the ones that aren’t, a lot of the times the reason is because it presents a data security concern. So payment fields, for example, are supported because of security there.
Prefill Basics
00:06:12
So that’s the background that I wanted to share about why you might care about prefill, and what Jotform has had in mind as we’ve created this, I also wanted to start with a broad strokes overview of what it is and how it works. Before I go into each example. Prefill just means that you’re providing your users with a form that’s already partially filled out, based on information that they’ve provided somewhere else along the line for you. As for how, for the most part, all of these options work the same way. So the form builder will either automatically pull in the fields, or you can manually transfer fields. And, as you’re creating prefilled forms, for the most part, you’ll first create a connection to the data source, and then create the URL based on that connection. So I’ll talk a little bit about the differences between each of the options and the similarities between each as I go along. But that essentially is the gist of how it functions.
Types of Prefill
00:07:13
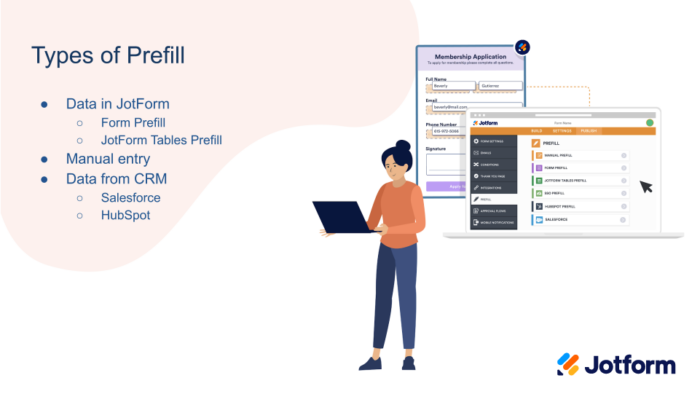
Just to go a little bit more in depth on the options, there are five different Prefill options. The first is a manual entry. To mention also what this looks like to your end user is the same regardless of which option you’re using. So it’s really a matter of what works best for your process and the form you’re creating, and where you have your data already stored. So you have a couple of options. So again, manual entry is the first option. You’re entering the data on behalf of one of your users getting your source of information from wherever you might have it. The second two options are to get your data from within Jotform. So those are either by connecting to a forum or connecting to a table. And then the last few options are CRM. So you can connect to your Salesforce or HubSpot accounts. Two of the most popular CRMs available out there. And I did. I mentioned SSL briefly a little bit earlier. We do also for enterprise customers who have the SSL option. I’m not going to be talking about that today. Nothing’s changed there. So there aren’t any updates to share, and it’s unique to enterprise. But if you ever have questions about that, we’d be happy to talk to you outside of the webinar. But as I mentioned at the beginning, all of the things I’ll be talking about today are available to you, no matter how you’re using Jotforms. So no matter which account you’re using.
Manuel Entry
00:08:45
Alright, so I’m going to kick it off with the manual entry. I’m starting with manual entry, because it is a little bit different from the other options. So I wanted to start by highlighting some of those differences. But for each of the options, I’m going to start just by talking a little bit broadly about best practices or highlighting significant use cases. Then I’ll go out to the site and show an example. So manual entry, you’ll be doing this on your own. So it’s really great if you have a form where you just want to fill out a couple of fields. The highlight here is that you can get your data from anywhere. So it’s not automatically connecting to anything for you. But if you have your data stored in a spreadsheet or a database that’s not automatically connected, you can pull it over yourself and you have your data wherever it is. Another nice highlight of this is that manual entry is a good way to create a form that you might want to share with multiple different people. So maybe you don’t have a ton of there’s not sensitive information or unique information, but there are some fields you want to fill out in advance and then share.
So I’m going to go to the site to show this in action. So I’m going to start just by showing you how to get to prefill, and this is the same for each of the options. This first example here is a safety training evaluation. So let’s assume in this case that we’re at a large company and headed back to the office. But before we go back, well, you need everybody to attend a COVID safety training about the new policies and procedures that will be in place. But I want to make sure that evaluations that I’m getting based on this, or responses that I’m getting are unique to the particular training that everybody attended. So we have five training sessions available, and each training has a different presenter. So I am going to fill those two fields out, and then send it off to the people who attended that session.
So to get to prefill, you’re first going to open up your form in the form builder by going to edit form. Then you’ll go over to publish within the form builder here.
And in the sidebar, look for prefill. And that’s where you can find all of the different options for prefills. So from here, you’ll just select the option that you want to use and then go through whatever i’ll be showing today. So we’ll start again with manual prefill here. So I mentioned in the slides that first you’ll create a connection to the data source and then create the link manual is a little bit different because there isn’t a data source, you essentially are the data source. So there’s not that first piece. So we’re just going to start by creating the unique form itself. So I’m going to do that by hitting “Add a new Prefill.” Then I’m going to fill out whatever information I want to fill out. So in this case, I want to send this form to everybody who attended Monday’s training. And our presenter that day was Barbara. So I’m going to fill that out and then just hit create in the upper right hand corner here.
Now you can see I have a new link available. And when I click on it, those two fields are already filled. And the rest of the fields are blank, leaving them available to the user to fill up.
So you can share this in a couple of different ways. We’ve generated it at this point, probably want to share it to start getting that feedback. So you can share it just the way I just opened it, and copy the URL. There’s also a copy URL link here, which essentially does the same thing. You can just paste it wherever. So you can see that the clipboard notification comes up. There’s also an option to send an invitation. I’ll talk about that one a little bit more in the next example. But something consistent across all of the prefilled options is that when you have your filled out, partially filled form you’ll see the vertical ellipses here with a couple of options. And you have the option to edit or to start to make it so that users can edit the prefill fields, or that they can only read the prefill fields. So in this case, I want to make sure that everybody is filling out the right training form, I don’t want them to be able to change the date or the presenter. So if I change this to read only and reopen it, you can’t tell that I’m clicking. But now I’m clicking on the drop down here, and there’s no option to change it. So I can’t reselect or select a different day. So that’s the difference between edit and read only.
With regards to the options in the vertical ellipses here, those are for the most part consistent across the board. So for each no matter which prefill you’re using, you’ll have the Send invitation and copy URL for sharing purposes, you’ll have a rename, which I’ll show in a second here. And then you’ll have a delete option. So you can delete an individual form that’s already been created. For the manual option, you also have a duplicate and an edit Prefill option. So if I wanted to keep all of the settings the same, and just change a few details. For example, if I wanted to create something for the 13th as well on the 14th 15th 16th, I can duplicate this. Then I’m going to open up the Edit prefill. You see up here it says update rather than create. So I’ll change this to the 13th. And this presented that day was Brynn. So update. And now if I click on this copy, you’ll see that those fields have been updated. You do also have the option to change what these are called. So especially in the case of the manual prefill you get kind of a generic title for the form. If I want to make it really easy to differentiate between them, I can change that just by clicking next to it and we’ll call that July 12. Or I can also do the Rename option which places the cursor in the same place. It’s essentially I’m just getting you back to the same spot to change the title. So now I could do that for each of the days of training and have all of them easily differentiate between them. And then you also have the option to send them out in a couple of different ways that I showed, again, I mentioned that you can delete individual records, you can also for all of these different prefilled options, select all, and then you’ll see a delete option if you wanted to entirely delete that. Yes, delete. Now you can see there, they’re not there anymore, I’d have to recreate to do that. To do that again.
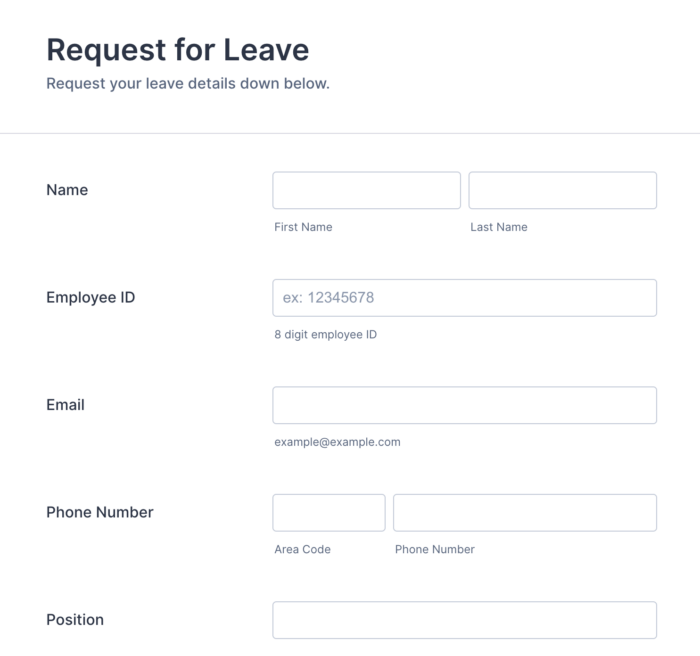
All right. This is the summary of the manual entry. I showed that training evaluation is one of the use cases, I think this is another really strong use case here is something where your data is in your head. So, like a performance evaluation, where maybe you’re a manager, you want to share your feedback, send the form to your employee, for them to share their feedback. And then you can get together and talk about it, that’s another really nice way to use manual entry. Any other situations where you already kind of know the data. Maybe the recipients like, it’s an employee leave request form, you’re going to fill out their name, and employee ID number, and then send it to them to add the dates. And then also, again, anything where your data is stored externally, where there’s not an automatic connection between Jotform and the data source. So if you’re a small business owner, using an Excel spreadsheet to manage customer information, or a nonprofit with an Access database of all of your donations, you can pull that up, manually transfer it to the form and then send the form out from there.
Jotform As the Data Source
00:16:55
The next example is Jotform as the data source. Before I go into some of the best practices for this one, really, these are two ways of approaching the same option. So if you’re not familiar with Tables, whenever you create a form and start getting data, Jotform automatically pulls that data into a table, it looks like a spreadsheet. Each column is one of the questions on your form. And each row is somebody’s response. So all of the data is stored there. But we know that not everybody uses tables. And so we wanted to make sure that wasn’t a barrier to easily getting to your data. So whether you’re used to using Tables, or you’re just using forms, these will both connect you to data that you’ve already collected in Jotform. So one of the highlights is that you already have your data here, within Jotform, you don’t need to go elsewhere for it, you can easily transfer data from one form to another, or even you’ll pull it into the same form and resend that, for me. This is a great option for sending to the same person or a group of people. I know just from hosting webinars, one of the major use cases I’ve seen for prefill. Over the past couple of months, as I’ve been doing this, people ask if there’s a way to easily transfer data if you’re asking a customer to fill out the same information a couple of different times. This is really a great option for that. So if you have a starter pack where they have to fill out three forms, and you’re asking for names on all three, you can pull that in, so they don’t have to worry about that.
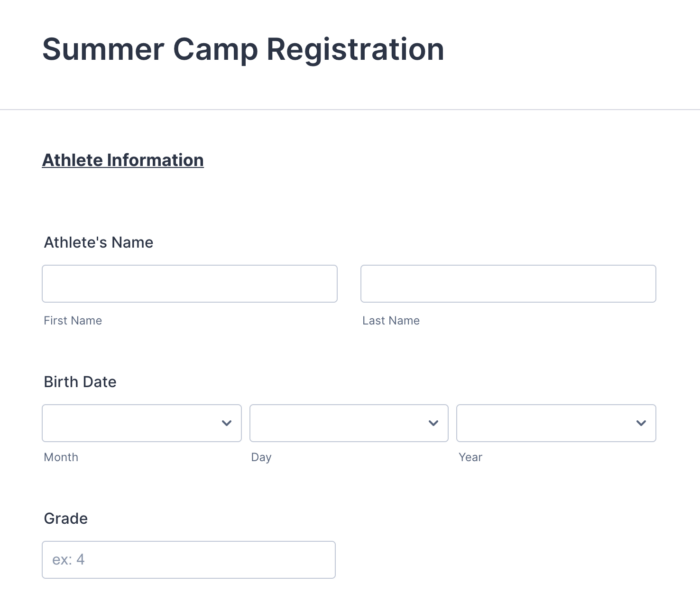
I’m going to show an example of both form and table prefill. And I’ll talk a little bit about how they’re different and then also, of course, how they’re the same as well. So the Jotform Prefill. I have an example here of a summer camp registration. And in this case, let’s pretend I’m the camp director, and I have chosen to do registration in two steps. So first, parents will submit. I don’t want to collect payment upfront because I need to approve each student and make sure there’s space for them. So once a student is ready to be enrolled, I’ll follow up with the parent, and then send them the payment form. So we’ll say “congratulations welcome to camp, please pay before the start of camp.” So here’s our registration form, this is the first thing they’ll fill out. So I wanted to especially highlight student name, adult name, phone number and email because those are fields that I’m going to pull into the payment form as well. That allows me to easily be able to check who’s paid before camp starts and who hasn’t, who I might need to follow up with. If I do need to follow up, I have contact information on both forms ready to go. In order to do this, I’m going to open up the form that I want to pull the data into, which is the payment form here. So again, I’m going to go to the Edit form and get to Prefill from our Publish tab, and I’m going to go to form pre fill in this case. And so as soon as you click Form Prefill, you’re prompted to select the form you want to pull data from. And in this case, I want to use that first form the summer camp registration form to get that data. So you see what I’ve selected is that some of the fields automatically pull in, student first name, last name, phone number, email, automatically came over. And I also have the option to add more. So I also want to pull in the adults first and last name, and then we’ll be ready to send this off.
So first name, last name. When it comes to the current form, you can see that you only have the option to choose from forms that are available and forms where data will transfer. So it makes it pretty easy to find the fields that you’re looking for. So connect to adult last name. And then all I need to do is save settings. So this is that piece where I’ve now created the link between the current form and the data source. So now I need to create the actual forms themselves. I’m going to do that by selecting “Add a new Prefill” here, that brings me to my table. I can now select one or multiple different users to create one at a time or multiple at one time. So I’m going to click this checkmark in the upper left hand corner to select all. Then I’m going to hit Create to create them.
Now I have an individual personalized link for each student that’s getting enrolled into camp each payment form that I want to send out. Again, when I click on this, you can see that that form has been already partially filled out. So in this case, all dad Forrest’s needs to do to finish up with Isabella’s enrollment is check which grade she’s in for the appropriate payment amount and then submit their pay.
This is only showing an error because it’s not actually connected to a PayPal. But presumably, if you’re using PayPal, it would not be showing an error here. So then, dad submits. And that’s it. If dad does need to edit anything if anything’s misspelled or the phone numbers wrong, or anything that can be done here, unless again, I’ve selected read only. But in this case, probably smart to leave it as an added option. If I click on settings here, it takes me back a step to where I created the connection. So if at any point, you need to make any changes to the fields that you’ve pulled over, like if I want to remove cell phone number, for example, and not pull cell phone number, I can then make that change and save settings. Here, also if you’ve created a connection, and it’s not quite right, and you want to start over for any reason, I showed you a couple of ways you can delete individual forms that have been created, you can also entirely remove the connection and the associated forms with this Remove button. And that would prompt you to accept the removal and then you would see a blank slate and start from scratch. Discard changes and go back. I did also want to show the other option for sharing. So you can see those same options in the vertical ellipses here. Again, you can copy the URL and paste it into whatever you’re planning to share. But you do also have the Send invitation option. So we could say something like “Hi, welcome to camp, we’re ready for payment.” And then send it off. You also have the option to send this message to up to five people at once. So if I select all here, I can start with “send invitation”. It will prompt me to send to five people at once. So I have to delete a few. To send my message to multiple people, I can enter the message here again, and send an invitation. So this will send that same message but the personalized URL to each person included here.
Alright, so that’s for Prefill. I have an abbreviated example of table prefill here. So I can quickly show you the differences between the two. I mentioned that one of the ways that you can easily use the Jotform Prefill options is to pull in the same information. So in this case, maybe I’m HR at a company and I asked employees to update their contact information every year. But I don’t want them to have to re enter it, I want to give them a starting point. So I’m going to fill this out for them, then all they need to do is make changes if they need to.
So again, we’ll move over to publish here. You can see here that I’ve already created the connection. That’s what that little checkmark means. So I have my connection created. And I have my URL ready to go. But just to show you what this looks like I’m going to open up settings here. So rather than selecting a form, in this case, it’s prompting me to go directly to the table. So I’ve selected the same table and the same form and fill out the table from the form, “Employee emergency contact list.” Tables can have multiple tabs. So you’ll then need to tell it which tab you want to connect to. So in this case, I want to use my 2021 data. And I’ll eventually share that into my 2022 data. But that’s my data sources, 2021 tab.
So all of those settings are there, it’s all set, all of the fields are connected, and ready to go. So again, when I click on the link here, it has my emergency contact form filled out with all of my data, all I need to do is confirm this, or make any changes necessary rather than having to start from scratch.
So I showed a couple of examples there, again, a really strong use case, if you are sending multiple forms to the same person and asking them to fill out the same information over and over again, like the camp registration example, annual account verification. Again, a really nice way to do that so that somebody doesn’t have to start from scratch there. Speaking of annual account verification, any business that you do on any sort of regular basis, so you have your CPA wanting to send tax prep forms to previous customers, or you have a long term contract, and you need to invoice your contractor each month. Again, you can pull in the data that you’ve collected previously. And all they need to do is update that rather than starting from scratch. Similarly, recurring events where you have the data in Jotform already. So if you have some kind of annual fundraiser, and you’ve been sending your form your invitation out through Jotform for the past 10 years of this fundraiser, and you want to send something saying, “Hey, we loved seeing you last year, you were able to give $1,000, will you be joining us this year?” “Can we depend on your donation? “Again, anywhere where you can pull data in from Jotform already is the really the biggest use case here.
CRM as the data source
00:27:10
Alright, so our last example here is the CRM as the data source. So obviously, in this case, you’ll need to be a HubSpot or Salesforce user in order to use this option. If you are a hub for HubSpot, or Salesforce user, you may already be familiar with connecting to these and integrating with these in the other direction where Jotform is pushing data into your CRM. This is the first time that we’ve made it so that data can go the other direction as well. So it really creates Jotform and allows you to use Jotform as sort of a centralized hub of data management. So you can do everything you need to do within either and push data in either direction. Again, the first time we’ve done this, but we certainly hope it’s not the last and very excited about this full cycle data management opportunity.
So, highlights here are again. It connects with tools you’re already using and places you’re already connecting customer data. As far as what you might be sharing with Jotform. It’ll allow you to create personalized or focus communications, among other things. So again, pulling that information in from your CRM makes it really easy to send your messages directly to one person.
Let’s show this one in action. I’m only going to show the HubSpot example. But they function exactly the same way. So if I show HubSpot, you’ll also understand Salesforce. I know all of the forms that I’ve been showing have been pretty brief examples. But my hope is that this will be short enough to keep your attention but long enough that you at least have a starting point of how this works. So you can go ahead and get started. And we’re always happy to help with any questions.
So for this example, I have created a conference session for the conference coming up. What I want to pull in from my CRM so that I can invite all of my prospects and customers is really just their name, first and last name. And I’ve also set up the intro text for the invitation here to pull this field into the text. So both of these should populate with my CRM data, my HubSpot data.
Open this one up, and here we go.
So again, I’m going to go into HubSpot. And again, this functions the same either way, you’ll first need to authenticate your account which again, you may already have done pushing data the other direction, and then you’ll select your accounts. So I’ve selected my account here. I’ve chosen HubSpot, because I was able to do a free account with HubSpot for this example. So if this is something you want to try and you don’t already have a CRM account, this might be a nice way to try it out, you can just sign up with HubSpot and get the sample data to work with.
Once you select the CRM, you’re going to select either contacts or companies. In this case, I want to pull individual names in for my personalized invitation. So I have contacts, again, it’s automatically pulling over fields. In this case, those are the only fields I need. So that data has come over. So I’ll save settings, create my new prefill, I have my two different contacts listed here. So I’ll select both of those and hit Create.
And I just want to point out again, this is just sample data provided by HubSpot. So sample contact is part of the name here. So that will not show up on yours if you’re using real data, but wanted to make sure to mention that. So now we see Maria Johnson’s first and last name pulled in here to the name fields. And in the intro here, so it’s addressed to her personally, All she needs to do is select whether or not she’s attending, and then fill out any questions she might have for the panelists or for the organizers of the event. So pretty easy, simple to use, and ready to go ready to send off to all of my different contacts.
So I showed registration forms and a kind of irrelevant targeted message in this case. So those are two nice use cases. Again, if you’re maintaining data in your CRM and using Jotform as a way to connect with people, great use cases there. Also being able to simplify order forms for your clients. So if your CRM maintains information about what they’ve ordered previously, you can fill that in, make it easier for them, and maybe even easier for you to make a sale in that case, because you’ve already prompted them with their frequently purchased items. Again, if you’re maintaining contact information in your CRM, but you want to use Jotform as a way to do an annual update with vendors or leads or customers, this is a nice way to do that. I also got customer feedback as a nice example. So if you have data in your CRM, about which store people attended, or when they attended, or, whatever the case may be, who’s who they spoke to on the phone, you can send them a personalized questions like “how was your recent visit” with that information already included, then they can select one through 10 on how it was and provide their feedback. So also a nice example there.
So on that note, that is what I wanted to share. Again, I kept these examples brief, intentionally. So I could get through showing you all of them. But I am going to hand things back over to art to get us through q&a. So I see a number of you have already shared questions. But if you have others, now’s a great time to enter those. And we will address some questions.
Questions and Answers
00:33:10
Art:
Thank you so much, Morgan. for that great presentation. We’ve received a number of questions that were submitted in advance of the webinar, and I can see a number of questions that have also come in during the presentation. So just as a general reminder, before we totally get into the q&a, this webinar will be available on YouTube, shortly after it concludes. So if you came in late, or you didn’t get a chance to watch the entire webinar for some reason or you missed something, you can certainly watch it again, at your own pace, in the very short future. Furthermore, if you check out Jotform’s YouTube channel, we have some other content, new tutorials related to prefill that may also answer your preferred questions if they weren’t addressed here today. So I would encourage you to check that out as well. That’s the Jotform YouTube channel. So, without further ado, let’s get into some of the q&a questions. And we’ll try to get through as many as we can. Especially the questions that were repeated, we will try to address those.

Is there any way to pull in data from a CSV or XLS file?
00:34:15
So, one of the questions that came up a lot is this: is there any way to pull in data from a CSV or XLS file? I will partially answer this. We also have David on the line who is able to to give a little bit more color to some of these questions. But my quick answer is you can import the data into tables, which is a Jotform free product, which Morgan talked about and then prefill the form from your table. And then David has another solution that could also work.
David:
So we also have what we refer to as our spreadsheet to form a widget. While it’s not a dynamic data source, it does allow for entering a unique value that’s contained in the sheet, and then populating multiple different form fields based on a match to that unique value, and the data that’s contained in that same row of the matching value. So there is an option, we do have a guide regarding how to use that widget. So if you just Google Jotform spreadsheet to form, you should be able to pull up a pretty detailed guide with examples on how to use that feature.
Art:
Awesome, thank you so much.
Is it possible to convert an existing Jotform form to a prefilled form?
00:35:33
Art:
Now, the question here is, is it possible to convert an existing Jotform form to a prefilled form? Yes, the answer is yes. If you go to any one of your forms and go to the Publish tab, you will see the prefill option from the settings on the left hand side. So yes, you can convert an existing Jotform form to a prefill form.
Will Jotform Prefill work on forms or for forms embedded on our website using Jotform for collection?
00:36:00
Art:
Now the question here, will this only work on forms we send out? Or will this work on forms or for forms embedded on our website using Jotform for collection? So the question is, does it work on embedded forms? Or only the link that’s created from the Prefill or sending it out directly via email? I’ll let David answer this one. But I think it would have to be from the link or the email only at this time.
David:
Yes, that’s correct, there isn’t an option to replace the domain with the domain of your web page, there is still the ability to use our regular prefill. That’s done via URL parameters with embedded forms. So that still does work. But there is no option to adjust the URL or domain for the prefilled option, or the links that are sent. So those would need to be done from the direct URL, or from the body of the email.
Any opportunity to update prefilled data?
00:37:12
Art:
Great, thank you. Another question here that came up quite a bit. And I think we addressed it, but will the user have an opportunity to update any prefilled data which may need to be updated? An example would be, a typo on the user’s name or something like that? Yes, you can choose editable or read only in the prefill settings, as Morgan pointed out in the webinar, so you can lock or leave that open, depending on your preferences. So that is something that you can do. And that was a common question.
Is there any chance to see updated fields?
00:37.49
Morgan:
Here, I see one in the q&a, that’s come up a few times. So I’m just gonna jump in here for a sec. And hopefully, David, you can address this. So a couple of people are asking, if you are using this to update like in the emergency contact example I showed, is there a way to see updated fields or easily identify what’s been changed or updated?
David:
Directly from the unique submissions , so just looking at that specific submission? No. But if you load the data in the Tables view, and then filter it just for whatever is unique to that specific submission, both the previously submitted value and the new value, then you can see a comparison or a real quick comparison between the columns in the table, and you can check the data that way. But there is no identifier added to any fields that are changed from the prefilled fields, that you just captured the data as it’s submitted. And then that’s it.
Morgan:
Oh, thank you.
Can you customize the message in the emails?
00:38:57
David:
Another question from the q&a, can you customize the emails? You can customize the message in the body of the email for sure, I don’t know if there’s additional customization beyond just a body, but you can certainly put whatever message you need in the body of the email.
Morgan:
If sending through Jotform doesn’t work again, you do have the option to copy the link and share it through email or whatever. However, you may already be used to sharing things. So that is always an option to consider.
Can I use Airtable with this function?
00:39:37
David:
Another question from the q&a. Can I use Airtable with this function? Right now Jotform Prefill does not support Airtable, but I believe there are items on the roadmap in the future. So, look potentially for other integrations, but right now, we do not support their table.
Can we upload our own company forms with corporate logos?
00:40:02
Morgan:
I see kind of a general Jotform question, can we upload our own company forms with corporate logos? David, do you want to talk about that a little bit?
David:
It would really depend on what they mean by upload. So if you mean just creating a form from scratch and applying whatever images or styling or branding that you want to the form, absolutely. If the form is in PDF format, if it’s a native PDF, fillable PDF would be best. But if it’s a native PDF file, we also have a tool that allows for converting PDF forms into web forms. Then as an additional bonus of using those, you can output the data into that uploaded PDF. But it would really depend on what they mean by upload.
Does Jotform Prefill work for HIPAA accounts?
00:40:58
Art:
Another question that came up a lot is does Jotform Prefill work for HIPAA accounts? David, if you could handle that one?
David:
Yes, the Prefill options are available for HIPAA accounts, I would just advise being cautious with how you are sending that link and what data is being prefilled. So the link should not be able to be retrieved anywhere that would be publicly accessible. So even if you’re emailing it to like a Gmail account, then their logs have that link. And while it’s not necessarily a huge security concern, that still wouldn’t be HIPAA-friendly. So use caution with what you’re prefilling, if you are prefilling any sort of protected health information, make sure that that link is being sent elsewhere in the body of an encrypted email, or some direct fashion that isn’t being logged somewhere that someone might be able to access that link. That isn’t the patient.
Can each recipient have their own customized link to Prefill to work?
00:42:06
Morgan:
There is also a kind of a related question in the Q&A. So not about HIPAA, but just generally speaking. So, is it that each recipient has their own customized link, in order to Prefill to work, and that link shouldn’t be shared with others. And I would say that, for the most part, that’s true. If you’re pulling in a form created for one person that has their personal information in it, then it should only be shared with them. But if you wanted something more broad like the first example I showed with the manual entry, there’s not really any sensitive data in there. So you can create a form that does not have sensitive or personal information in there and share that more broadly. But definitely, if you are creating a form just for one person with their data, you don’t share that with others. anybody other than the intended recipient.
Can you send more than five mails at a time?
00:43:03
Art:
Another question here in the q&a, this, might be for David.
They use Jotform registration, and there’s a large number of recipients that would need to be sent out. Is there any workaround or any way to send more than five emails at a time? Or is that the sort of hard limit on the emails?
David:
Currently, that is the hard limit, you can always copy down all of them individually. But there is currently no bulk export option for the list of URLs, that would actually be a very nice feature, especially with that limitation in place. I’ll probably send a ticket for that once we’re off of this call. Because it really would be nice to be able to, since we are limited to five, export that list and then send that list out via mail merge or something like that. But currently, no, it’s the five limit. And unless you go through and copy the links one by one, there isn’t really a bulk way to do it in excess of five at a time.
Art:
Thanks. That question came up a couple of different ways. So I appreciate you answering it. I think that it’s a great idea to submit a ticket for that.
Morgan:
Just to backup, David’s submission, I always share these questions, all of our webinar registration and q&a with our support team, our dev team. So I will also be passing this along. And this is just the start of prefill. And hopefully, this will continue to develop and grow over time as well.
Conclusion
00:44:45
Art:
I think we probably didn’t get to everybody’s question, but I think we got through a lot of them so I’m going to hand this back to Morgan. But you’re always welcome to send your questions to us. We can answer. I think Morgan will provide her email as well.
Morgan:
Absolutely. Thanks, Art. I just wanted to thank everybody for attending today. As I mentioned, if we didn’t get to your question, please feel free to email me. It’s just morgan@jotform.com. Find me there and I will either answer your question or refer you to someone who can. And it’s really no other than that, just thanks for being here today. Keep an eye out for the link to the recording. We’ll be sending that out in about a week. Before we send it out an email, it should also be available at https://www.jotform.com/webinars/. So if you wanted to watch it sooner than about a week from now, you can probably check that out by Friday at the latest. So, thank you everyone, and hopefully we’ll see you for the next webinar. Bye!


Send Comment:
2 Comments:
More than a year ago
Thnaks for the information. I want to follow-up on the following answer by one of the presenters:
“Because it really would be nice to be able to, since we are limited to five, export that list and then send that list out via mail merge or something like that. But currently, no, it’s the five limit. And unless you go through and copy the links one by one, there isn’t really a bulk way to do it in excess of five at a time.”
The hard limit on sending five emails with personalized form links as well as the inability to bulk export the list of links make this feature fairly useless. The workaround is to copy down each link individually?
When will the issue of bulk exporting personalized URL’s be addressed?
More than a year ago
Hi
I im new in this businessI would like know more about this business, I joined the business last year but i dont what to do after filling the form