


A webhook is a powerful tool that allows you to build and automate real-time communication between applications. One example is sending your form data, particularly from Jotform Sign, to your endpoint or other apps.
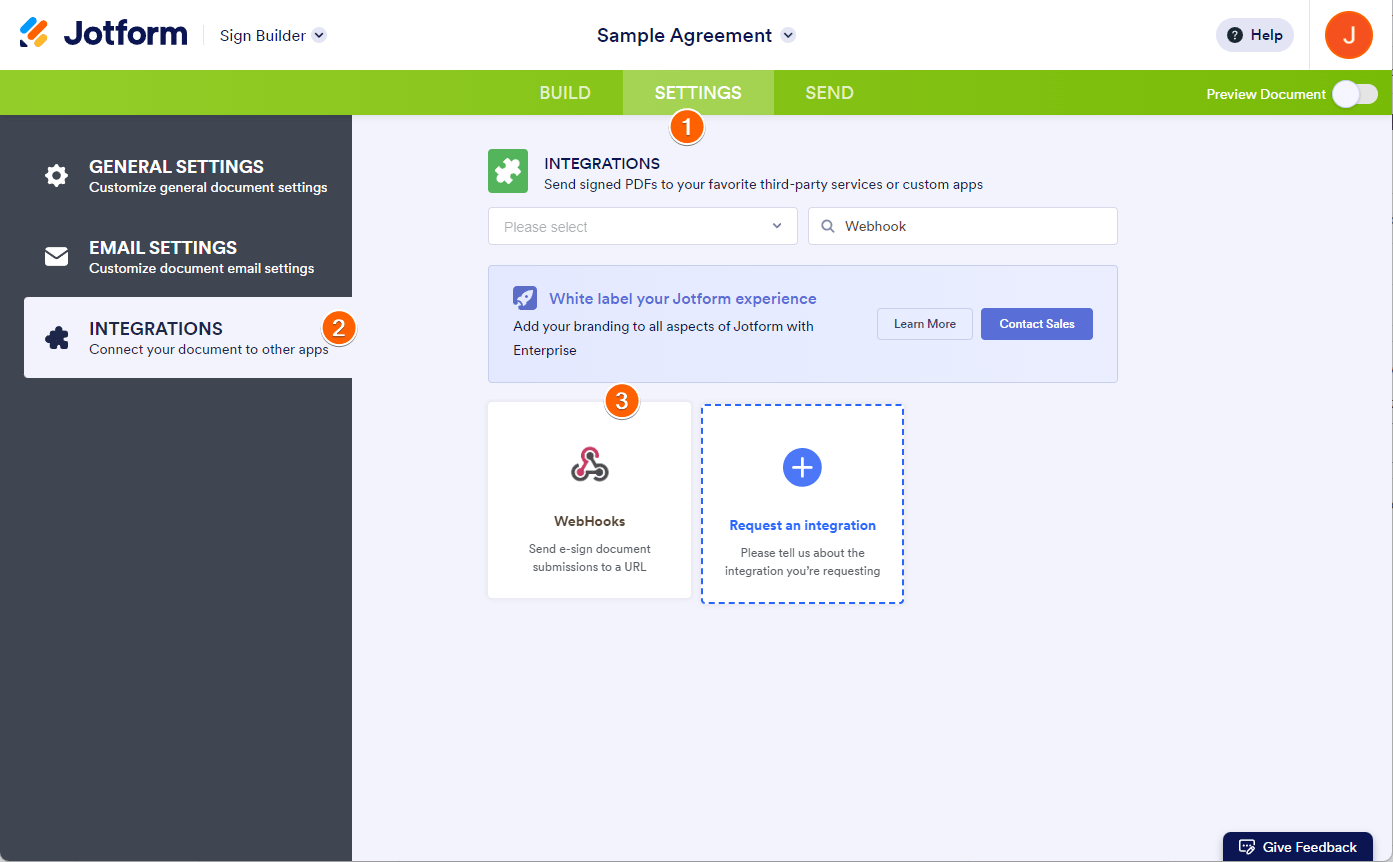
Follow the steps below to set up a webhook with Jotform Sign.
- In Jotform Sign Builder, go to the Settings tab.
- Click Integrations on the left panel.
- Search for and click Webhooks.
- Enter your endpoint or webhook URL in the Add WebHook box.
Note: To add more endpoints, click on Add New WebHook button. - Click the Complete Integration button to save the integration.
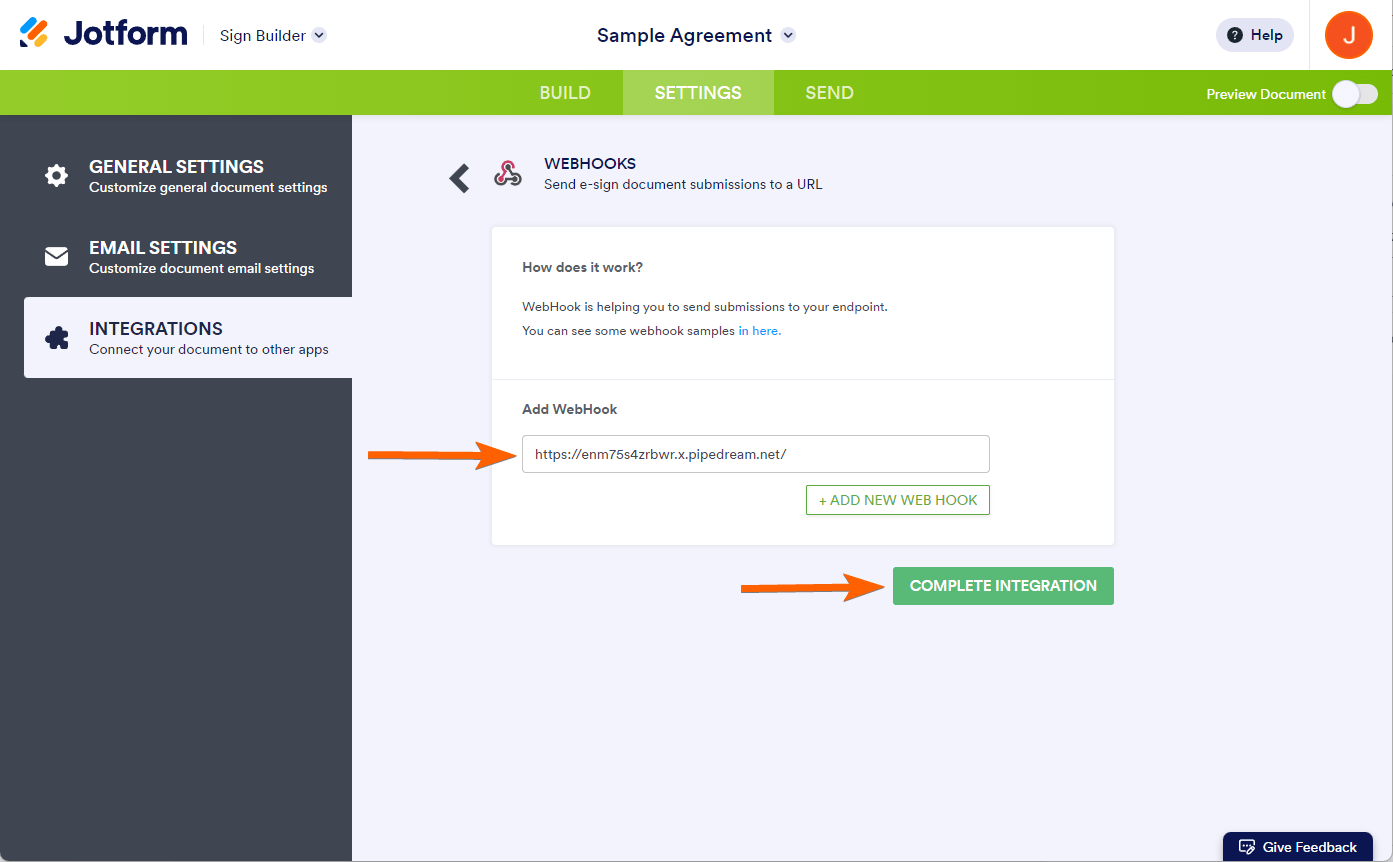
- Finally, click the Finish button, and your webhook integration is complete.
Notes:
- Jotform has a 30-second request timeout for the Webhook integration. If it times out, that states the endpoint fails to process the request.
- The endpoint may have limitations that would prevent the request from being processed. These include but are not limited to:
- Timeout to close the connection on the endpoint.
- The maximum size of data accepted may be lower than the submission data.
- Firewall rules on the endpoint.
With your webhook in place, you’re primed to automate and enhance your document-signing workflows efficiently. Now, let’s proceed to send your document for signatures.
Send my document for signature
File type is not allowed.
Maximum file size limit exceeded. (5MB)
Something went wrong.
Send Comment: