


Microsoft Power Automate, formerly known as Microsoft Flow, provides a premier service for business automation by connecting you to the service you use daily.
Jotform Enterprise connector, including those with HIPAA-enabled servers, is available on Microsoft Power Automate, making your Jotform forms more powerful. Whether you would like to create an approval system, a job application, shortlisting system, or a global survey to analyze results on Microsoft Excel, this can be done quickly using Jotform Enterprise and Microsoft Power Automate.
When setting up a connection, you must select Jotform Enterprise from the list of Triggers. Here are the steps:
- Click the Create option on the left panel of your Microsoft Power Automate dashboard.
- Choose from the options. If you wish it automated, we recommend choosing Automate Cloud Flow.
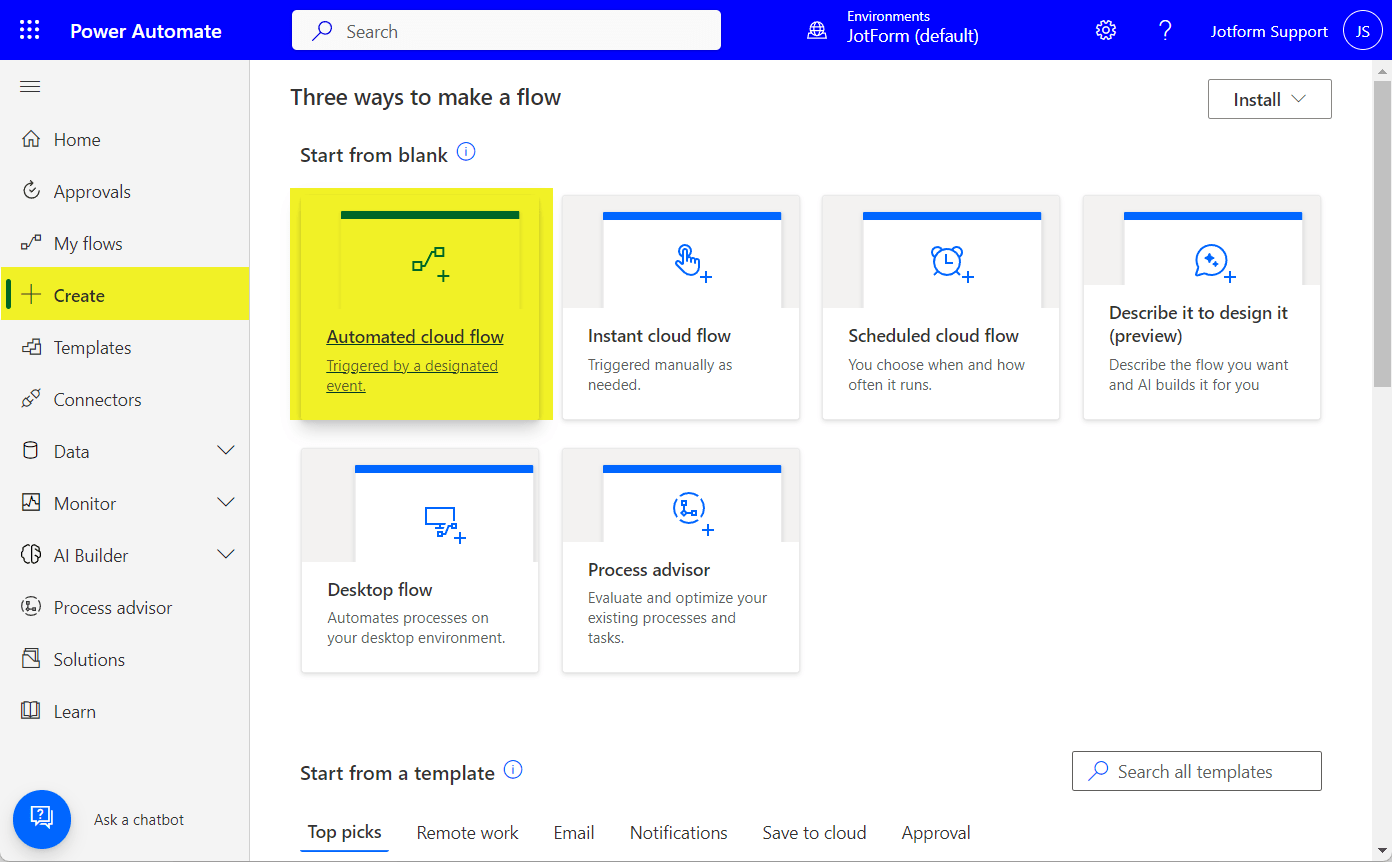
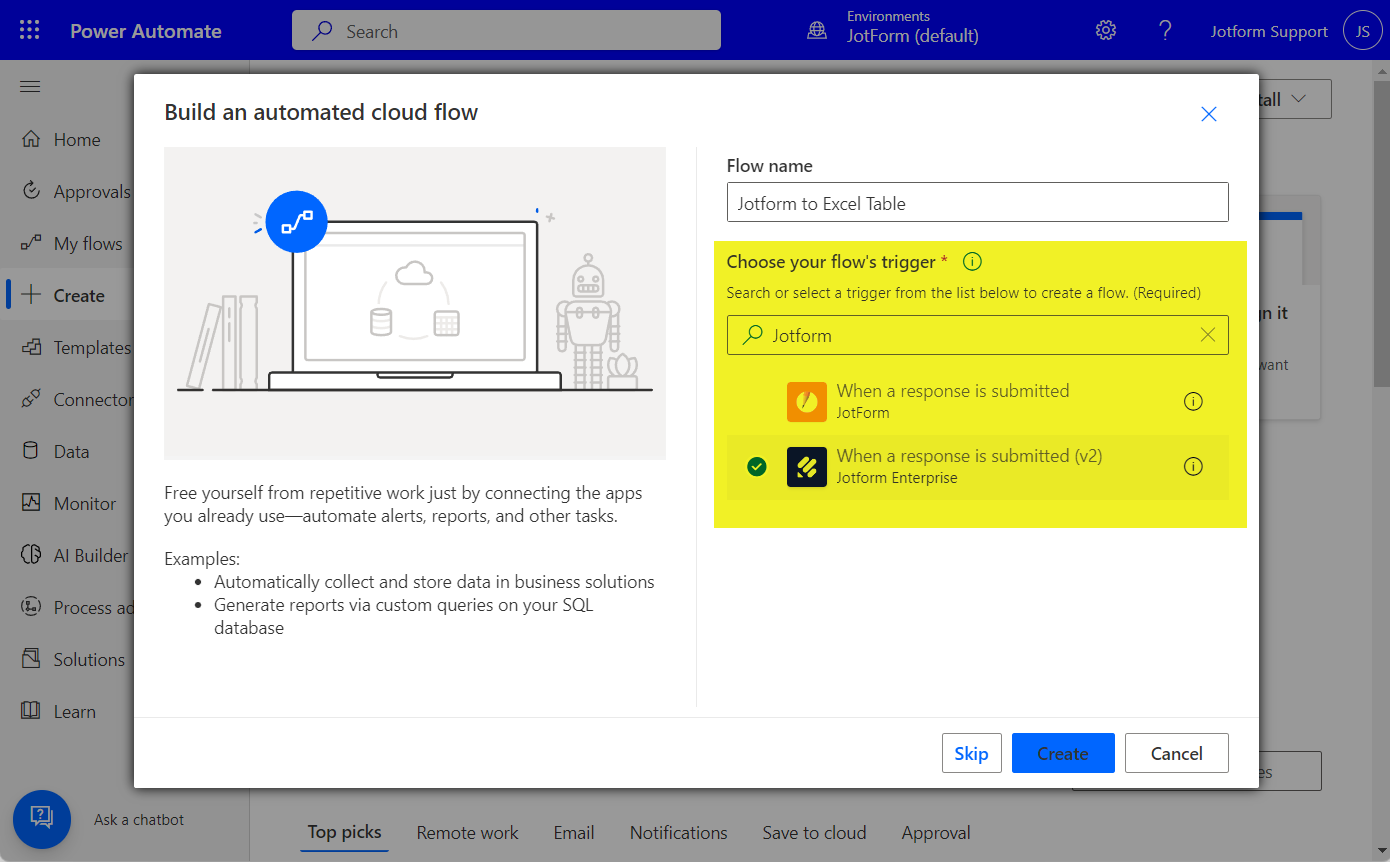
- Enter your Flow Name.
- Search for and choose Jotform Enterprise from the Choose your flow’s trigger box.
- Click on Create to proceed.
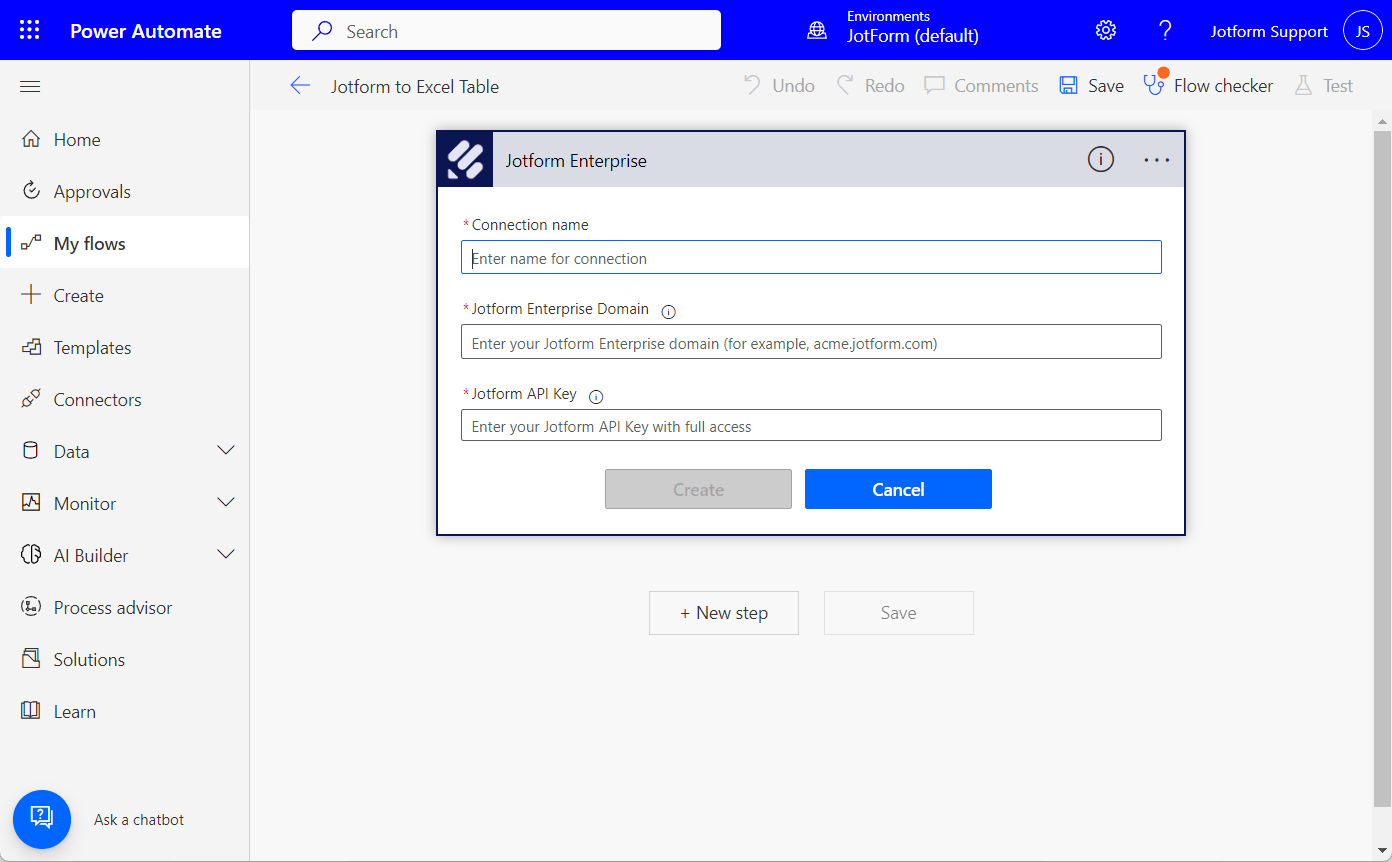
- Enter your Jotform Enterprise account details in the next window if you haven’t connected it yet. You will be asked to provide the following:
- Connection Name
- Jotform Enterprise Domain
- Jotform Enterprise API Key
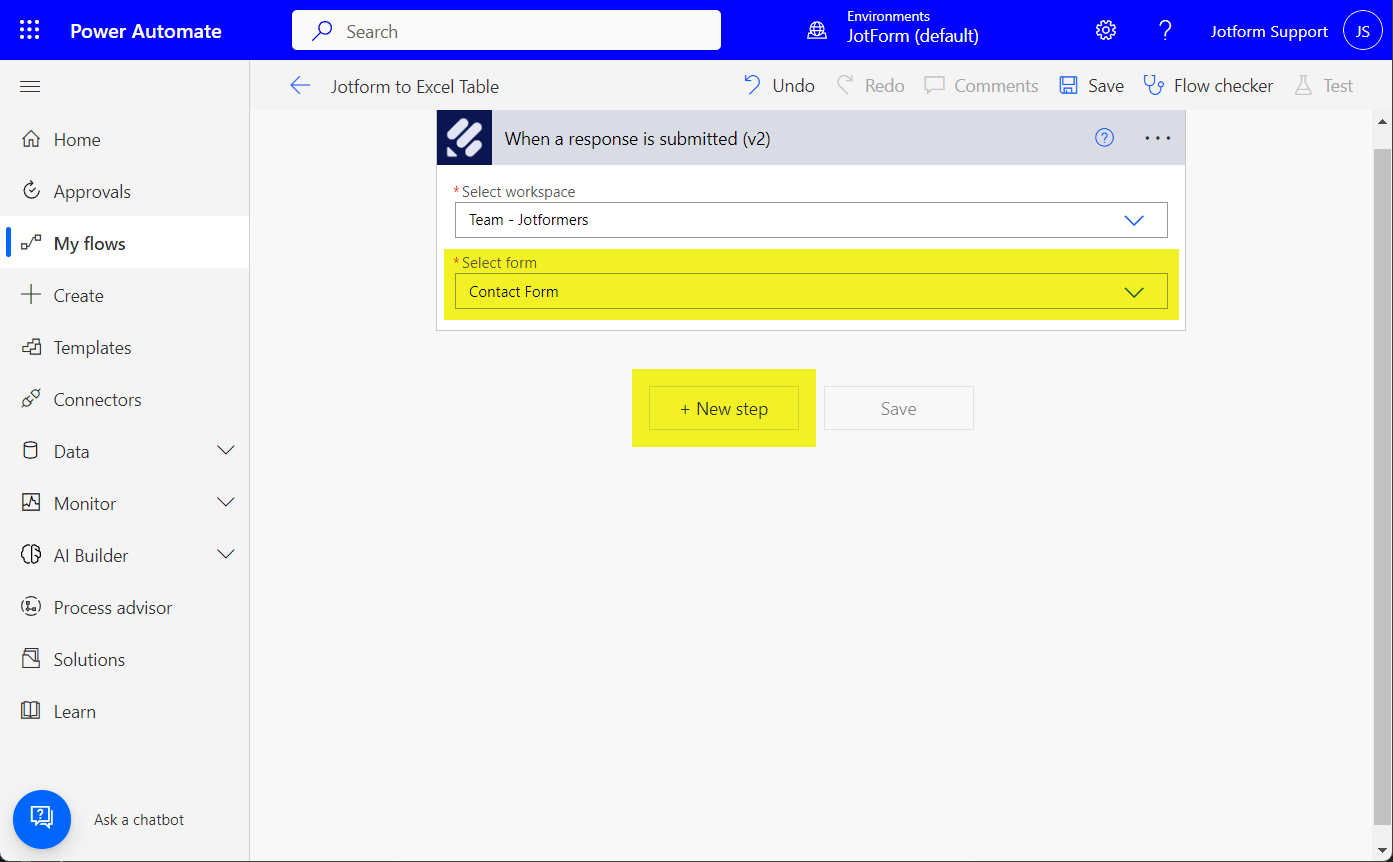
- Next, select a Workspace. With Jotform Enterprise, you can select a form from your account or a form that belongs to one of your teams from Jotform Teams.
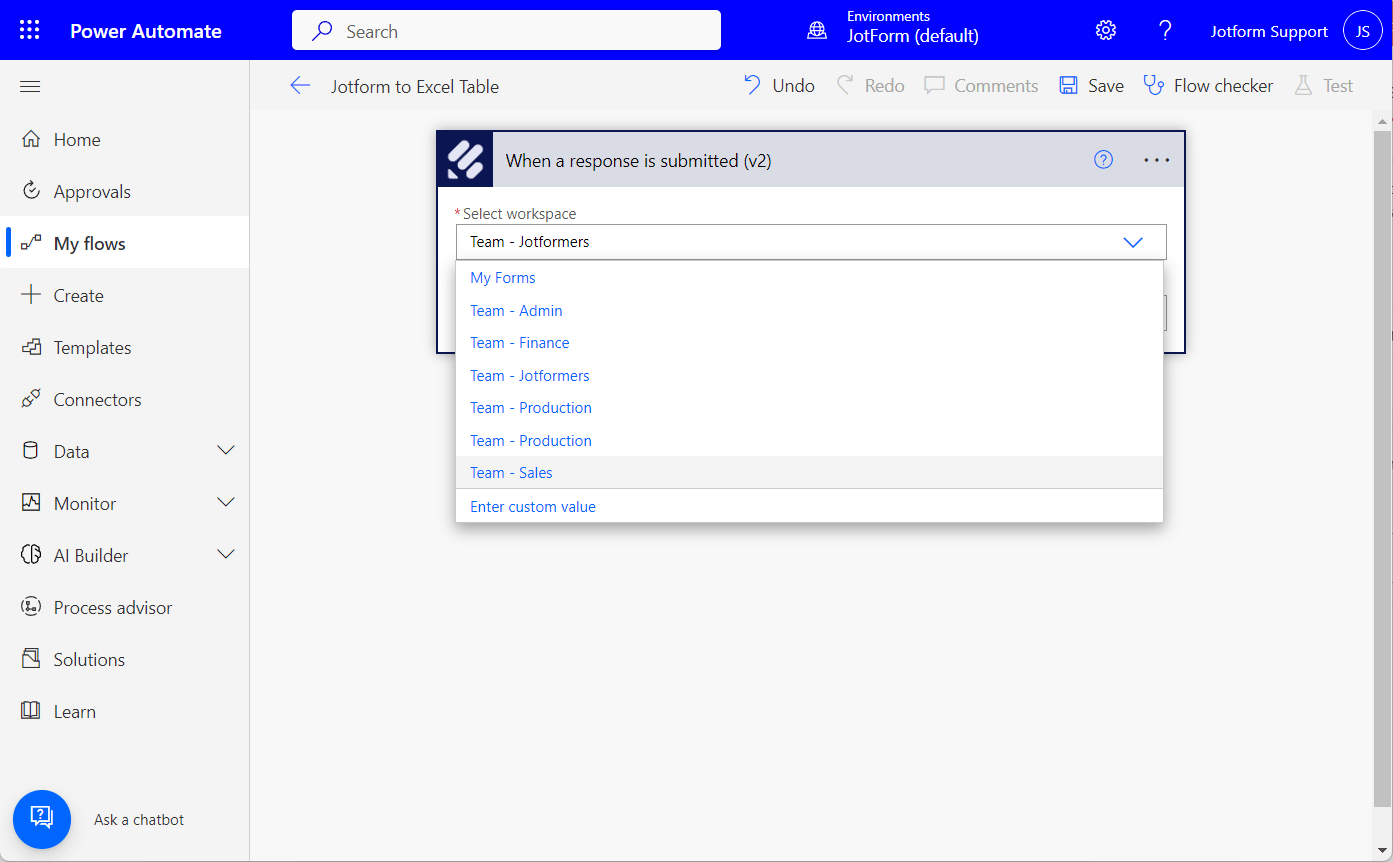
Note:
Moving a form from your My Forms page to a Team requires you to recreate your flow with Microsoft Power Automate.
- Select a form from the selected workspace.
- Click the New Step button to proceed.
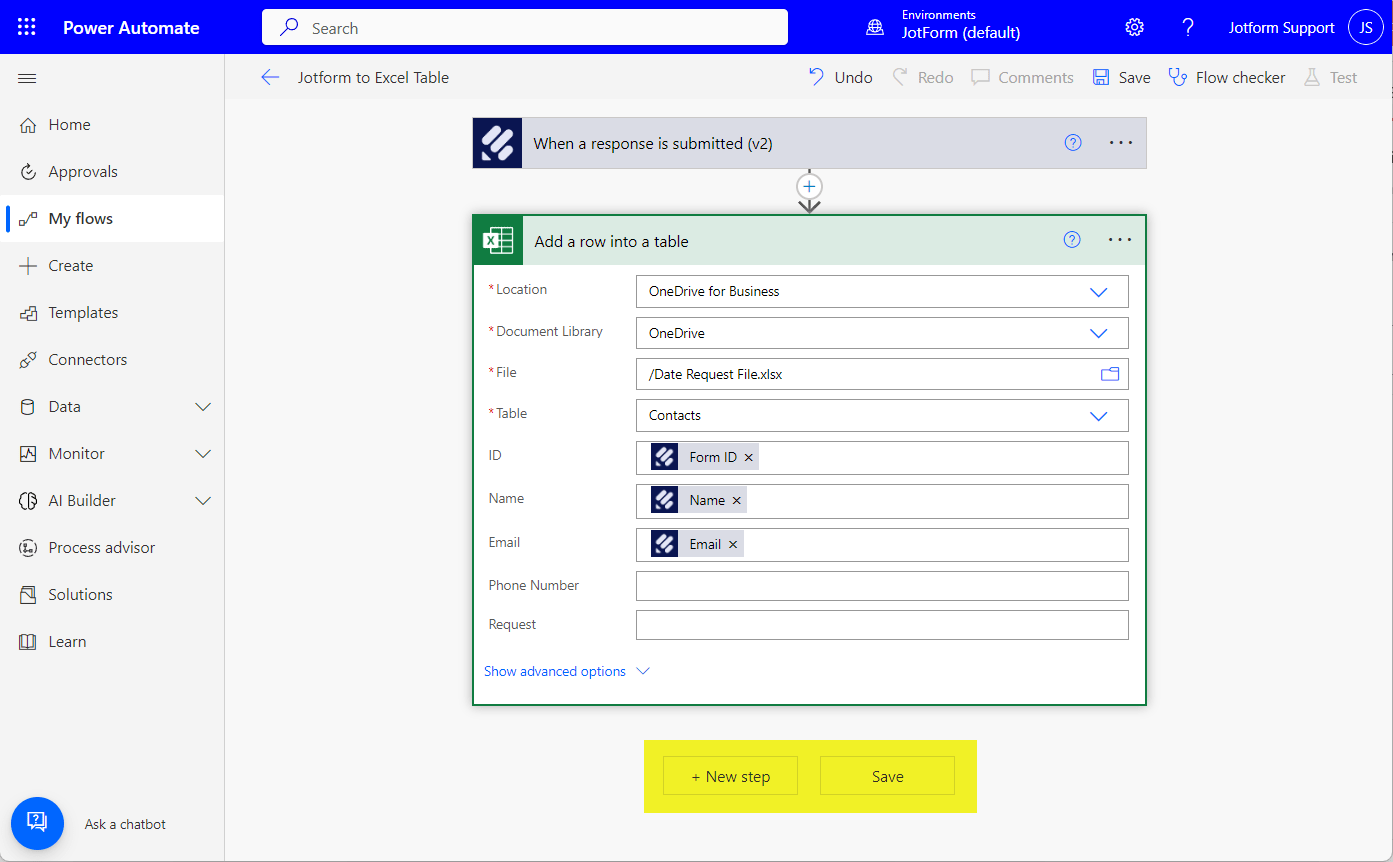
- Select from the list of 3rd party connectors from the Action dropdown — for example, Excel (Business) to add a new row to your existing Excel table.
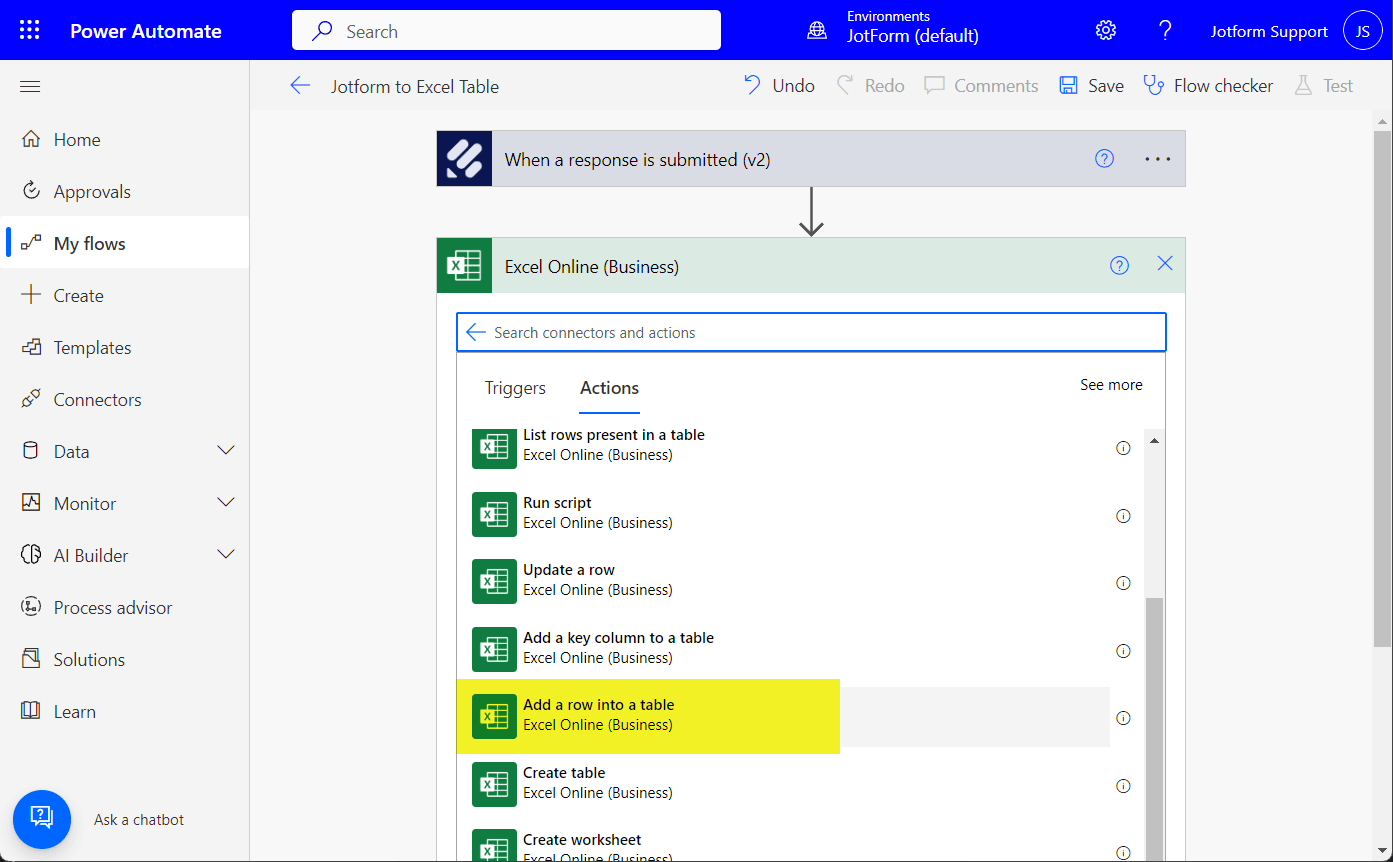
- Set up your connections accordingly.
- Click the + New Step button to add a new step in the same connection. Otherwise, click on Save, and you should be ready to go.
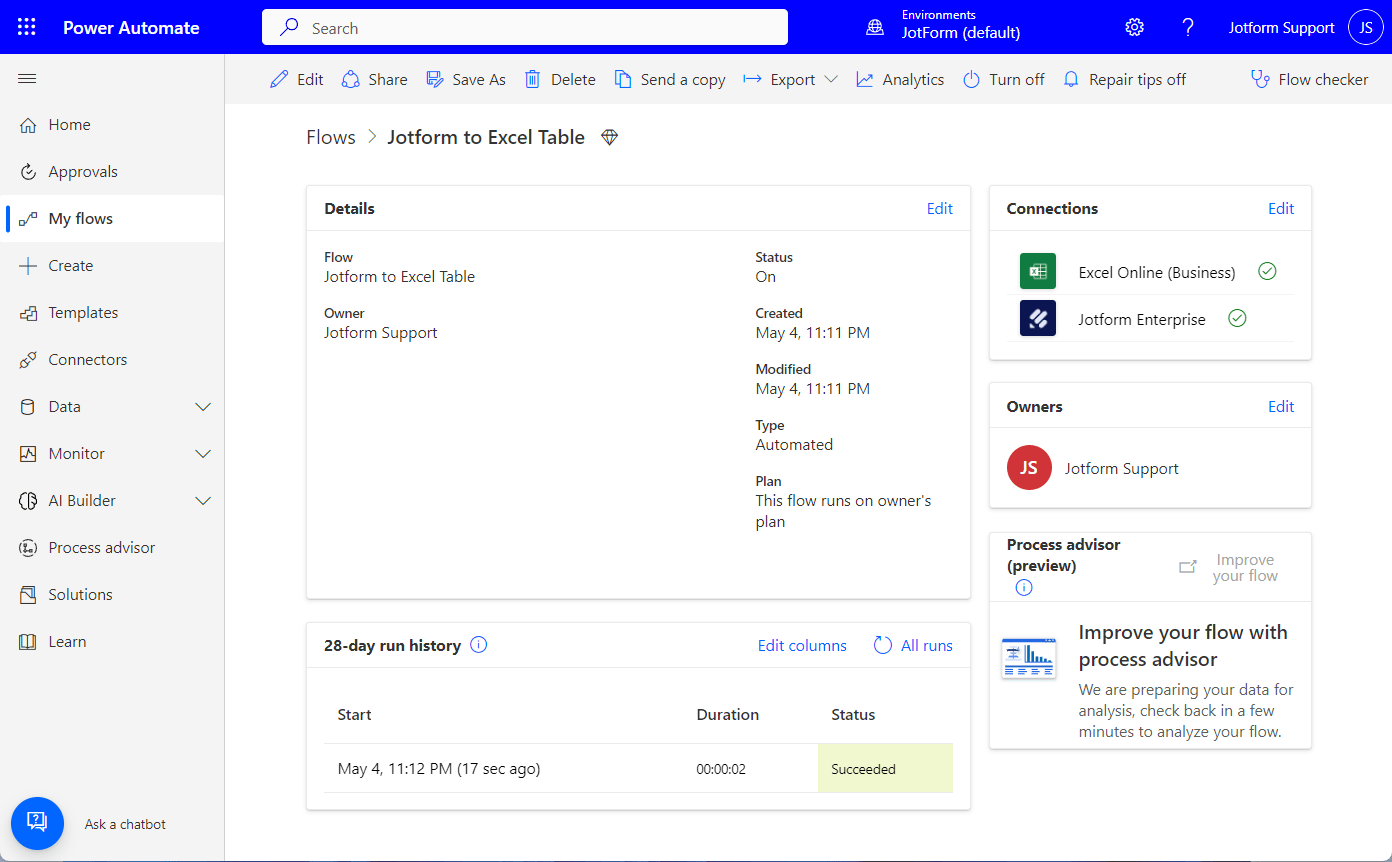
We highly recommend doing a test to see if the connection works. That way, you can fix any possible errors before going live. If any issue arises in the future, you can view them through the Flow History section of the created flow. Here’s a view of that:
Send Comment:
4 Comments:
182 days ago
Can I use this feature to auto populate an excel template for each client that completes the form? Each client would have their own form. For eg- client fills out form with income and expense data, info auto populates into my excel network calculator, this happens for each response.
More than a year ago
Power Automate only has a trigger for 'When a Response has been submitted'.
This means if a submitter changes/updates their response, Power Automate cannot pick this up and change the data in the target system/application i.e. Excel. This appears to be different from the integration with Google Sheets, where updated submissions are reflected in the target Google Sheet.
Would it be possible to add a new trigger when submission is updated?
More than a year ago
Hello,
I am a software developer working for a company exploring e-sign solutions. I am wondering if the Jotform Enterprise edition includes in its API a way to embed a form into a website? Once this form is embedded, are we then able to pre-fill some of the fields for the user, if we know some of their information?
Thanks,
Ariel
More than a year ago
what is the connection name?