If you’ve connected Dropbox to your form and want each folder to have a unique name, the Unique ID widget is a great option. By pairing the Dropbox integration with this widget, you can automatically create a separate subfolder for every submission—no manual sorting needed. It’s a simple way to keep files neatly organized, whether you’re collecting client documents, managing project files, or handling application forms, so everything stays easy to find and manage.
Adding the Unique ID Widget to Your Form
Keeping your form submissions well-organized in Dropbox is simple with the Unique ID widget. In just a few steps, you can automatically create unique folders for each submission, helping you stay on top of your files without any manual sorting. Here’s how to get started:
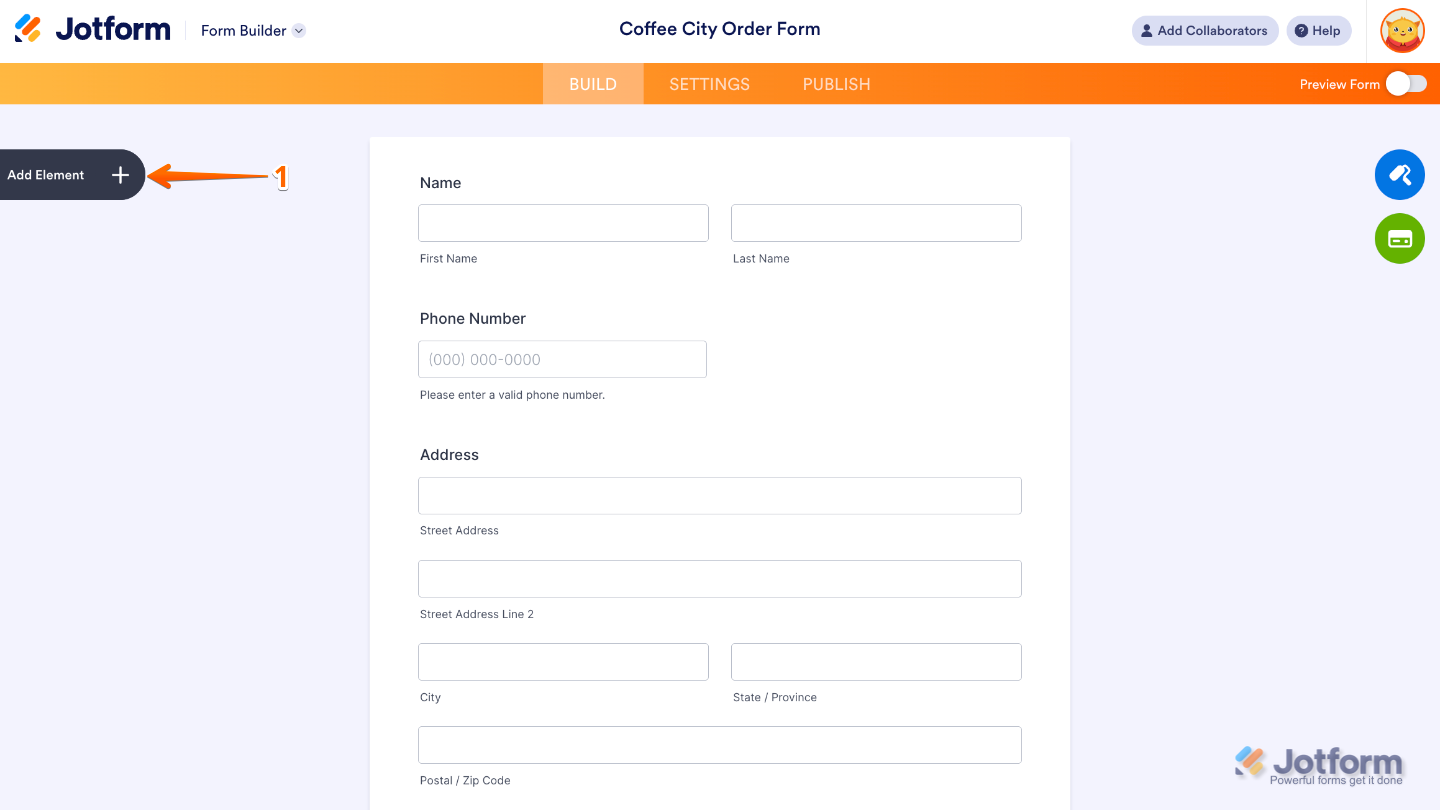
- In Form Builder, click on the Add Element menu on the left side of the page.
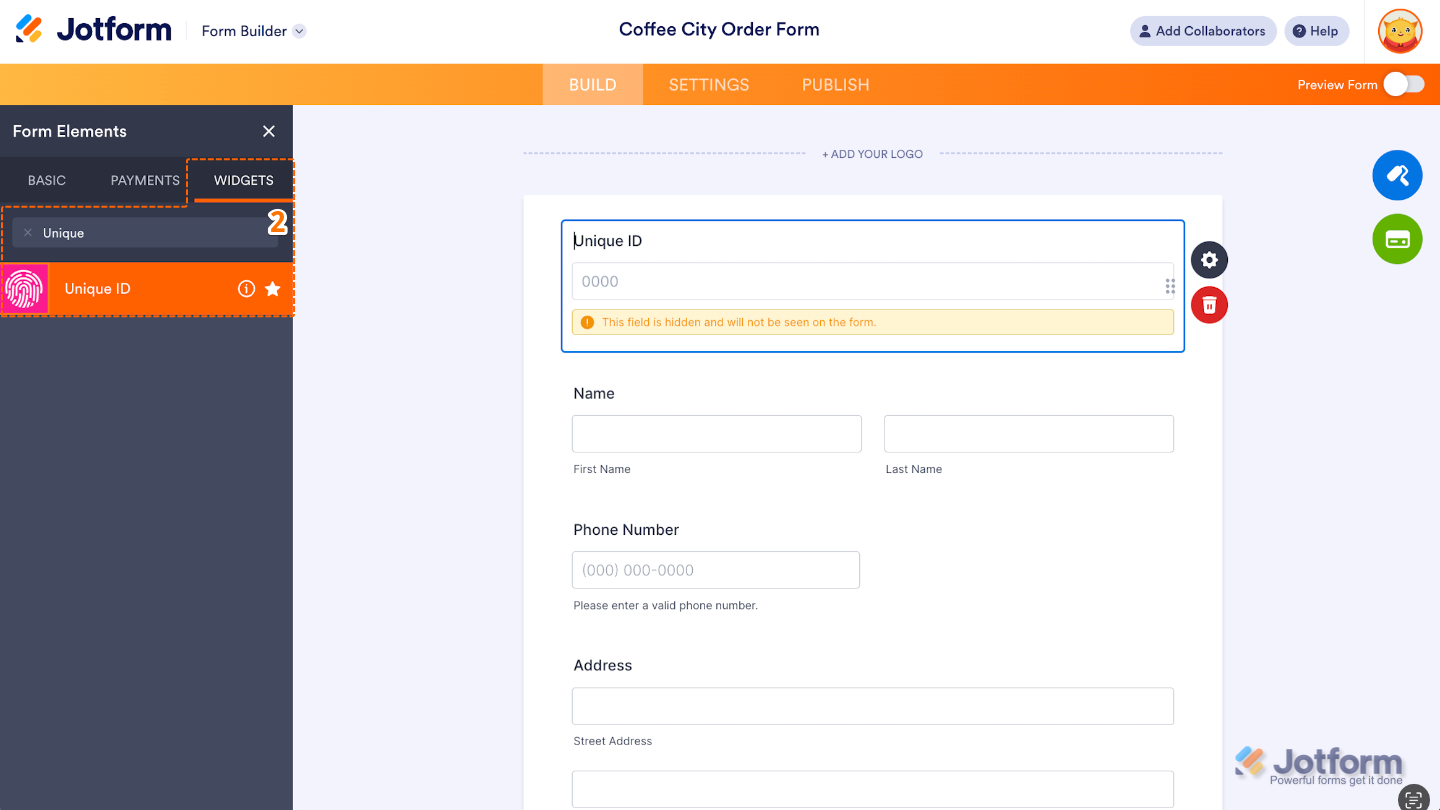
- Under the Widgets tab in the Form Elements menu, search for Unique ID and then click on it. Or, just drag and drop it to where you want it to be on your form.
To learn how to customize the way the widget generates unique values, you can check out our guide on How to Add Custom Unique IDs to your Form Submissions to learn more.
Notes
- The Unique ID widget works behind the scenes using a hidden field, so users won’t see it while filling out the form. If you’d like your users to see a unique value as they complete the form, a great alternative is the Random Value Generator widget.
- Keep in mind, the Unique ID widget only generates its value when the form is submitted—not when the form first loads.
Setting up the Unique ID as a Sub-Folder in Dropbox Integration
Using the Unique ID field as your Dropbox folder name is an easy way to stay organized. It keeps your files tidy and makes finding specific submissions quick and hassle-free. You can do it in just a few steps:
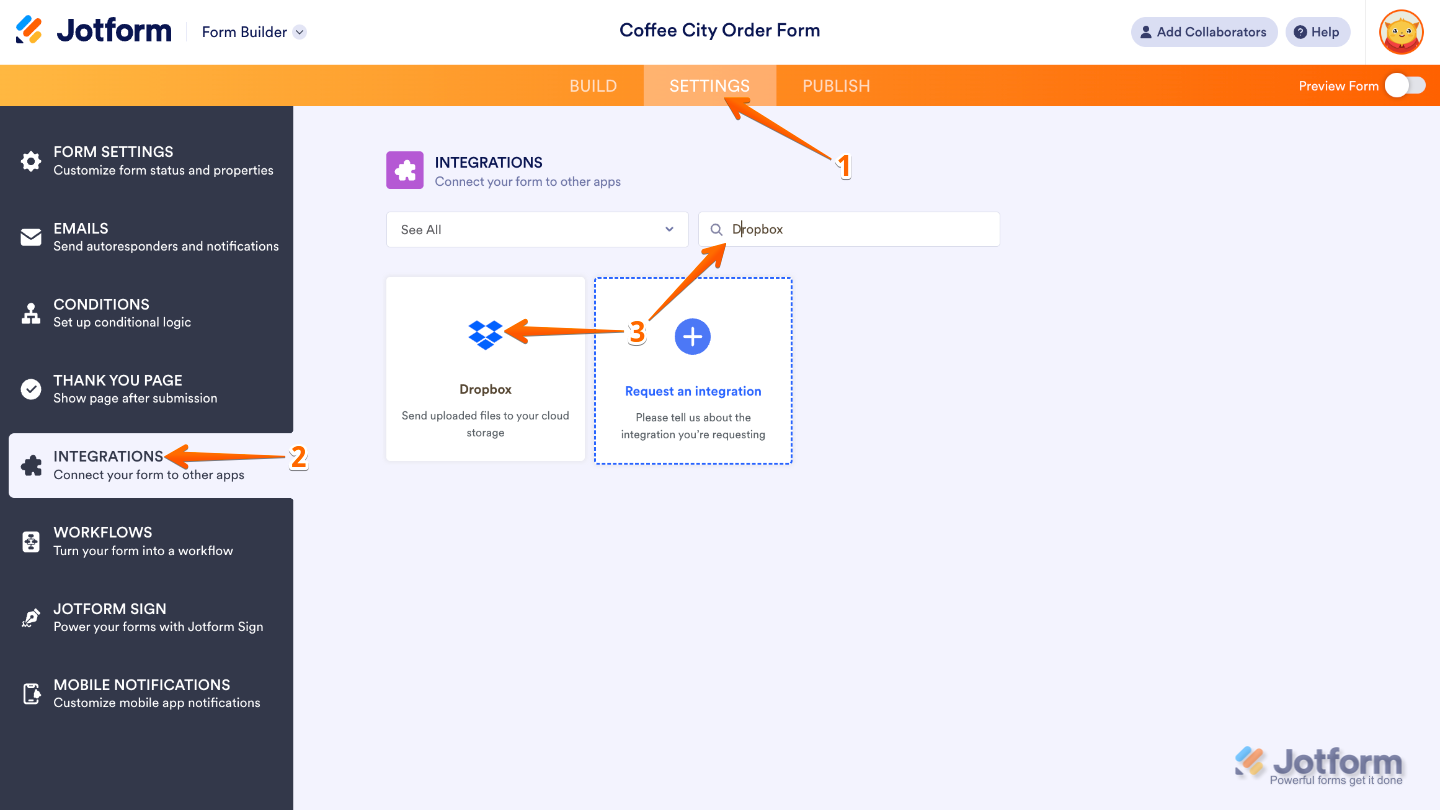
- In Form Builder, in the orange navigation bar at the top of the page, click on Settings.
- In the menu on the left side of the page, click on Integrations.
- Search for Dropbox, and then click on it.
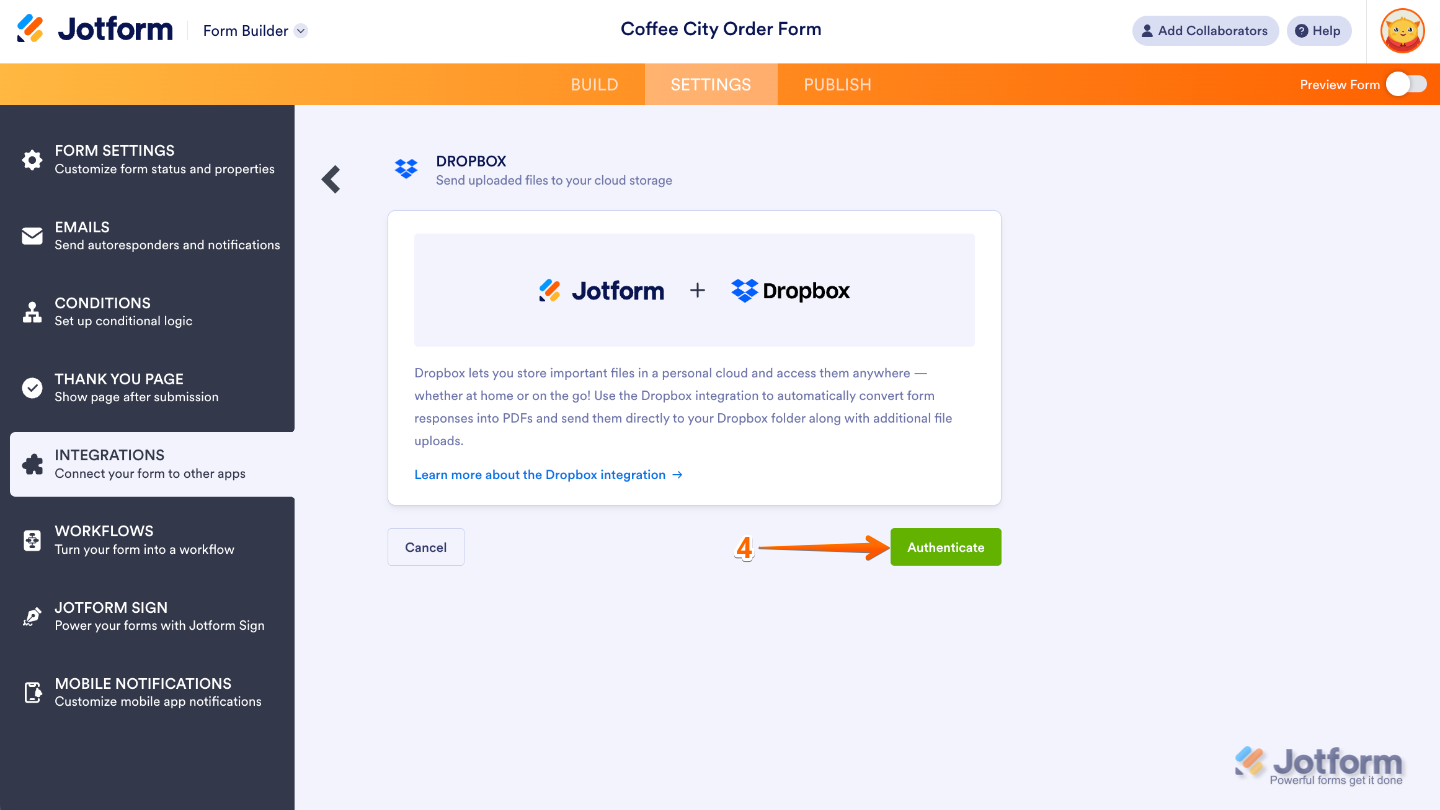
- Next, click on Authenticate.
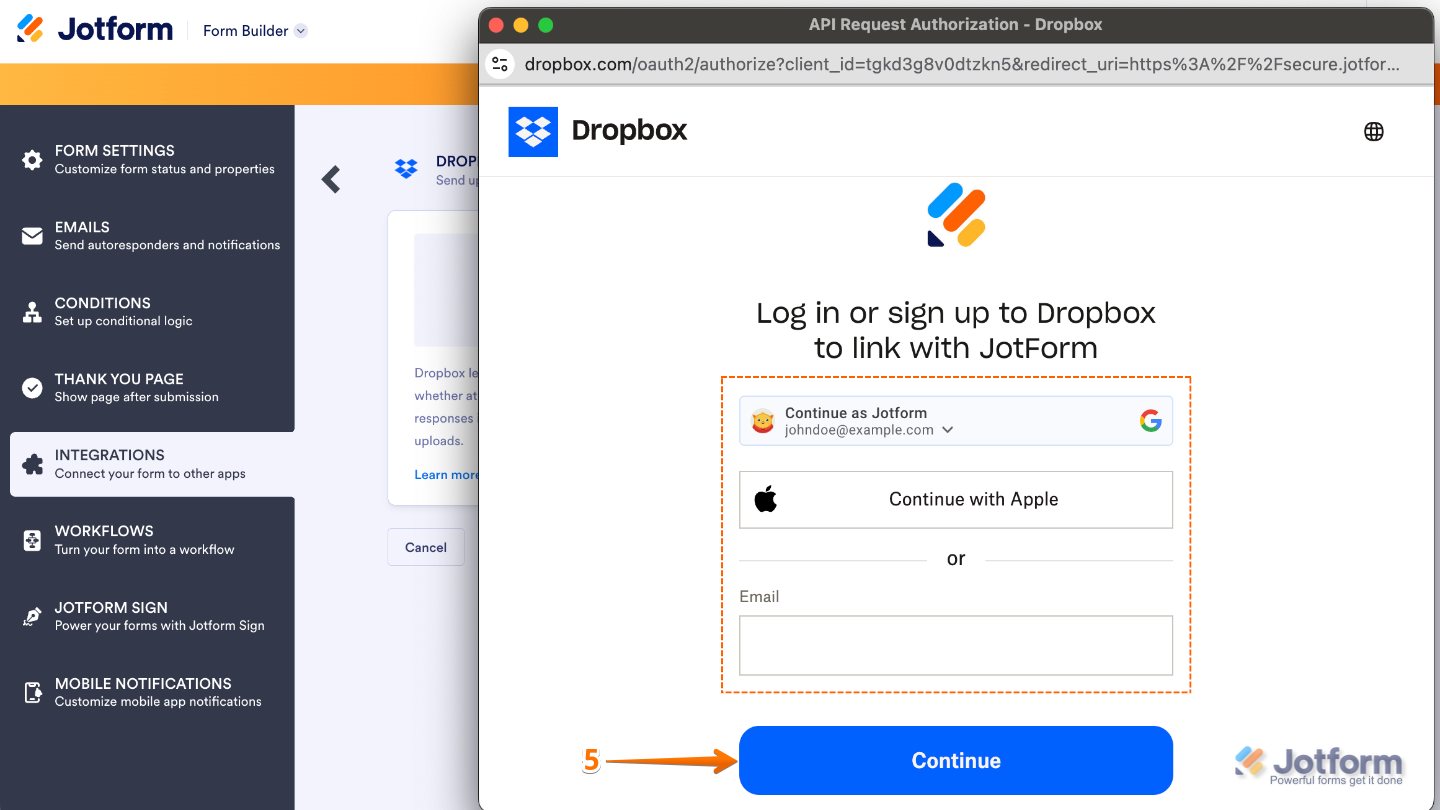
- In the window that pops up, log in your Dropbox account, and then click on Continue.
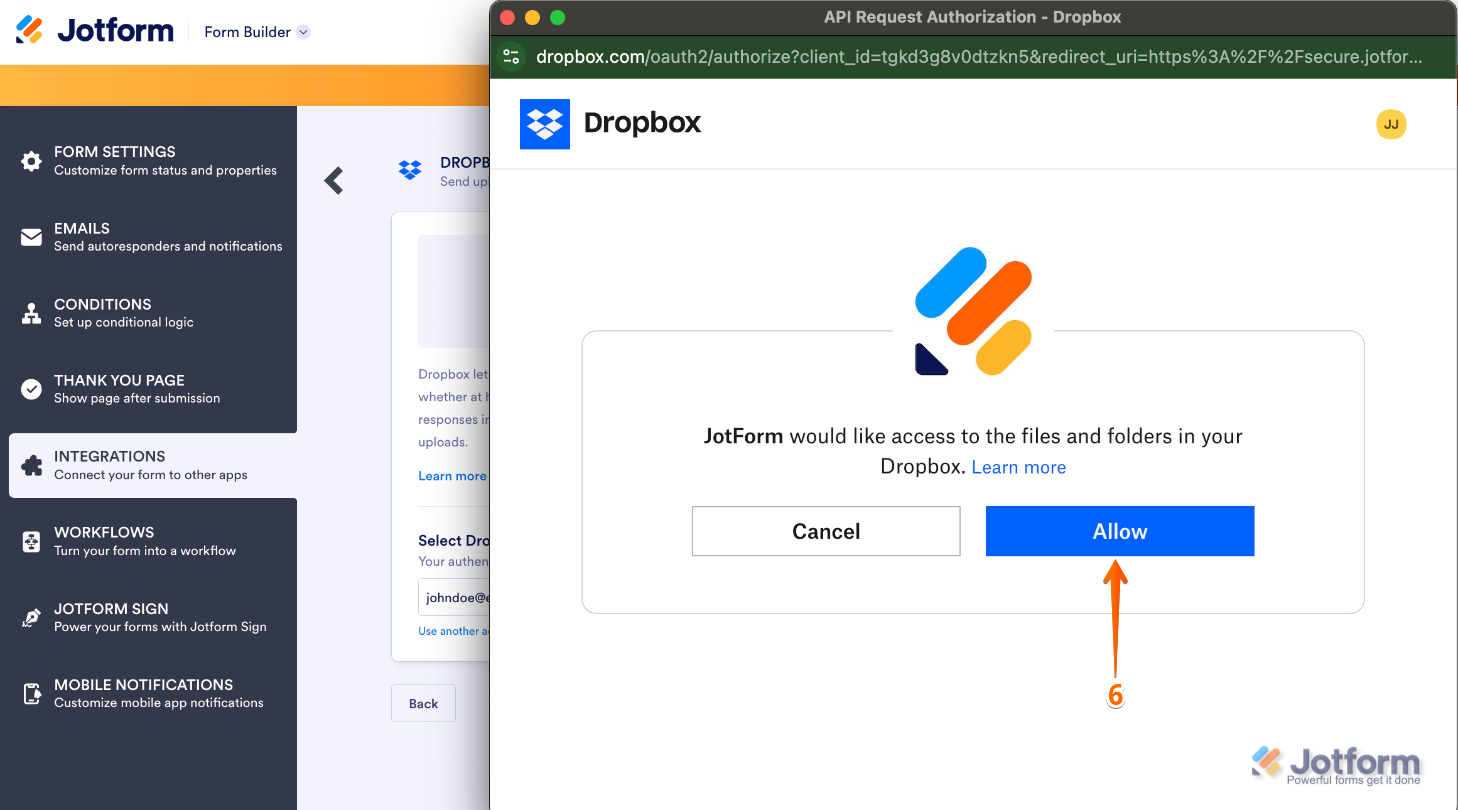
- Once logged in, click on Allow.
- Then, edit the following:
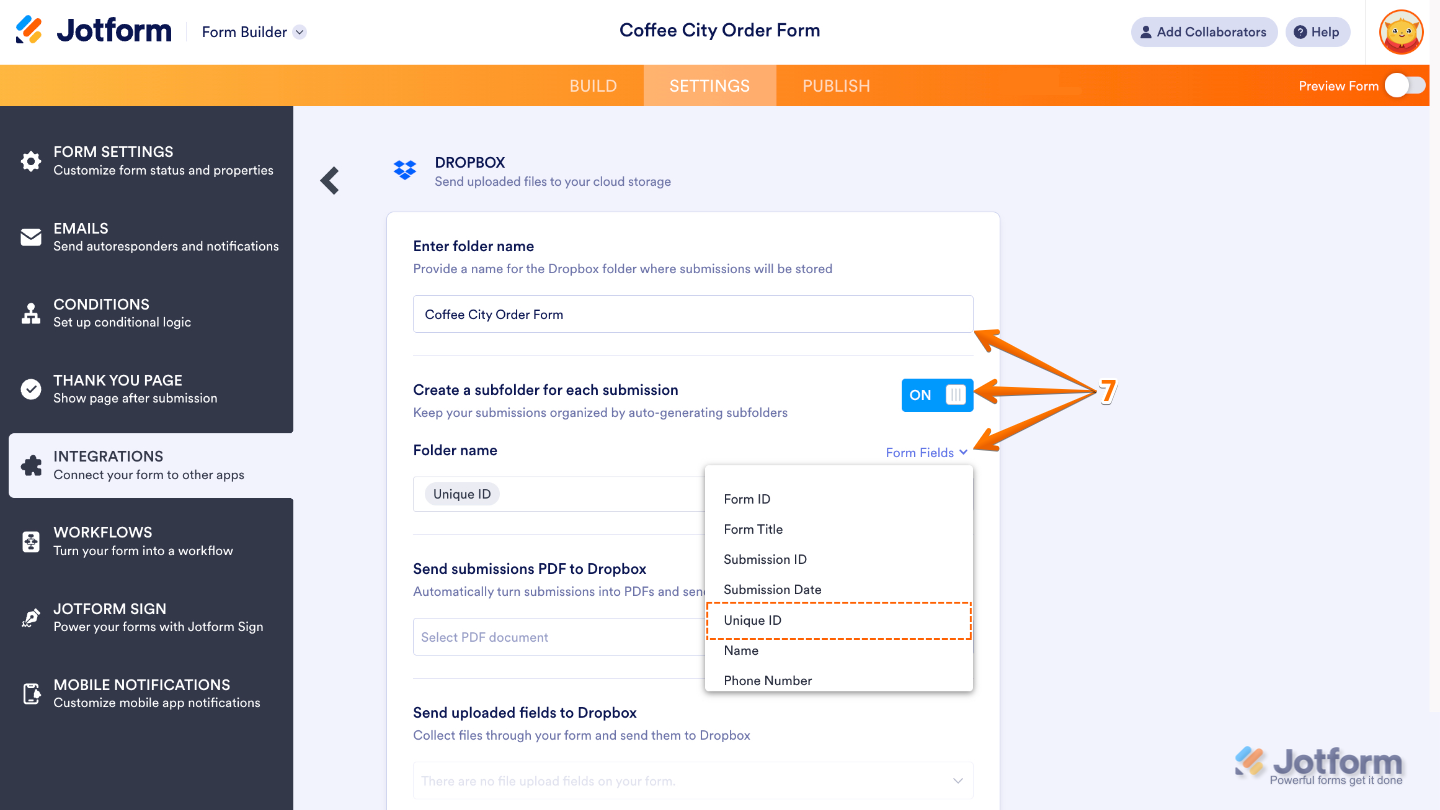
- Enter folder name — This will be your main Dropbox folder.
- Create a subfolder for each submission — Turn this on to create a separate folder for each submission inside the main Dropbox folder. You can type your custom folder name or dynamically create it based on Form Fields.
- Folder Name — This field will show up once the Create a subfolder for each submission is switched On. From here, you can select the Unique ID field.
- After that, set up these last two Dropbox integration settings:
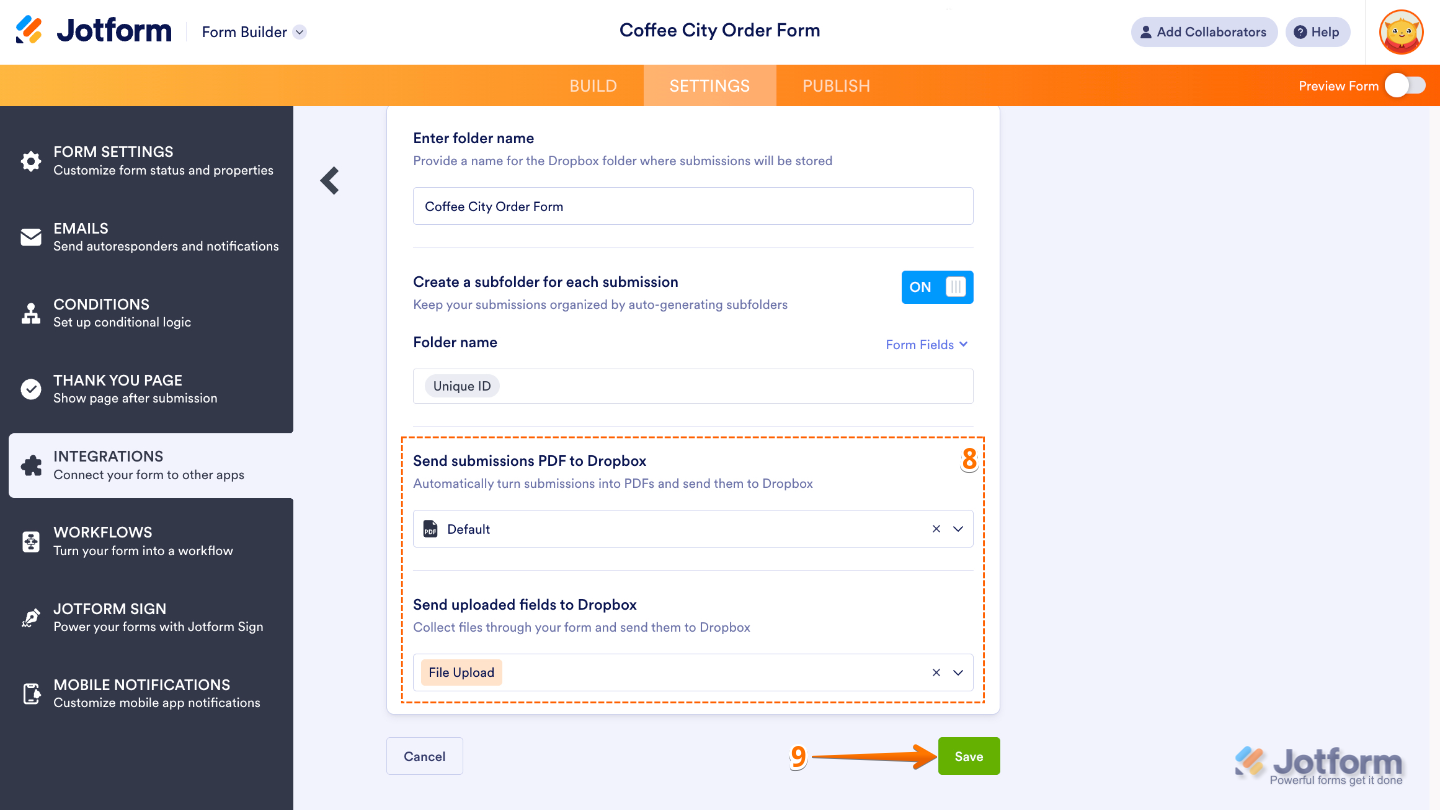
- Send submissions PDF to Dropbox — Select which PDF document to send to Dropbox. You’ll see Default if you haven’t created a PDF document yet.
Note: To rename your PDF, see How to Assign a Custom File Name to Your PDF Report. - Send uploaded files to Dropbox — Select from which file upload field to send to Dropbox. You can select multiple file upload fields here.
- Send submissions PDF to Dropbox — Select which PDF document to send to Dropbox. You’ll see Default if you haven’t created a PDF document yet.
- Once done, click on Save.
That’s it. From now on, your form submissions will be neatly organized in your Dropbox account, each in its own subfolder named after its Unique ID. If you’ve already set up the Dropbox integration and want to start using Unique IDs for folder names, just hover over the integration and click the Edit icon to update it.
You can also click the Three Dots icon to see more options, such as:
- See Action Logs — This section will display your Dropbox integration’s successful and failed runs. It’s useful when troubleshooting issues.
- Rename Action — If you want to personalize the action’s title.
- Disable Action — This option is useful to temporarily stop the integration from sending files.
- Delete Action — If you want to completely remove the integration from your form.

Send Comment:
1 Comment:
More than a year ago
how can I integrate with dropbox but have the forms save to an existing folder within dropbox?