Jotform’s File Upload feature lets you collect files such as documents, images, or other media directly through your forms. It’s perfect for job applications that need resumes, event registrations requiring signed waivers, or customer support forms for uploading screenshots or error logs. You can allow multiple file uploads, define acceptable file types like PDFs or JPEGs, and set size limits to match your needs, ensuring a smooth experience for respondents.
Here are a few ways to use it:
- Collect resumes, cover letters, or portfolios in job application forms.
- Upload signed waivers, permits, or documents in registration forms.
- Receive screenshots, logs, or attachments in customer support forms.
- Collect proof of payment, receipts, or invoices in order forms.
- Gather identification documents for verification or onboarding processes.
Notes
- The File Upload element is available in both Classic and Card Forms. You can check out our guide on When to Use Card Forms to learn more.
- Files uploaded through the File Upload field on your forms will count toward your account’s upload storage space.
Adding the File Upload Element
Whether you’re creating a new form or updating an existing one, you can add the File Upload element in a few easy steps. Here’s how to do it:
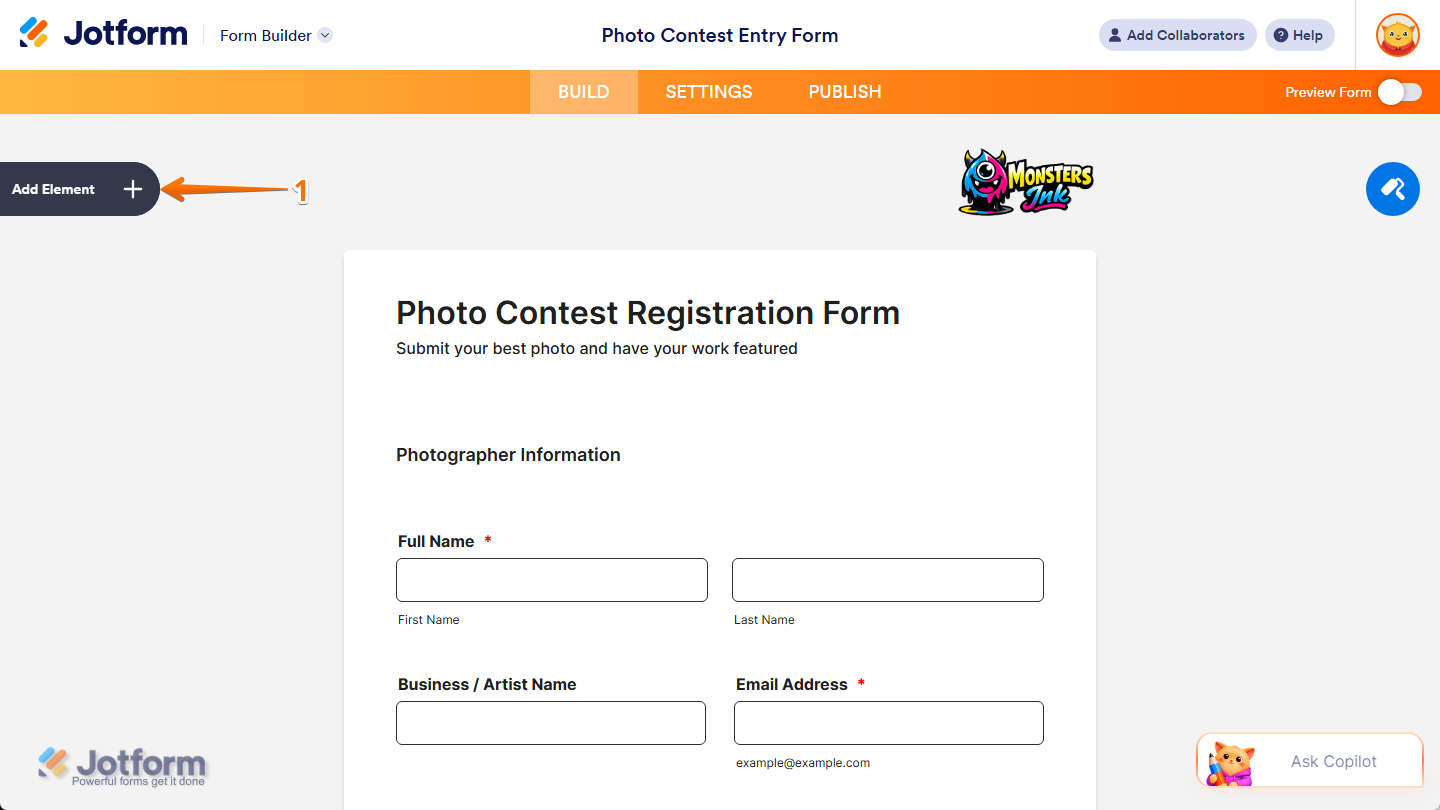
- In Form Builder, click on Add Element on the left side of the page.
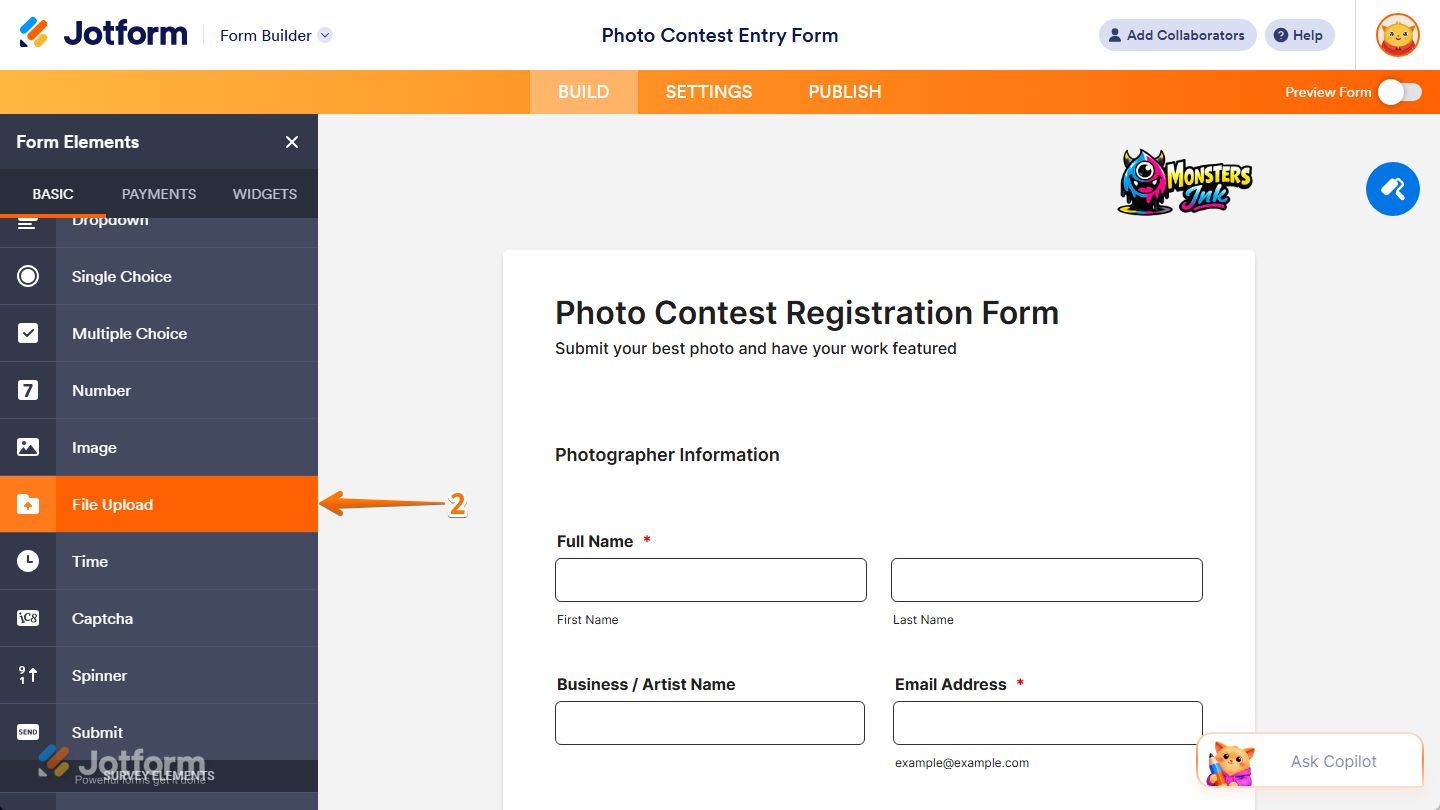
- Then, in the Form Elements menu, under the Basic tab, scroll down and then click on File Upload. Or, just drag and then drop it to where you want it to be on your form.
Once you’ve added the File Upload element to your form, you can adjust how it appears and works through the following tabs:
Configuring General Tab Properties
After adding the File Upload element, you can configure its basic properties to control how it looks and behaves on your form. Follow these quick steps to get started:
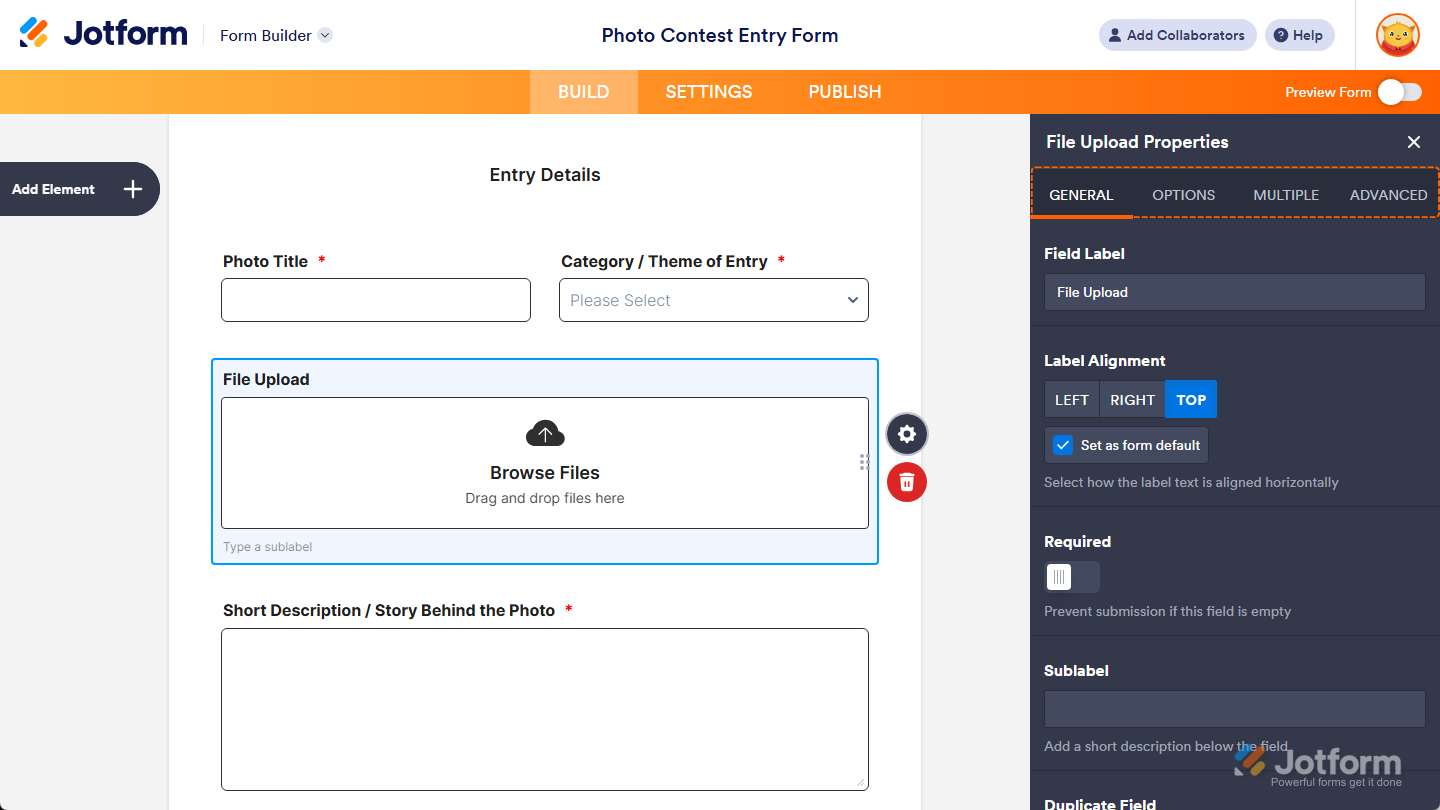
- In Form Builder, while your File Upload element is selected on your form, click on the Gear icon on the right side of it.
- Then, in the File Upload Properties menu that opens on the right side of the page, under the General tab, you’ll see a list of properties you can configure:
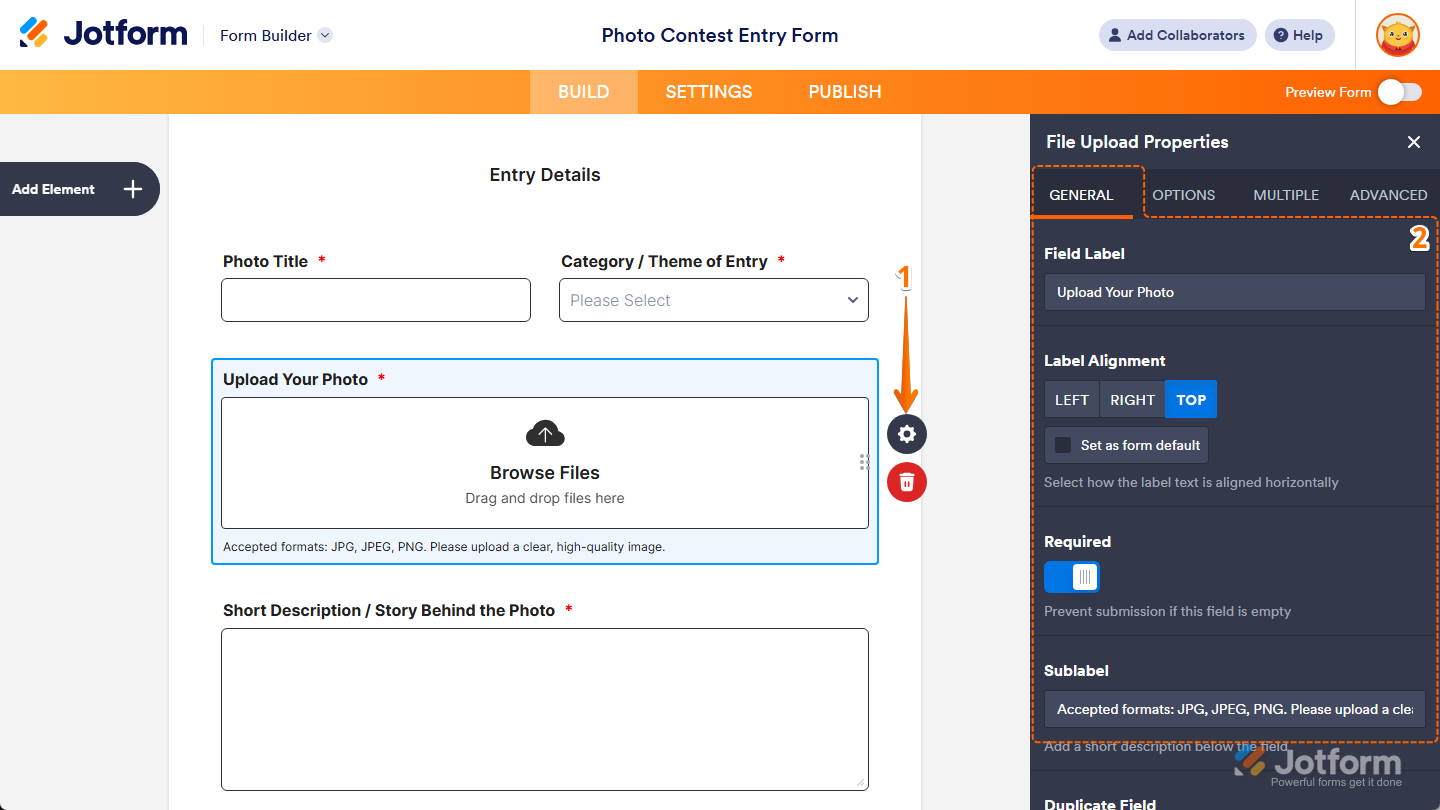
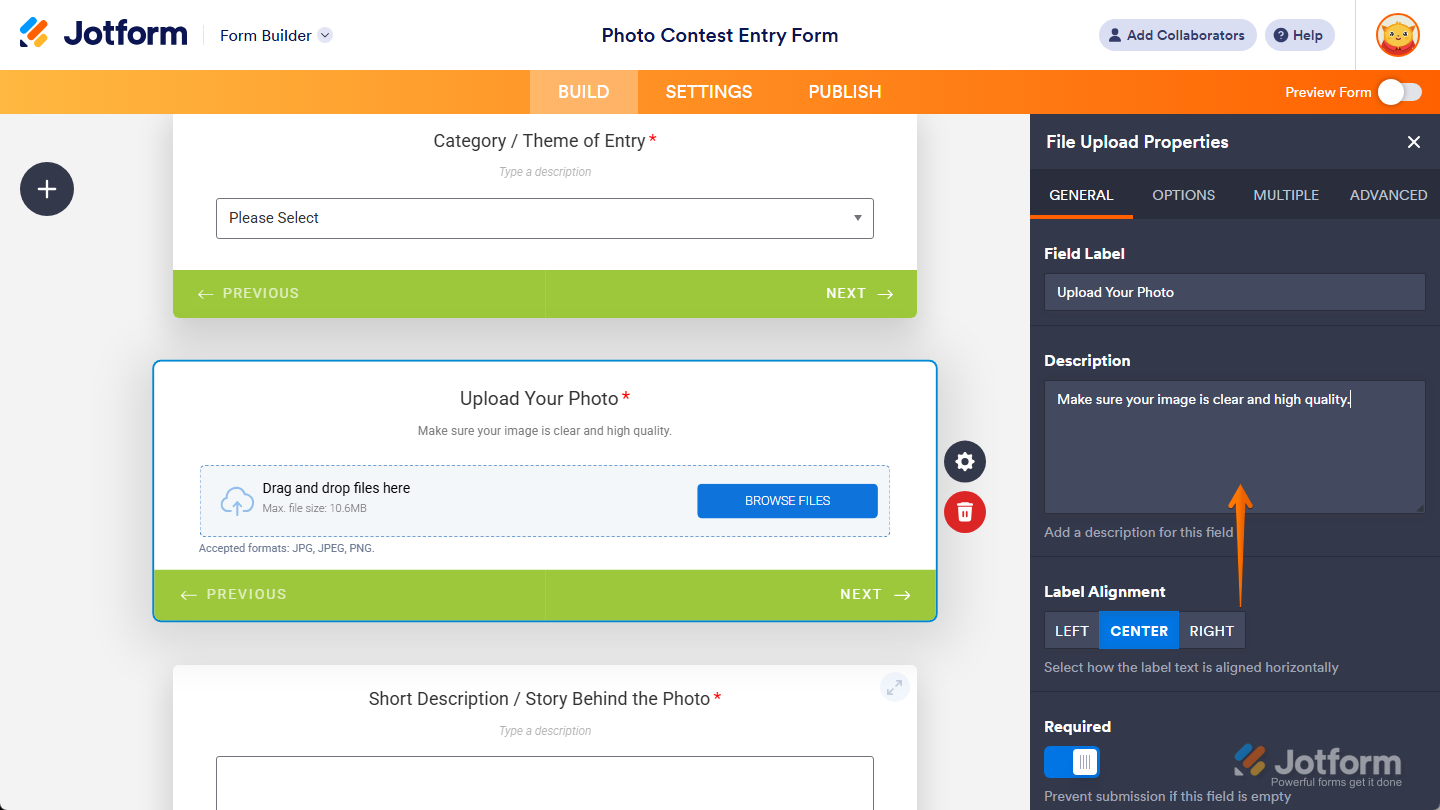
- Field Label — Delete the default text and enter a label in the input box if you want to customize your File Upload field’s question.
- Label Alignment — Keep this set to Center to position your File Upload field’s label in the middle of its width, or select Left or Right to position it on either side.
- Set as Form Default — Keep the check in the box next to this option, or remove it if you want other fields to retain their current label alignment when you change your File Upload field’s label alignment. You’ll only find this option in Classic Forms.
- Required — Toggle this on if you want respondents to complete your File Upload field before they can submit the form.
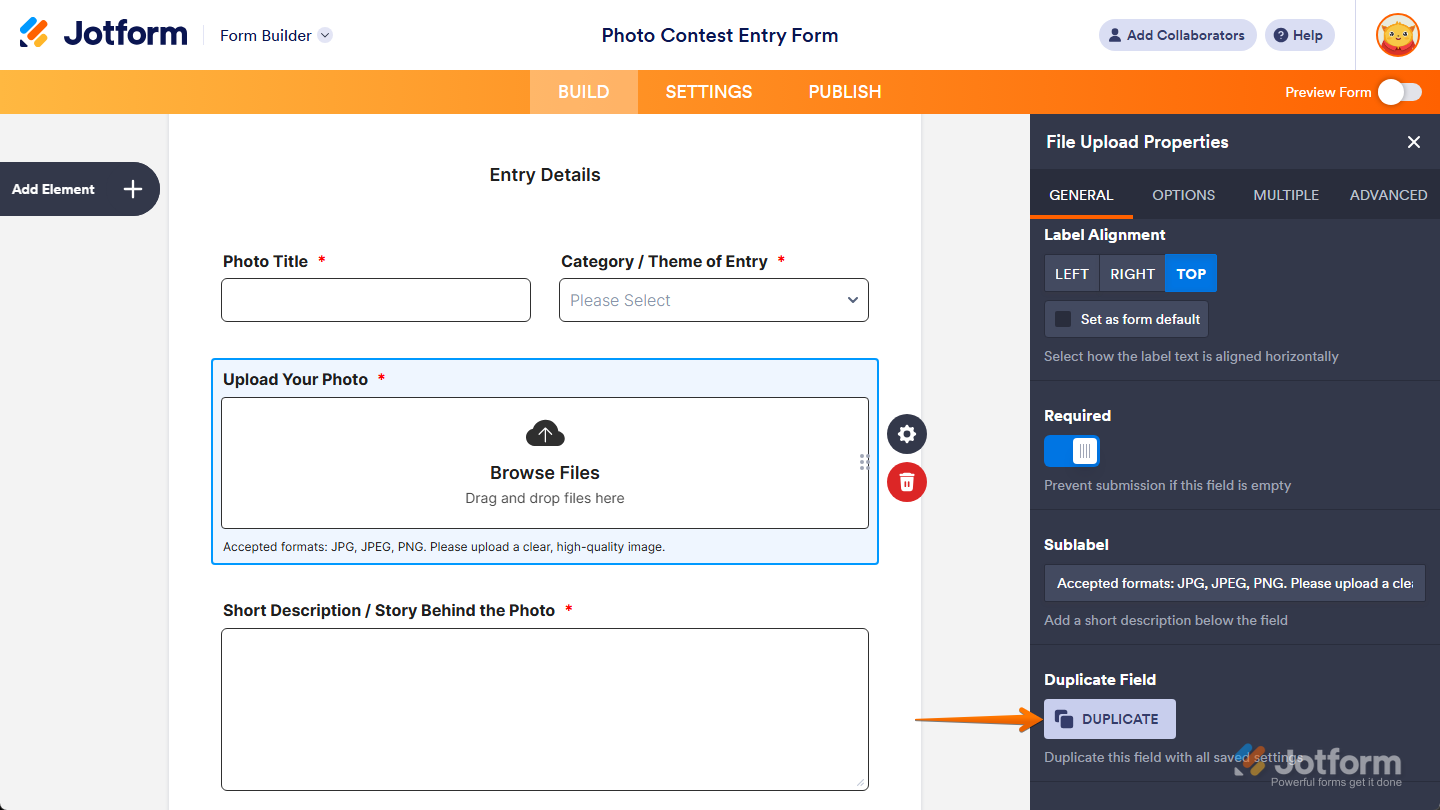
- Sublabel — Enter a sublabel in the input box if you want to add additional context or instructions below your File Upload field.
In Card Forms, you can enter text in the Description property to add context or instructions that appear below your File Upload field label.
That’s it. You’ve configured the General tab properties of the File Upload element on your form. If you want to create a copy of your field with the same setup, click on the Duplicate button at the bottom of this tab.
Setting Up Options Tab Properties
With the File Upload element added to your form, you can tweak its properties to set what types and sizes of files it can accept from respondents. Here’s what to do:
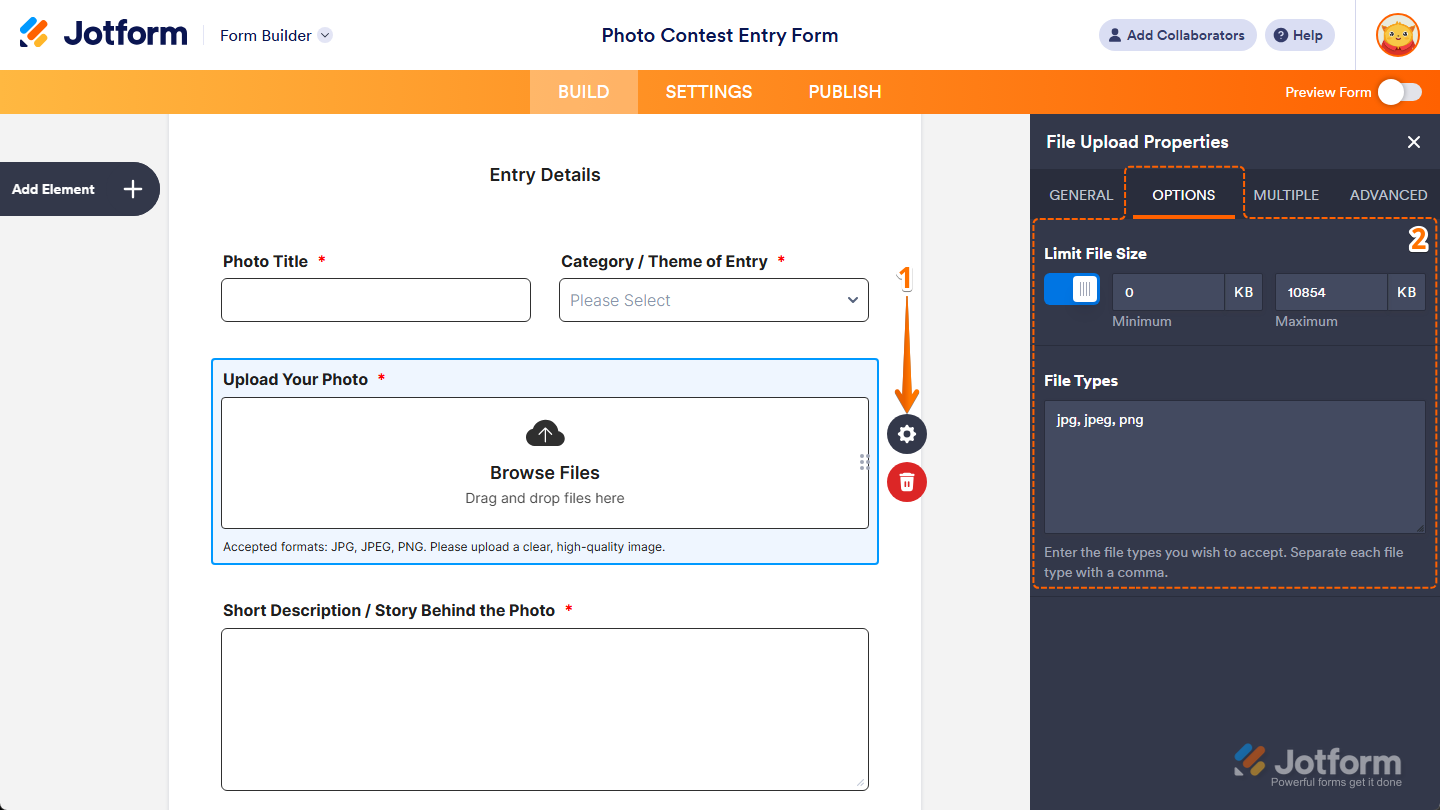
- In Form Builder, while your File Upload element is selected on your form, click on the Gear icon on the right side of it.
- Then, in the File Upload Properties menu that opens on the right side of the page, under the Options tab, you’ll see this list of properties you can set up:
- Limit File Size — Keep this toggled on and enter a minimum and maximum file size in KB (1024 KB equals 1 MB), or toggle it off if you want users to upload files without size limits. You’ll find more info in our guide on How to Change the File Size Limit in File Upload Fields.
- File Types — Keep the default file extensions in the input box or delete them, then enter only the ones you want to allow for uploaded files, separated by commas. You can check out our guide on How to Change the File Size Limit in File Upload Fields to learn more.
That’s it. You’ve defined the Options tab properties of the File Upload element on your form.
Managing Multiple Tab Properties
Once your File Upload element is in place, you can define its properties to limit how many files respondents are allowed to upload. Here’s how to set it up:
- In Form Builder, while your File Upload element is selected on your form, click on the Gear icon on the right side of it.
- Then, in the File Upload Properties menu that opens on the right side of the page, under the Multiple tab, toggle on the Limit Number of Files property and, in the input box that appears, enter the maximum number of files respondents can upload in each submission.
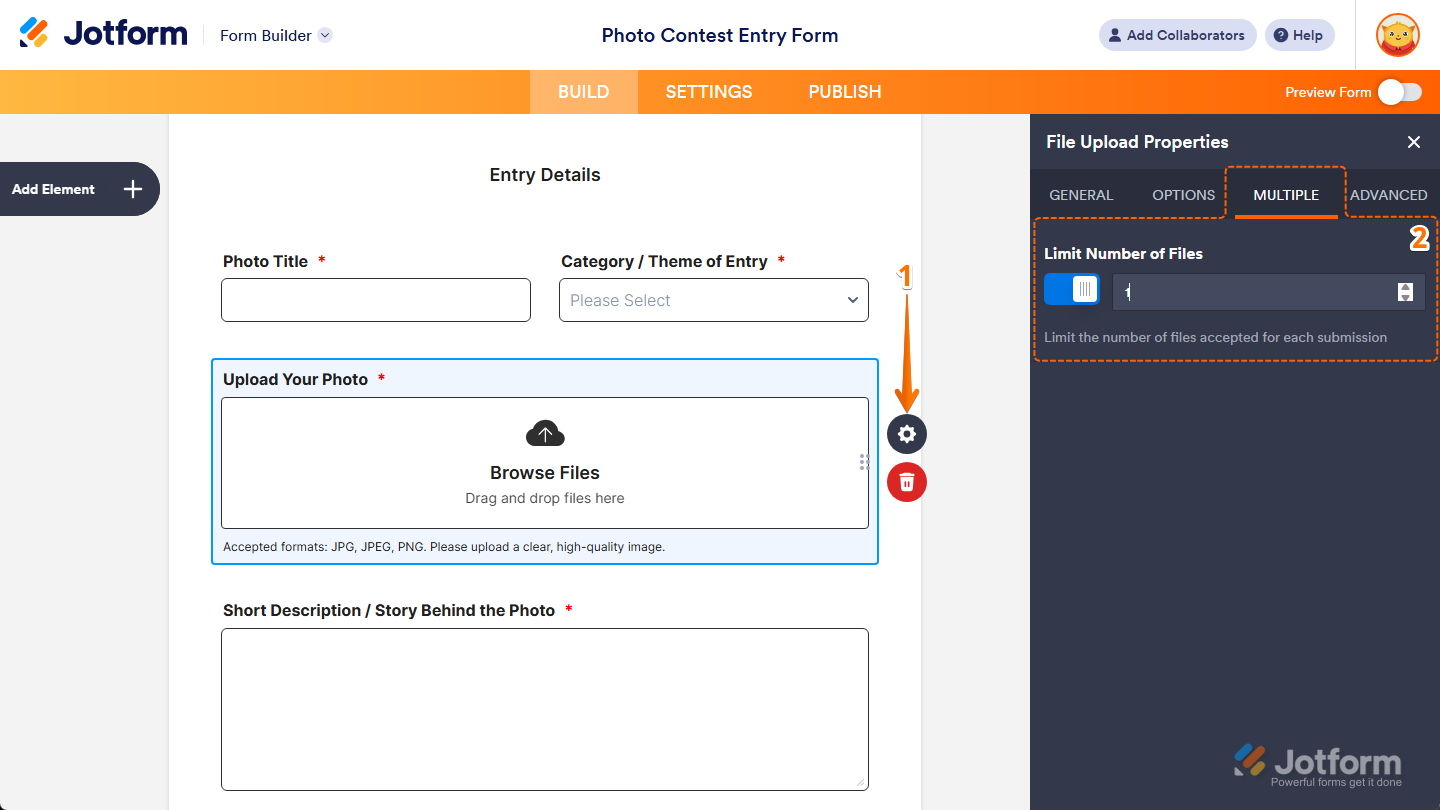
That’s it. You’ve set the Multiple tab properties of the File Upload element on your form.
Customizing Advanced Tab Properties
After you’ve added the File Upload element to your form, you can customize its additional properties to manage how it works with different form features. Here’s what to do next:
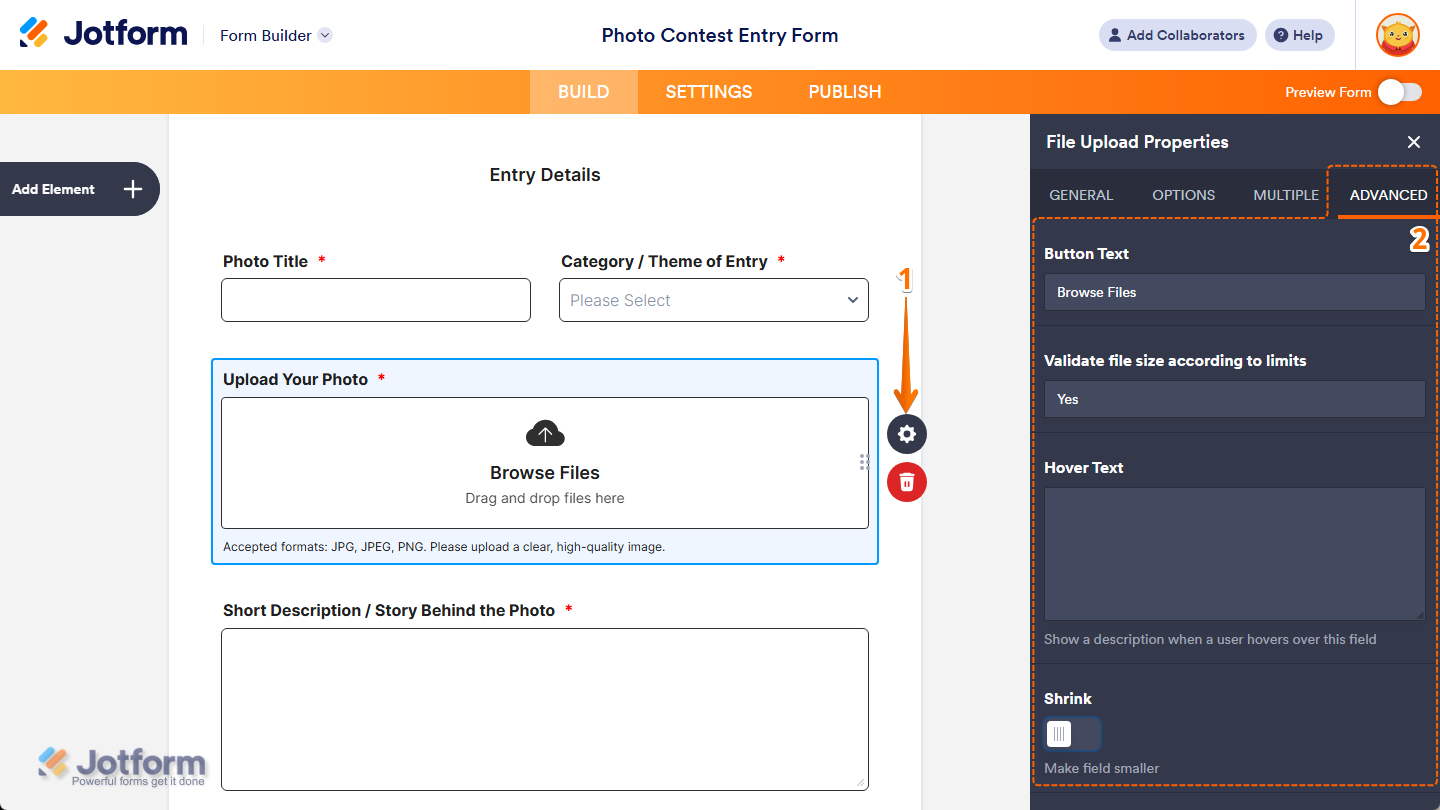
- In Form Builder, while your File Upload element is selected on your form, click on the Gear icon on the right side of it.
- Then, in the File Upload Properties menu that opens on the right side of the page, under the Advanced tab, you’ll see this list of properties you can customize:
- Button Text — Keep the default value to “Browse Text” or enter a new one you want to show on the File Upload field’s upload button. You’ll find this property under the Multiple tab in Card Forms.
- Validate File Size According to Limits — Keep the default value set to “Yes” or enter a different one if you want to disable it on your File Upload field.
- Hover Text — Enter the text you want to show as a short description when users hover their mouse over your File Upload field. You’ll only find this property in Classic Forms.
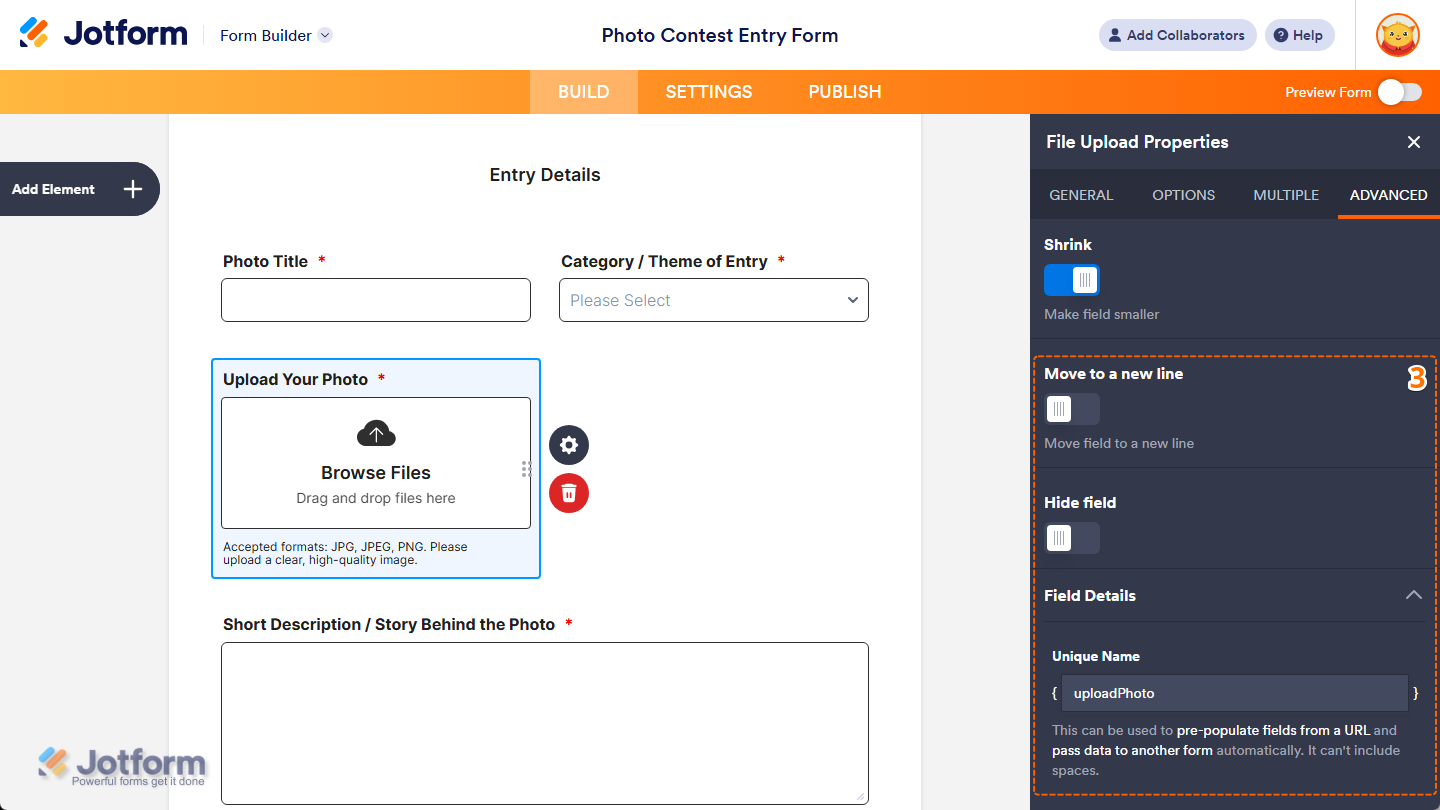
- Shrink — Toggle this on if you want to reduce your File Upload field’s width to half or to fit within the width of your form’s column. You can check out our guide on Setting Up Form Columns to learn more. You’ll only find this property in Classic Forms.
- Next, scroll down to the bottom and continue customizing these properties:
- Move to a New Line — You’ll only see this when the Shrink property is enabled. Toggle this on if you want to move your File Upload field to a new line instead of placing it next to another shrunk field.
- Hide Field — Toggle this on if you want to hide the File Upload field on your form. Take a look at our guide on How to Hide Form Elements for more details.
- Field Details — Click on this section to expand it and view, copy, or update your File Upload field’s Unique Name, which is used to reference it in integrations, calculations, and other advanced form features. Check out our guide on How to Find Field IDs and Unique Names to learn more.
That’s it. You’ve customized the Advanced tab properties of the File Upload element on your form.
Notes
- Any changes you make in the File Upload Properties menu are automatically saved on your form.
- In addition to the basic File Upload element, you can also use File Upload widgets to collect files on your forms. Check out our guide on How to Add a Widget to Your Form to learn more about it.

Send Comment:
10 Comments:
July 25, 2024
Questions, can't find anywhere... I'm researching form companies to integrate into our TourneyCentral product... teams need to submit team rosters, liability waivers, etc... we don't want to deal with file uploads, so we'e looking to partner and integrate.
We can feed back the team ID on a hidden field, but file upload names... any way to rename them as they come int, example, teamID is 508987 so every file this team upload s prefaced with 508987-file name.pdf ??
I'm trying to avoid an admin seeing 800 files called roster.pdf and being driven crazy trying to see which goes to which team.
Thanks!
G.
May 28, 2024
My account says I have exceeded my space limit in spite of the fact that I have one submission with one 2.2mb file in it. Is there something else I need to do to clear the uploaded files?
May 6, 2024
I have downloaded and delete multiple file however my account still says I am reaching my space limit. Is there something else I need to do to clear the system once I delete the uploaded files?
April 7, 2024
How do I create a file
February 23, 2024
My network was very poor ,so I couldn't finish uploading my documents
June 6, 2023
This has helped enormously.
February 10, 2023
How create a form
October 30, 2022
file upload is not working at all, I can have it on my from but when u click on the button it doesn't do anything, i need this to have my clients upload pictures please help
February 25, 2022
I can't get to the Form Elements page
October 4, 2021
is this free and will it work with wp stmp