-
 SaraTour
Merhabalar,
Müşterilerimize bildirim gönderiyoruz. Onlar bu bildirime 1 kere bastıktan sonra bir daha göremiyorlar. Müşteriler uygulamayı açtıktan sonra istediğimiz yere koyacağımız bir bildirim butonu sayesinde daha önce gönderdiğimiz bildirimleri toplu şekilde görebilmeli.
Bu konuda çözüm rica ediyorum.
İyi çalışmalar.
-
 Bart AI Operations Specialist
Merhaba SaraTour,
Öncelikle Jotform Destek ile iletişime geçtiğiniz için teşekkür ederiz. Maalesef istemiş olduğunuz özellik şuanda mevcut değil. İstek talebinizi aldık ve ilgili ekibimize yönlendirdik. Ancak geliştirici ekibimizin iş yüküne bağlı olduğu için size herhangi bir zaman zarfı söyleyemiyoruz. Talebiniz ile ilgili herhangi bir gelişme olduğunda bu forum başlığı üzerinden bilgilendirileceksiniz.
Desteğe gereksinim duyduğunuzda bizimle iletişime geçmekten lütfen çekinmeyin.
-
 Theo Product Operations Specialist
Hi SaraTour,
We’re thrilled to announce a major upgrade to our Push Notification feature. With this latest update, you can now effortlessly schedule your push notifications in advance, target specific user segments with precision, and seamlessly redirect users to specific pages in your app. This gives you complete control over when your messages go out, who sees them, and where your users land for a truly tailored experience. Let me show you how to set up your push notifications:
1. In App Builder, in the purple navigation bar at the top, click on Publish.
2. Click on Push Notifications in the menu on the left side of the page.
3. Now, in the Push Notifications section, select Send Push Notifications or Schedule Push Notifications. I’ve used Send Push Notifications as an example.
4. Next, set up the Notification Title, Notification Content, Target Users, and Target Page.
5. To test the notification before sending it to users, click on Send Test and scan the QR code to view it.
6. Once you’re sure everything is set up the way you want it, click on Done, and then click on Send Now.
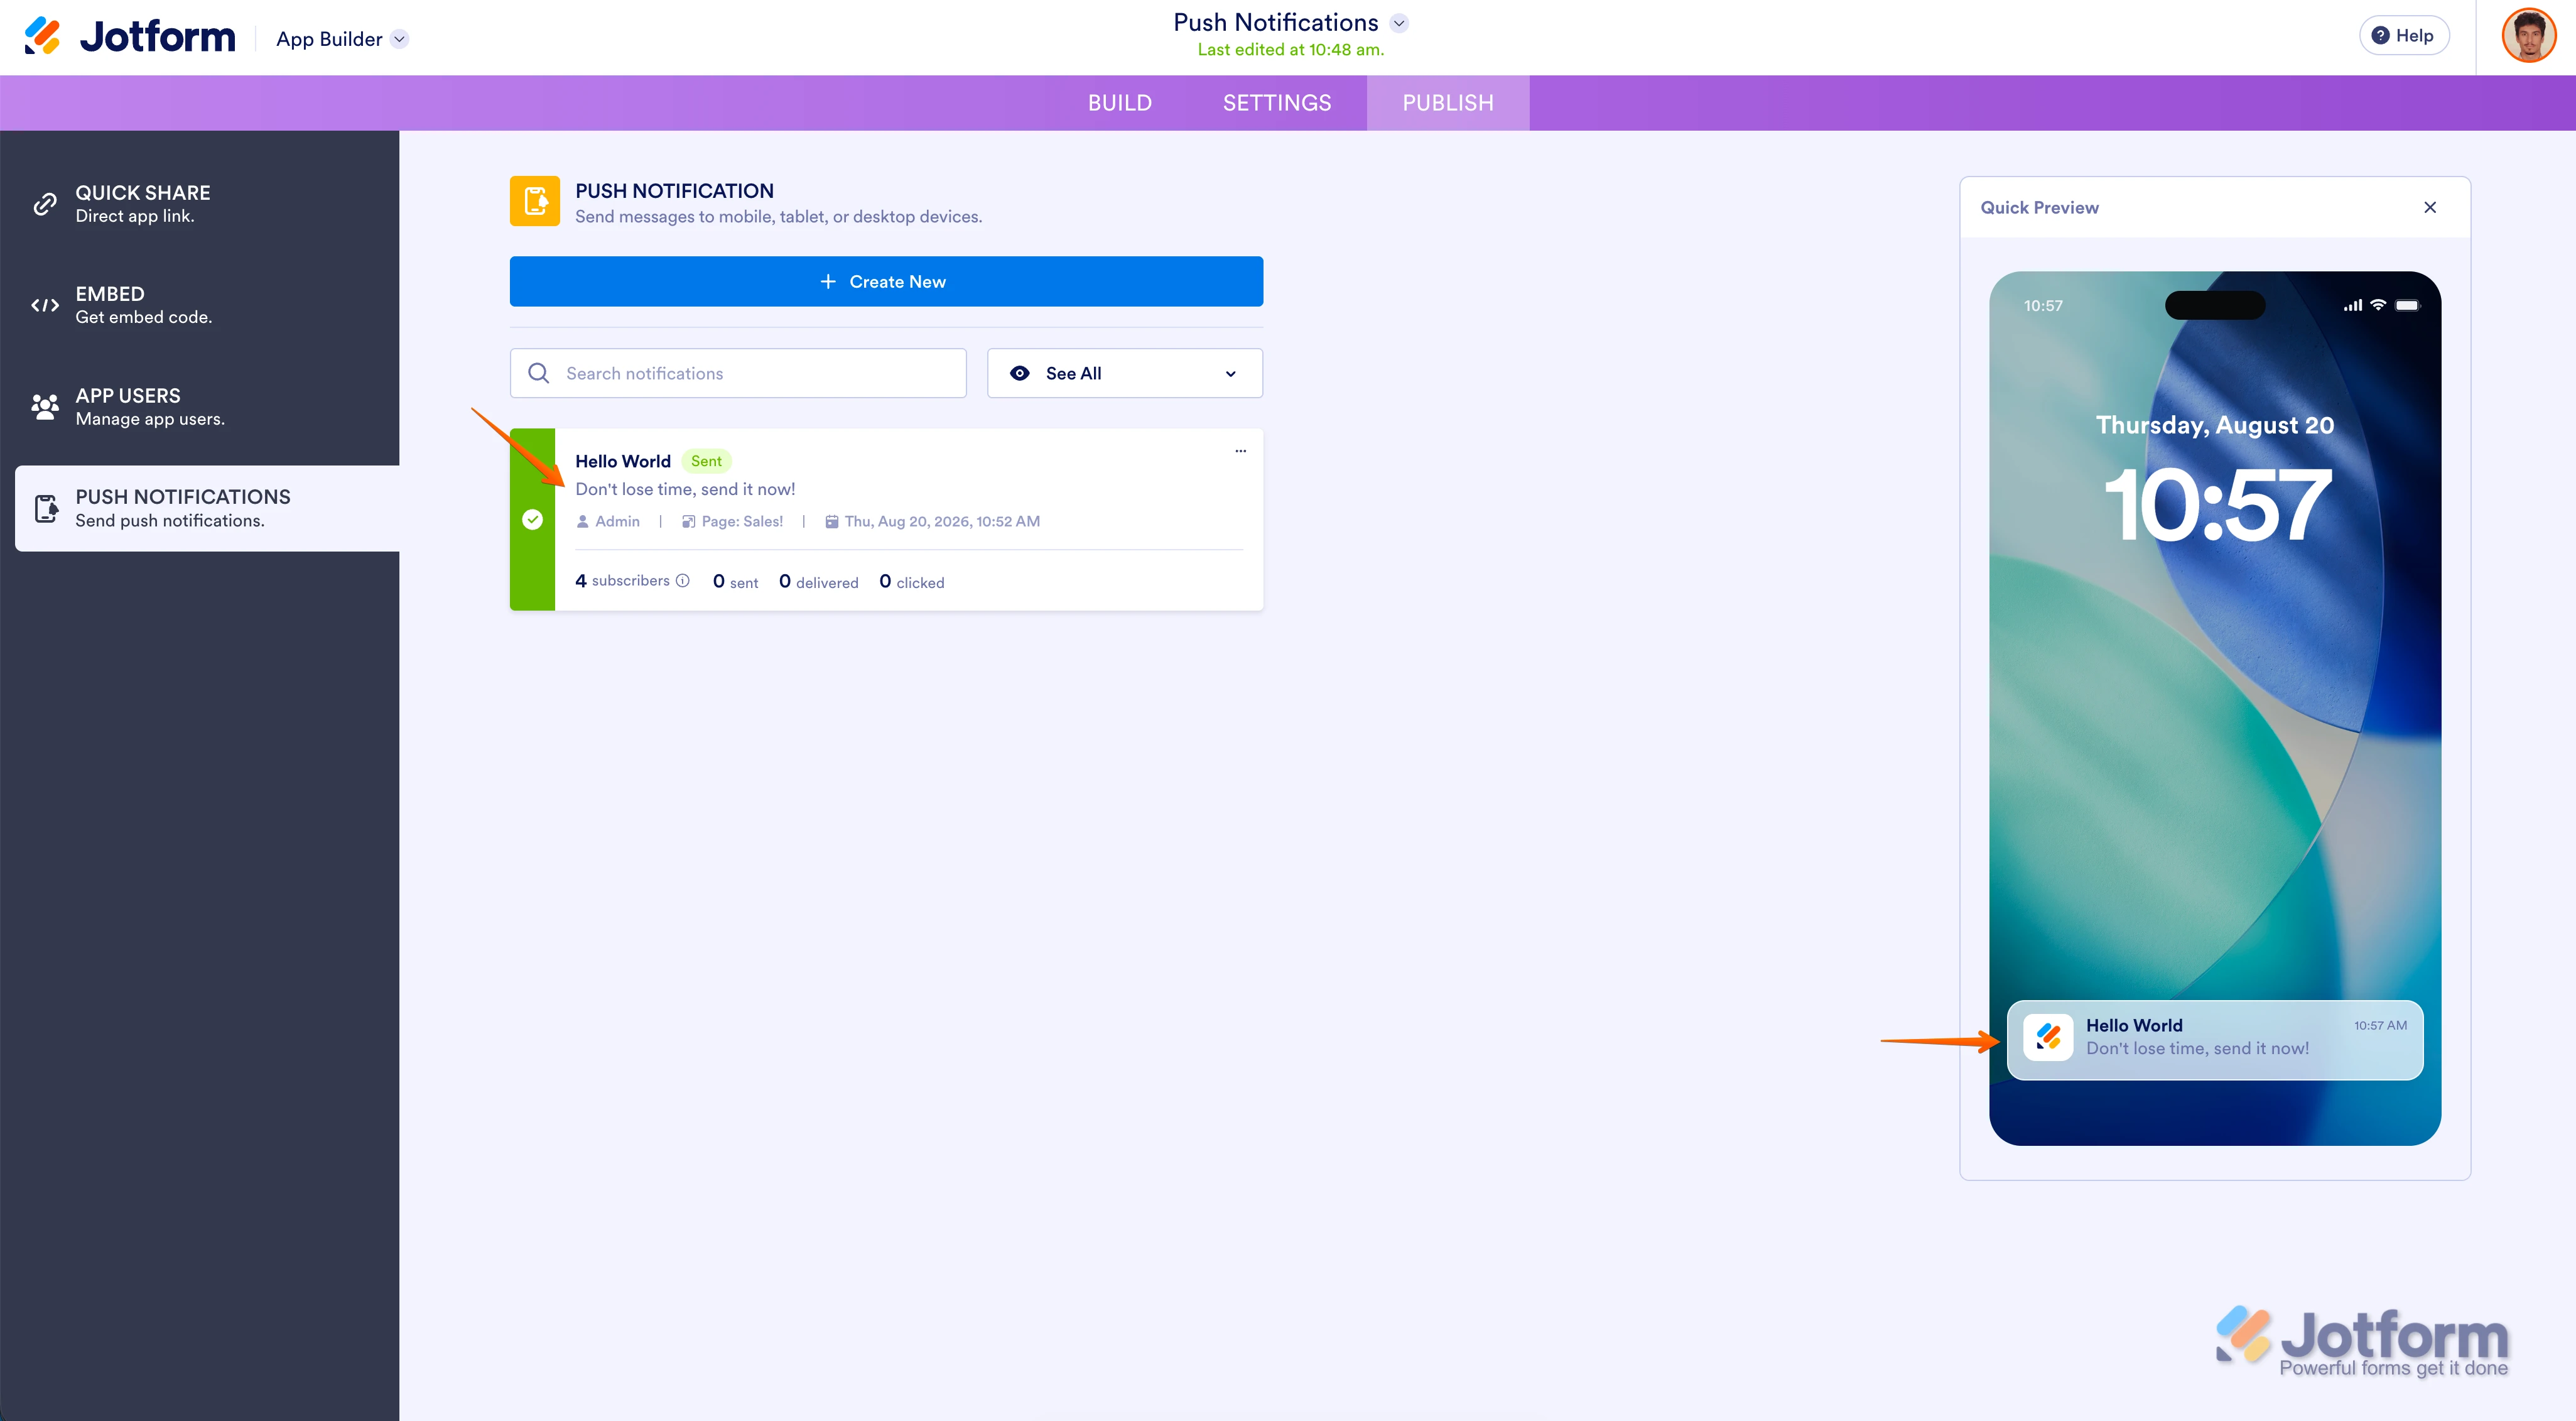
That’s it. You can also check out the sent notification content from the History and how it looks from the Quick Preview screen on the right side of the page.
If you want to create Scheduled Push Notifications, it’s just as easy. Here’s how to do it:
- While in App Builder, in the purple navigation bar at the top, click on Publish.
- Then, select Push Notifications in the menu on the left side of the page.
- Now, click on Schedule Push Notifications.
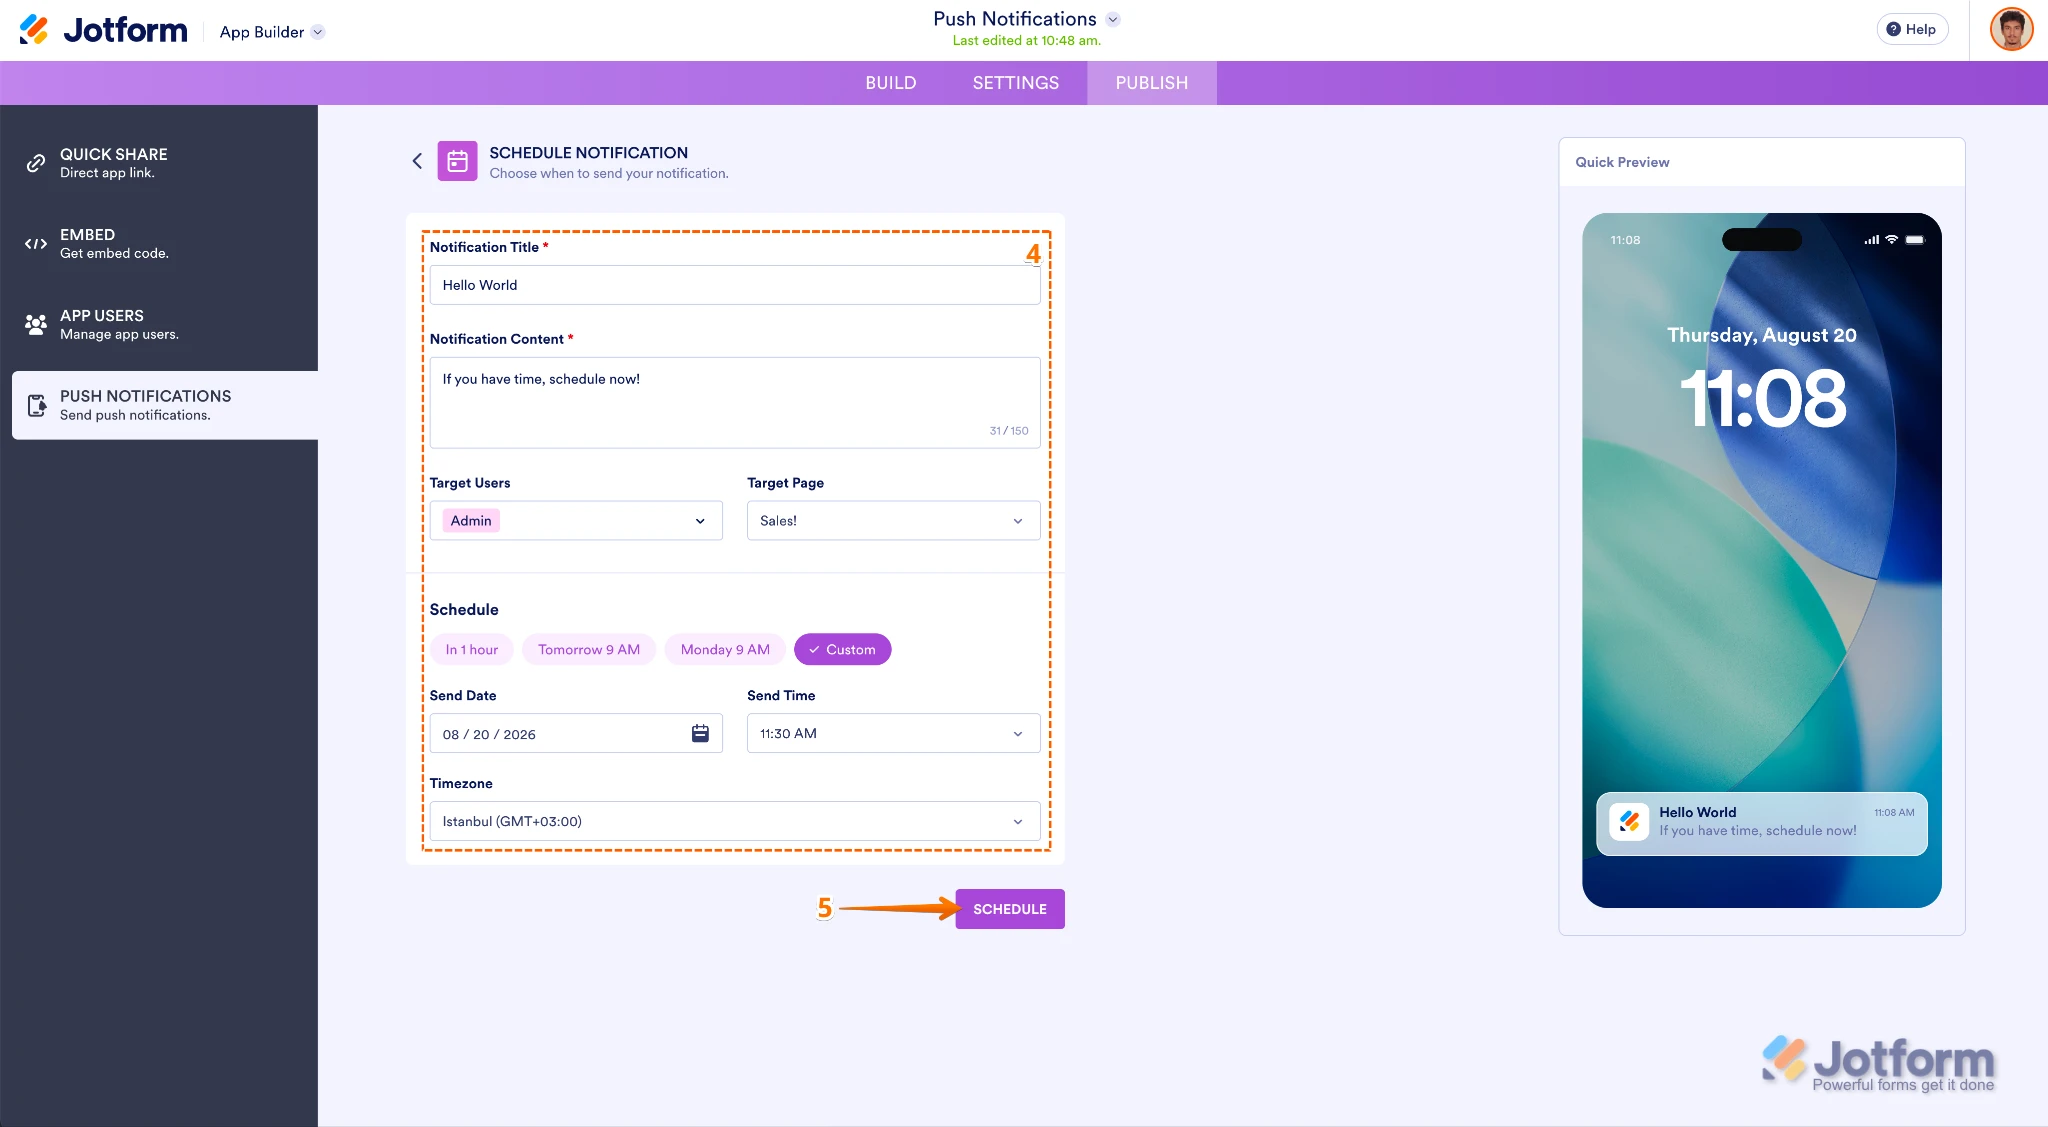
4.Set up the Notification Title, Notification Content, Target Users, Target Page, Schedule Period, Send Date, Send Time, Time Zone.
5.Once you’re sure everything is set up the way you want it, click on Schedule.
And that’s it. Your notifications will be sent when you want them to. If you want to cancel a Scheduled Notification Email, no worries. That’s as easy as creating one. Let me show you how:
- In the Push Notifications section, click on the Three Dots icon next to the Scheduled Notification you want to cancel.
- Then, in the menu that comes up, click on Cancel Notification.
- In the Confirmation window that opens, click on Yes, Cancel.
You can also reschedule previously scheduled notifications with one click, without having to set up the same configuration again. Here’s how to do it:
- In the Push Notifications section, click on Reschedule on the Cancelled Notification.
- Then, in the Configuration menu that opens, make the changes you want to the Notification Title, Notification Content, Target Users, Target Page, Schedule Period, Send Date, Send Time, and Time Zone.
- Then, click on Schedule to reschedule the notification.
You can also remove unsent or previously sent Push Notifications History. Here’s how to do it:
- In the Push Notifications section, click on the Three Dots icon in the top-right corner of the Sent Push Notification or Cancelled Scheduled Push Notification.
- Then, in the menu that opens, click on Delete Notification.
- In the Confirmation window that opens, click on Yes, Delete.
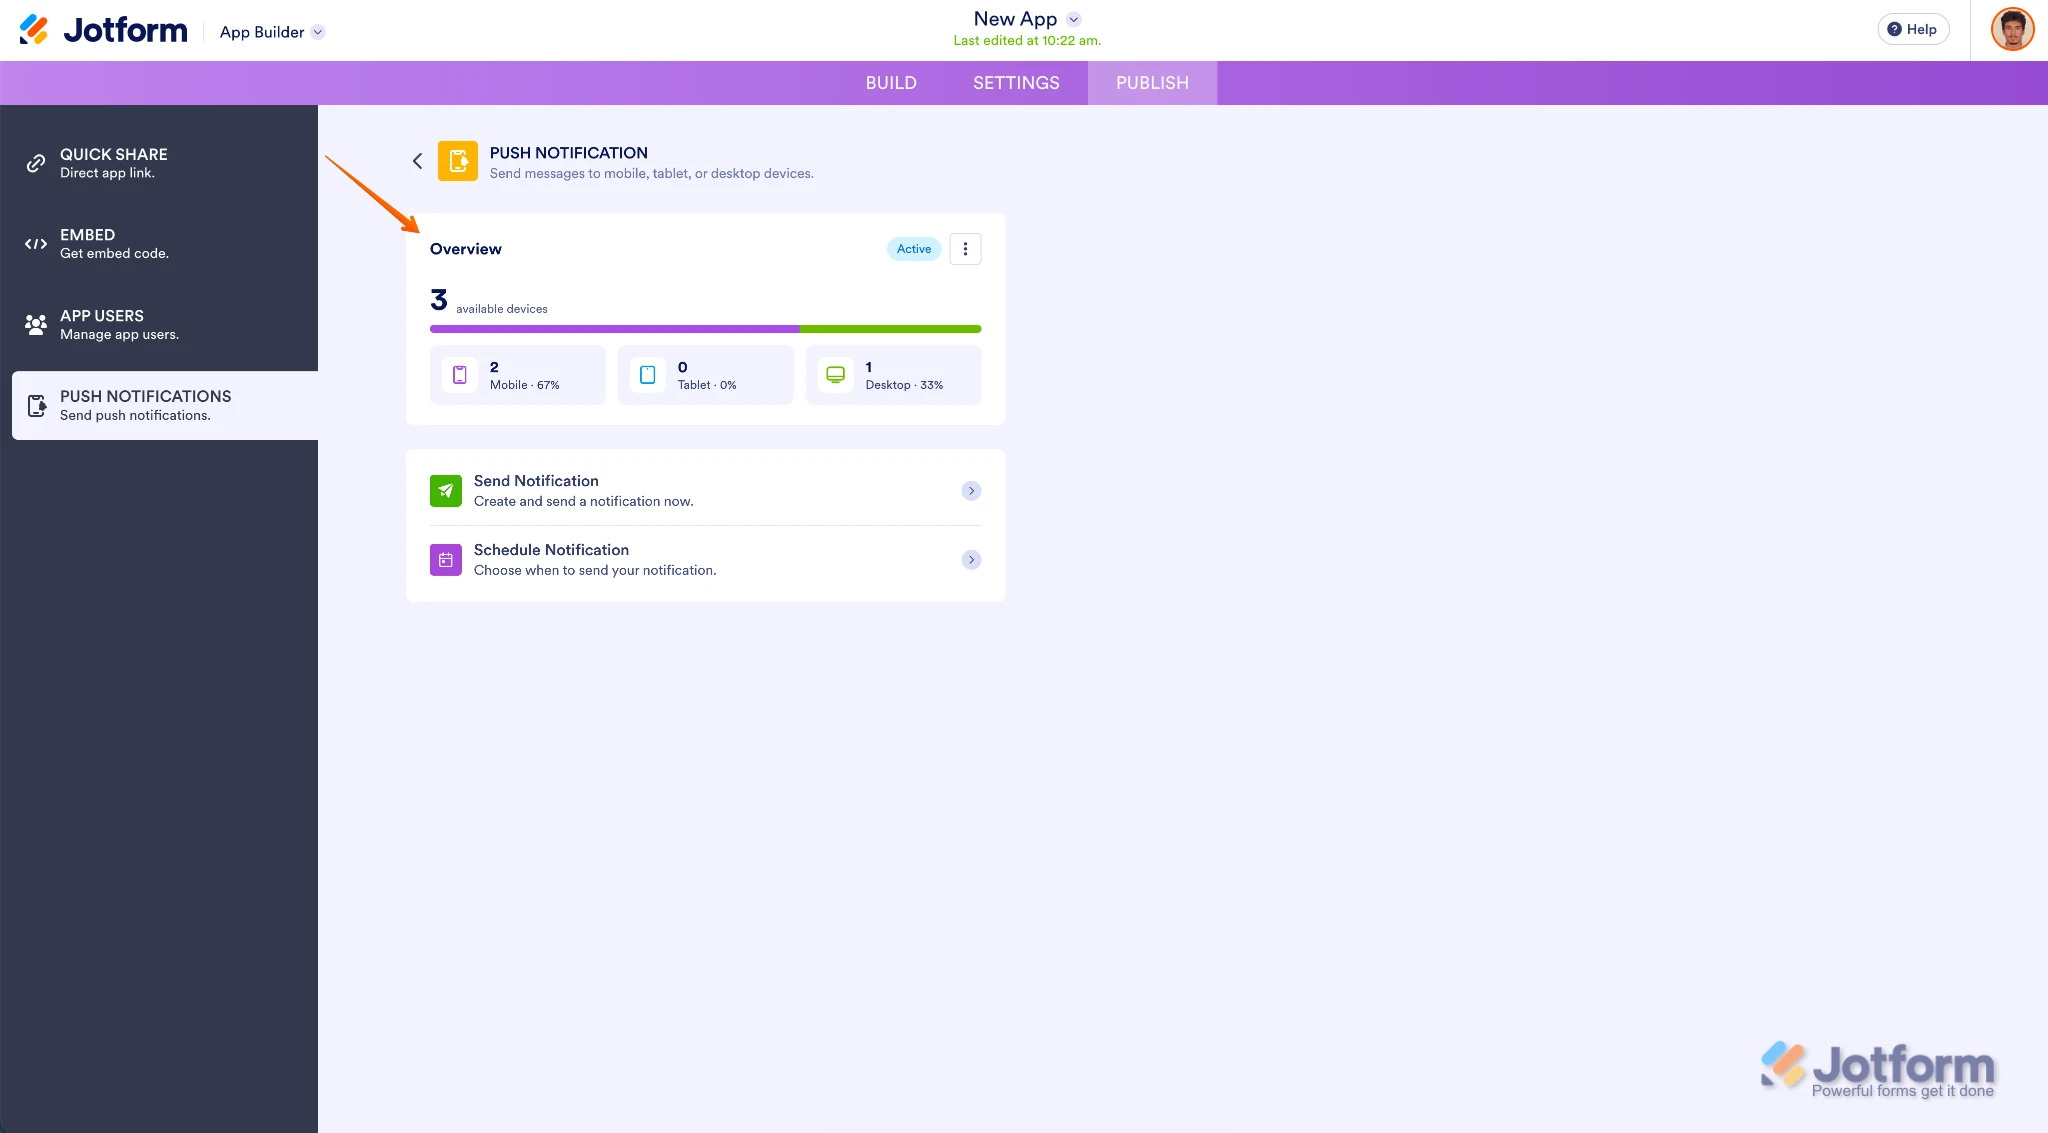
In addition to sending Push Notifications, you can also keep track of how they perform in the Overview section.
You can also edit the Permission Request title and content as needed, and disable Push Notifications whenever you want. Here’s how to do it:
- In the Push Notifications section, click on the Three Dots icon at the top right side of the Overview menu.
- Then, in the menu that opens, you can select Disable or Edit Permission Request. I’ve selected the Edit Permission Request as an example.
- Now, you can set up your Permission Request Title and Content.
- Once you’re sure everything is set up, click on Save.
Users can now view all the push notifications they got in their Push Notification History in the app, so they can easily find them later and never miss an update.
Give it a try and let us know if you need any help.