-
easytermobrasilPerguntado em 3 de abril de 2024 às 14:59
Adicionei um e-mail remetente, porem os e-mail de notificação parou de chegar no e-mail, podem me ajudar?
-
Gaud Jotform SupportRespondido em 3 de abril de 2024 às 17:17
Hi Easy Termo Brasil,
Thanks for reaching out to Jotform Support. Unfortunately, our Portuguese support agents are busy helping other Jotform users at the moment. I'll try to help you in English using Google Translate, but you can reply in whichever language you feel comfortable using. Or, if you'd rather have support in Portuguese, let us know and we can have them do that. But keep in mind that you'll have to wait until they're available again.
Now, let me help you with your question. Are you referring to Formulario's notification email? If yes, I can see you have added atendimentocenor@gmail.com as an additional email as recipient. Can you please check if this email address is correct? I can confirm that atendimentocenor@gmail.com is not on our bounce list.
Please add these two email addresses to your contact list: noreply@jotform.com, and noreply@formresponse.com. To resolve an issue, you can whitelist Jotform's IP addresses and domains. These are the IP addresses:
- 152.160.0.0/16
- 23.251.253.0/26
- 23.26.226.0/24
You can refer to the guide on how to whitelist Jotform's IP addresses, and this guide will show you several reasons why you are not receiving the email notification. If the issue persists, you can set up your own SMTP. Here are the steps on how to use your Gmail account as your email sender via SMTP. I can help you change the Notification Email address. Let me show you how:
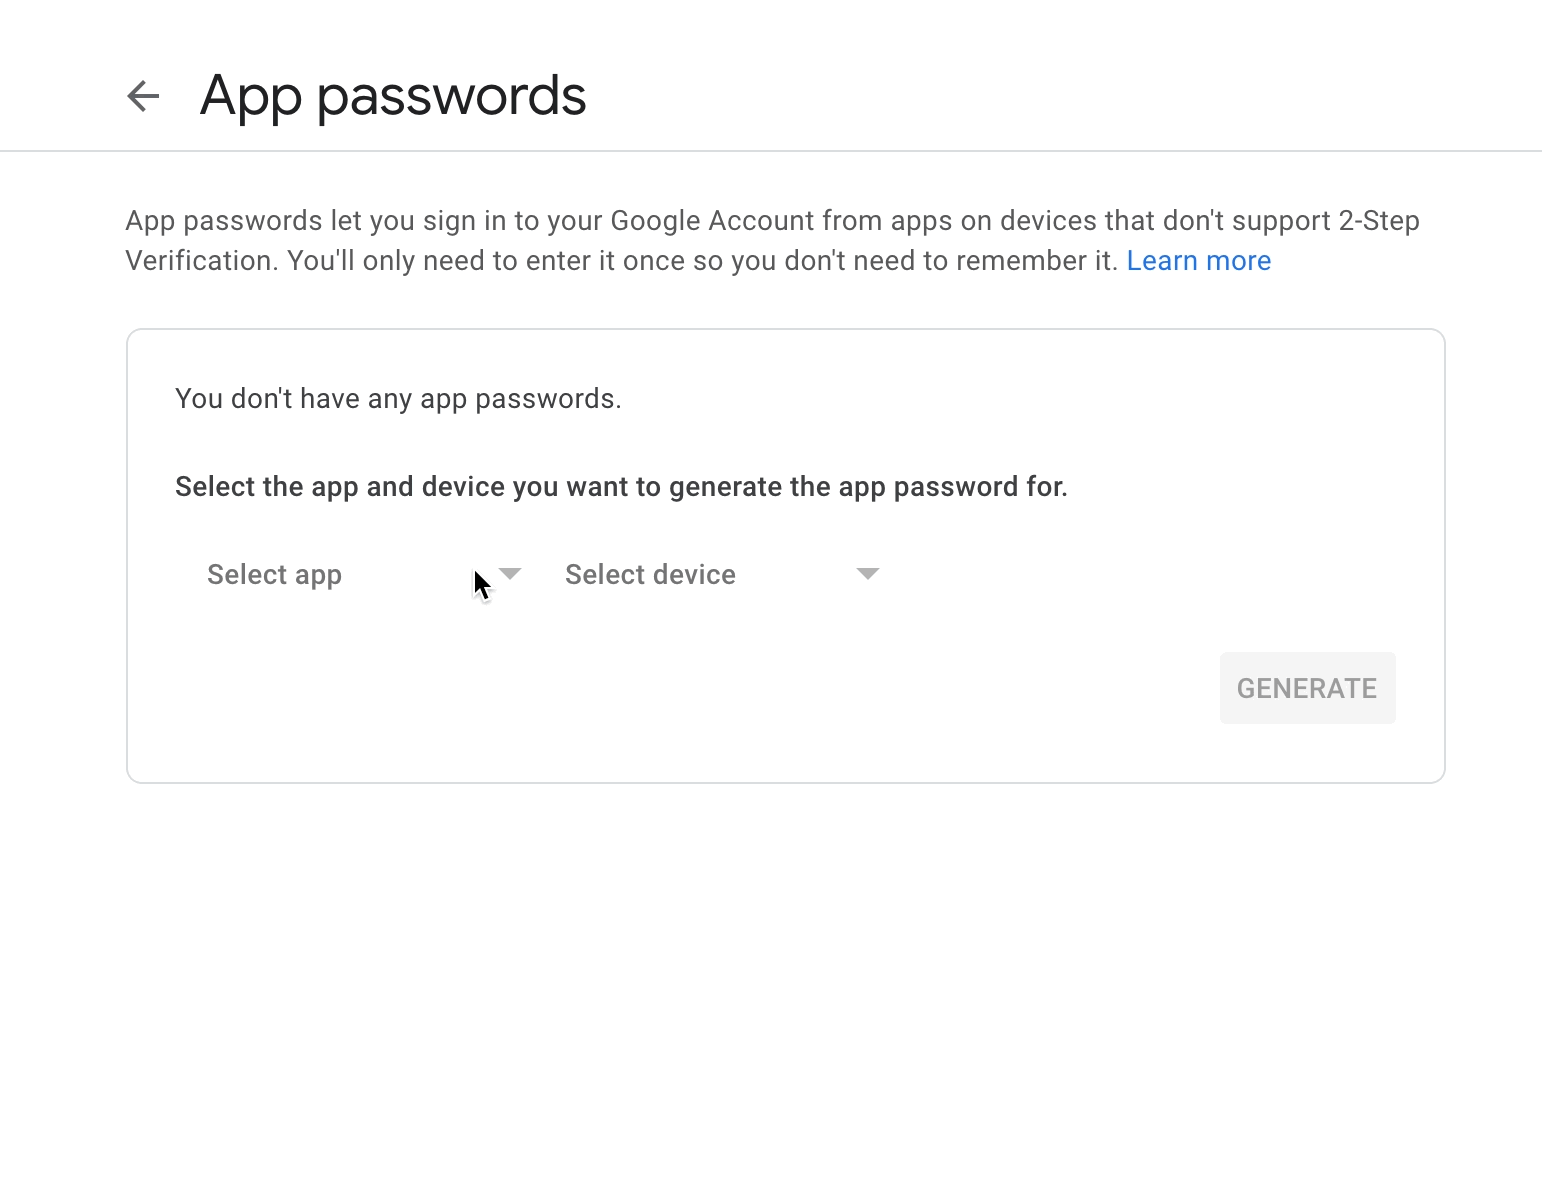
1. Click here to sign in to your Google account and access the App Password Generator.
2. In the list of available apps, click on Mail.
3. In the device list, click on Other.
4. Enter your Custom Name, such as Jotform.

5. Click on the Generate button.
6. *Copy and save the password to your computer.
7. Finally, click the Done button.
*It is very important that you save the password to your computer so you can use it again later. If you don't save it, you'll have to generate a new one again because Google doesn't let users view their passwords after they click the Done button.
Now, to add the Sender email:
1. Go to your My Account page, and click on Settings, or visit here directly.
2. Click on the Add Sender Email button.

3. Enter the following information:
- Email Address: {your email address}
- Hostname: smtp.gmail.com
- Port: 587
- Username: {your Gmail address}
- Password: {your Gmail or app-specific password}
- Security Protocol: TLS
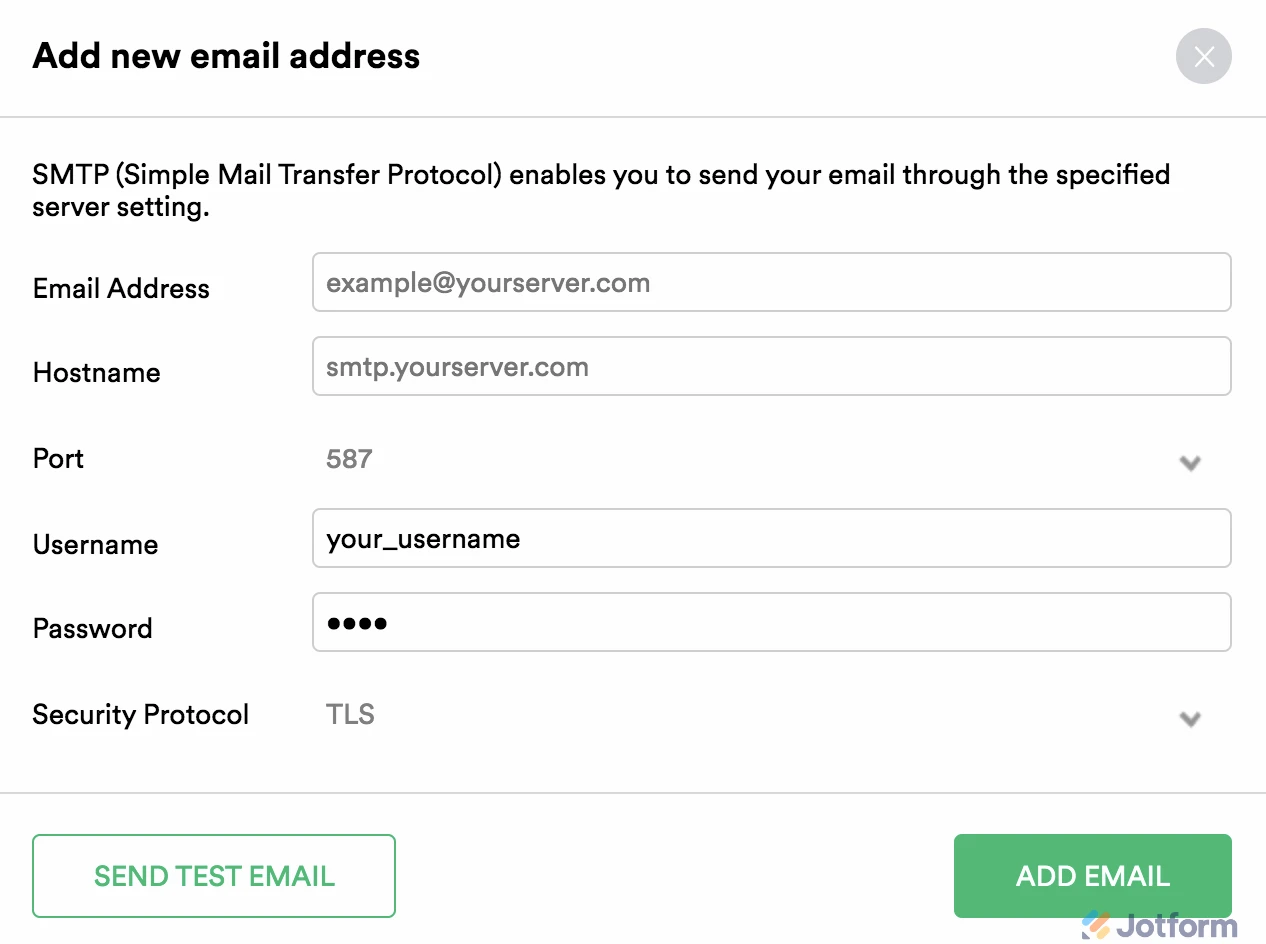
4. When you're finished, click on the Send Test Email button to make sure that everything is working. If it works, click on the Add Email button. If not, please check the details again and correct any errors.
You might also want to check out this guide about How to Use Your Gmail Account as Your Email Sender via SMTP.
Give it a try and let us know if you need any help.
- Modelos
- Integrações
- INTEGRAÇÕES
- Ver +100 integrações
- INTEGRAÇÕES EM DESTAQUE
 PayPal
- Slack
- Planilhas Google
- Mailchimp
- Zoom
- Dropbox
- Google Agenda
- Hubspot
- Salesforce
- Ver mais Integrations
- ARMAZENAMENTO
- Google Drive
- Dropbox
- OneDrive
- Box
- Egnyte
- FTP
- Galleria
- Ver mais Storage Integrations
- Produtos
- PRODUTOS
- Criador de Formulários
- Jotform Empresas
- Jotform Apps
- Criador de Lojas
- Jotform Tabelas
- Caixa de Envios Jotform
- App Móvel Jotform
- Jotform Aprovações
- Criador de Relatórios
- Formulários PDF Inteligentes
- Editor de PDFs
- Jotform Assinaturas
- Jotform para Salesforce Conheça Já
- Suporte