The Thank You Page wraps up a form submission in a simple but meaningful way. It gives people a smooth transition right after they submit the form, helping create a better overall experience. Instead of leaving them hanging, you can display a friendly message, share helpful next steps, or send them to another page.
This comes in handy for all kinds of forms—like signups, bookings, orders, or event registrations. It’s a great way to build trust, keep people engaged, and guide them toward what to do next. Whether you just want to say thanks or give a clear call to action, a good Thank You Page makes the interaction feel complete.
Displaying a Thank You Page After Submission
A Thank You page gives respondents a smooth and friendly way to wrap up their submission. Setting it up is easy—here’s what to do:
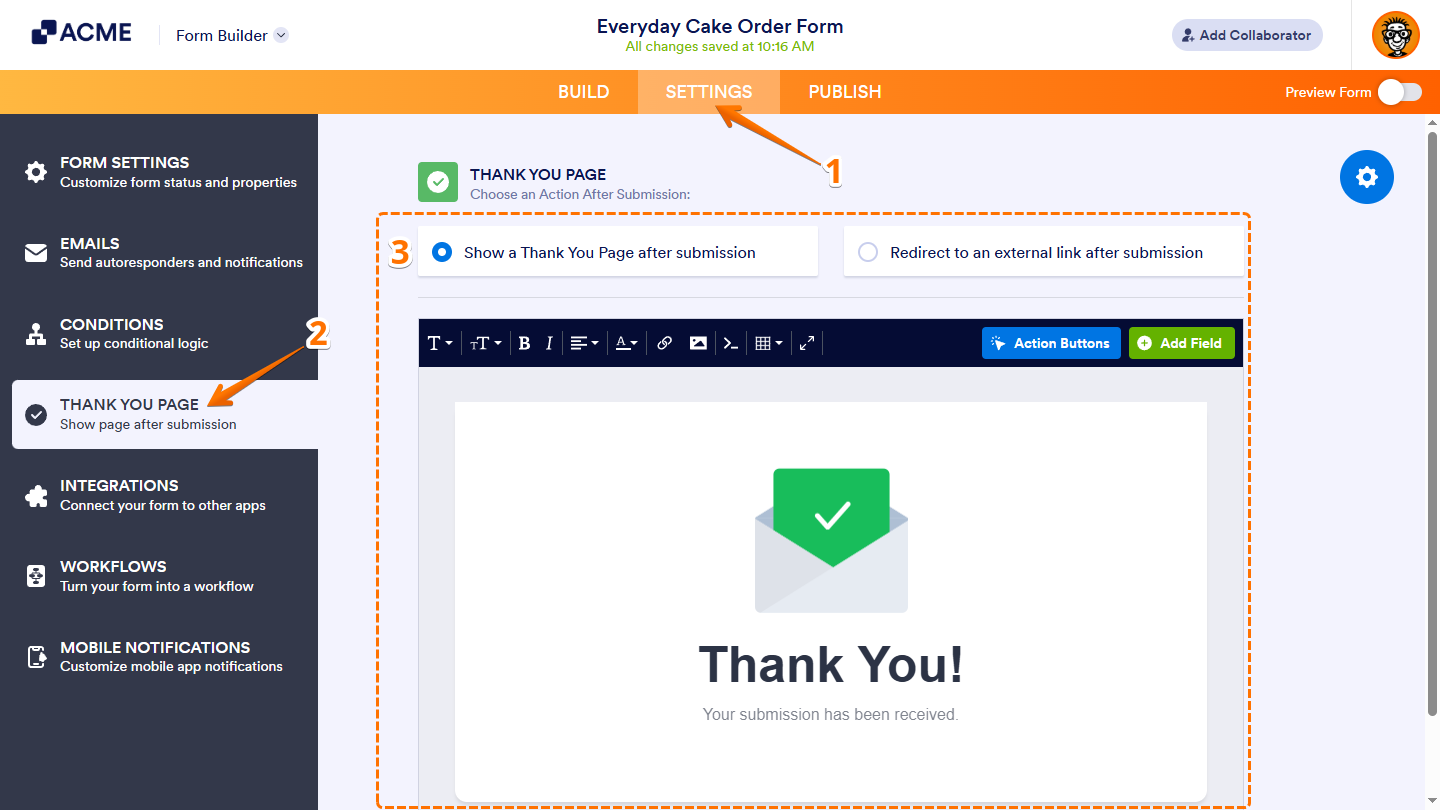
- In Form Builder, in the orange navigation bar at the top of the page, click on Settings.
- Then, in the menu on the left, click on Thank You Page.
- Next, in the Thank You Page section on the right, keep the Show a Thank You Page After Submission option selected and, in the Rich Text Editor below it, customize the message that will appear after the form is submitted.
You can use the following toolbars at the top of the Rich Text Editor to format text, insert links or images, and add other elements to your Thank You page:
- Font Family — Changes the typeface of your text so it fits the look you want.
- Font Size — Adjusts how big or small the text appears.
- Bold — Makes text thicker to highlight key details.
- Italic — Tilts the text to give it a bit of emphasis.
- Text Align — Lines up the text to the left, center, right, or stretches it evenly across the line.
- Text Color — Changes the color of your text to make it stand out.
- Insert or Edit Link — Adds a link or updates an existing one.
- Insert Image — Adds an image by uploading a file or using a URL.
- Source Code — This lets you view or edit the HTML of your message.
- Table — Inserts a table and lets you adjust rows and columns.
- Fullscreen — Expands the editor so you can work without distractions.
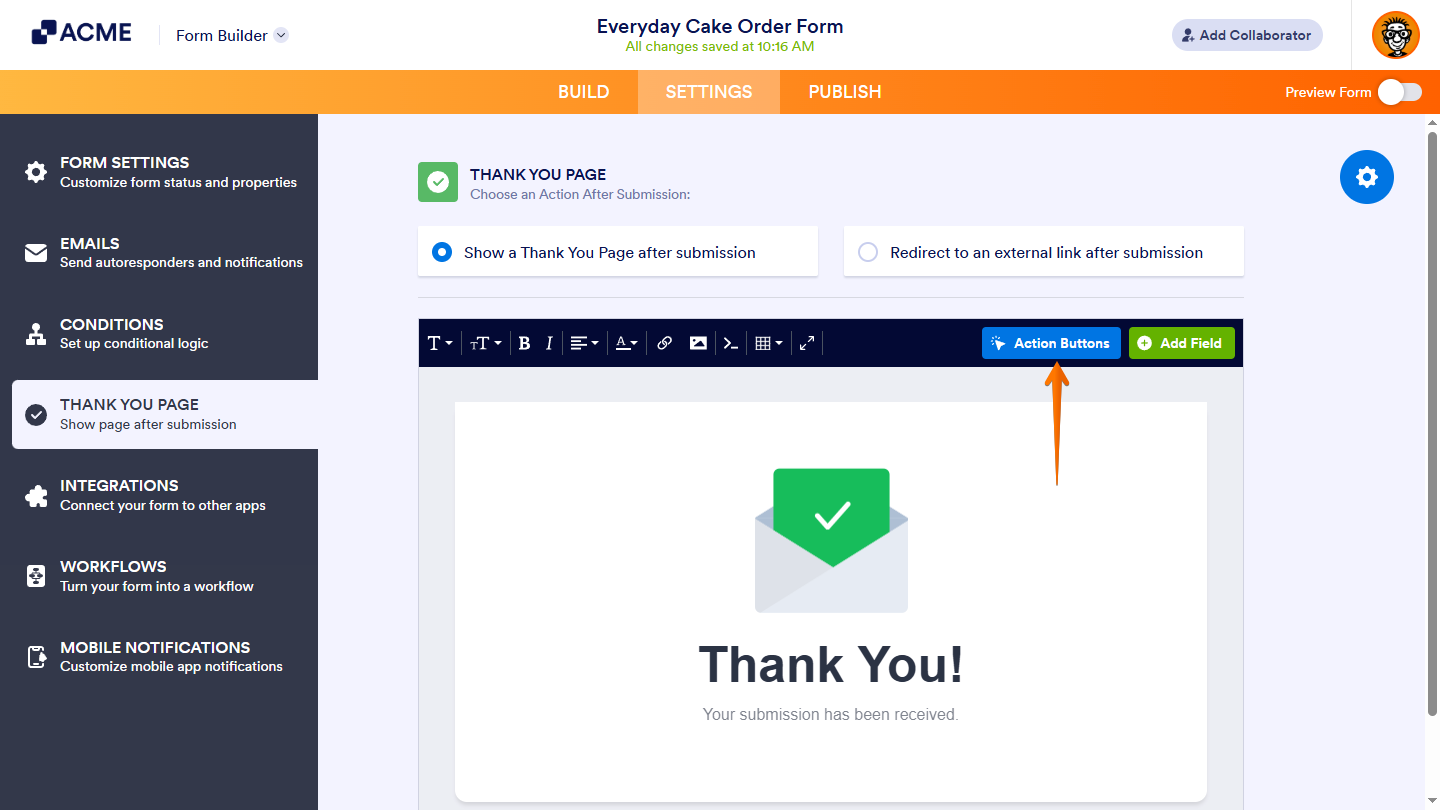
Adding Action Buttons
Clicking on Action Buttons on the top-right side of the Rich Text Editor opens the Action Buttons window.
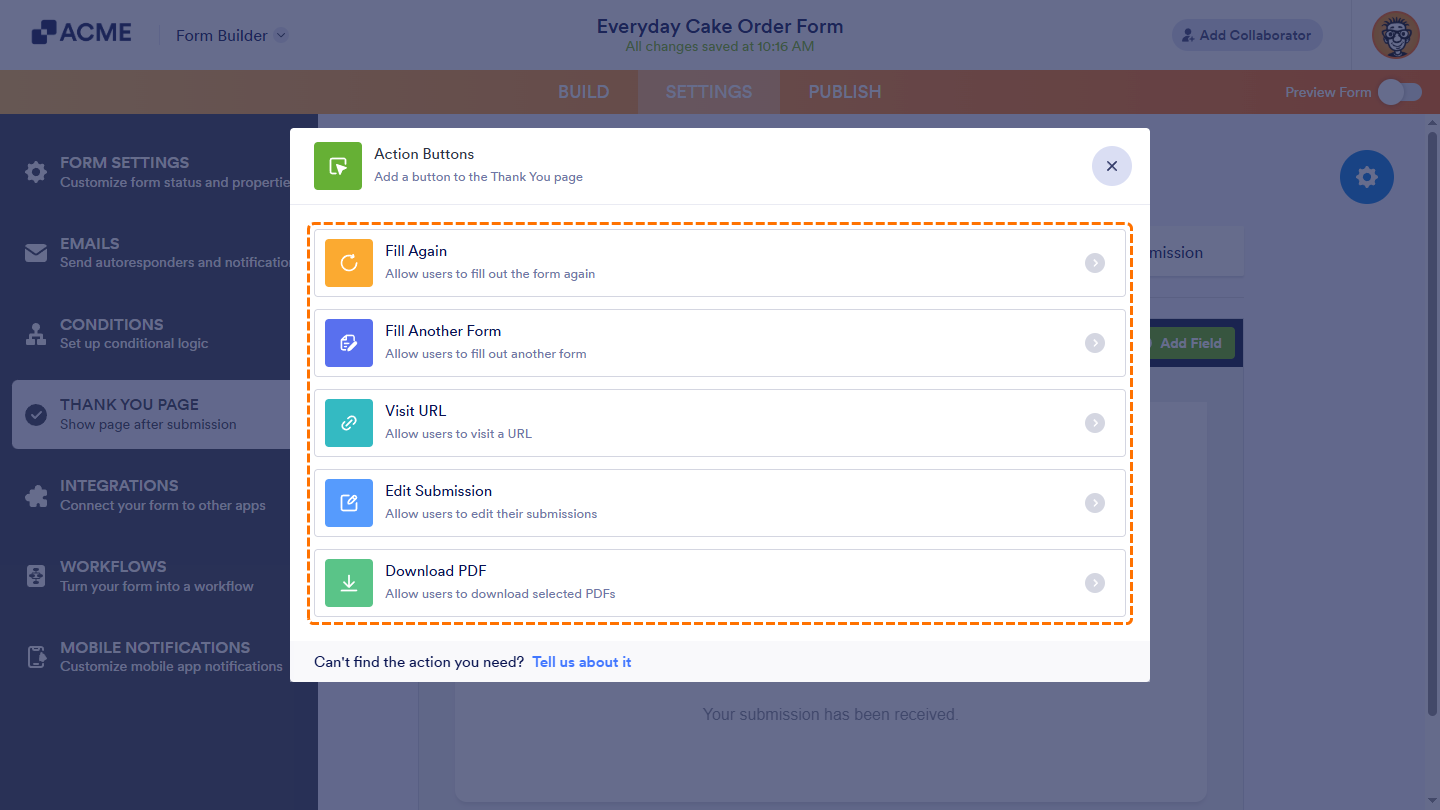
From there, you can select an action to add as a button on your Thank You Page, letting respondents fill out another form, visit a URL, edit their submission, or download it as a PDF—guiding them to the next step after completing the form.
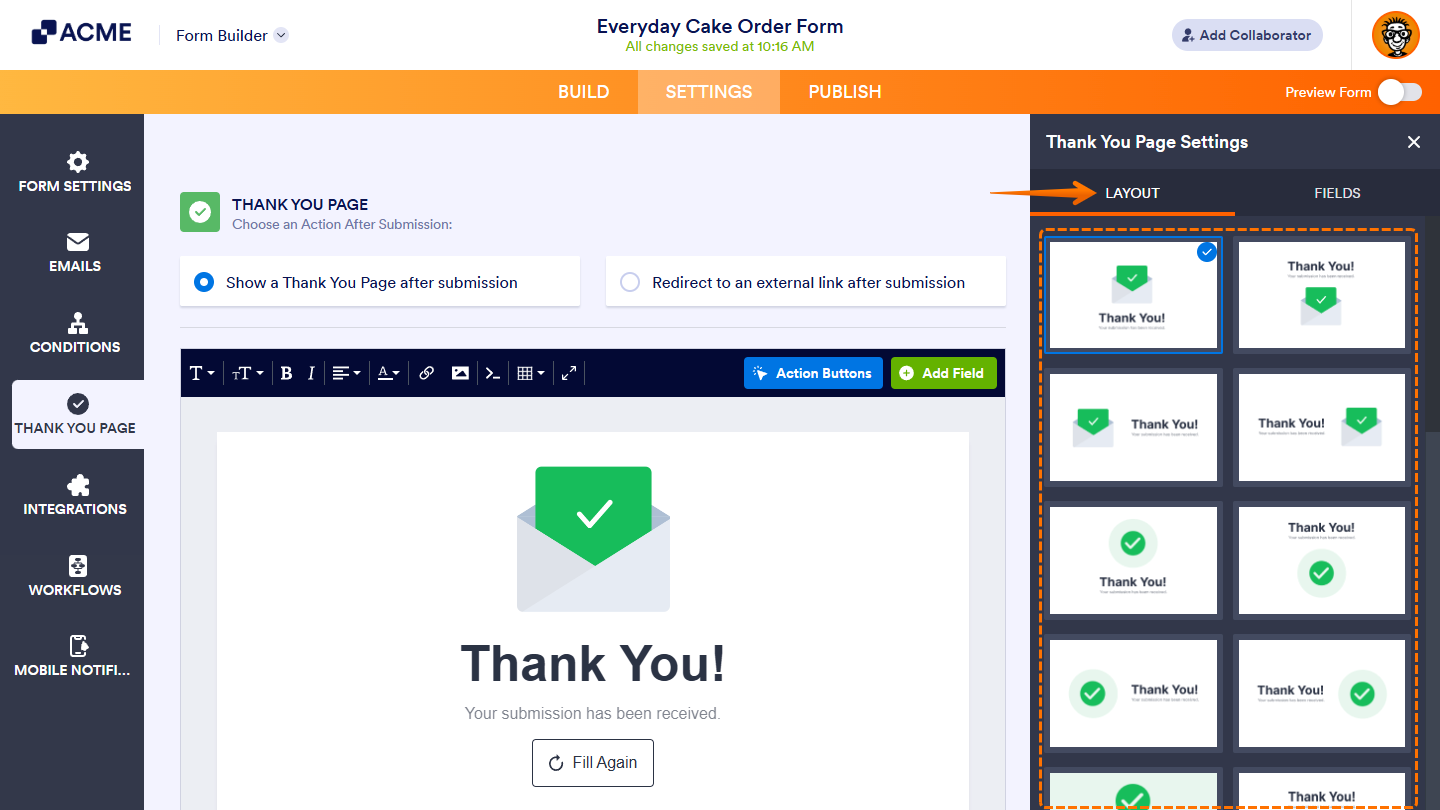
Changing Layout and Adding Form Fields
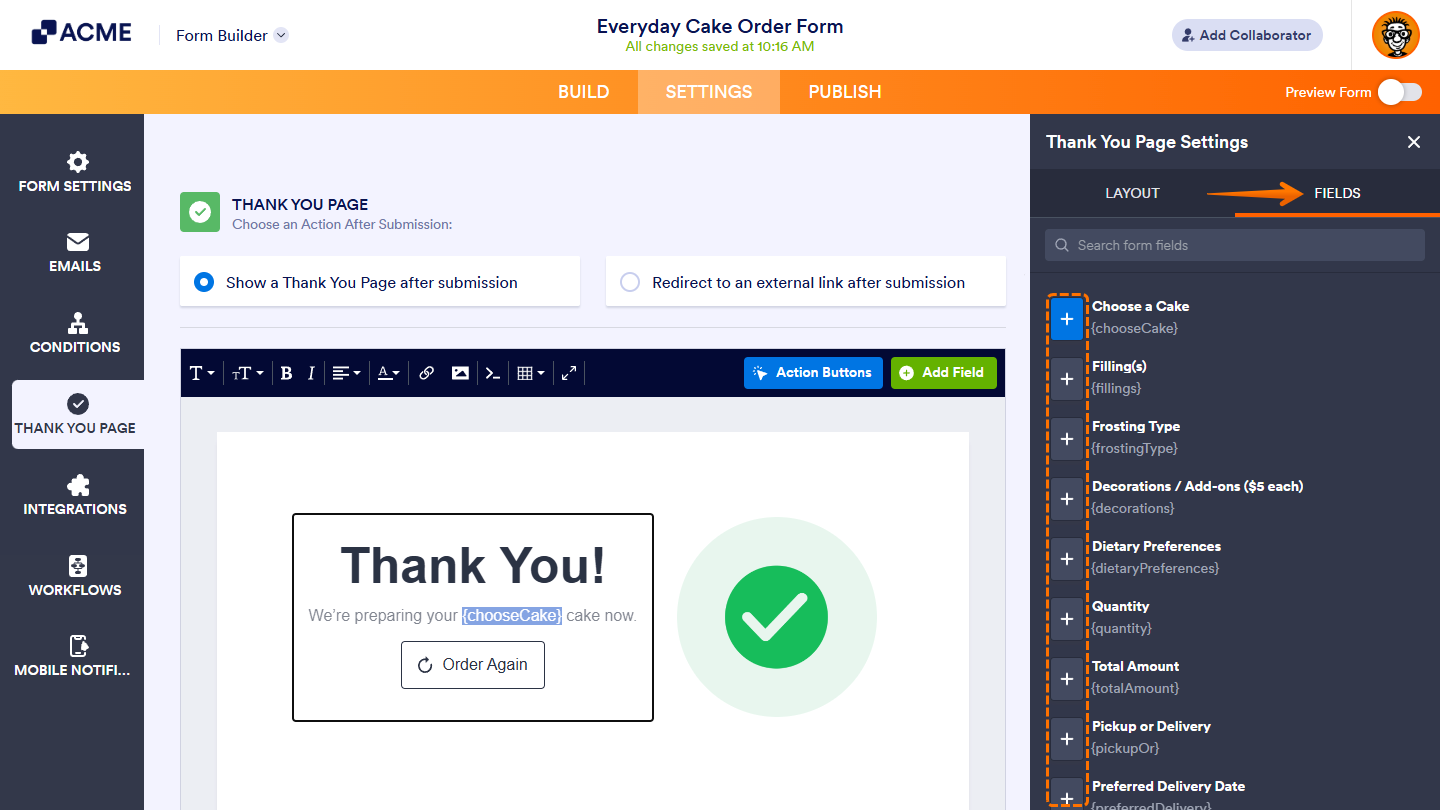
Clicking on the Add Field button or the Gear icon on the right side of the page opens the Thank You Page Settings menu.

In the Layout tab, select a layout to change the position of the image, main text, and subtext on the Thank You Page.
In the Fields tab, click on the Plus icon next to a field after placing your cursor in the Rich Text Editor where you want that field’s value to appear on the Thank You Page. You can use the Search bar at the top of the menu to find a specific one easily.
Note: The changes you make in the Thank You Page section under the Settings tab of Form Builder are saved automatically.
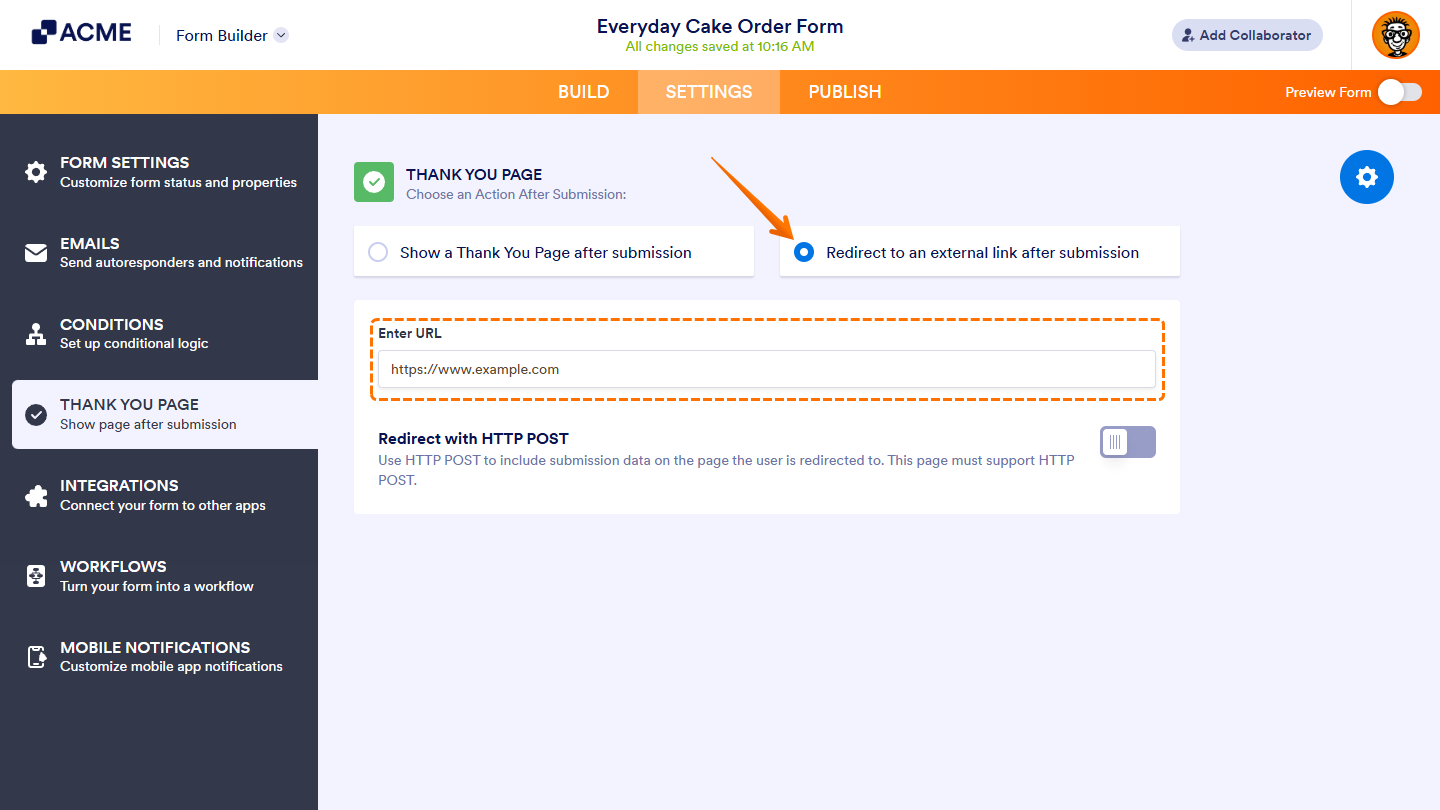
Redirecting Respondents to an External Link After Submission
While you’re in the Thank You Page section, select Redirect to an External Link After Submission, and in the Enter URL input box that appears below it, type the URL you want users to be sent to after they submit the form.

Send Comment: