If you want your form to respond differently based on what a user selects or enters, you’re in the right place. With conditional logic, you can automatically enable or disable form fields depending on the user’s input. This gives you more control over how your form behaves and helps guide users through the form in a smooth, intuitive way.
Setting fields to disabled or read-only is especially helpful when you want people to see certain information but not change it—like calculated values, reference details, or fields that should remain fixed. It keeps your form clean, accurate, and easy for users to follow, while still giving you the flexibility to control how everything works behind the scenes. Take a peek at this Demo Form to see it in action.
Enabling or Disabling Fields Using Conditional Logic
To conditionally enable or disable form fields, you can use conditional logic rules that respond to your user’s input. This lets your form adjust in real time, showing only what’s needed and keeping the rest locked or inactive. Here’s how to set it up:
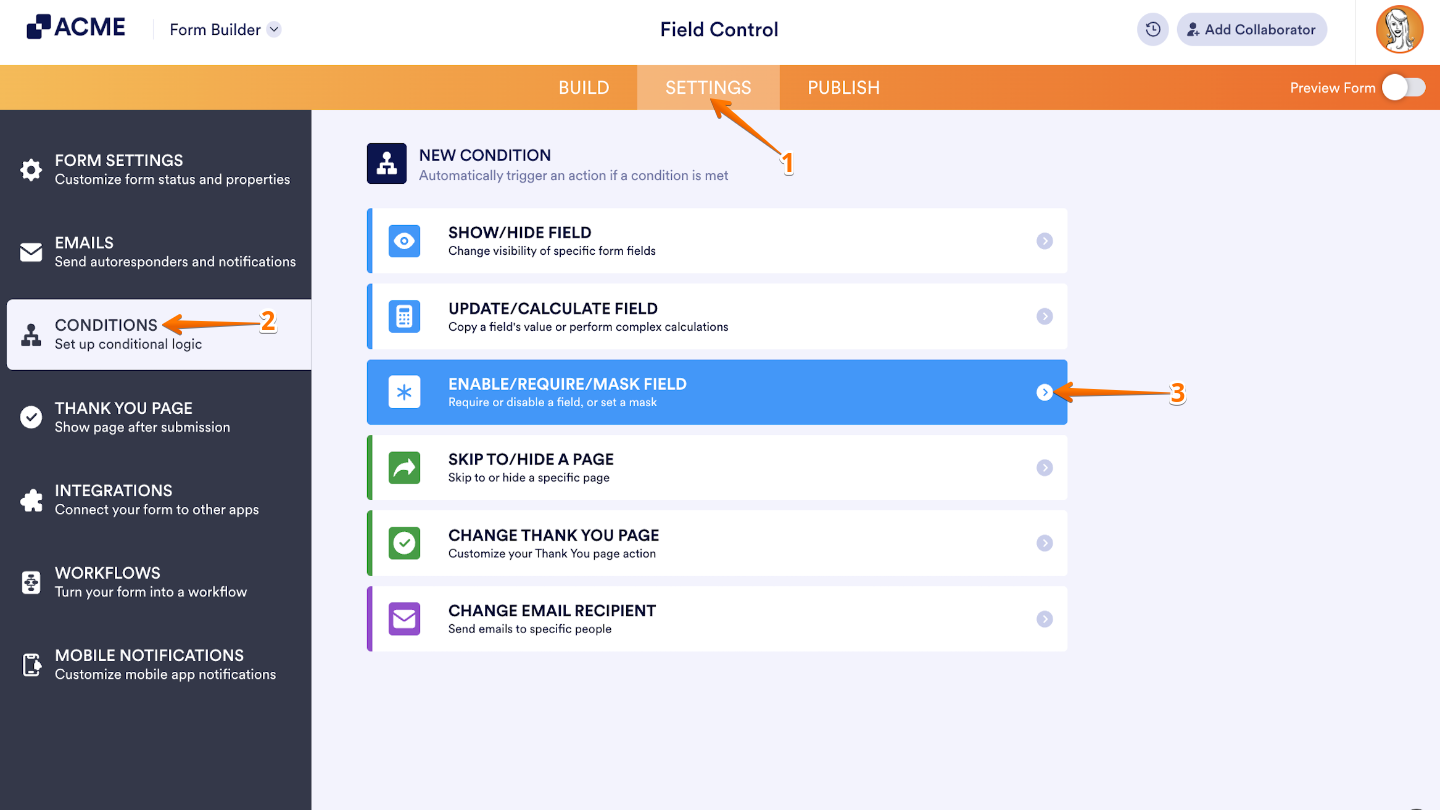
- In Form Builder, in the orange navigation bar at the top of the page, click on Settings.
- In the menu on the left side of the page, click on Conditions.
- Then, in the New Condition menu, click on Enable/Require/Mask Field.
- Now, configure your condition rules, and then set Do to Enable or Disable the selected Field. (In this example, we used Disable, so when the condition is met, it’ll disable the selected field.)
- Once you’re done, click on Save.
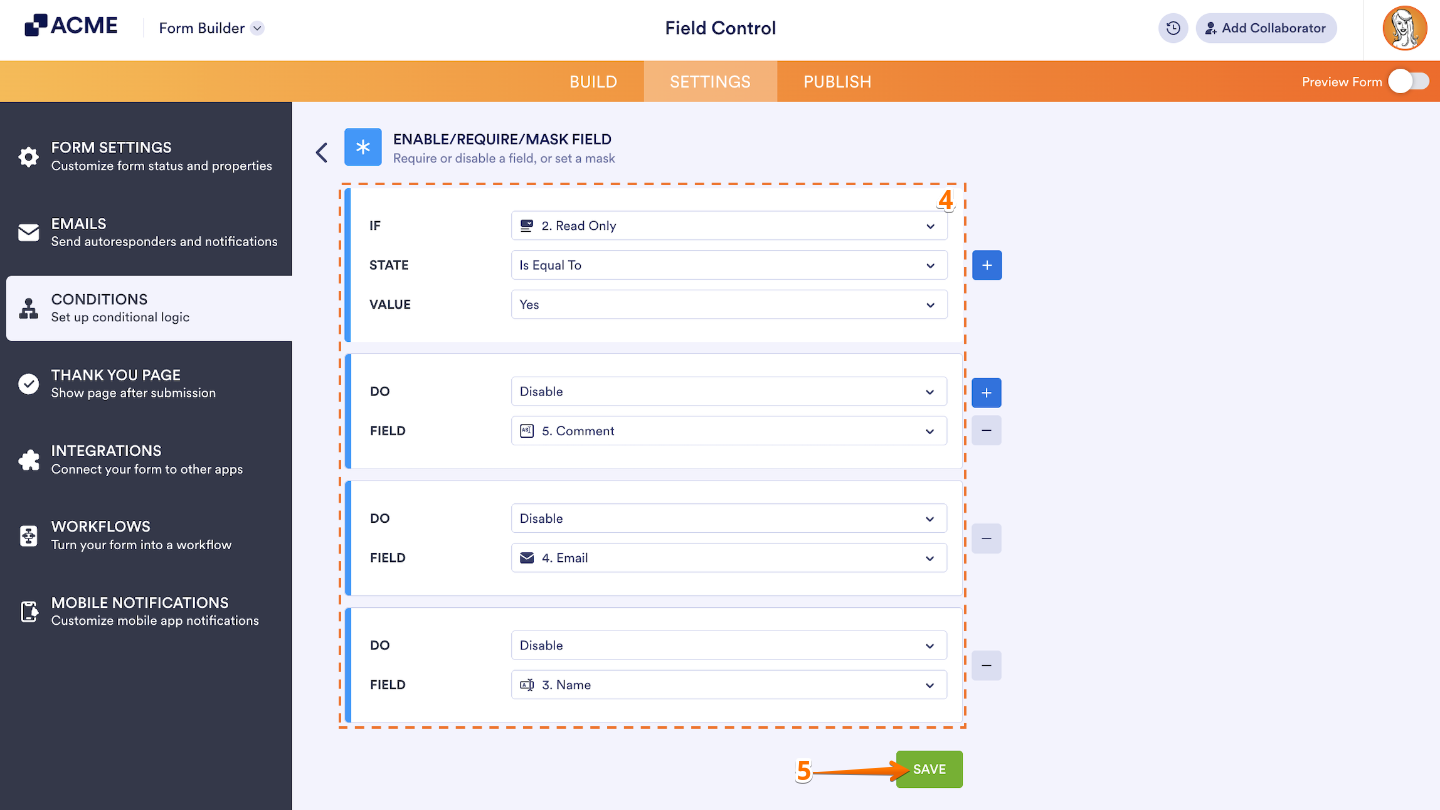
That’s it. Your form field is now set to automatically disable based on the user’s answer. To break that down:
- We’ve set up the IF condition to check whether the “Read-only” field is set to “Yes.”
- If that condition is true, the DO action will automatically disable all the relevant fields. This way, the fields remain visible but can’t be edited, keeping your form neat and controlled.

Send Comment: