One way to use conditional logic is by customizing the Thank You Message based on a user’s response or a combination of responses. Instead of showing the same static text, this feature allows you to display personalized messages after form submission.
The setup to change the thank you message using conditional logic is straightforward, and setting it up takes no time at all—here’s how:
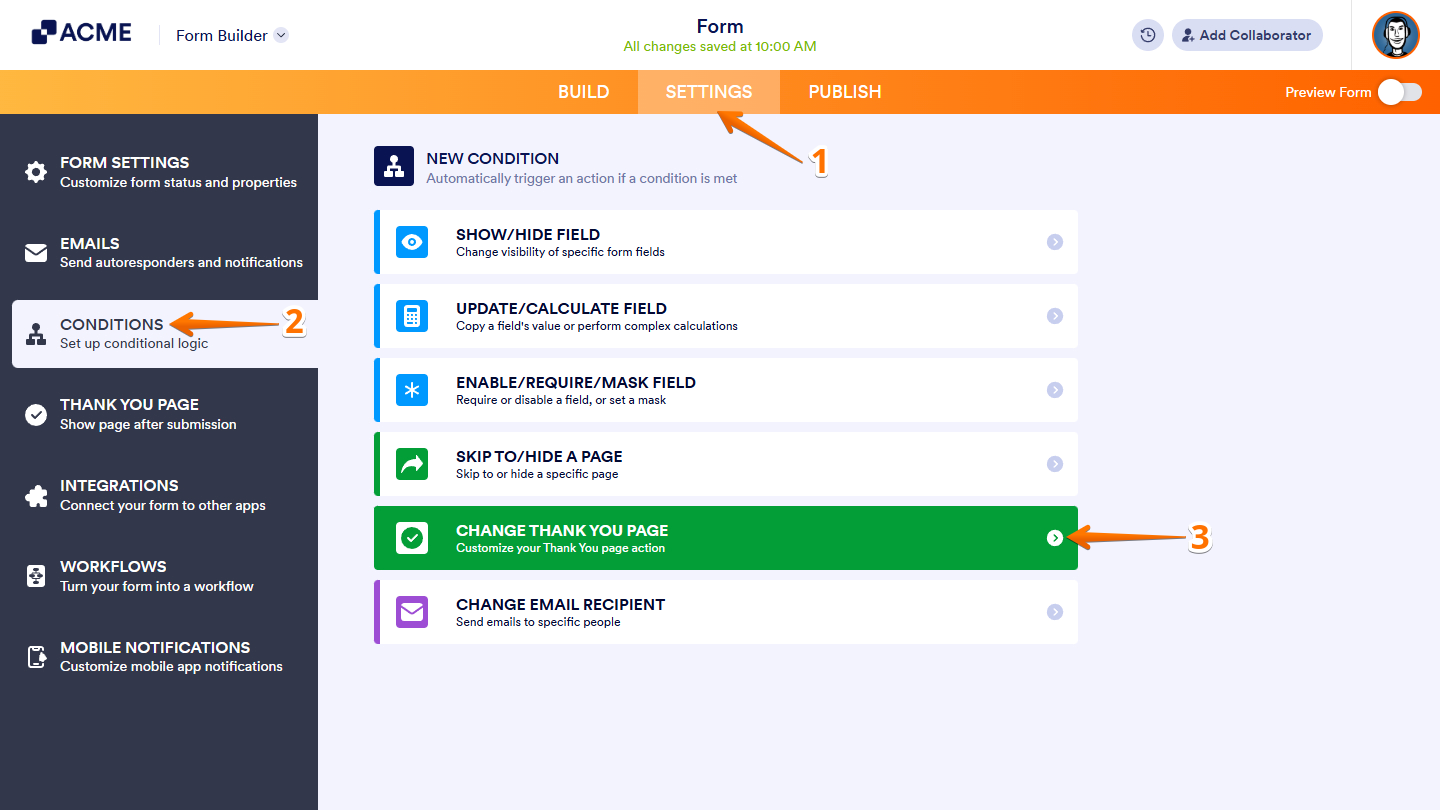
- In Form Builder, in the orange navigation bar at the top of the page, click on Settings.
- Then, in the menu on the left side of the page, click on Conditions.
- Now, in the New Condition section on the right, click on Change Thank You Page.
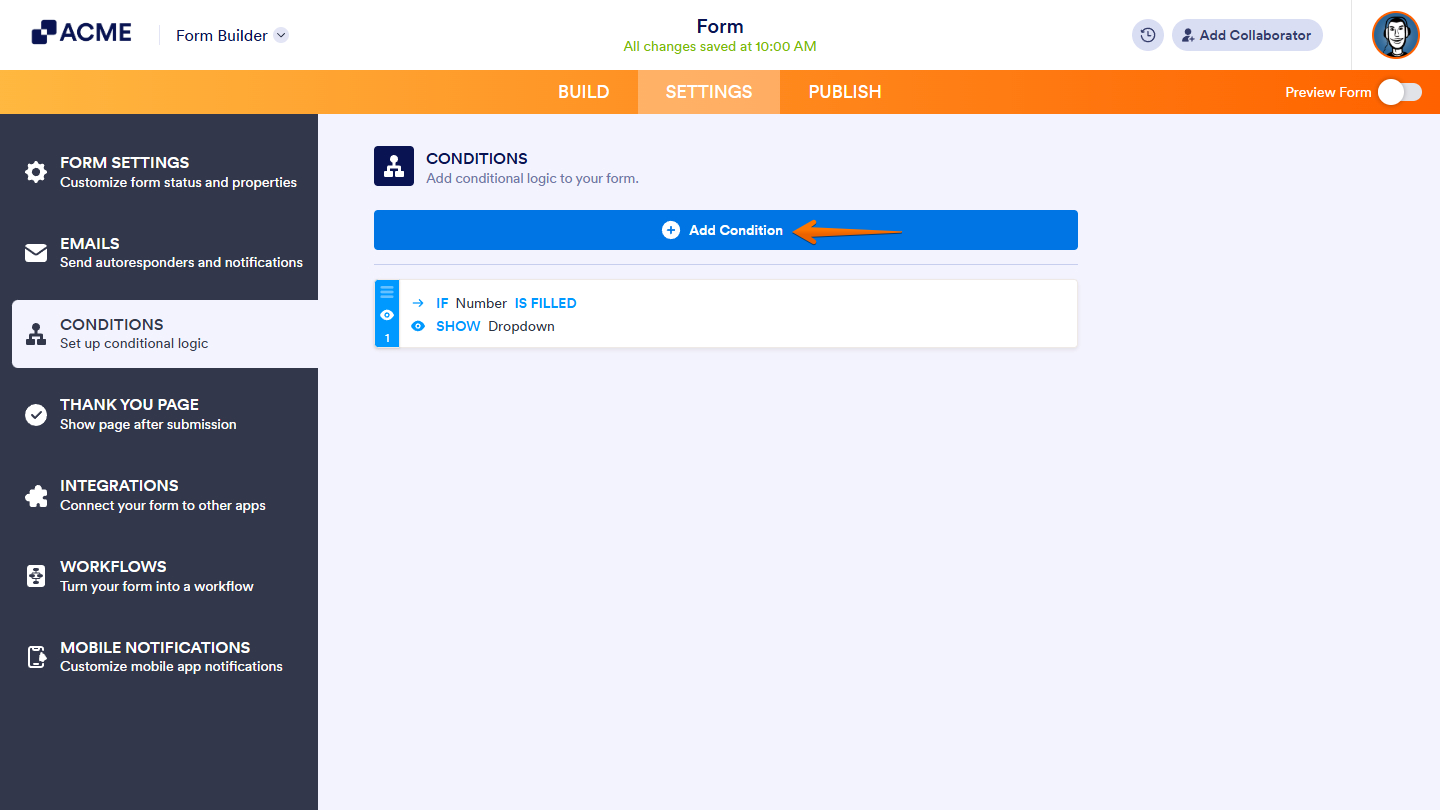
If there is already a conditional logic created for your form before, click on the Add Condition button at the top of the Conditions section first.
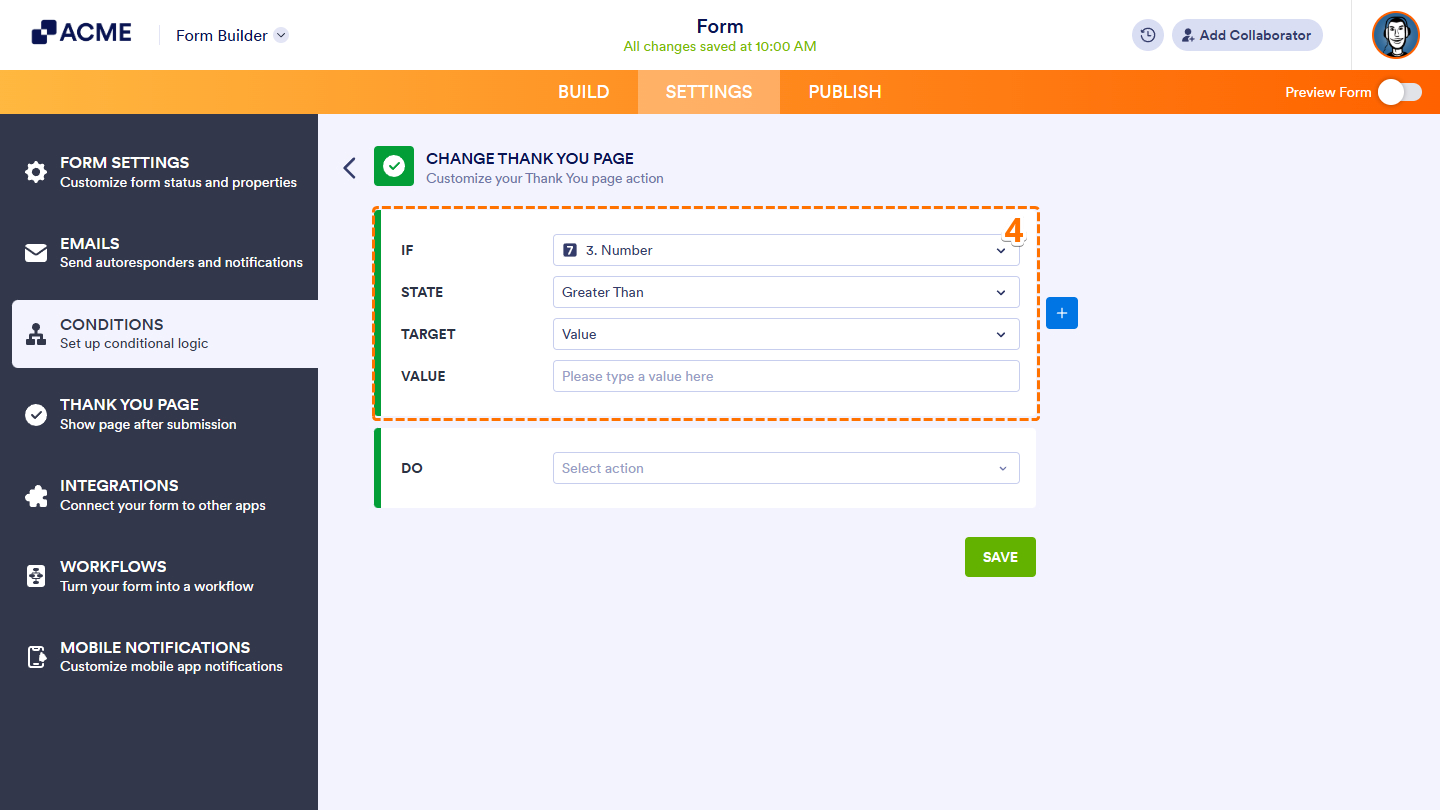
- In the Change Thank You Page section, configure these fields to set an If rule for your condition:
- IF — Select the form field that will trigger the condition. In this example, the Number field serves as the trigger.
- STATE — Specify the rule that determines when the condition should activate. Here, the Greater Than state is used.
- TARGET— Choose whether the condition will compare against a Value or Another Field.
- VALUE/ FIELD— Enter the specific value or select the field you want to use for the comparison.
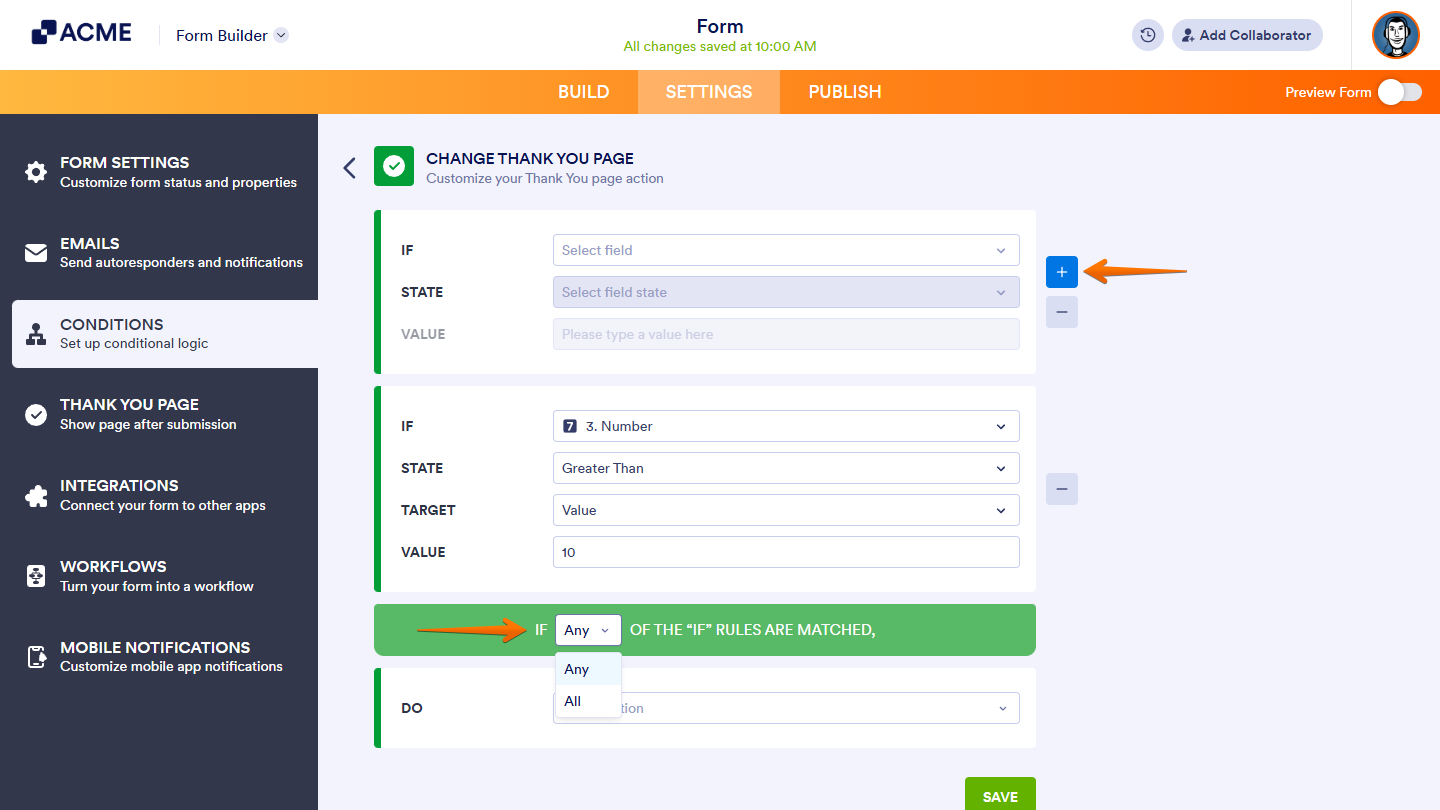
If you want to set another If rule for your condition, click on the Plus icon on the right side of the If Rule section, then, in the Any/All dropdown that appears below it, select Any if at least one rule should be met, or All if every rule should be met to trigger the condition.
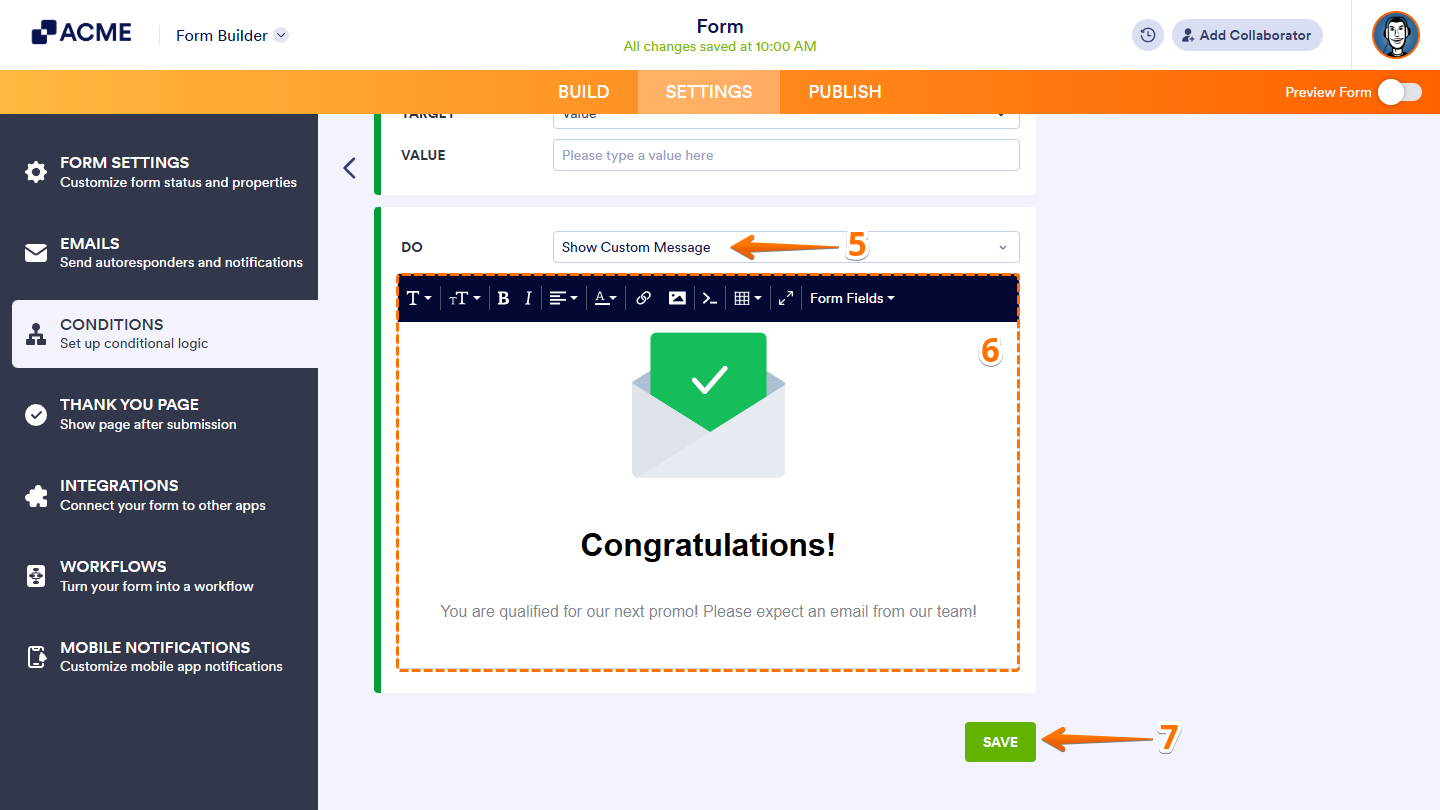
- Next, click on the Do Dropdown menu and then select Show Custom Message.
- Now, write your custom message that displays when the condition is met.
- Once everything is set, click on Save.
That’s it — you’re all set to create dynamic, personalized messages with conditional logic. With these options in place, you can tailor the user experience, guide responses more effectively, and make your form feel smarter and more interactive.

Send Comment: