Jotform’s Reusable Payment Connections are designed to make managing payments simpler and less repetitive. You only need to connect your preferred payment gateway once, and you can reuse that same connection across all your forms and apps—no more setting it up again and again. It’s a smooth, time-saving way to keep your payment workflows consistent and stress-free.
You can add a reusable payment connection while you’re building a form, or set it up anytime from the Connections page in your account settings. Once it’s connected, it’s ready to use whenever you need to start accepting payments.
Adding Reusable Payment Connection in the Form Builder
If you’re working inside the Form Builder, adding a Reusable Payment Connection is quick and straightforward. You can do this while setting up a Product List element or when you add a payment gateway to your form. This is how it’s done:
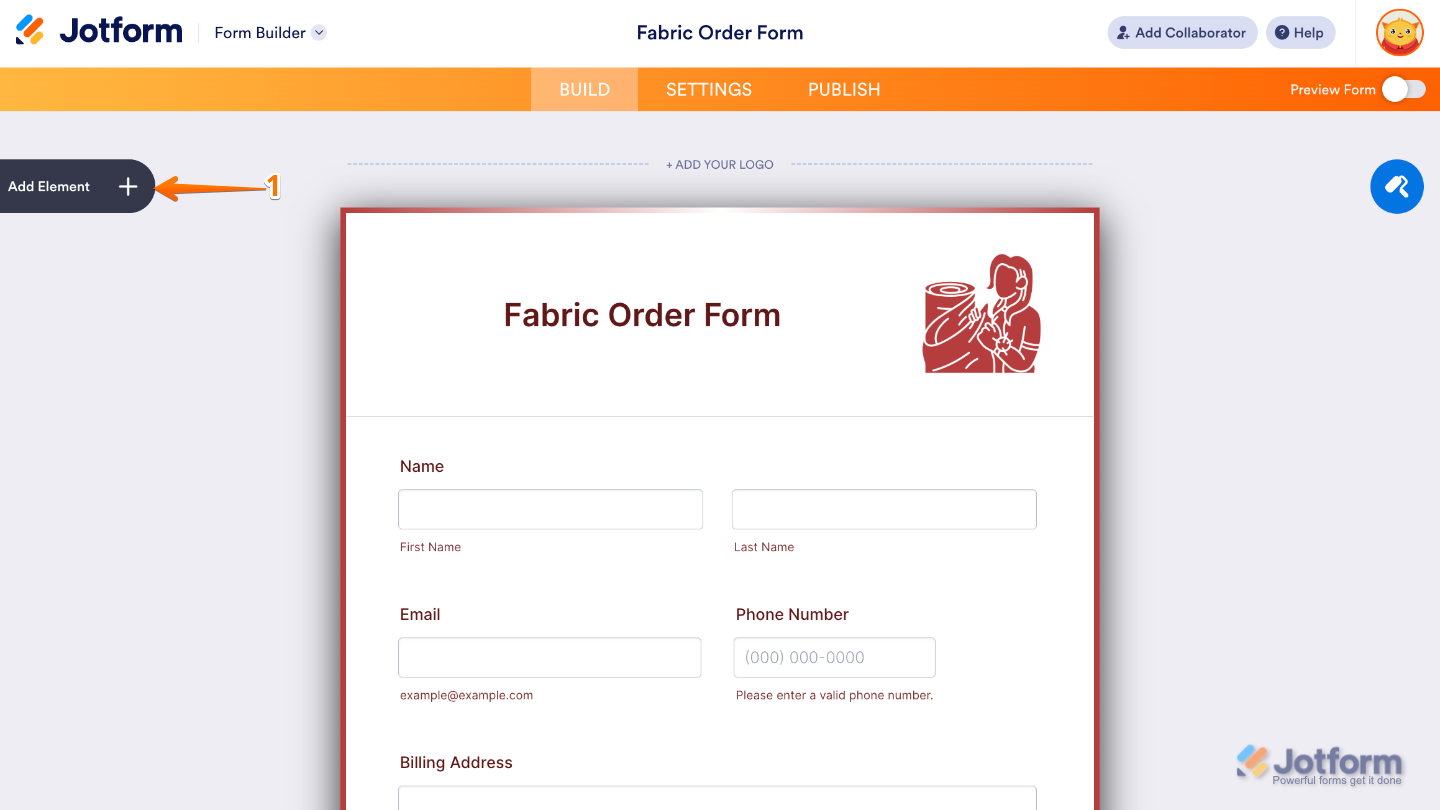
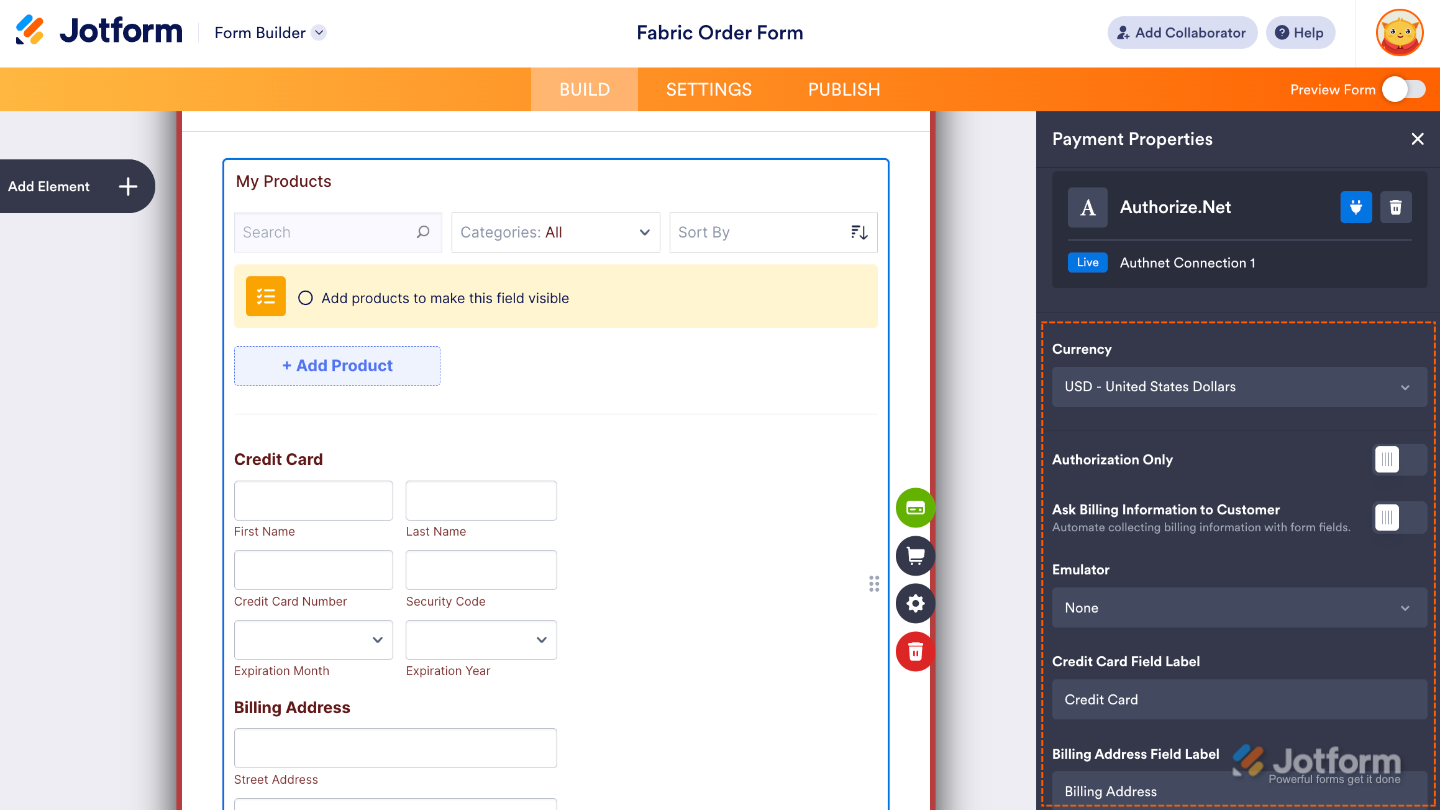
- In Form Builder, click on Add Element on the left side of the page.
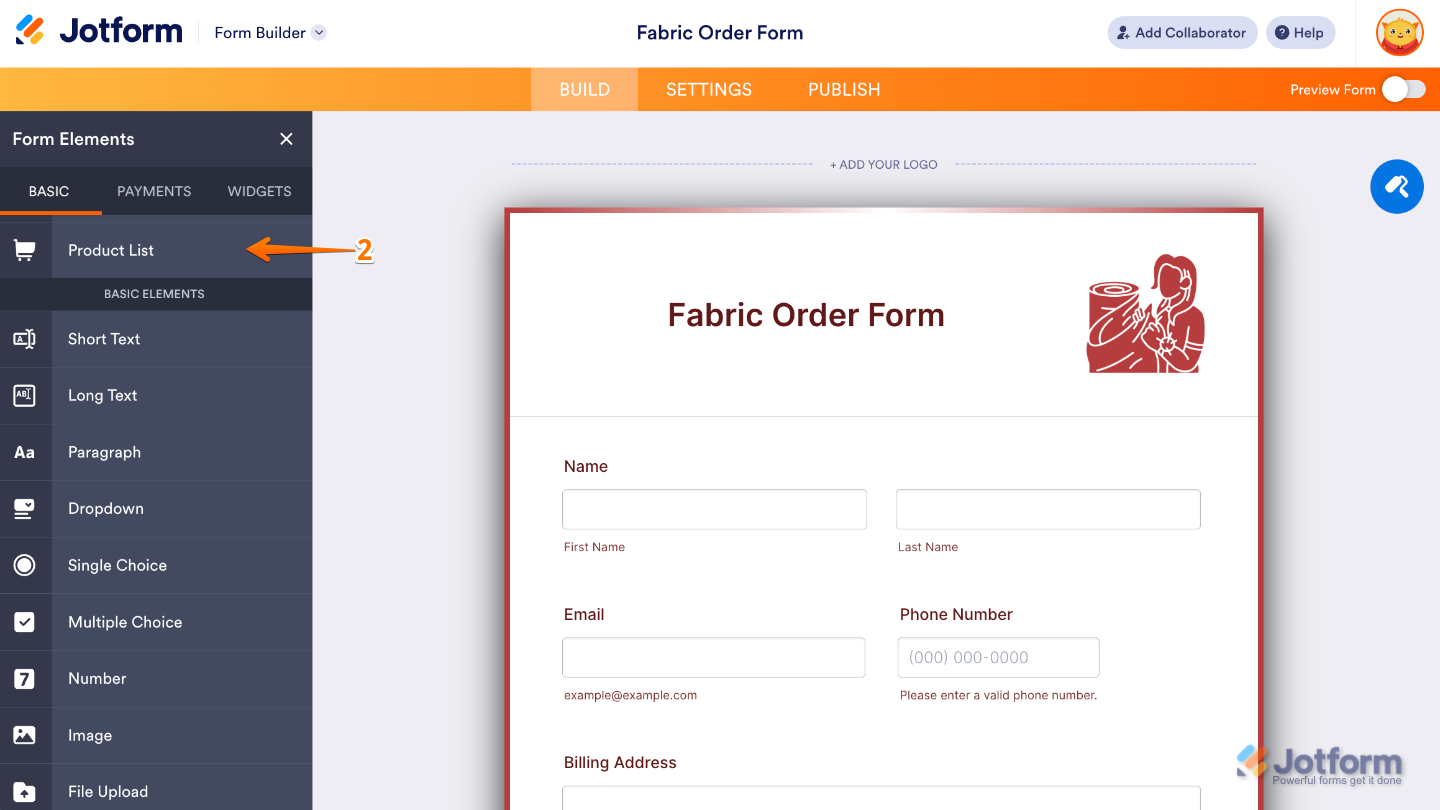
- In the Form Elements menu, under the Basic tab, click on Product List element. Or, just drag and then drop it to where you want it to be on your form.
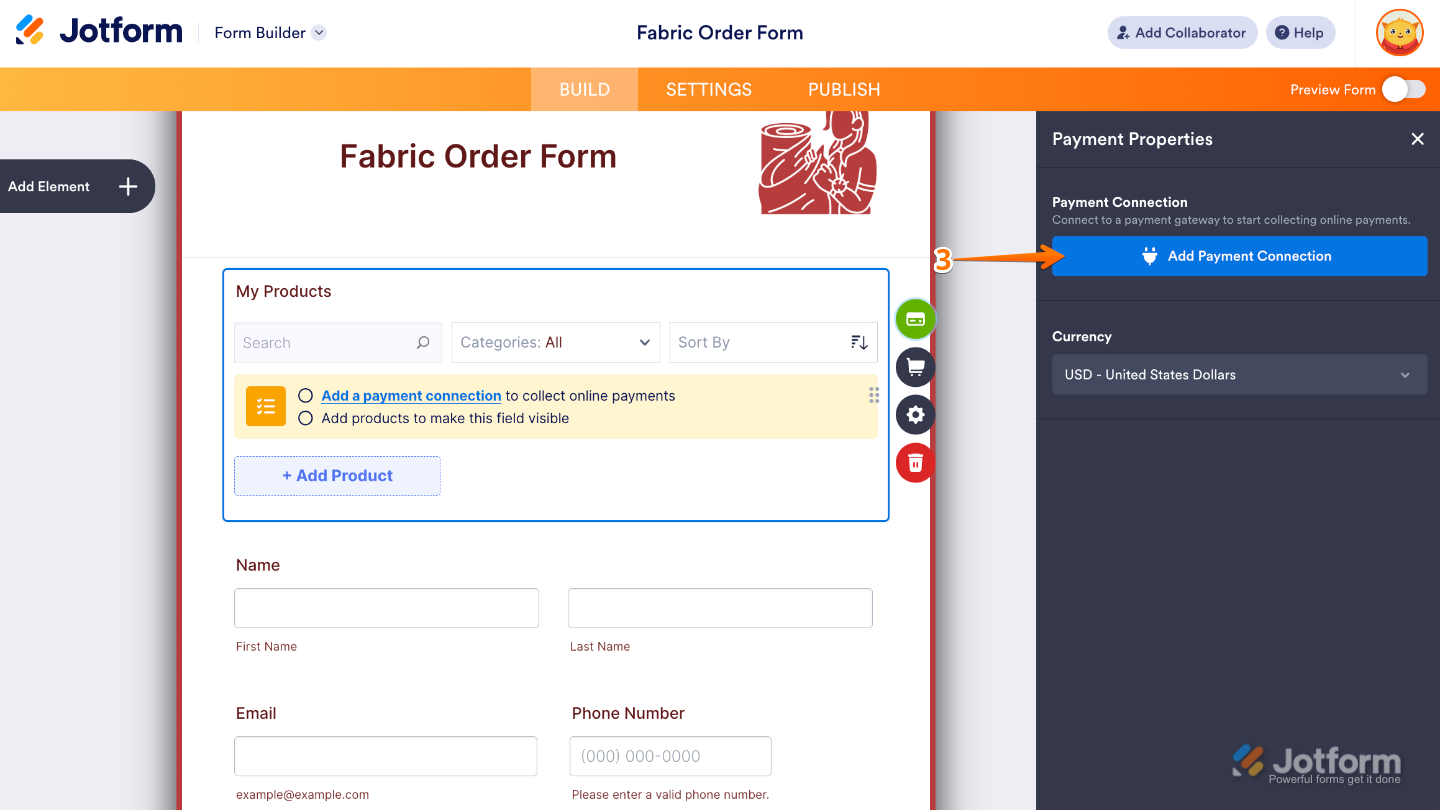
- Then, in the Payment Properties menu on the right side of the page, click on the Add Payment Connection button.
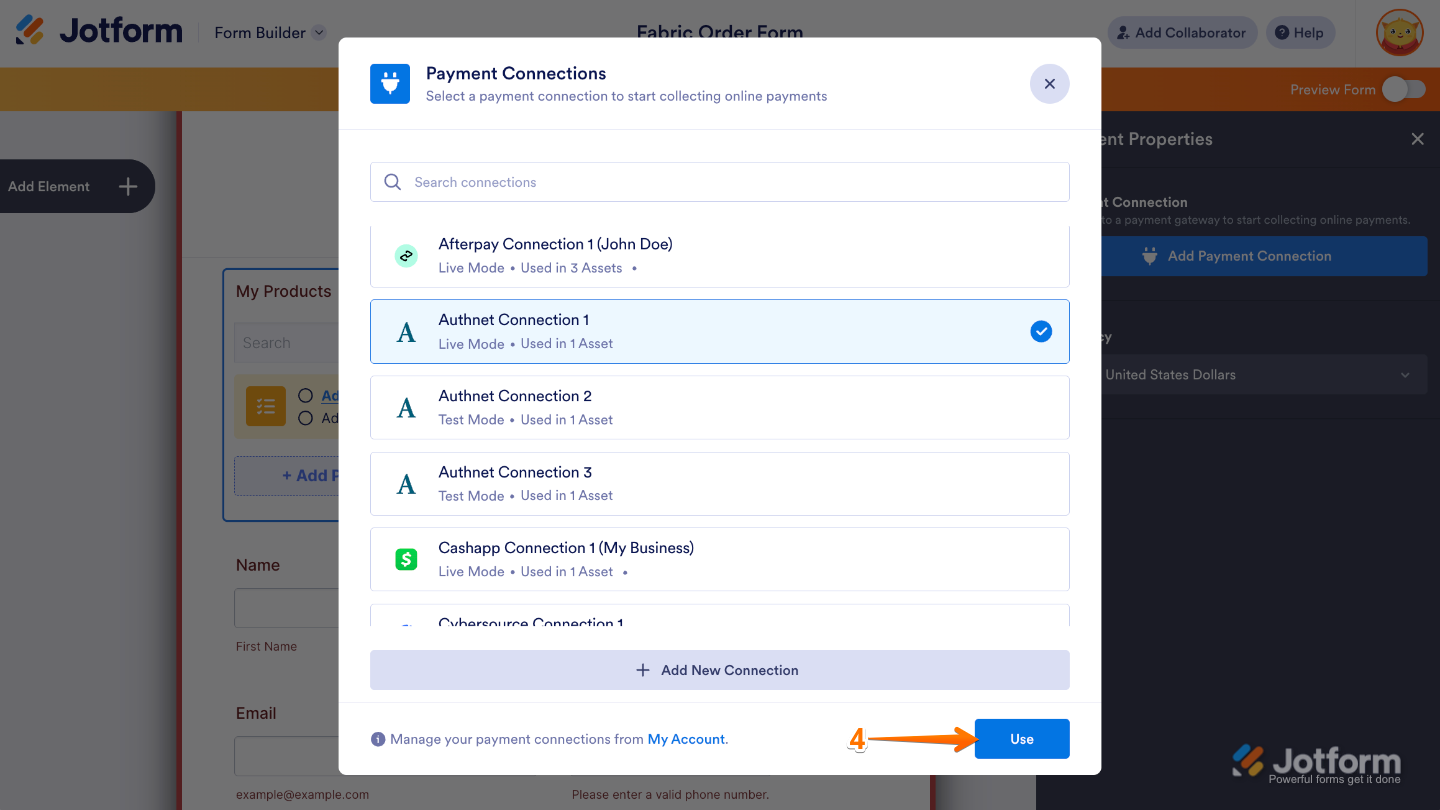
- Now, in the Payment Connections window that pops up, select a connection and then click on Use.
That’s it. Your form is now successfully connected to a payment gateway. Once you’ve added the Payment Connection, you’ll be able to access and fine-tune the settings for your chosen gateway. Make any additional adjustments you need, and the system will automatically save your changes and start accepting payments smoothly.
Managing Reusable Payment Connections
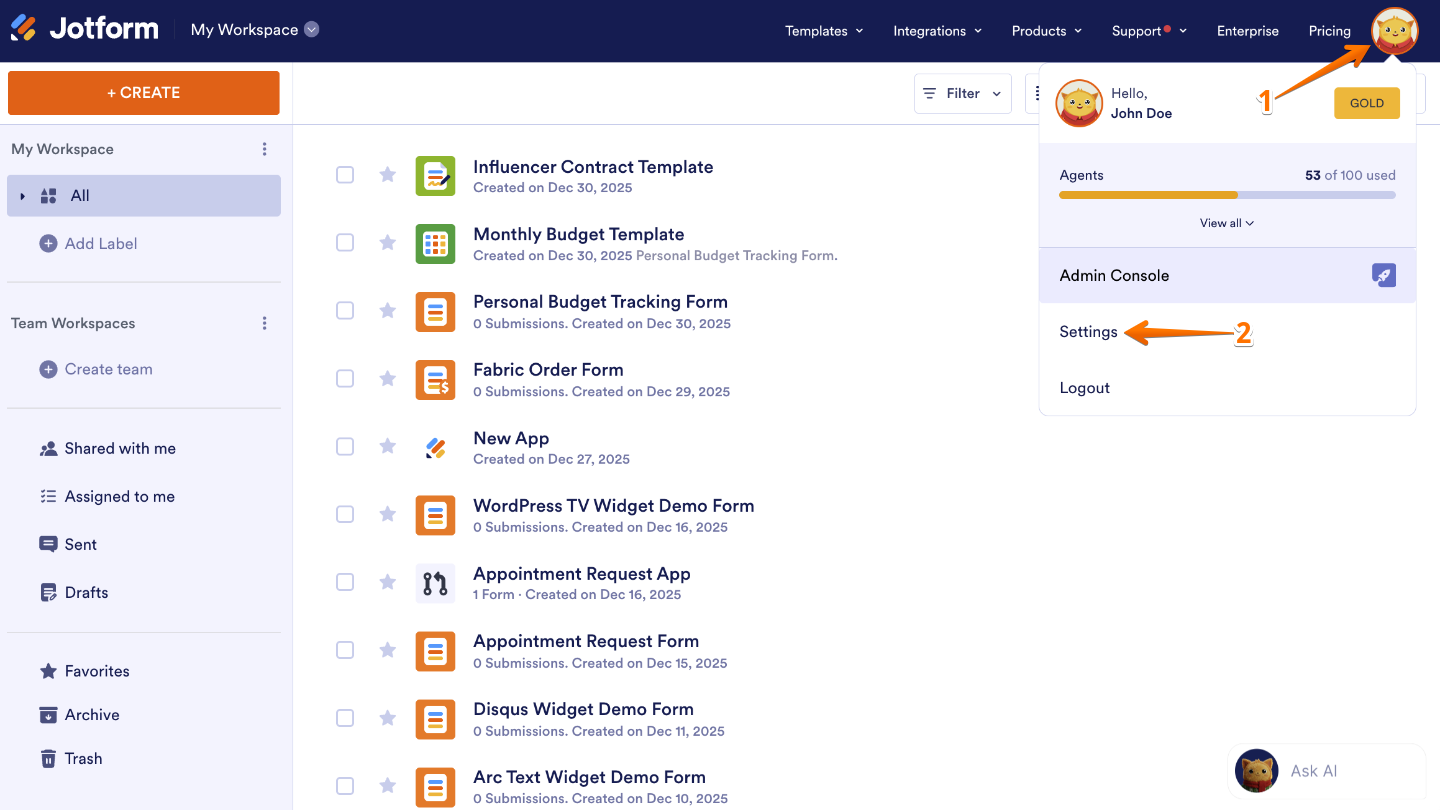
You can easily manage all your active Reusable Payment Connections from the connections section in your My Accounts page. From here, you can review your connected gateways, make updates when needed, and stay in control of how payments are handled across your forms and apps. You can do it in just a few steps:
- On your Workspace page, click on your Profile Picture/Avatar on the top-right side of the page.
- In the menu that opens, click on Settings to open your Account Settings page in a new browser tab.
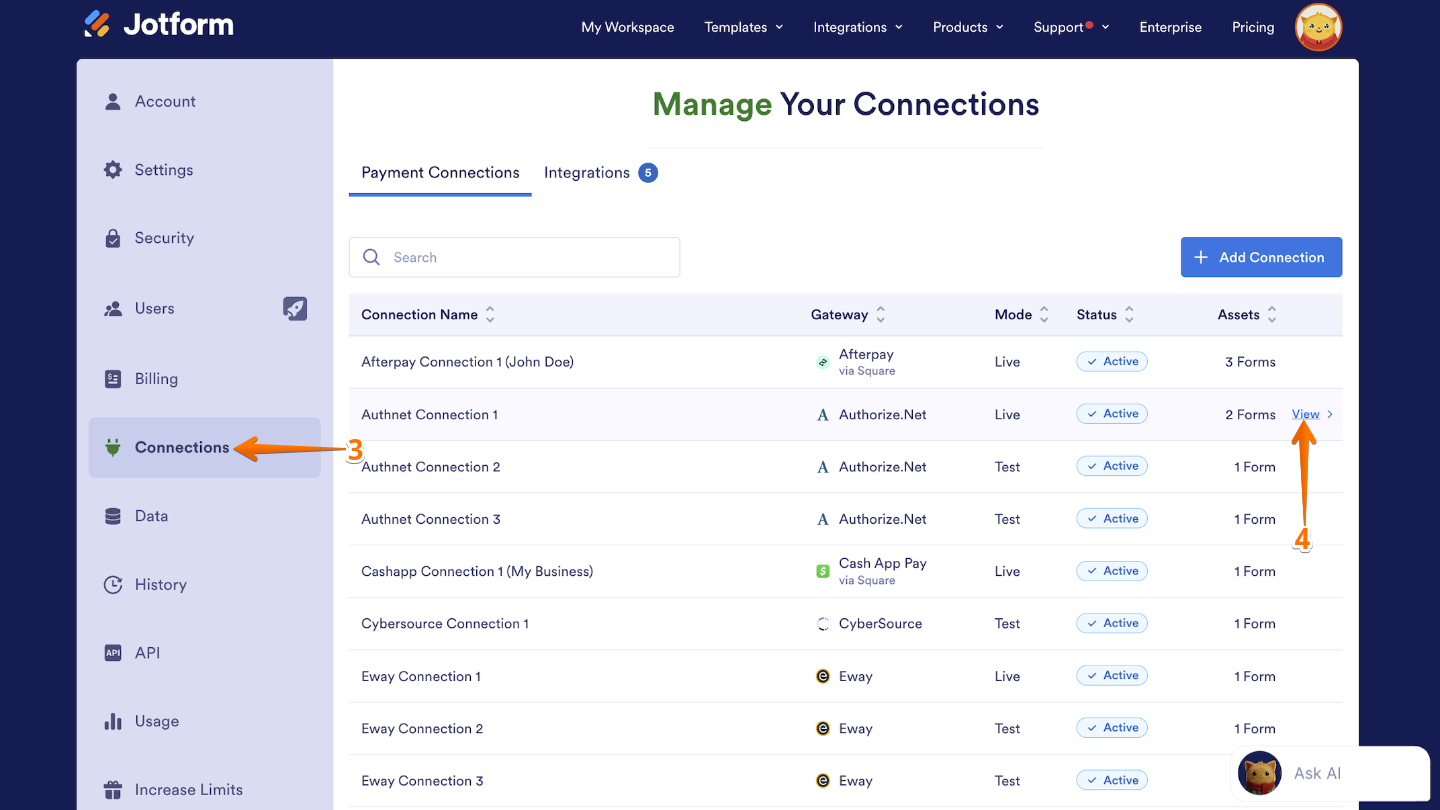
- Now, on the left side panel, click on Connections.
- Under the Payment Connections tab, hover over a payment connection and then click on View.
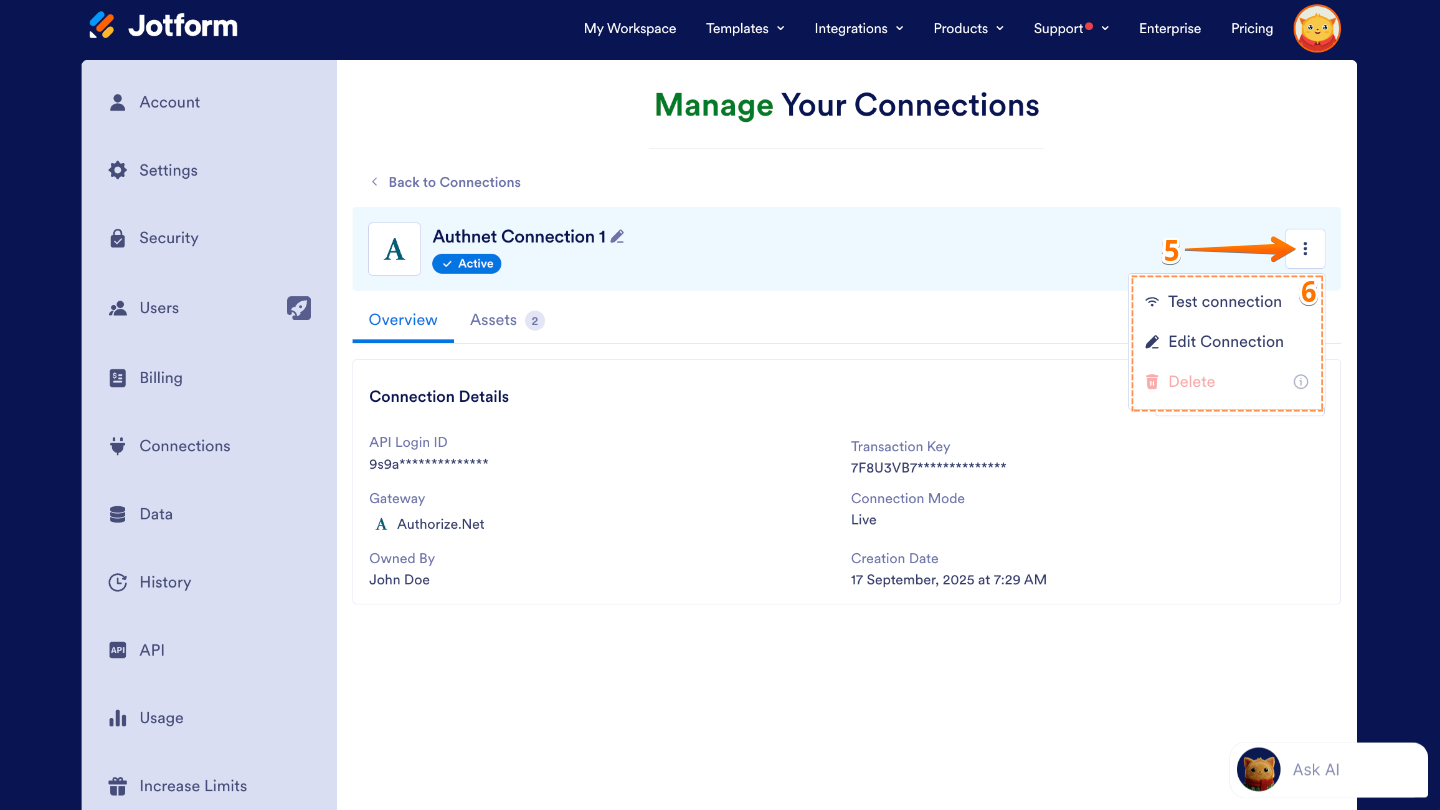
- Next, click on the Three Dots icon on the left side of the page.
- Then, from the menu that appears, choose any of the following options:
- Test Connect — Lets you check if your connection is working properly. When you click it, Jotform runs a quick test to make sure everything is set up correctly and can communicate with the connected payment gateway.
- Edit Connection — Use this when you need to update or change your connection settings. You can modify details like account credentials, permissions, or configuration options without creating a new connection from scratch.
- Delete — Select this if you want to remove the payment connection entirely from your account. Once deleted, it won’t be available for forms or integrations anymore.
Note
The Delete option only becomes available once the connection is no longer used by any assets. Make sure to remove it from all linked forms or apps first, and then you’ll be able to delete it without any issues.
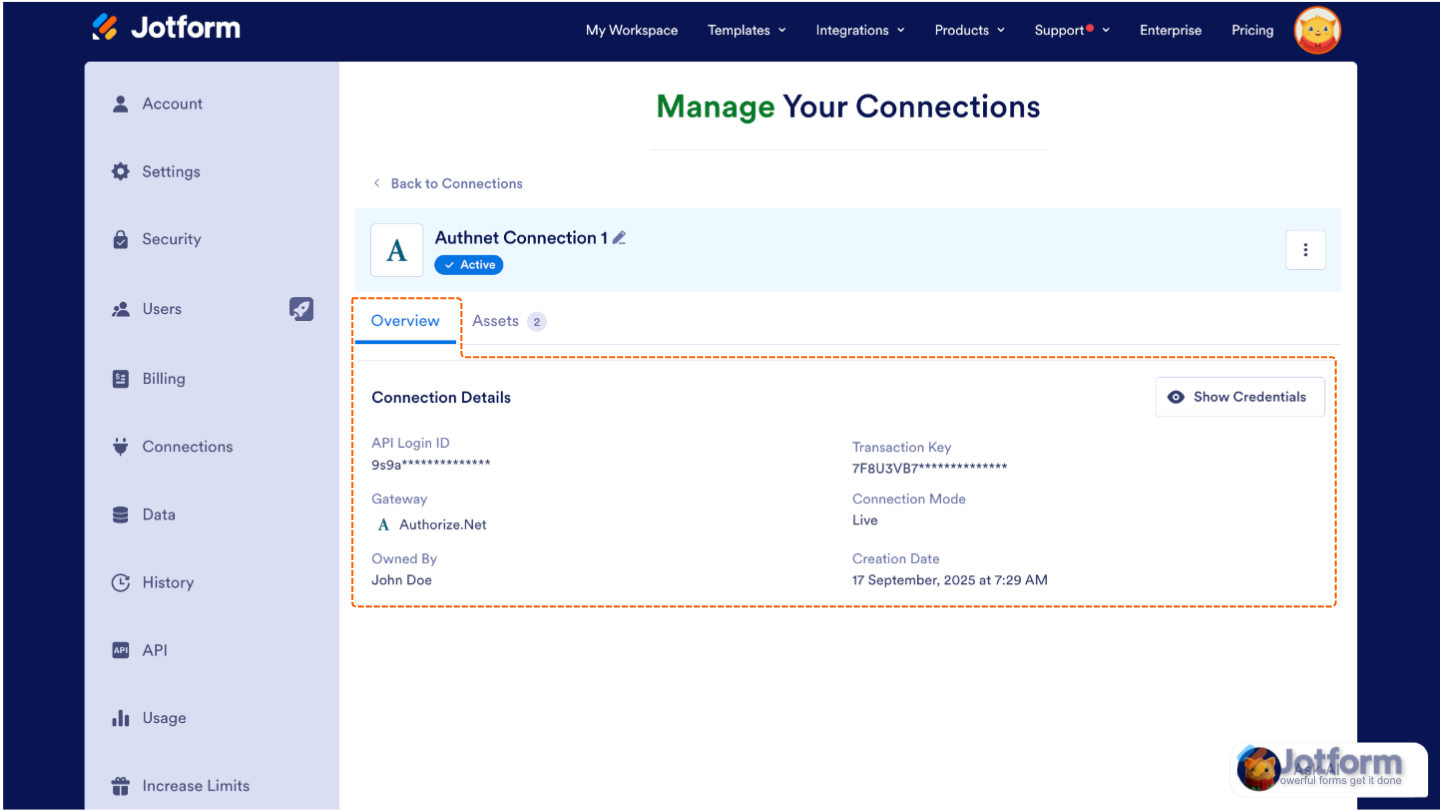
From there, you’ll also see the Overview tab for that connection, where you can quickly review all the key details at a glance—like the API login ID, transaction key, payment gateway in use, the connection owner, the connection mode, and the date it was created. This makes it easy to see exactly how and when the connection was set up.
While the Assets tab gives you a clear overview, listing each Asset’s Name, the Currency it uses, and the number of Submissions it has received.

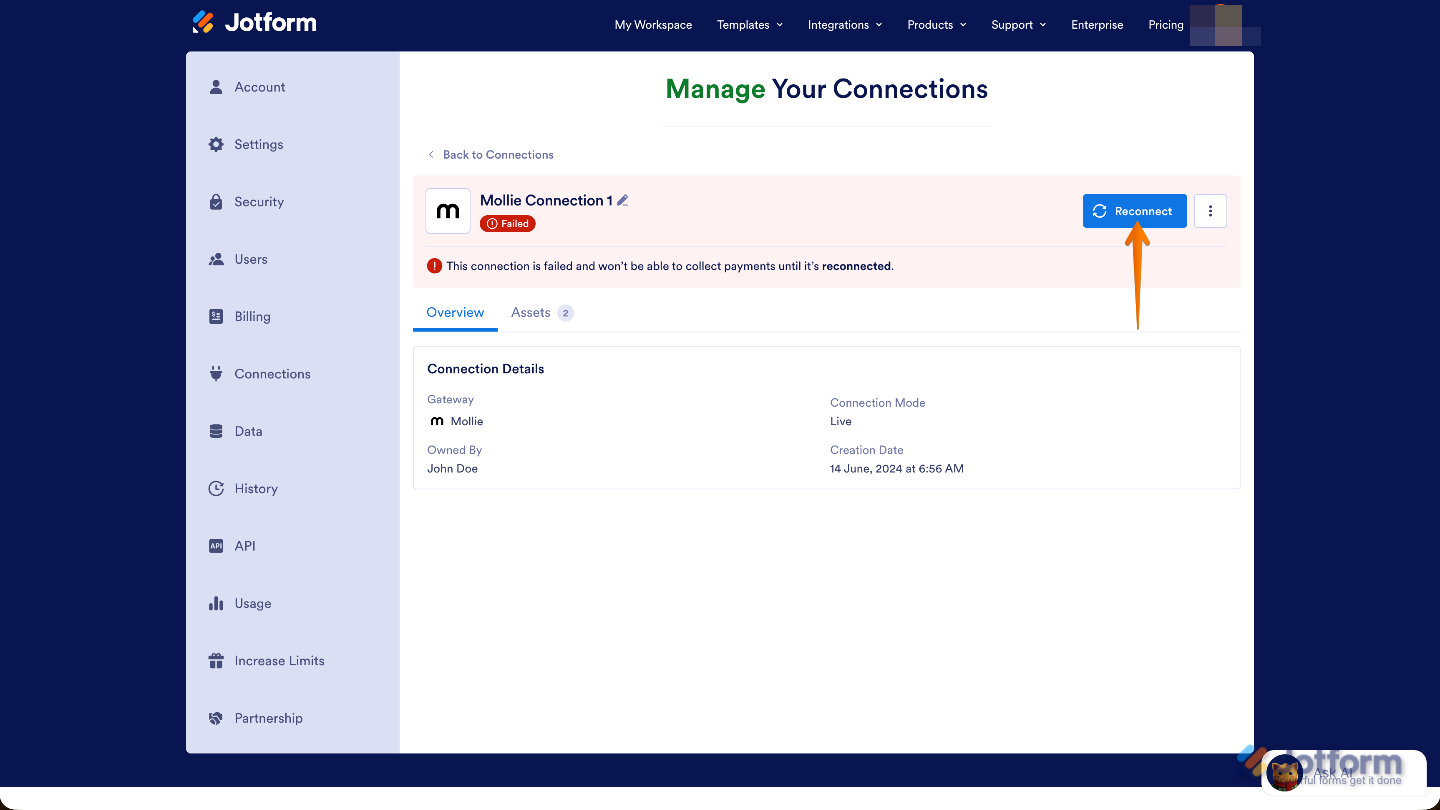
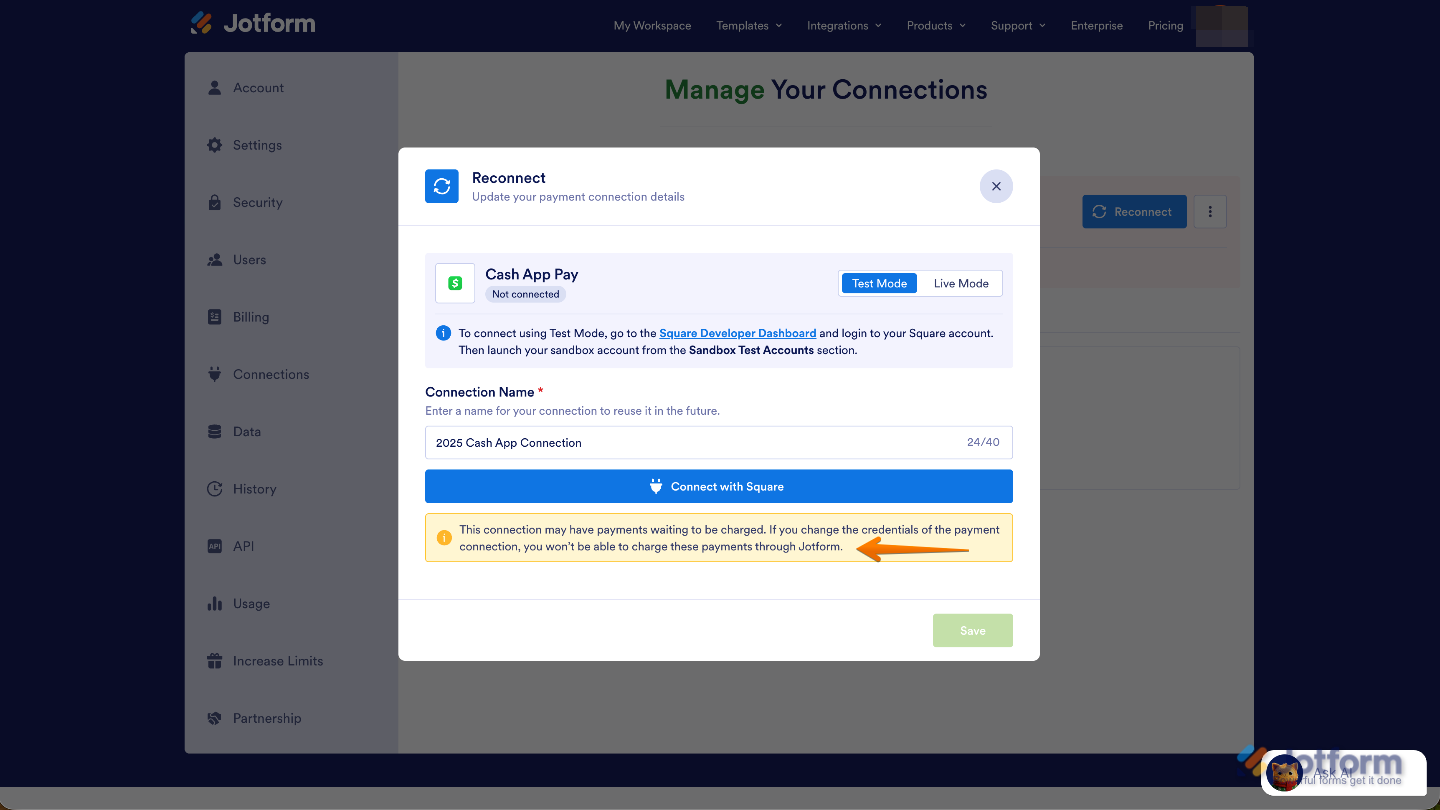
If a connection ever fails, don’t worry—it’s easy to fix. Simply click on the failed connection and you’ll see a Reconnect button. This lets you quickly reauthorize the connection, sign in again if needed, and get everything back up and running without setting it up from scratch. It’s a quick way to restore the connection and make sure your payments or integrations continue working smoothly.
Note
This reconnect process is only meant for refreshing or fixing a connection; it cannot be used to switch to a different gateway account. If the connection fails or needs to be renewed, make sure to reconnect using the same account, or you’ll run into an error:
Switching Reusable Payment Connections
If you’d like to use a different payment gateway for your form, you can easily switch to it through the Payment Properties. Just make sure you’ve already set up a Payment Connection for your new preferred gateway. Once that’s in place, changing gateways is quick and hassle-free. This is how it’s done:
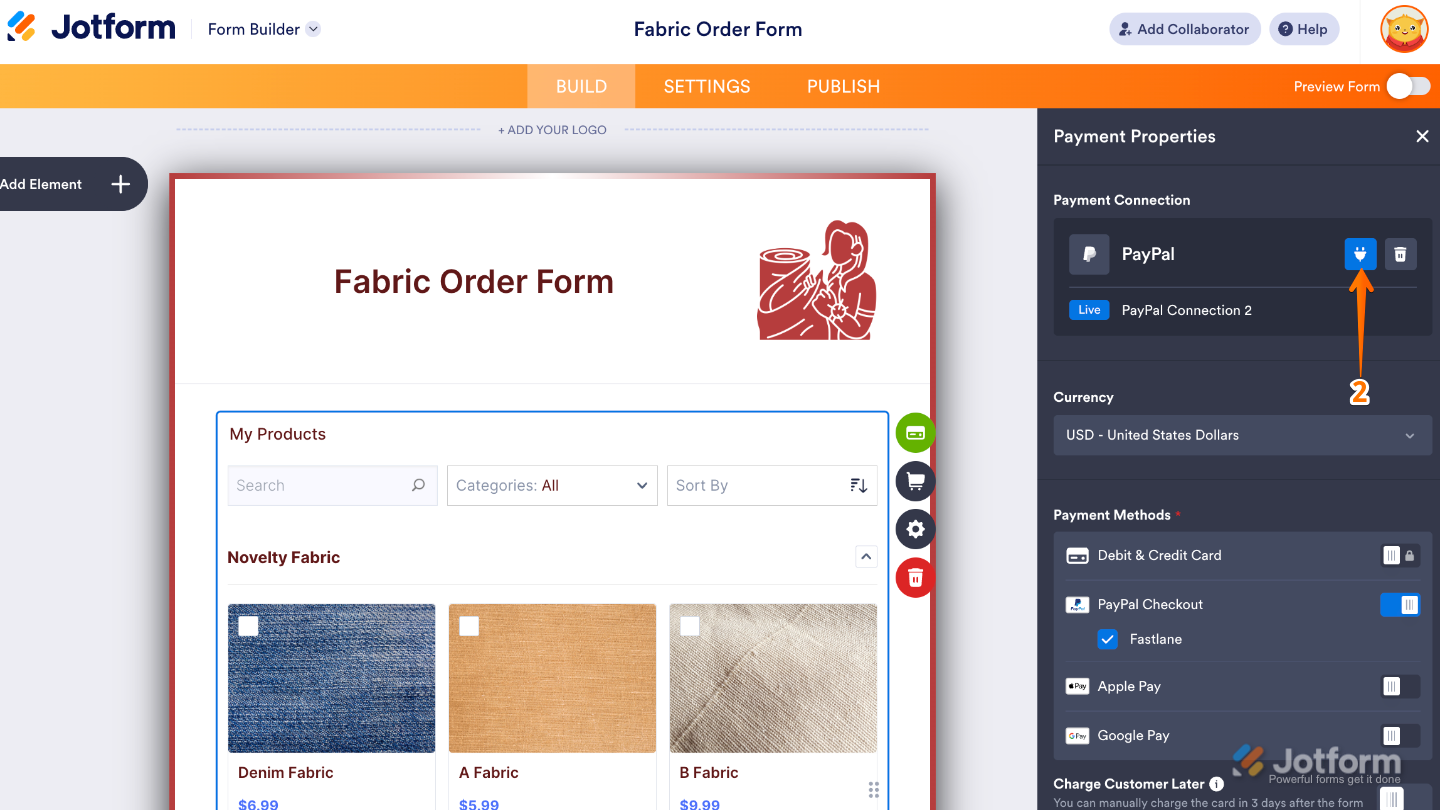
- In Form Builder, click on the Credit Card icon on the right side of the page.
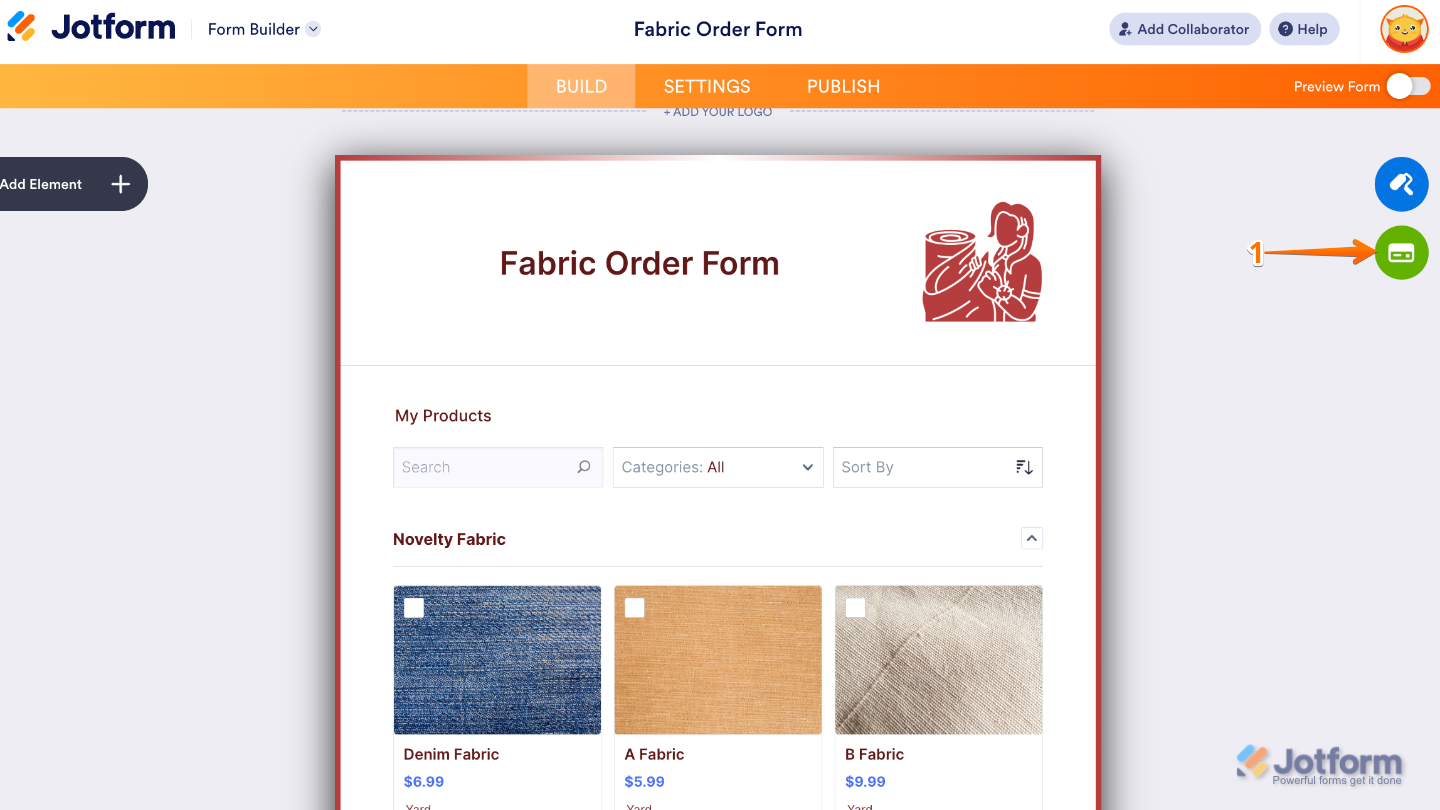
- Next, in the Payment Properties menu on the right side of the page, click on the Plug icon.
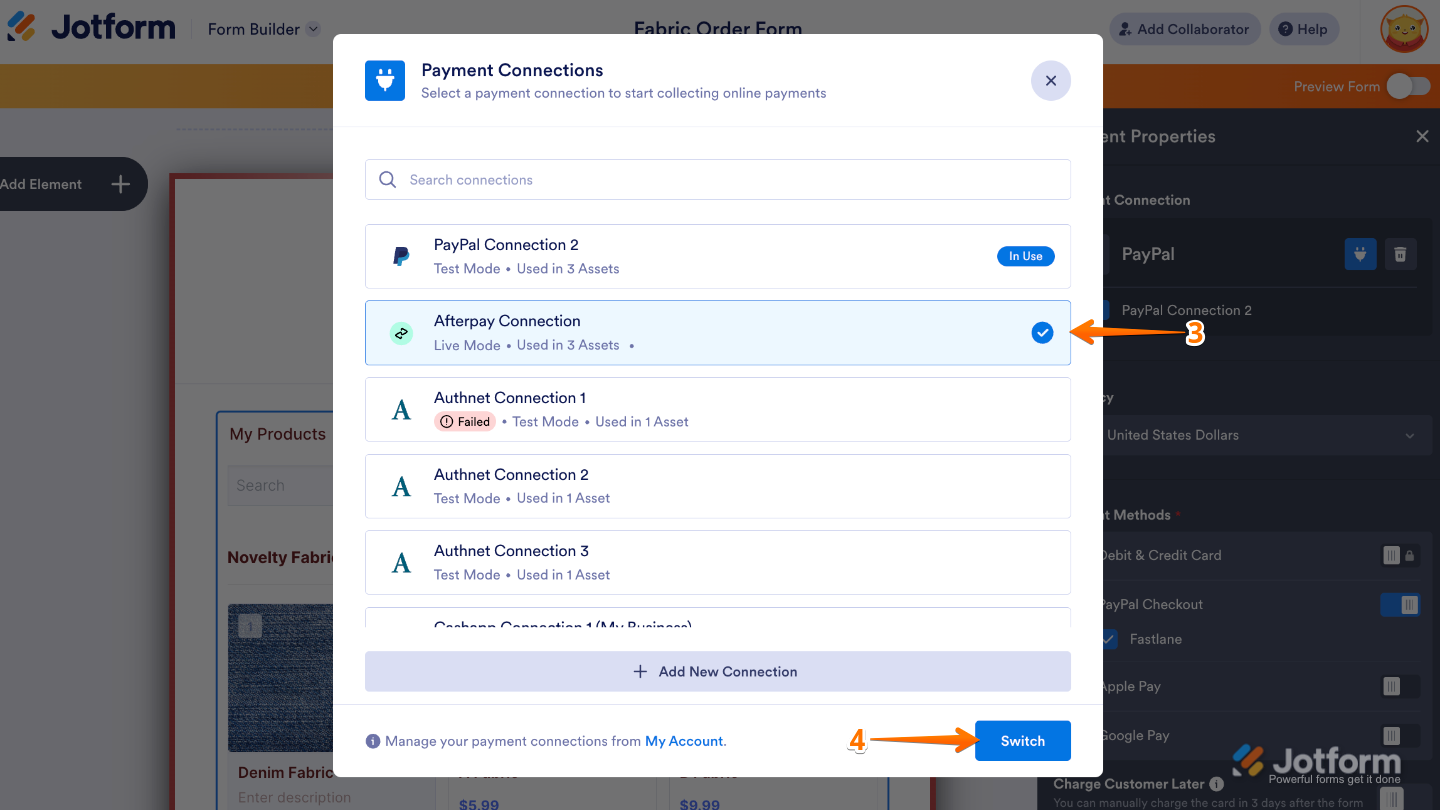
- Then, in the Payment Connections window that comes up, search for the new payment gateway you want to use and then select a connection.
- Once you’re done, click on Switch.
- Now, in the Do You Want to Switch Your Payment Connection modal that shows up, click on Yes, Switch.
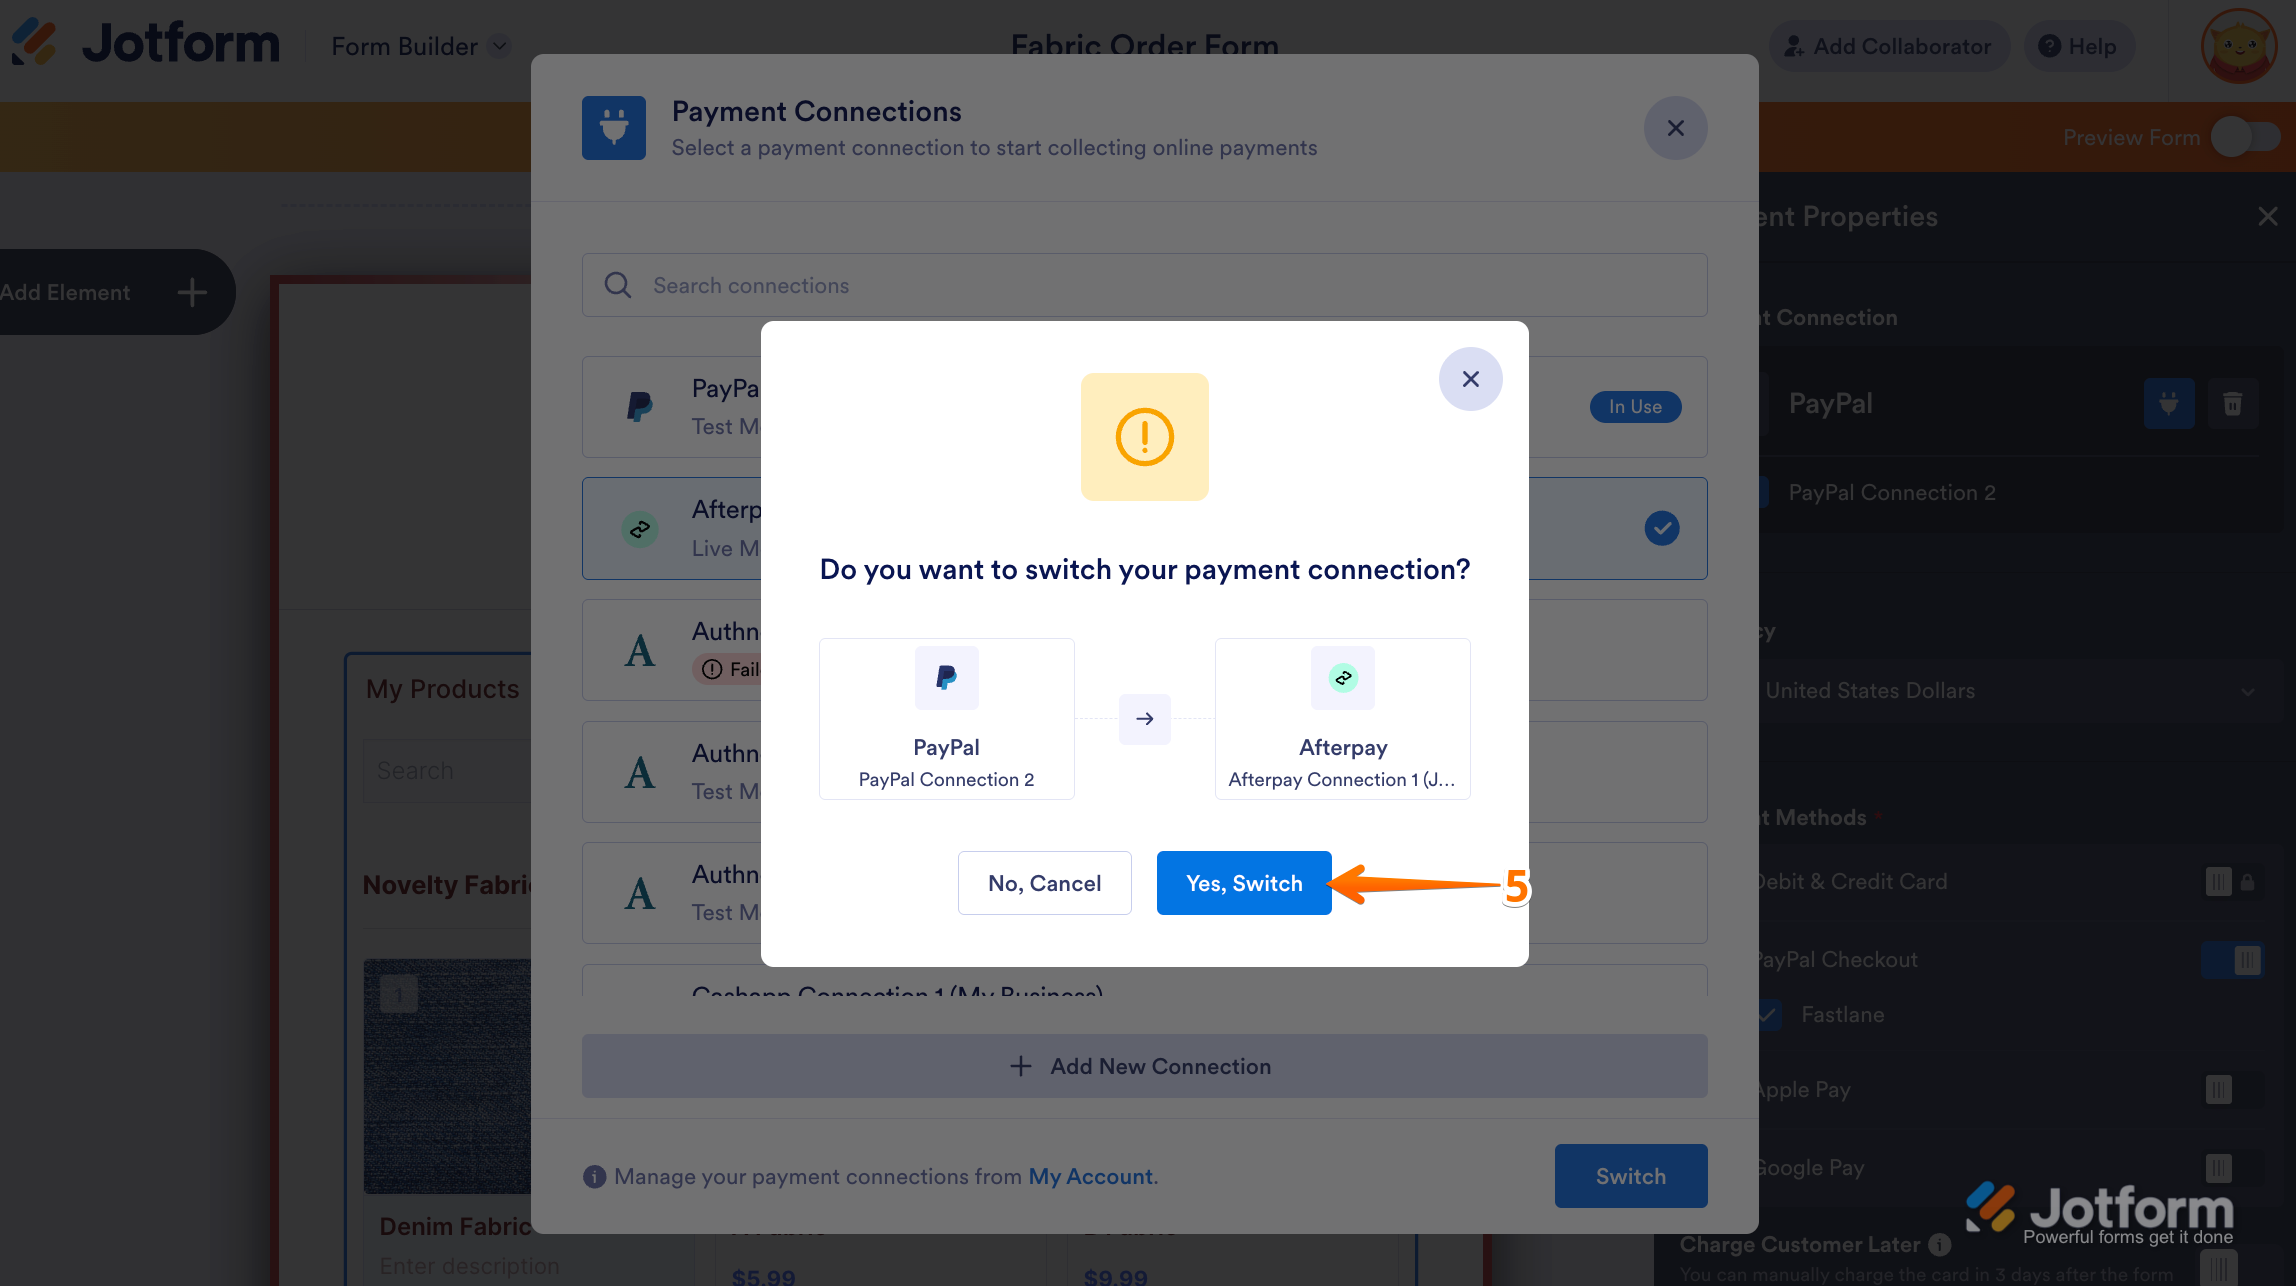
That’s it. You’ve successfully switched to a different payment gateway using a Reusable Payment Connection. Your form is now linked to the new gateway, so you can continue collecting payments smoothly without rebuilding anything. Feel free to test the form to make sure everything looks good, and you’re all set to move forward with your updated payment setup.

Send Comment:
5 Comments:
November 4, 2025
Can i use a product list without payment and add a payment in later?
October 28, 2025
I have the same problem from the message below, it gets stuck on the "Work in progress...Please wait while we set up your payment connection" page. I tried clearing the cache, doesn't solve it.
October 27, 2025
I have been unable to set up a payment connection for my form. It takes me through all of the steps of connecting my accounts but after I've done that, it gets stuck on the "Work in progress...Please wait while we set up your payment connection" page.
June 13, 2025
Hi, HOw come I do not have this Option of Connections in my Account portal?
June 3, 2025
good to see the info