As a Team Admin, your Team Settings allow you to manage the core details and configuration of each Team Workspace. From here, you can update the Team’s name, control appearance elements, and manage your users’ access and roles.
Accessing your Team Settings
- Start by clicking on the Team Settings button, located in the bottom left of your Team Workspace page.
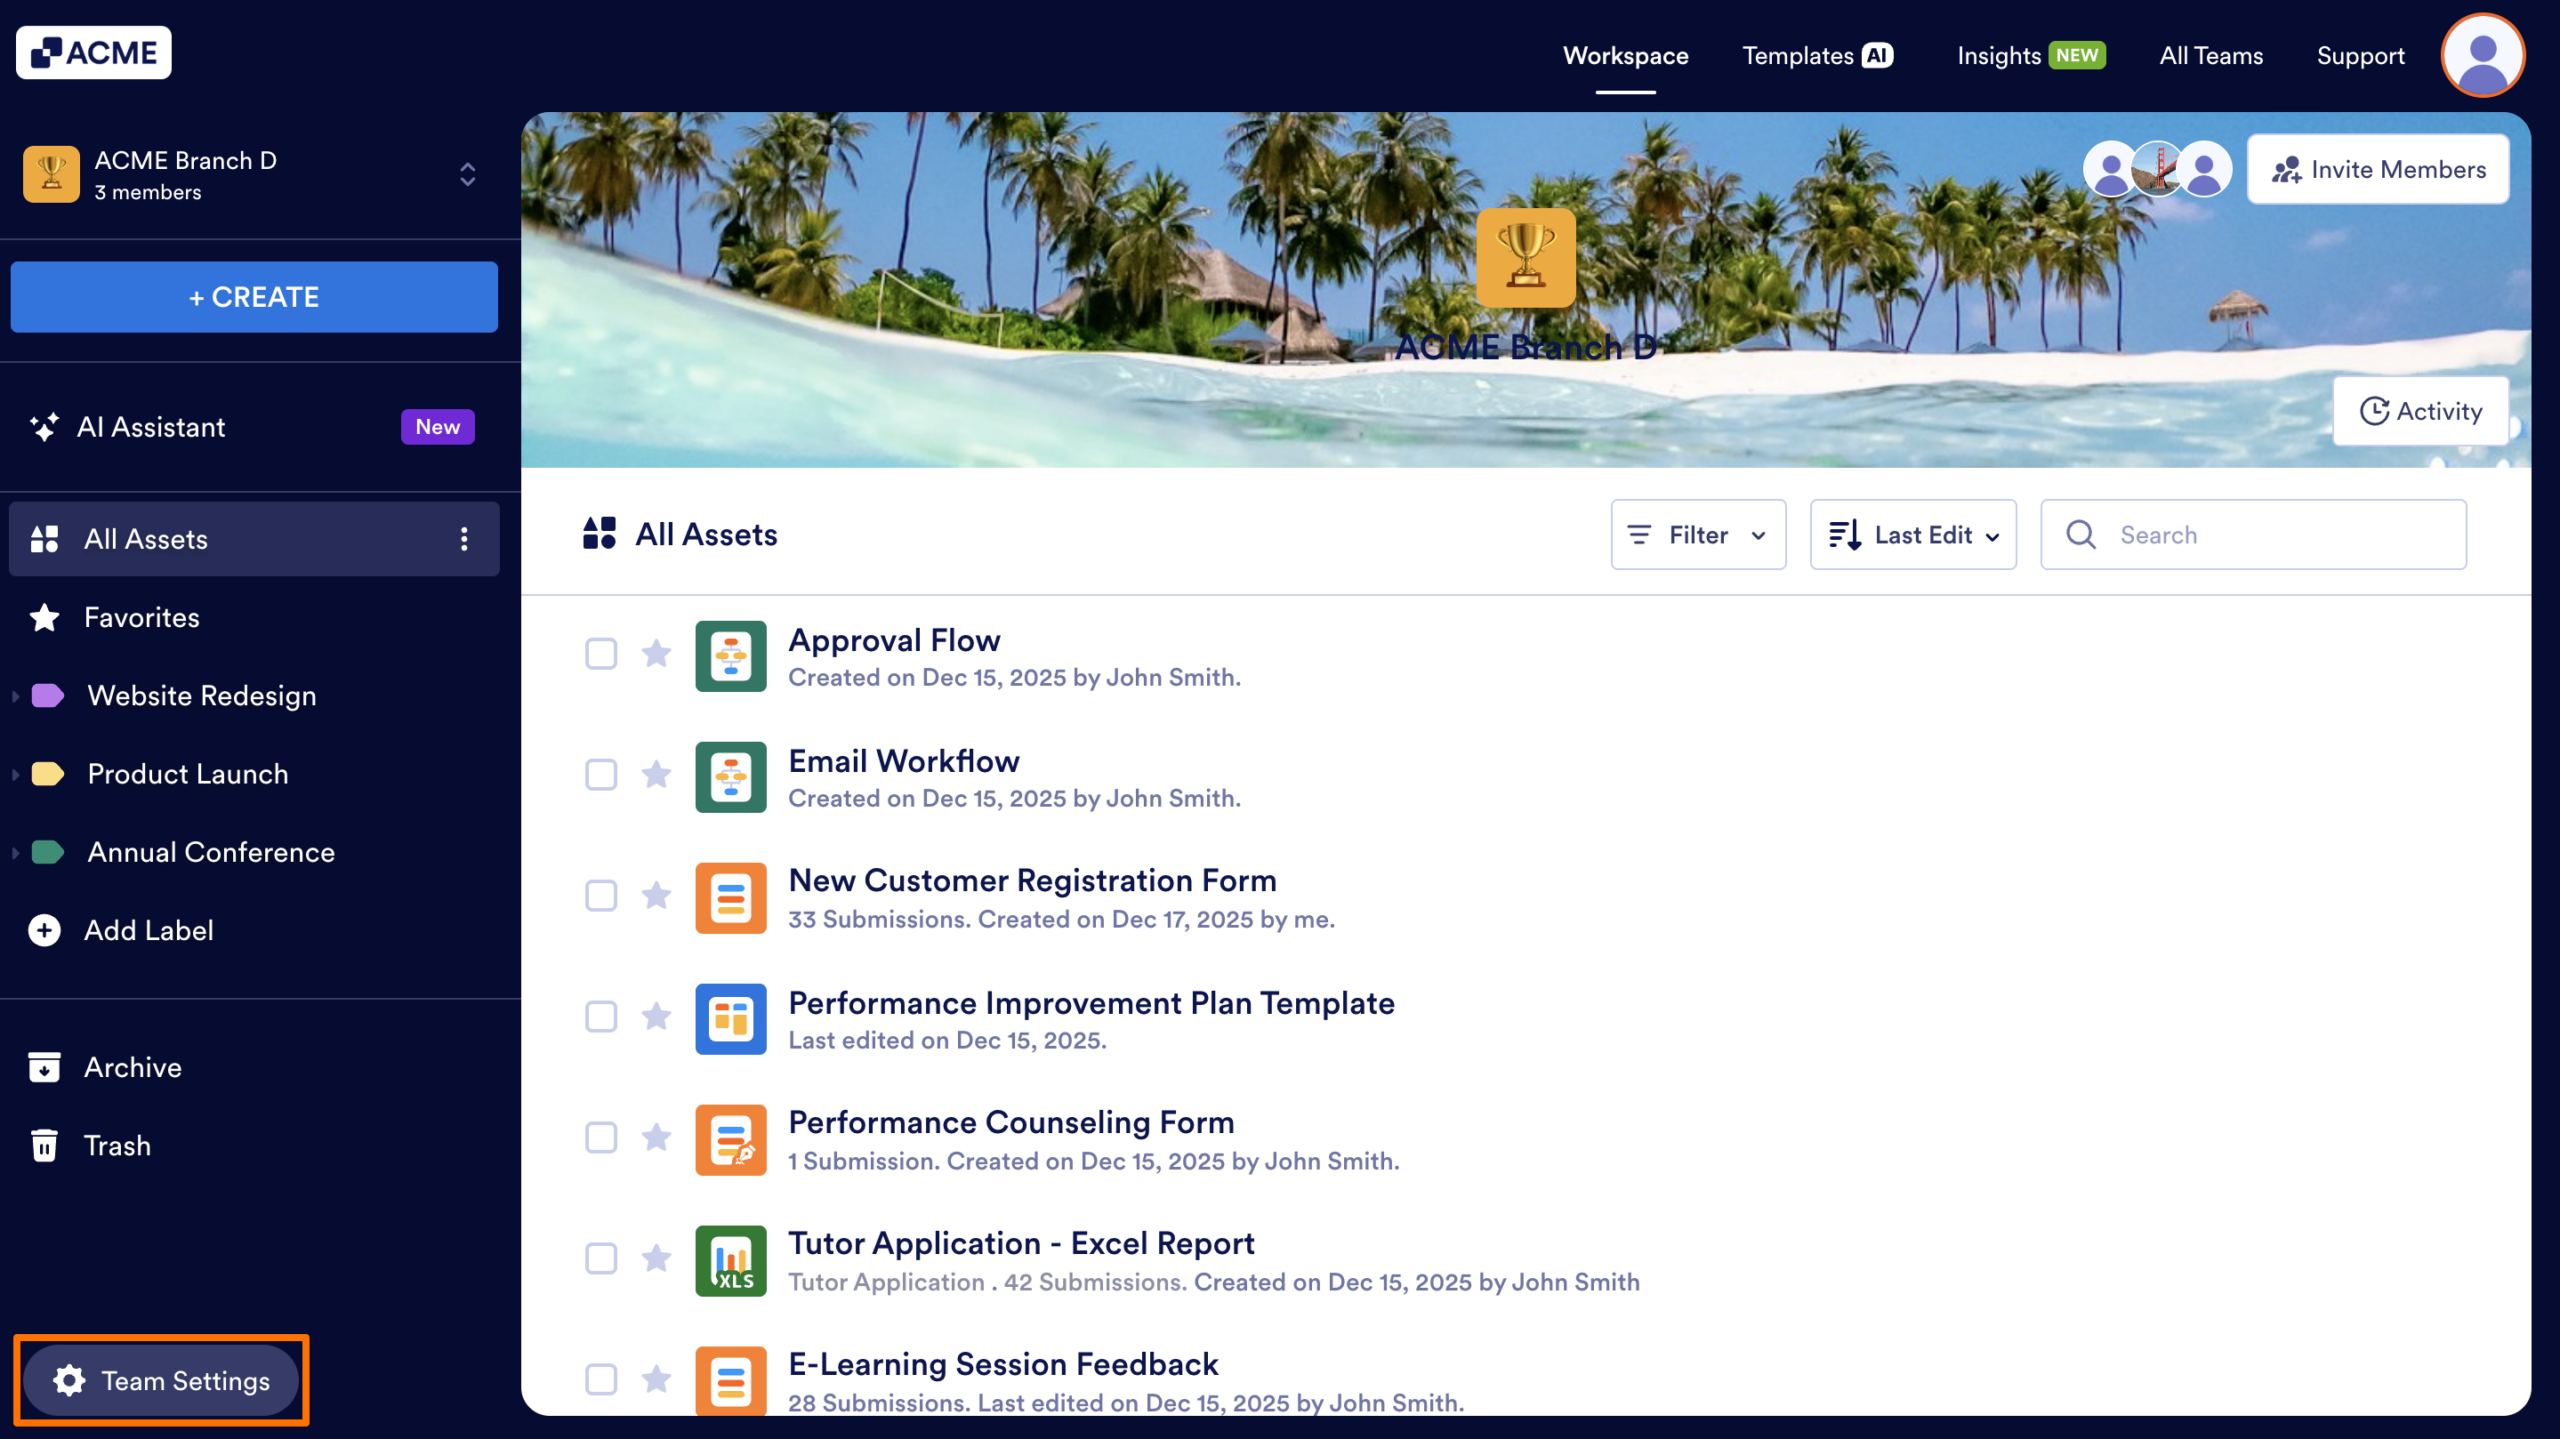
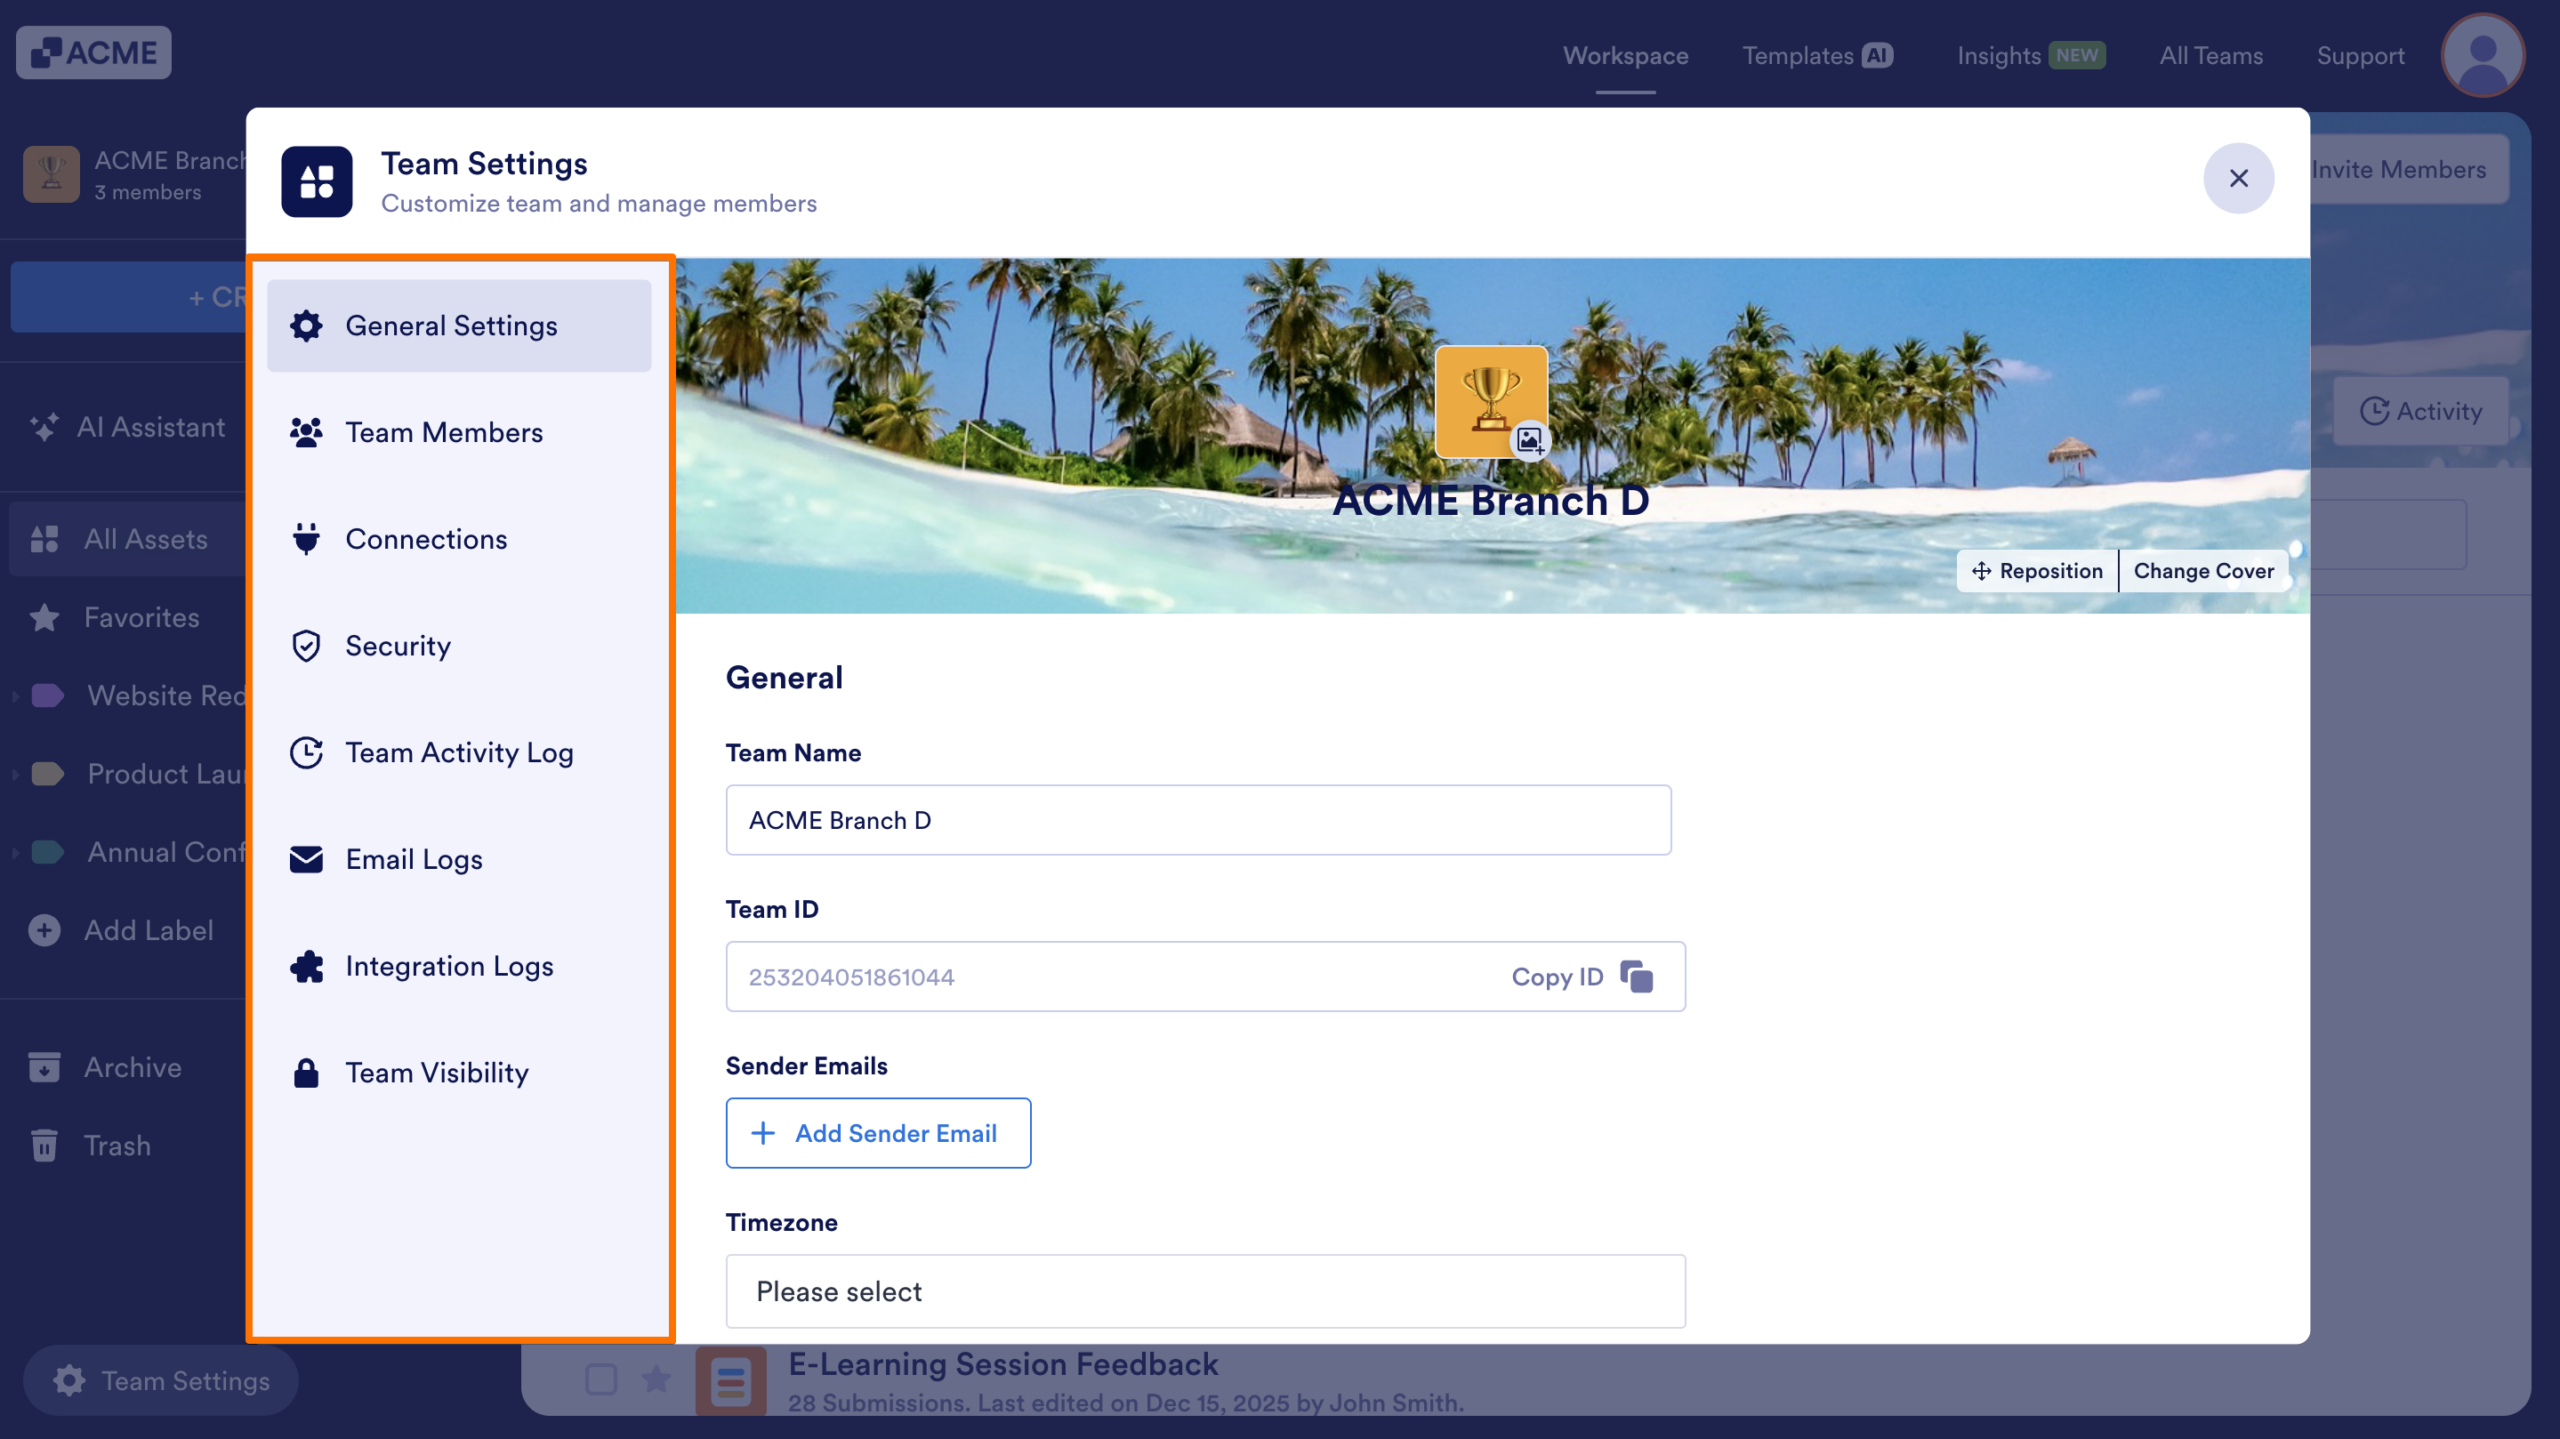
- Once the Team Settings page opens, the following tabs will appear on the left:
- General Settings — Manage your team’s name, custom URL, email preferences, timezone, time format, and team deletion.
- Team Members — Add, remove, or update team members and modify their roles and permissions.
- Connections — Any payment account you add here becomes available for all team members to use when creating assets.
- Security — Set login requirements for viewing submissions, uploaded files, and RSS feeds.
- Team Activity Log — Track your team’s activities and filter them by date, member, or action.
- Email Logs — Monitor all outgoing emails from your team, including delivery status, source, and event details.
- Integration Logs — Track your team’s integration activities, including connection status, source assets, and related events.
- Team Visibility — Control whether your team appears in the Teams Directory and set the default member role.
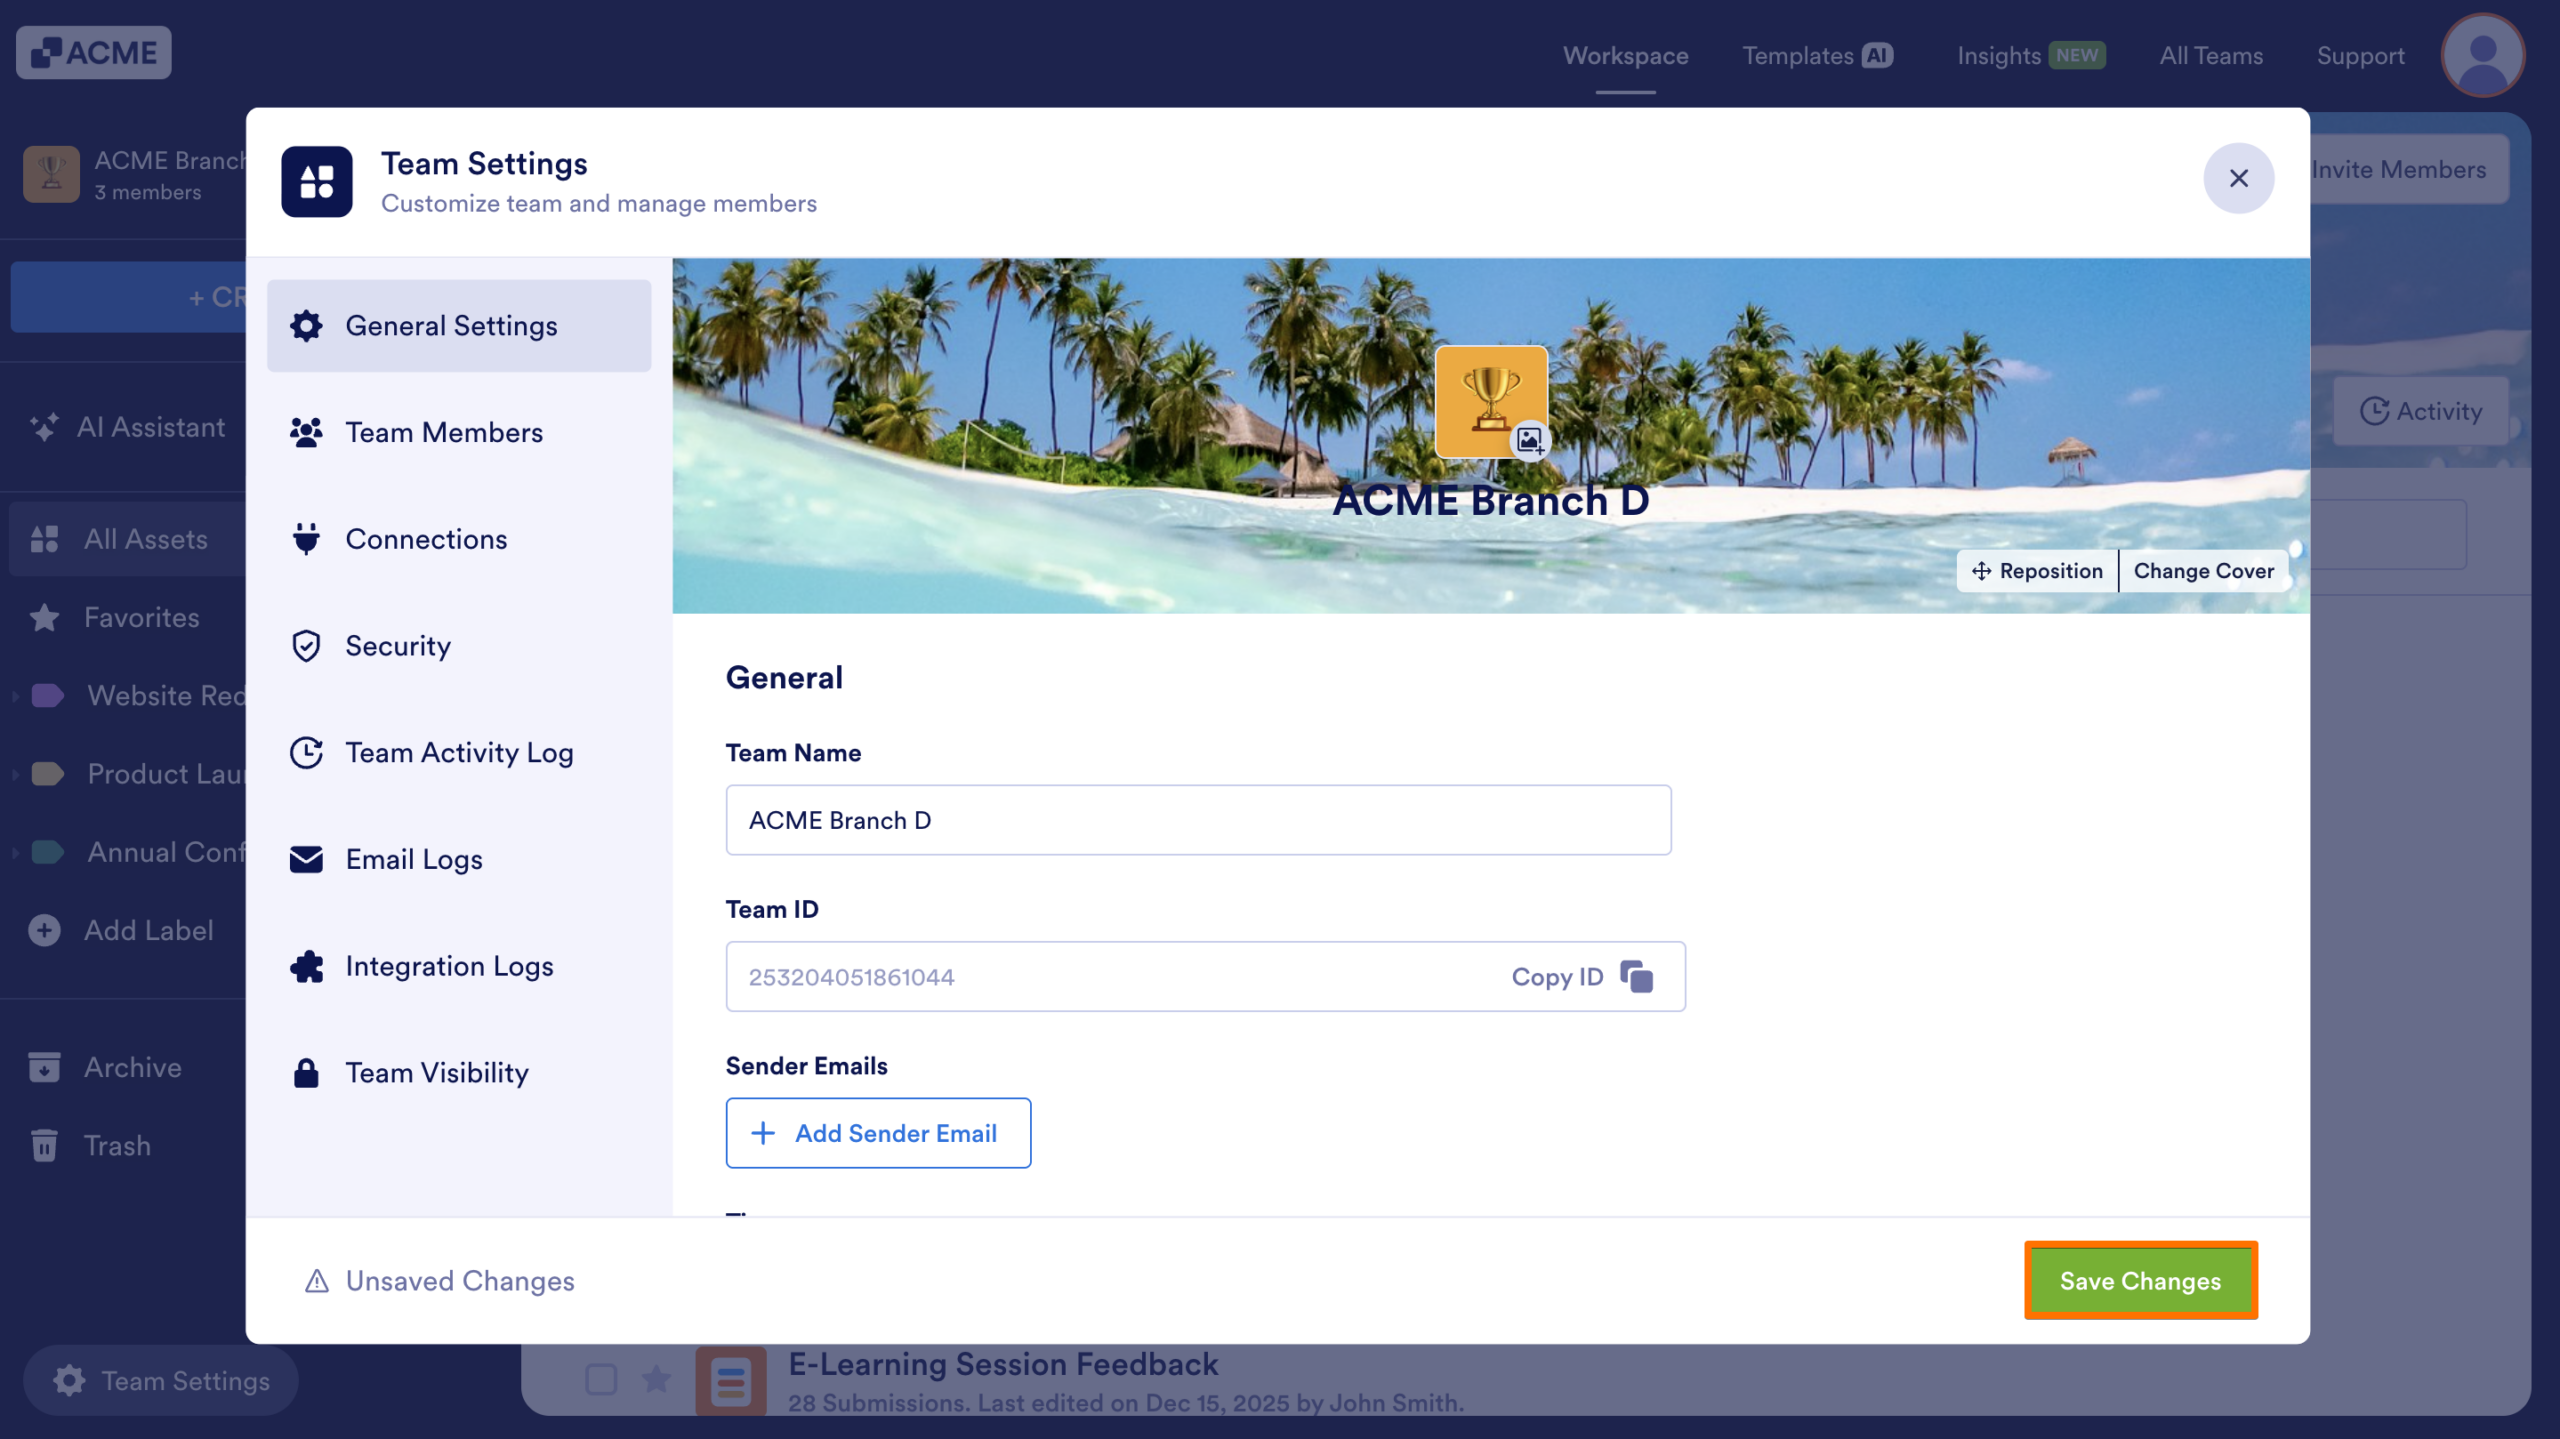
- After making any changes within a tab, be sure to save your updates by clicking on Save Changes in bottom right.

Send Comment: