API keys allow you to authenticate your data and establish secure connections between your forms and external services or custom applications. They act as authentication tokens, granting authorized access to specific features and data within your organization’s account.
Creating an API Key
Creating an API key is a straightforward process. You’ll just need to follow these simple steps:
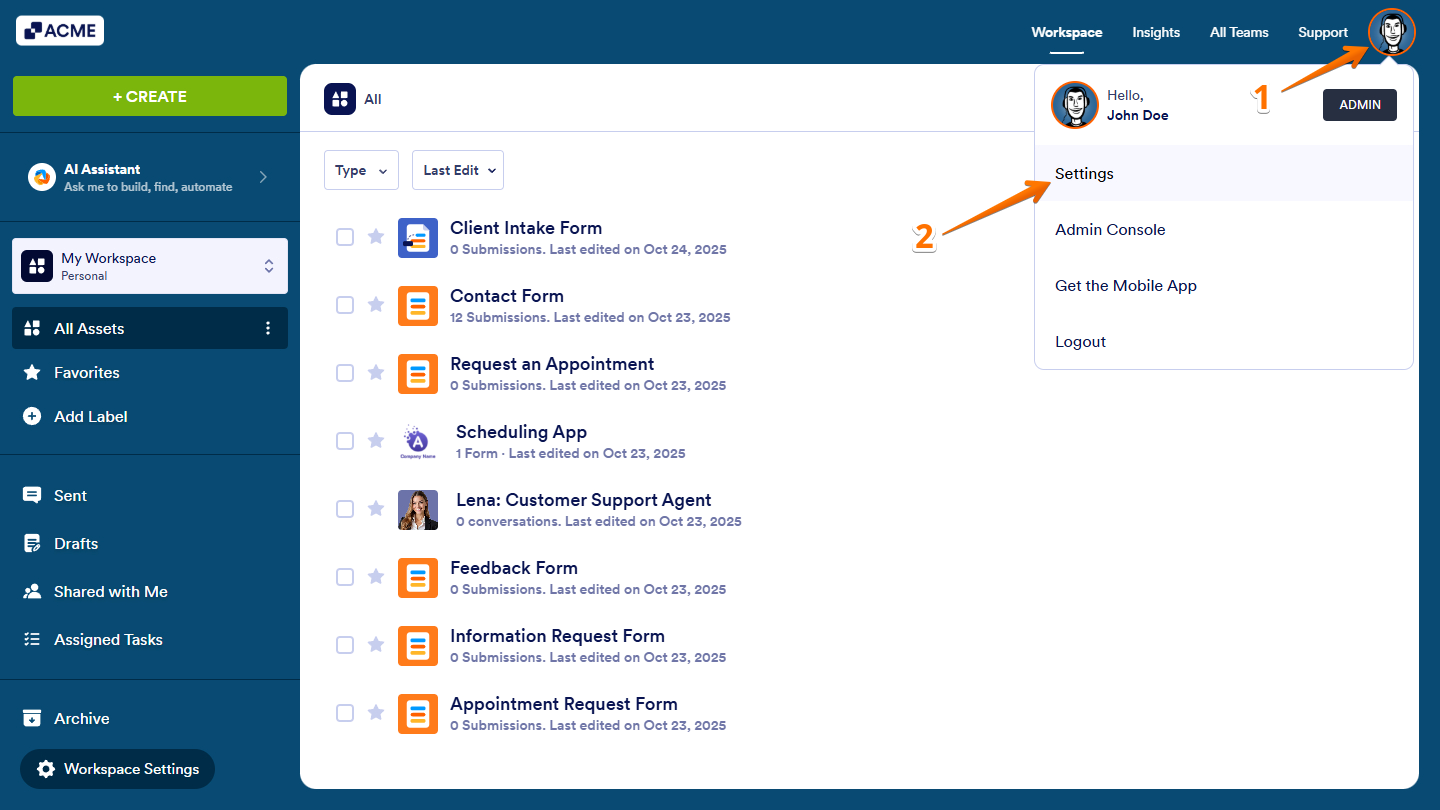
- On your Workspace page, click on your Avatar/Profile picture in the top-right corner of the screen.
- Then, in the Dropdown menu that comes up, click on Settings.
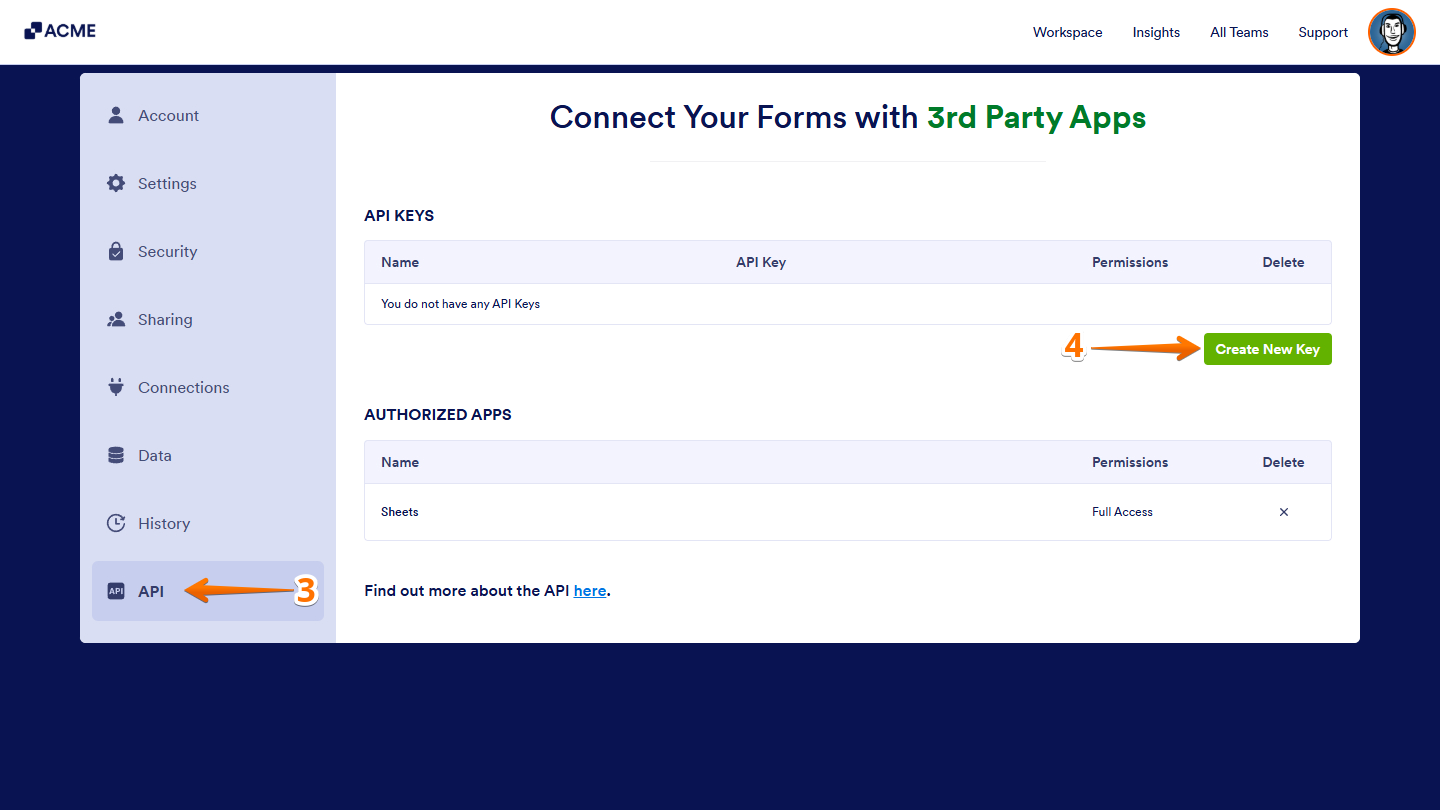
- Next, in the menu on the left side of the Account Settings page, click on API.
- Now, under the API Keys section, click on Create New Key.
Managing Created API Keys
After creating your API keys, each key is assigned a default label and granted read-only access by default. You can manage these keys by updating their labels, adjusting permission levels, or revoking access as needed.
Here are the things you can manage:
- Name — Click the New API Key text to rename your key.
- Permissions — Keep it set to Read Only to allow view-only access, or choose Full Access to enable adding, editing, and deleting data.
- Delete — Click the X icon to remove the API key.
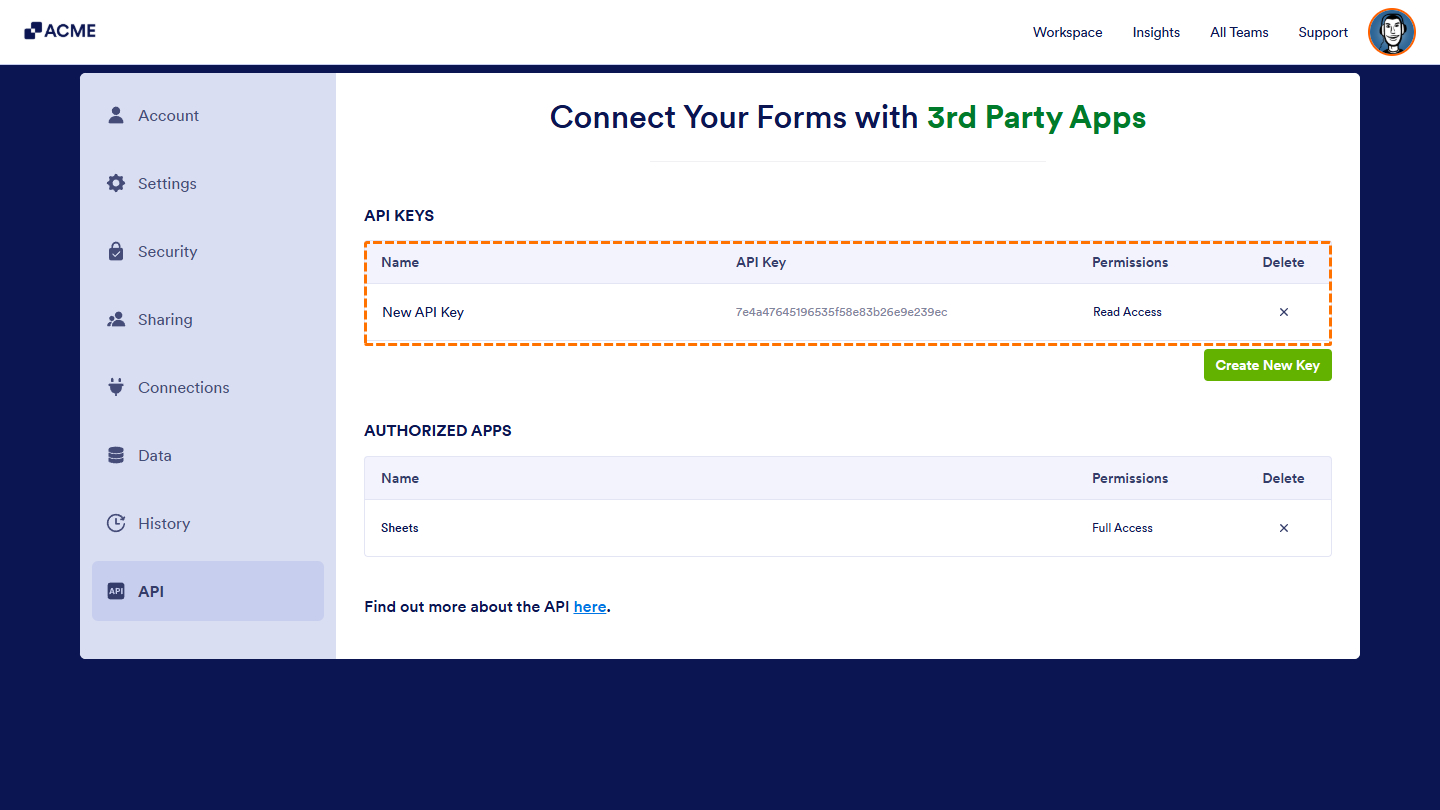
That’s it! You’ve successfully created and managed your API keys, giving you secure control over how your organization’s data is accessed and integrated.

Send Comment: