Boards allow you to create a new board directly from an existing form in your account, making it easier to manage submissions as tasks. When setting up the board, you’ll map form fields to task fields so each task is automatically filled with the right details. This helps you keep everything organized and easier to track. You can also choose specific form fields to display on each task card, so key information is visible at a glance—no need to open the full task to see what matters most.
Starting from Your Workspace Page
You can create a board from an existing form in your account in a few easy steps. Here’s how to do it:
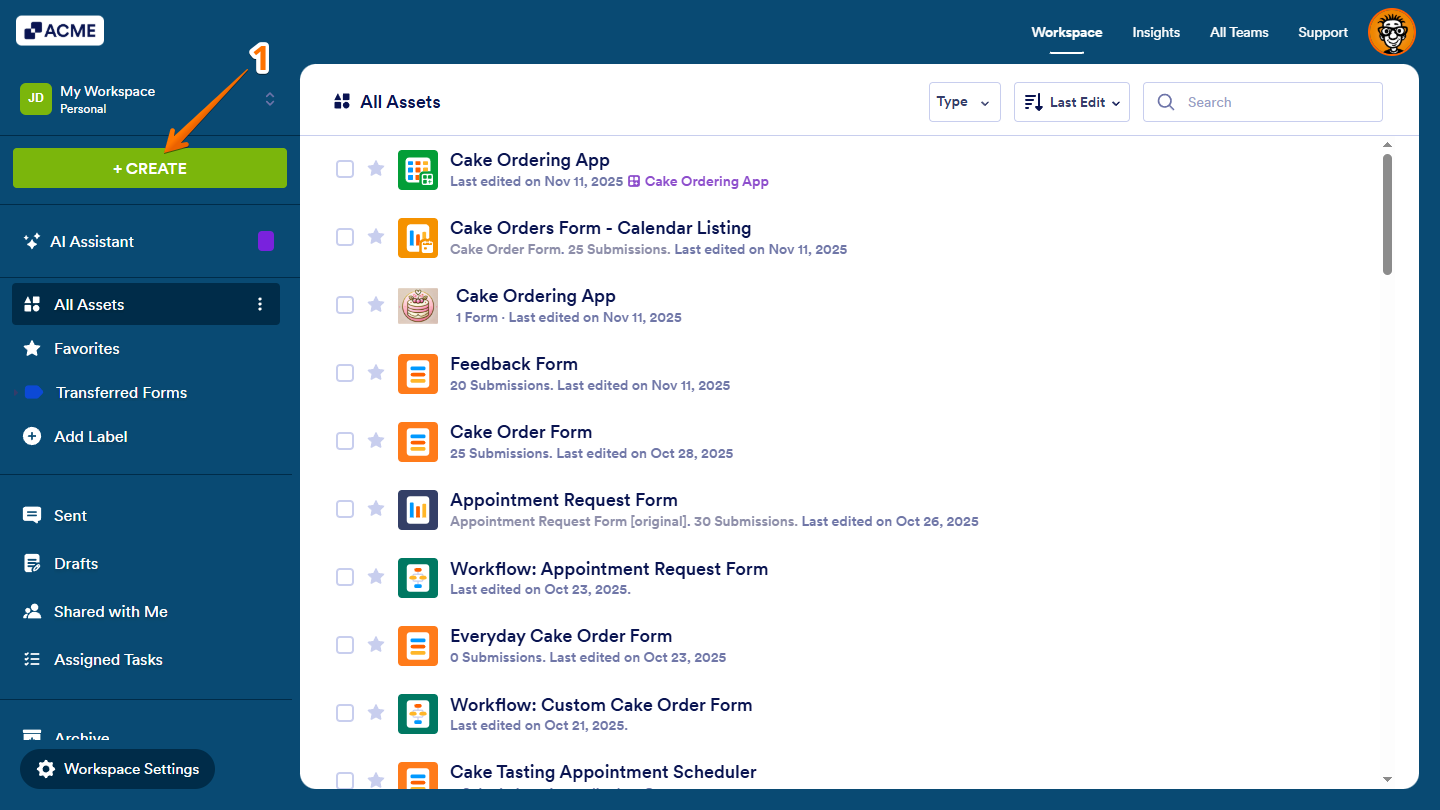
- In the menu on the left side of the Workspace page, click on Create.
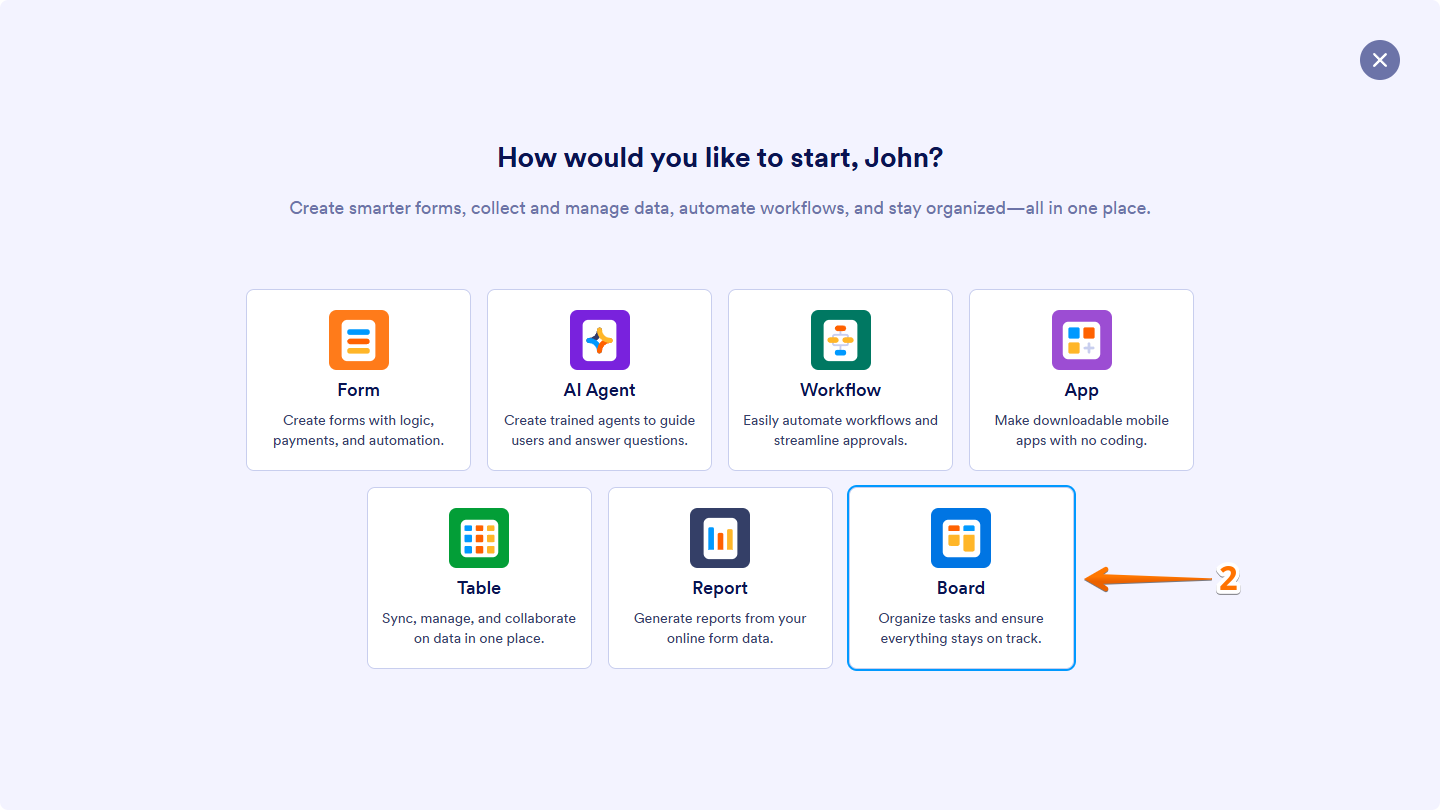
- In the window that opens up, click on Board.
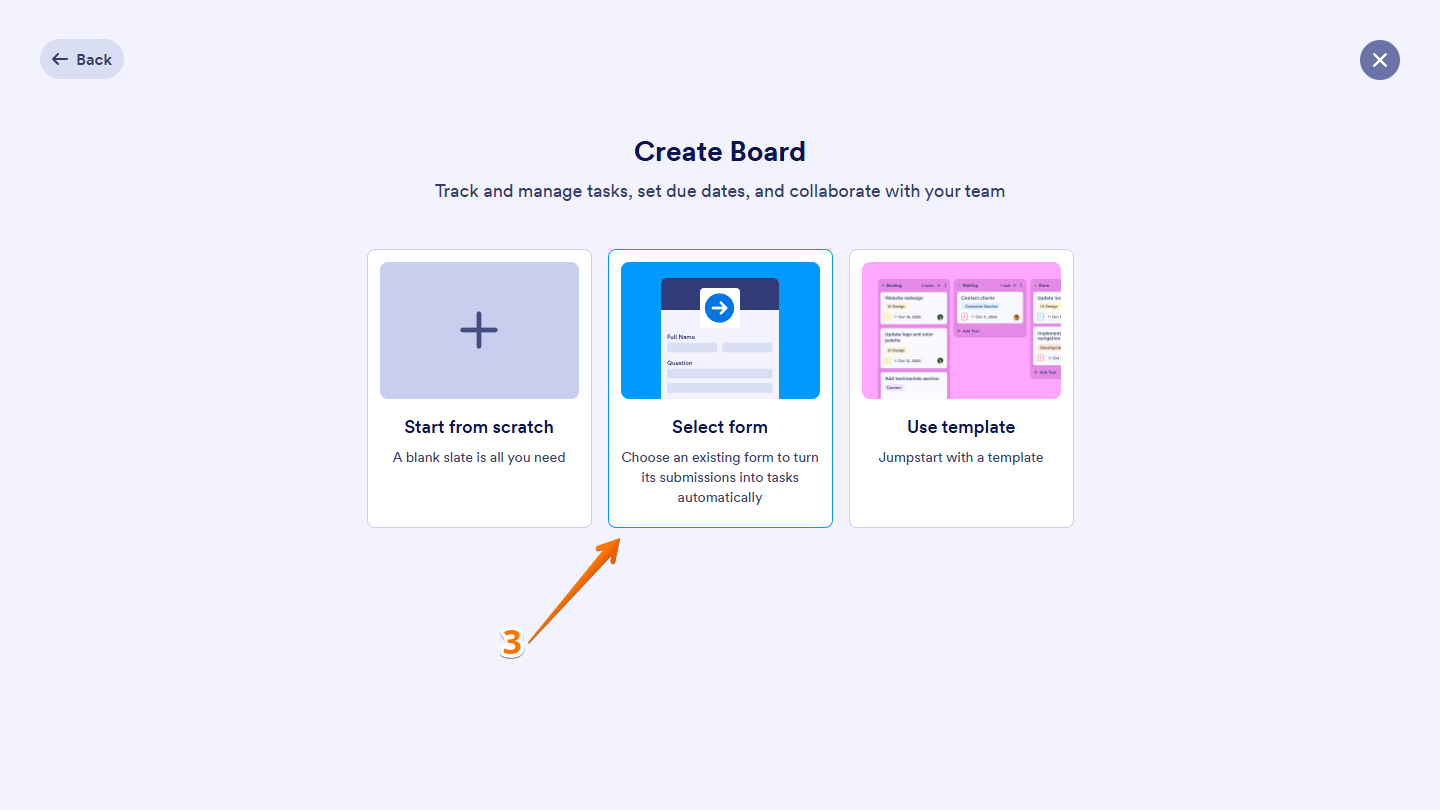
- Now, click on Select Form.
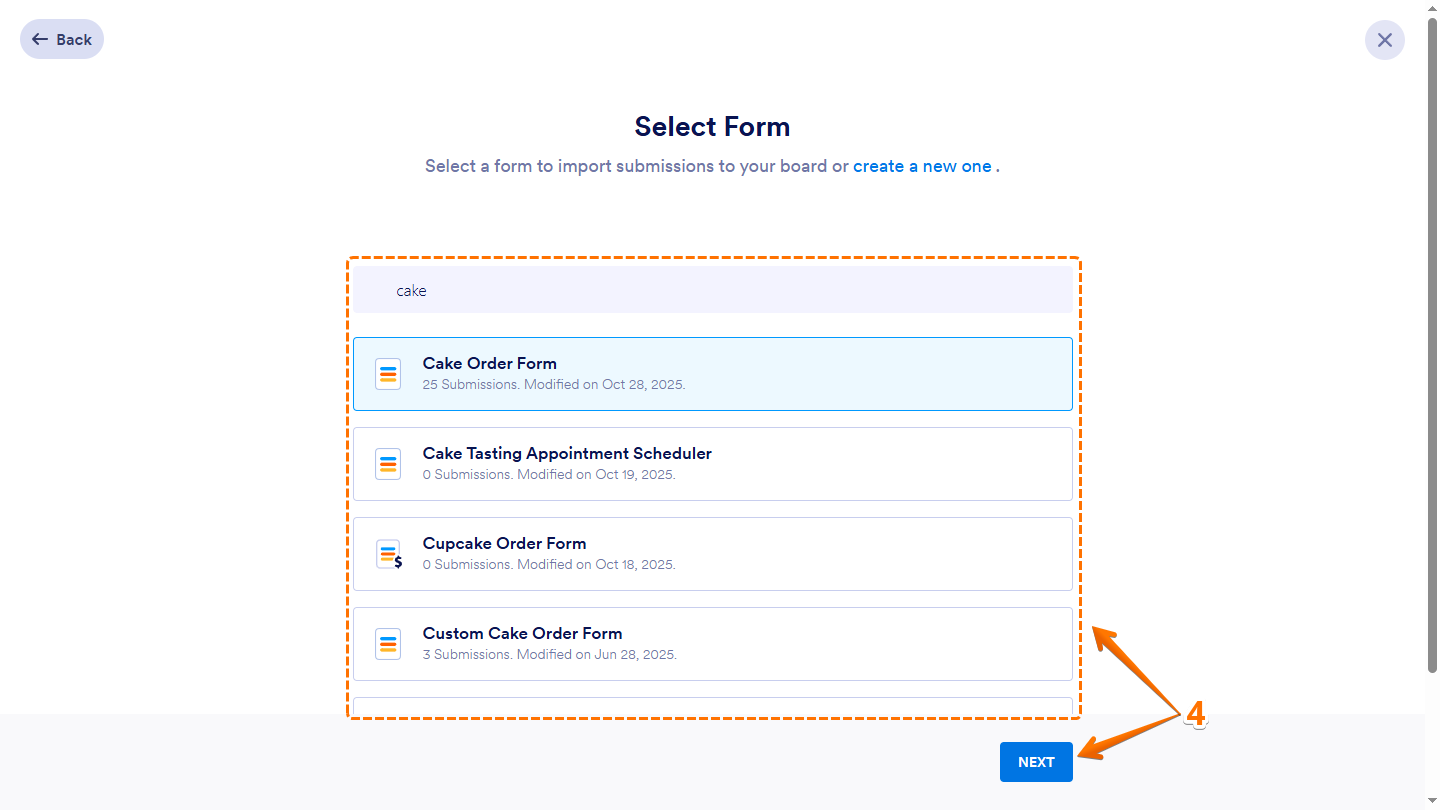
- Next, in the Select Form window that opens, select the form you want to create your board from, and then click on Next at the bottom. Or, use the Search bar at the top of the form list to find a specific one easily.
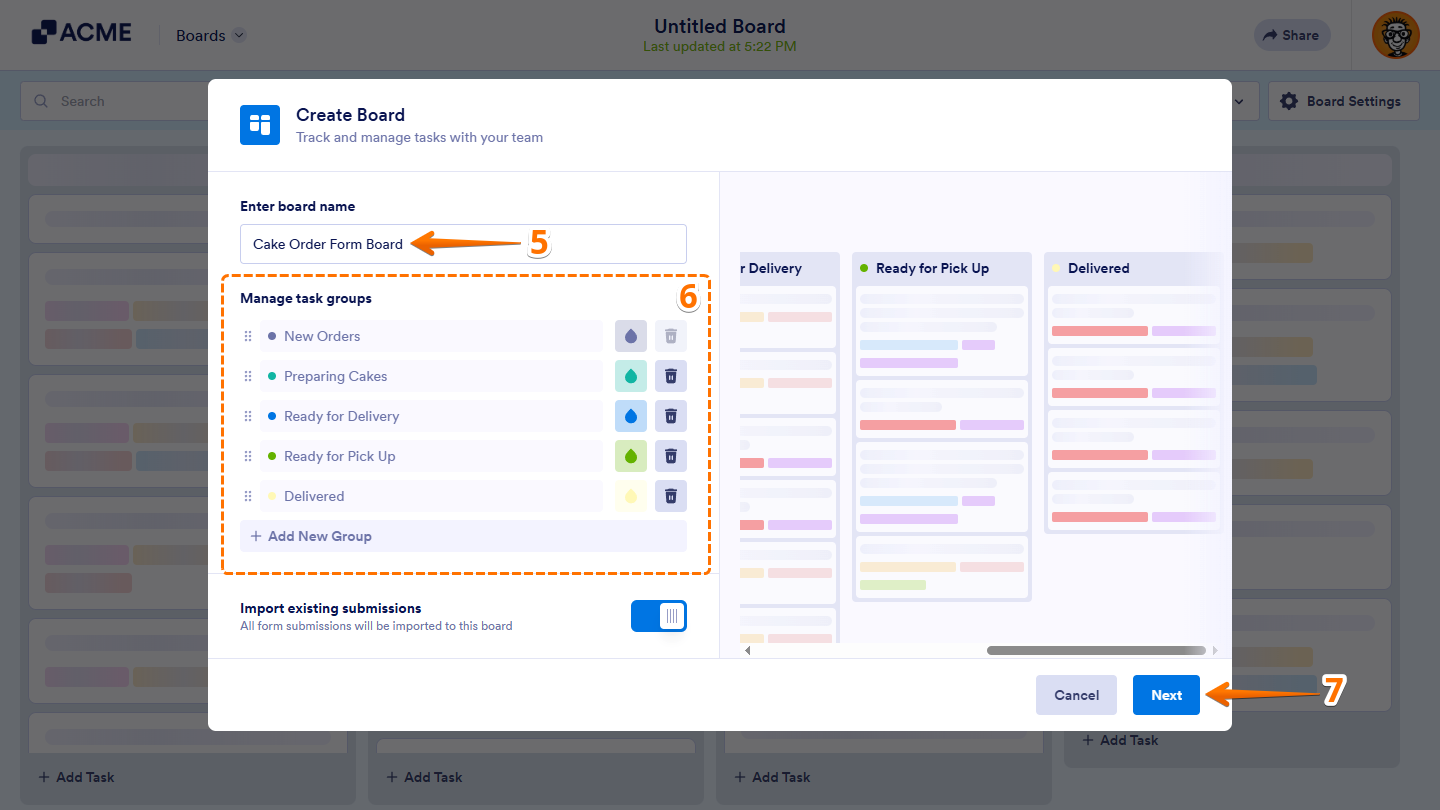
- In the Create Board window on the Boards page, enter a Board Name.
- Now, under the Manage Task Groups section, select from the following actions to organize how the groups on your new board are set up:
- Arranging the Group Order — Click on and hold the Six Dots icon on the left side of a group to grab it, and then move it to where you want to drop it.
- Updating the Group Name — Double-click on a group name to start updating it. Click anywhere outside it to save your changes.
- Changing the Group Color — Click on the Ink Drop icon on the right side of a group, and then select from the predefined colors in the menu.
- Adding a Group — Click on Add New Group at the bottom of the list to create a new group for your board. After entering a name, click anywhere outside it to save it.
- Deleting a Group — Click on the Trash Can icon on the right side of a group to delete it. This immediately deletes the group, and it can’t be undone.
- Next, toggle Import Existing Submissions to the Off position if you don’t want to add the submissions as tasks to your board right now, and then click on Next.
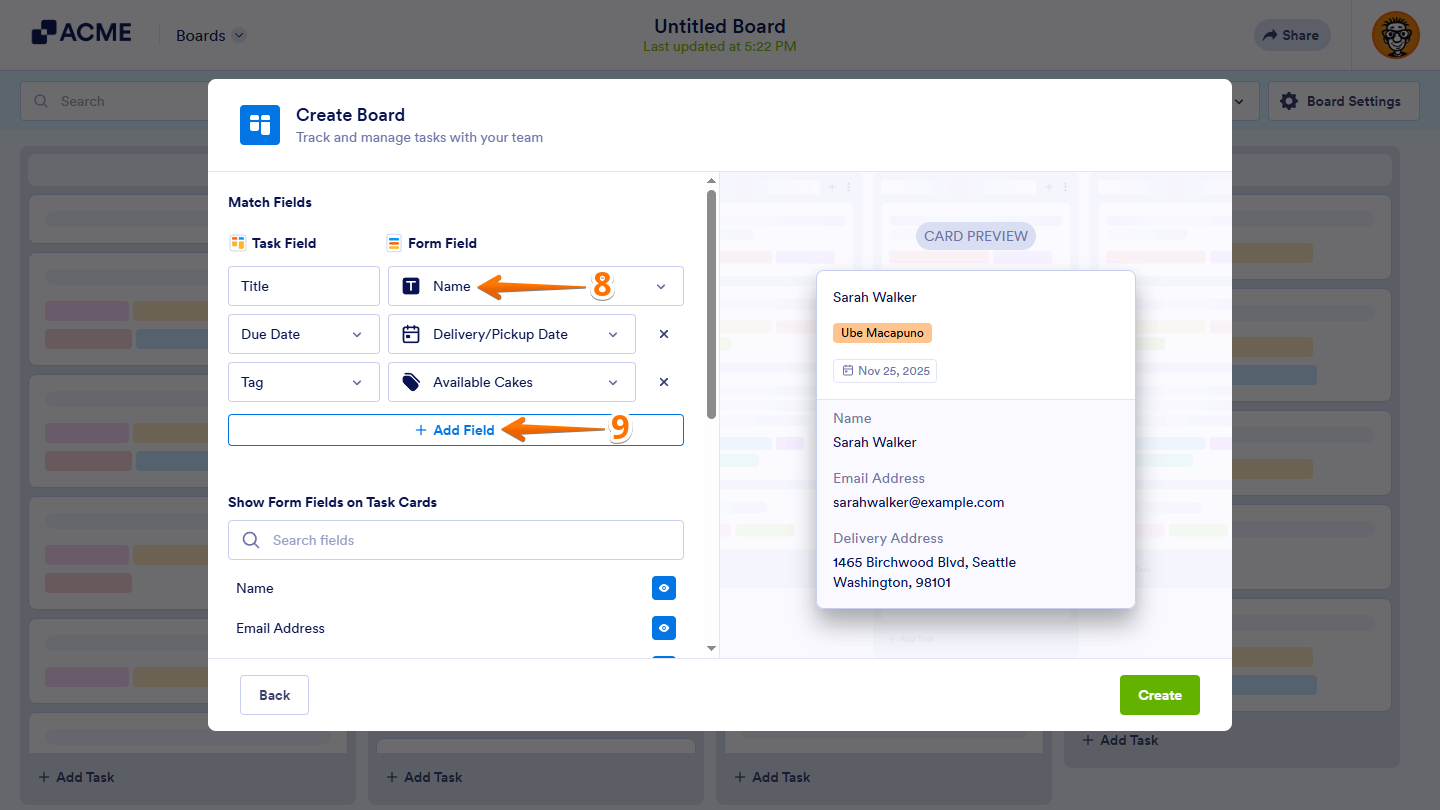
- Then, in the Match Fields section, click on the Dropdown menu under the Form Field column if you want to select a different form field that matches the default Title field under the Task Field column.
- Next, click on +Add Field to set up the next task field.
The task fields you added will automatically display the value of the form field you match them to in a task. You’ll need to have at least the Title field matched to a form field to continue. Here are the different form field types each task field supports:
- Title — You can select a Full Name, Dropdown, Single Choice, Multiple Choice, Short Text, or Long Text field to match this task field.
- Due Date — You can select a Date Picker or Appointment field to match this task field.
- Tags — You can select a Single Choice, Multiple Choice, or Dropdown field to match this task field.
- Description — You can select a Full Name, Dropdown, Single Choice, Multiple Choice, Short Text, or Long Text field to match this task field.
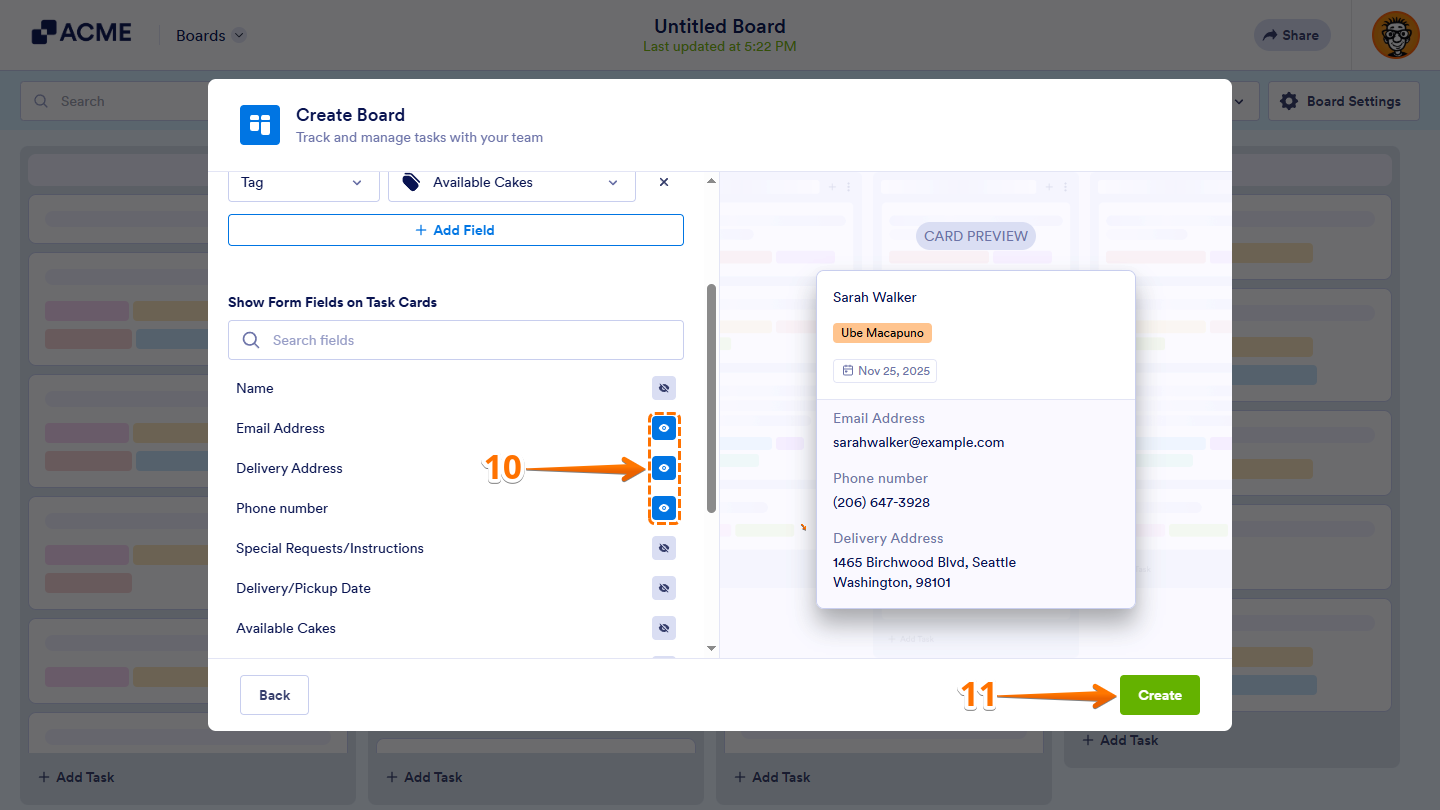
- Next, in the Show Form Fields on Task Card section, click on the Eye icon on the right side of a form field to display its real-time value on the task cards. Or, use the Search bar at the top of the Form Fields List menu to find one easily. You can display up to five (5) form fields on your task cards.
- Once you’re done, click on Create in the bottom-right corner of the window.
That’s it! You’ve successfully created a board from an existing form in your account.
As an alternative, you can create a board for an existing form and set it up in a new browser tab. Here’s how to do it:
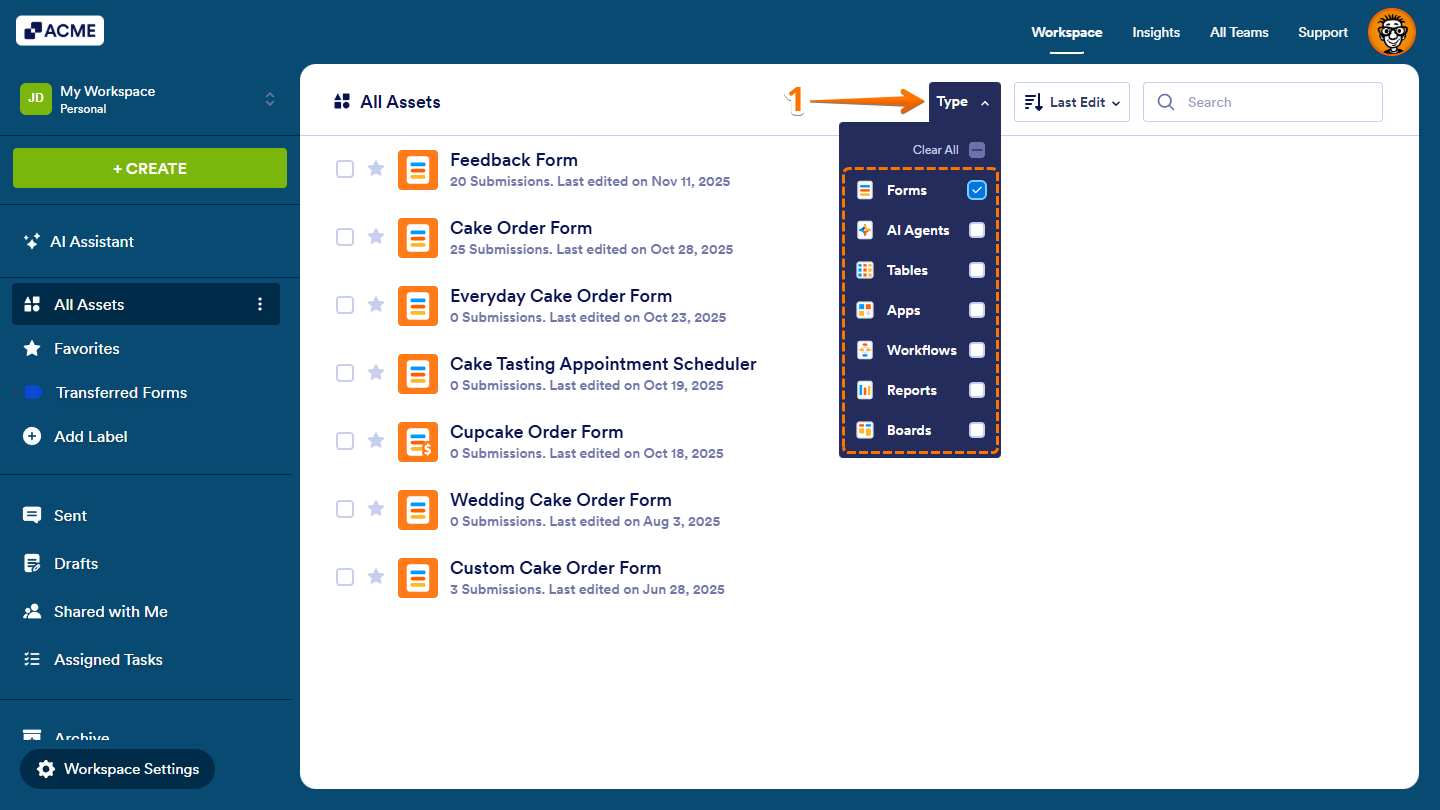
- On your Workspace page, click on Type at the top of the page, and in the Dropdown menu that opens, uncheck the boxes next to all the assets except Forms, so only they’ll be shown on the page.
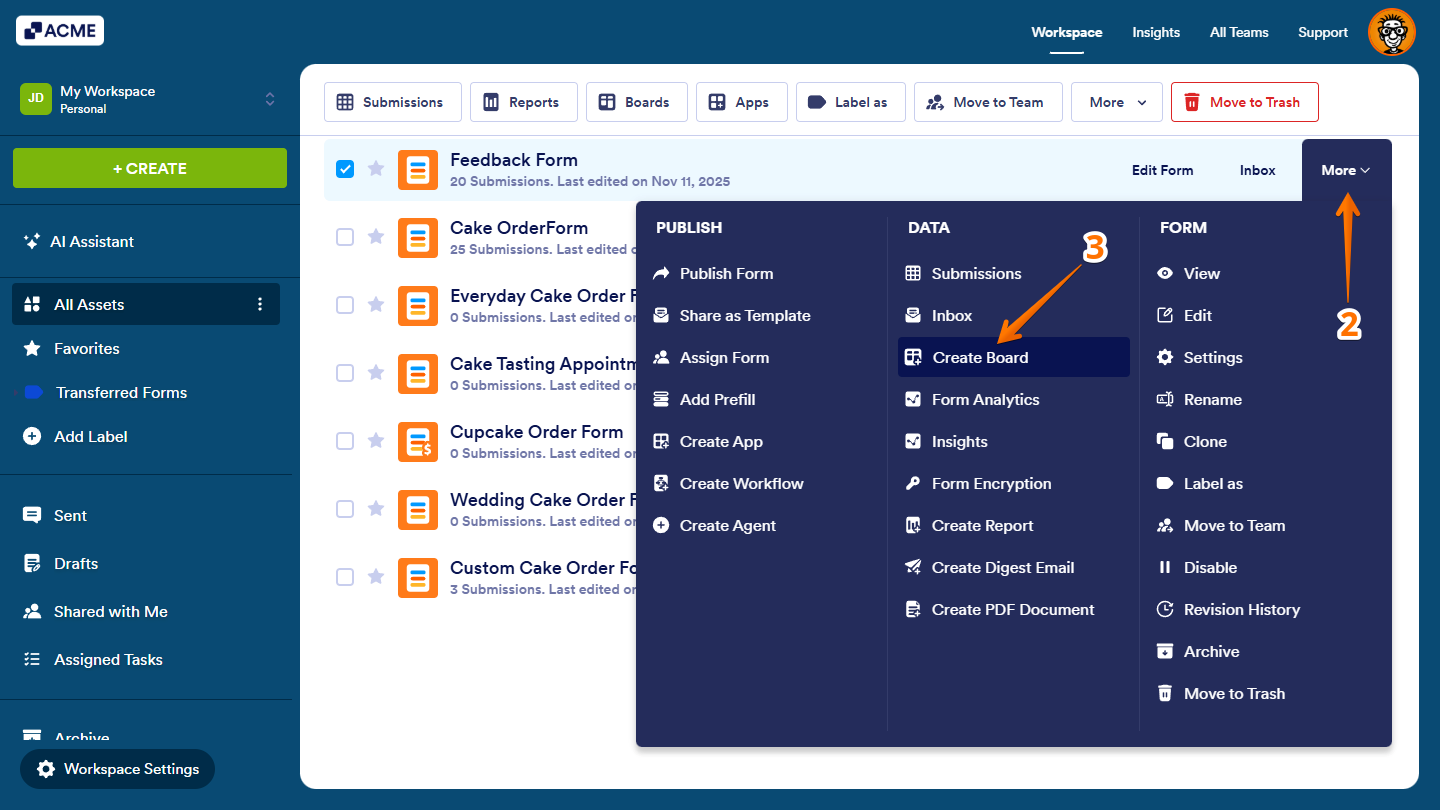
- Now, hover your mouse over the form you’d like to create a task for on a new board, and click on More on the right side of the page.
- Then, in the Dropdown menu that opens up, under the Form column, click on Create Board.
That’s it. You can follow the same steps as above to configure your board’s initial setup in the Create Board window on the Boards page.
Starting from Another Asset Page
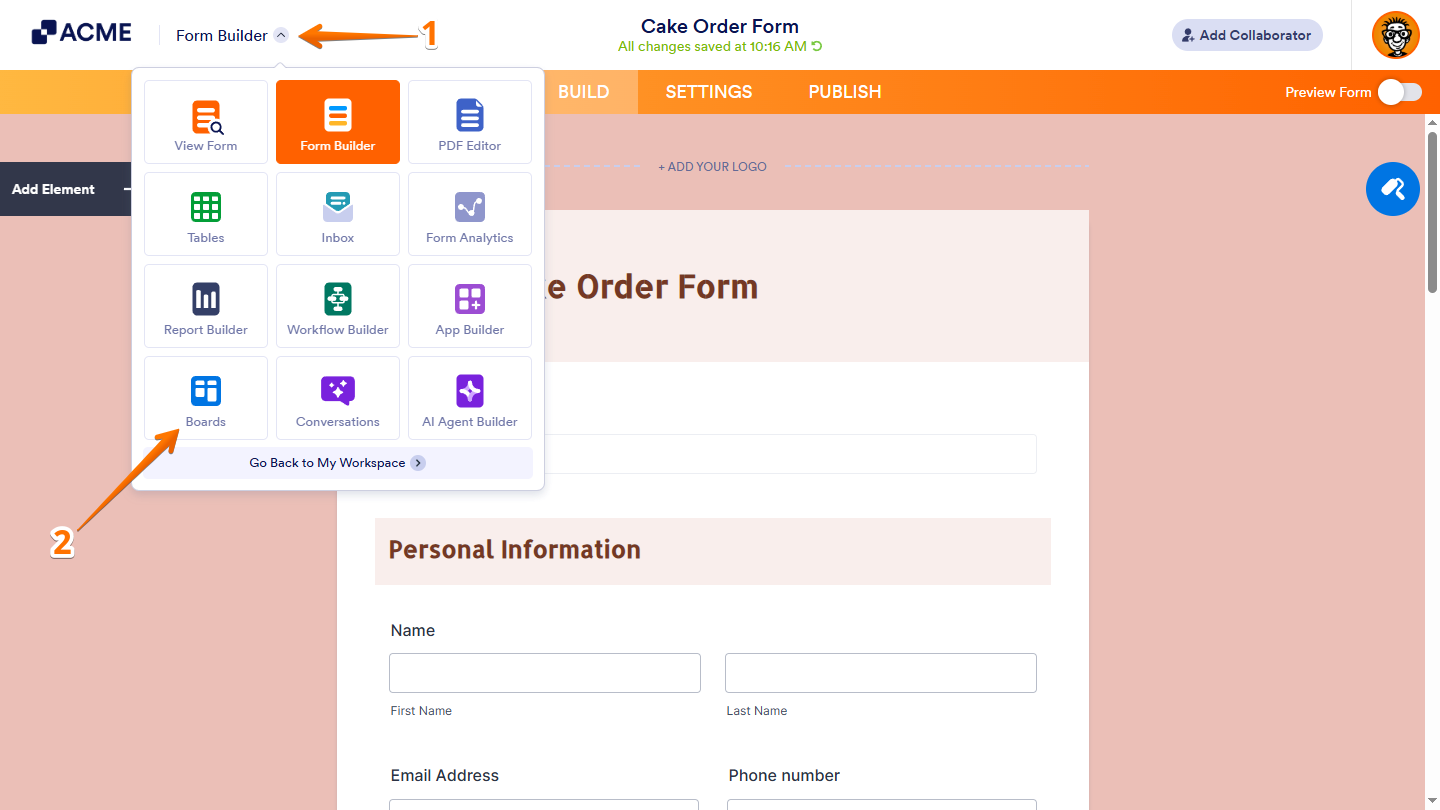
Another way to create a board is from Form Builder or any page where an asset or page linked to your form is open, such as App Builder, Inbox, Tables, PDF Editor, or Report Builder. Here’s how:
- Open the App Picker menu at the top of the page next to your Organization logo.
- In the menu that comes up, click on Boards, which will automatically take you to the Boards page.
That’s it. You can follow the same steps as above to configure your board’s initial setup in the Create Board window on the Boards page.
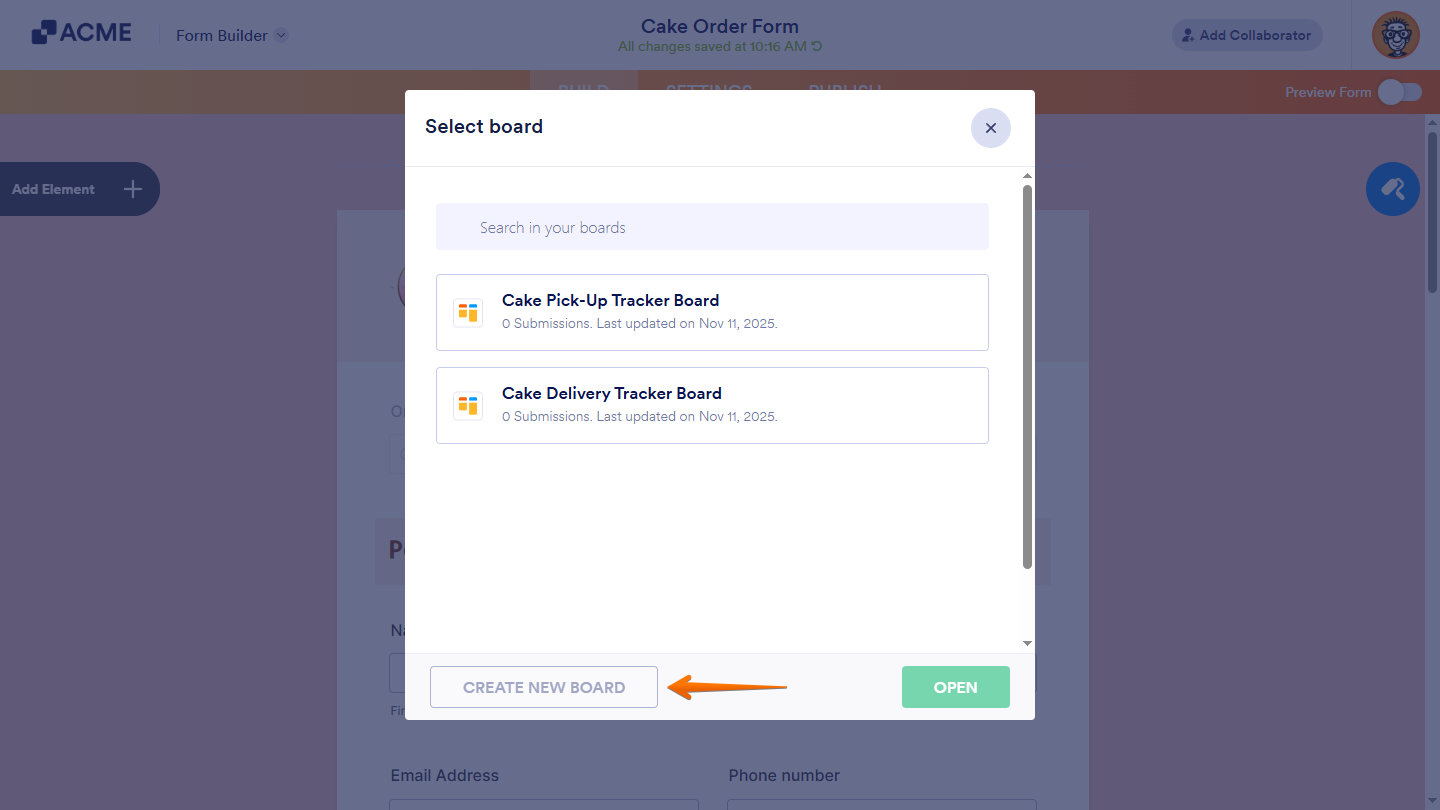
If your form is already connected to other boards, the Select Form window will open. From there, click Create New Board in the bottom-left corner of the window first.
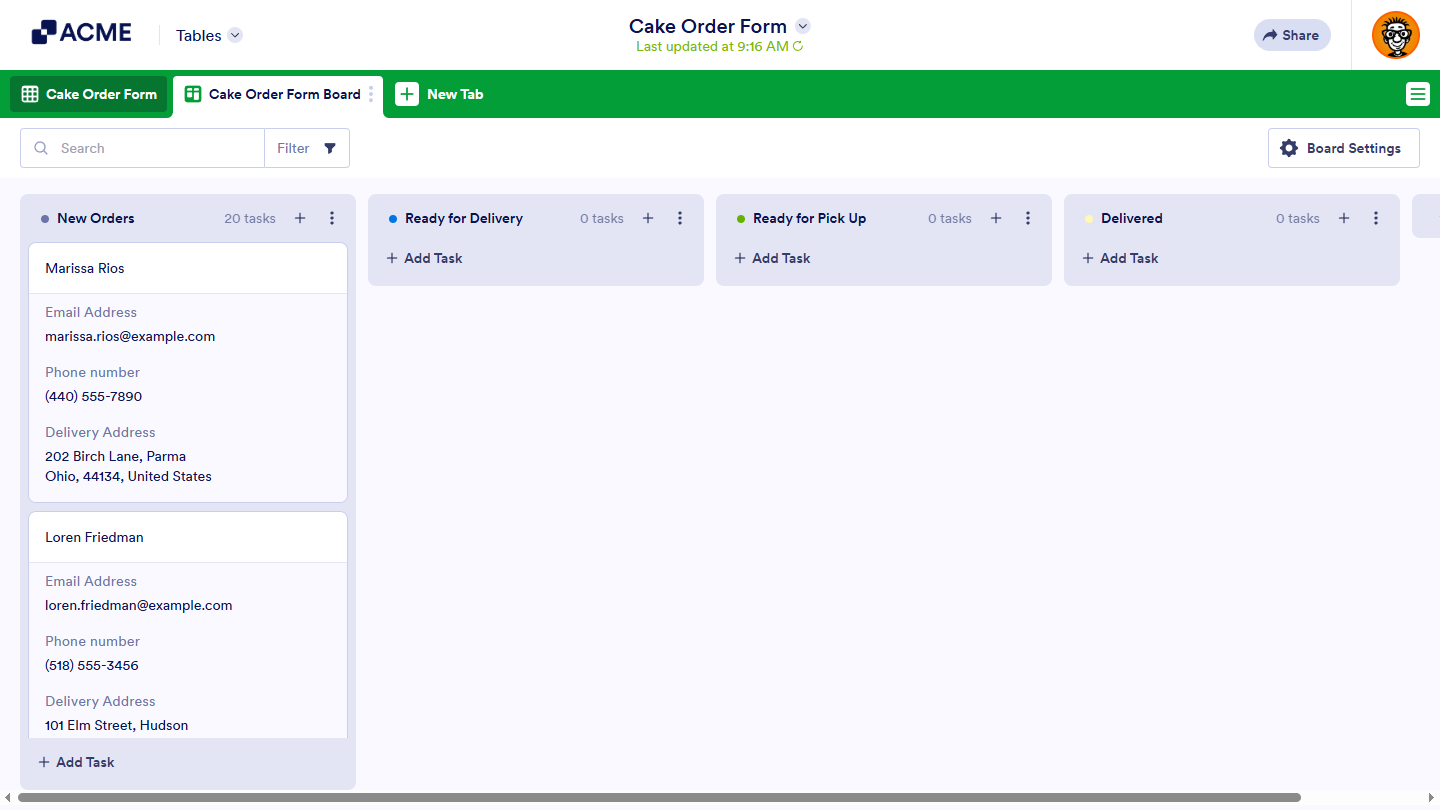
Setting Up Boards in a Tables Tab
You can also manage tasks alongside your form submissions by creating a board in Tables. This helps you track progress, update information, and keep everything organized in one place—without switching between different assets in your account.
For more details, check out our guide on Creating Boards View in Tables.
Importing Existing Form Submissions
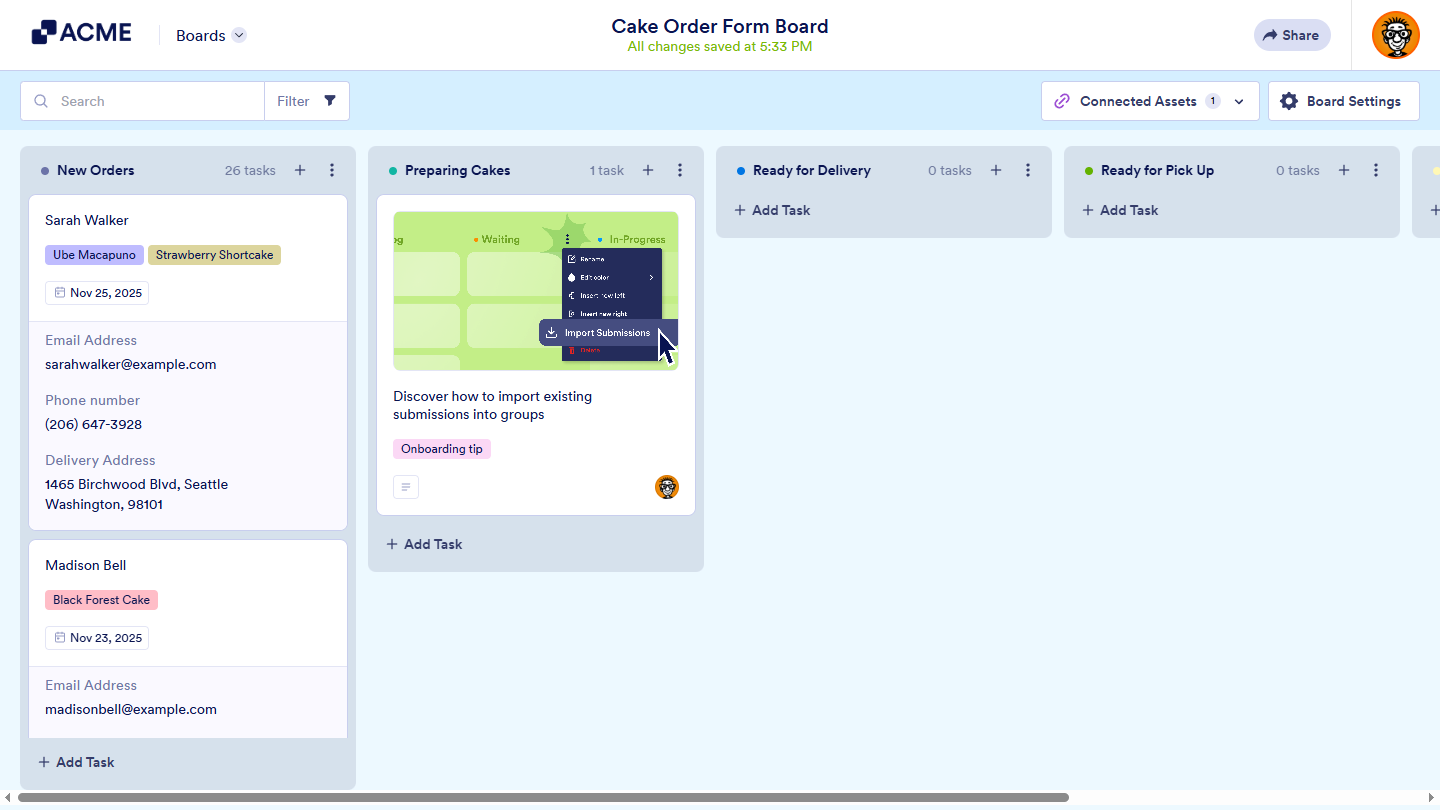
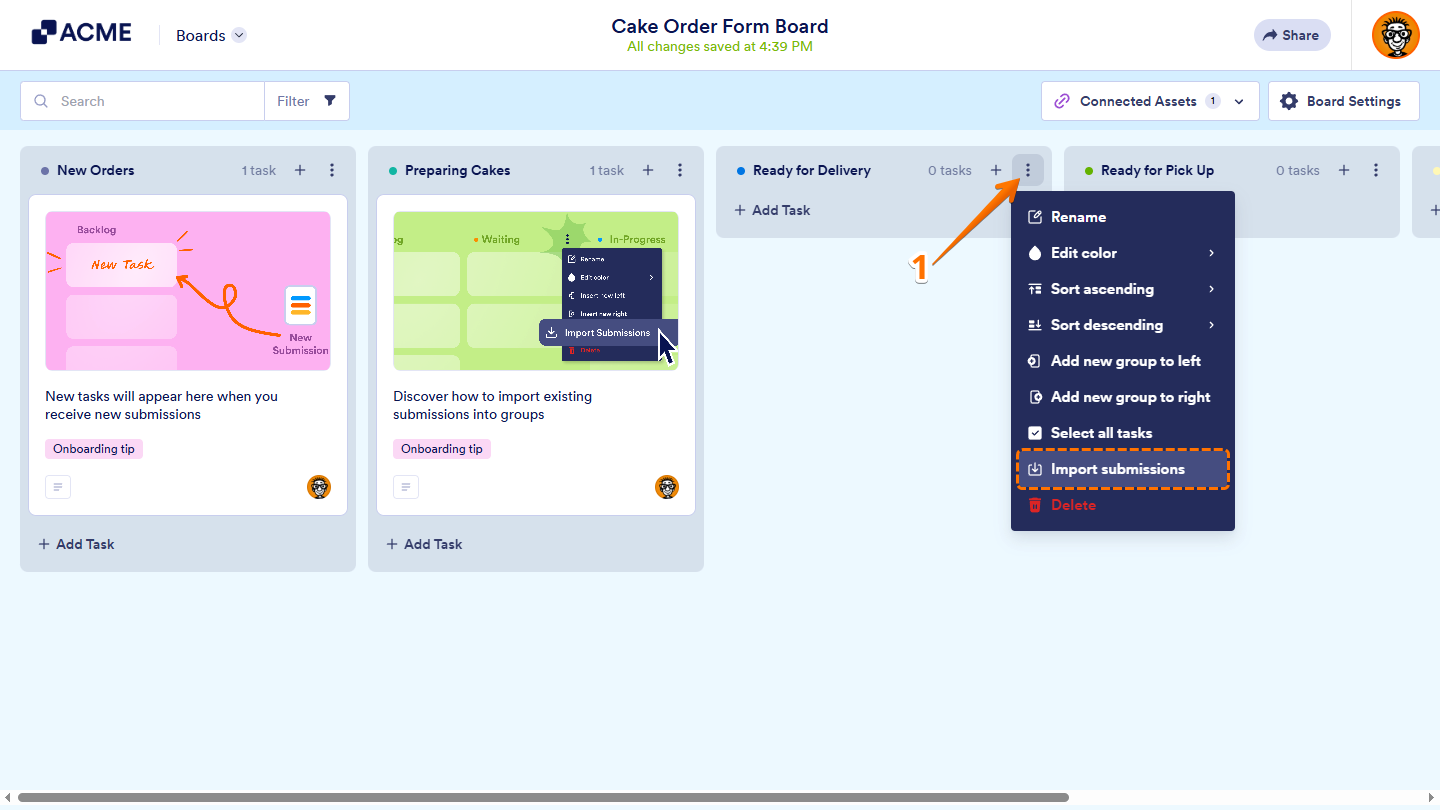
If your board is connected to a form, new tasks will be created automatically when you get submissions. But, if you didn’t import existing submissions when you created your board from an existing form and later decided to create tasks based on those earlier submissions, you can still import them into any group on your board. Here’s how to do it:
- While on your Board, click on the Three Dots icon on the top-right side of a group related to the submissions you want to import and select Import Submissions in the menu that opens up.
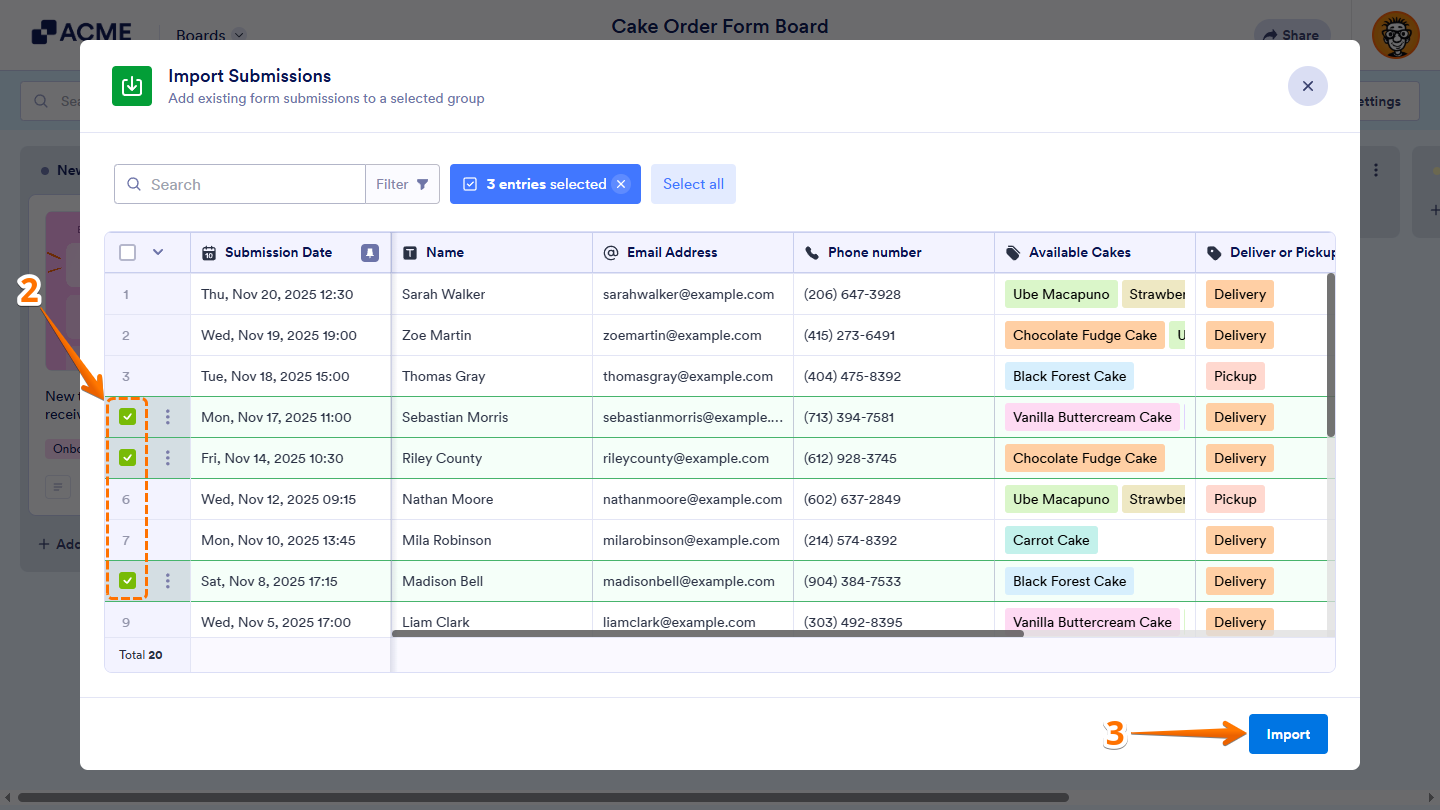
- Now, in the Import Submissions window, hover your mouse over the submissions you want to create tasks from and put checks in the boxes on the left side of them. Or, use the Search bar or the Filter button at the top to find certain submissions easily. Put a check in the box on the top-left side of the table to select all the submissions.
- Then, click on Import in the bottom-right corner of the window.
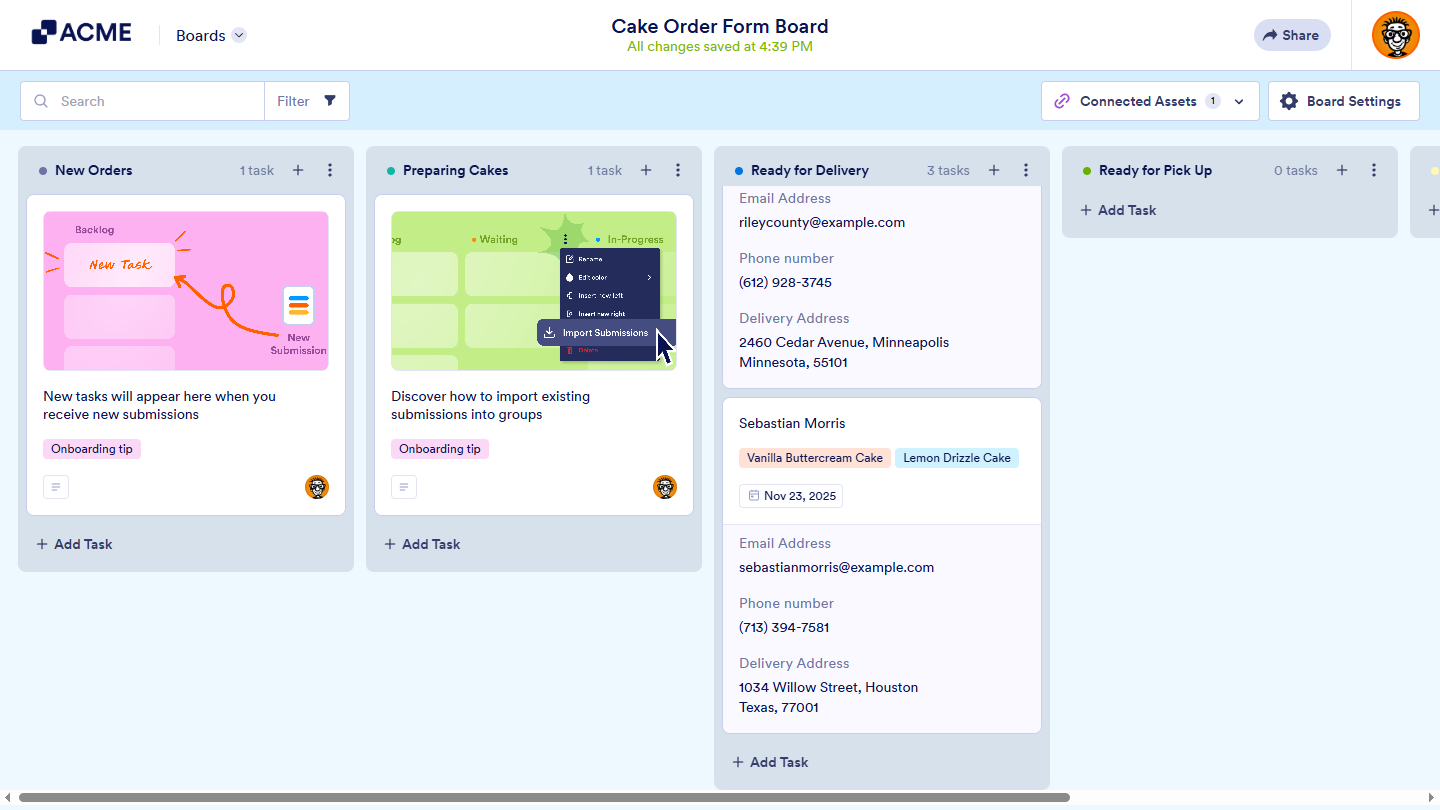
That’s it! New tasks will be created based on those submissions under the selected group. You can move the tasks at any time as the process progresses.
Notes
- Show submissions that were already added to any group on your board as tasks on the Import Submissions window by putting a check in the box next to the Show Imported Submissions option at the top of the window.
- Archived, deleted, incomplete, and pending payment submissions won’t be shown in the Import Submissions window.
- You can only connect five (5) forms on a single board and only import submissions from connected forms.
- The Import Submissions option isn’t available for task groups that were set up based on form fields on boards created in Tables.

Send Comment: