Generate professional, downloadable, and portable versions of your submission data using PDF Documents. In this guide, we’ll go over different ways you can create a PDF, either directly from a form, a table, or a workflow.
Create a PDF Document from the Form Builder
Access the PDF Editor directly while working on a form and design a custom layout to display your submission data.
From the List Picker
- In the Form Builder, click on the dropdown menu next to your logo in the upper left-hand corner of the page, also called the List Picker.
- Select PDF Editor from the menu.
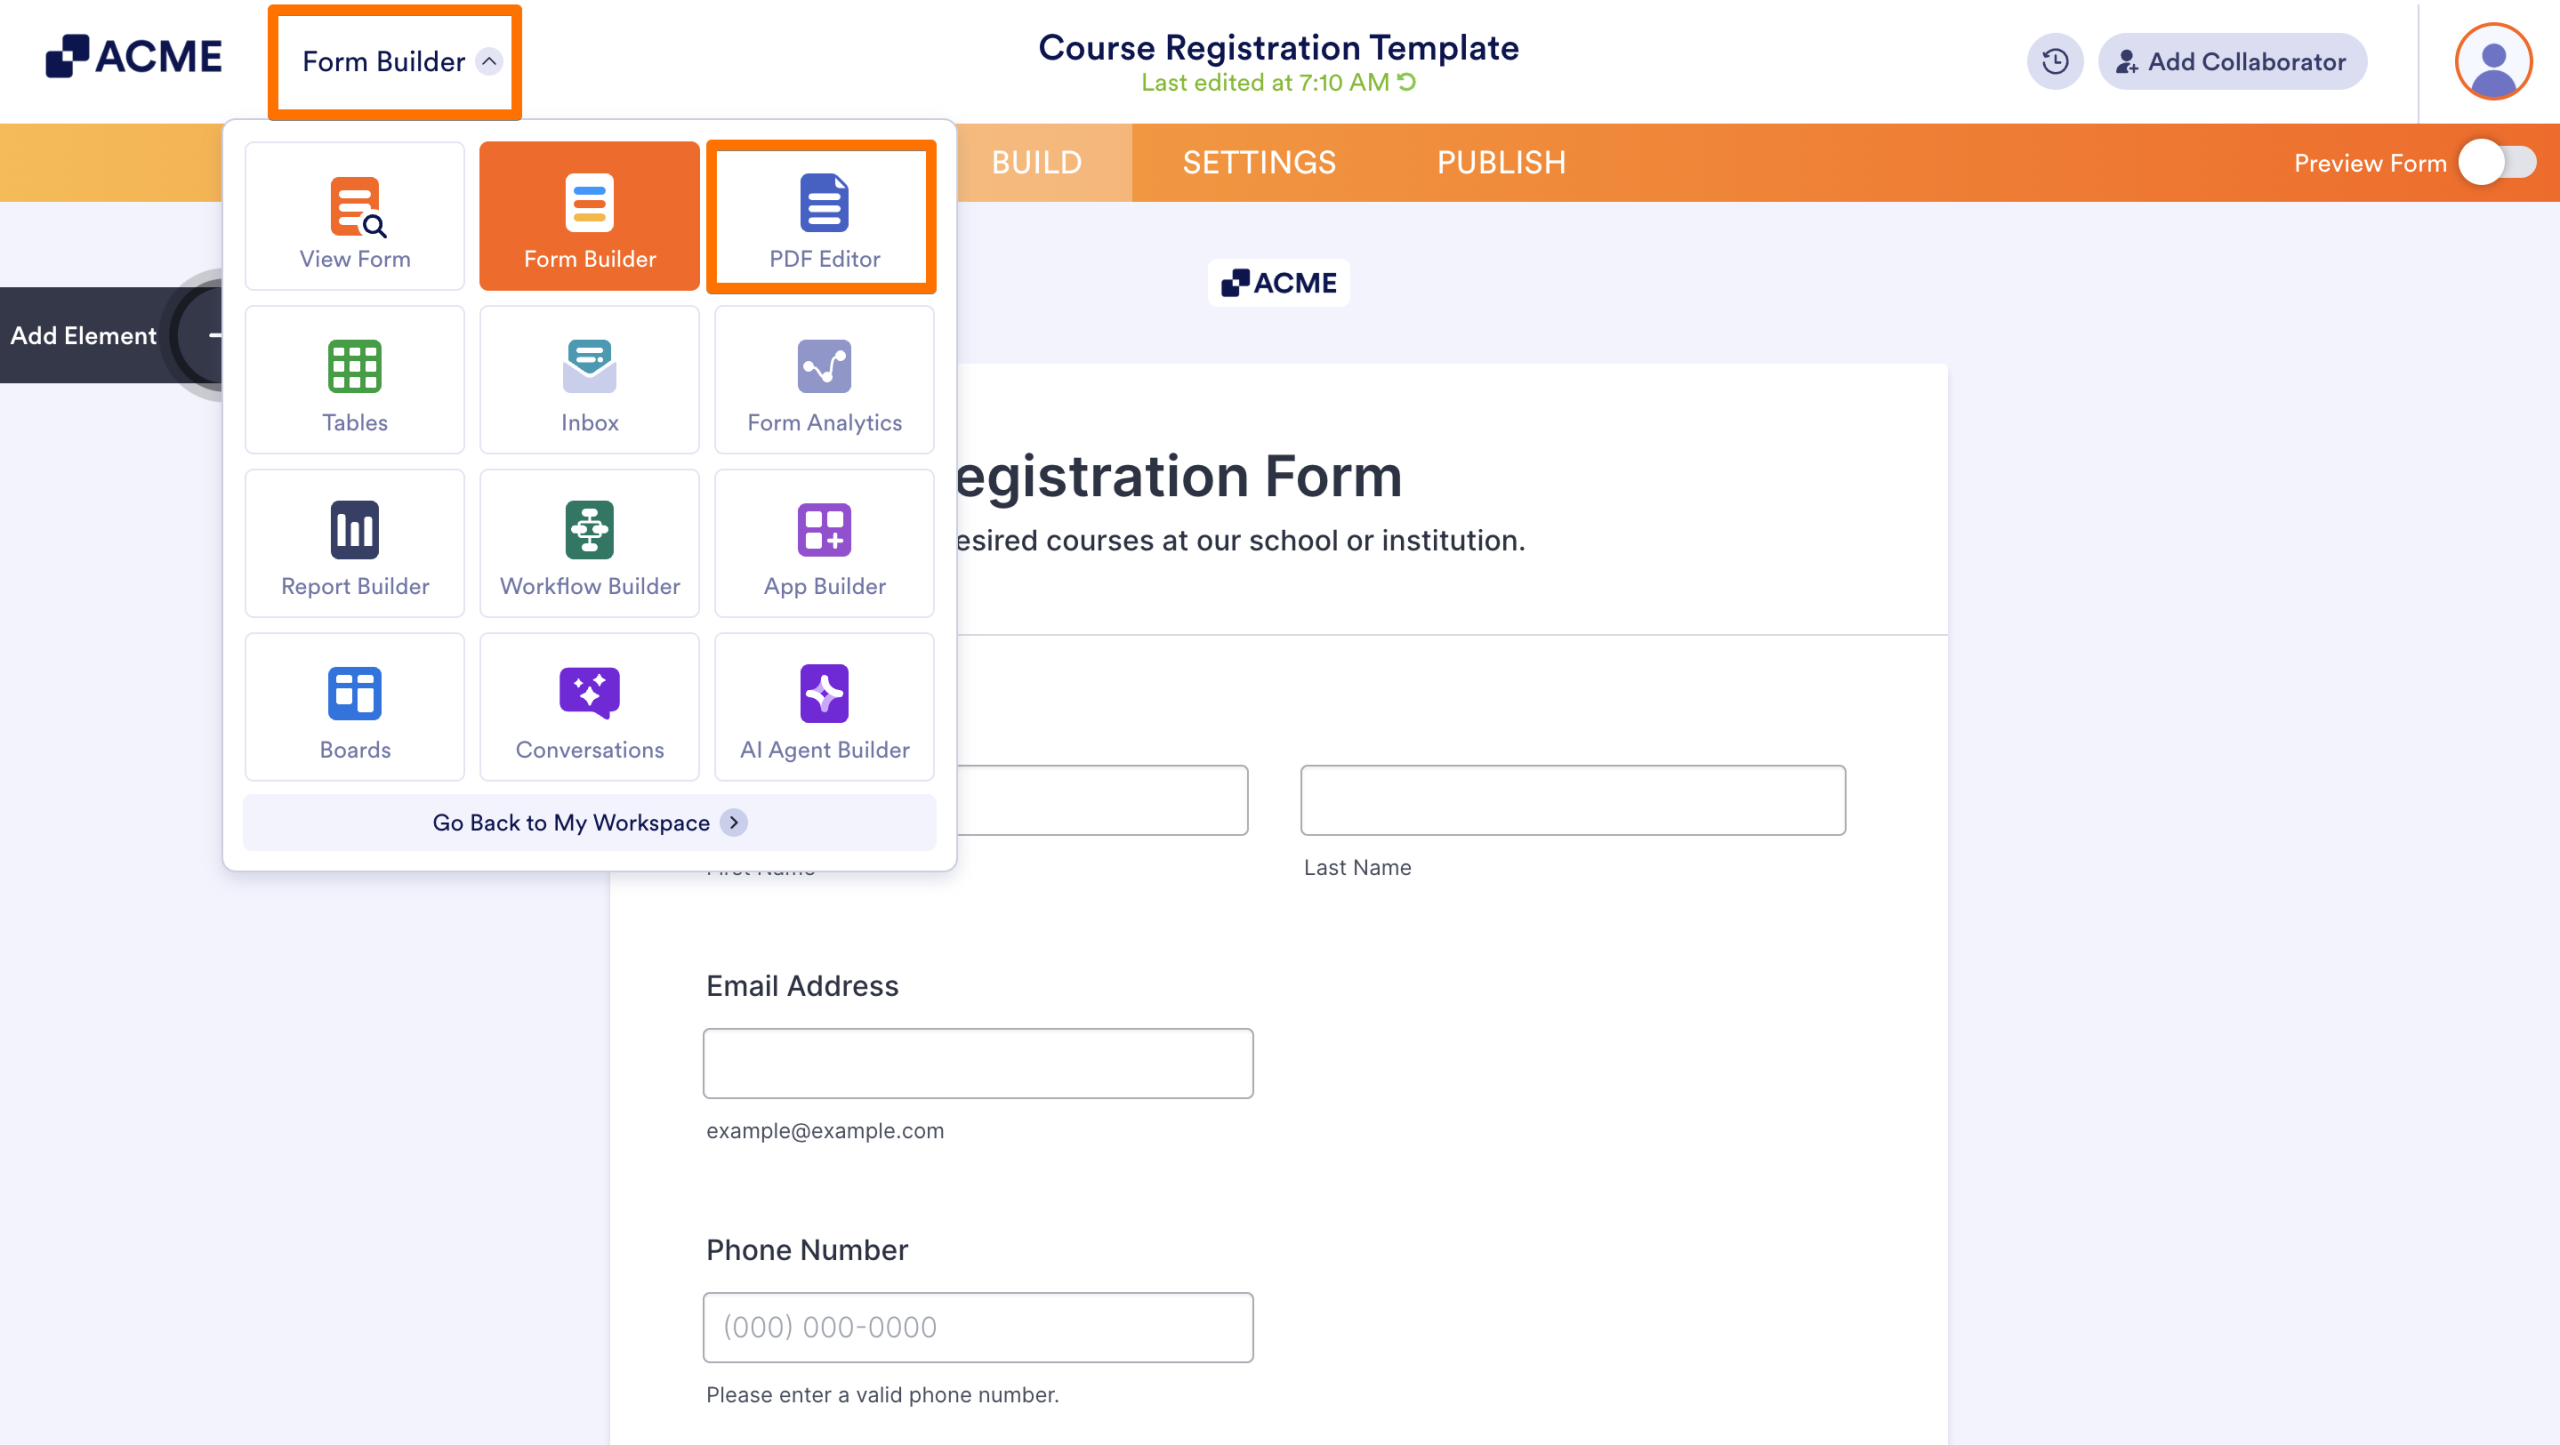
This opens the PDF Editor, where a new PDF is created based on the form fields. Here, you can edit and configure the document based on how you’d like to display submissions.
From the Publish Tab
- In the Form Builder, in the orange navigation bar at the top of the page, click on Publish.
- Select PDF from the left sidebar.
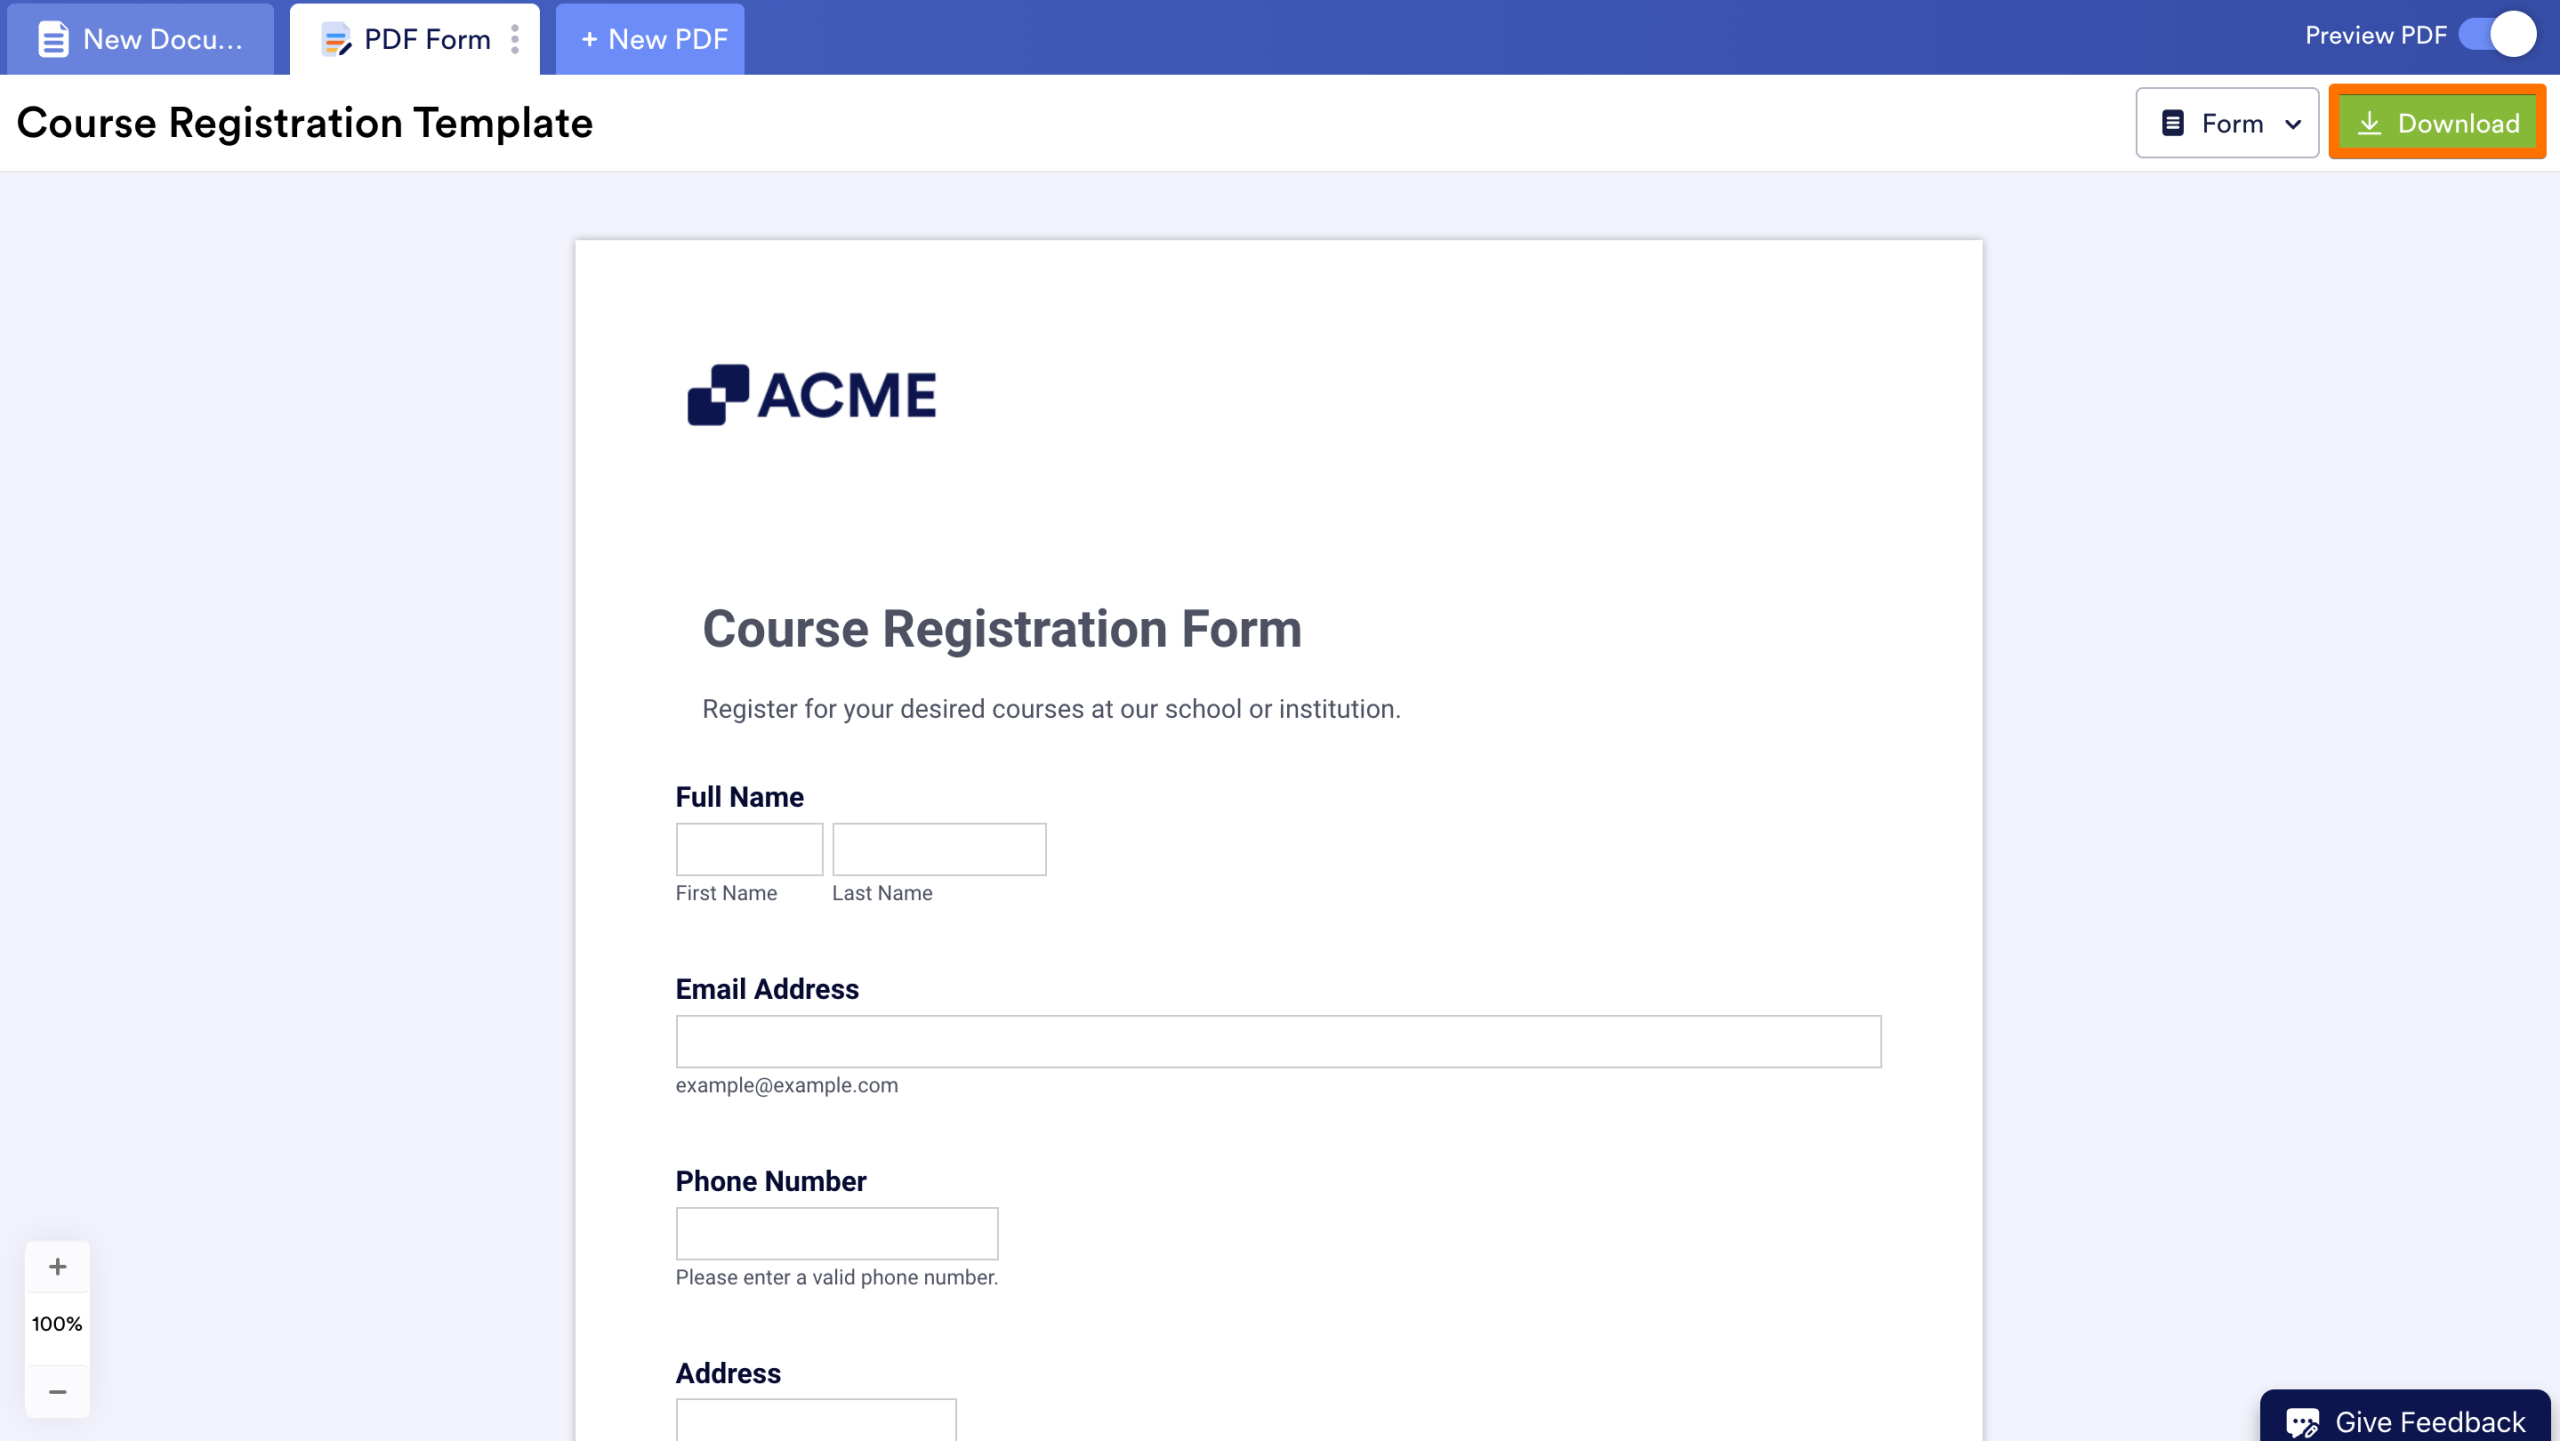
- Click on the Download button to open the PDF Editor, where an automatically generated PDF is created.
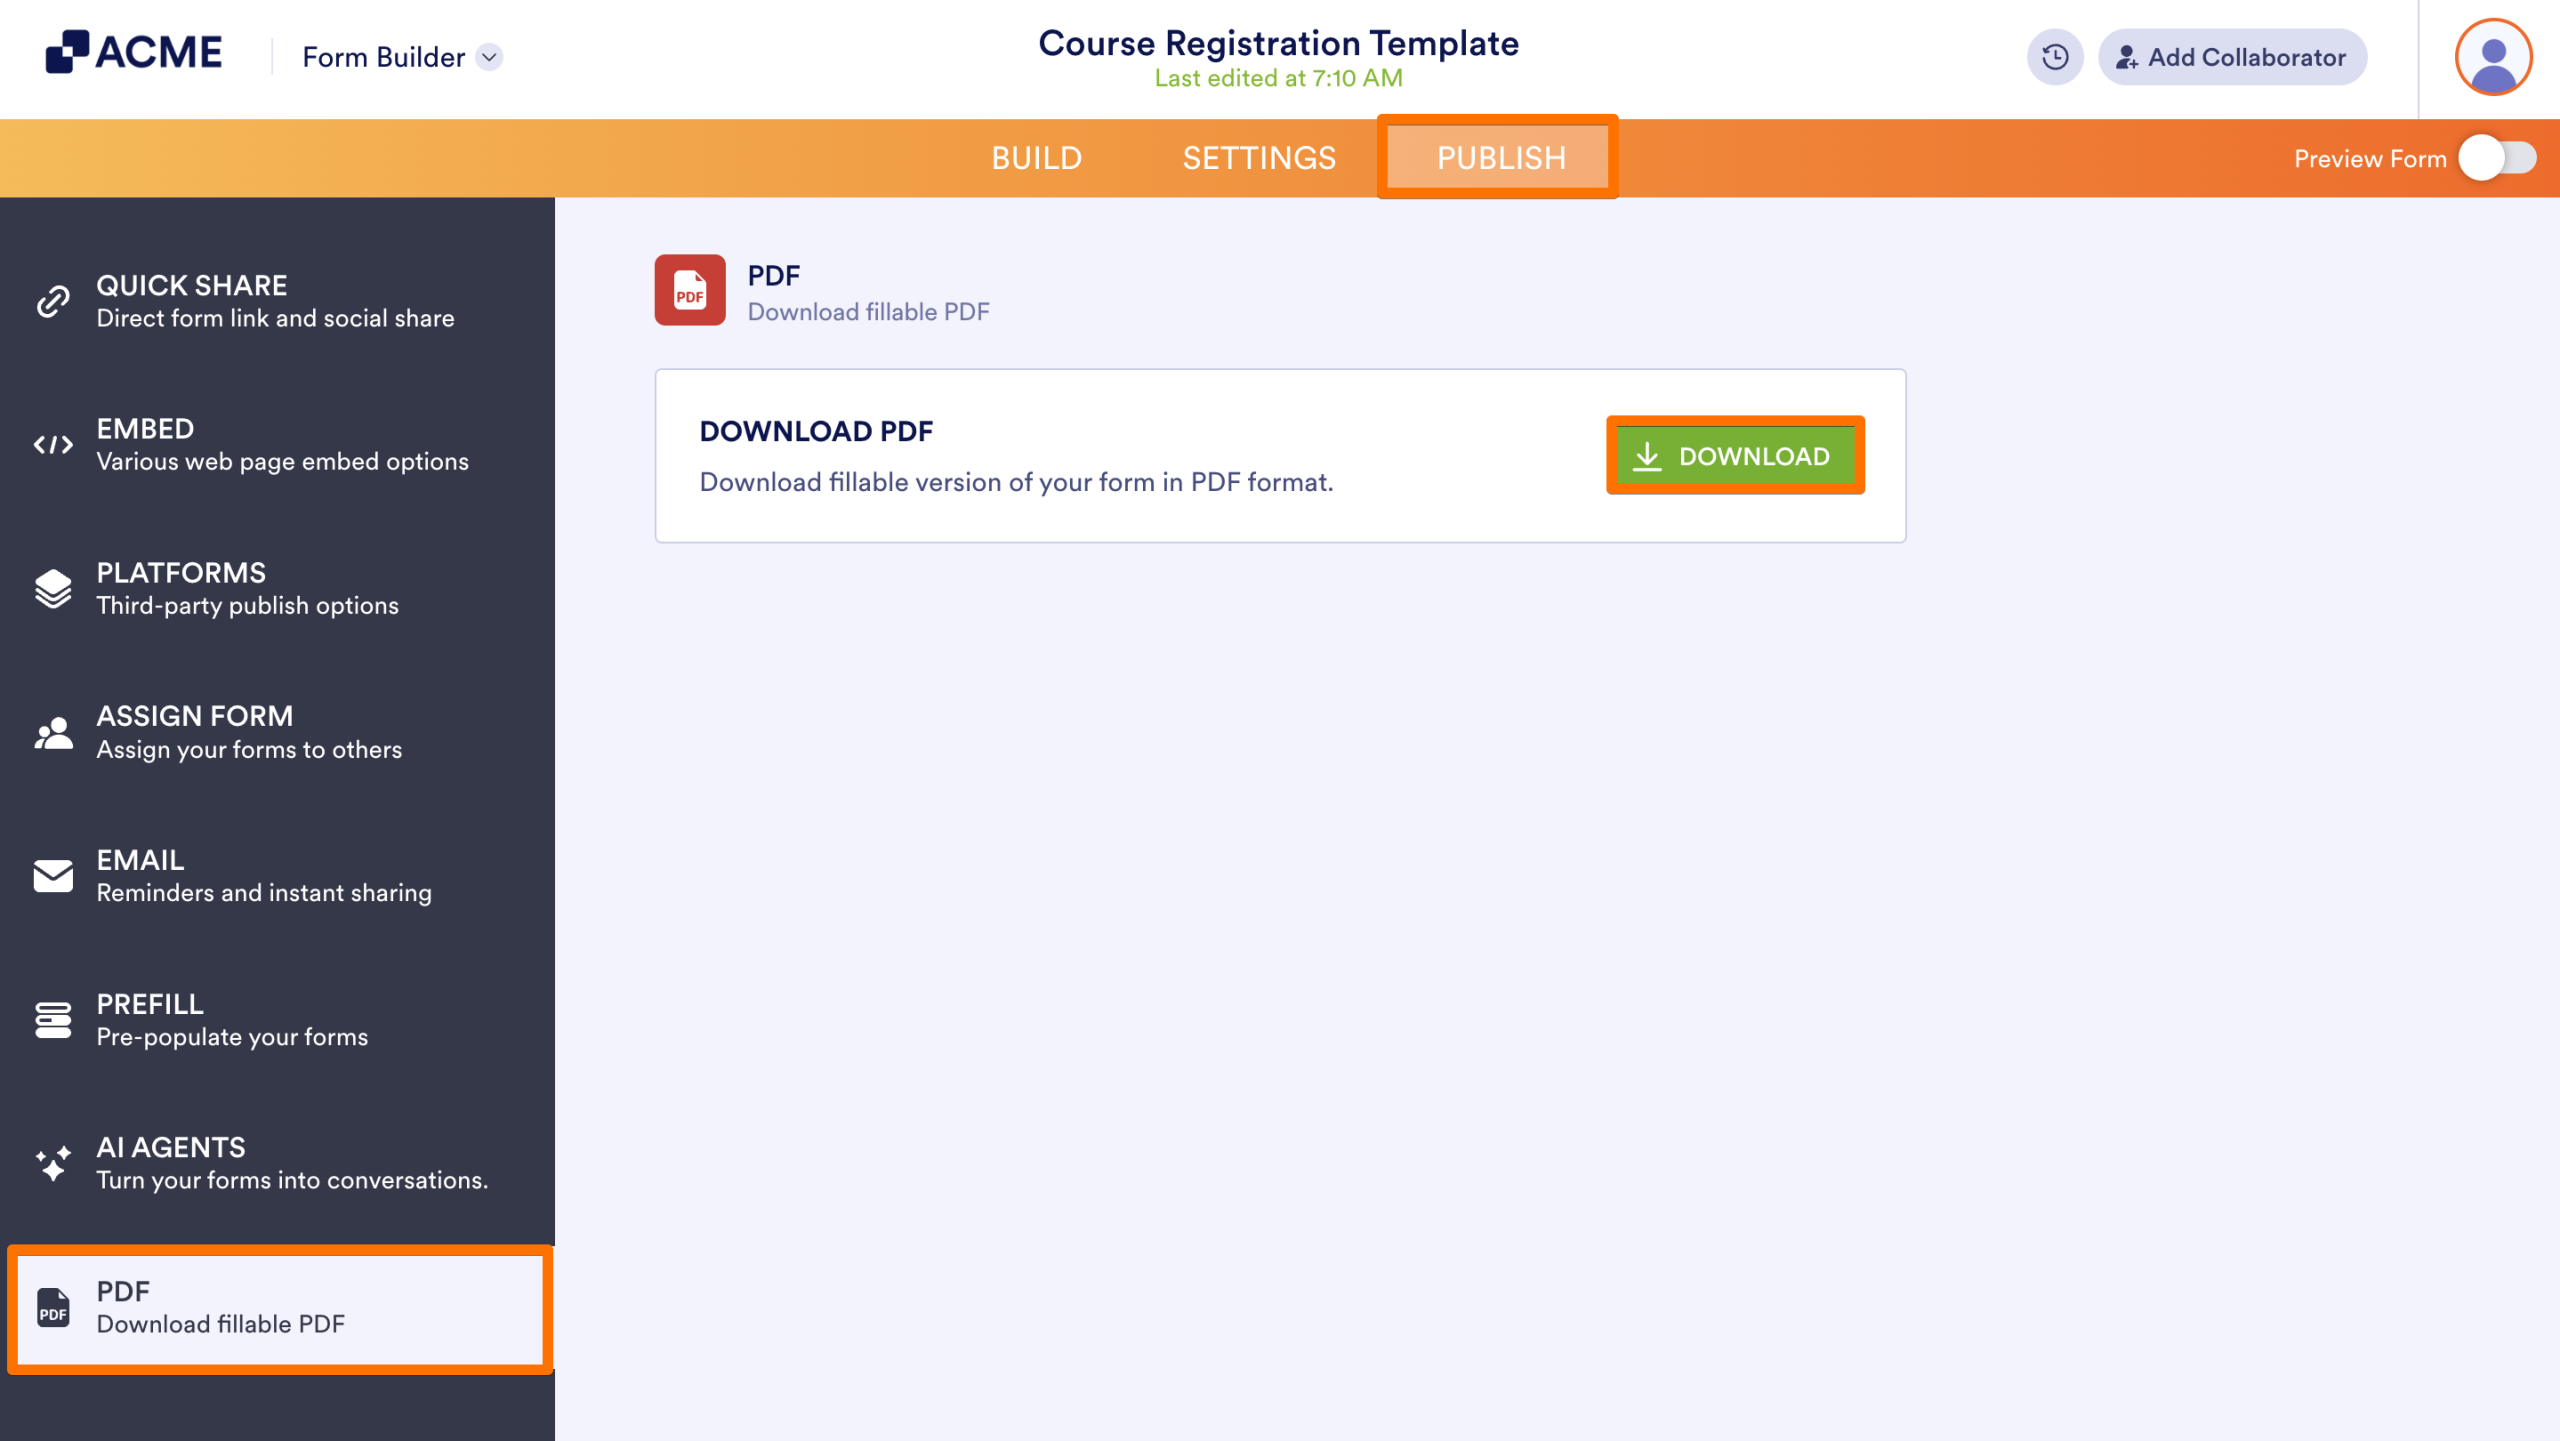
- To download the PDF, click on Download in the upper right-hand corner of the page.
Create a PDF Document from the Workspace
- In the Workspace where the form is located, hover over the form you want to create a PDF of and click on More.
- Under Data, select Create PDF Document.
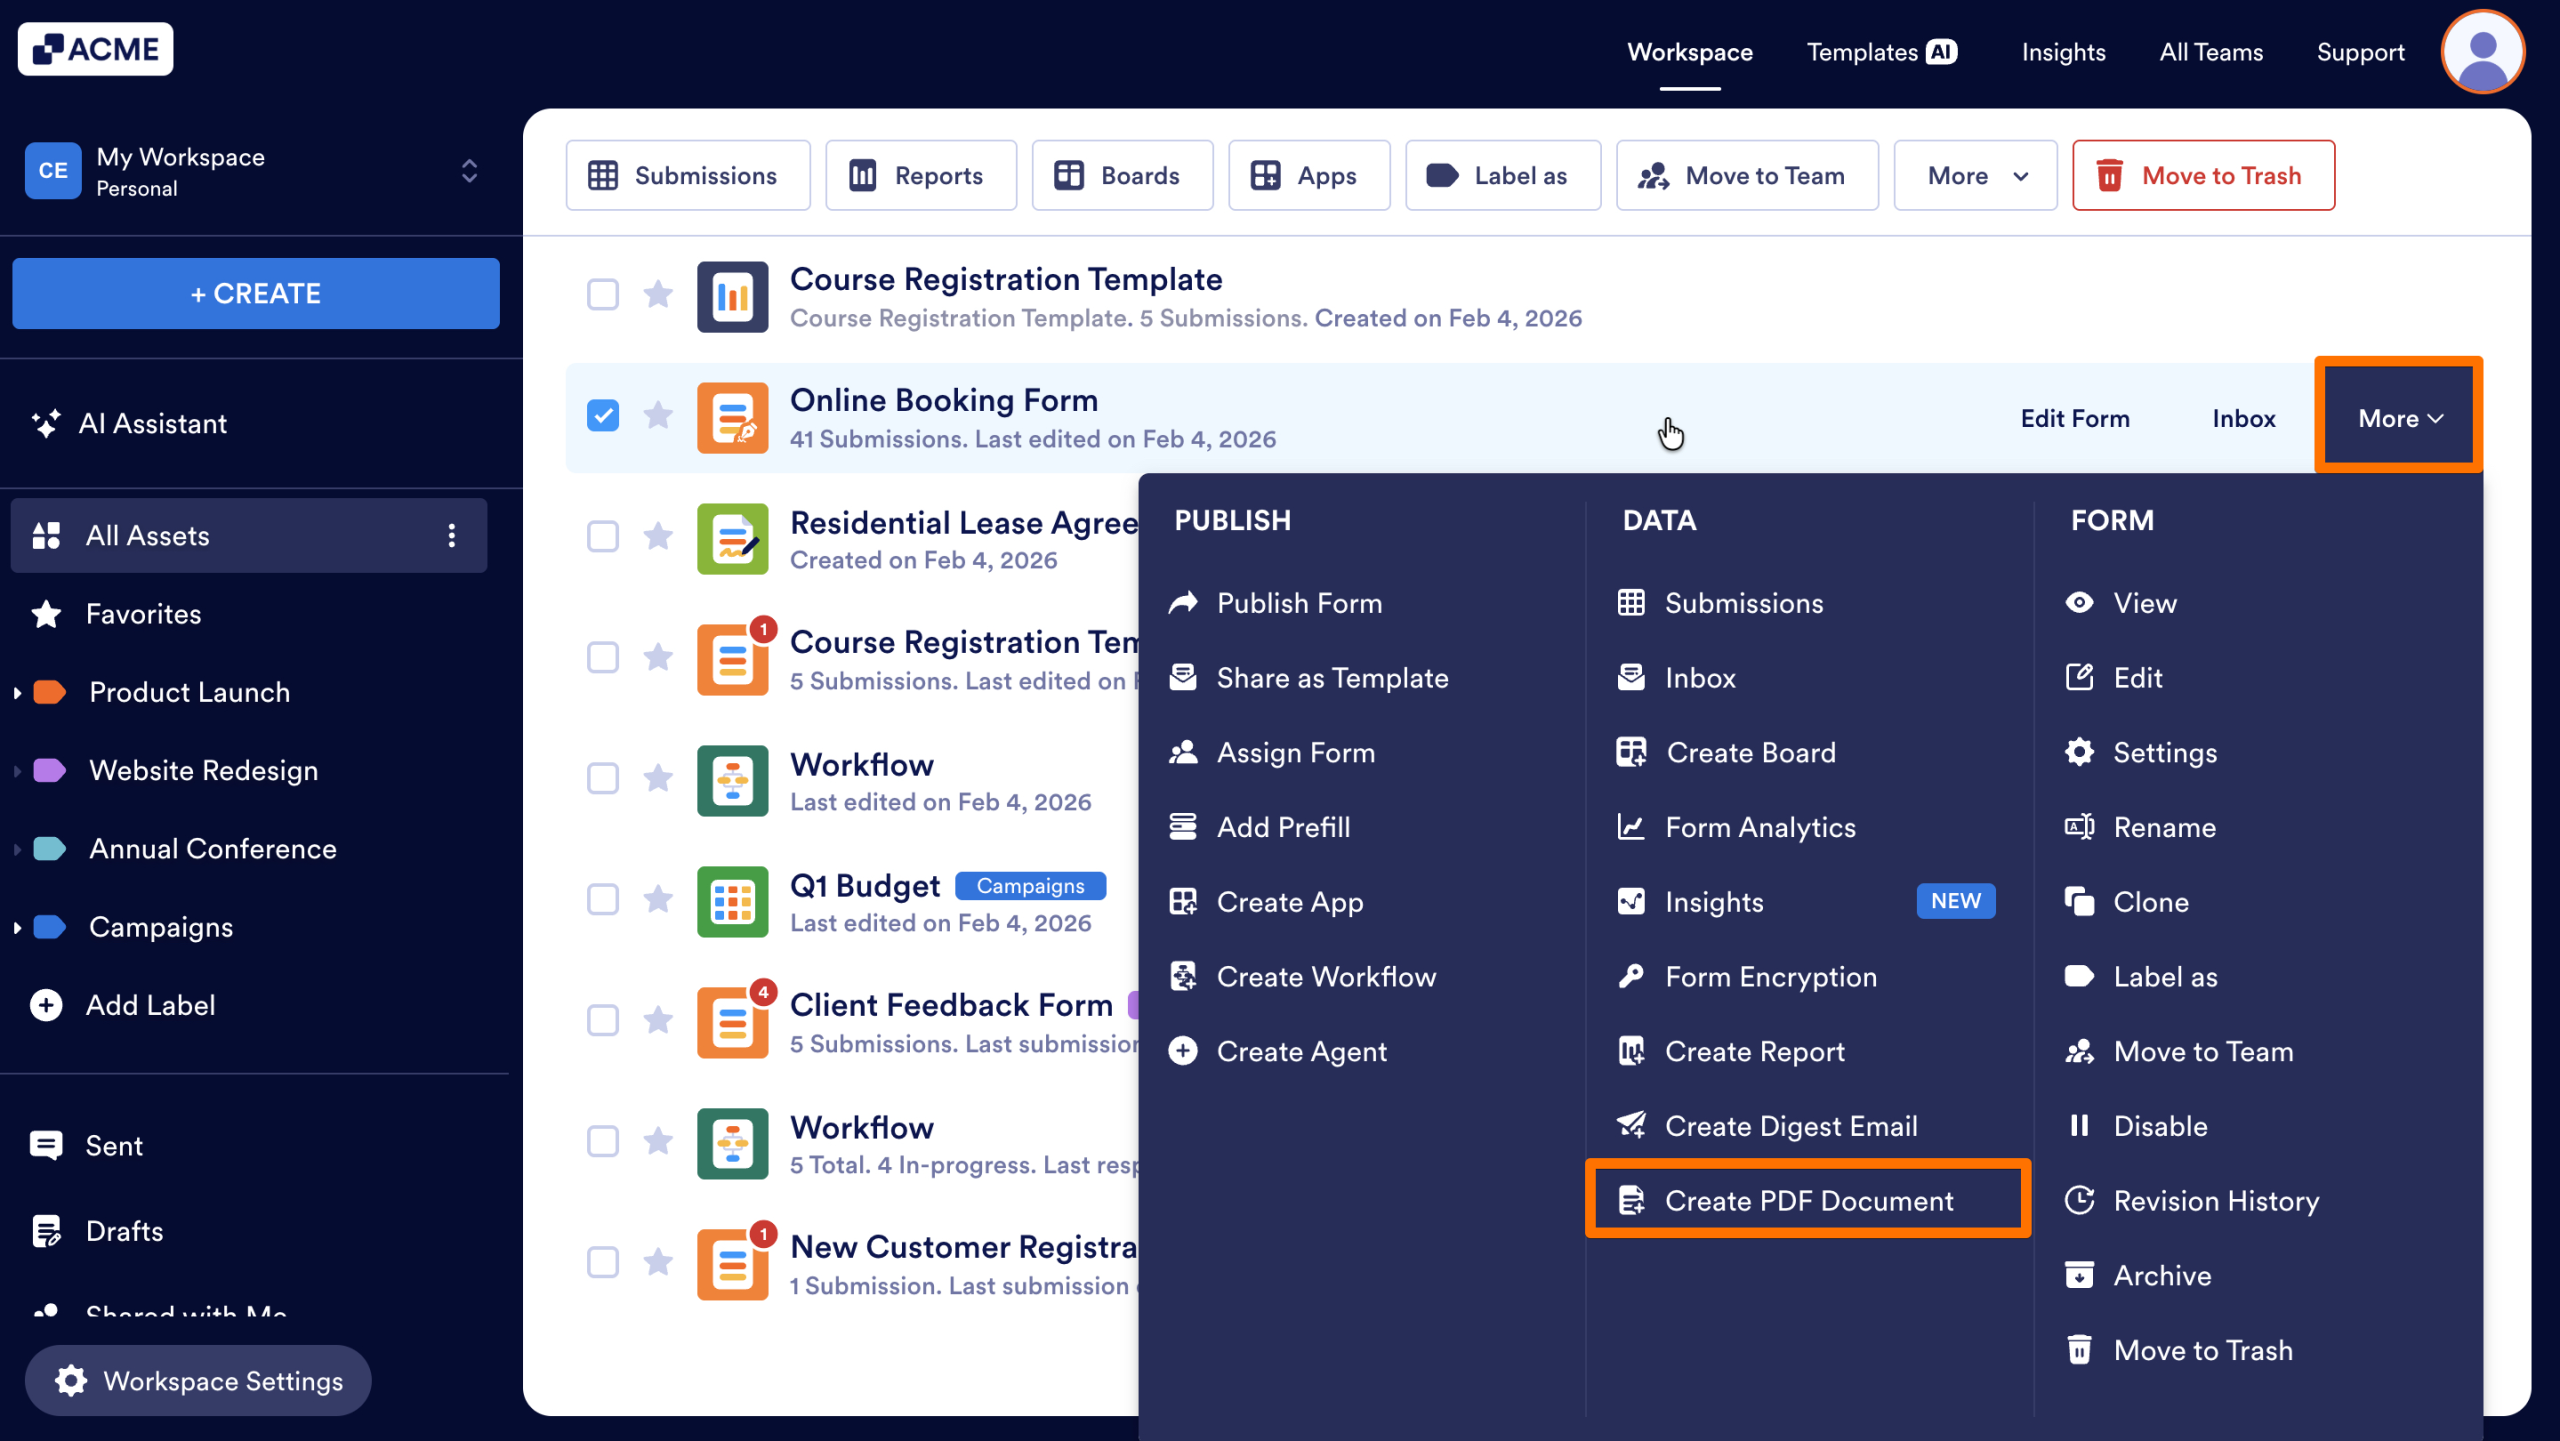
This will launch the PDF Editor, where you can design and customize your document layout.
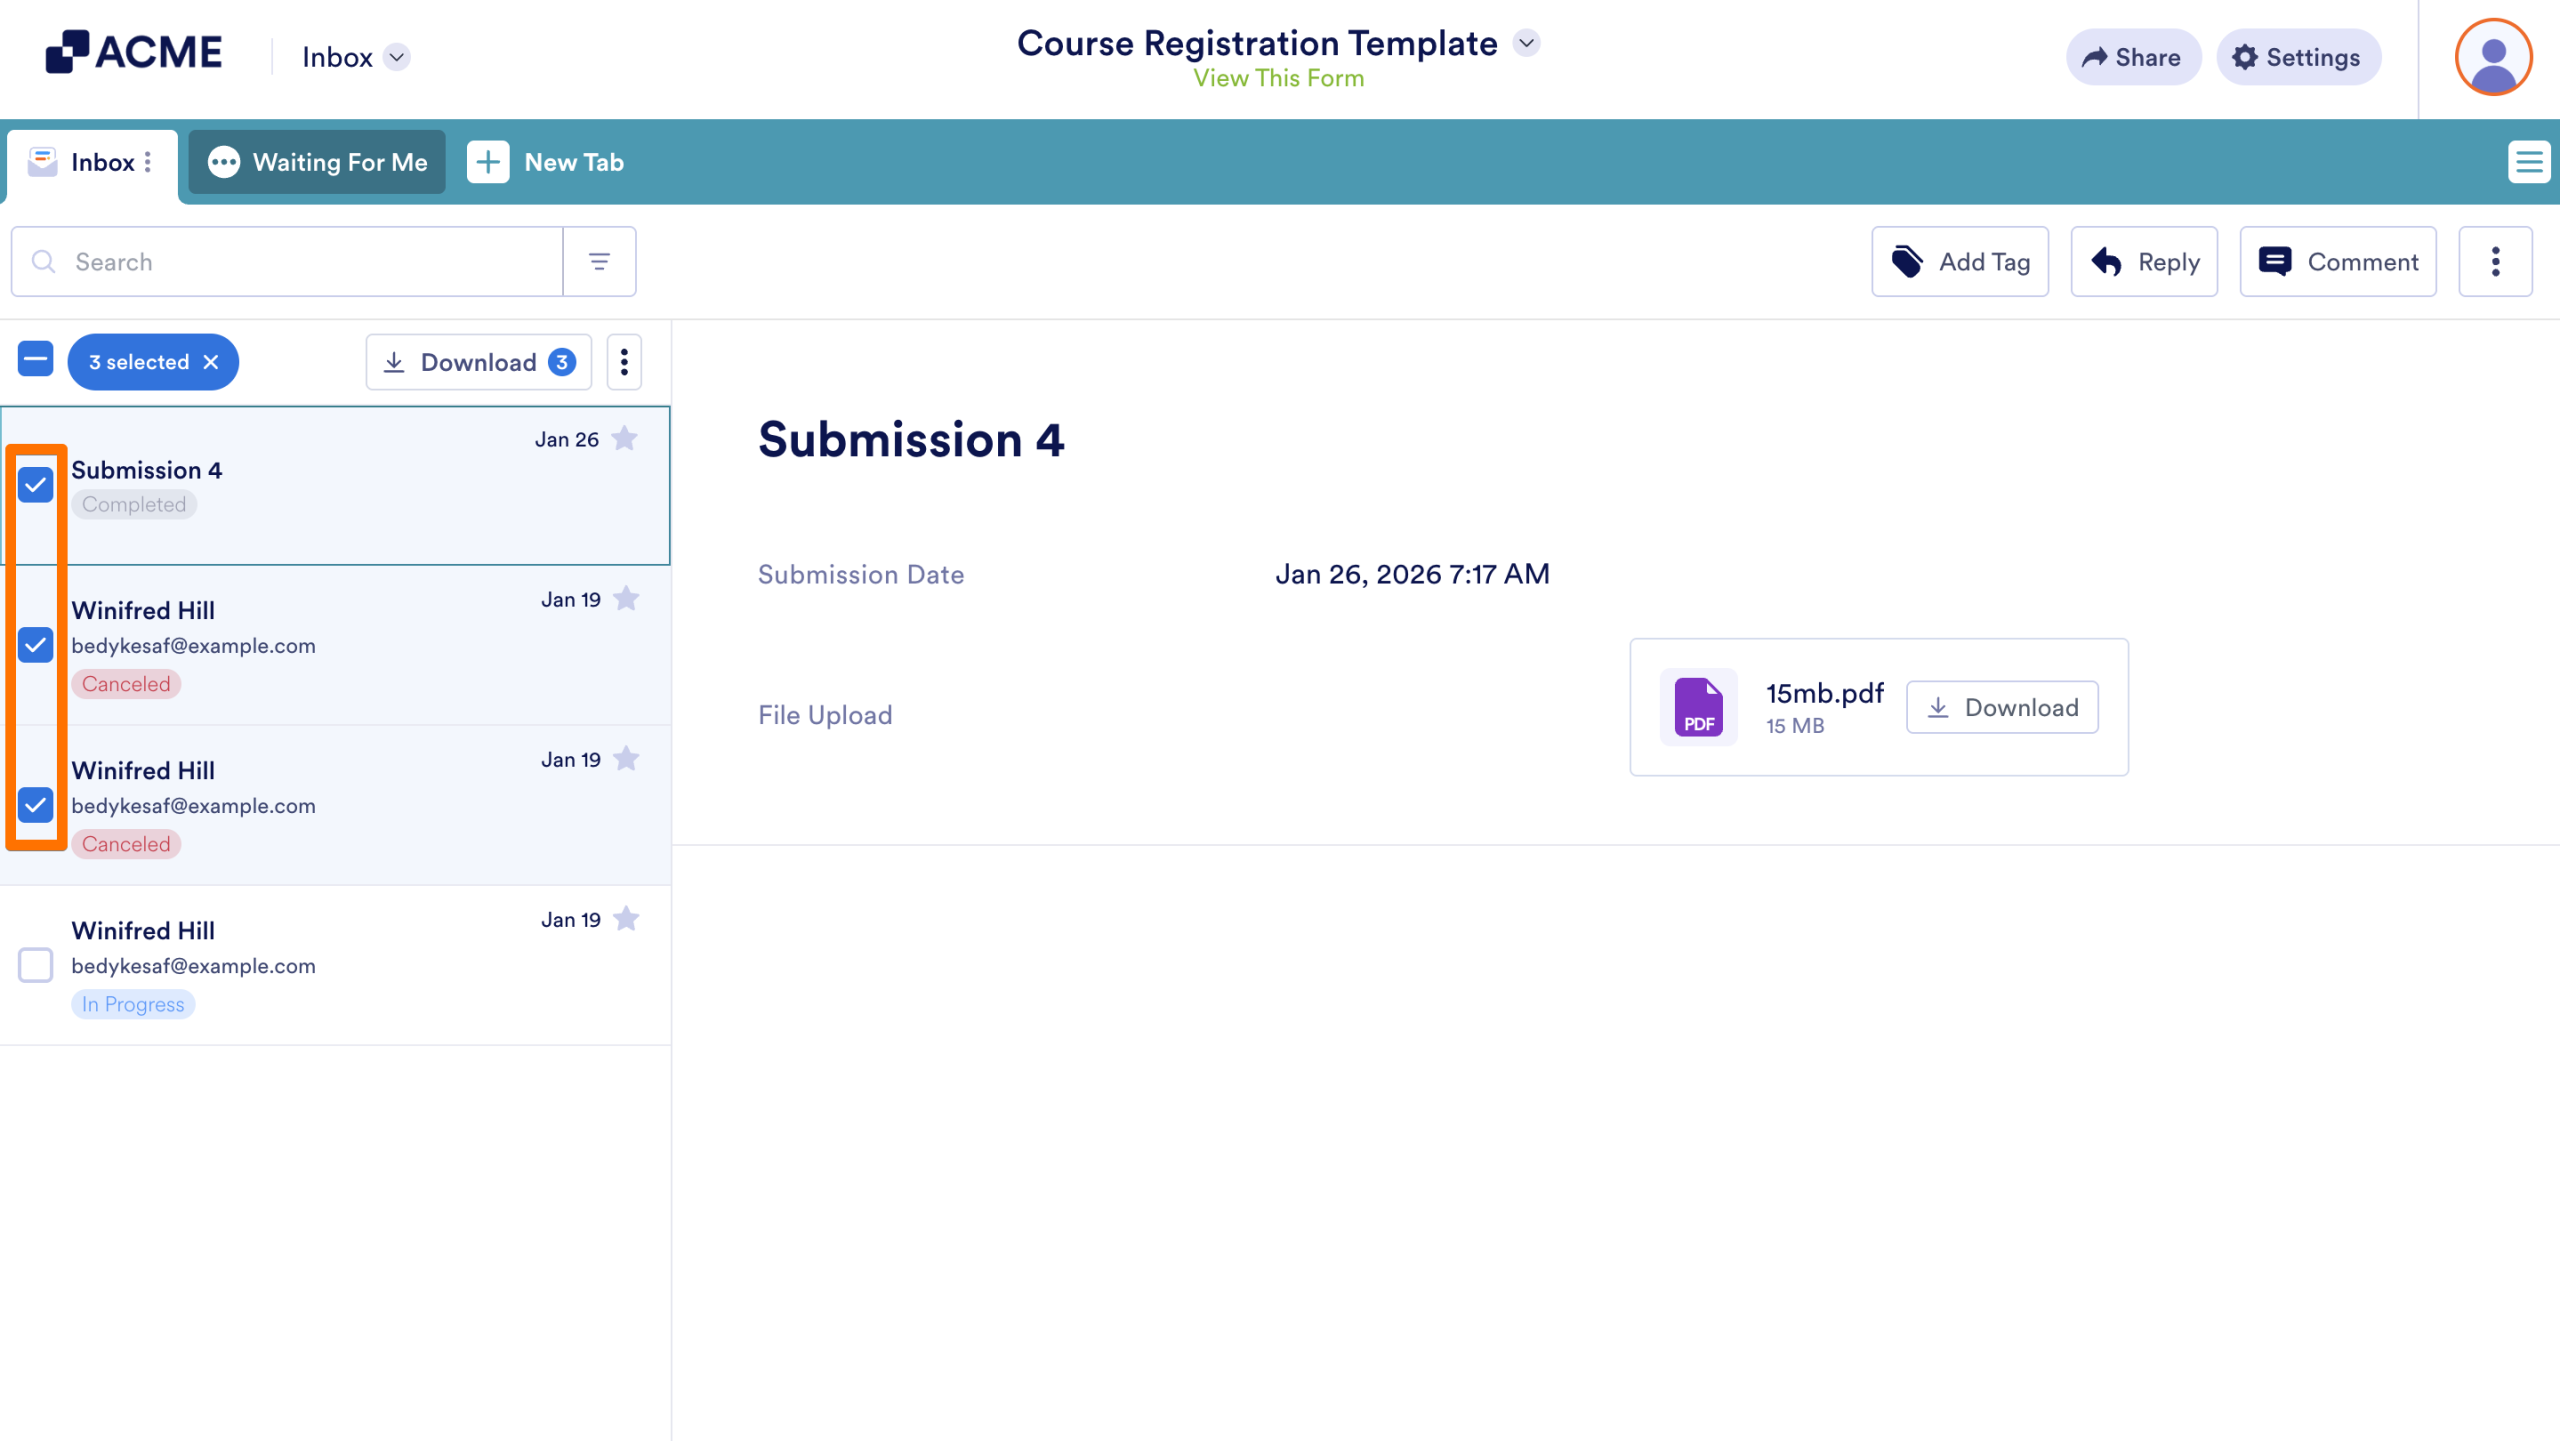
Create a PDF Document from the Inbox
- In the Inbox, click on the checkbox next to the submissions you’d like to download.
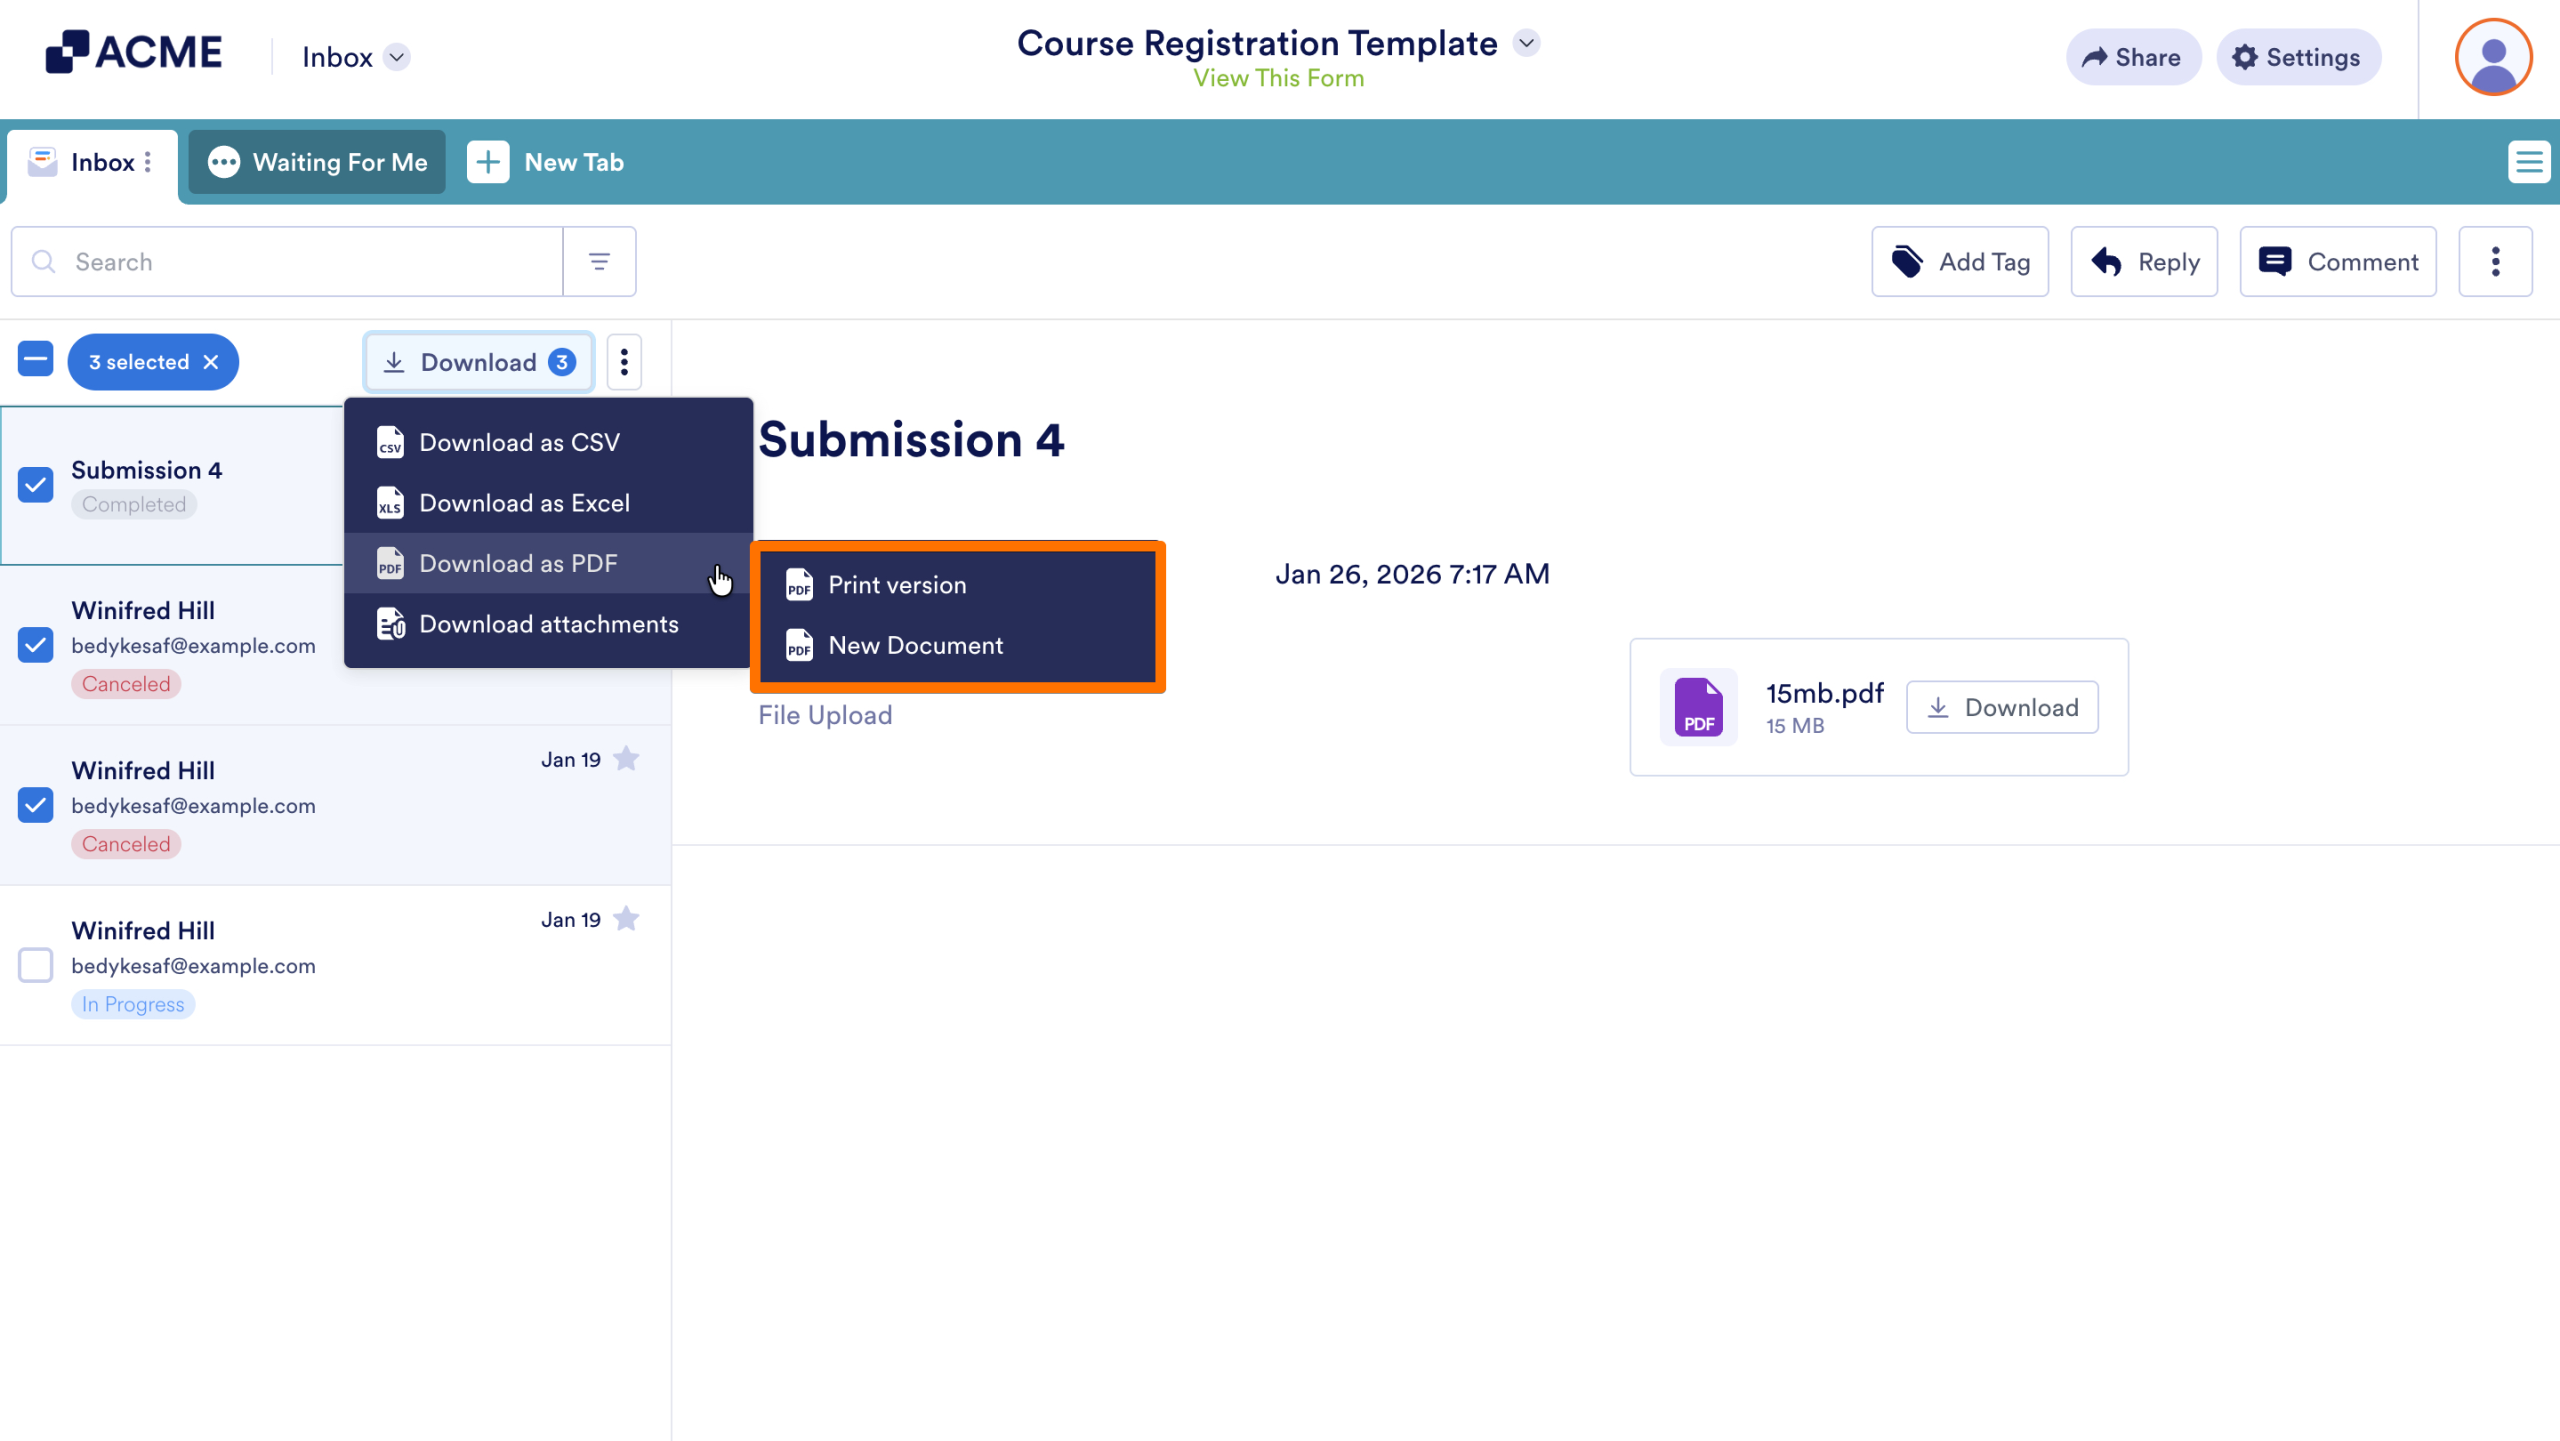
- Hover over the Download button at the top of the submission list.
- Then, hover over Download as PDF and select the name of the PDF you’d like to download.
Automation and Tables Integration
You can automate the delivery or creation of PDFs within your workflow or data management views.
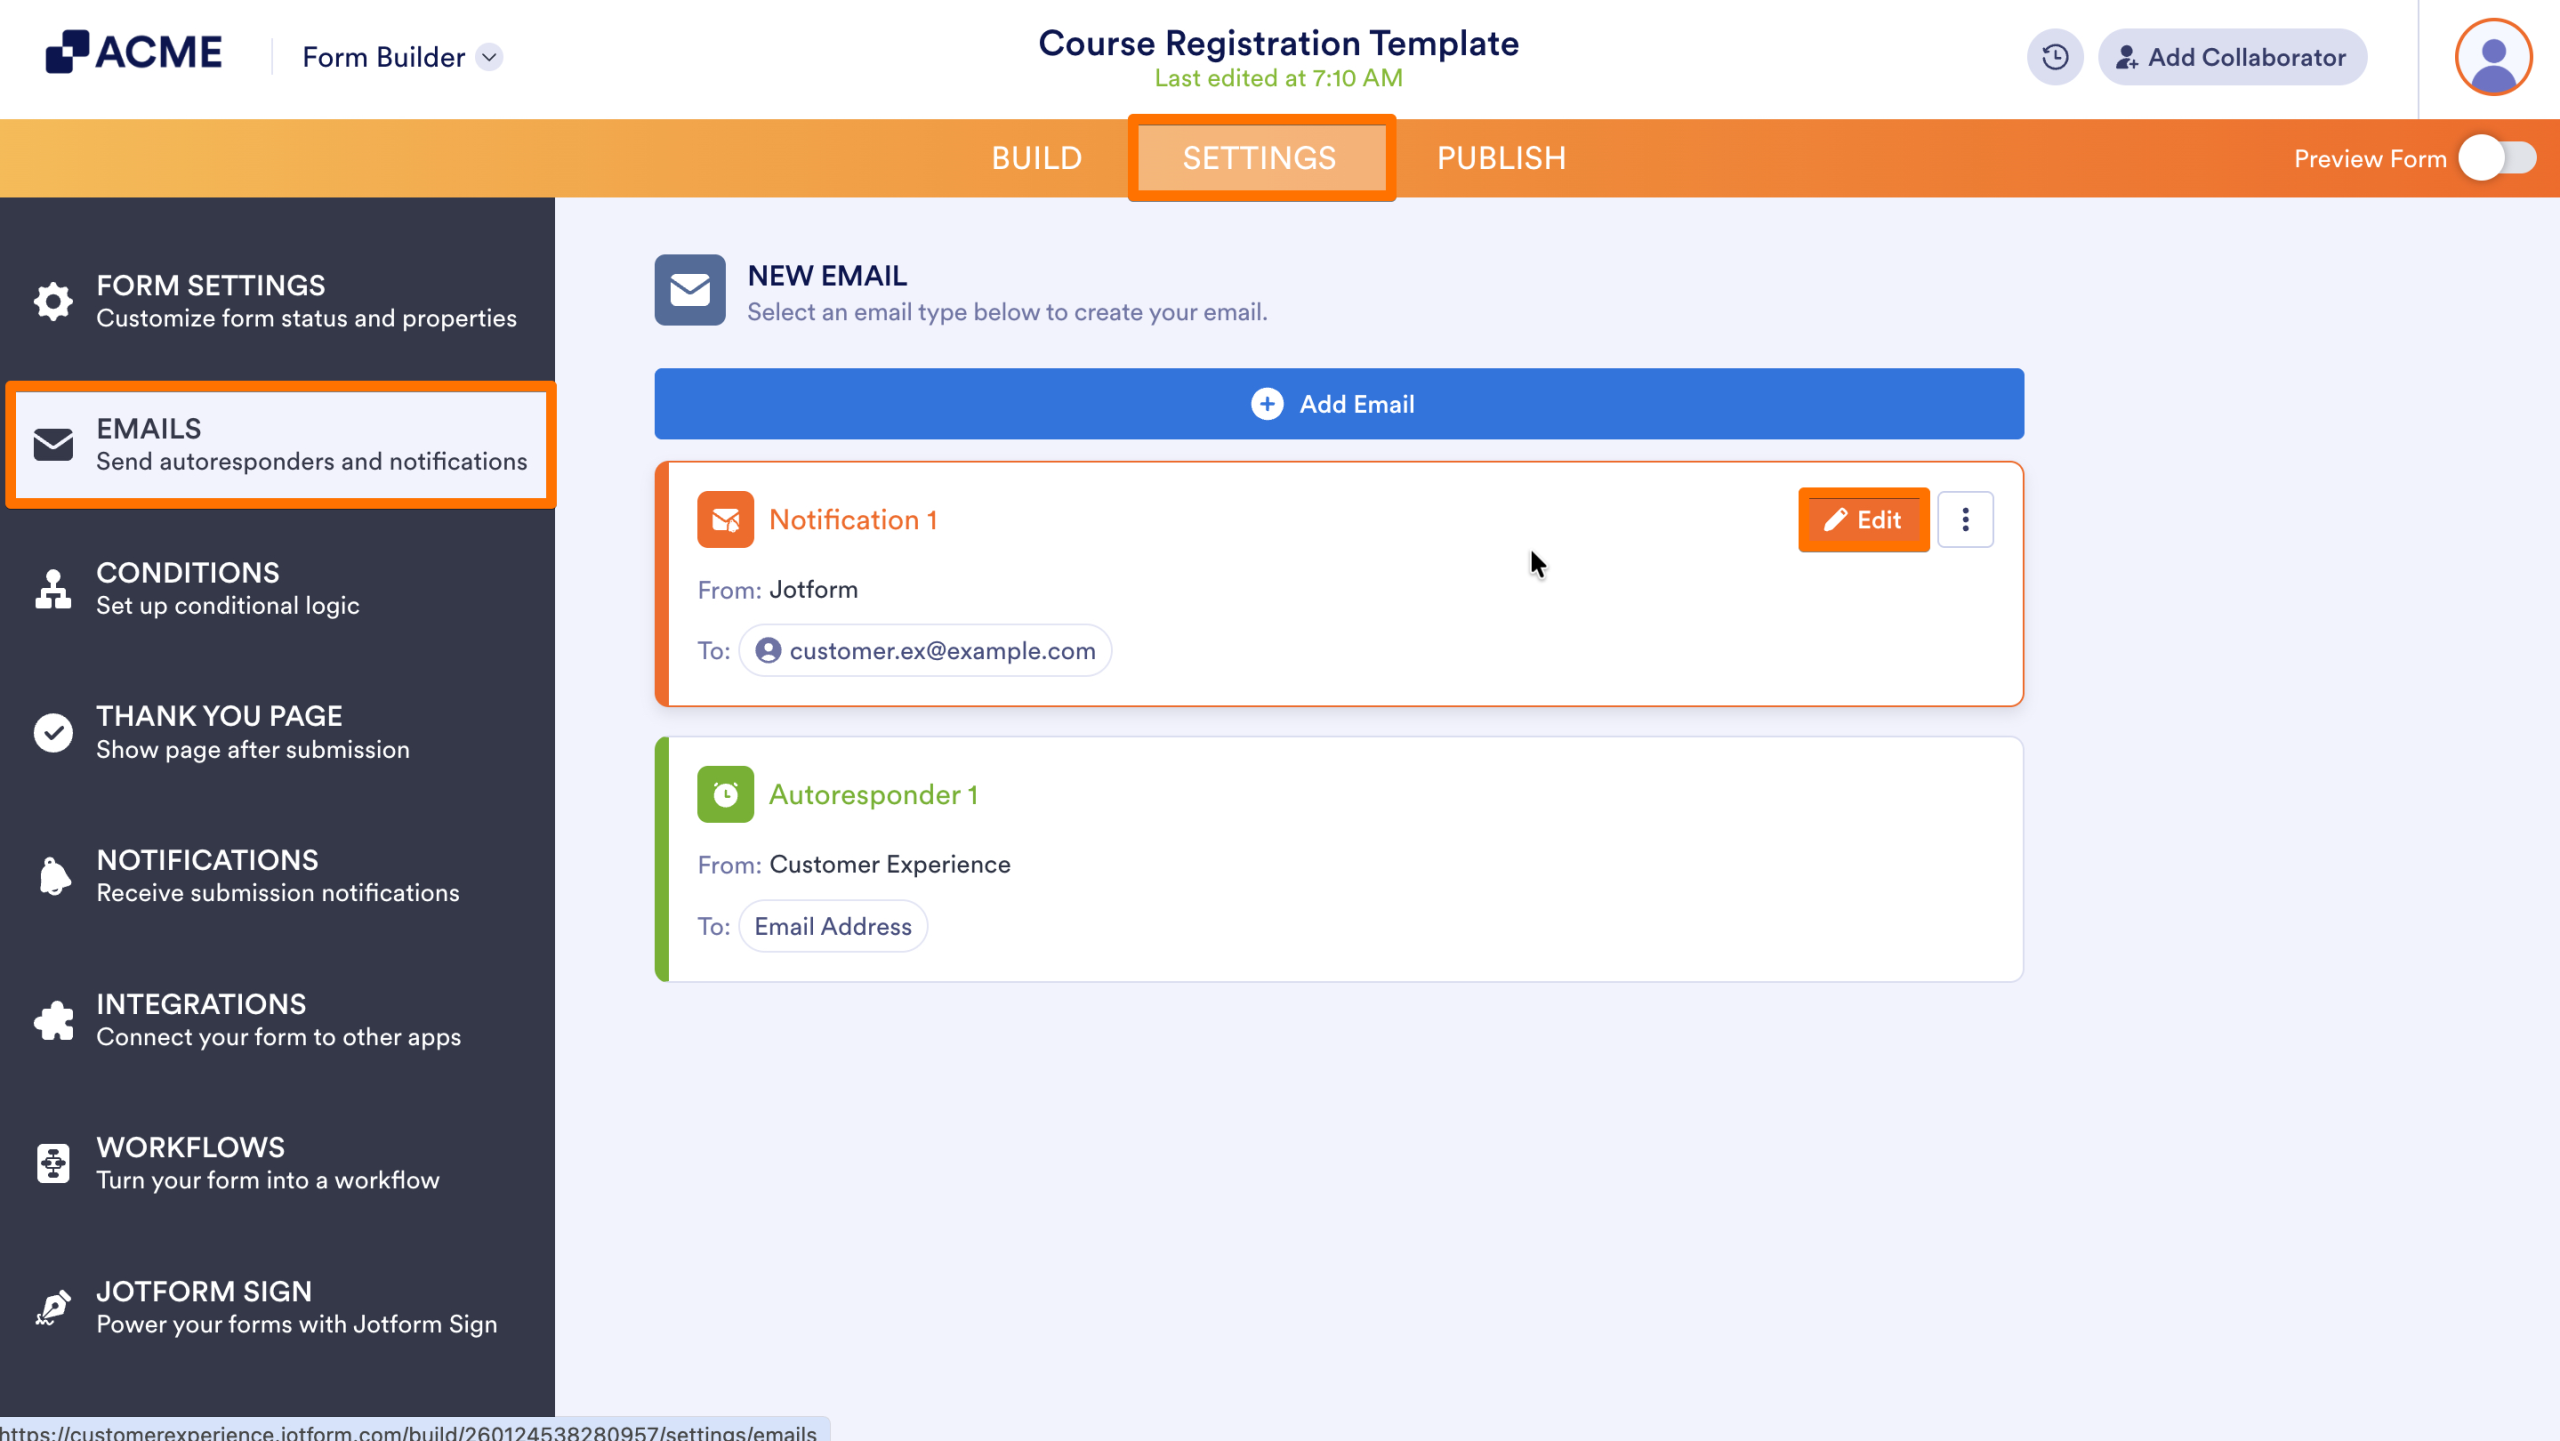
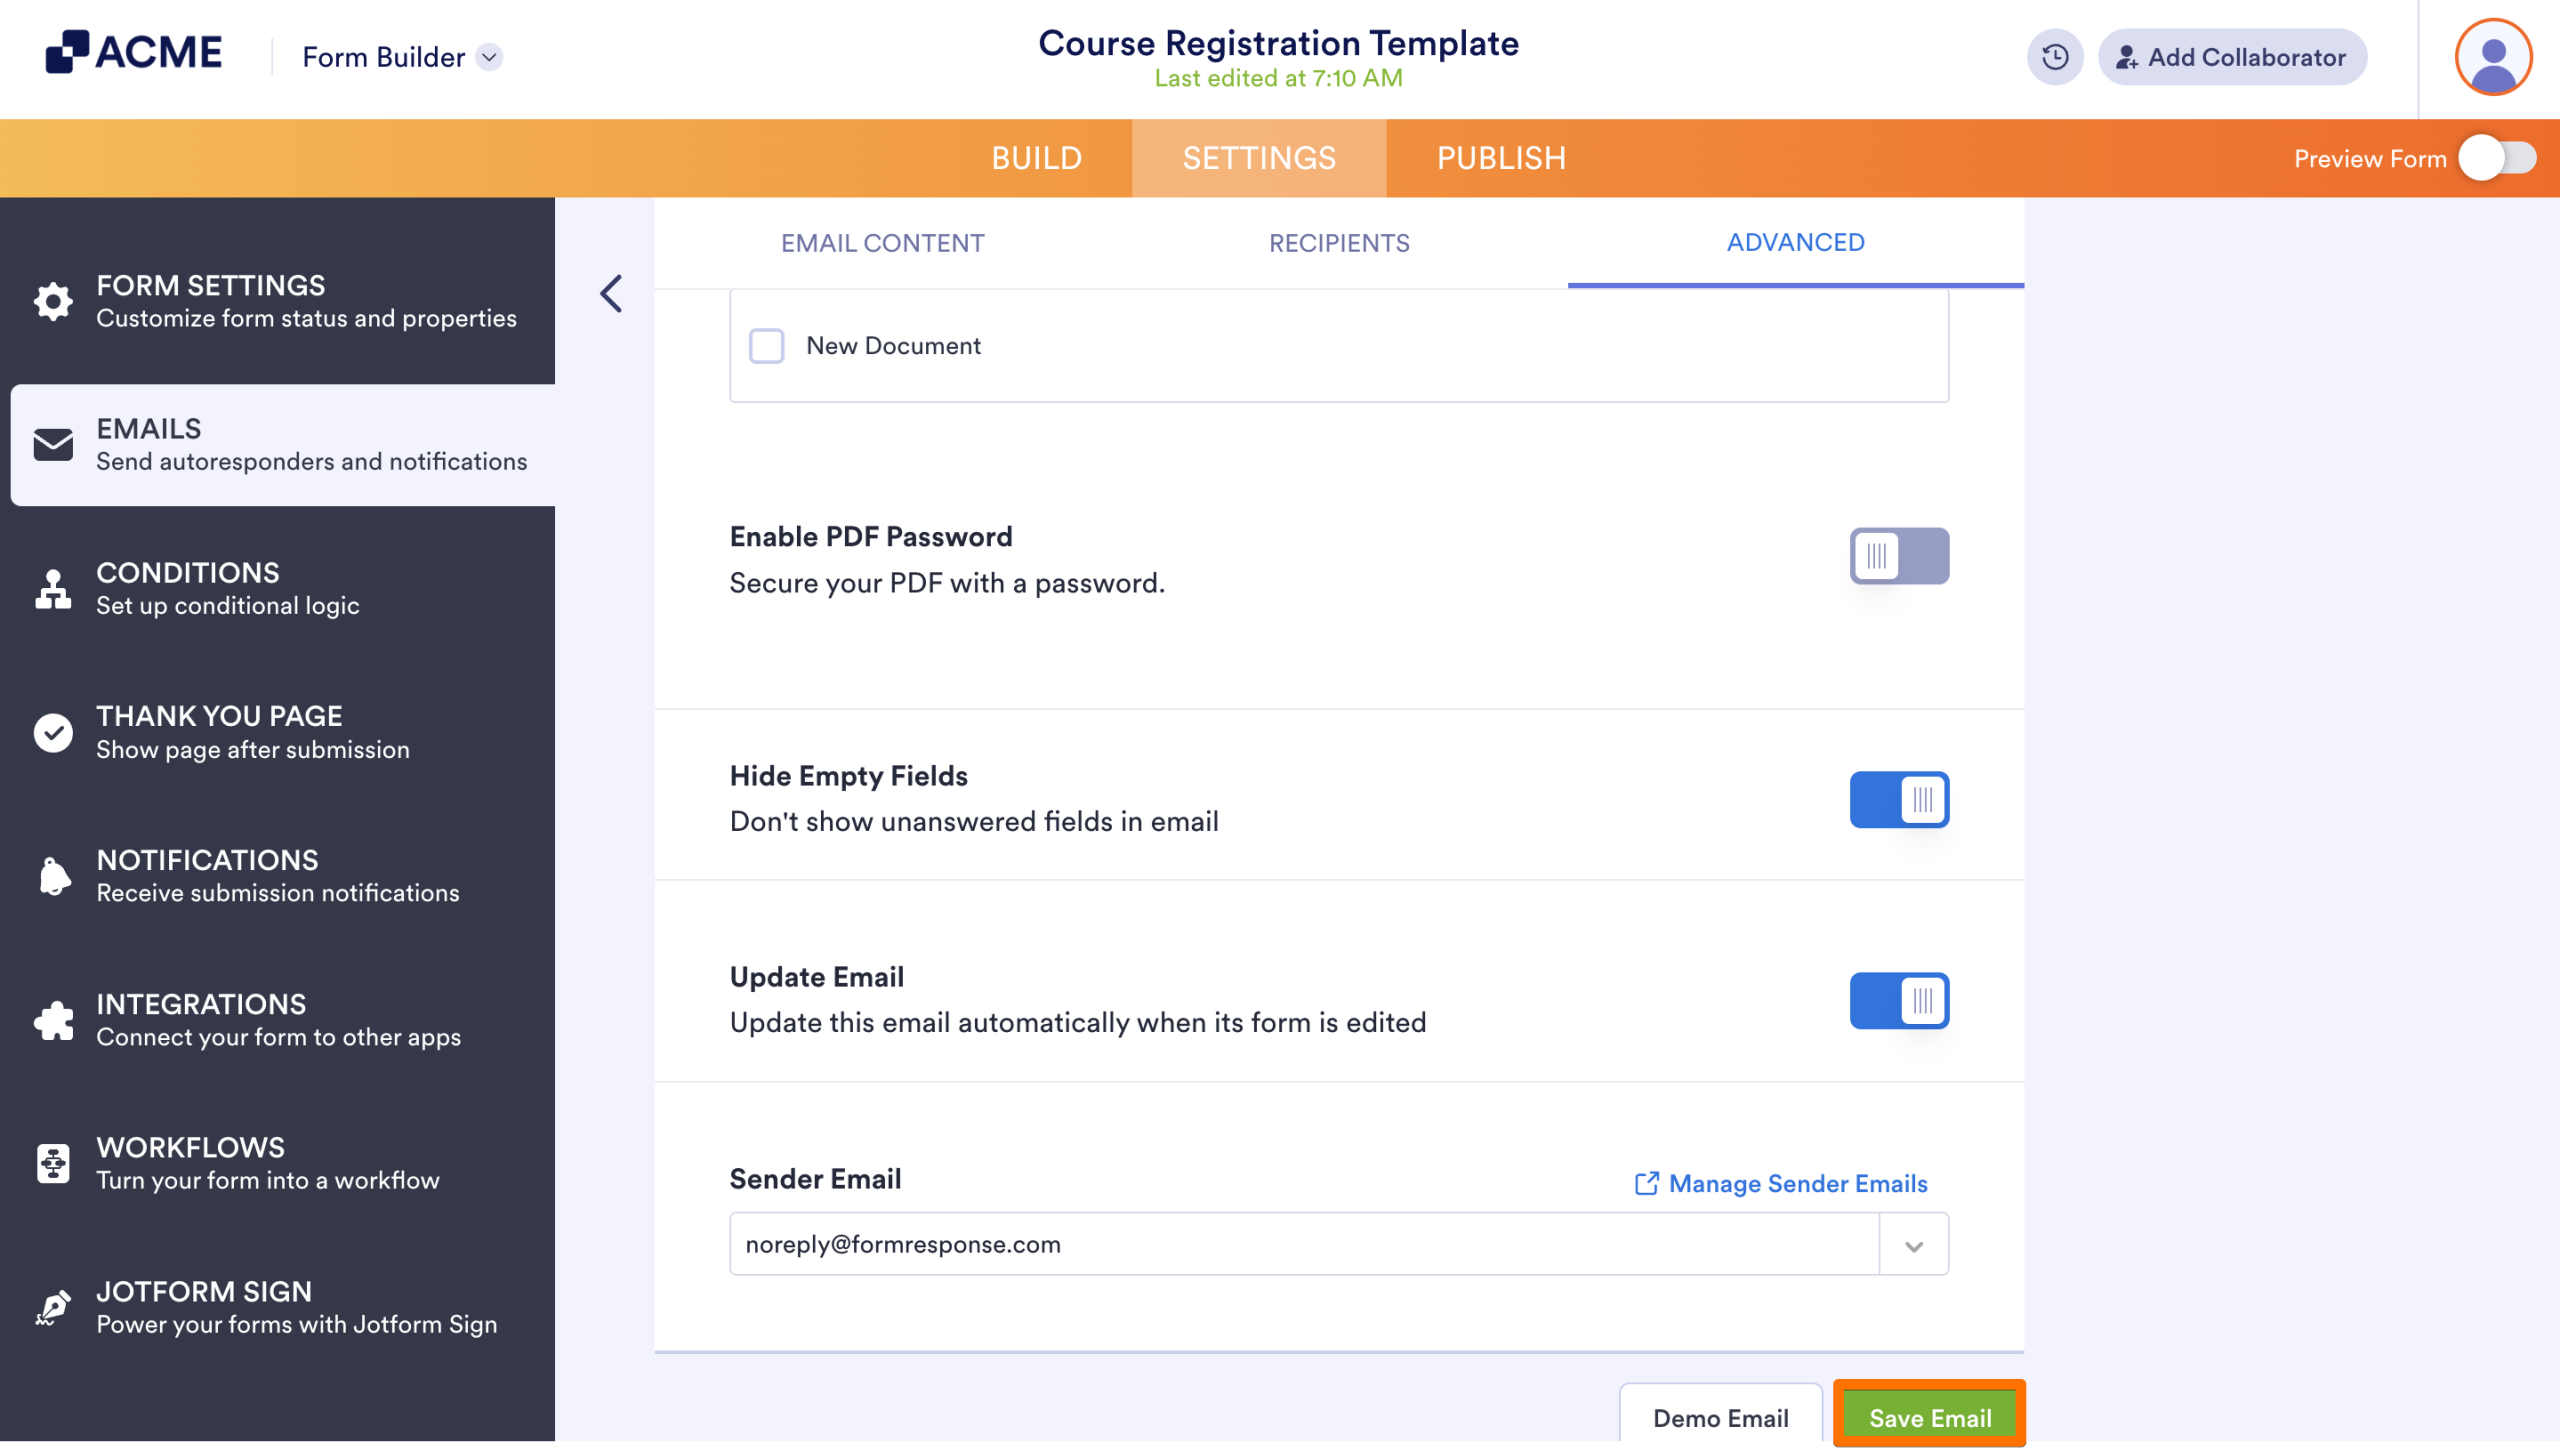
Send a PDF Document from Form Emails
- In the Form Builder, click on Settings in the orange navigation bar at the top of the page.
- Click on Emails in the left menu.
- Hover over the email you’d like to attach the PDF to and click Edit.
- On the next page, click on the Advanced tab.
- Toggle On the switch next to Attach PDF.
- Click on the checkbox next to the PDF(s) you want sent on the email.
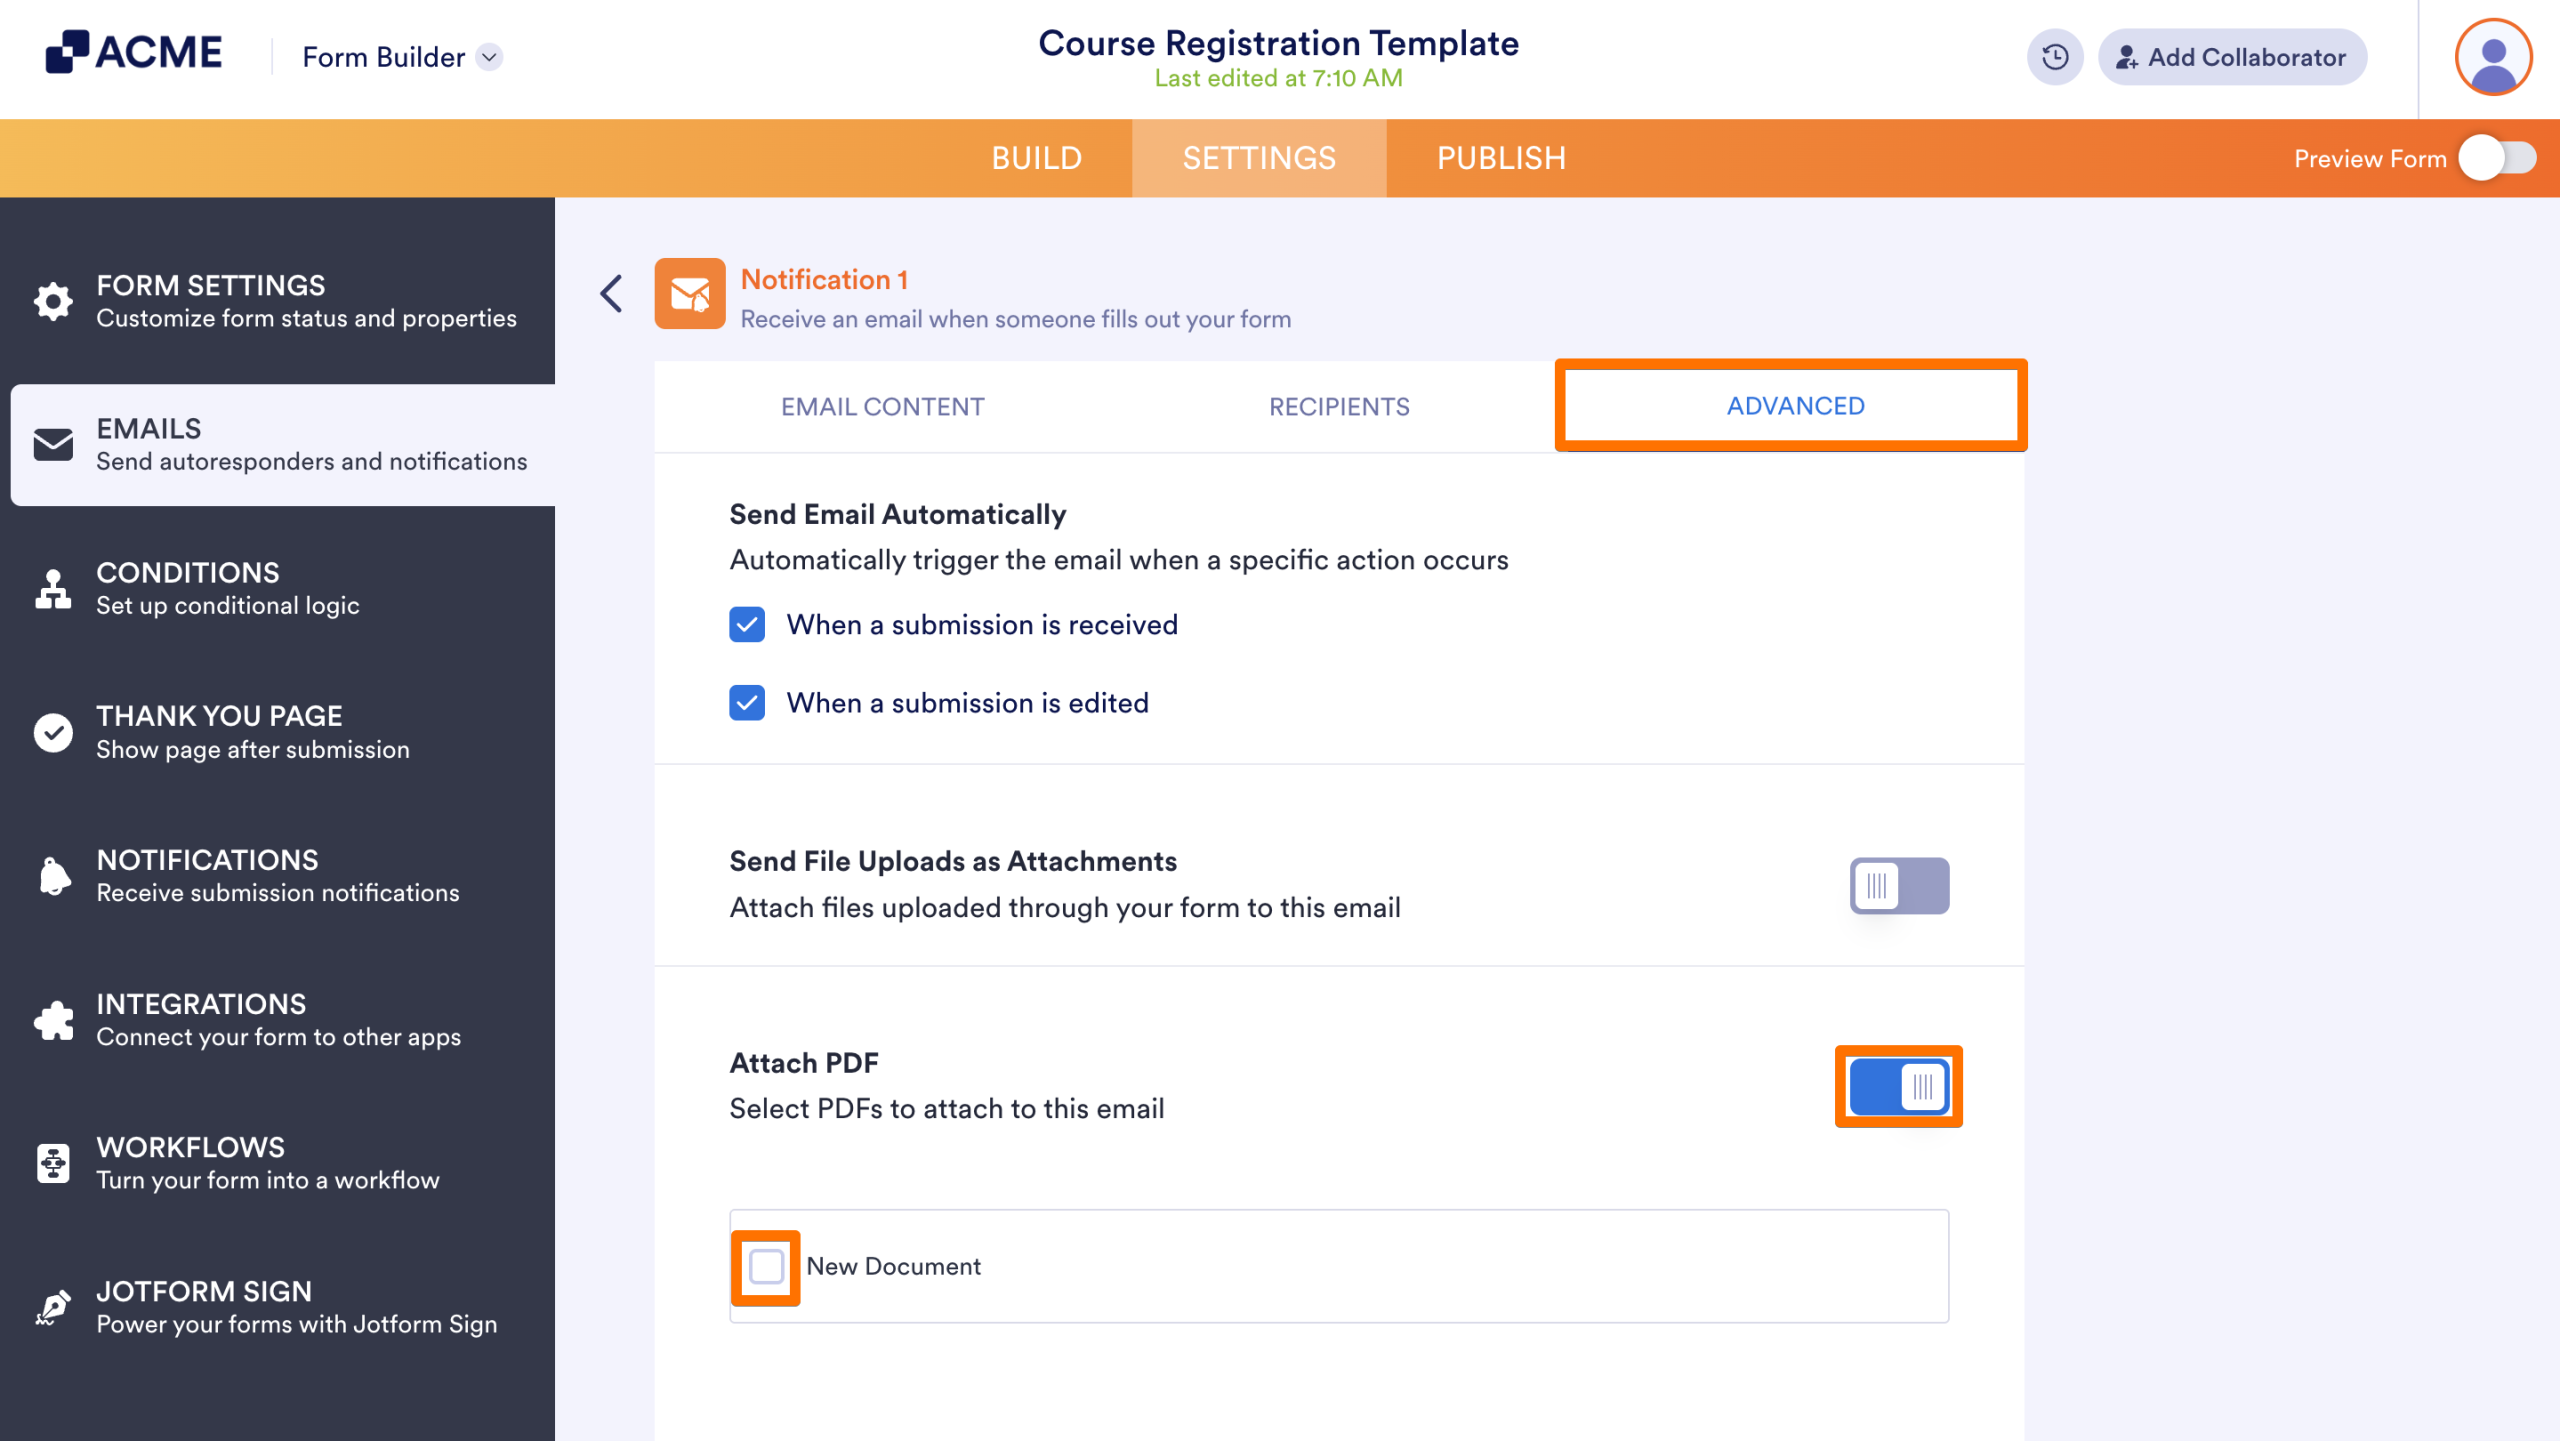
- Finally, click Save Email.
Send a PDF Document from Workflow Builder
Using the Workflow Builder, you can send PDF Documents as part of the workflow. Add a PDF Document already associated with the form, or let the PDF Editor automatically generate one based on the form’s fields.
- In the Workflow Builder, click on the Add Element button on the left-hand side of the screen.
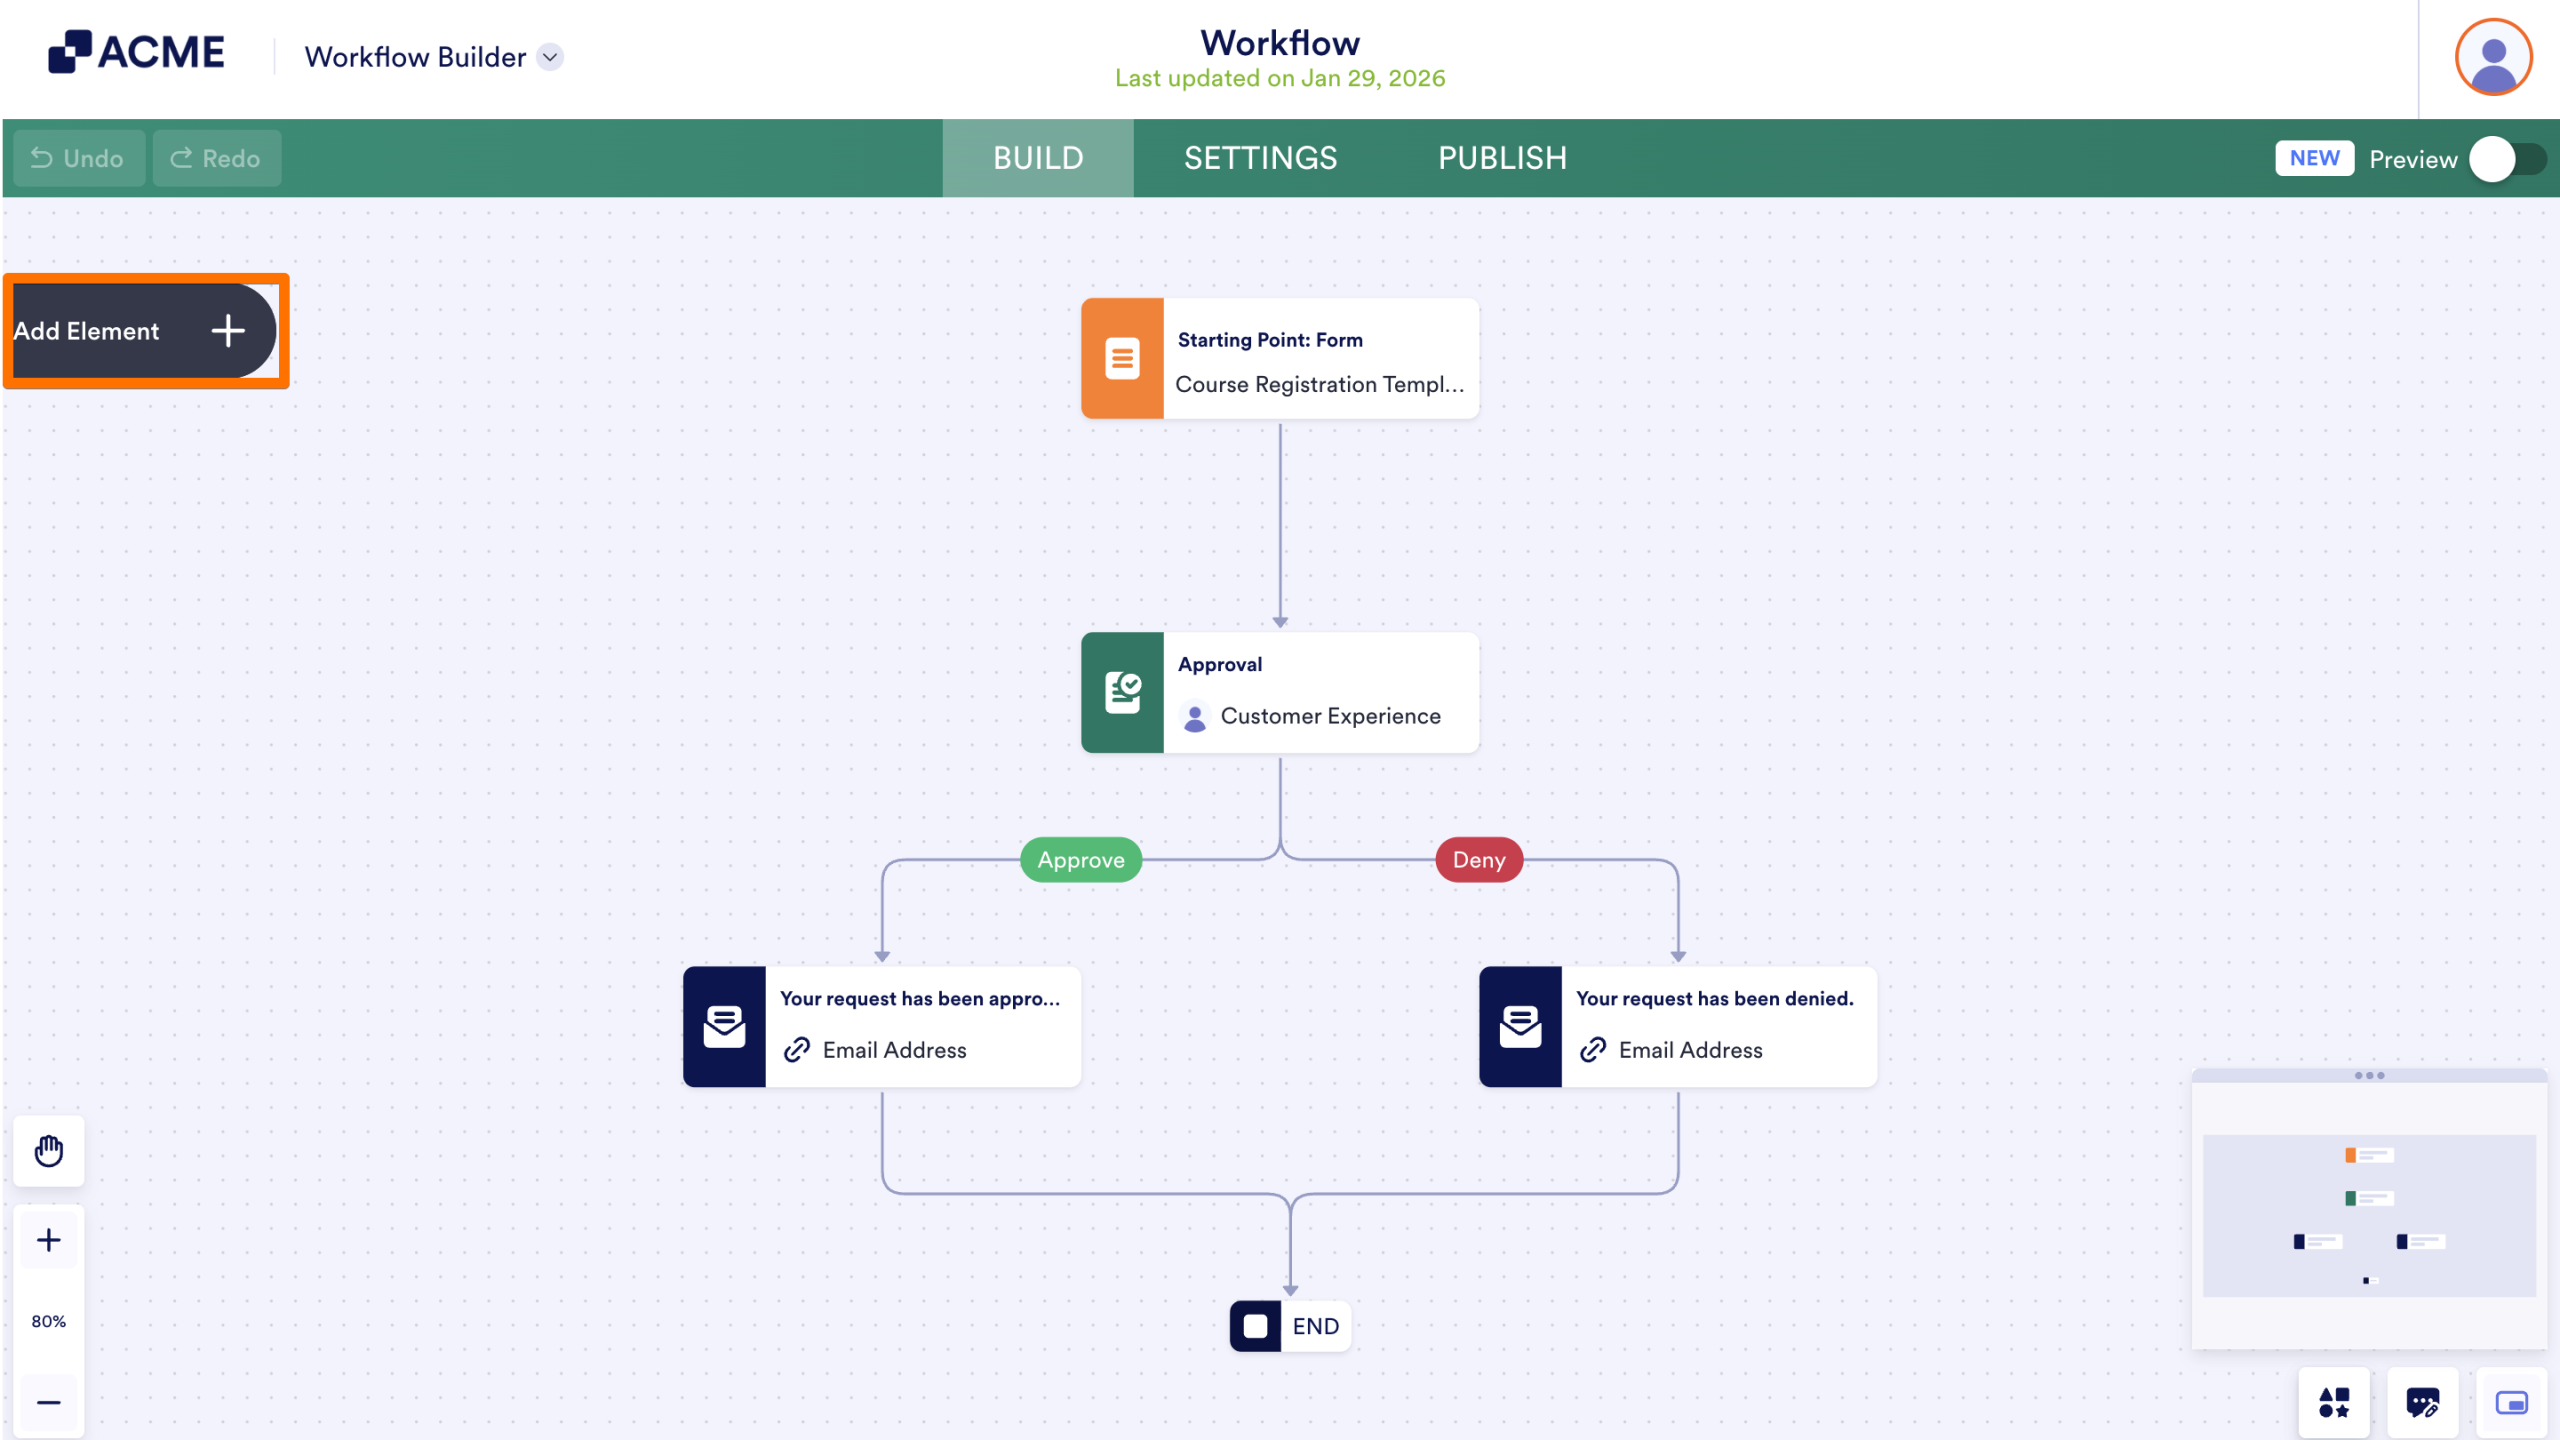
- Then, click and add a PDF element onto your flow.
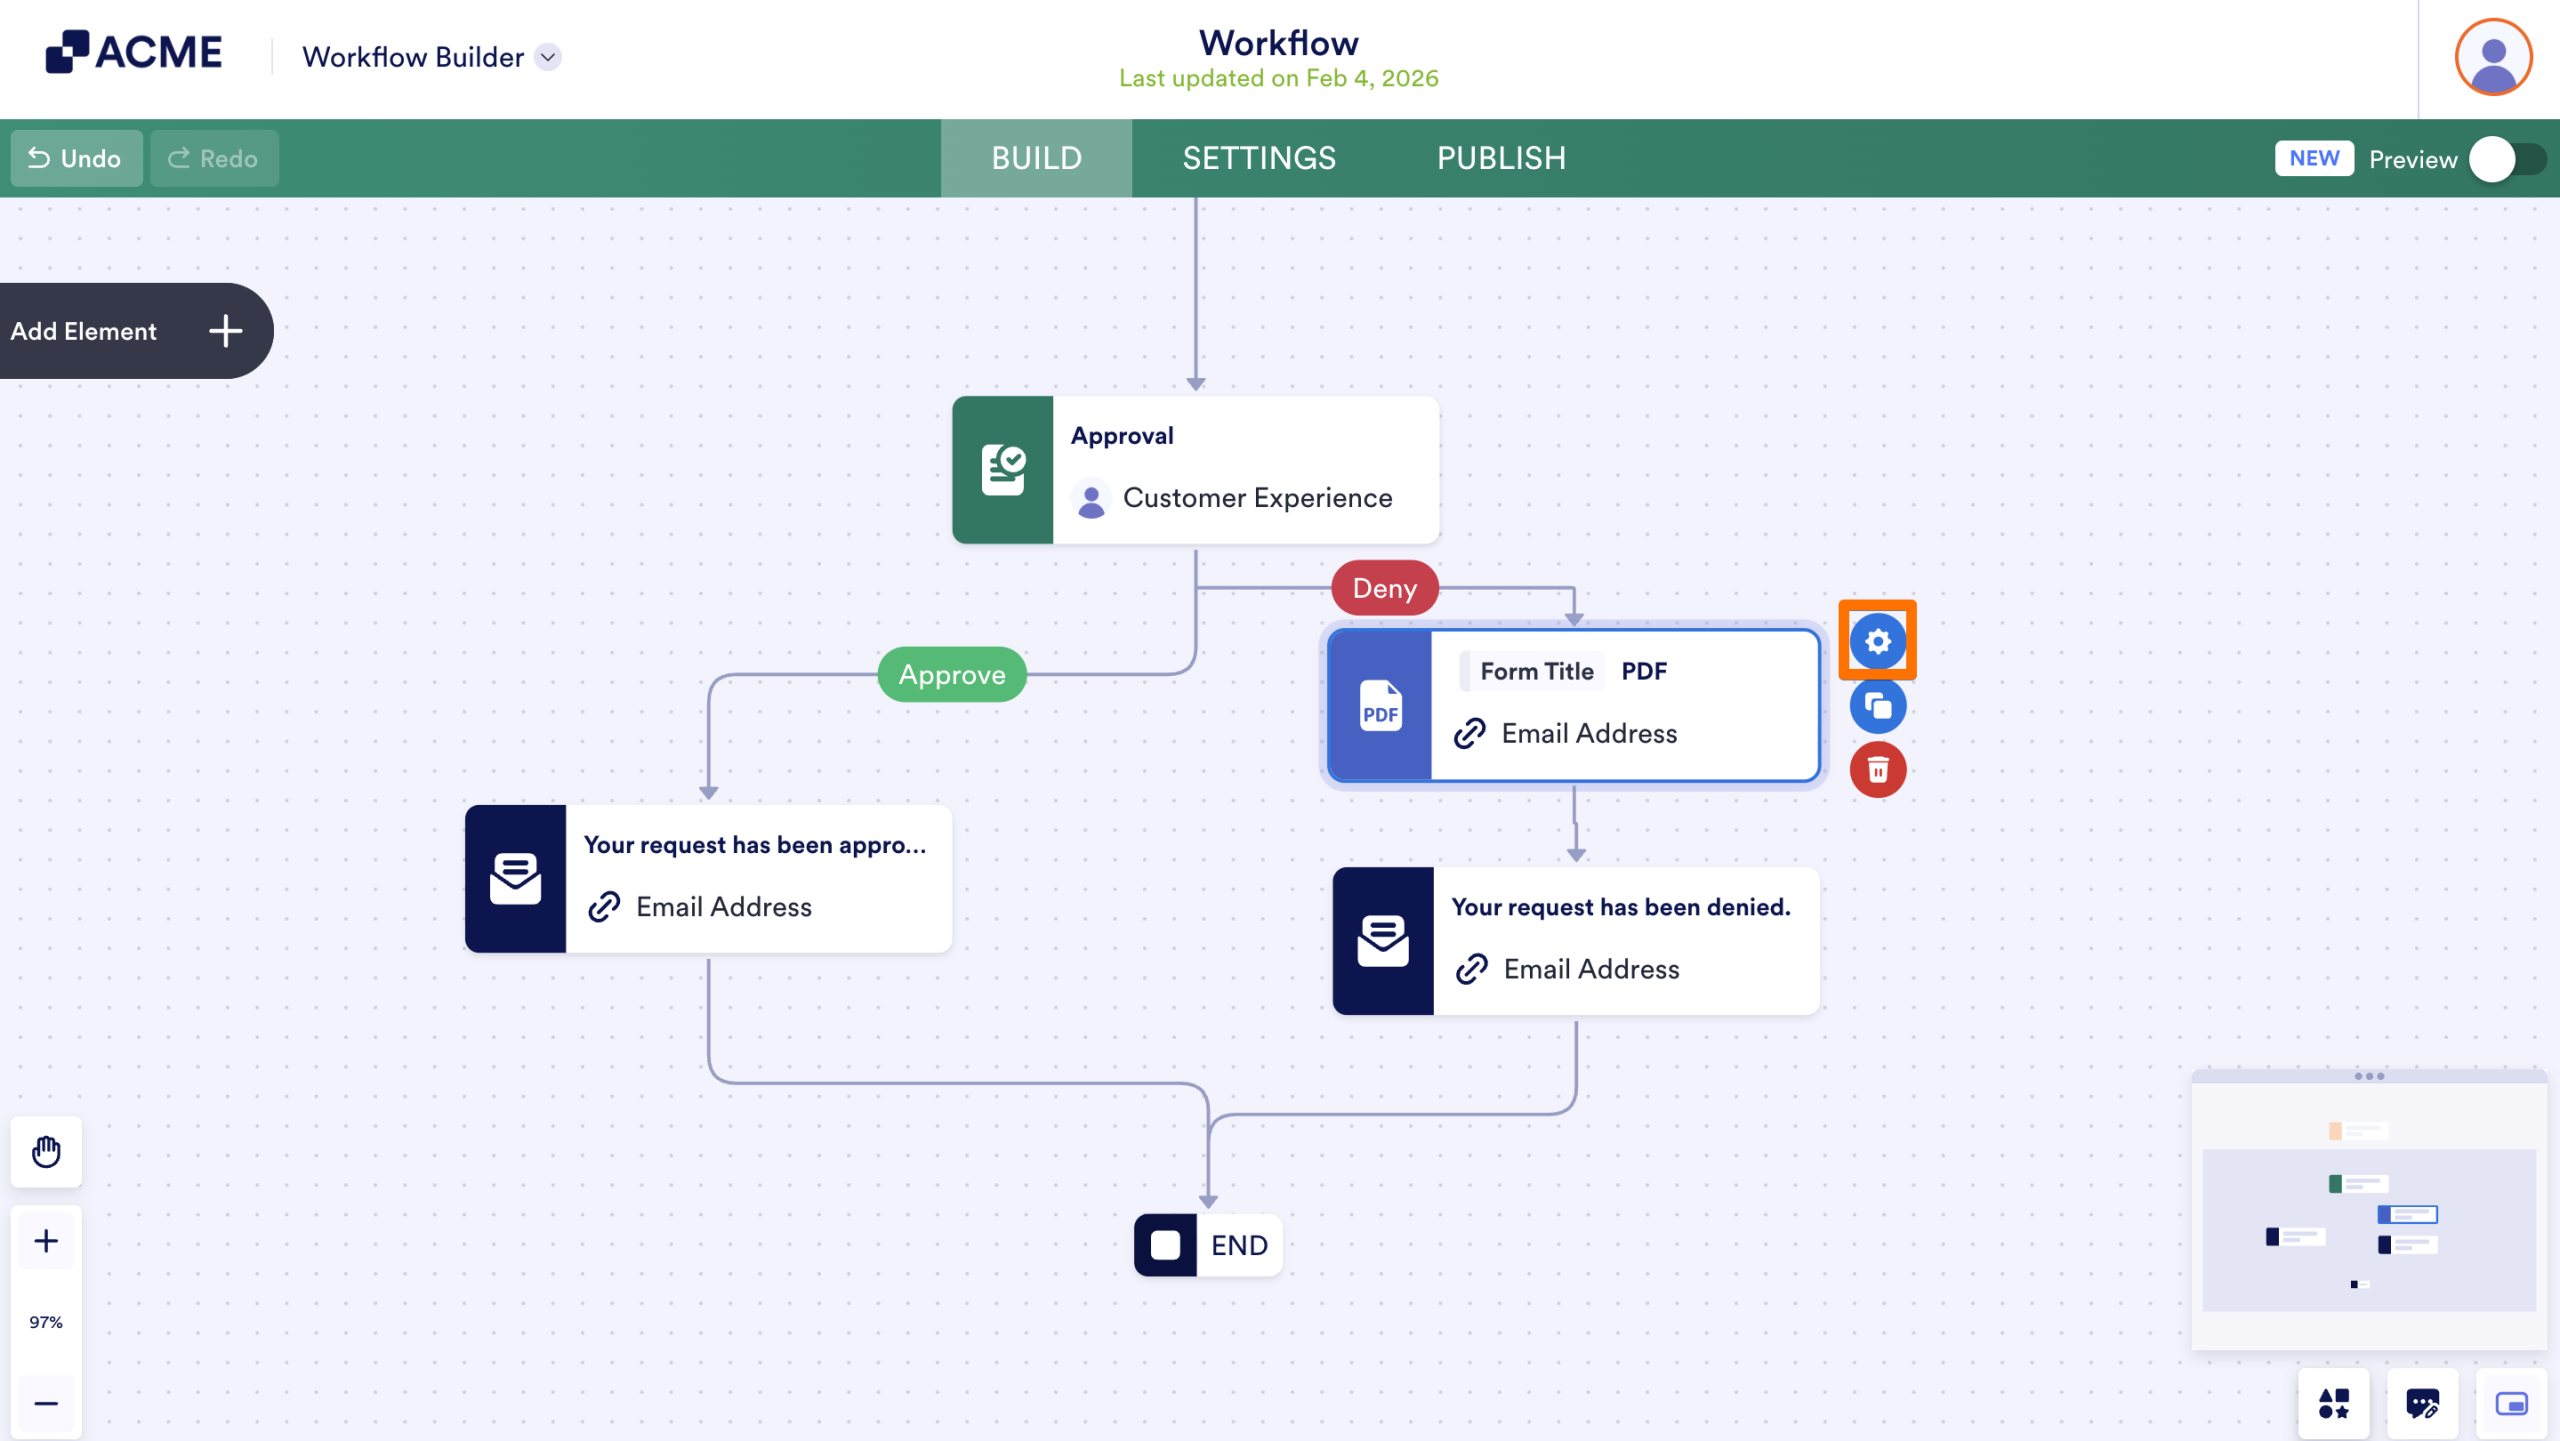
- Click on the Gear icon next to the PDF element to open the element’s settings.
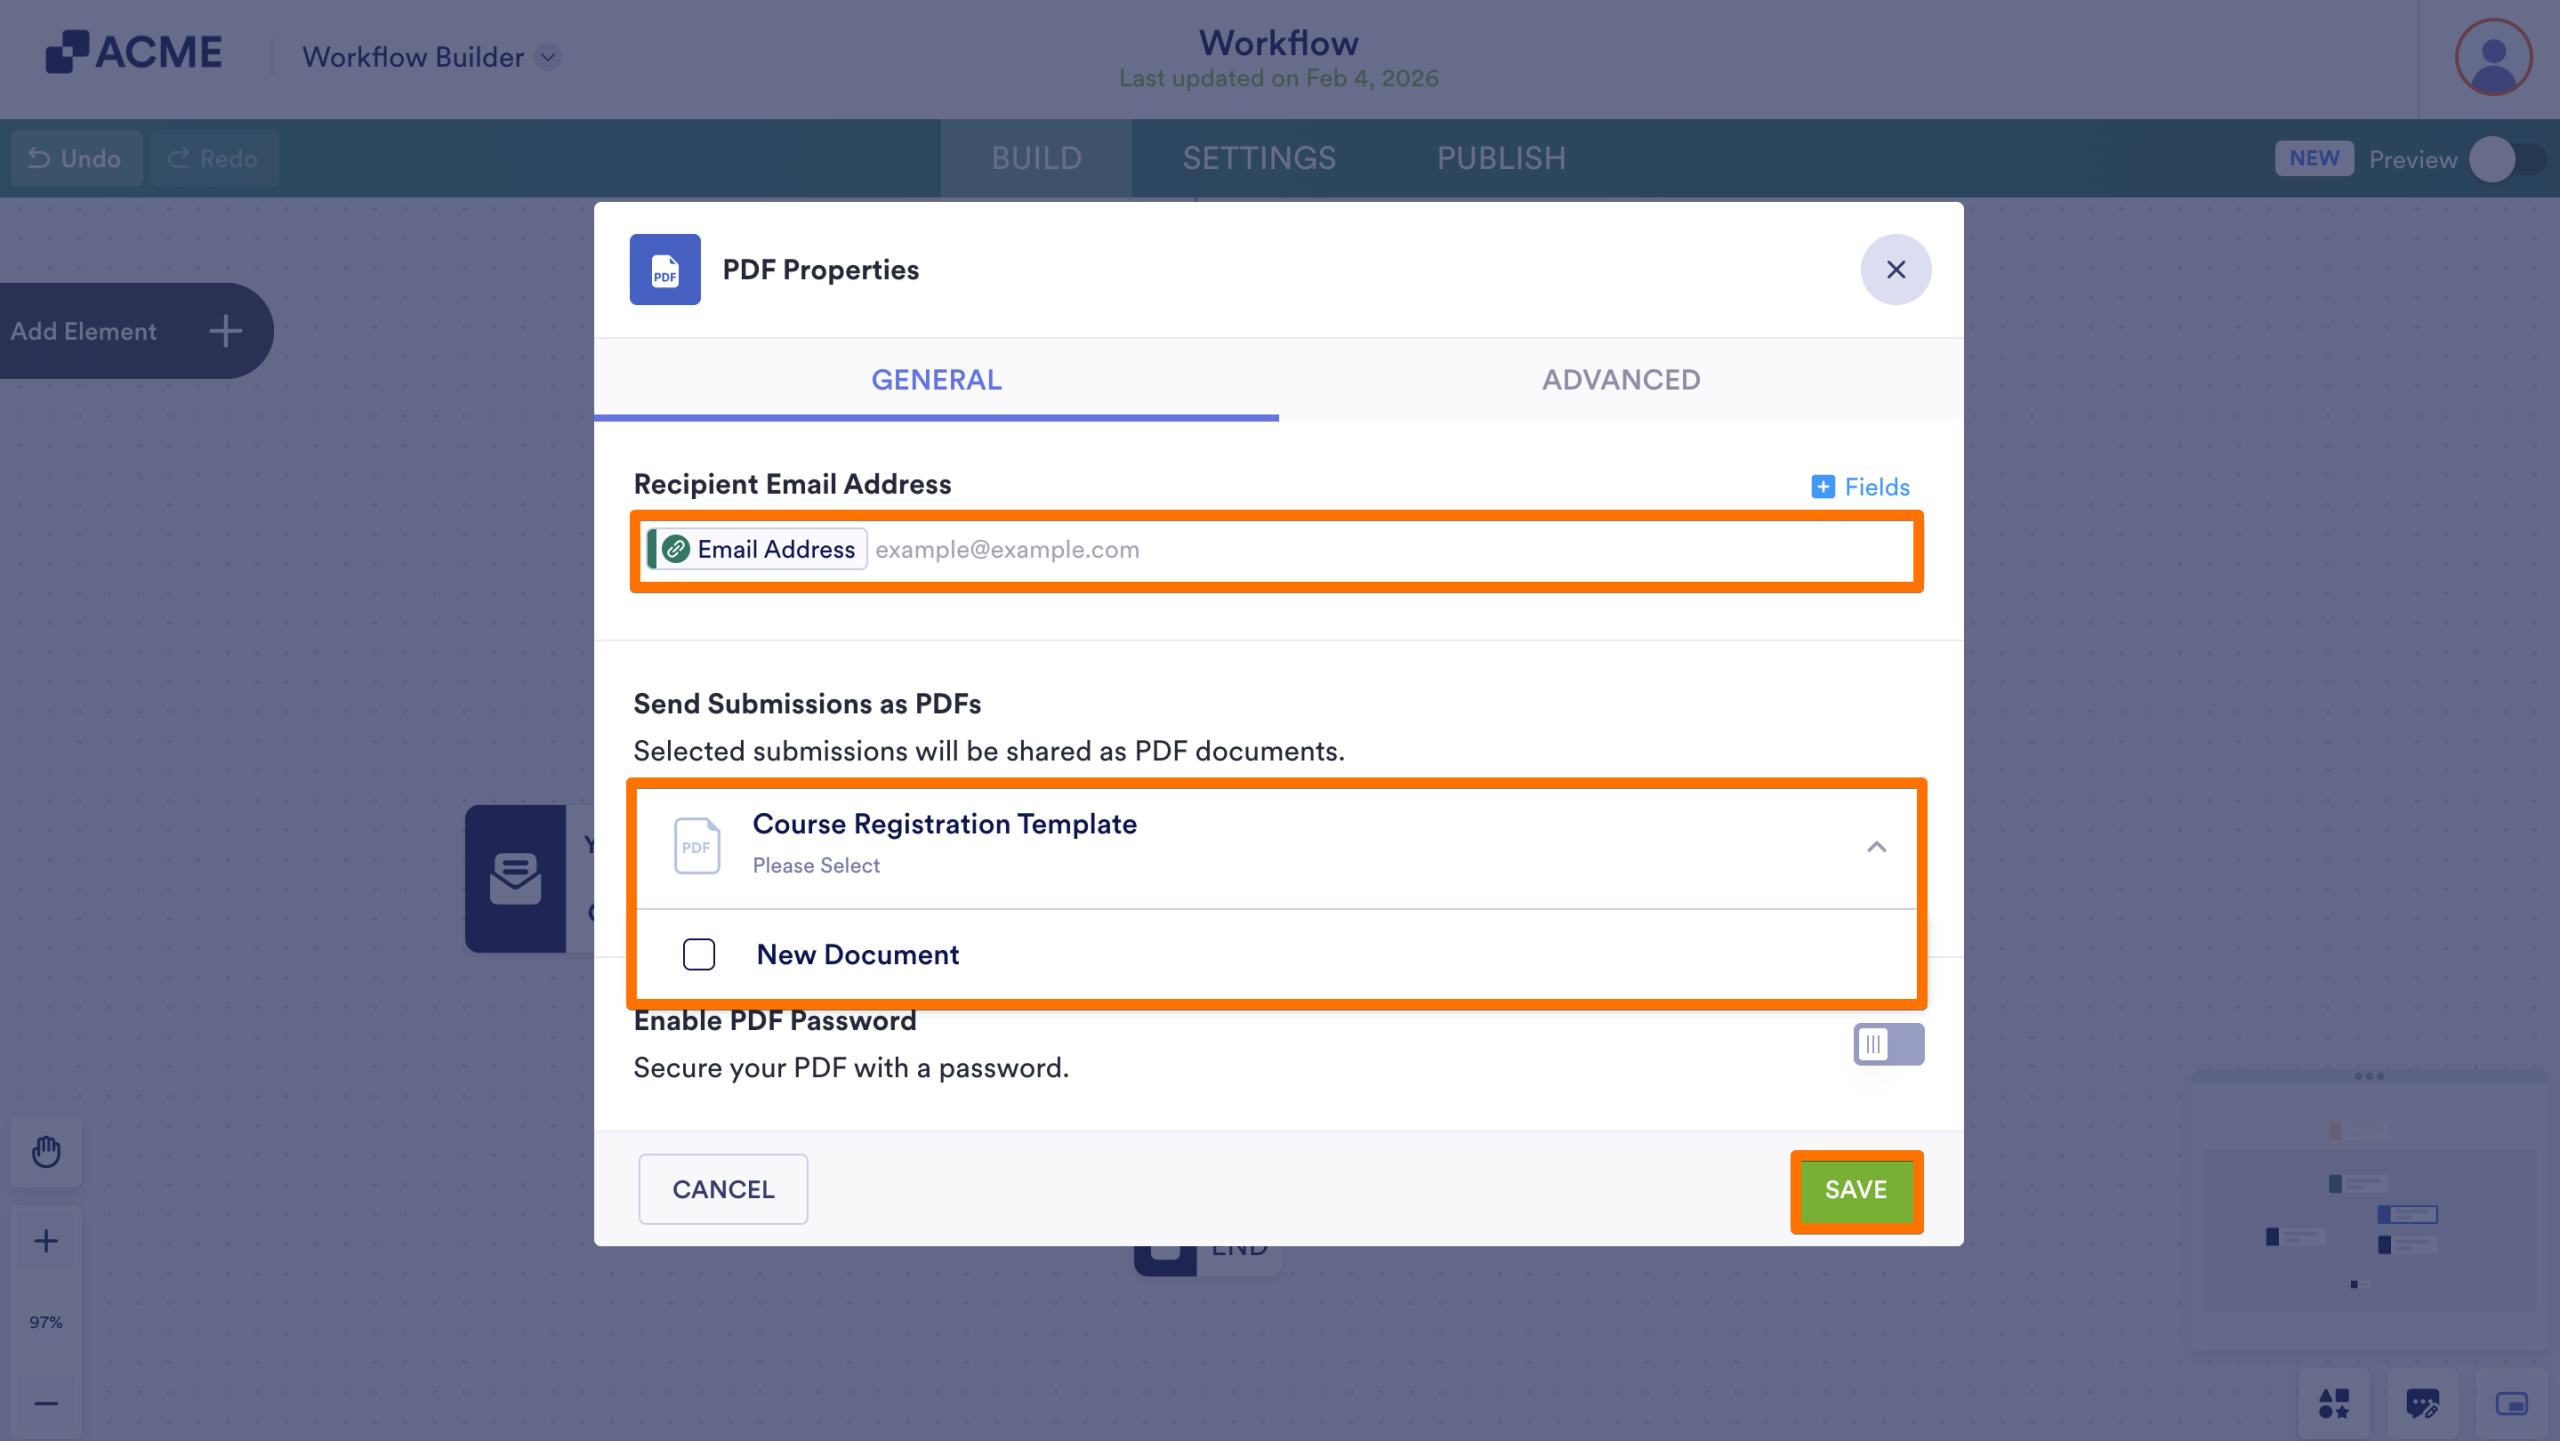
- In the pop-up window, click on the dropdown under Send Submissions as PDF and select the checkbox next to the PDF(s) you’d like to send.
- Finally, add email recipients and click Save.
Send a PDF Document from Tables
Using buttons, you can send a PDF document directly from a Table. Add a PDF already associated with the form, or let the PDF Editor automatically generate one from the form’s fields. Let’s walk through the process of adding the Send PDF button together:
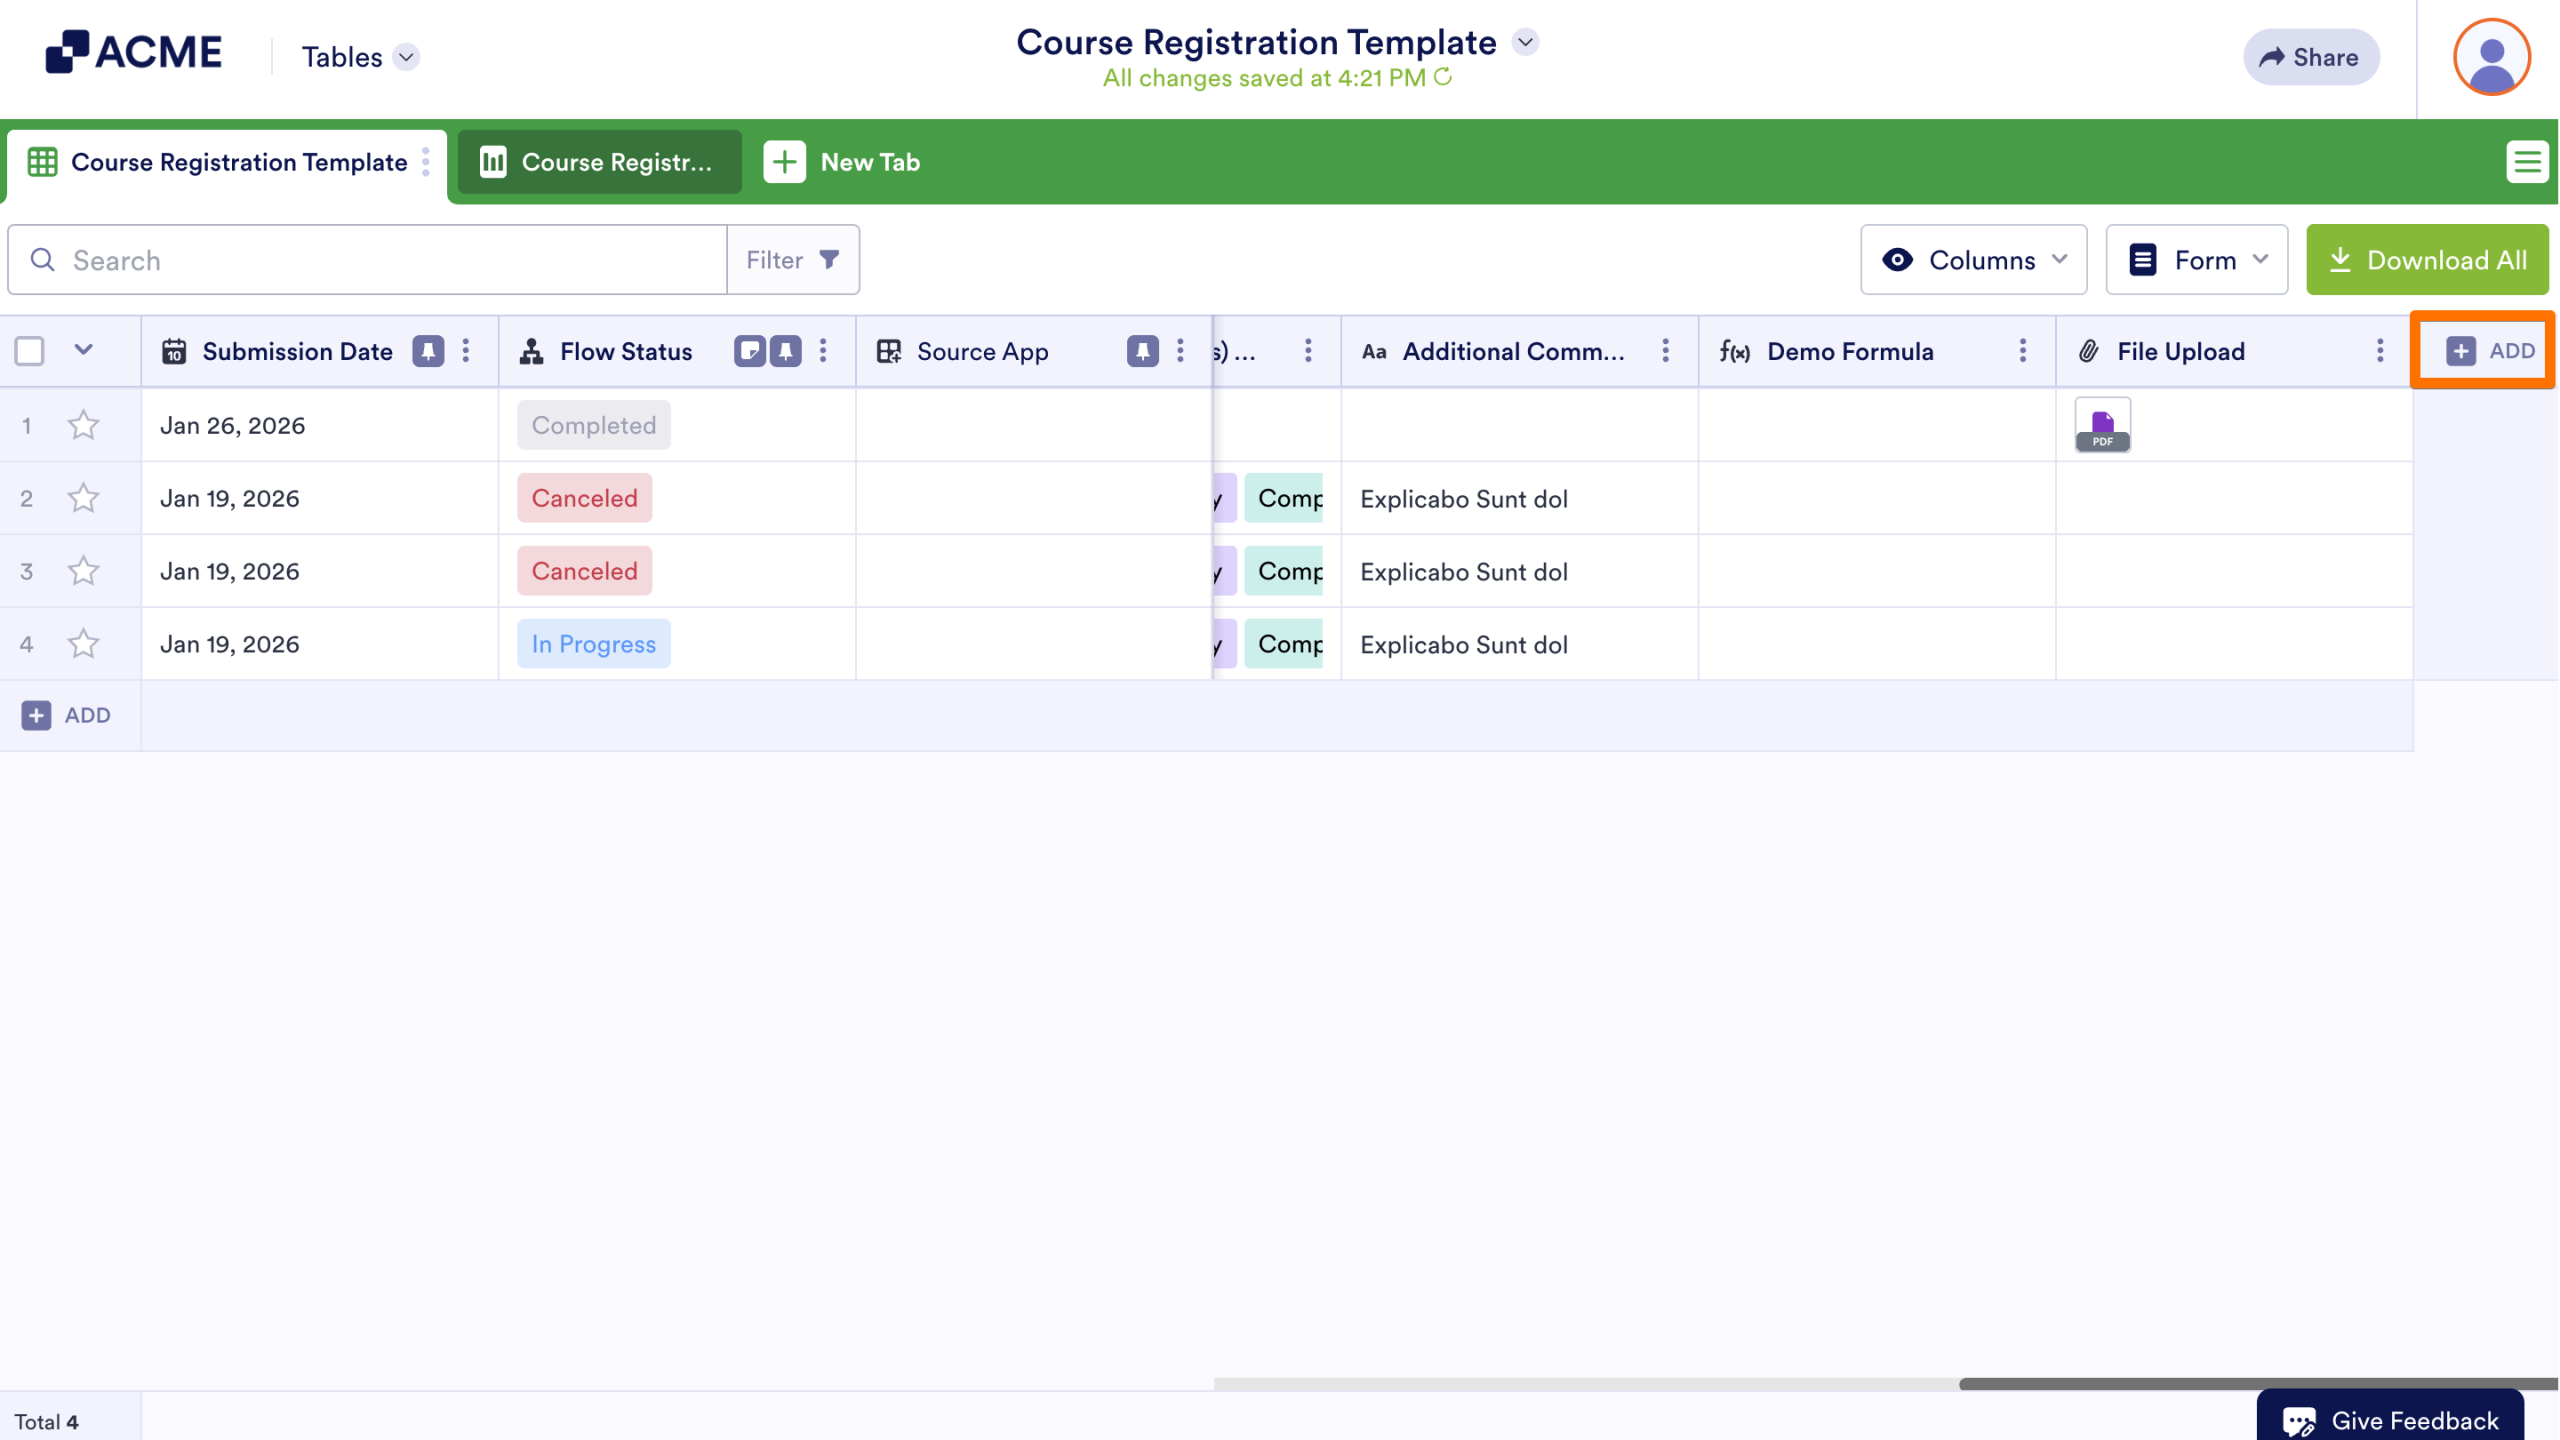
- In Tables, click on Add on the right-hand side of the column headers.
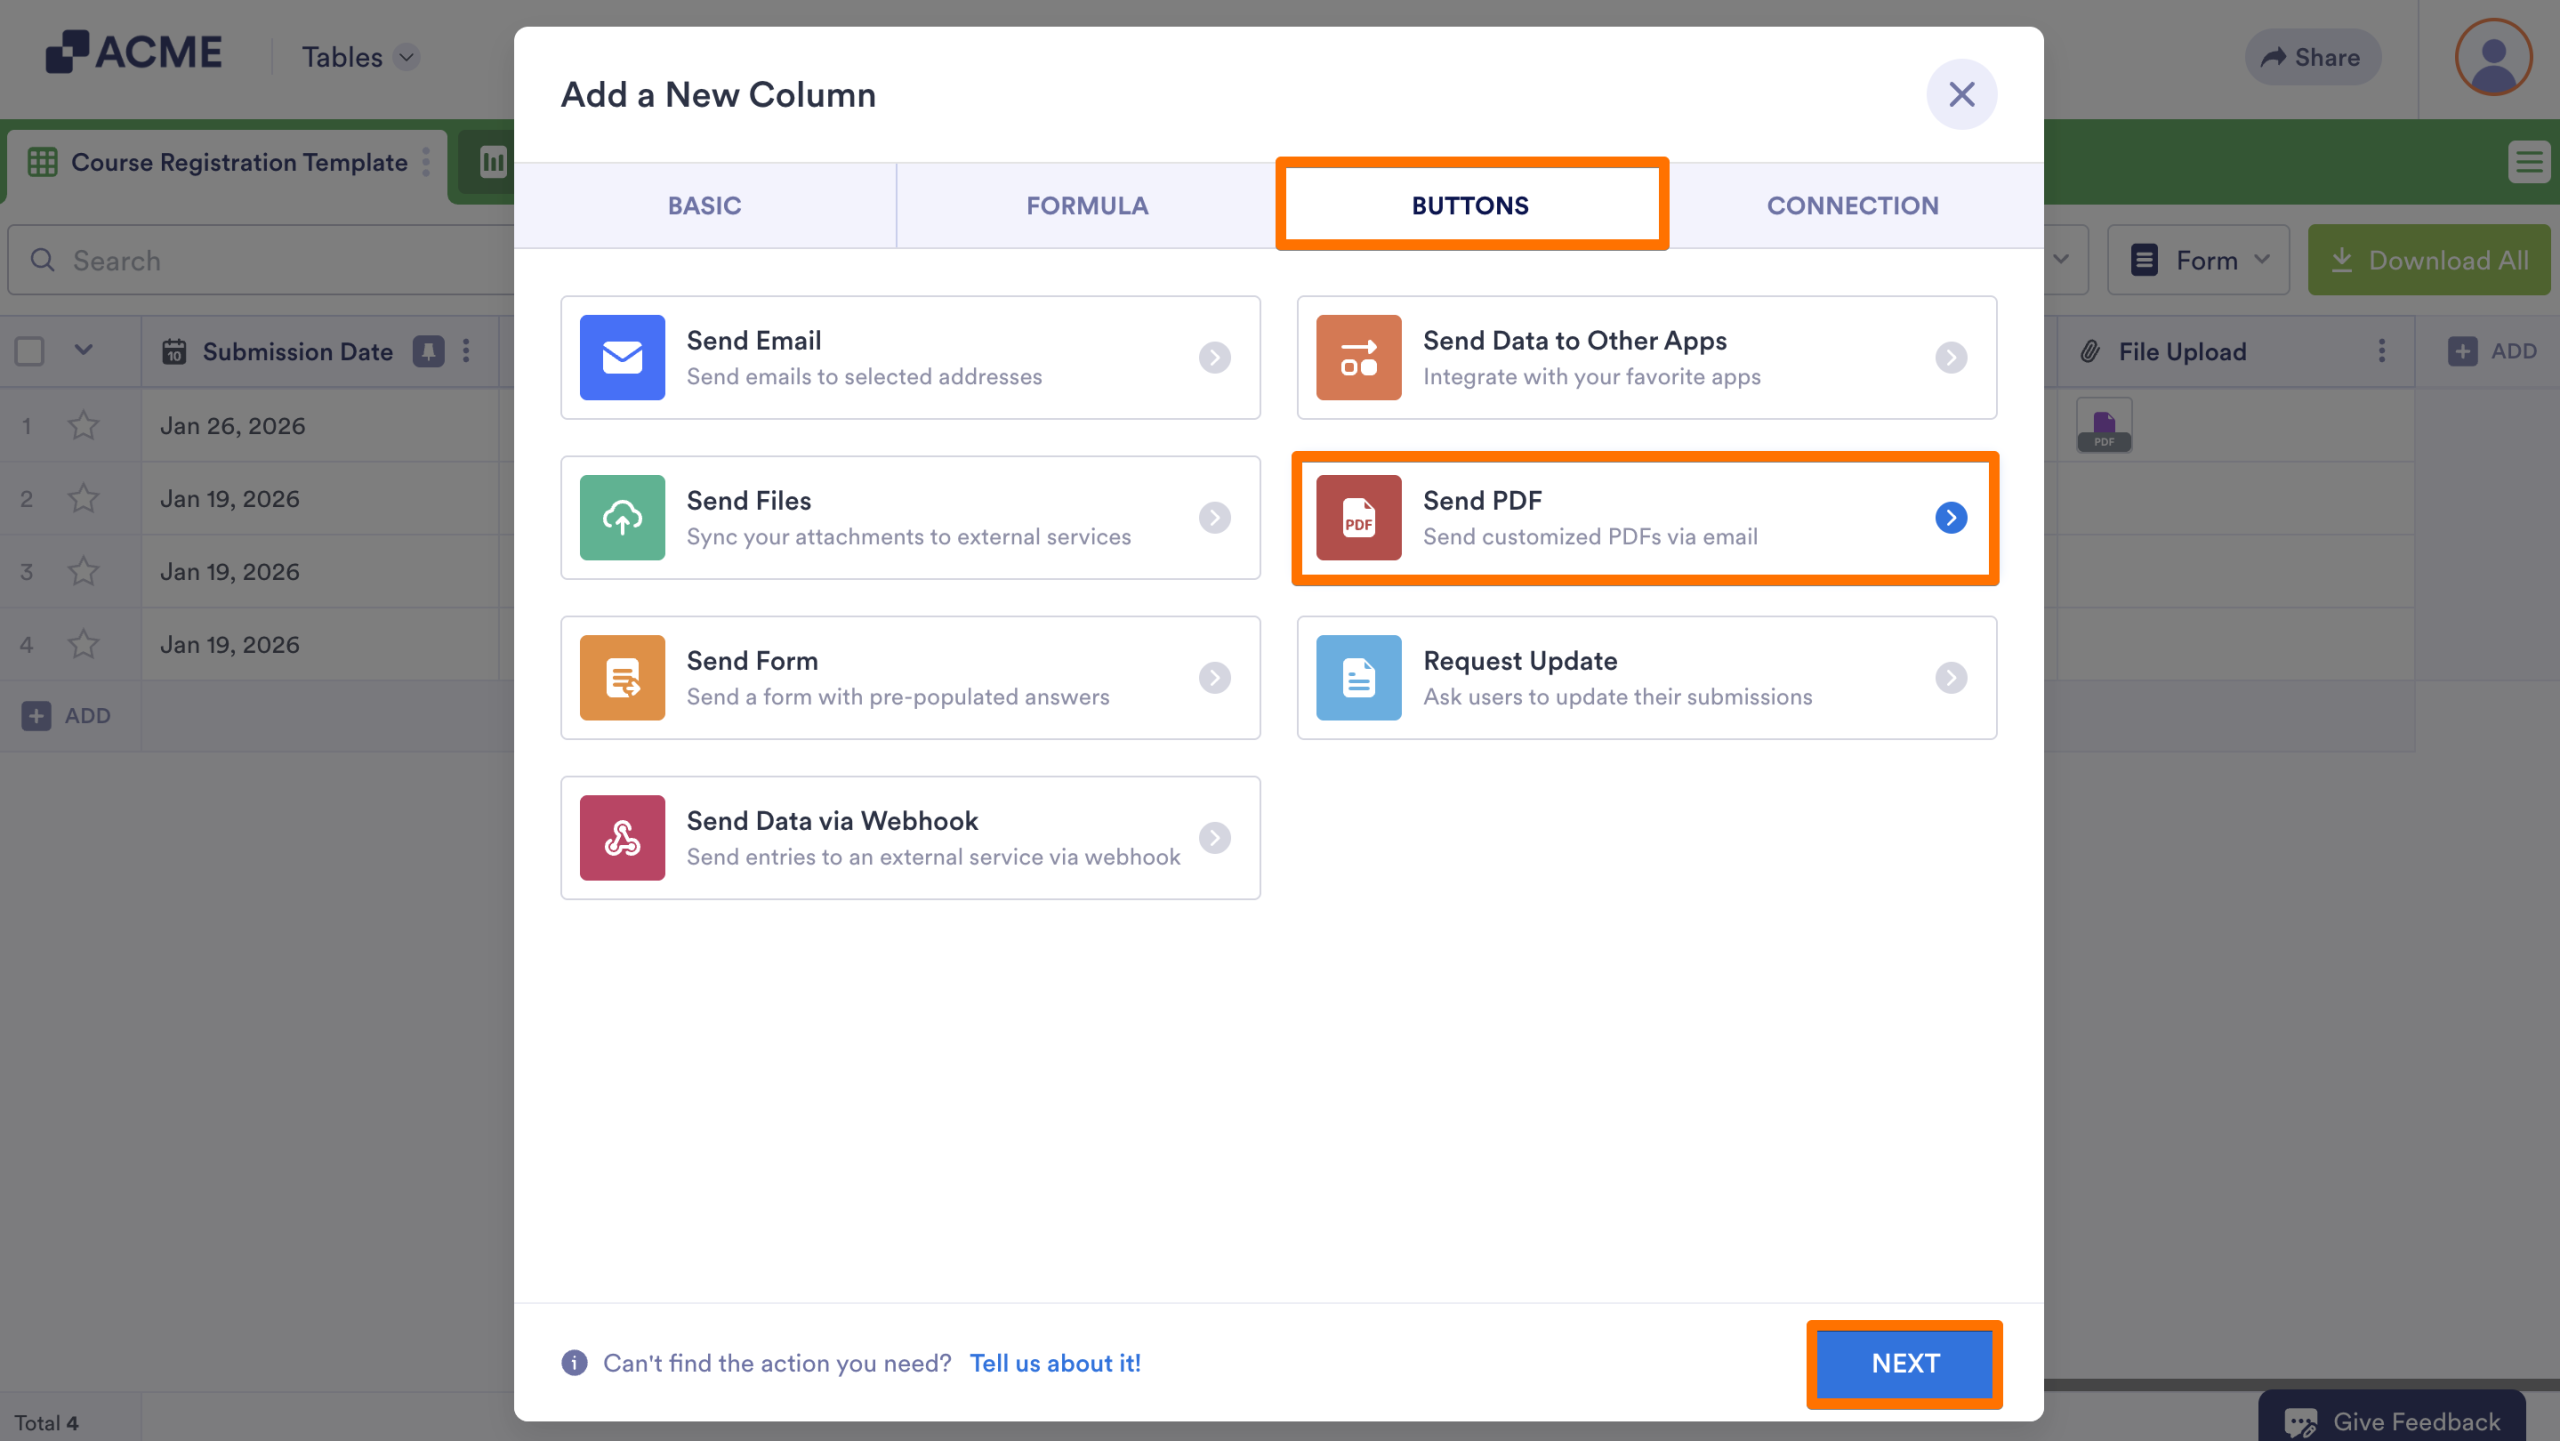
- Click on the Buttons tab in the pop-up window.
- Then, select Send PDF and click on Next.
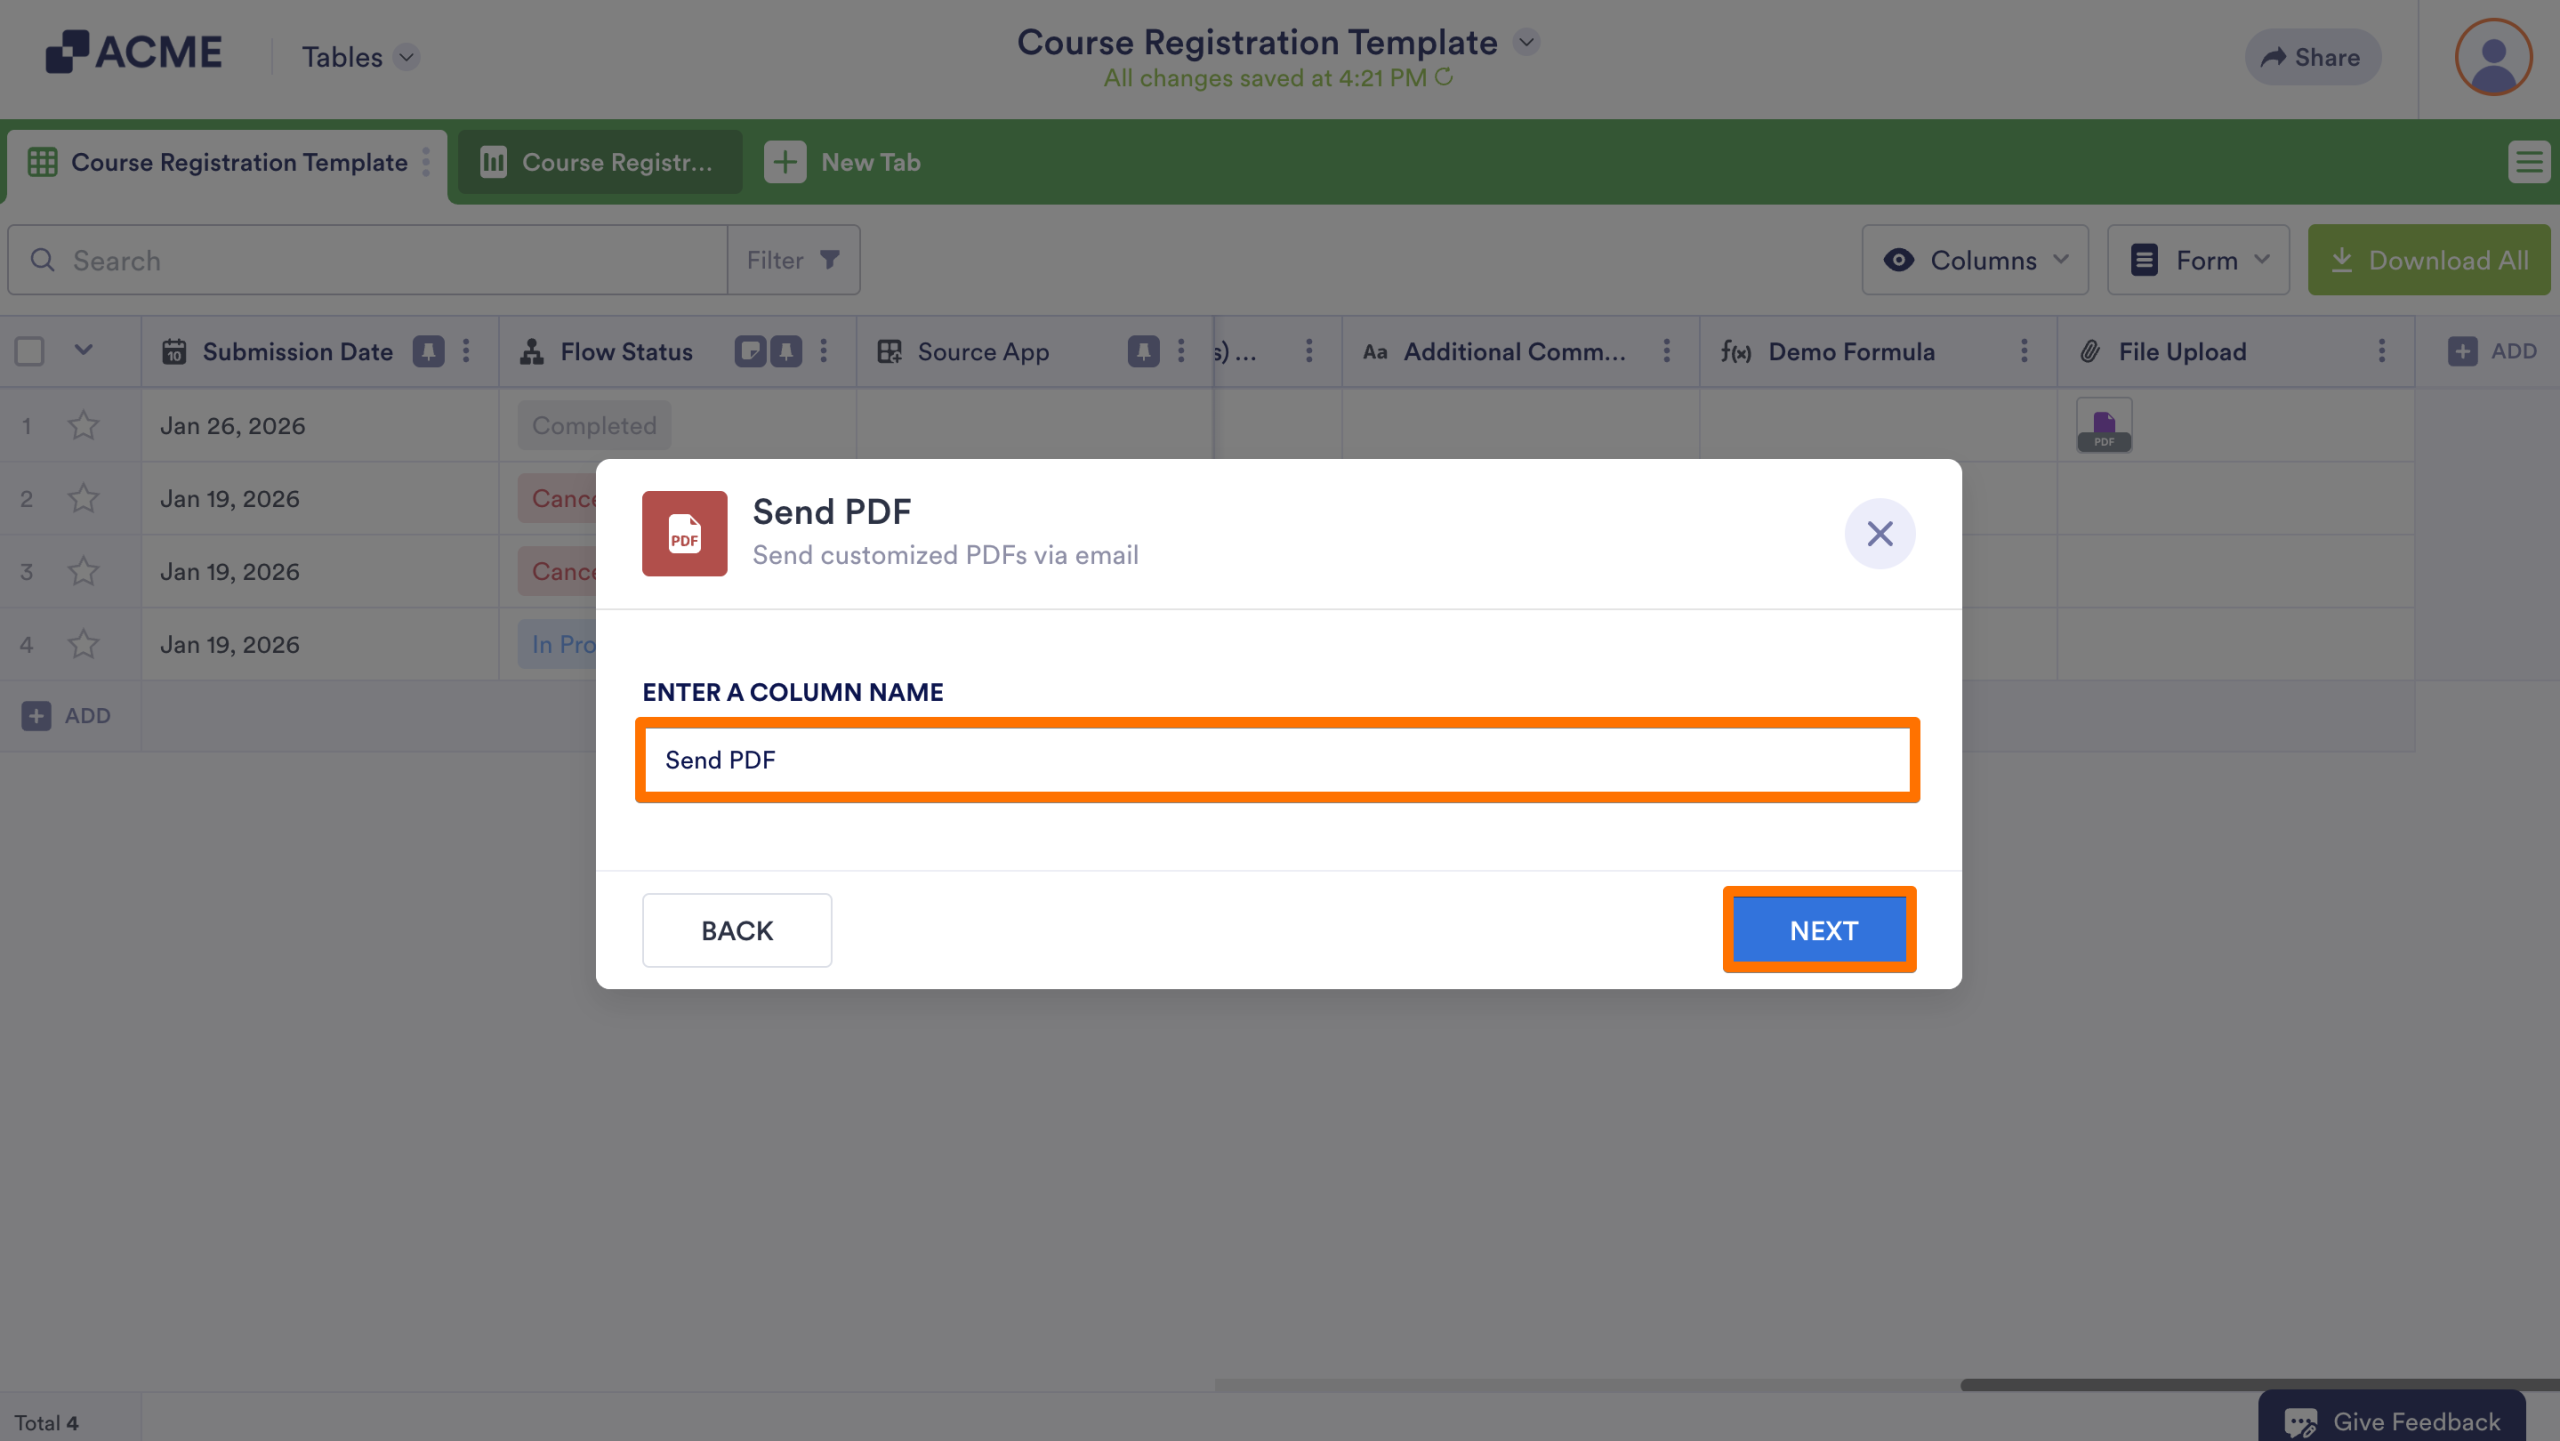
- Enter a column name and click Next.
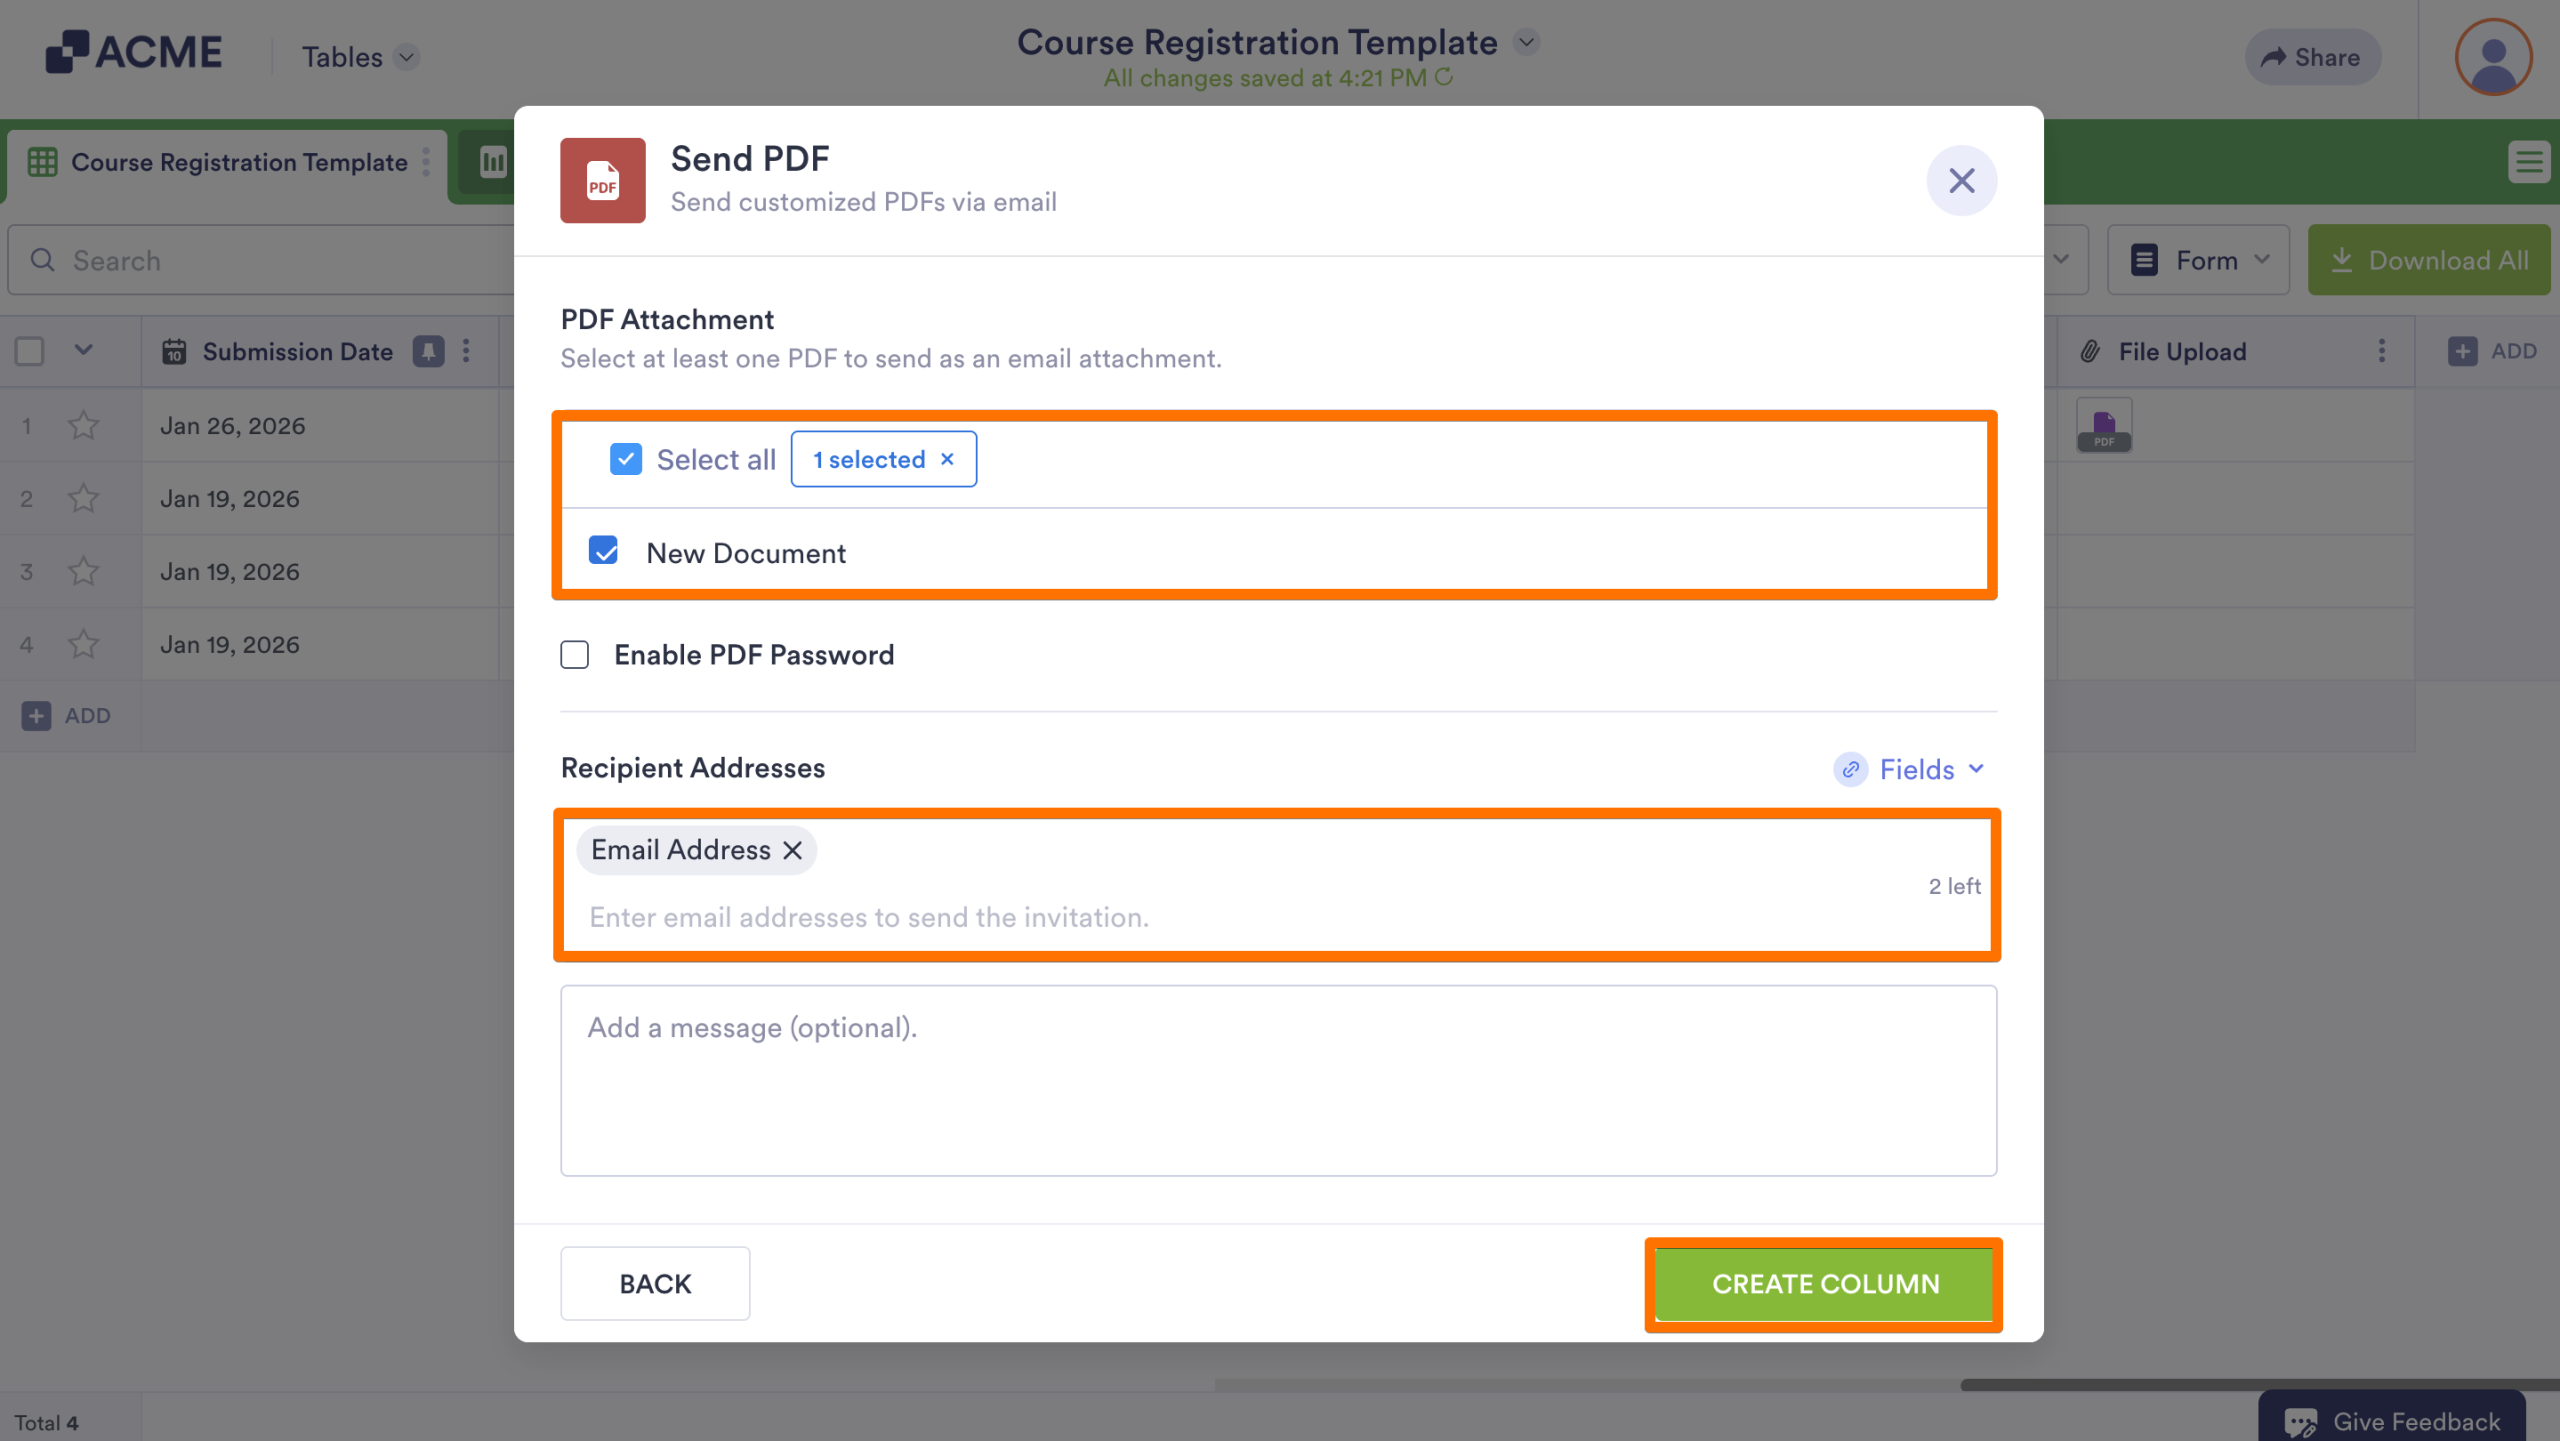
- On the next page, click on the checkbox next to the PDF(s) you’d like to send. If one hasn’t already been created, a PDF named New Document will be automatically created.
- Then, using form fields or manually entered email addresses, add Recipients and a message to the email.
- Finally, click Create Column.
Now, you can send PDF documents from the submission table by clicking Send PDF.

Send Comment: