Reports help you visualize your submission data using charts, graphs, and tables. You can use reports to analyze trends, track performance, and share clear, professional data summaries with your team. In this guide, you’ll learn how to create reports.
Create a Report in My Workspace
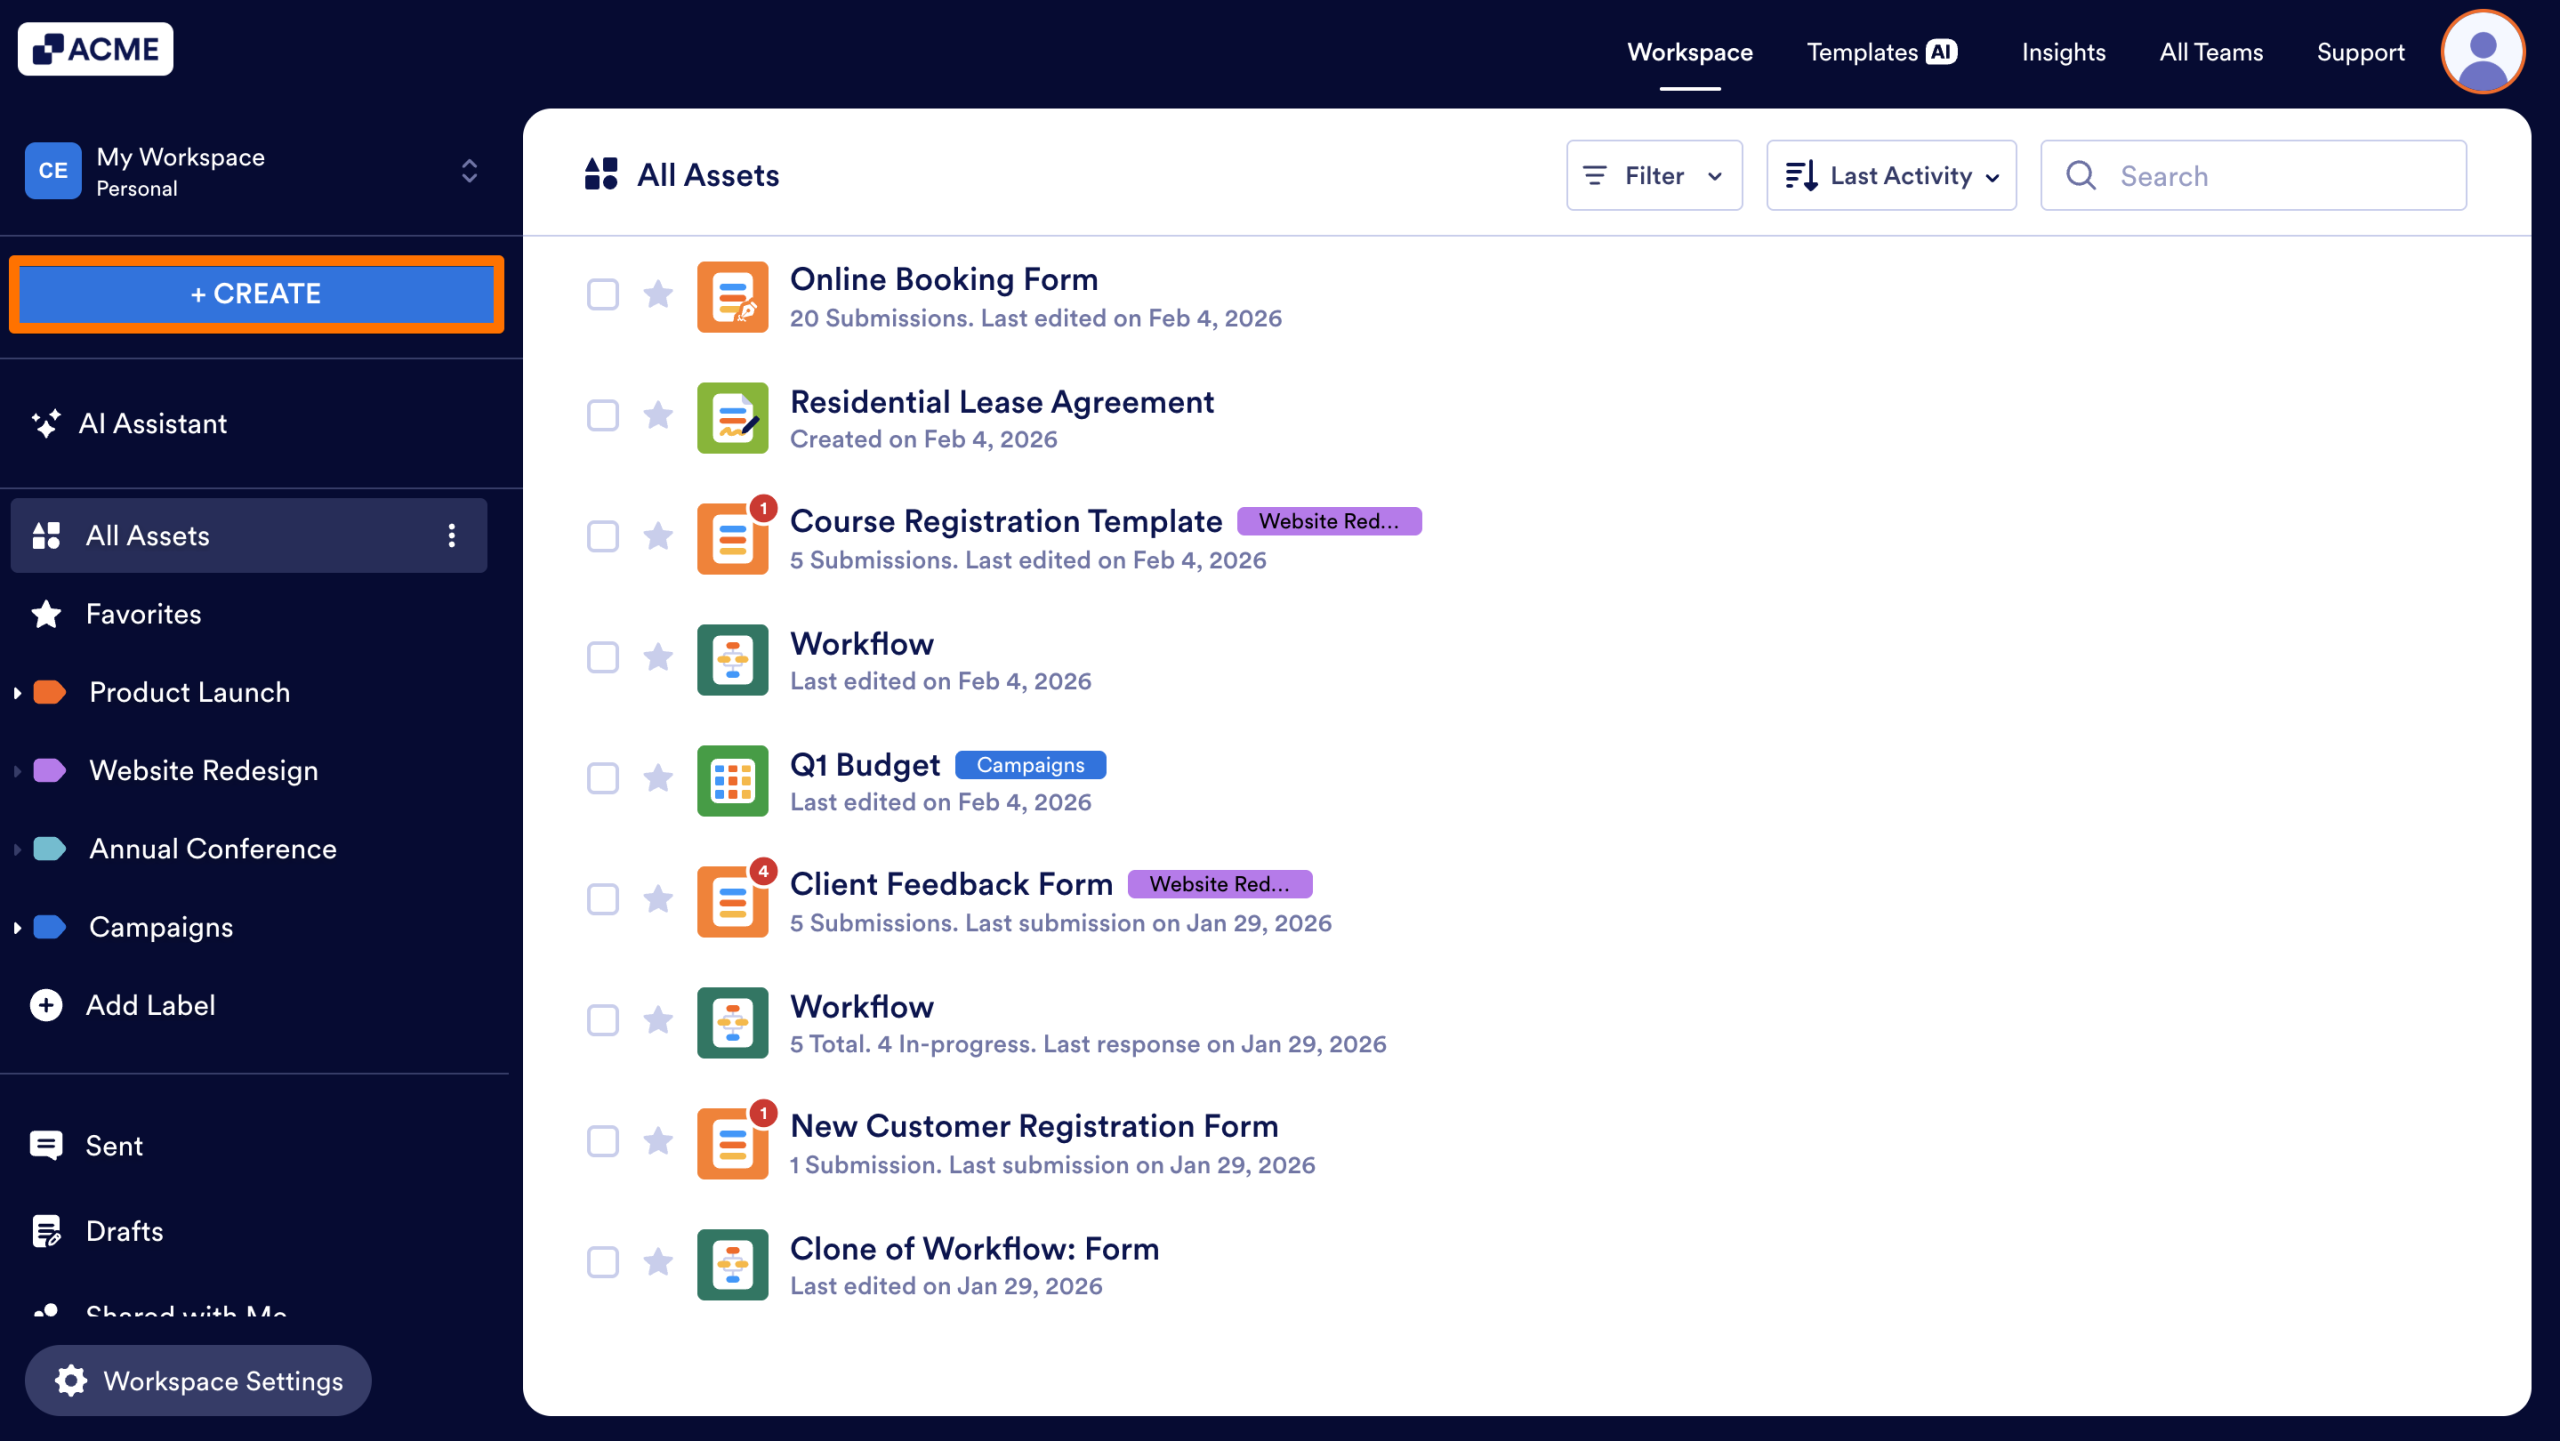
- In My Workspace, click on the Create button in the upper left-hand corner of the Workspace sidebar.
- Next, select Report.
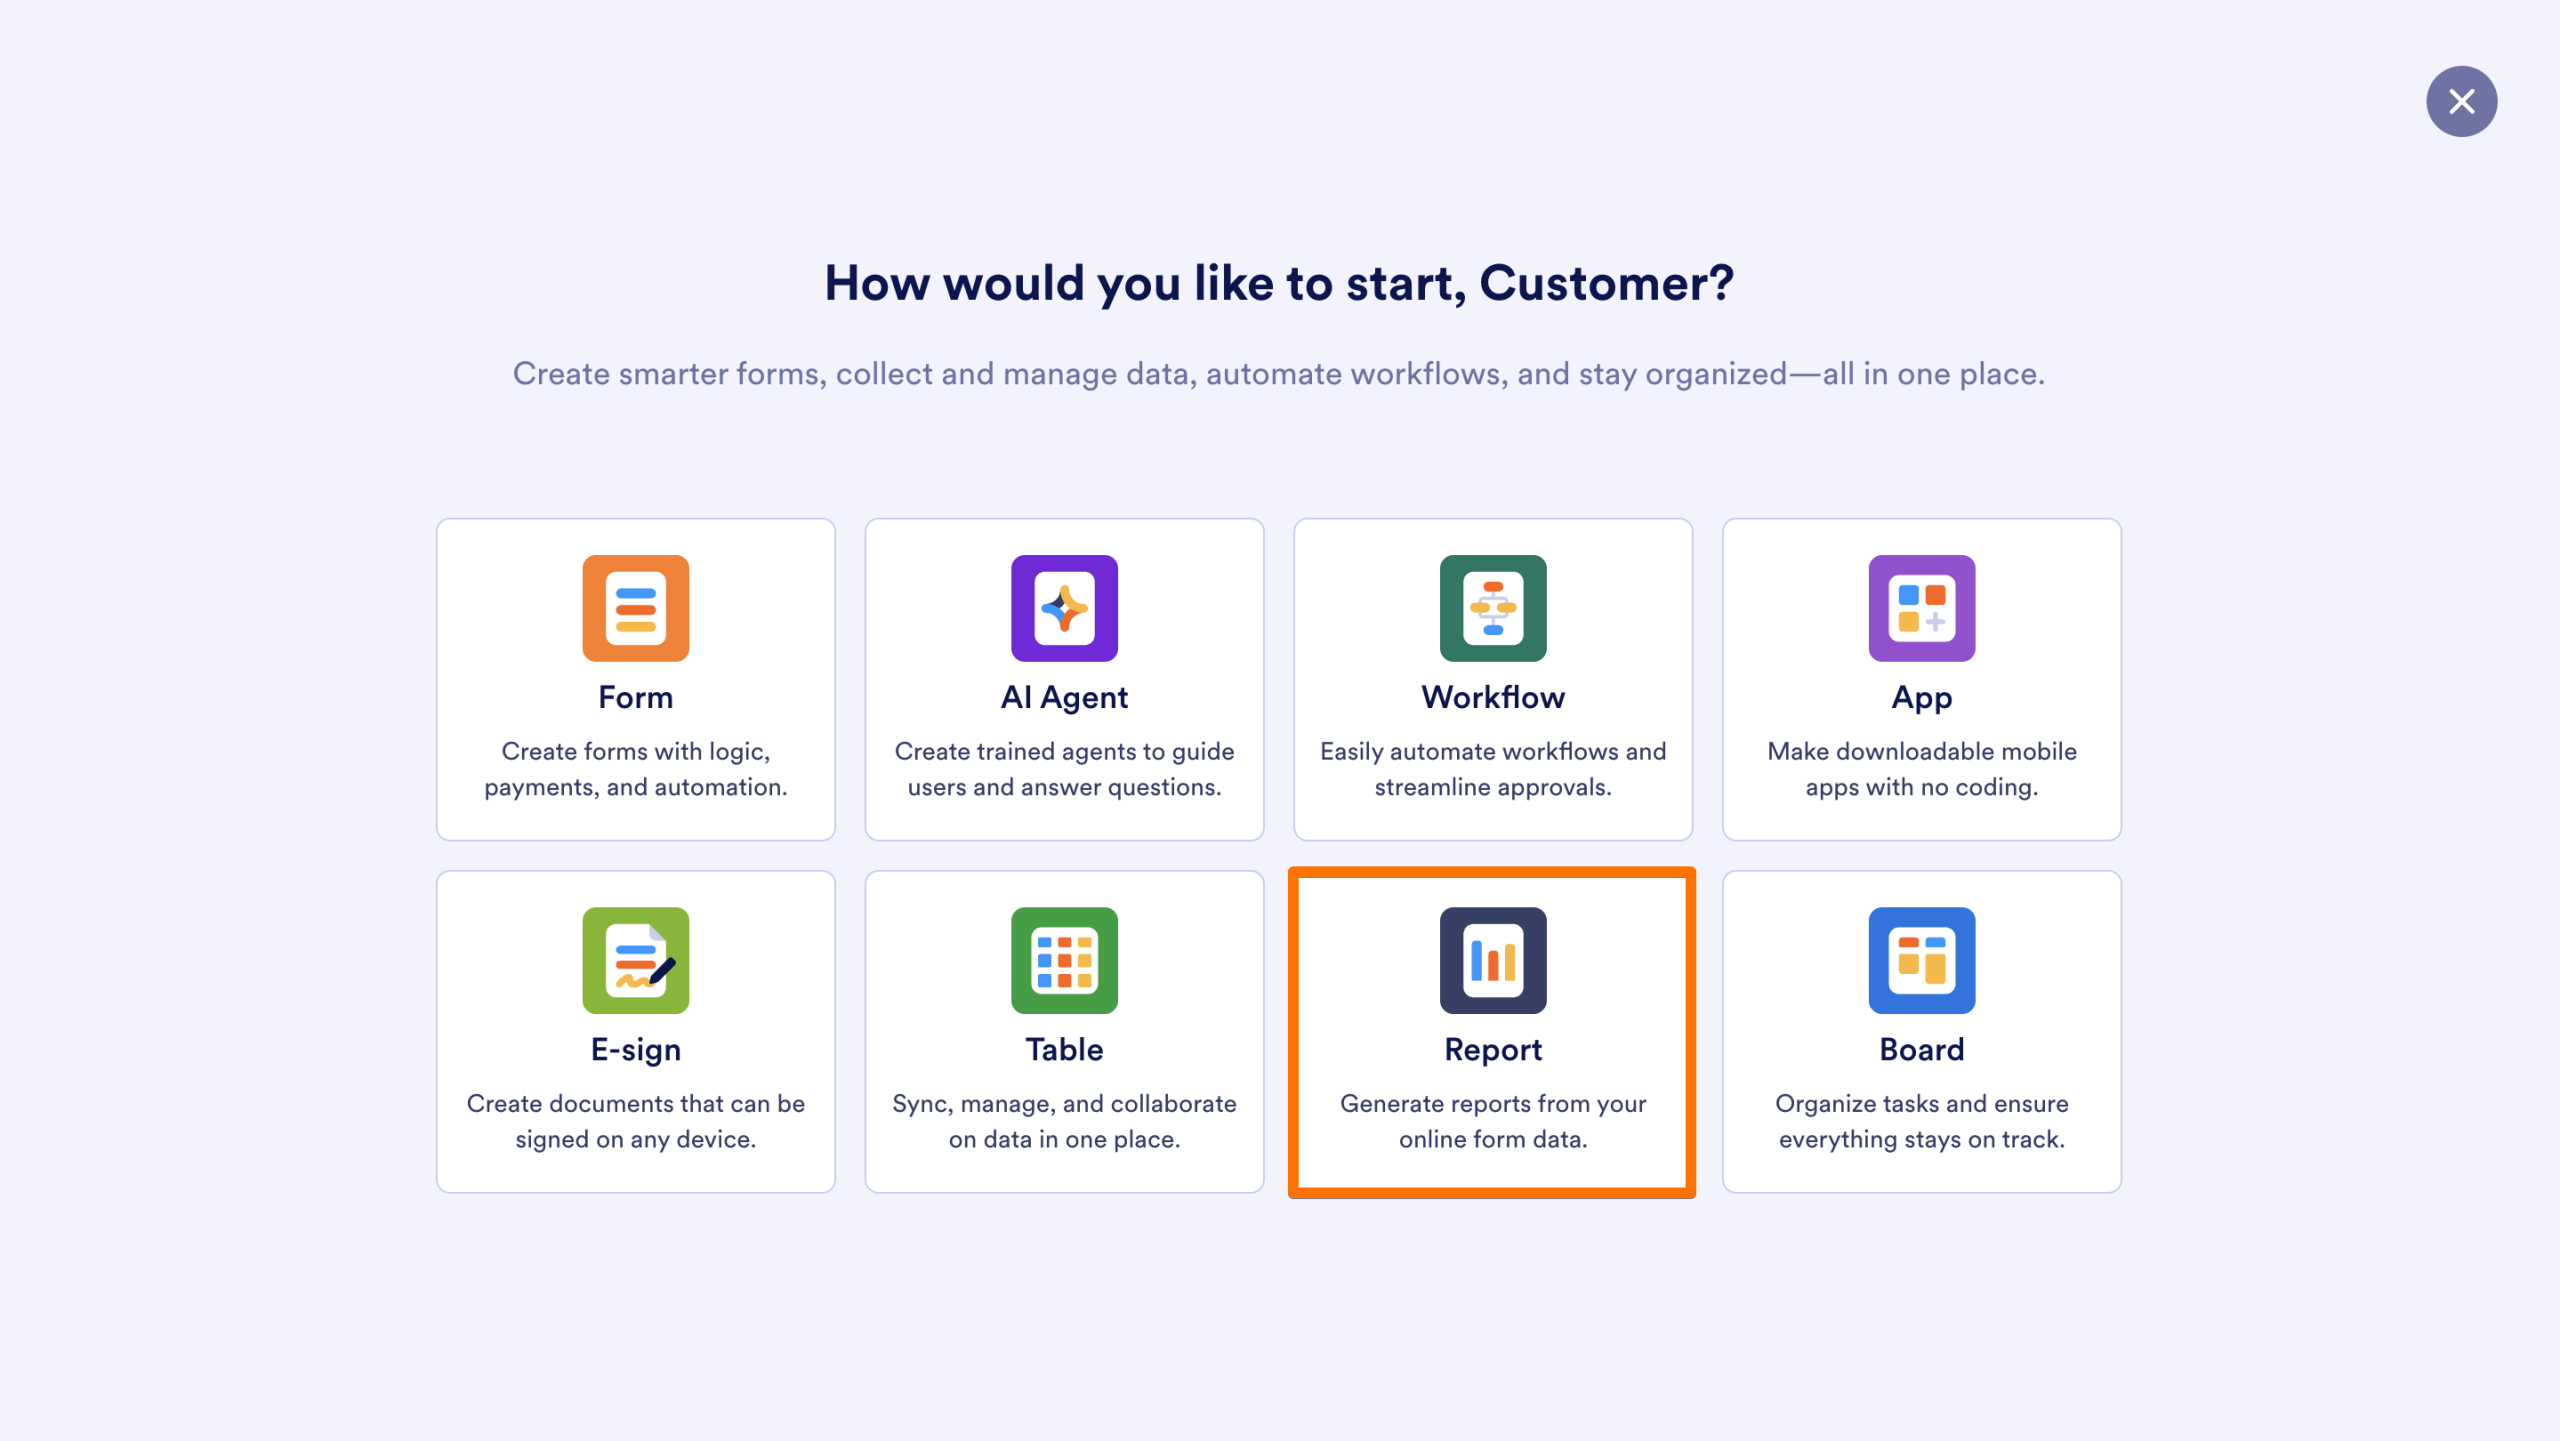
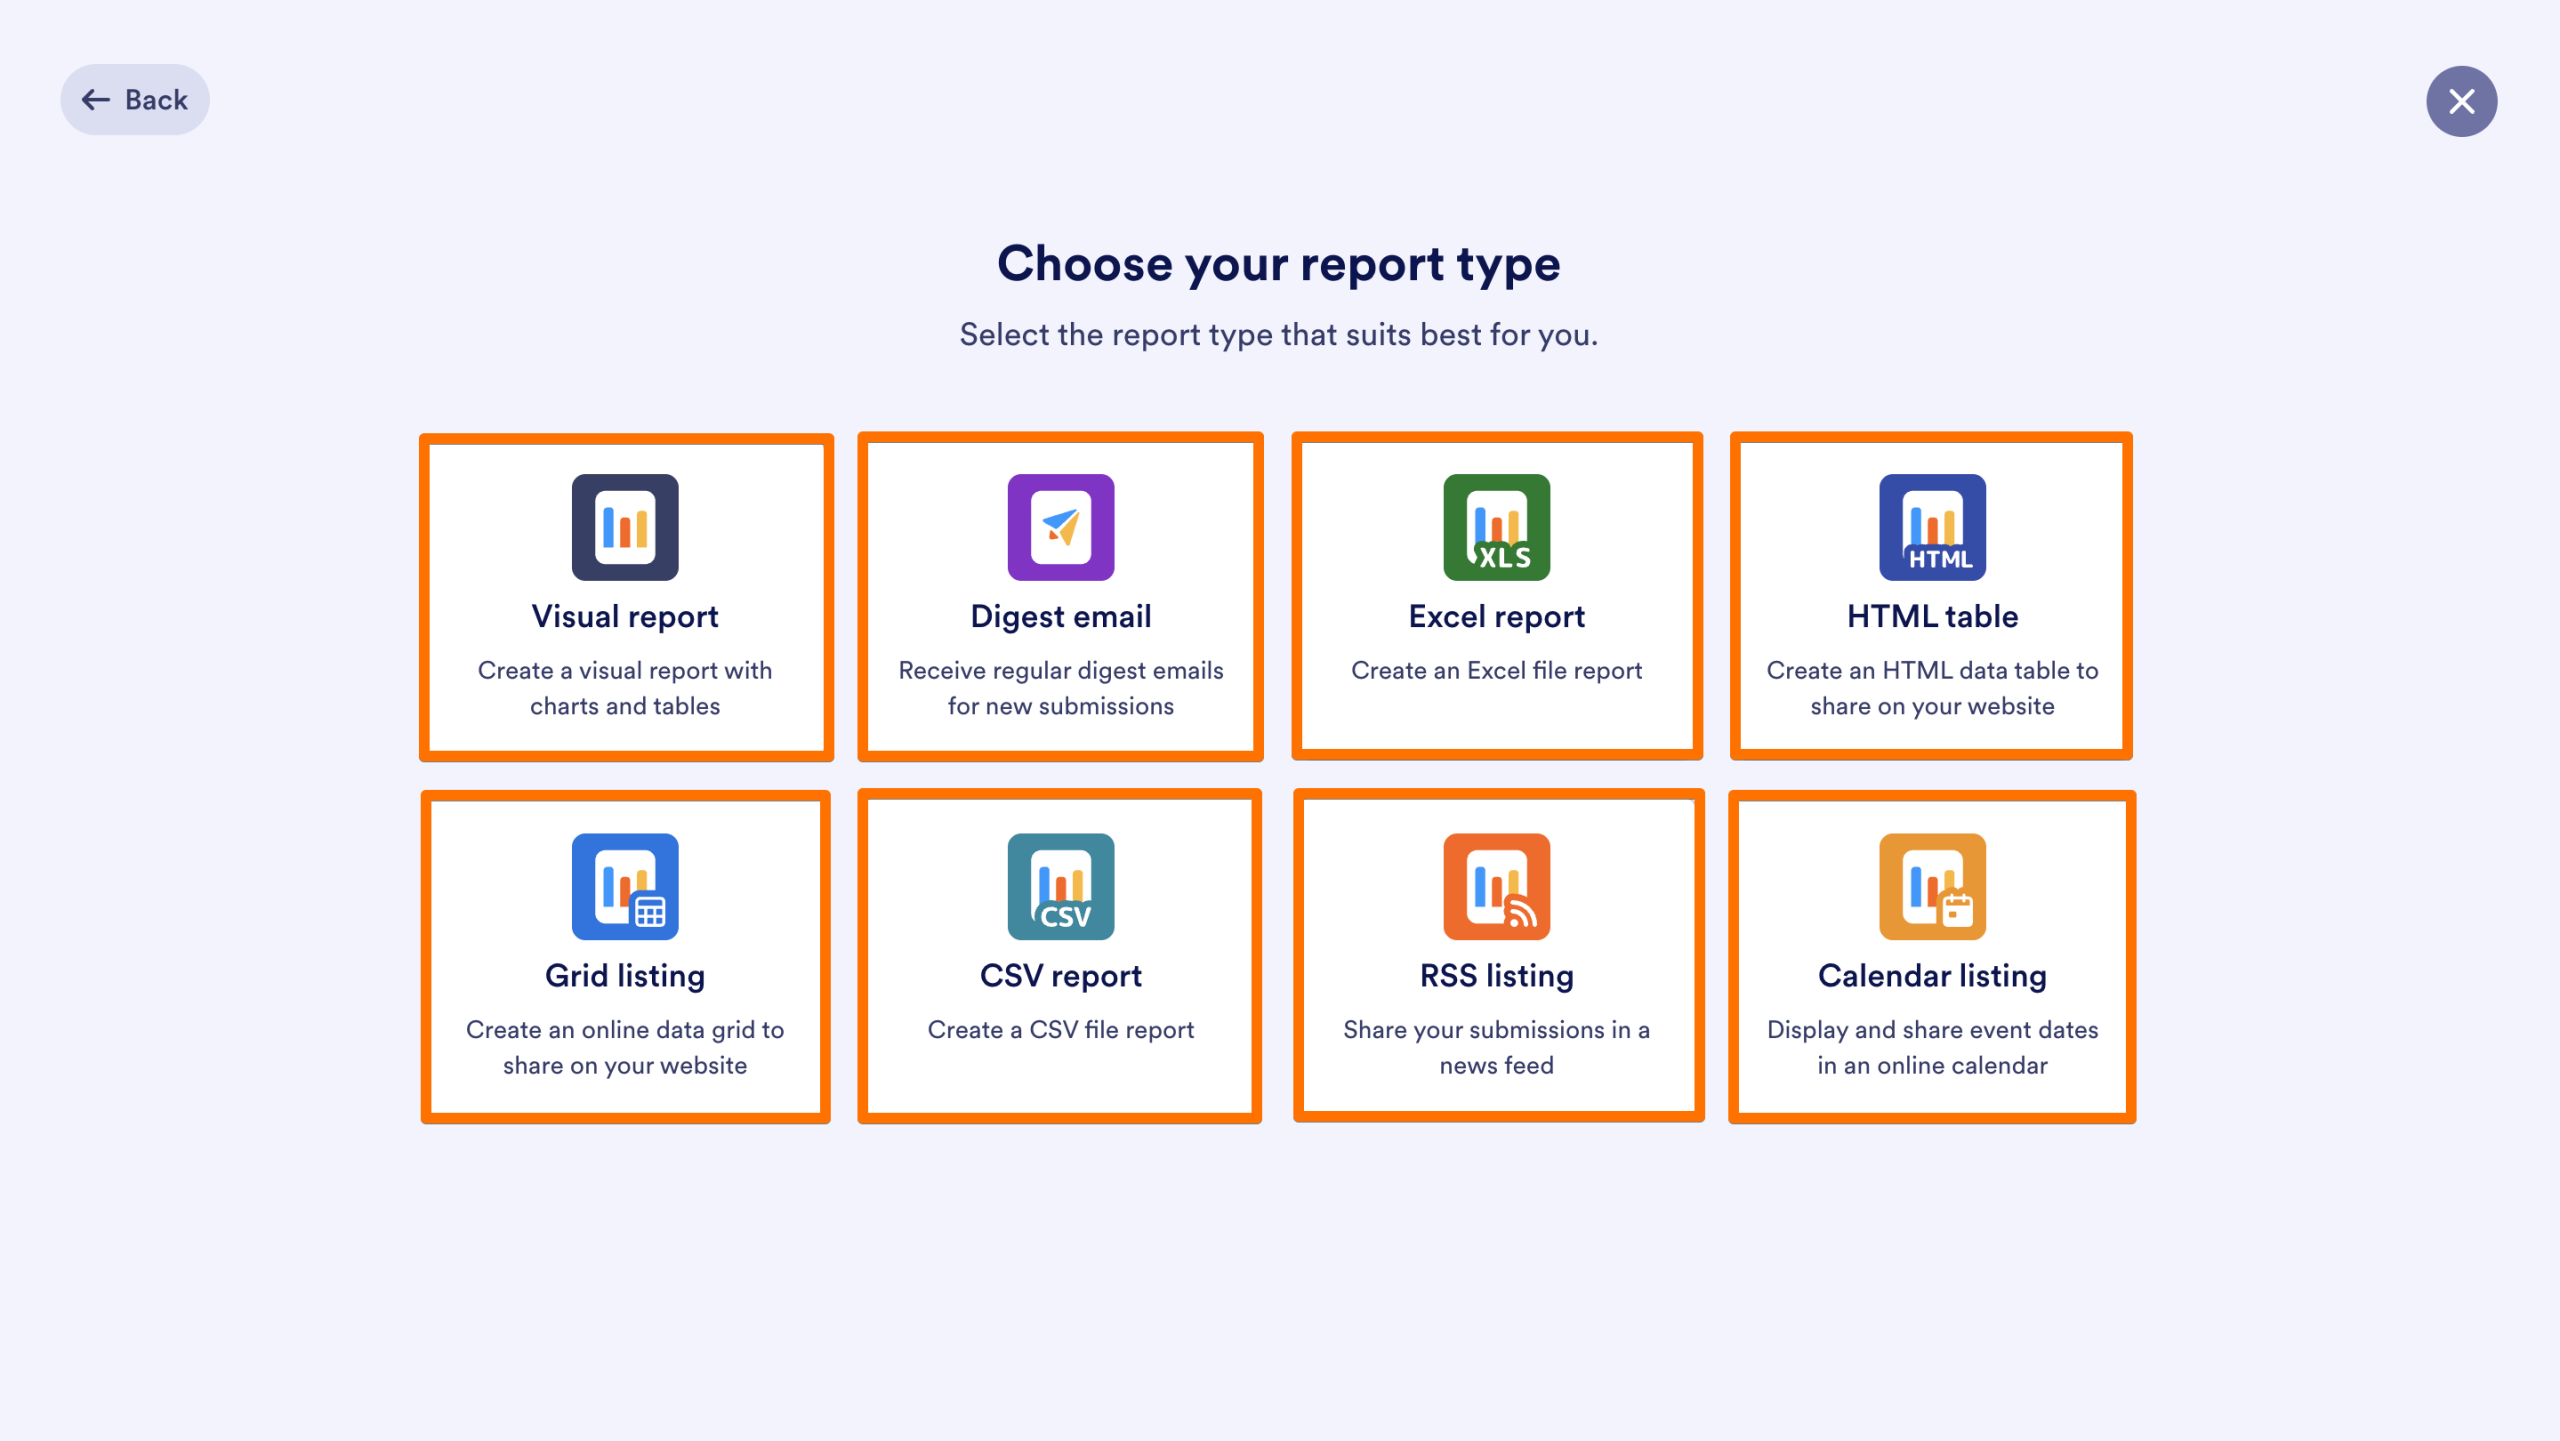
- Choose your preferred report type:
- Visual report: Create a visual report with charts and tables.
- Digest email: Receive regular digest emails for new submissions.
- Excel report: Create an Excel file report.
- HTML table: Turn submission data into an HTML data table that you can embed directly on your website.
- Grid listing: Use submission data to create a data grid that you can embed directly on your website.
- CSV report: Create a CSV file report.
- RSS listing: Share submission data from an existing form in a news feed
- Calendar listing: Display and share dates from an existing form, such as submission or event dates, in an online calendar that can be embedded on your website.
Follow the instructions and the new report will be visible in Workspace, where you can edit or share it.
Create a Report from Existing Assets
You can quickly generate reports or digests using shortcuts in your asset list or specific builder settings.
From the Toolbar (Single/Multiple Assets)
Note
If multiple forms or an app is selected, only Digest Emails can be created. If one form is selected, you can create any type of report using this method.
- In the Workspace, click on the checkbox next to the asset(s) you’d like to build a report for.
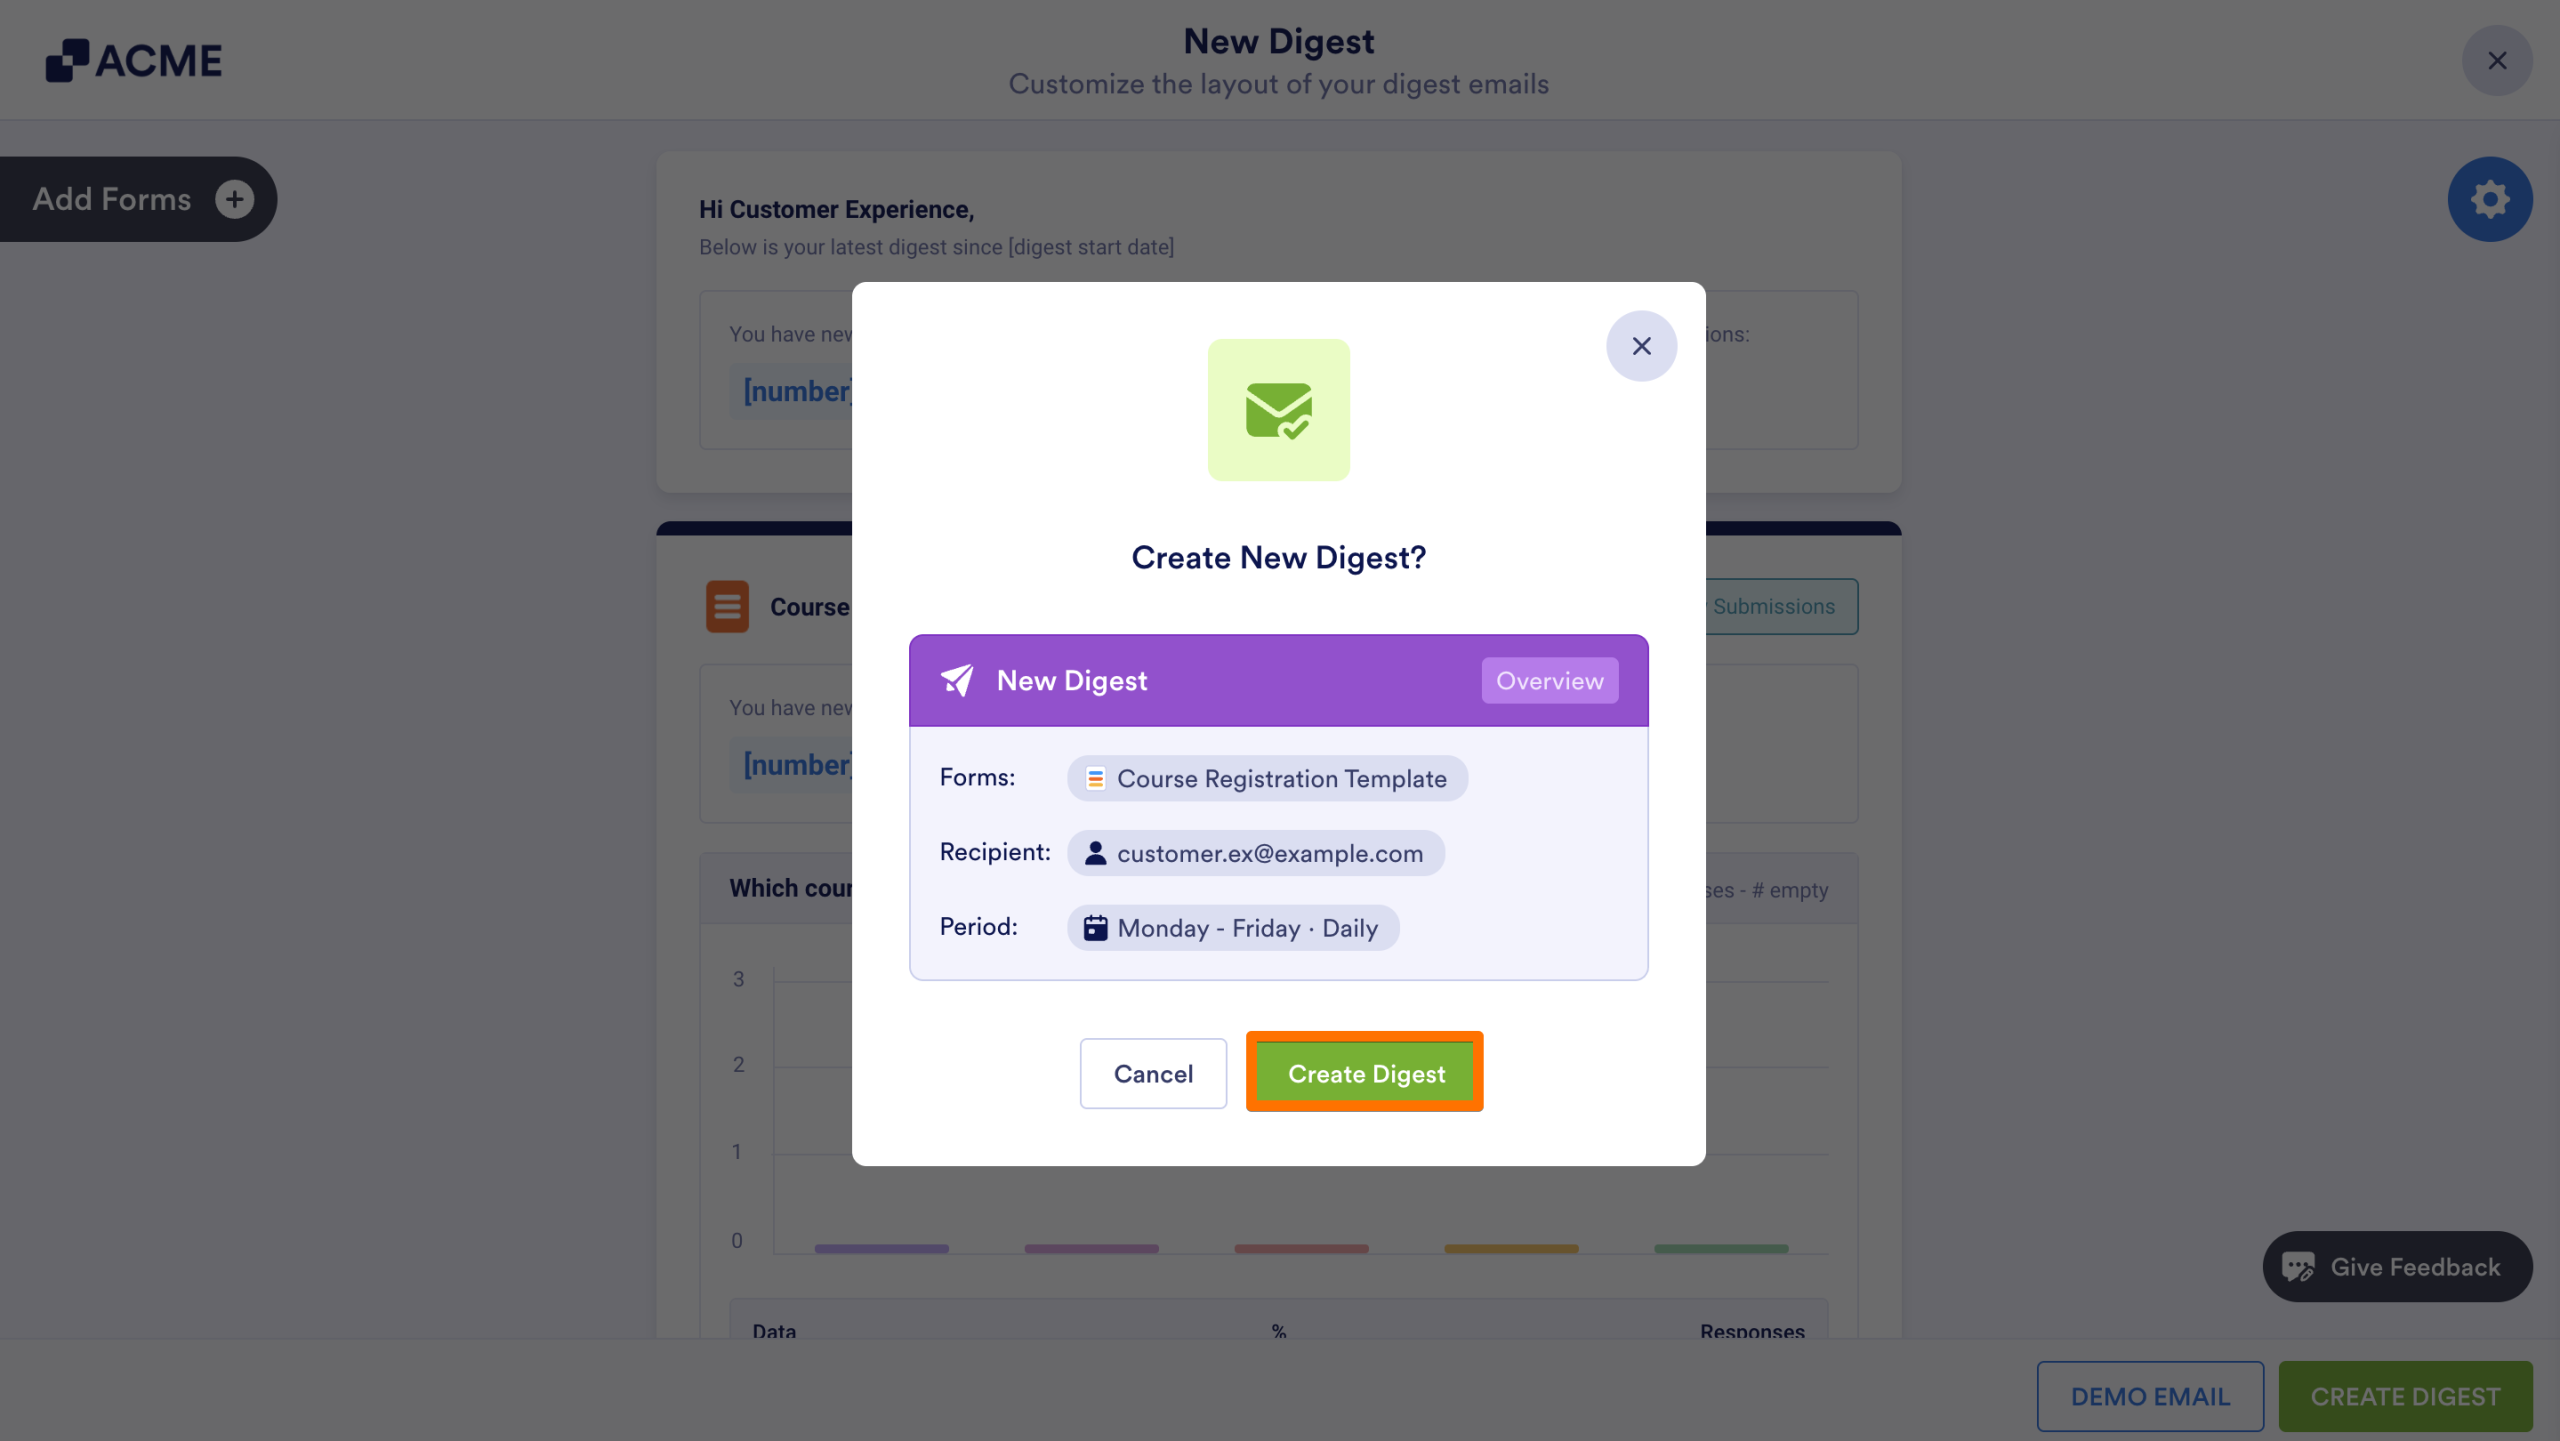
- Then, in the toolbar at the top of the page, click on Reports if you’ve selected one form, or Create New Digest if you’ve selected multiple or an app.
- If you’ve selected one form, click on Add New Report in the dropdown menu and select the type of report you’d like to build.
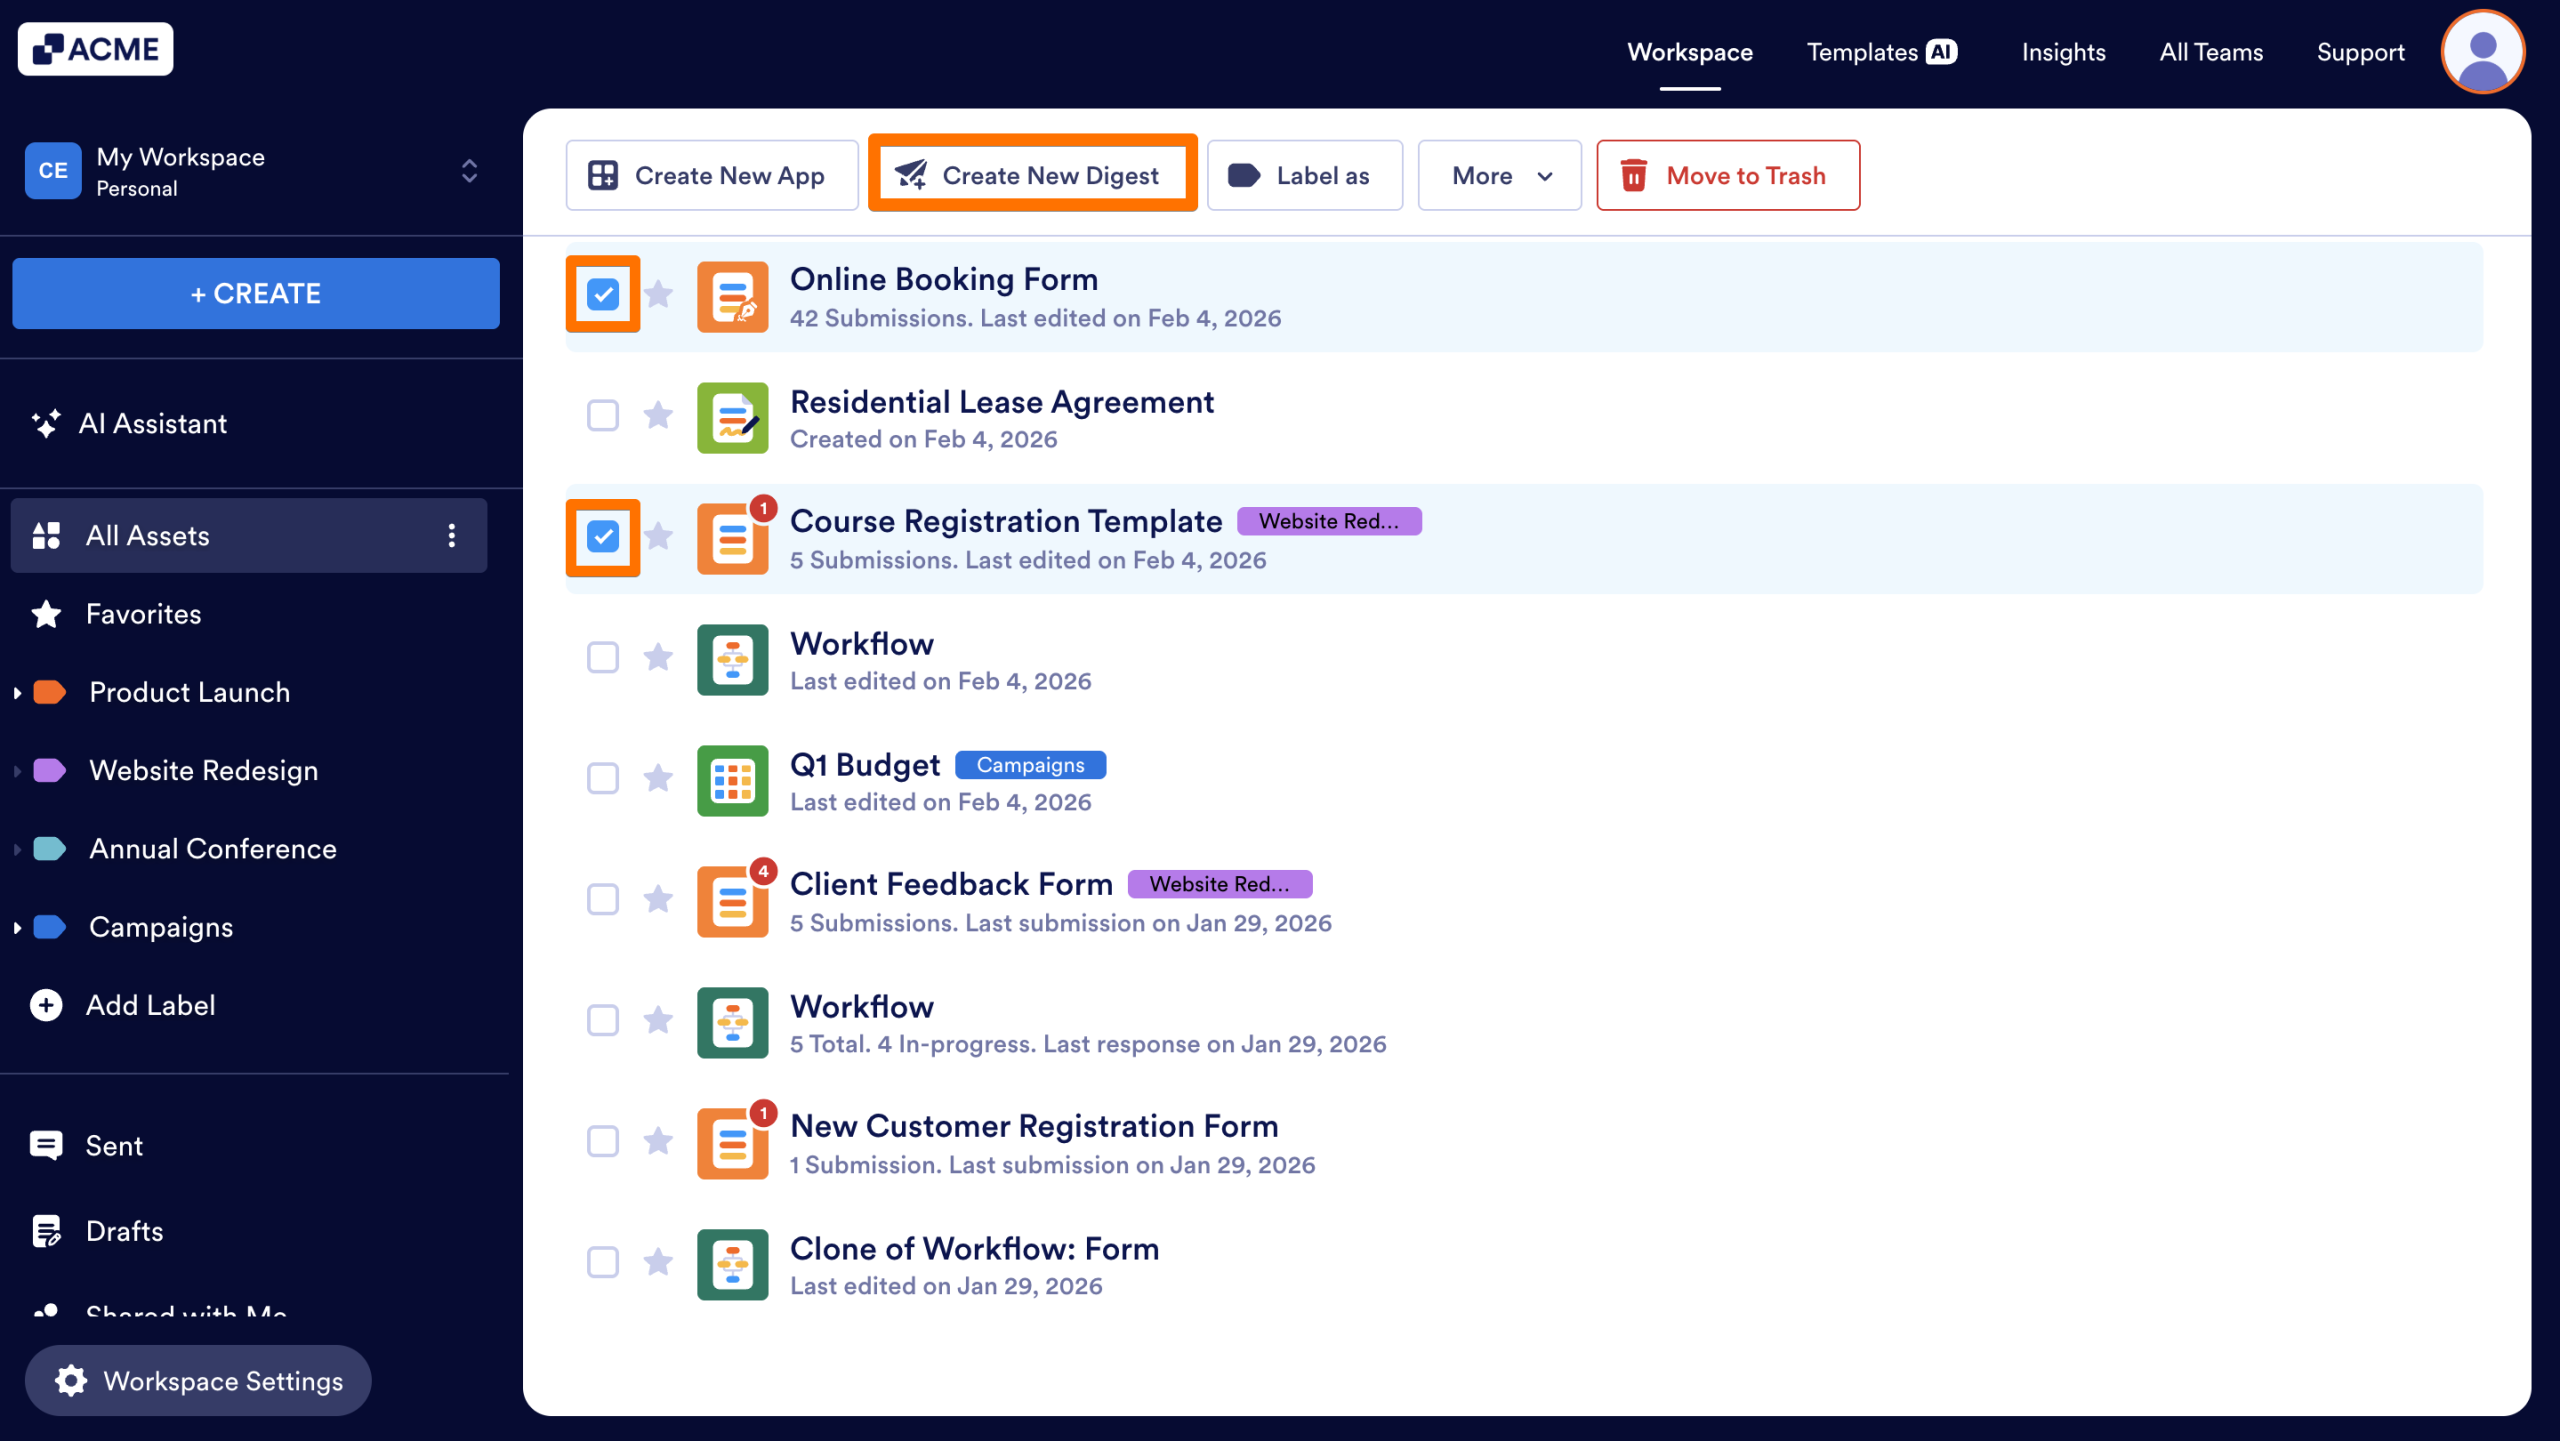
- Finally, set up the rest of the report by following the instructions.
Note
You can create digests with both Forms and Apps.
From Form Builder & Tables
From Form Settings
Only Digest Emails can be created from the Form Settings.
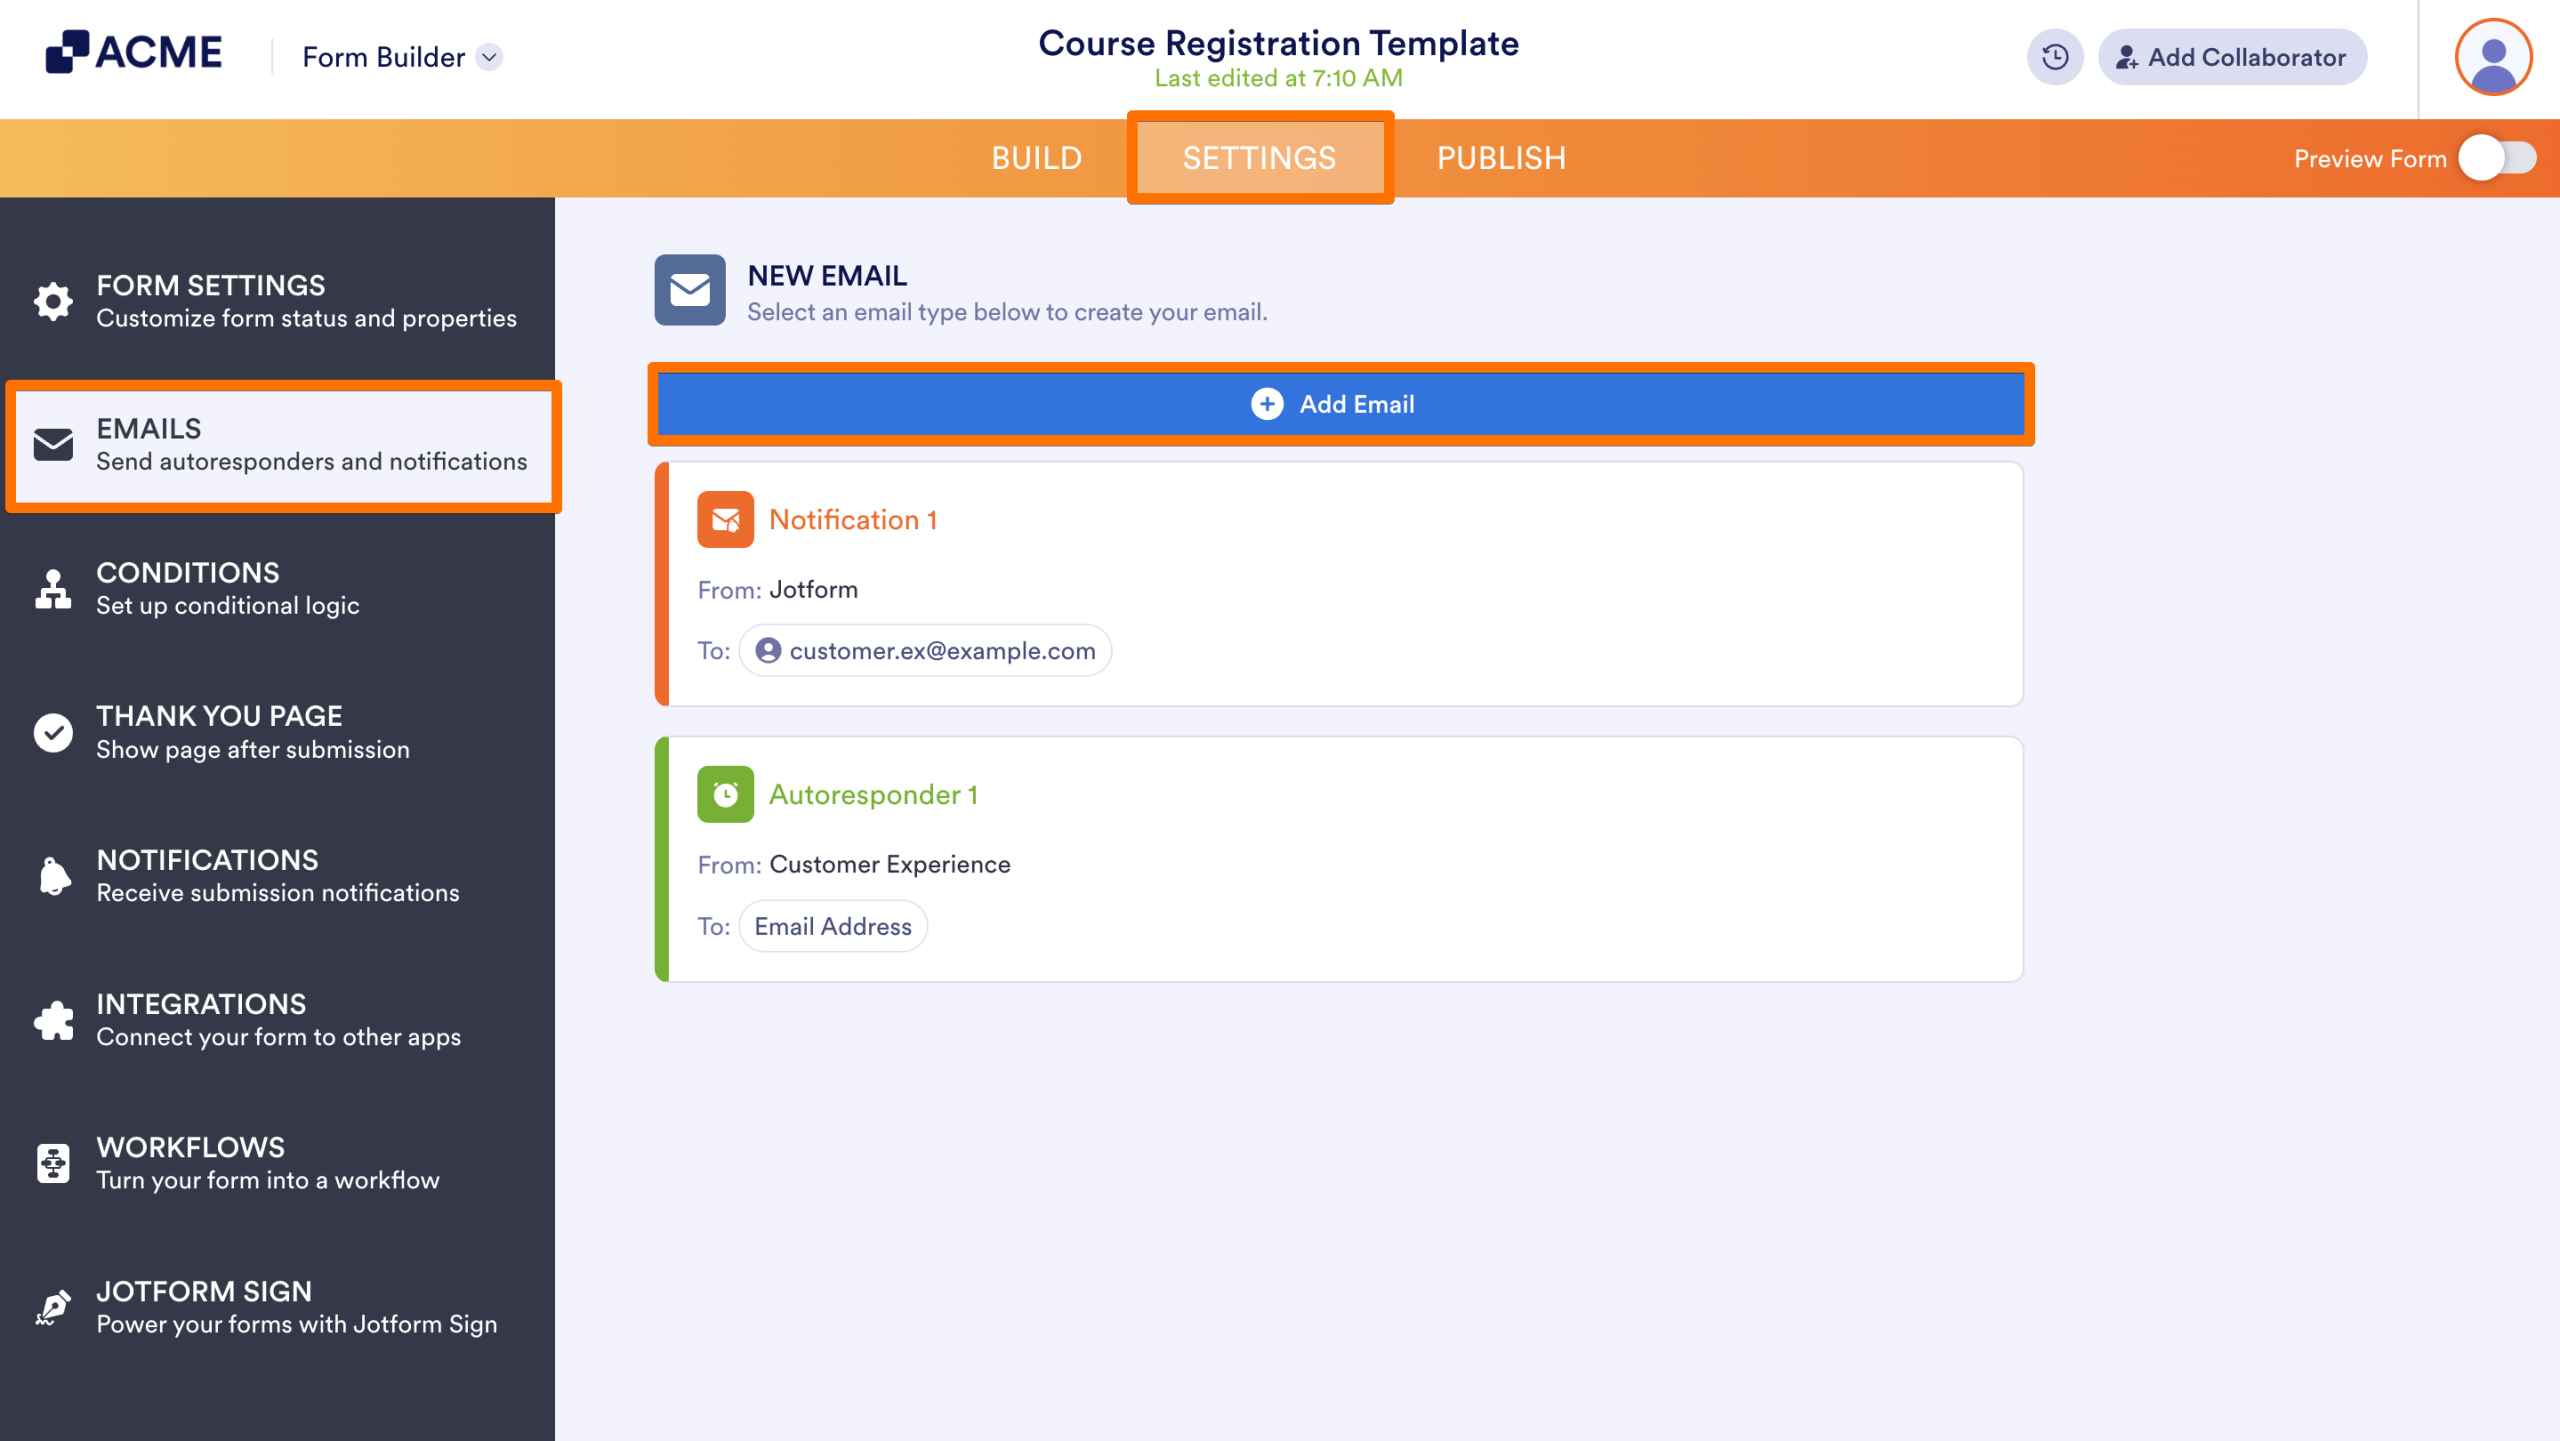
- In Form Builder, click on Settings in the orange navigation bar.
- Then, select Emails from the menu on the left-hand side of the page.
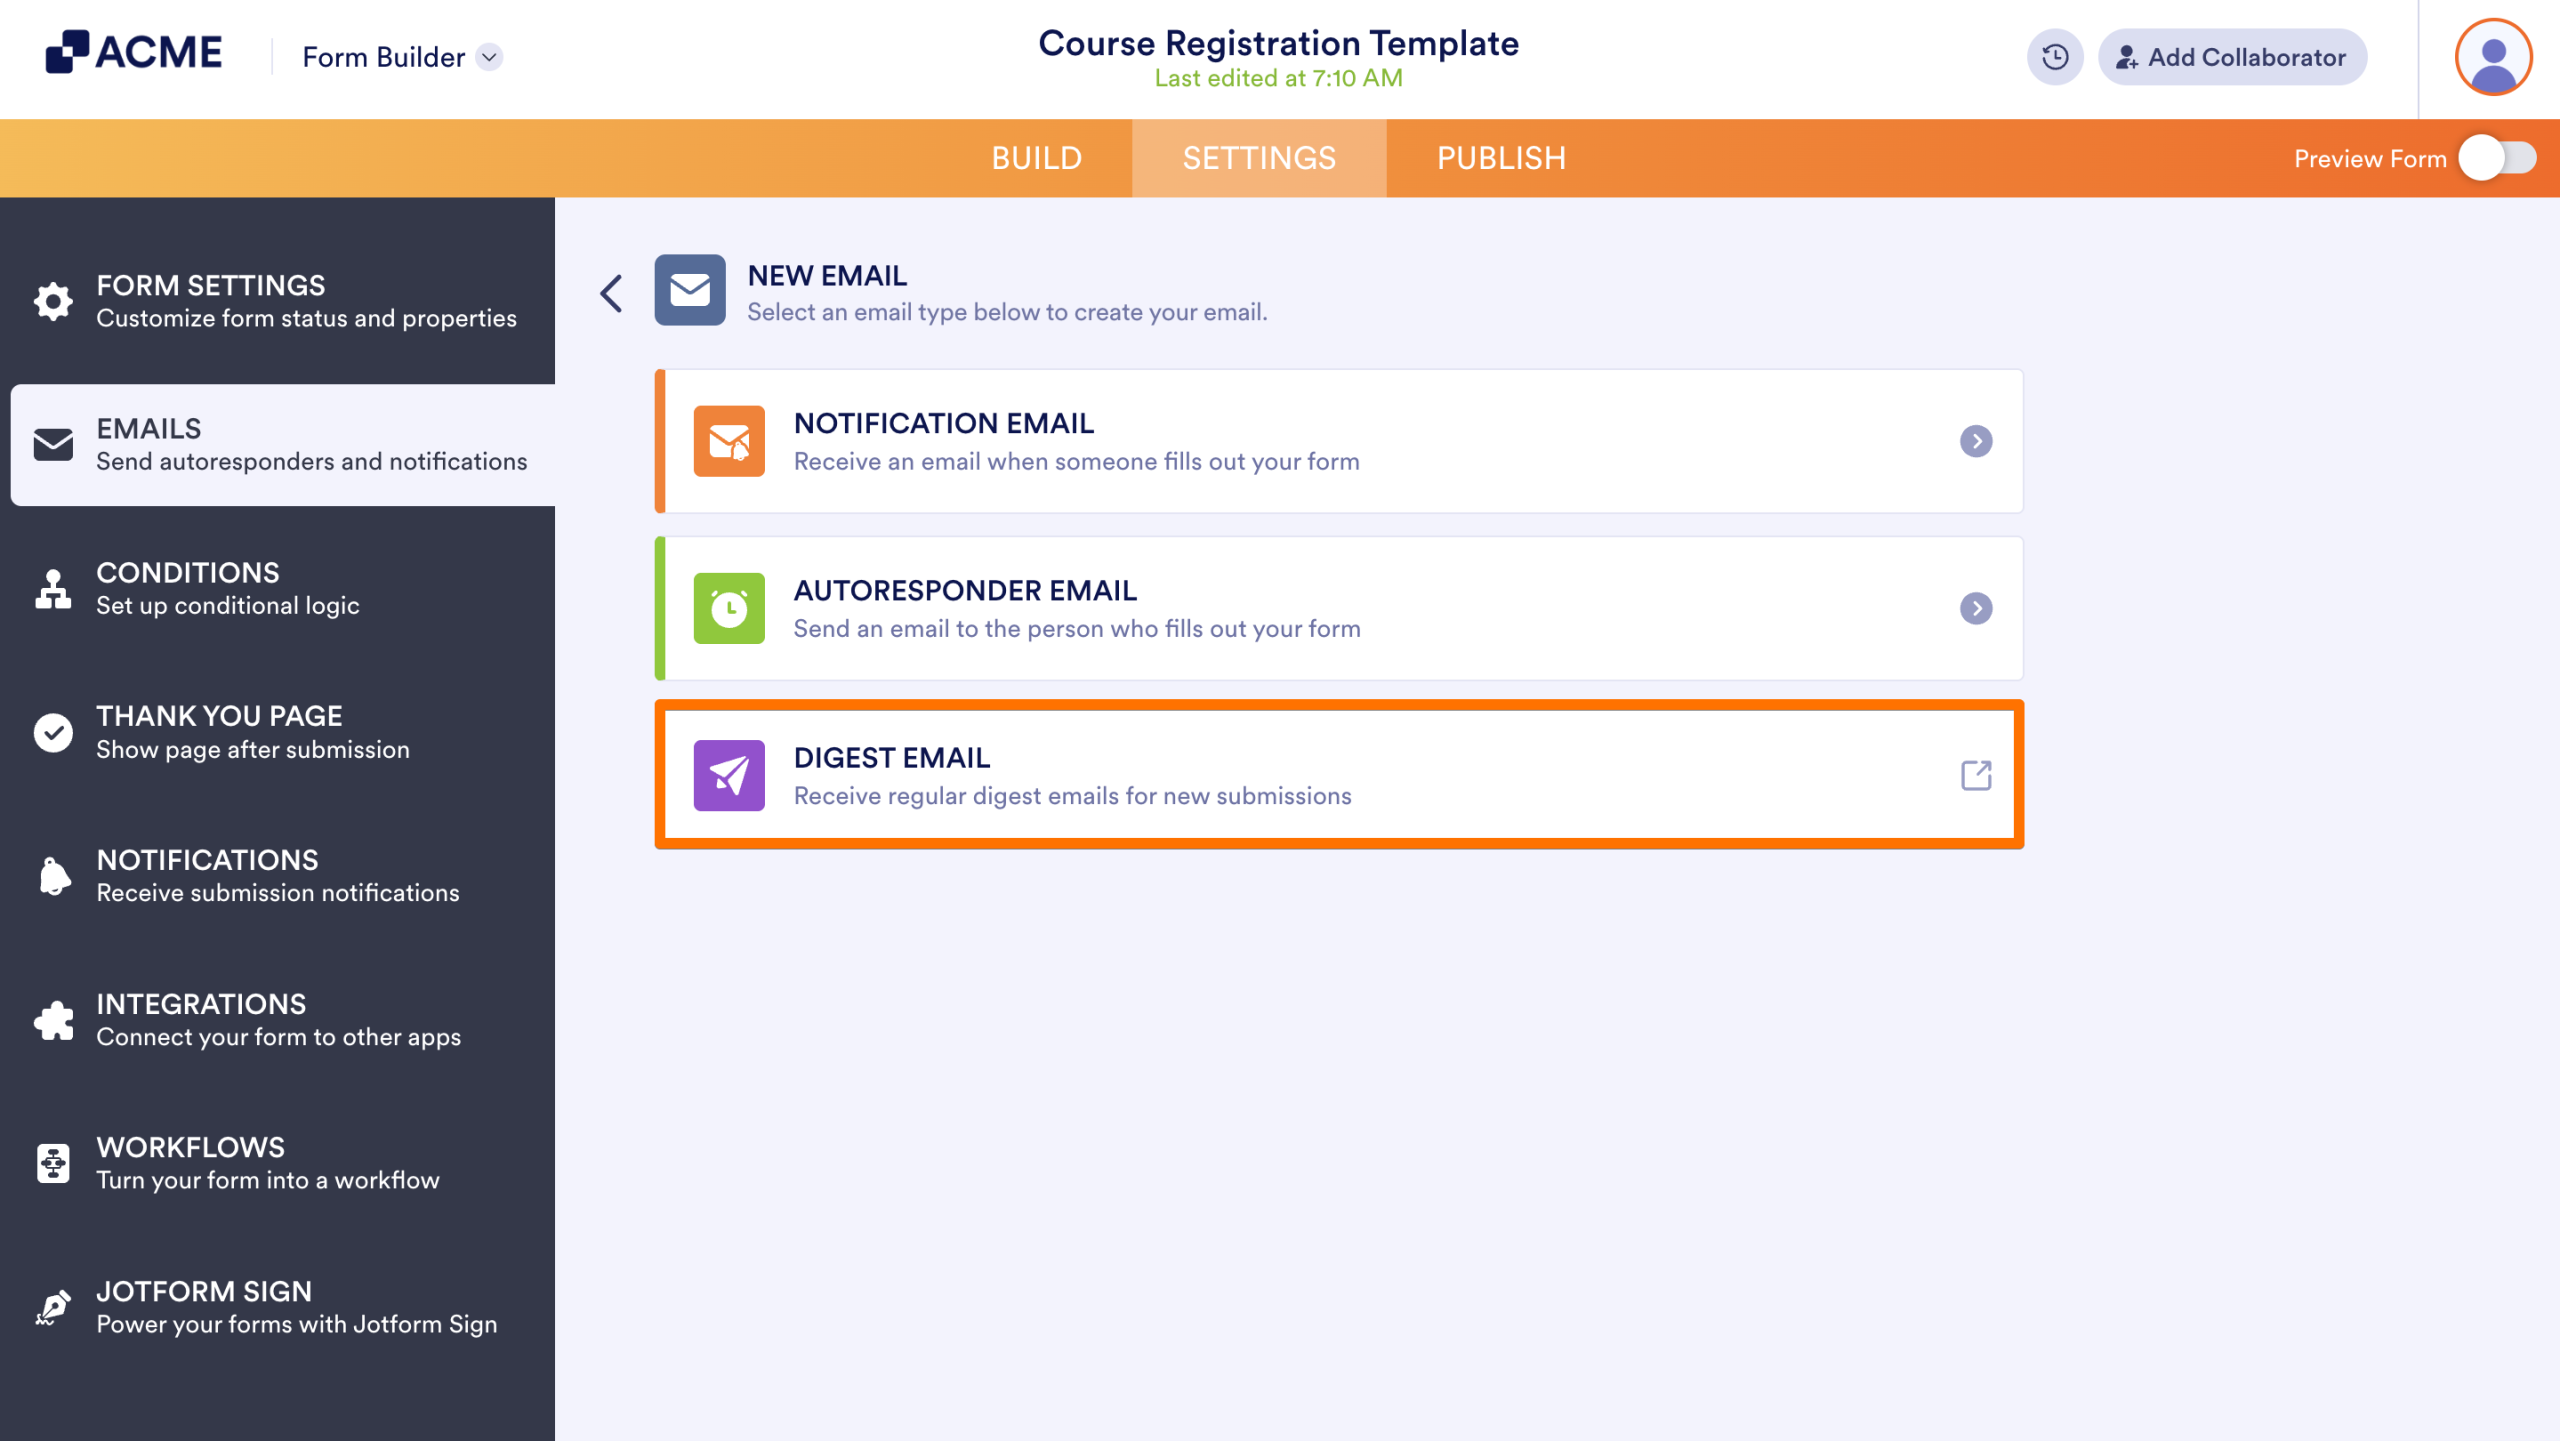
- Click on Add Email.
- Select Digest Email.
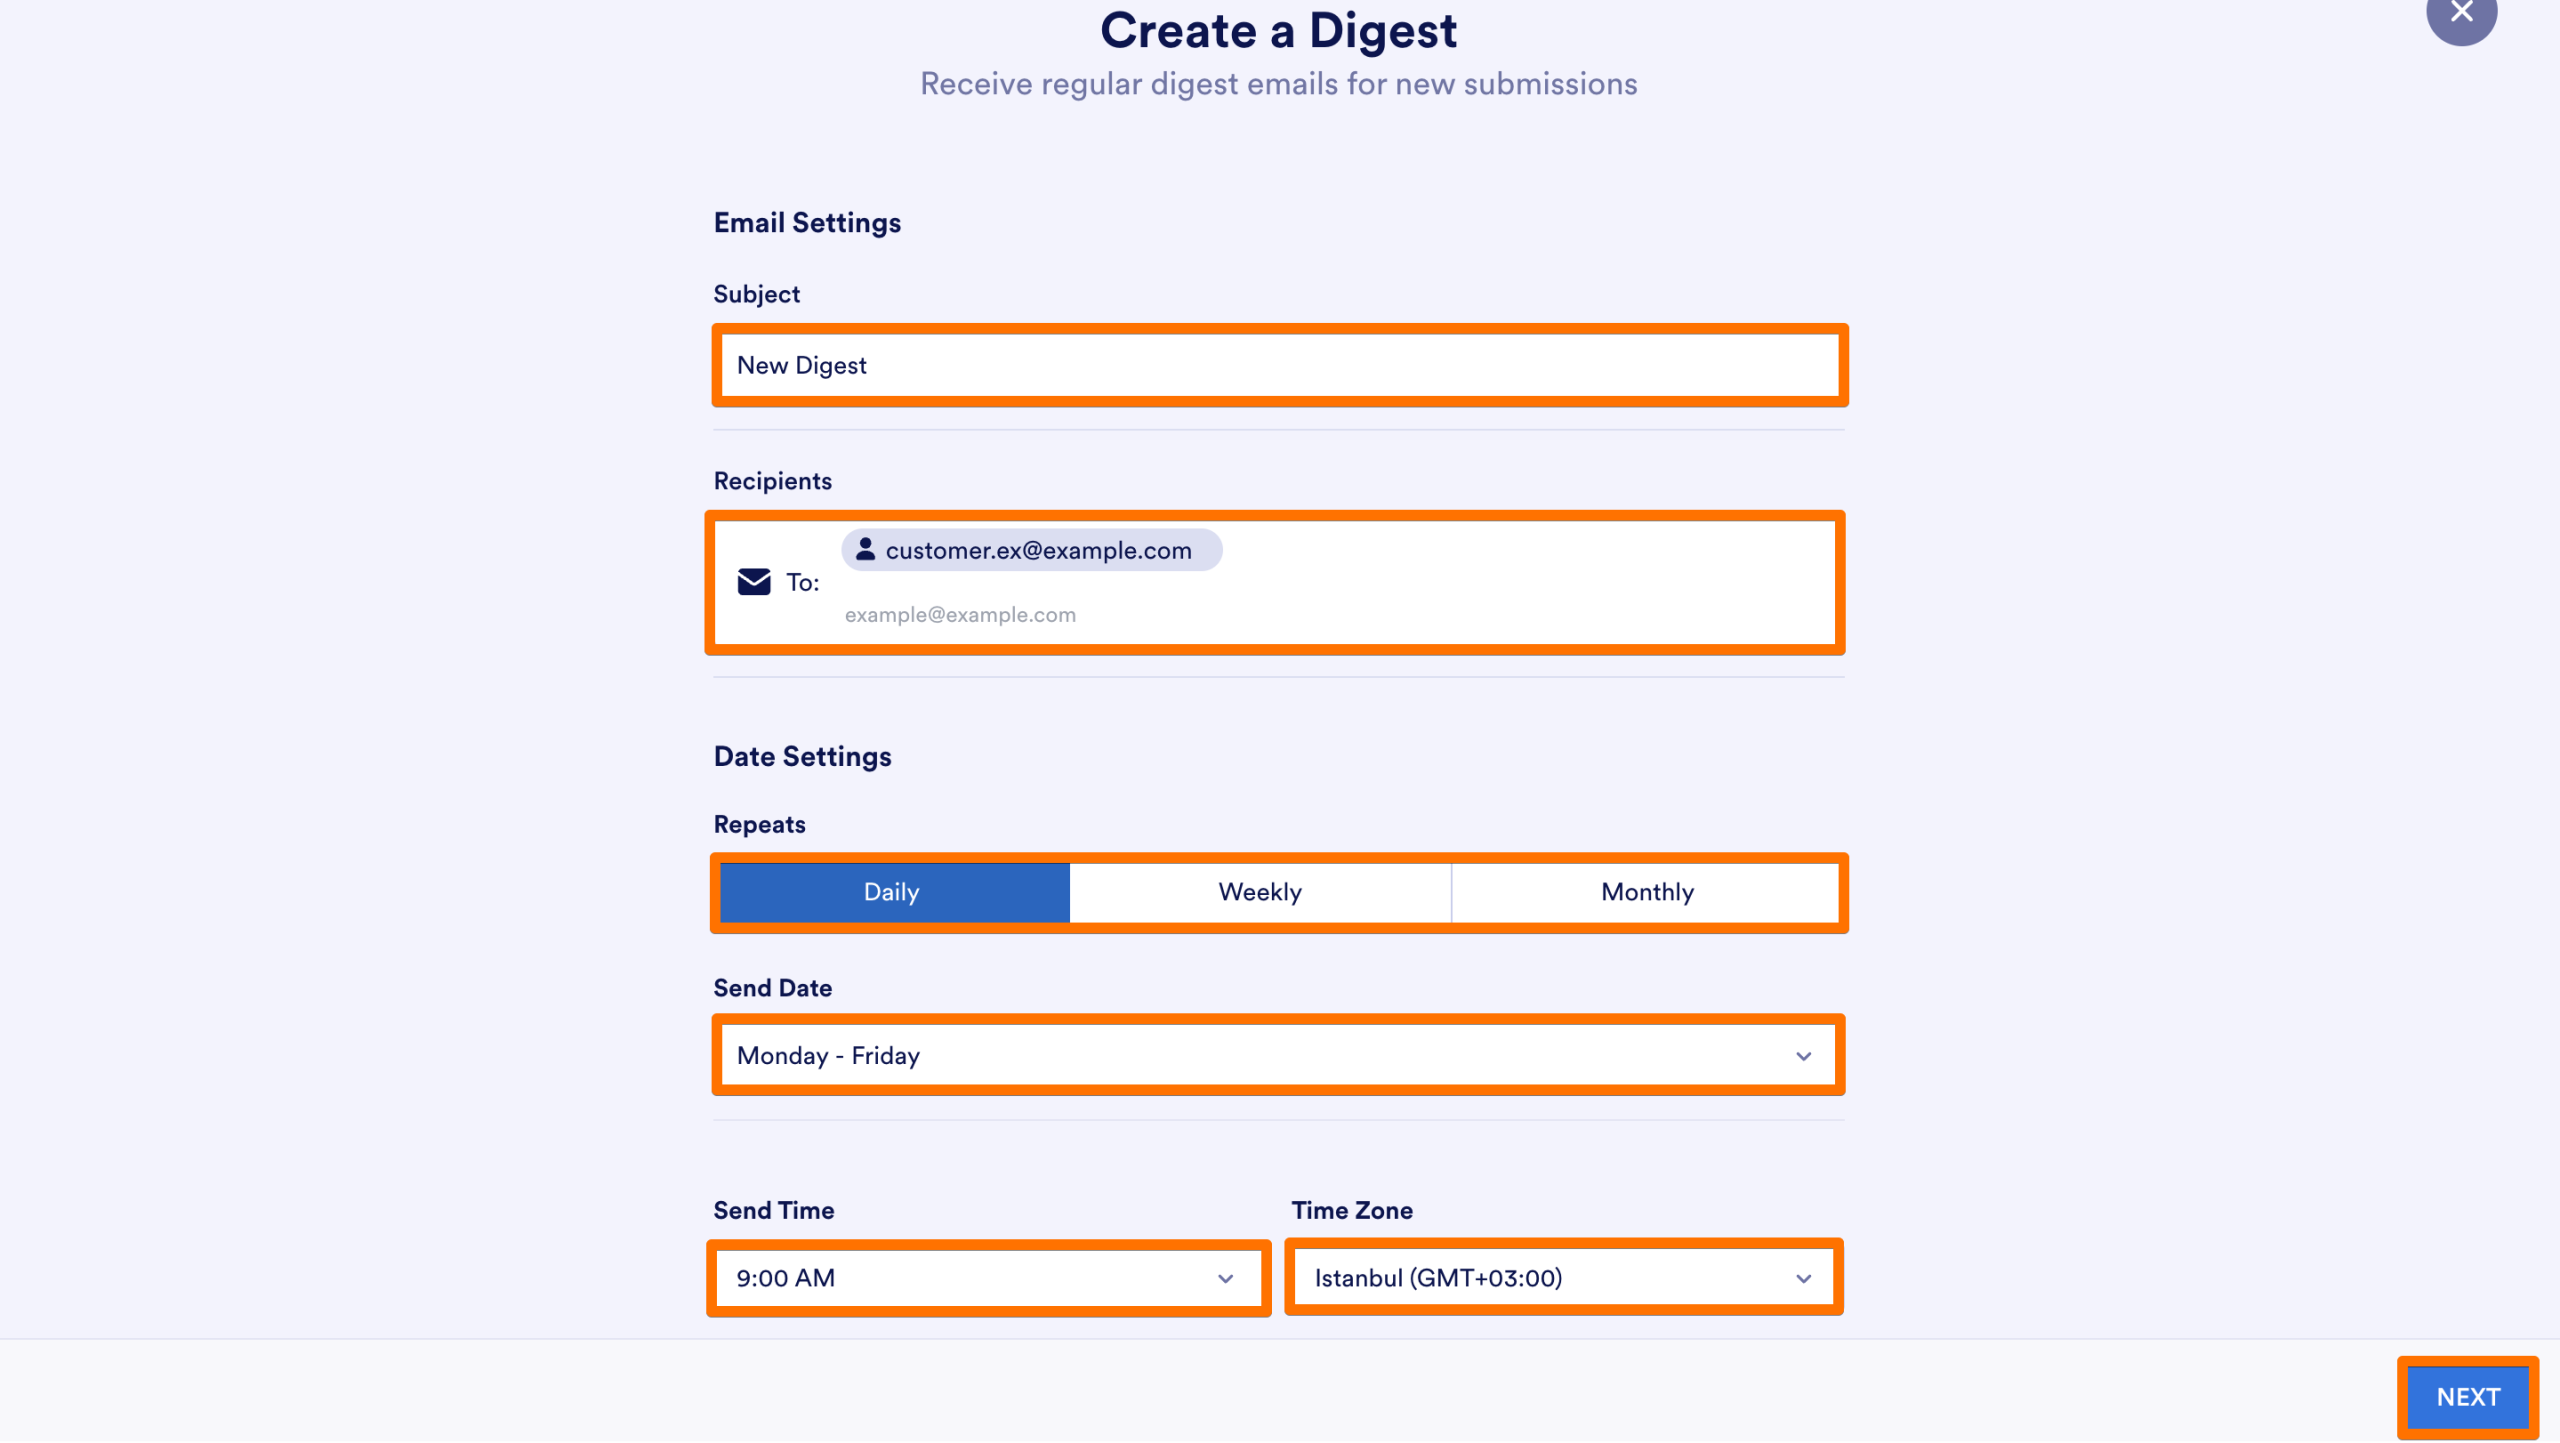
- On the next page, configure the email settings, including the Subject, Recipient Emails, and Schedule, and click Next.
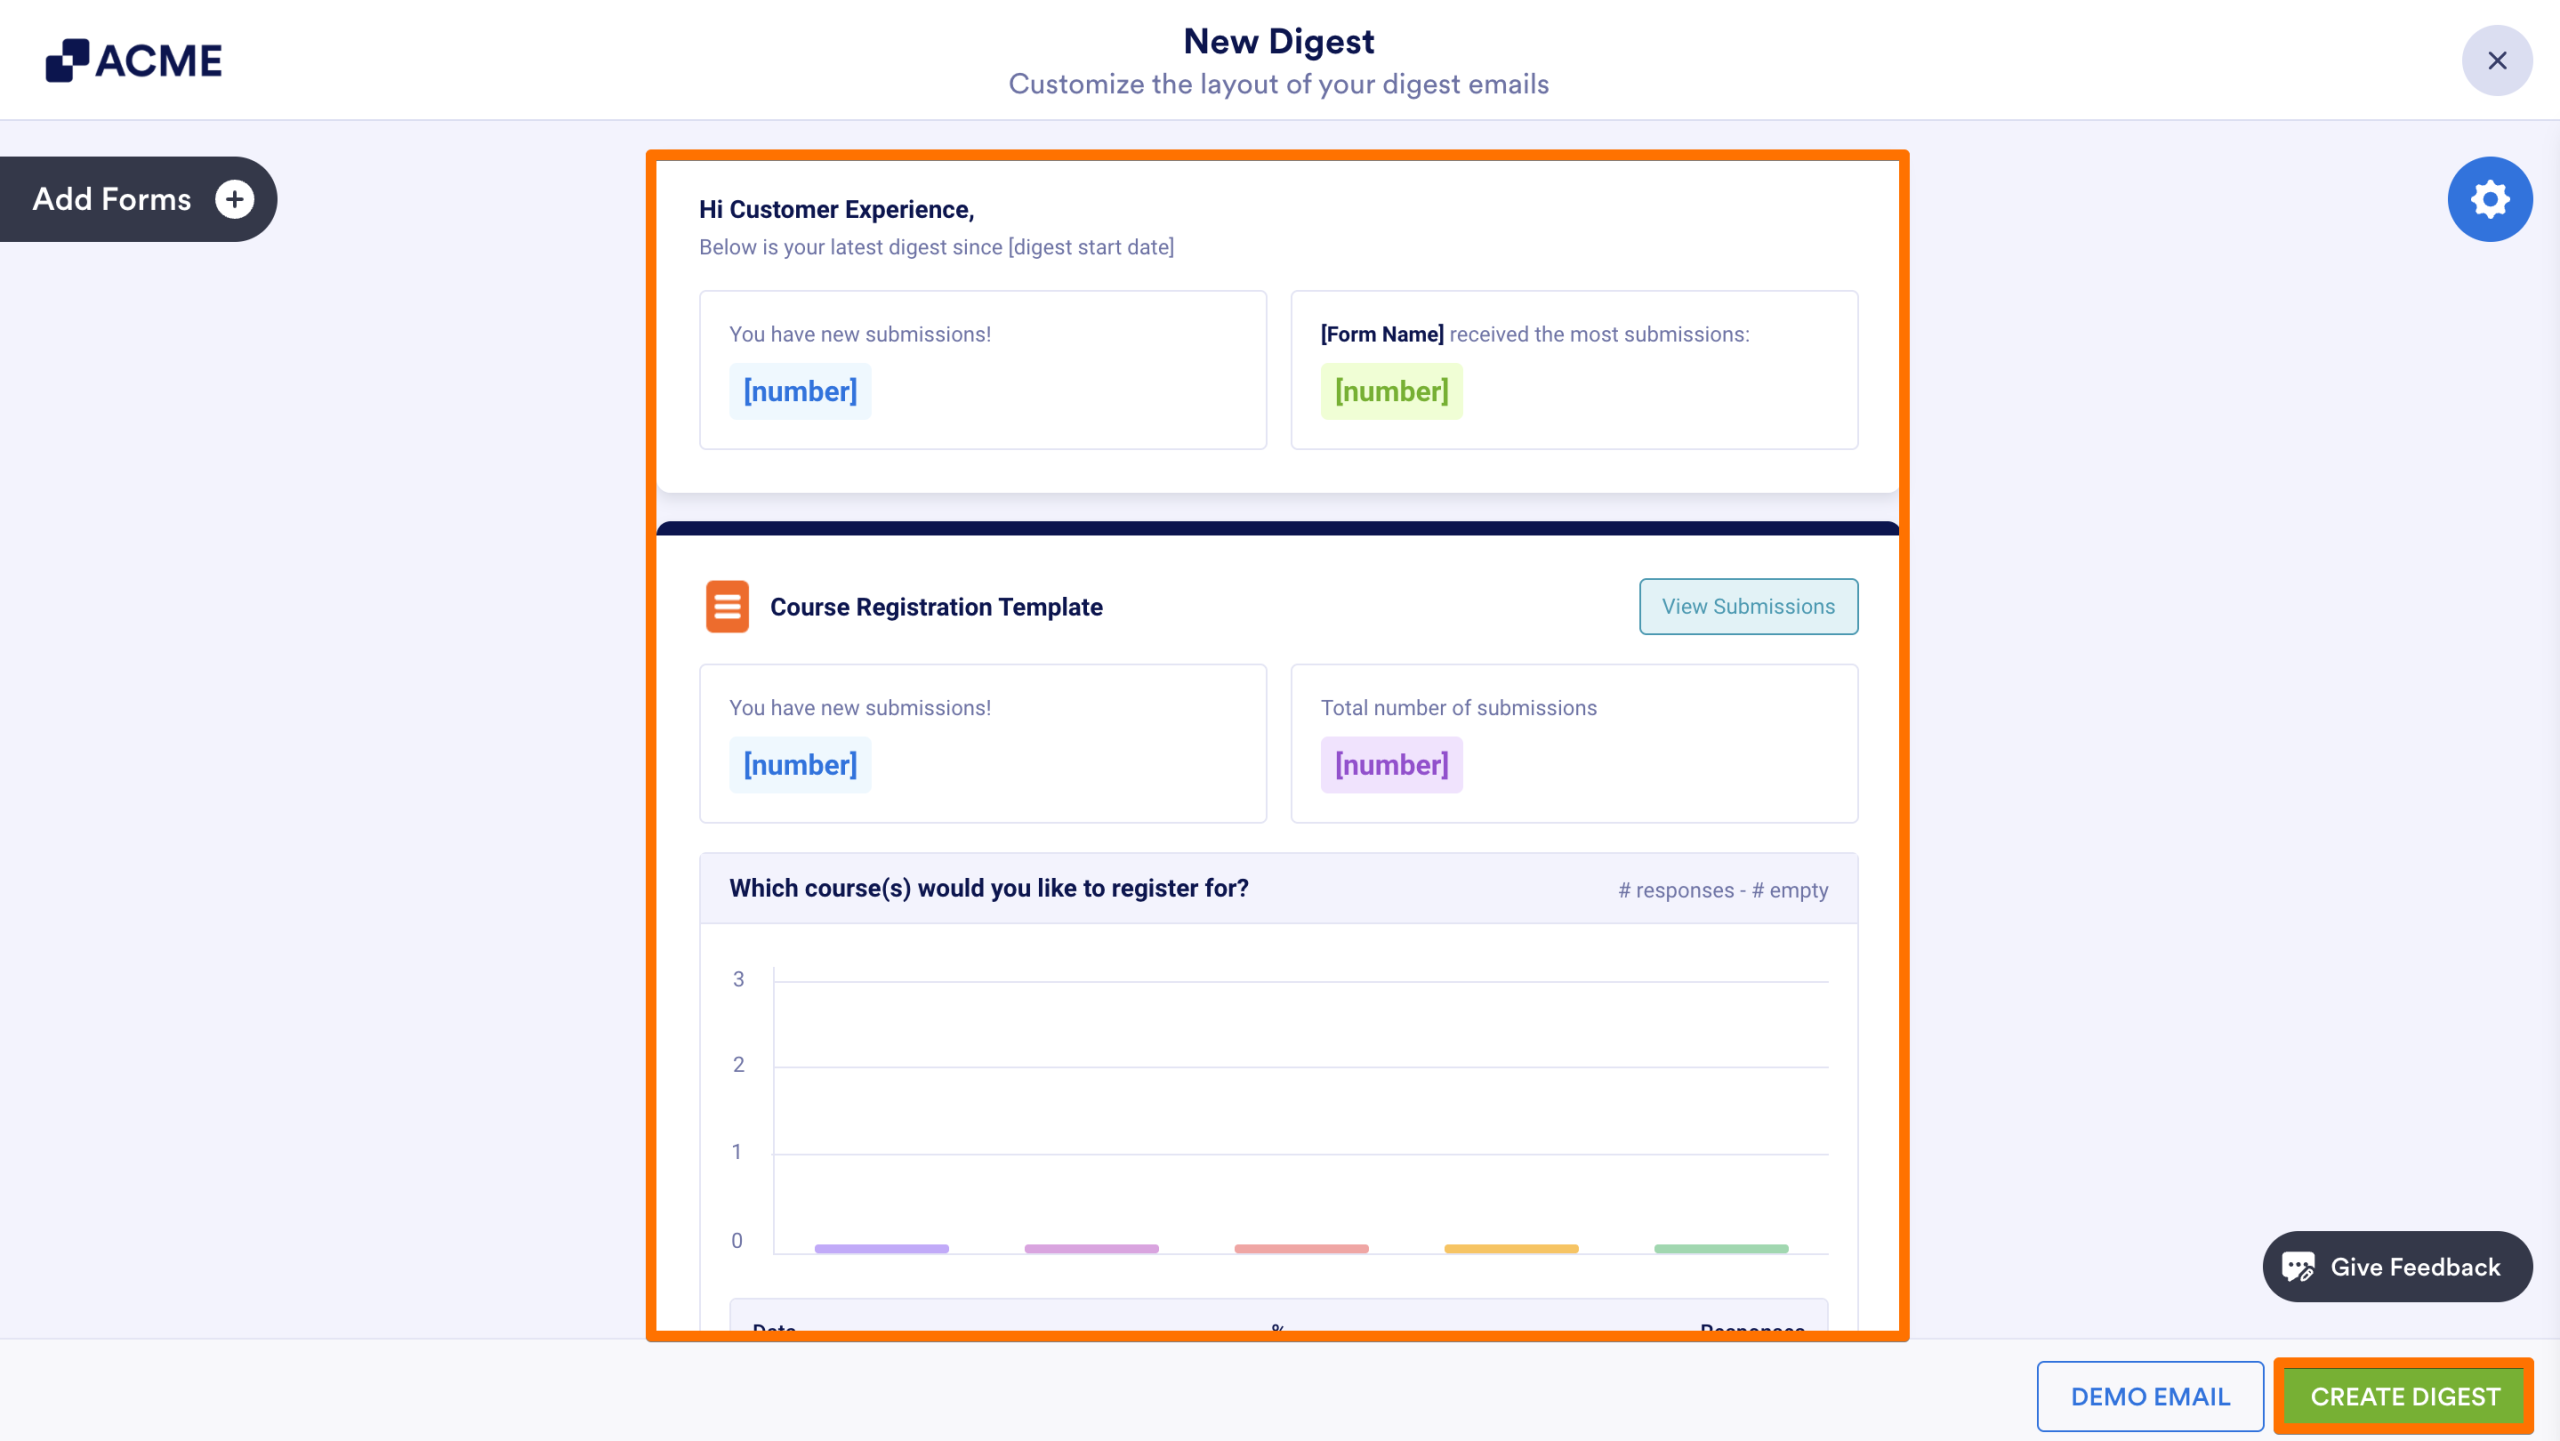
- Set up the email layout and click Create Digest.
- Lastly, confirm.
From the List Picker
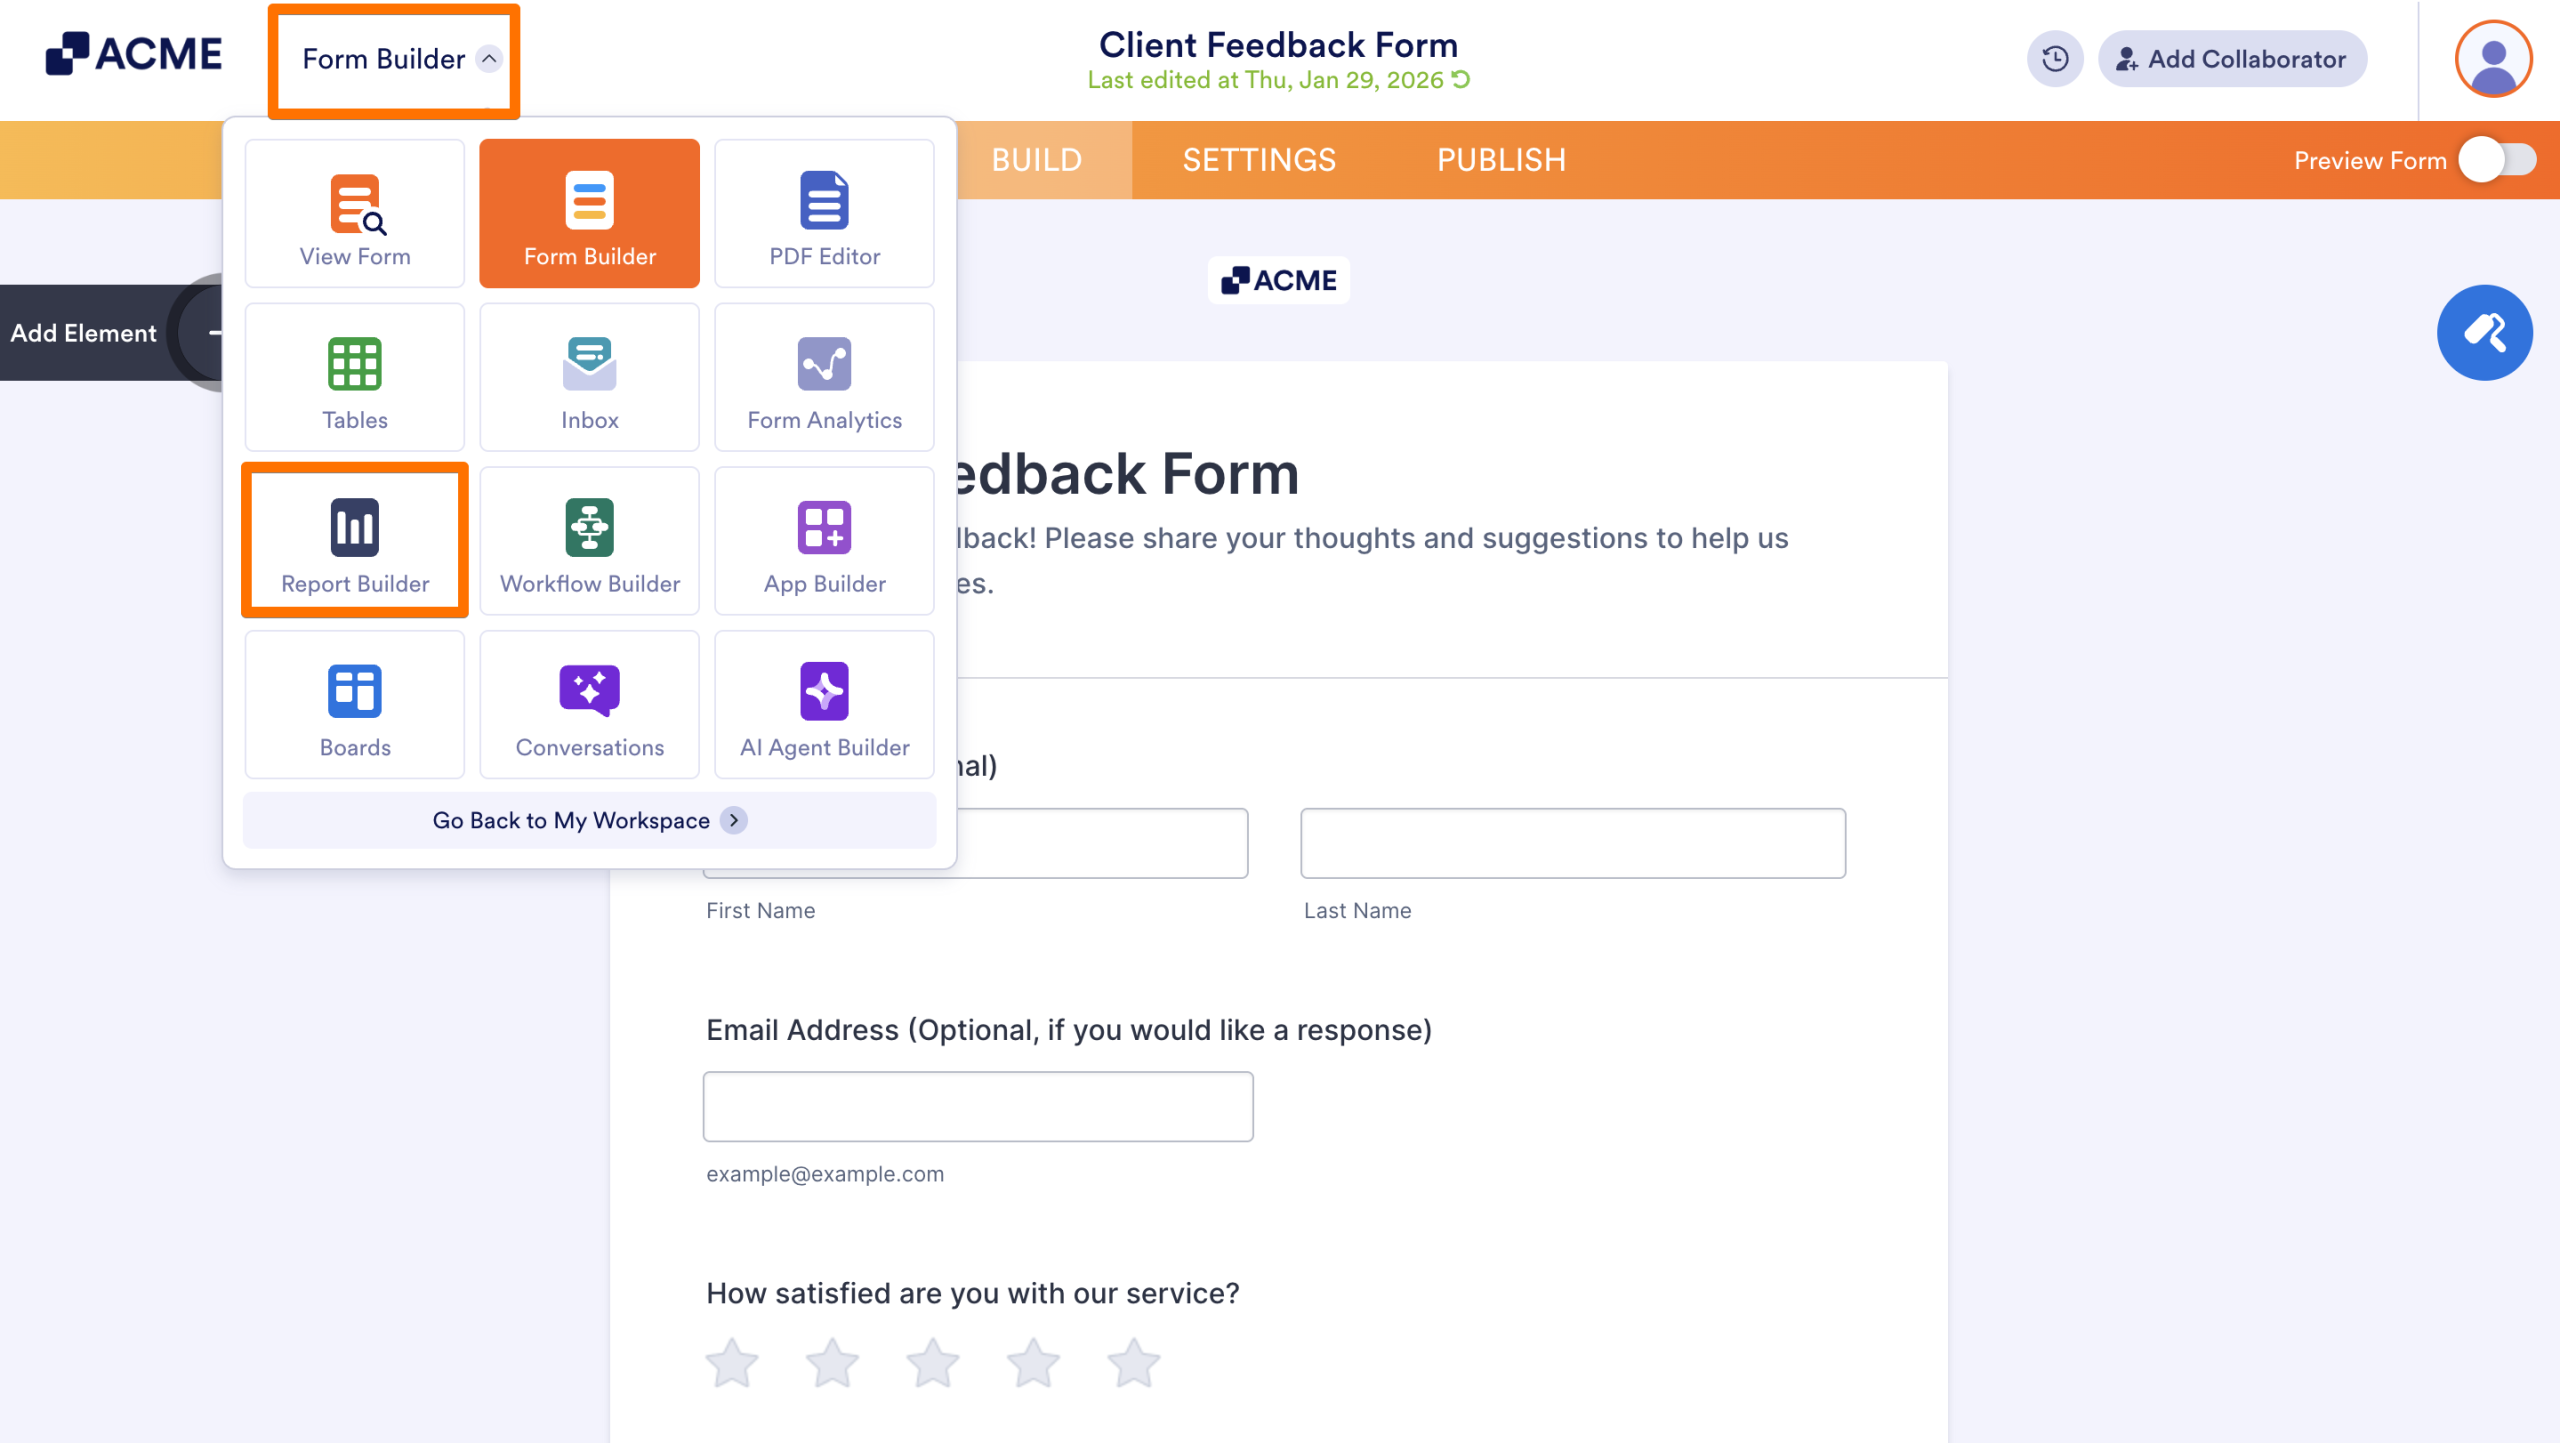
You can access the Report Builder directly while designing or reviewing a specific form. Only Visual Reports can be created using this method.
- In the Form Builder, click on the dropdown menu next to your logo in the upper left-hand corner of the page, also called the List Picker.
- Then, select Report Builder from the menu.
- Next, enter a Report Name and select how you’d like to build the report.
- Finally, click Create.
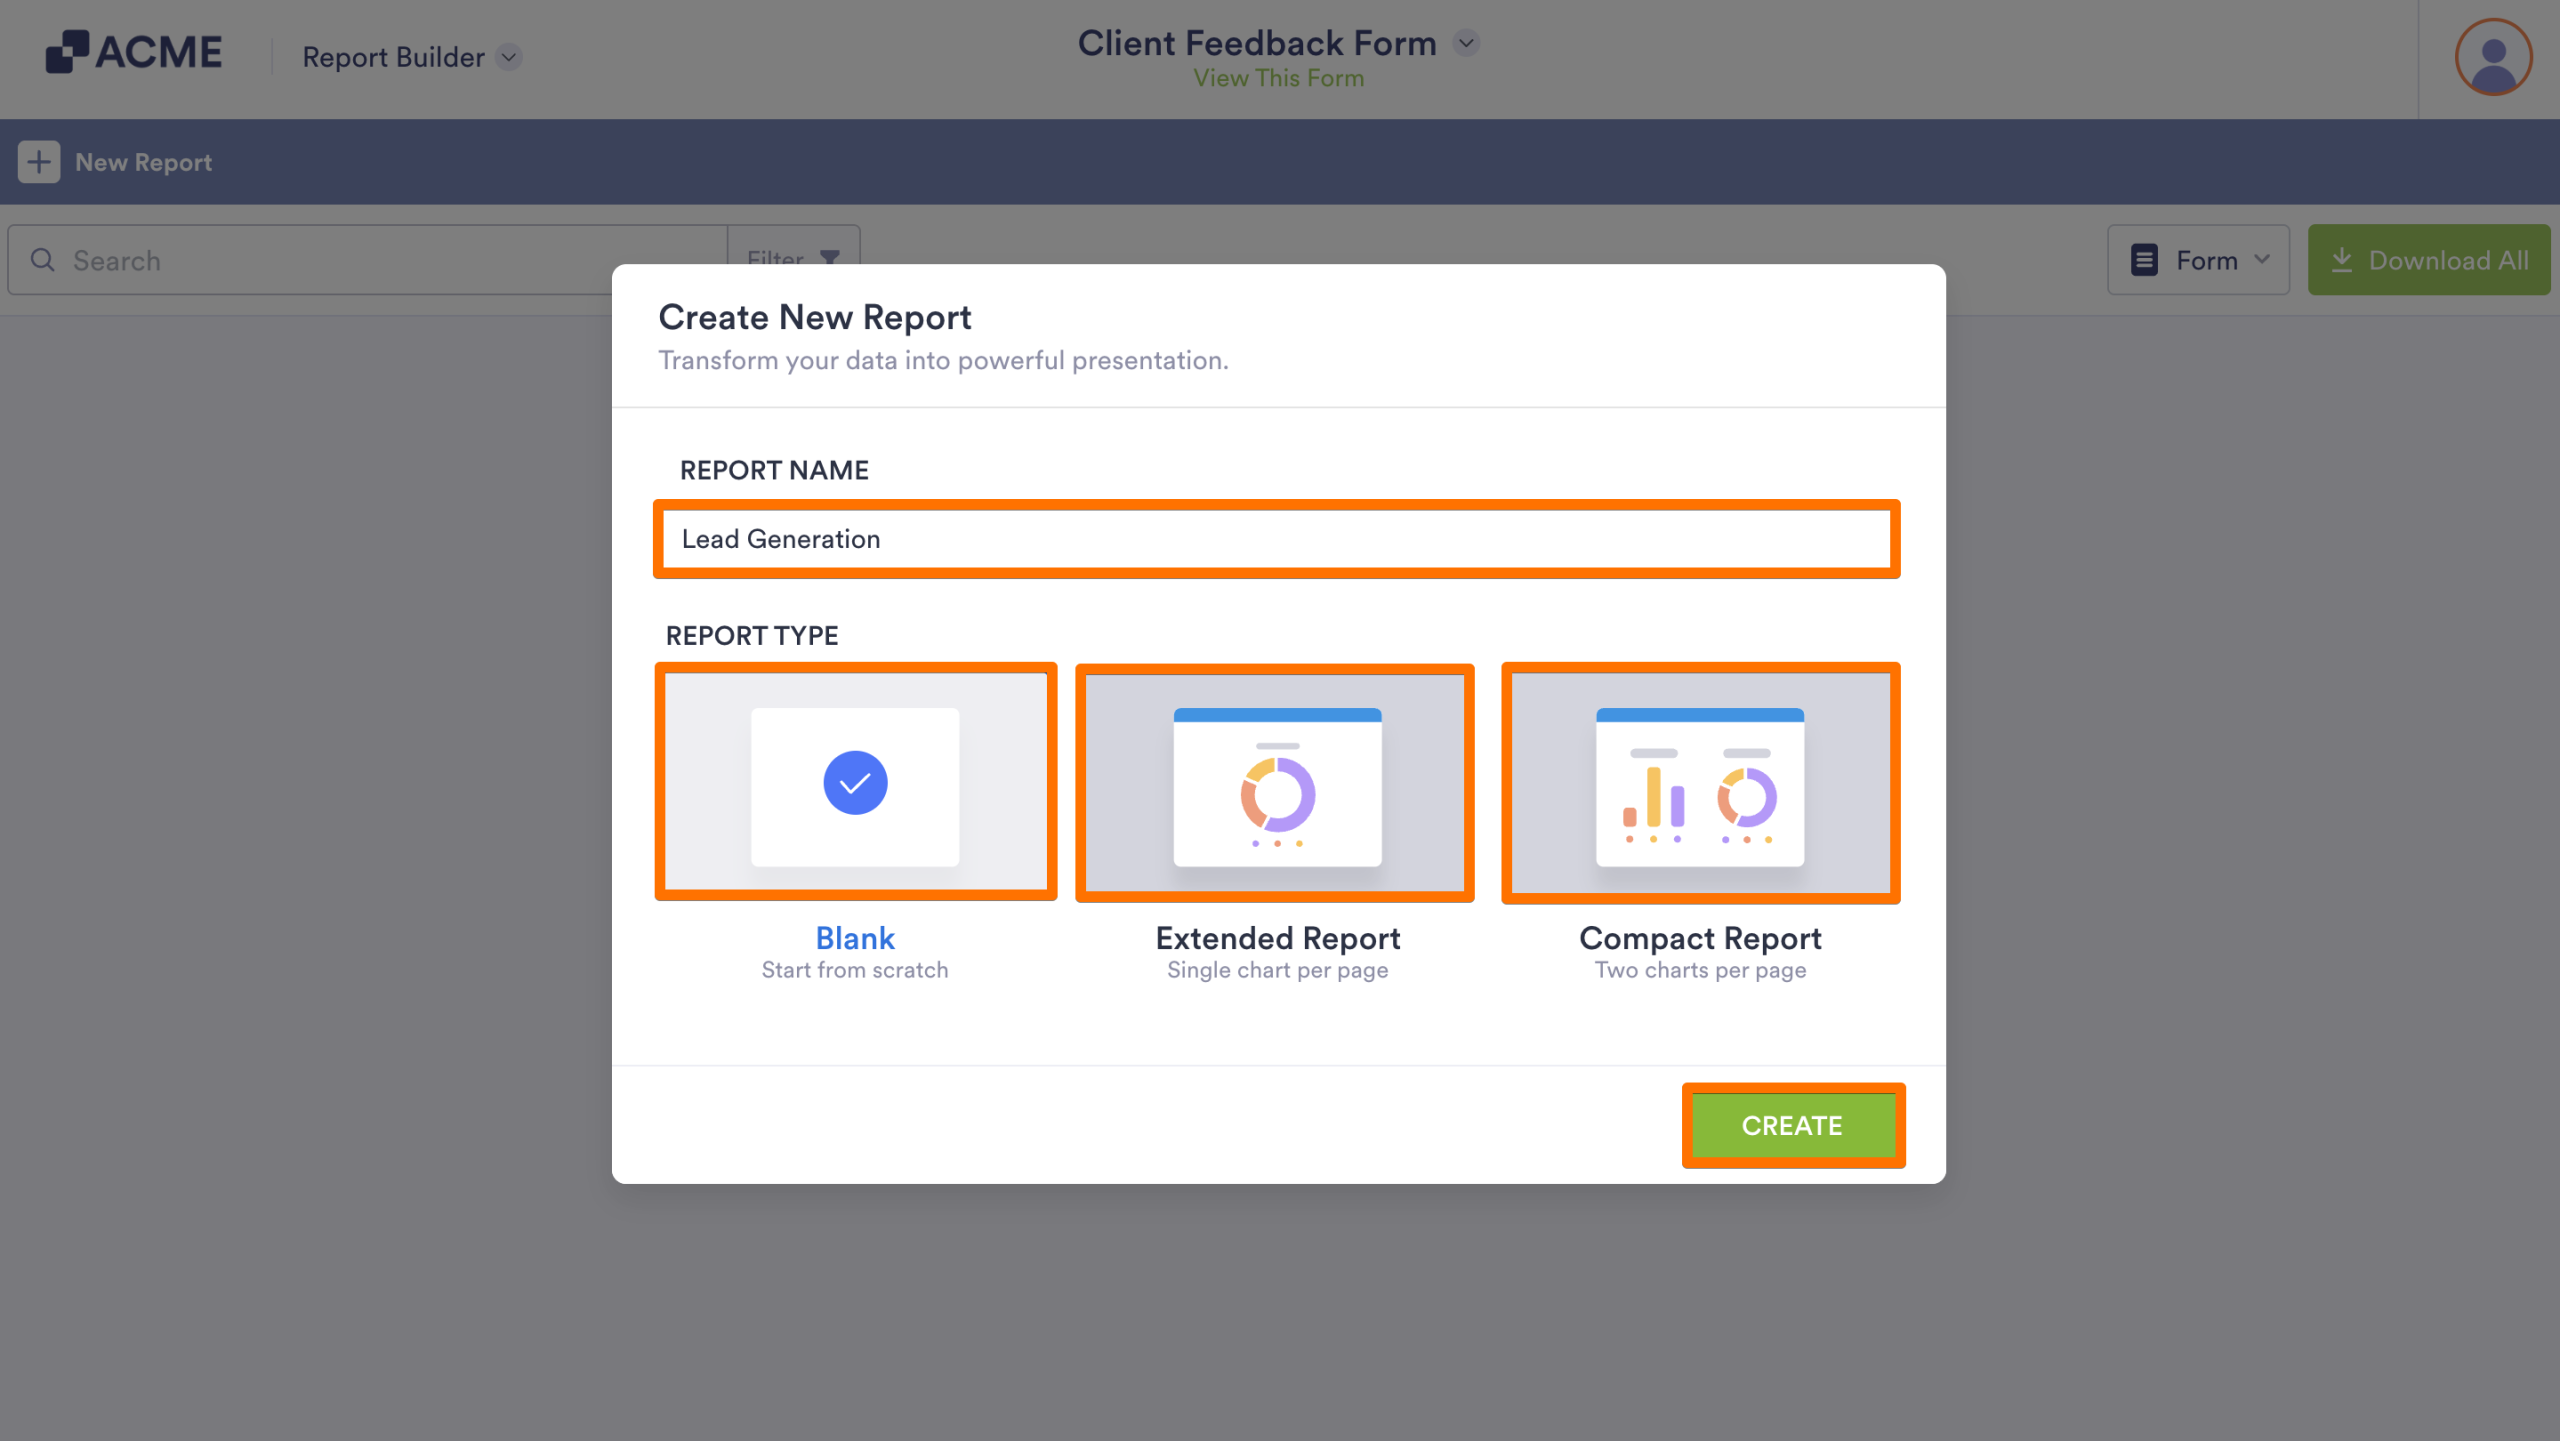
This opens the builder where you can design a new report tied to the form you’re currently working on.
From a Table
Only Visual Reports can be created from a Table.
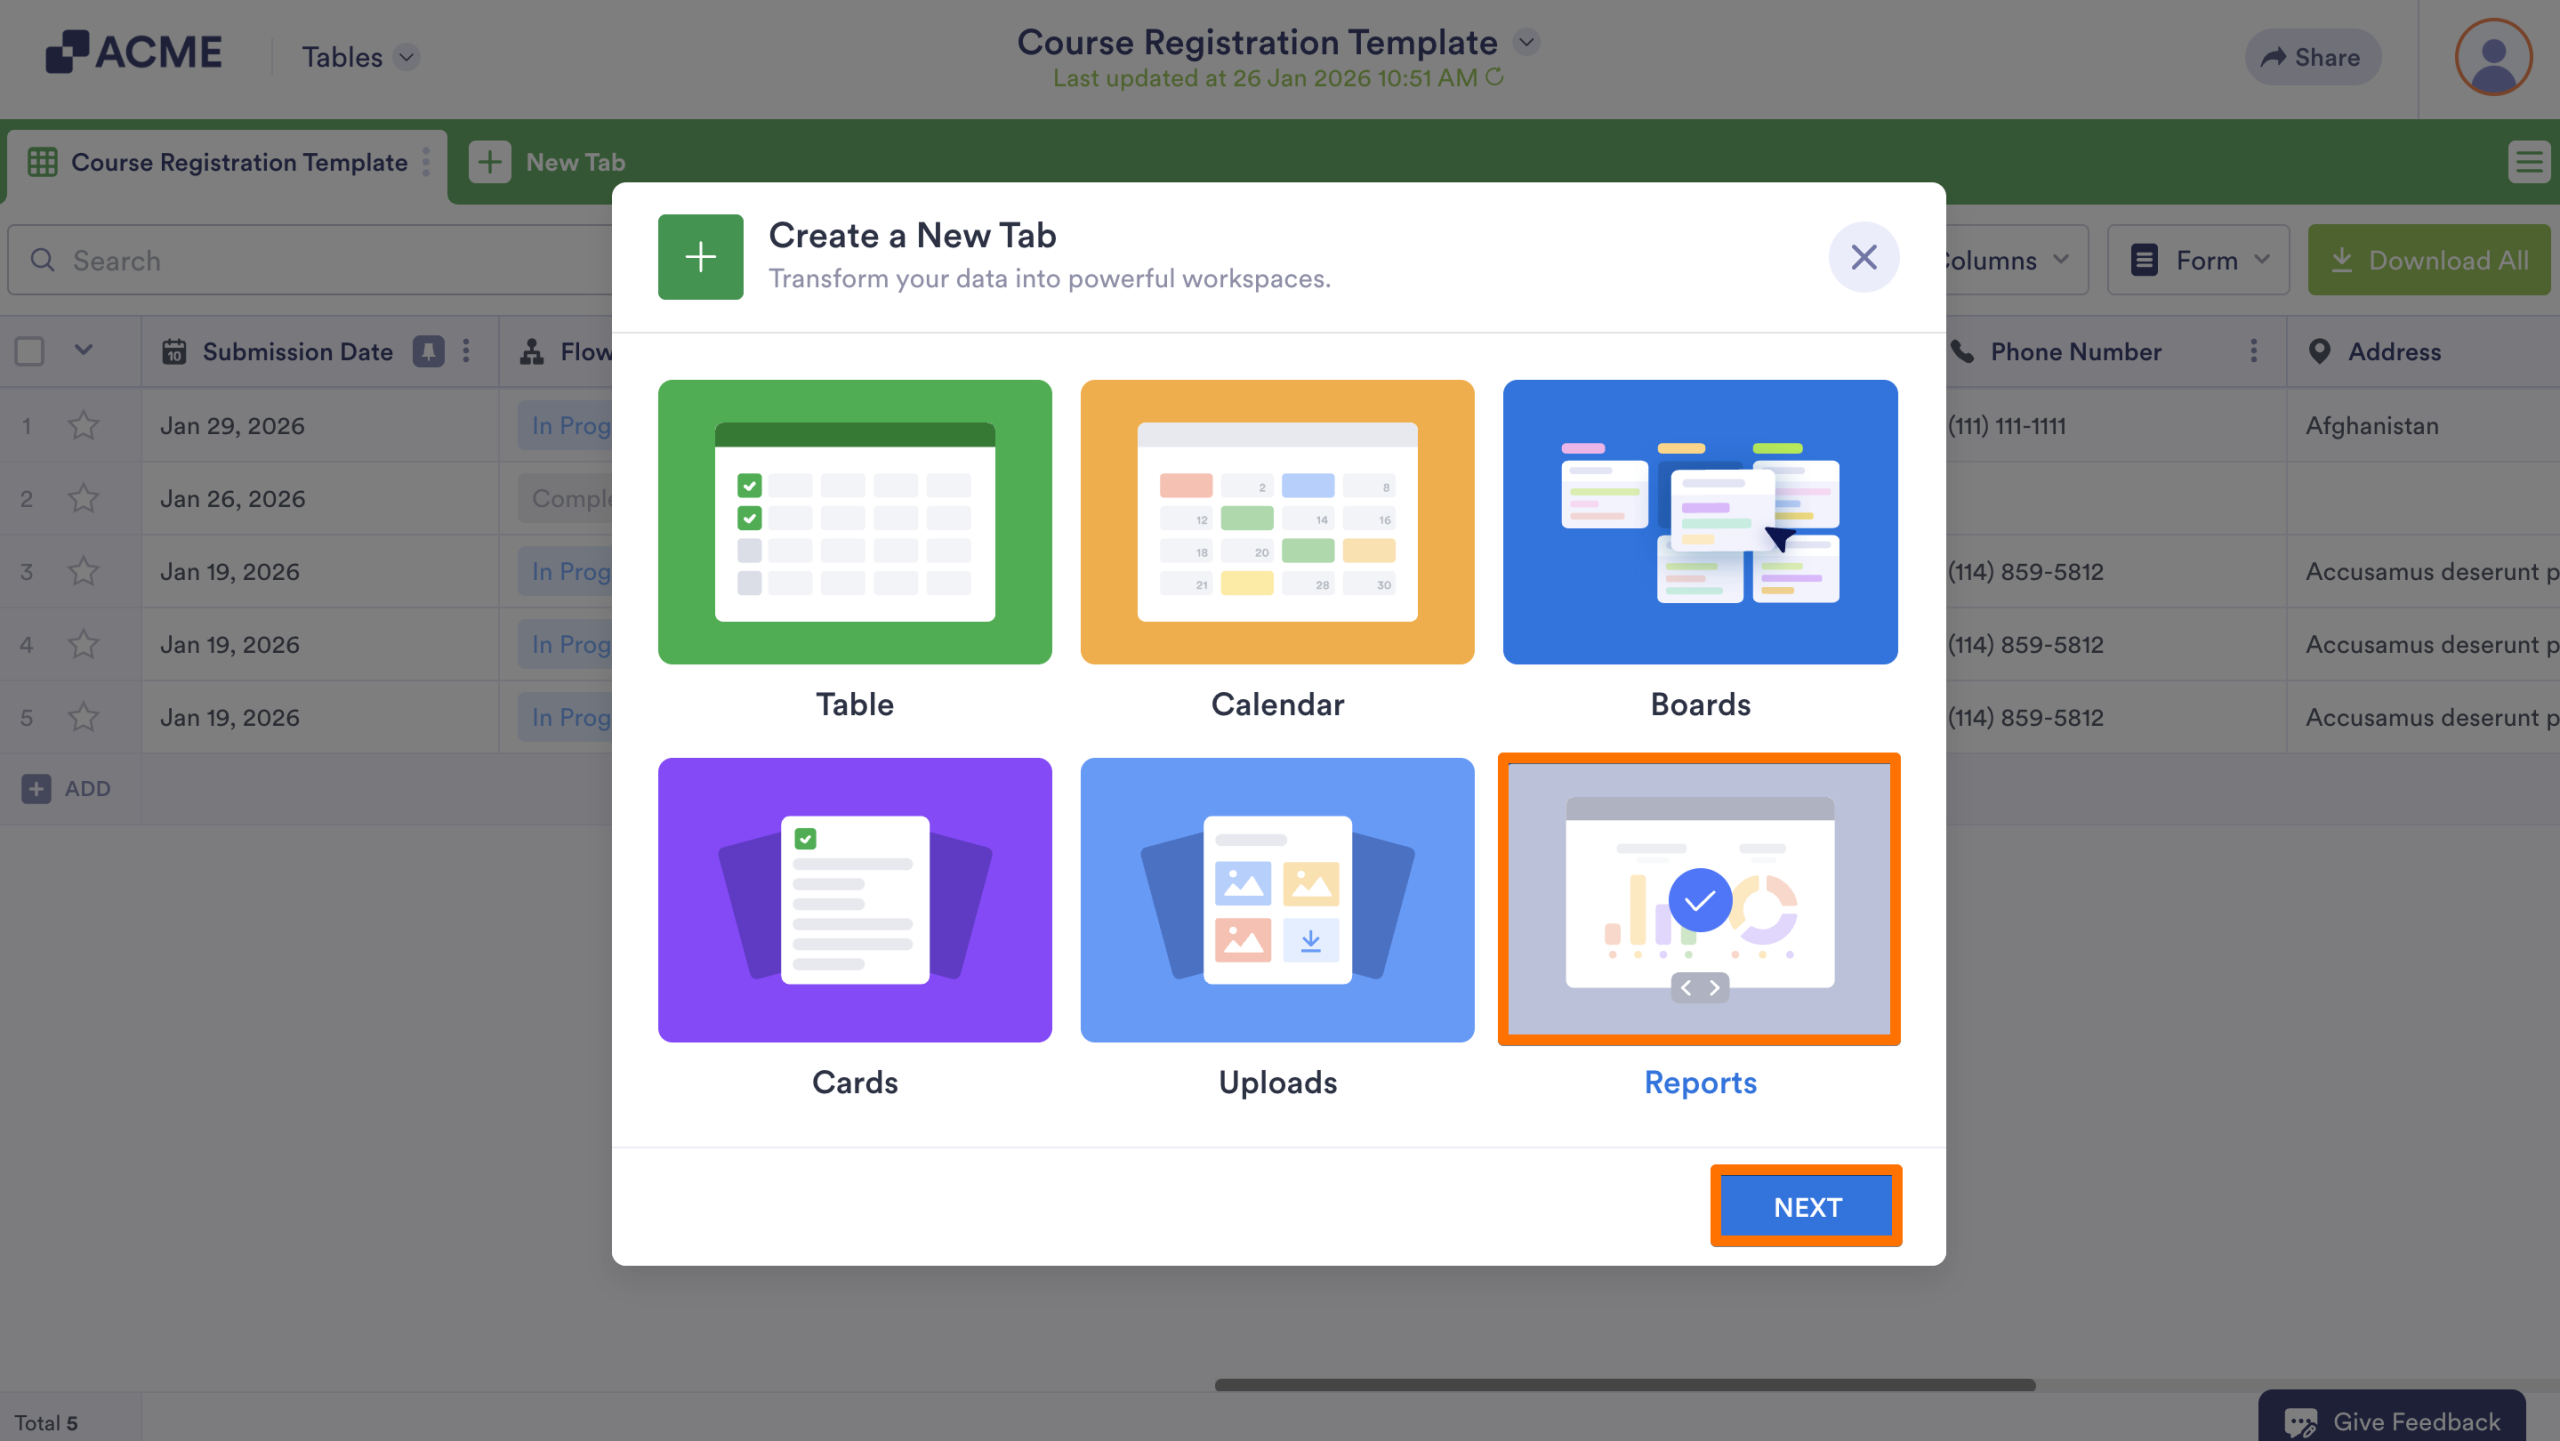
- In Tables, click on New Tab in the Tabs bar at the top of the page.
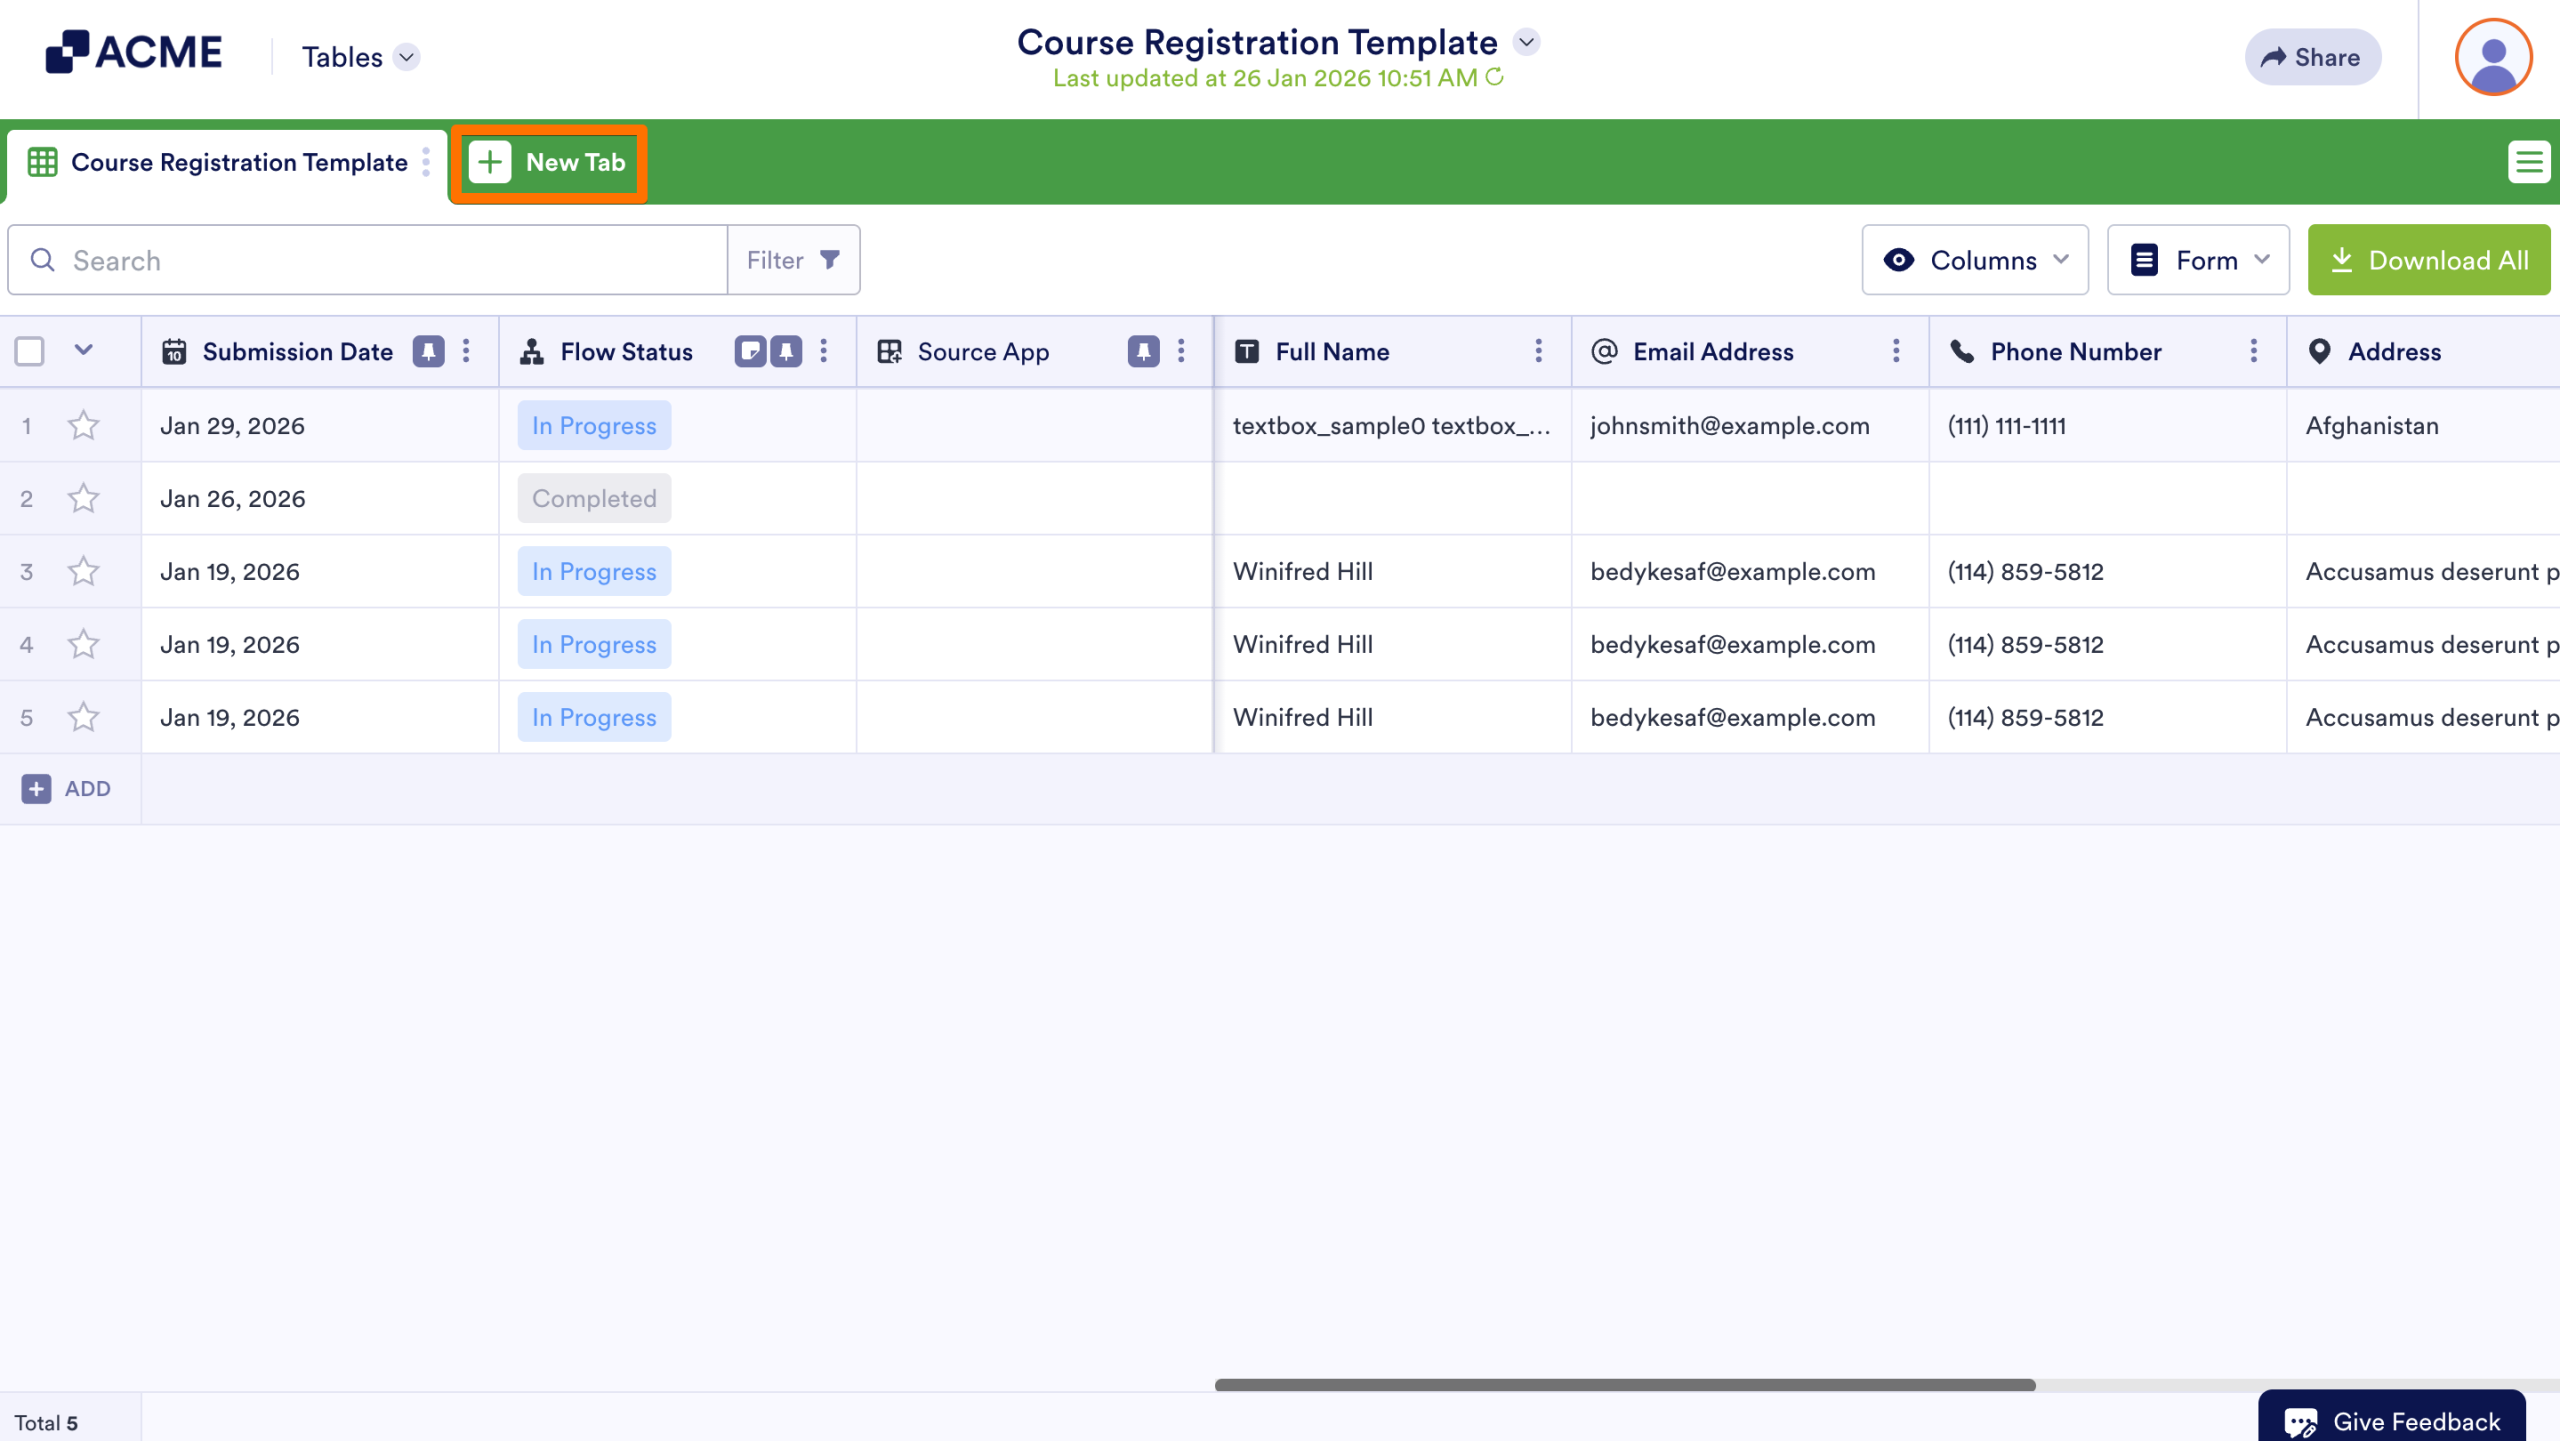
- Then, in the pop-up window, select Reports and click on Next.
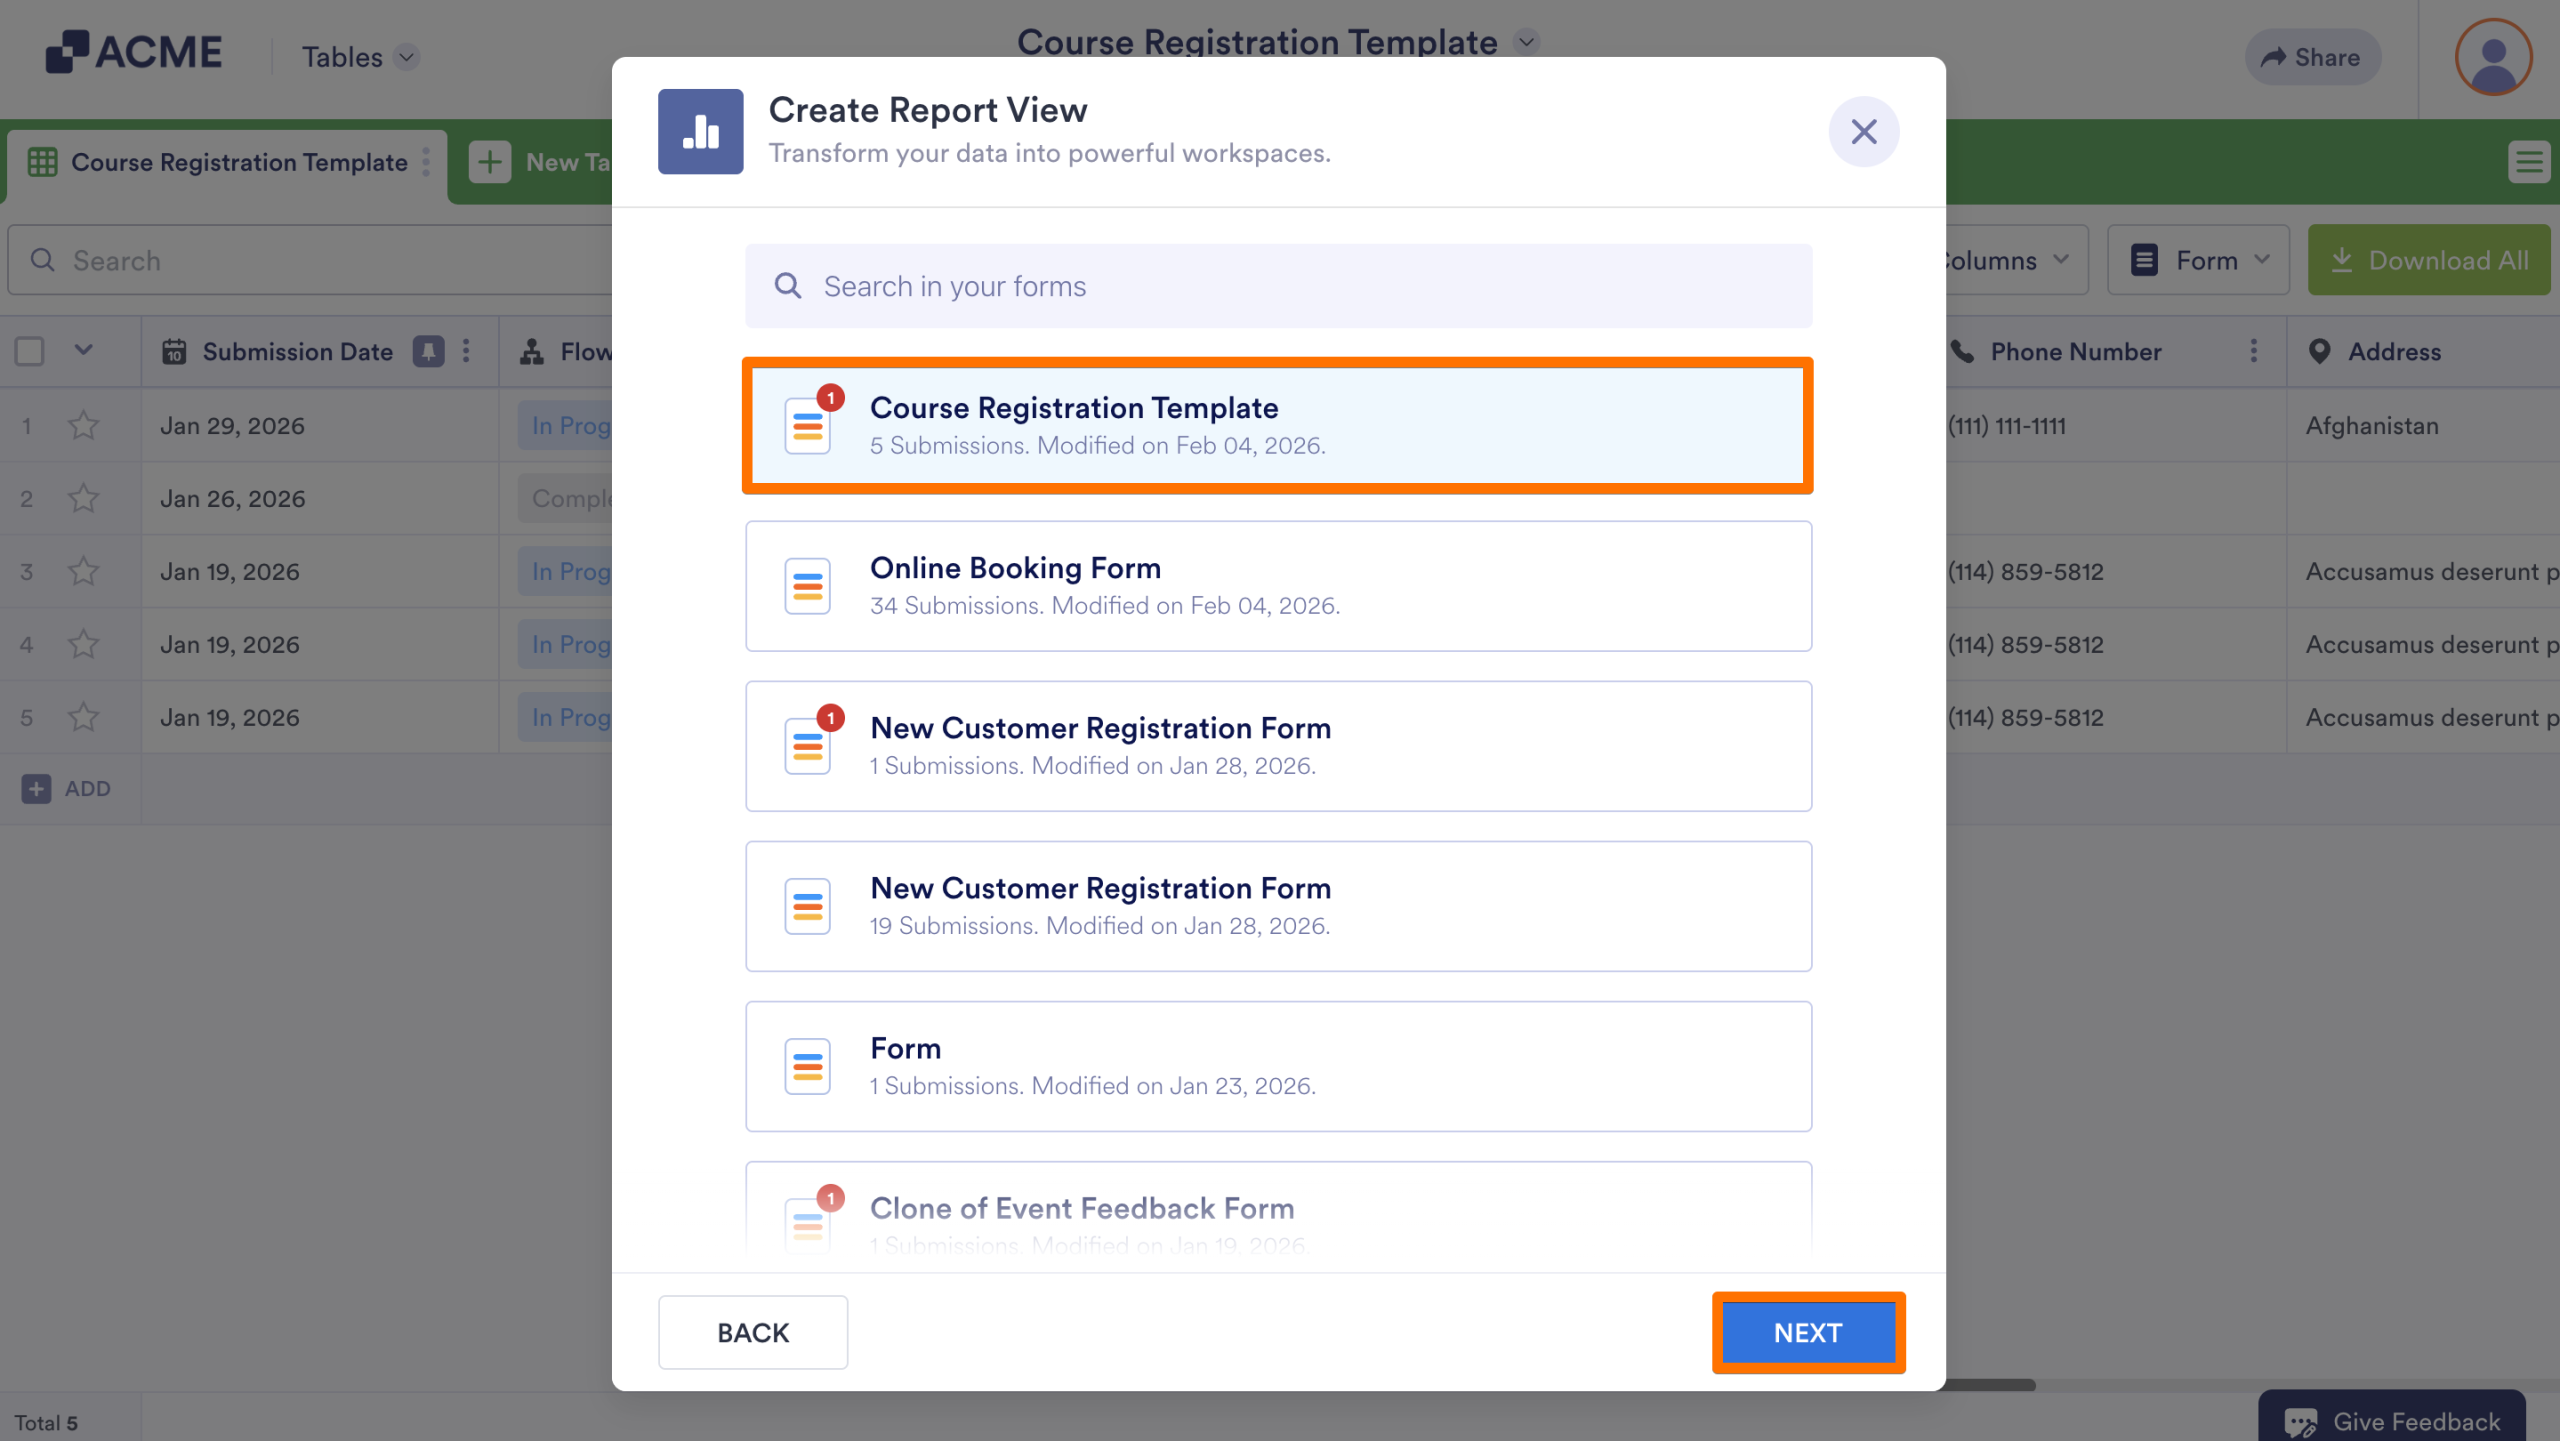
- Select the form you’d like to use for the report and click on Next.
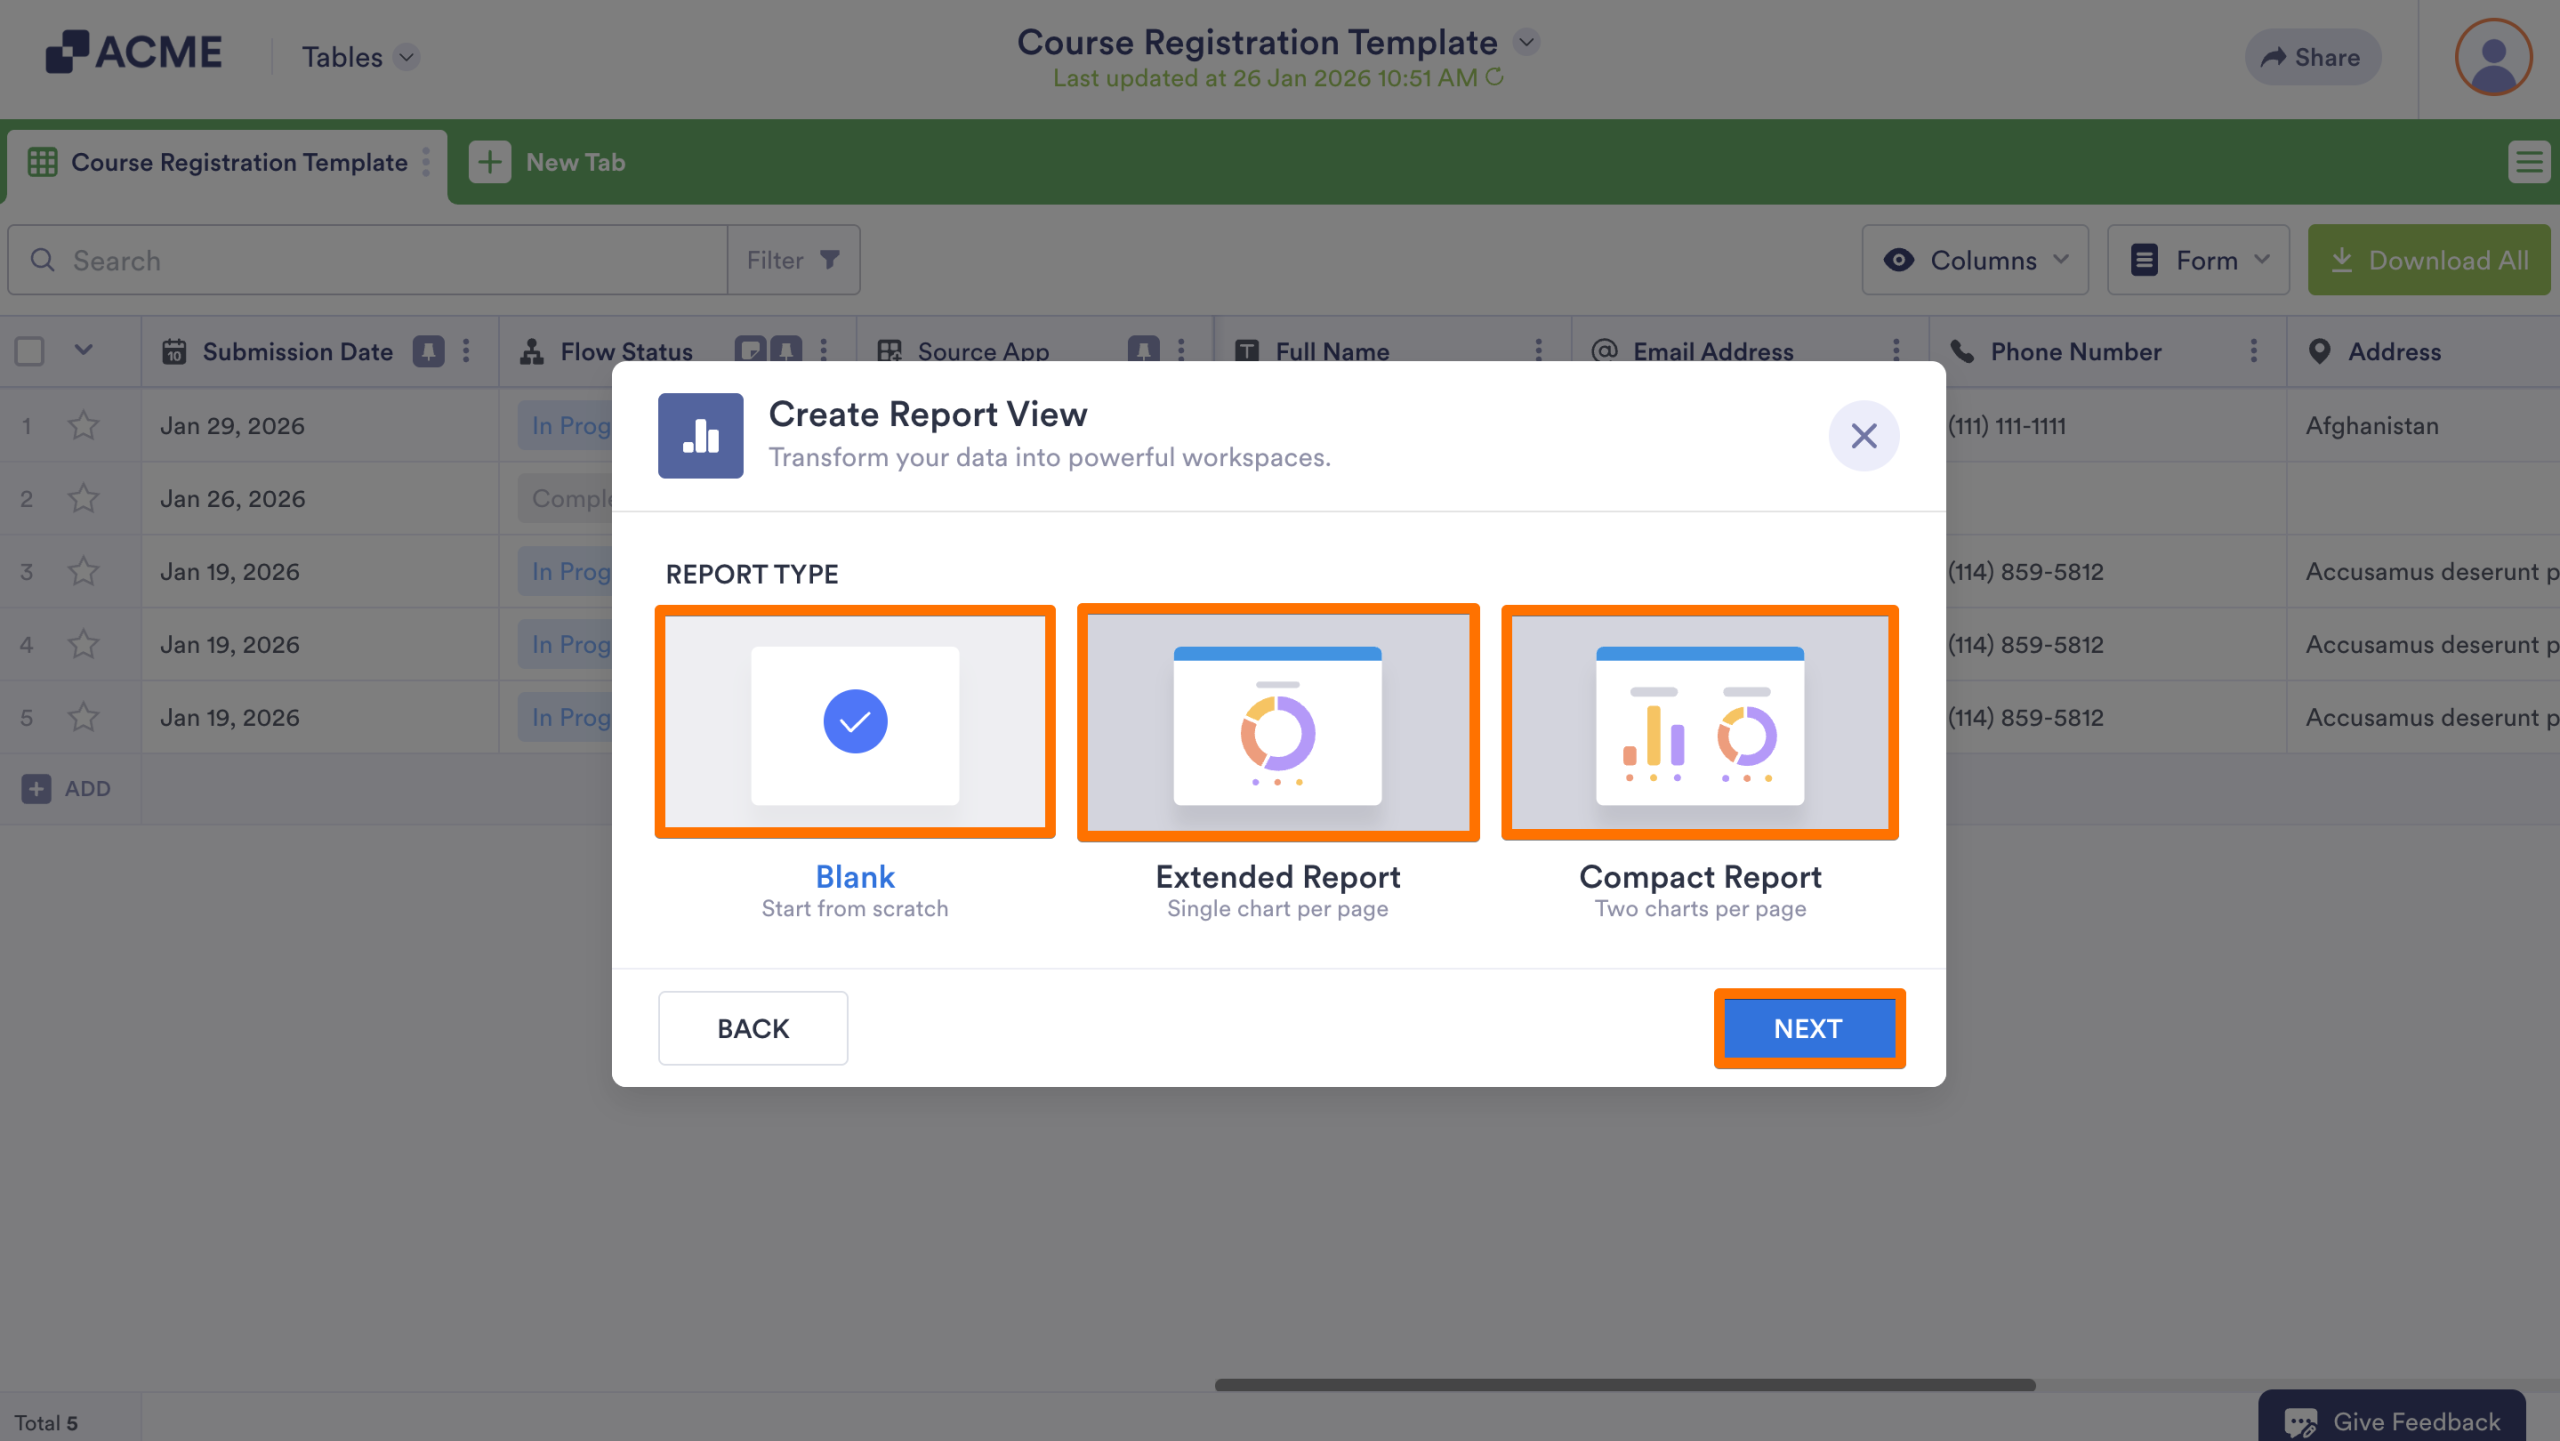
- Then, choose how you’d like to build the report and click Next.
A new tab will open with the report, where you can configure the report based on your needs.

Send Comment: