Your Workspace is more than just a dashboard—it’s your Team’s central hub for collaboration, forms, and data. The best part? You can make it your own. From adding your organization’s branding to organizing Forms and users, customizing your Workspace appearance helps create a smoother, more personalized experience for everyone on your team.
Note
To customize your Workspace appearance, you will need to open the Admin Console. This is where you’ll find all available customization options, including the setting to enforce a default appearance for all users.
You can personalize the look of your Workspace as long as your organization’s Admin hasn’t restricted appearance settings in the Admin Console.
Customizing the Appearance as a User
If your Admin has left the settings open, you can change how your personal workspace looks. Here’s how to do it:
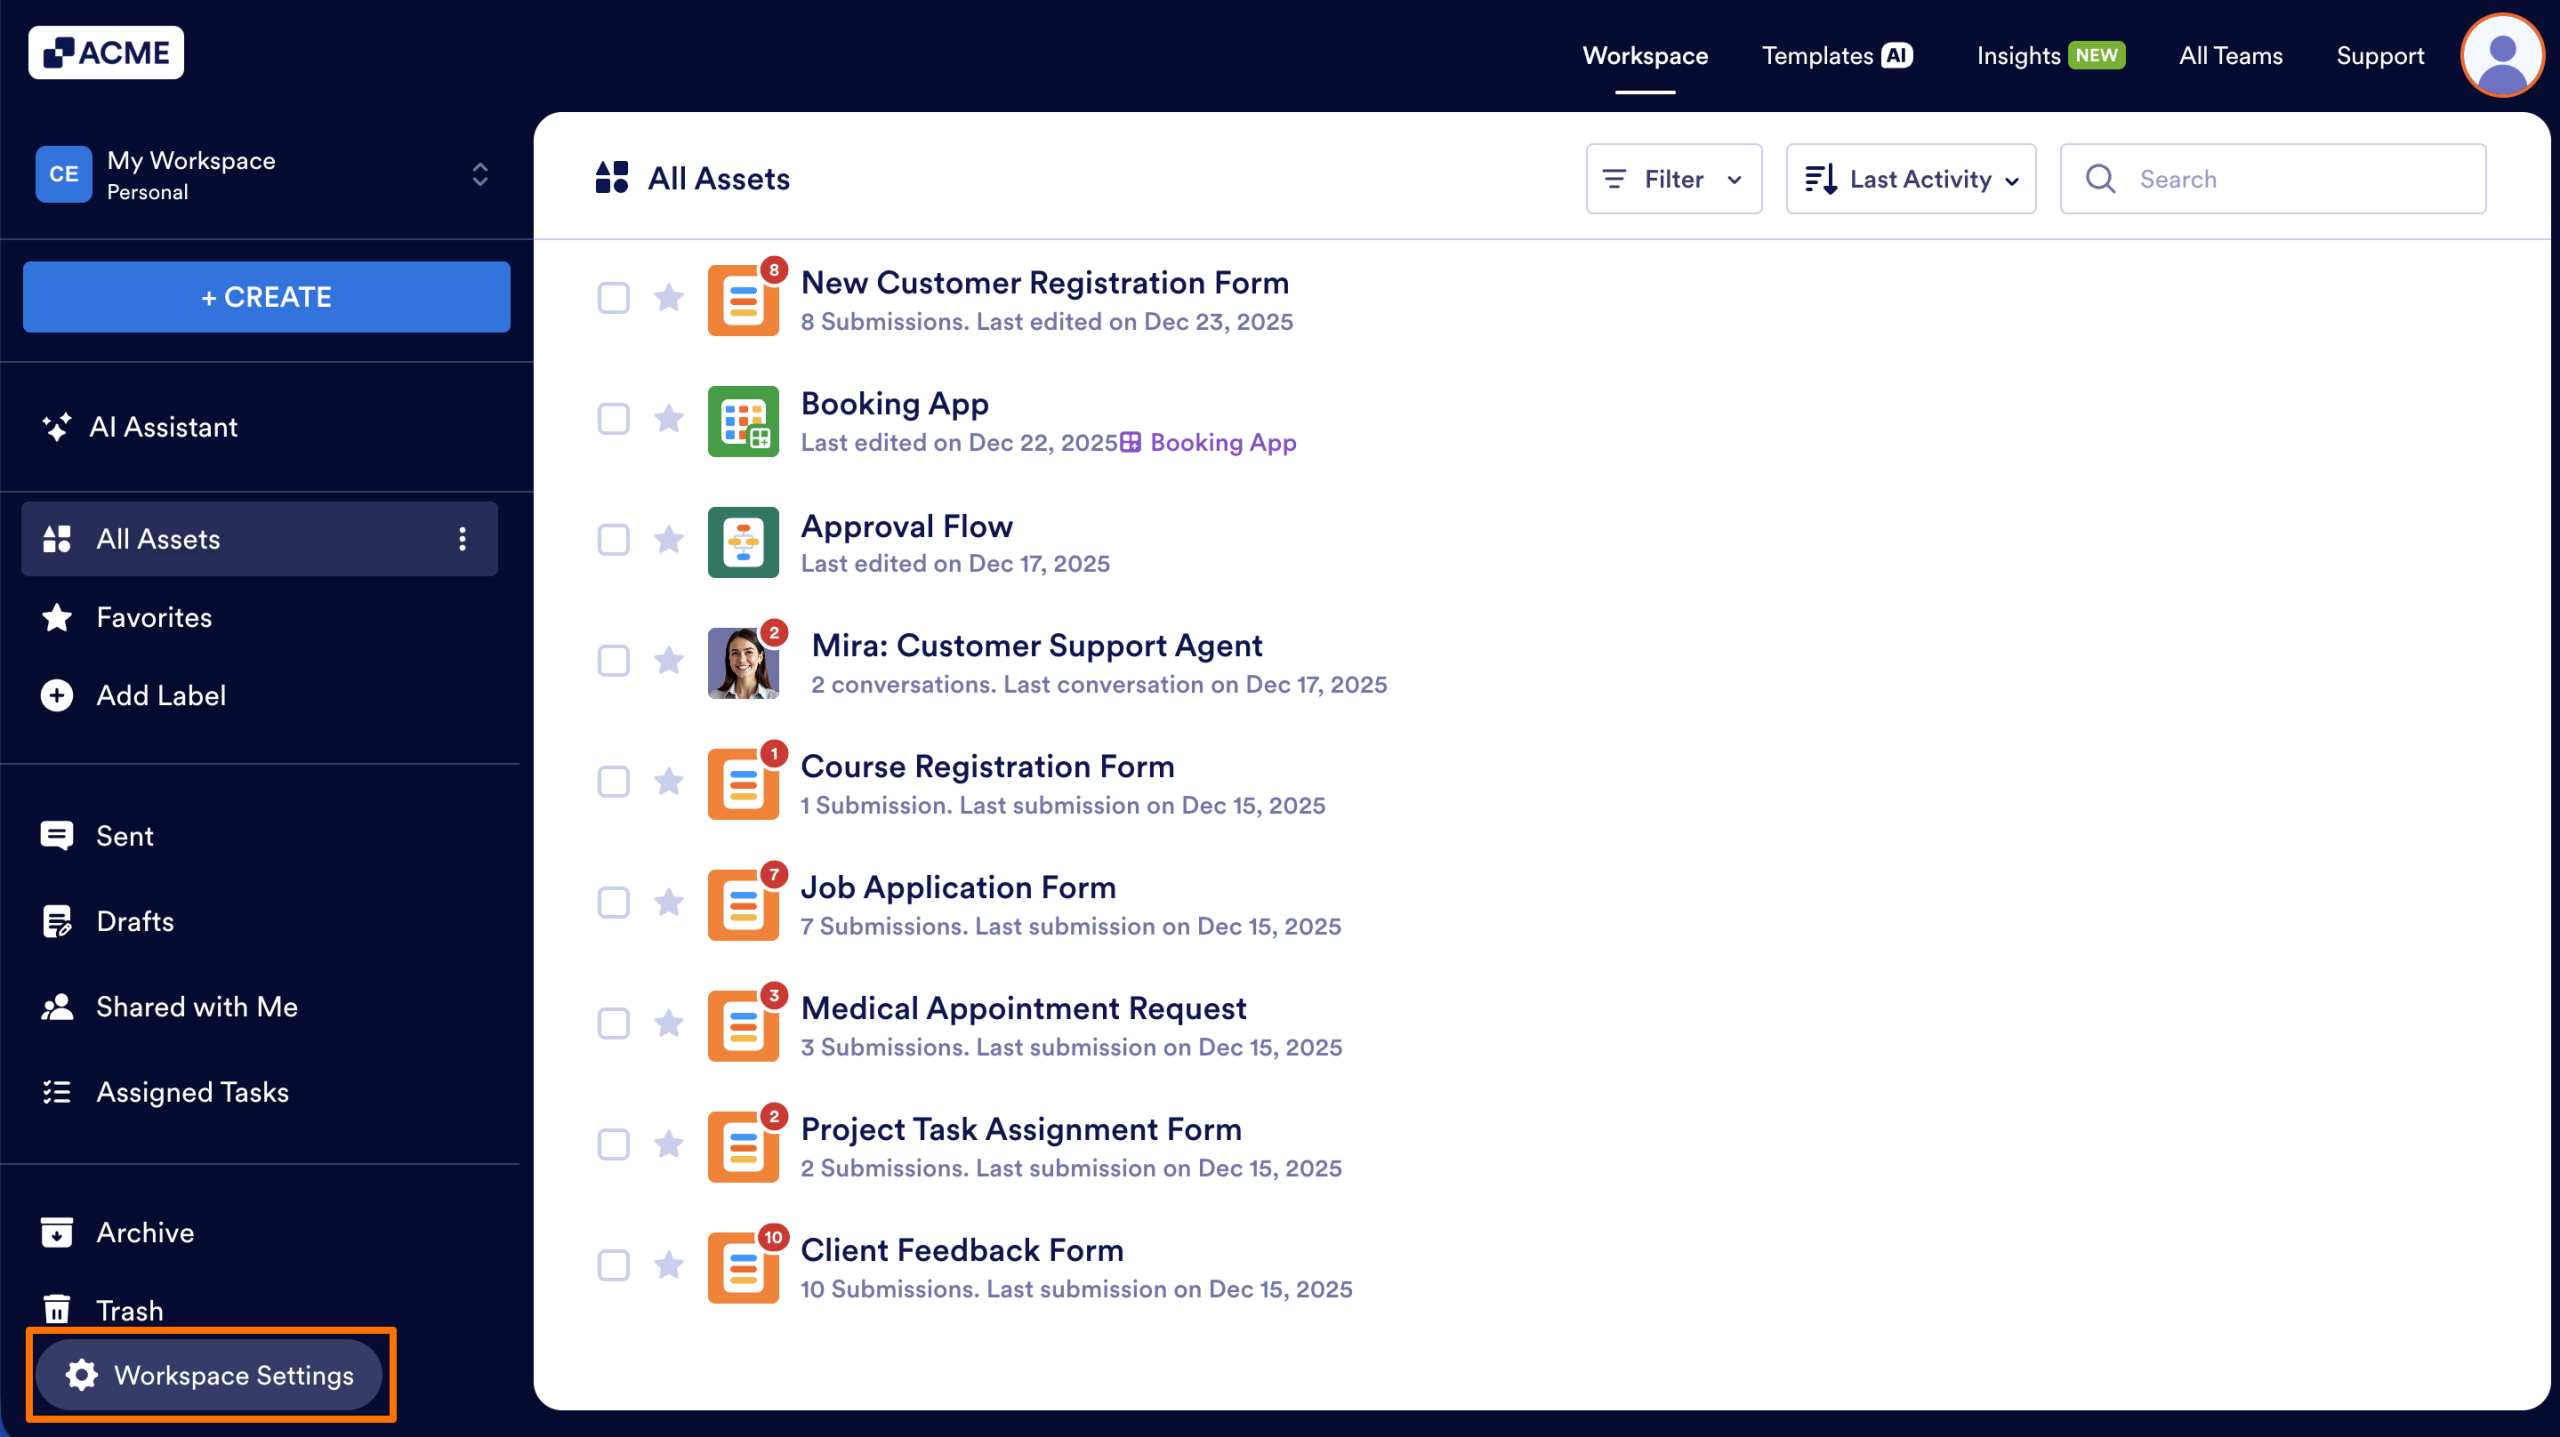
- First, in your My Workspace page, lower left corner of your screen, click on Workspace Settings.
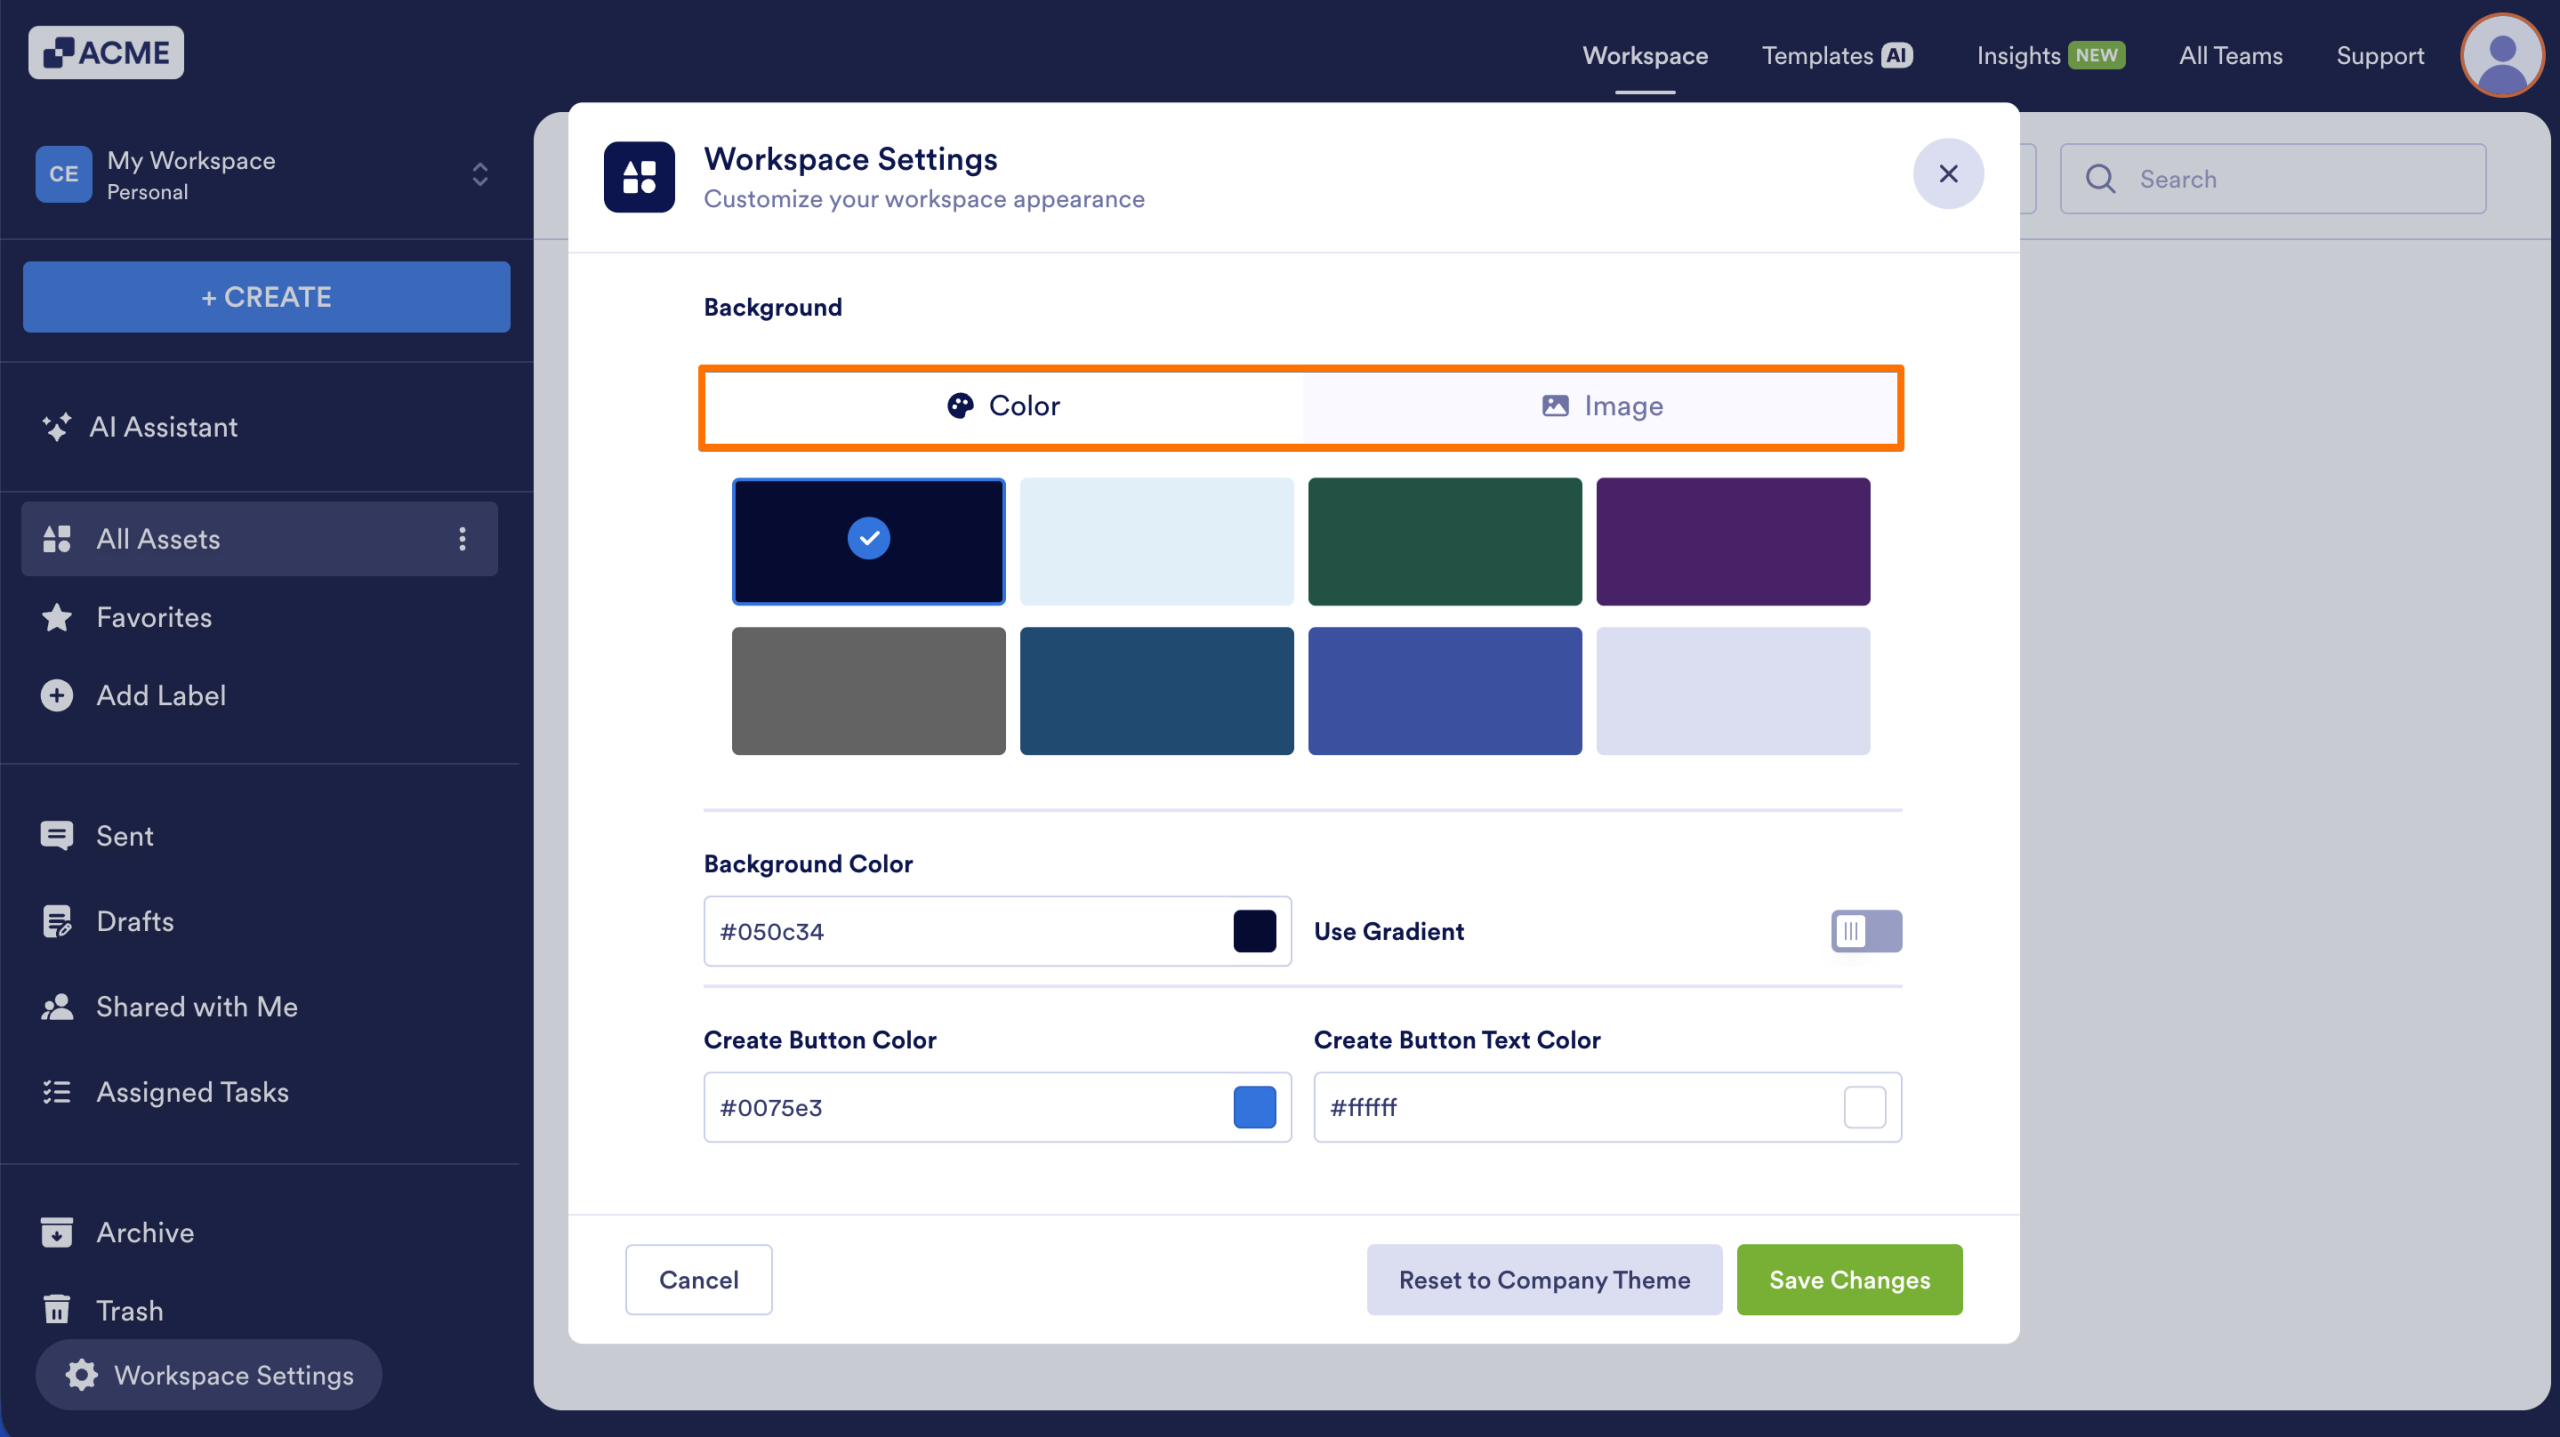
- Then, in the Workspace Settings window that opens, select one of the following background options:
- Color — Select this to pick one of the predefined list of colors or set your own. You can also toggle on the gradient look.
- Image — Select this to set a background image for your workspace. You can click on the Plus icon to upload your own. You can also change the colors for the Create button and its text.
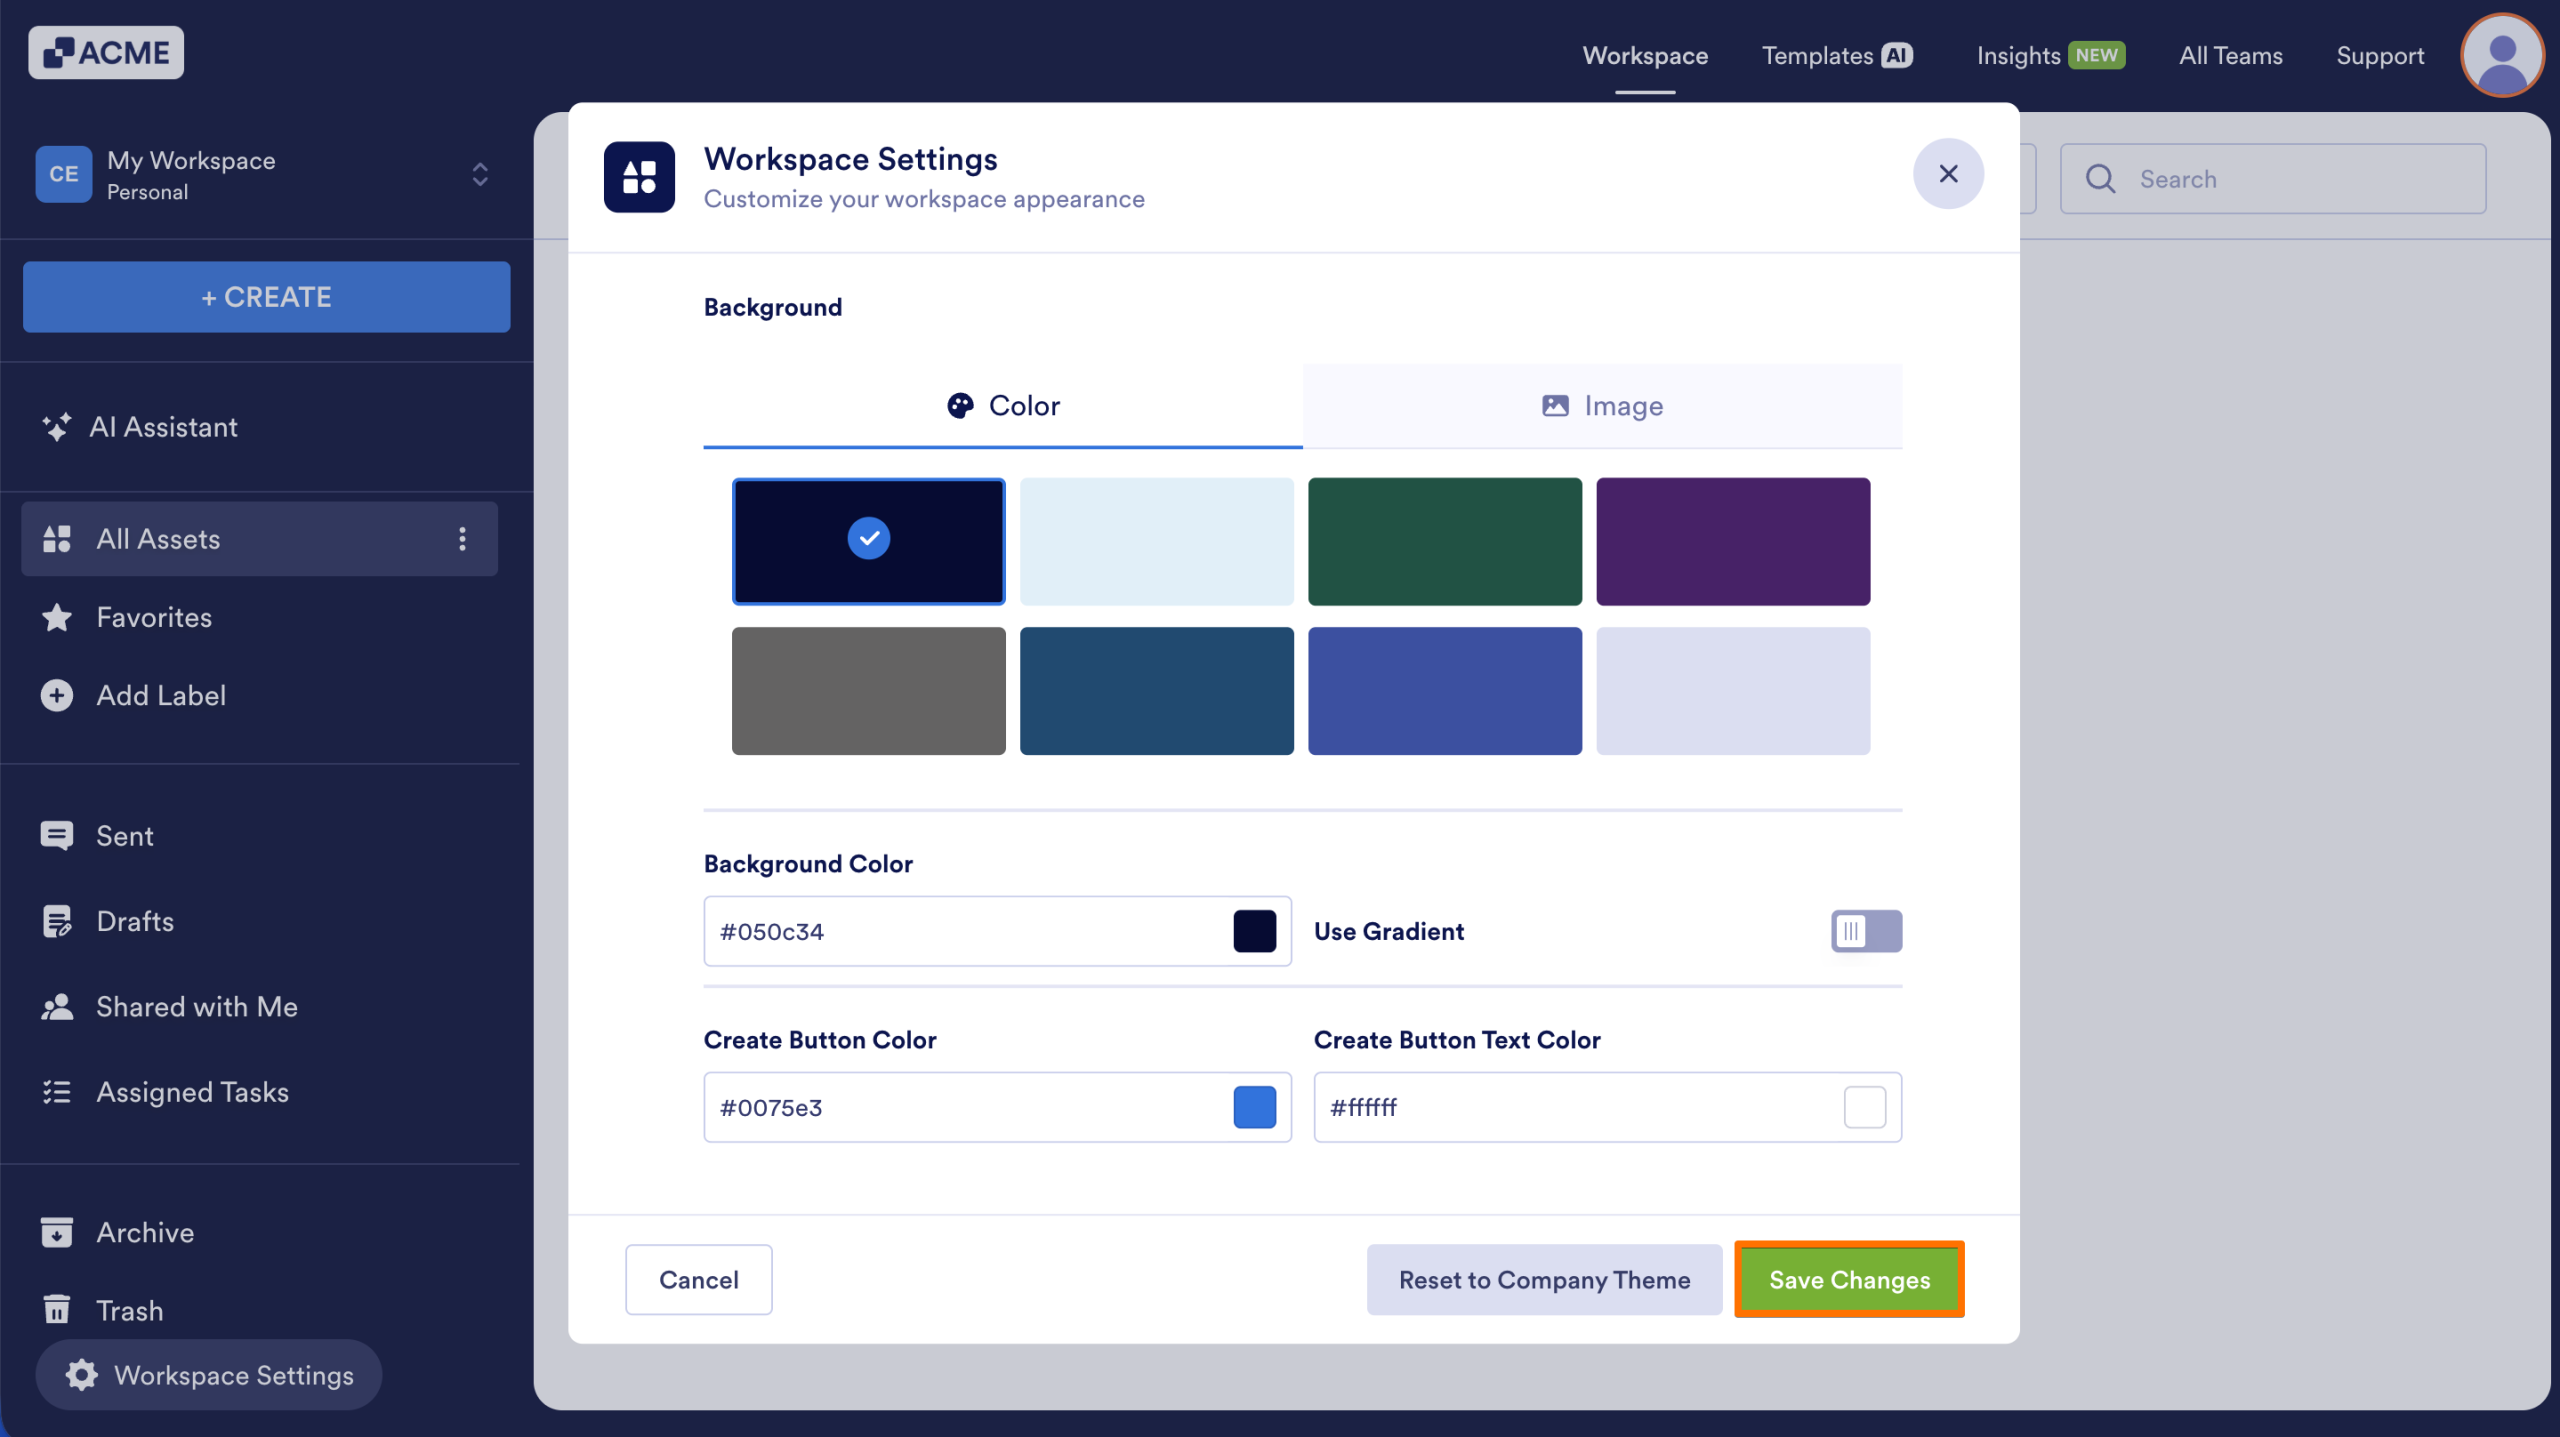
- Finally, click on Save Changes.
Note
If your Admin has set a default appearance, you can restore it at any time by using the Reset to Company Theme button.
Customizing the Appearance as an Admin
As an Admin, you can set the default appearance for your Team’s Workspace and choose whether to lock it so everyone uses the same style. Here’s how to do it:
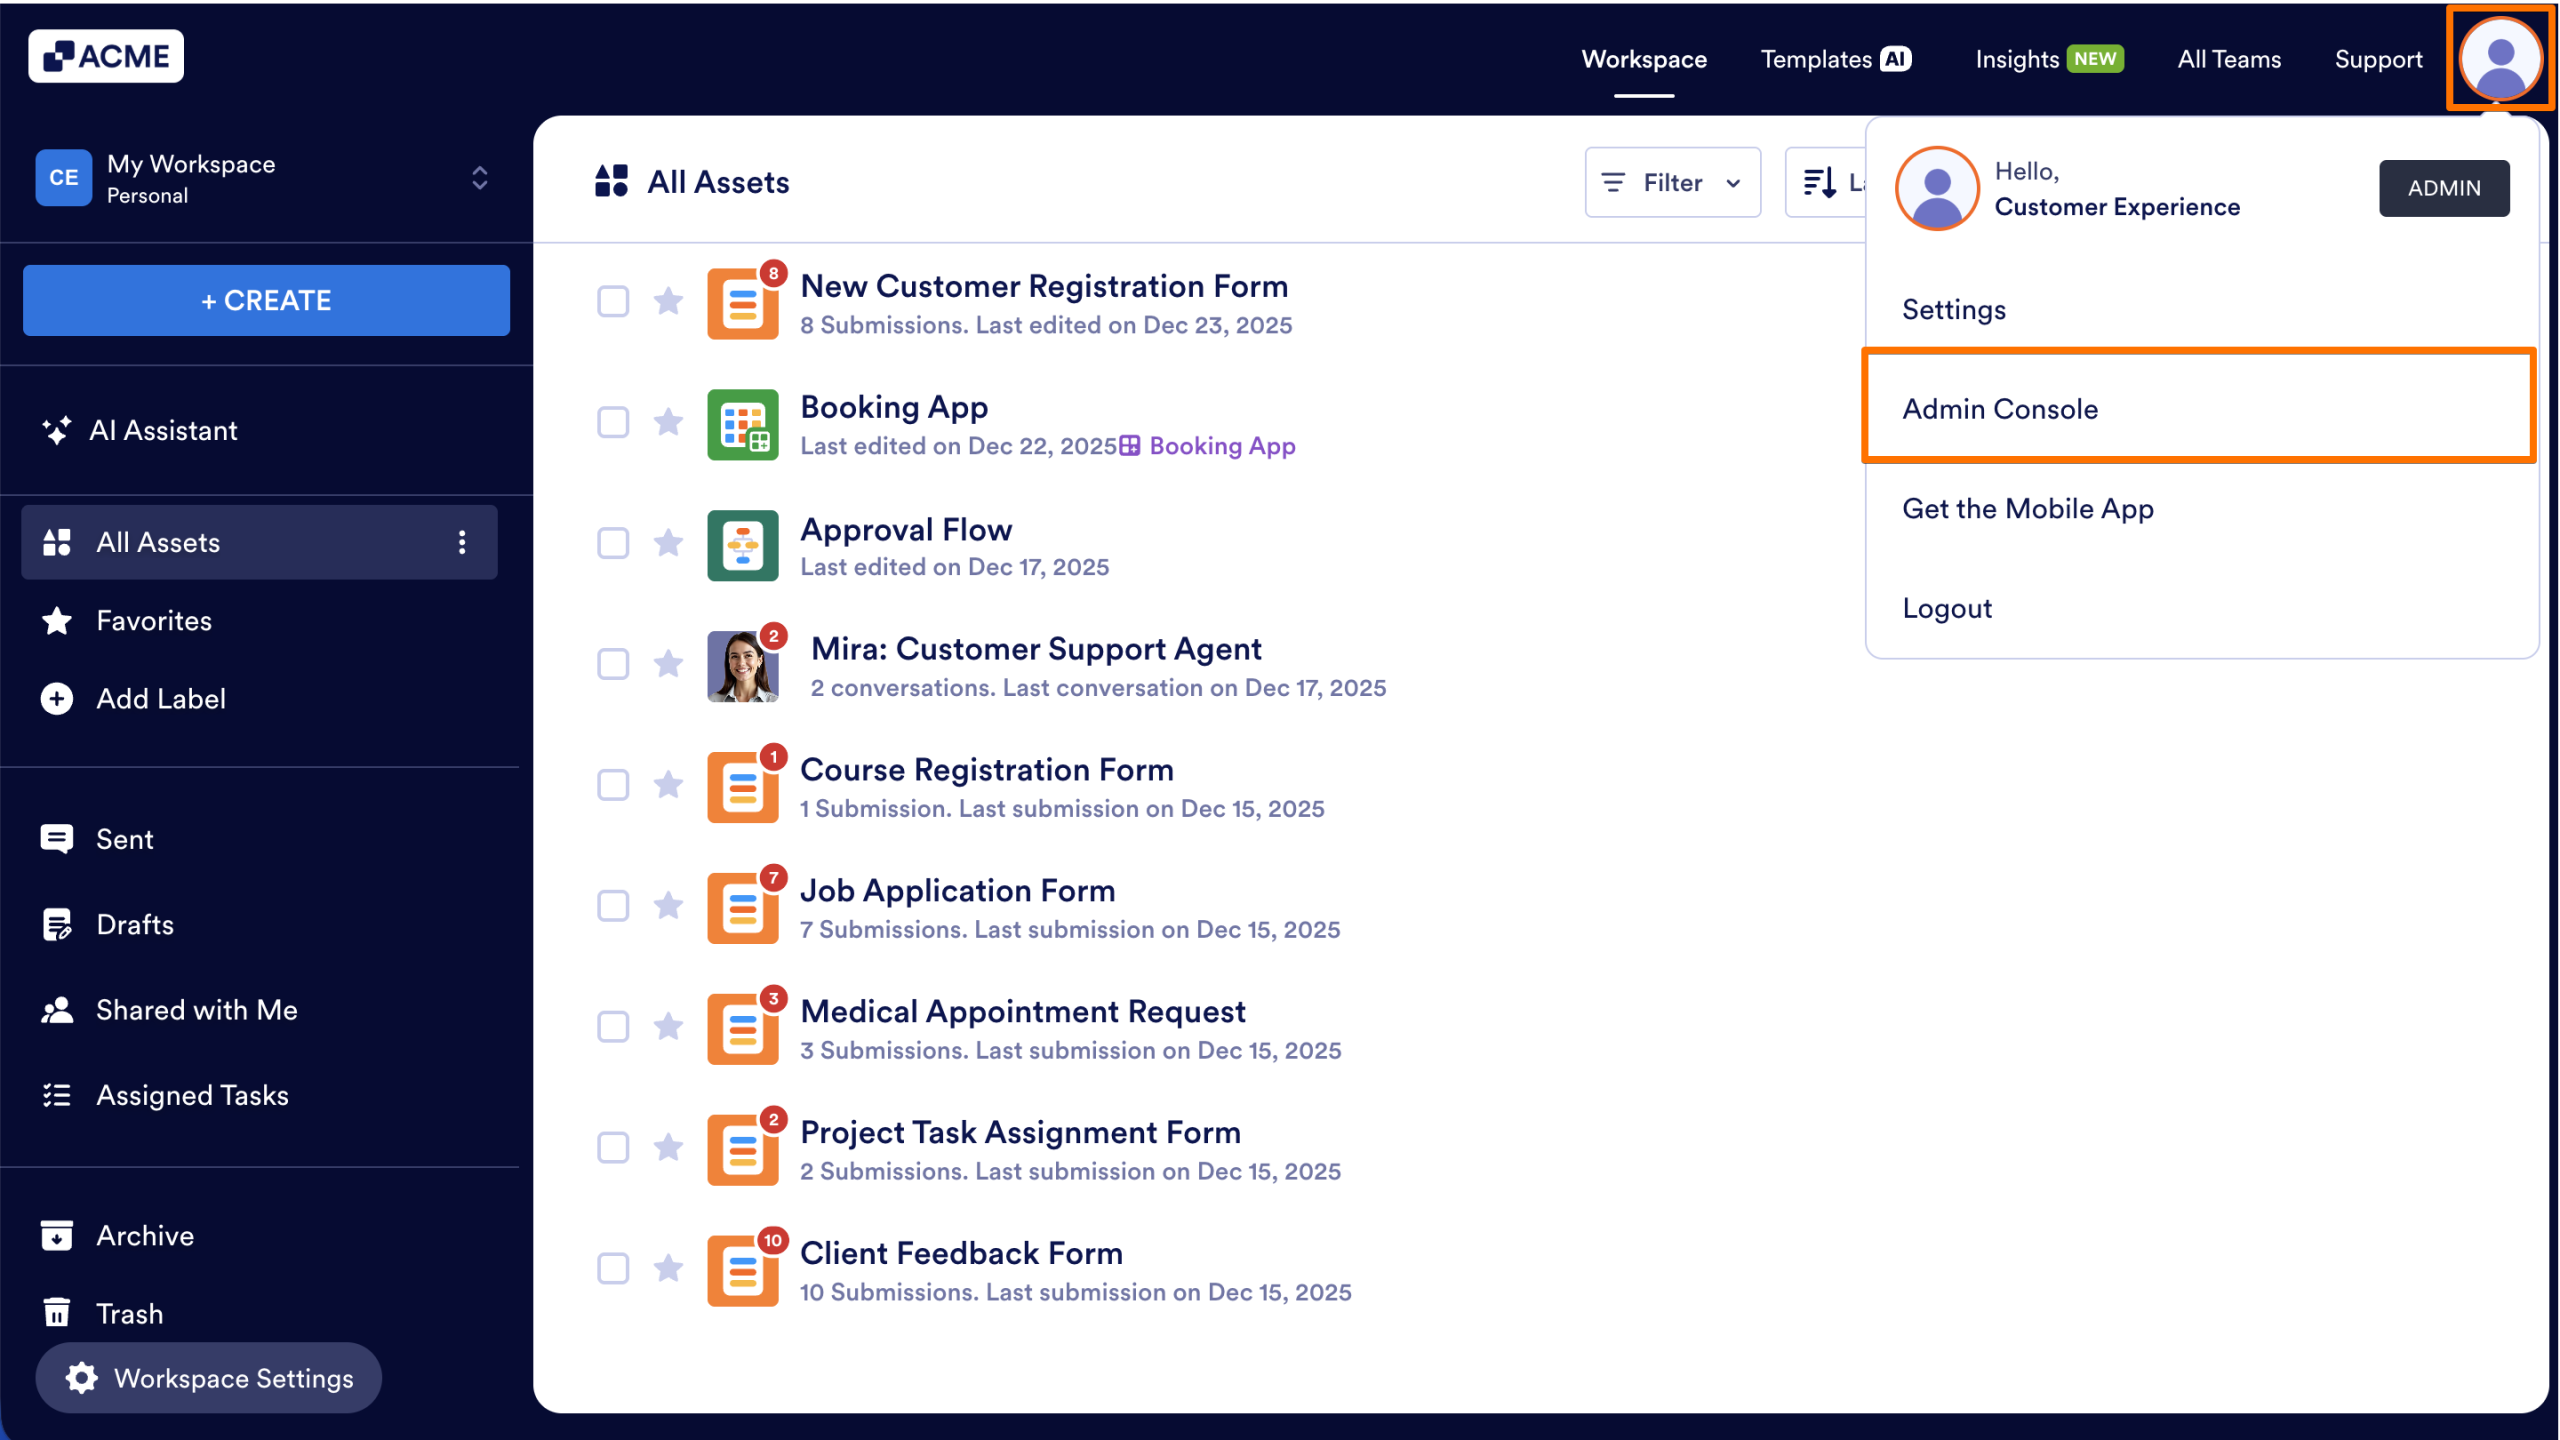
- First, in your My Workspace page, click on your Avatar/Profile picture in the upper right side of the screen.
- Then, in the menu that comes up, click on Admin Console.
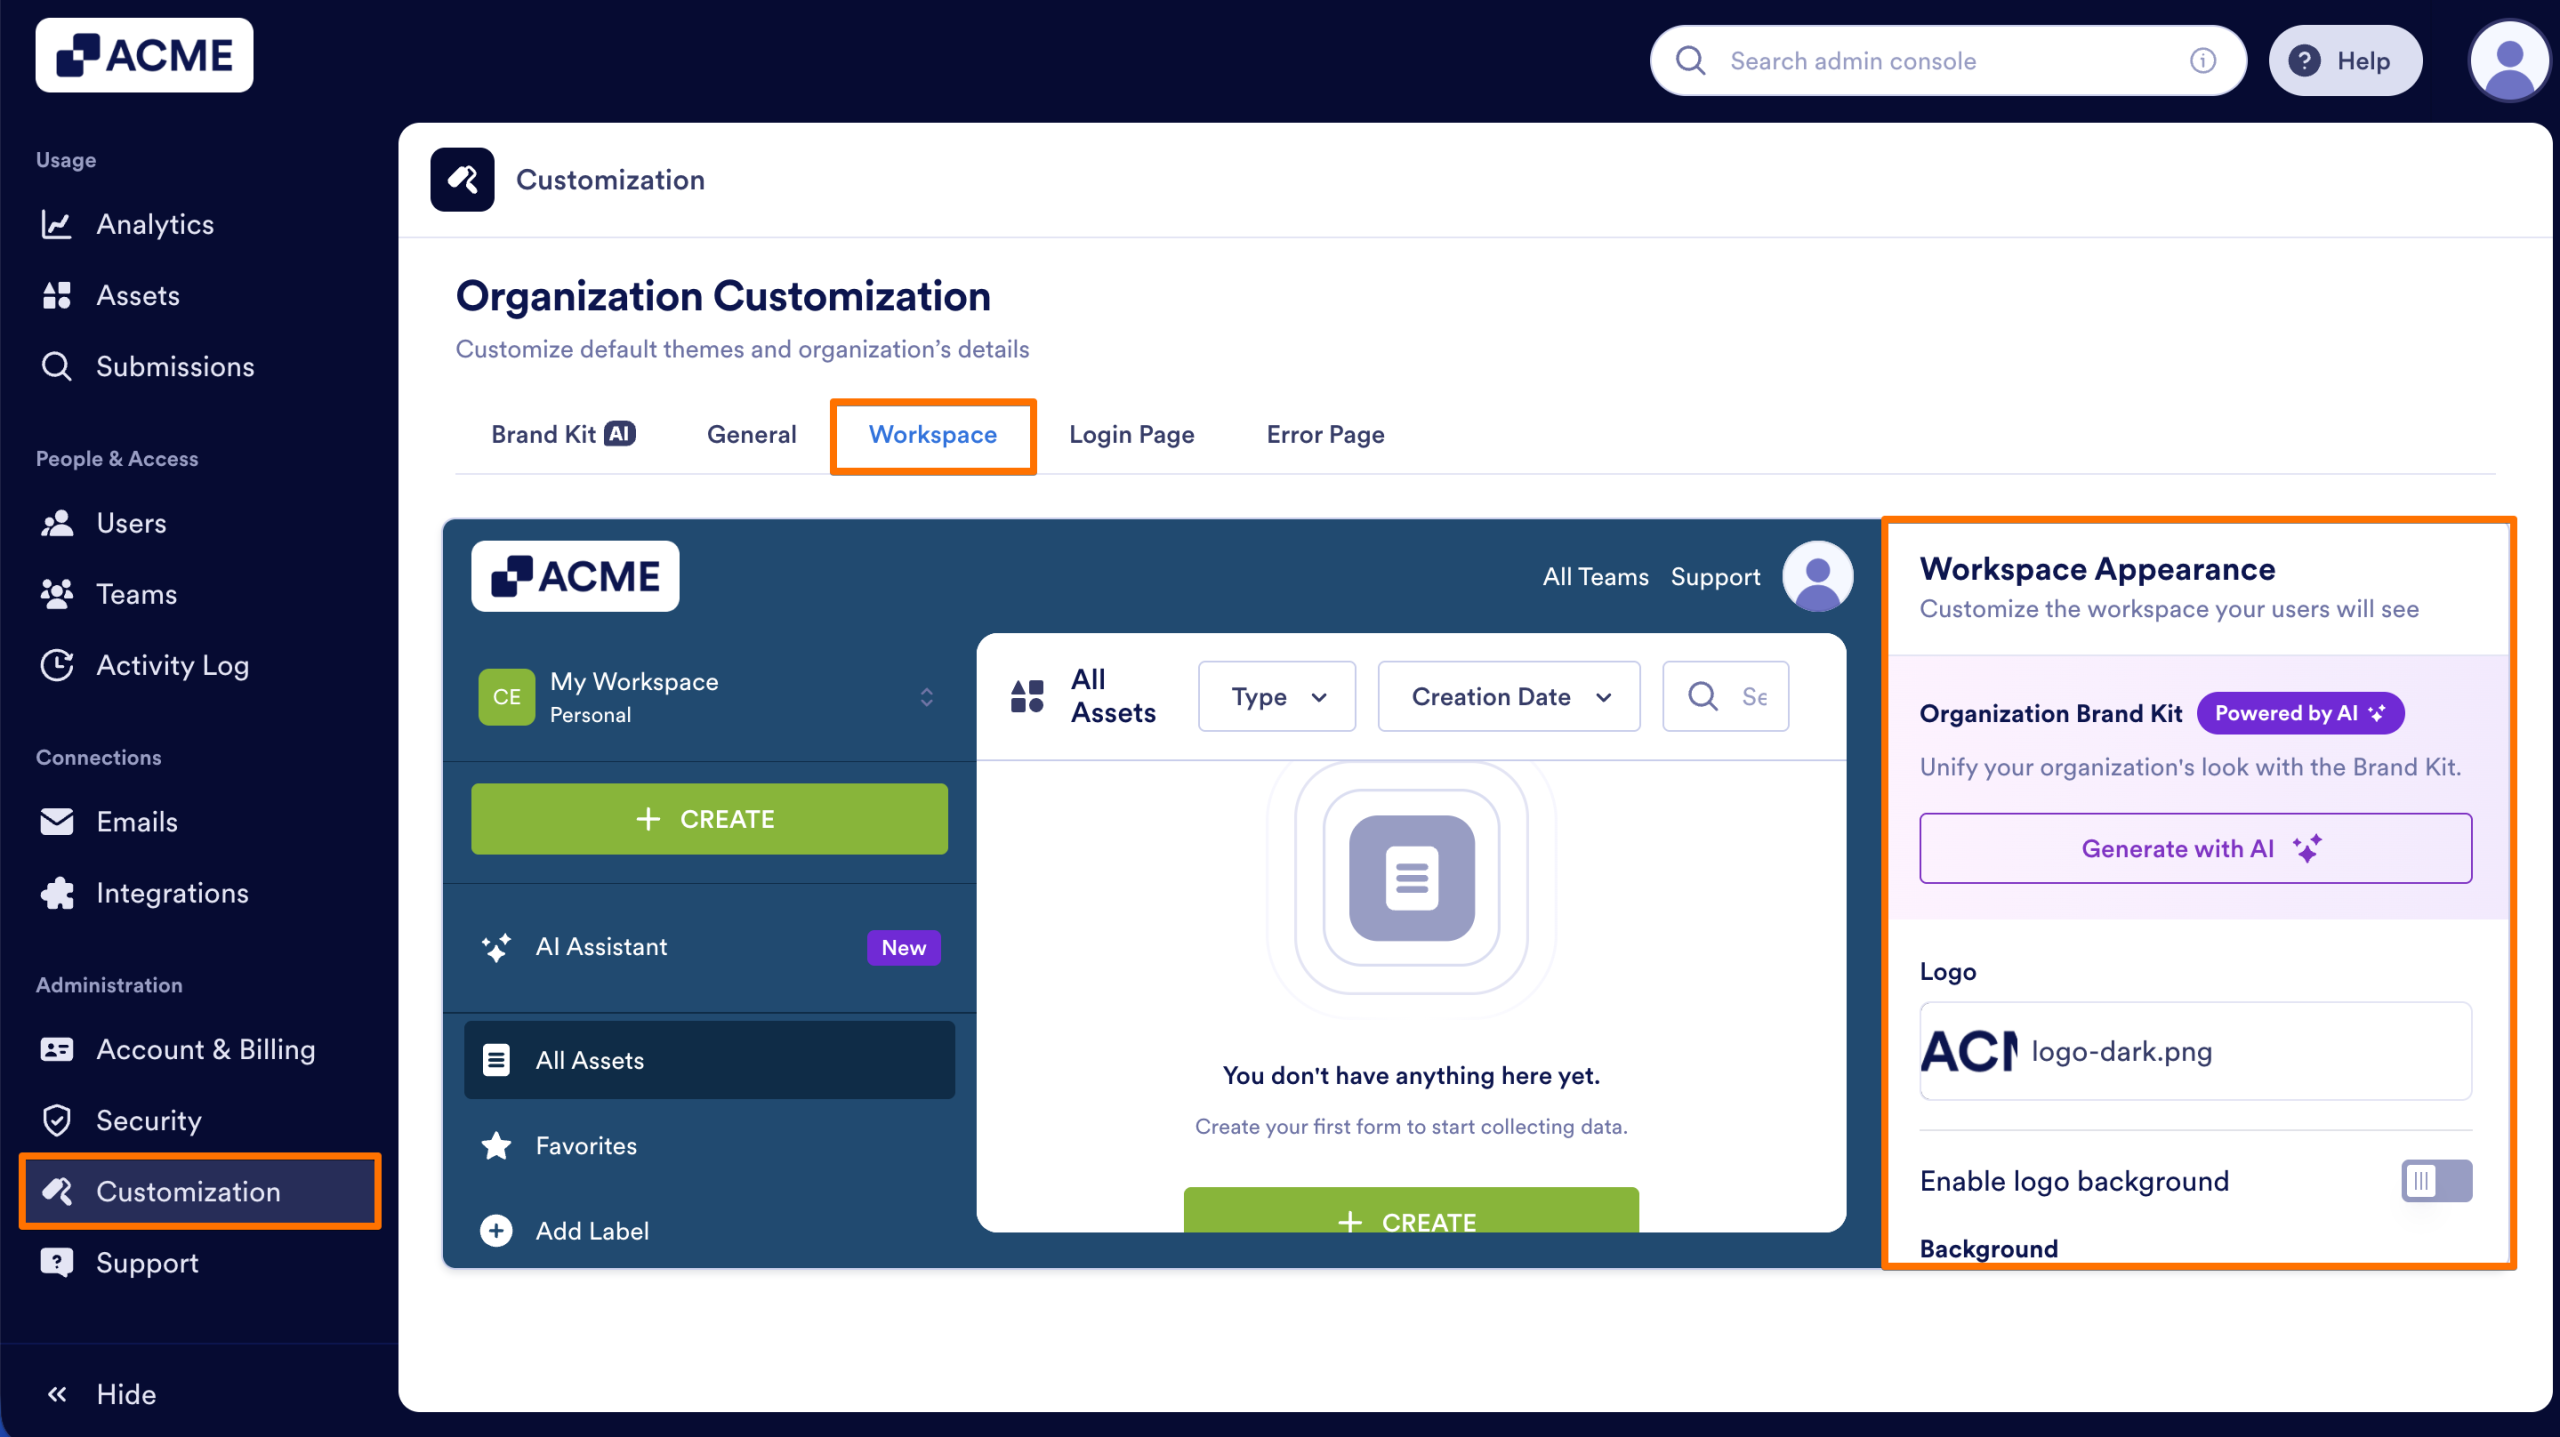
- Next, in the sidebar on the left side of the screen, under Administration, click on Customization.
- Then, below the Organization Customization header, click on the Workspace tab.
- Now, below Workspace Appearance on the right side of the screen, adjust the following settings:
- Enable Logo Background — Allows you to adjust the background color for your logo.
- Background — Select either Color or Image from the Dropdown menu:
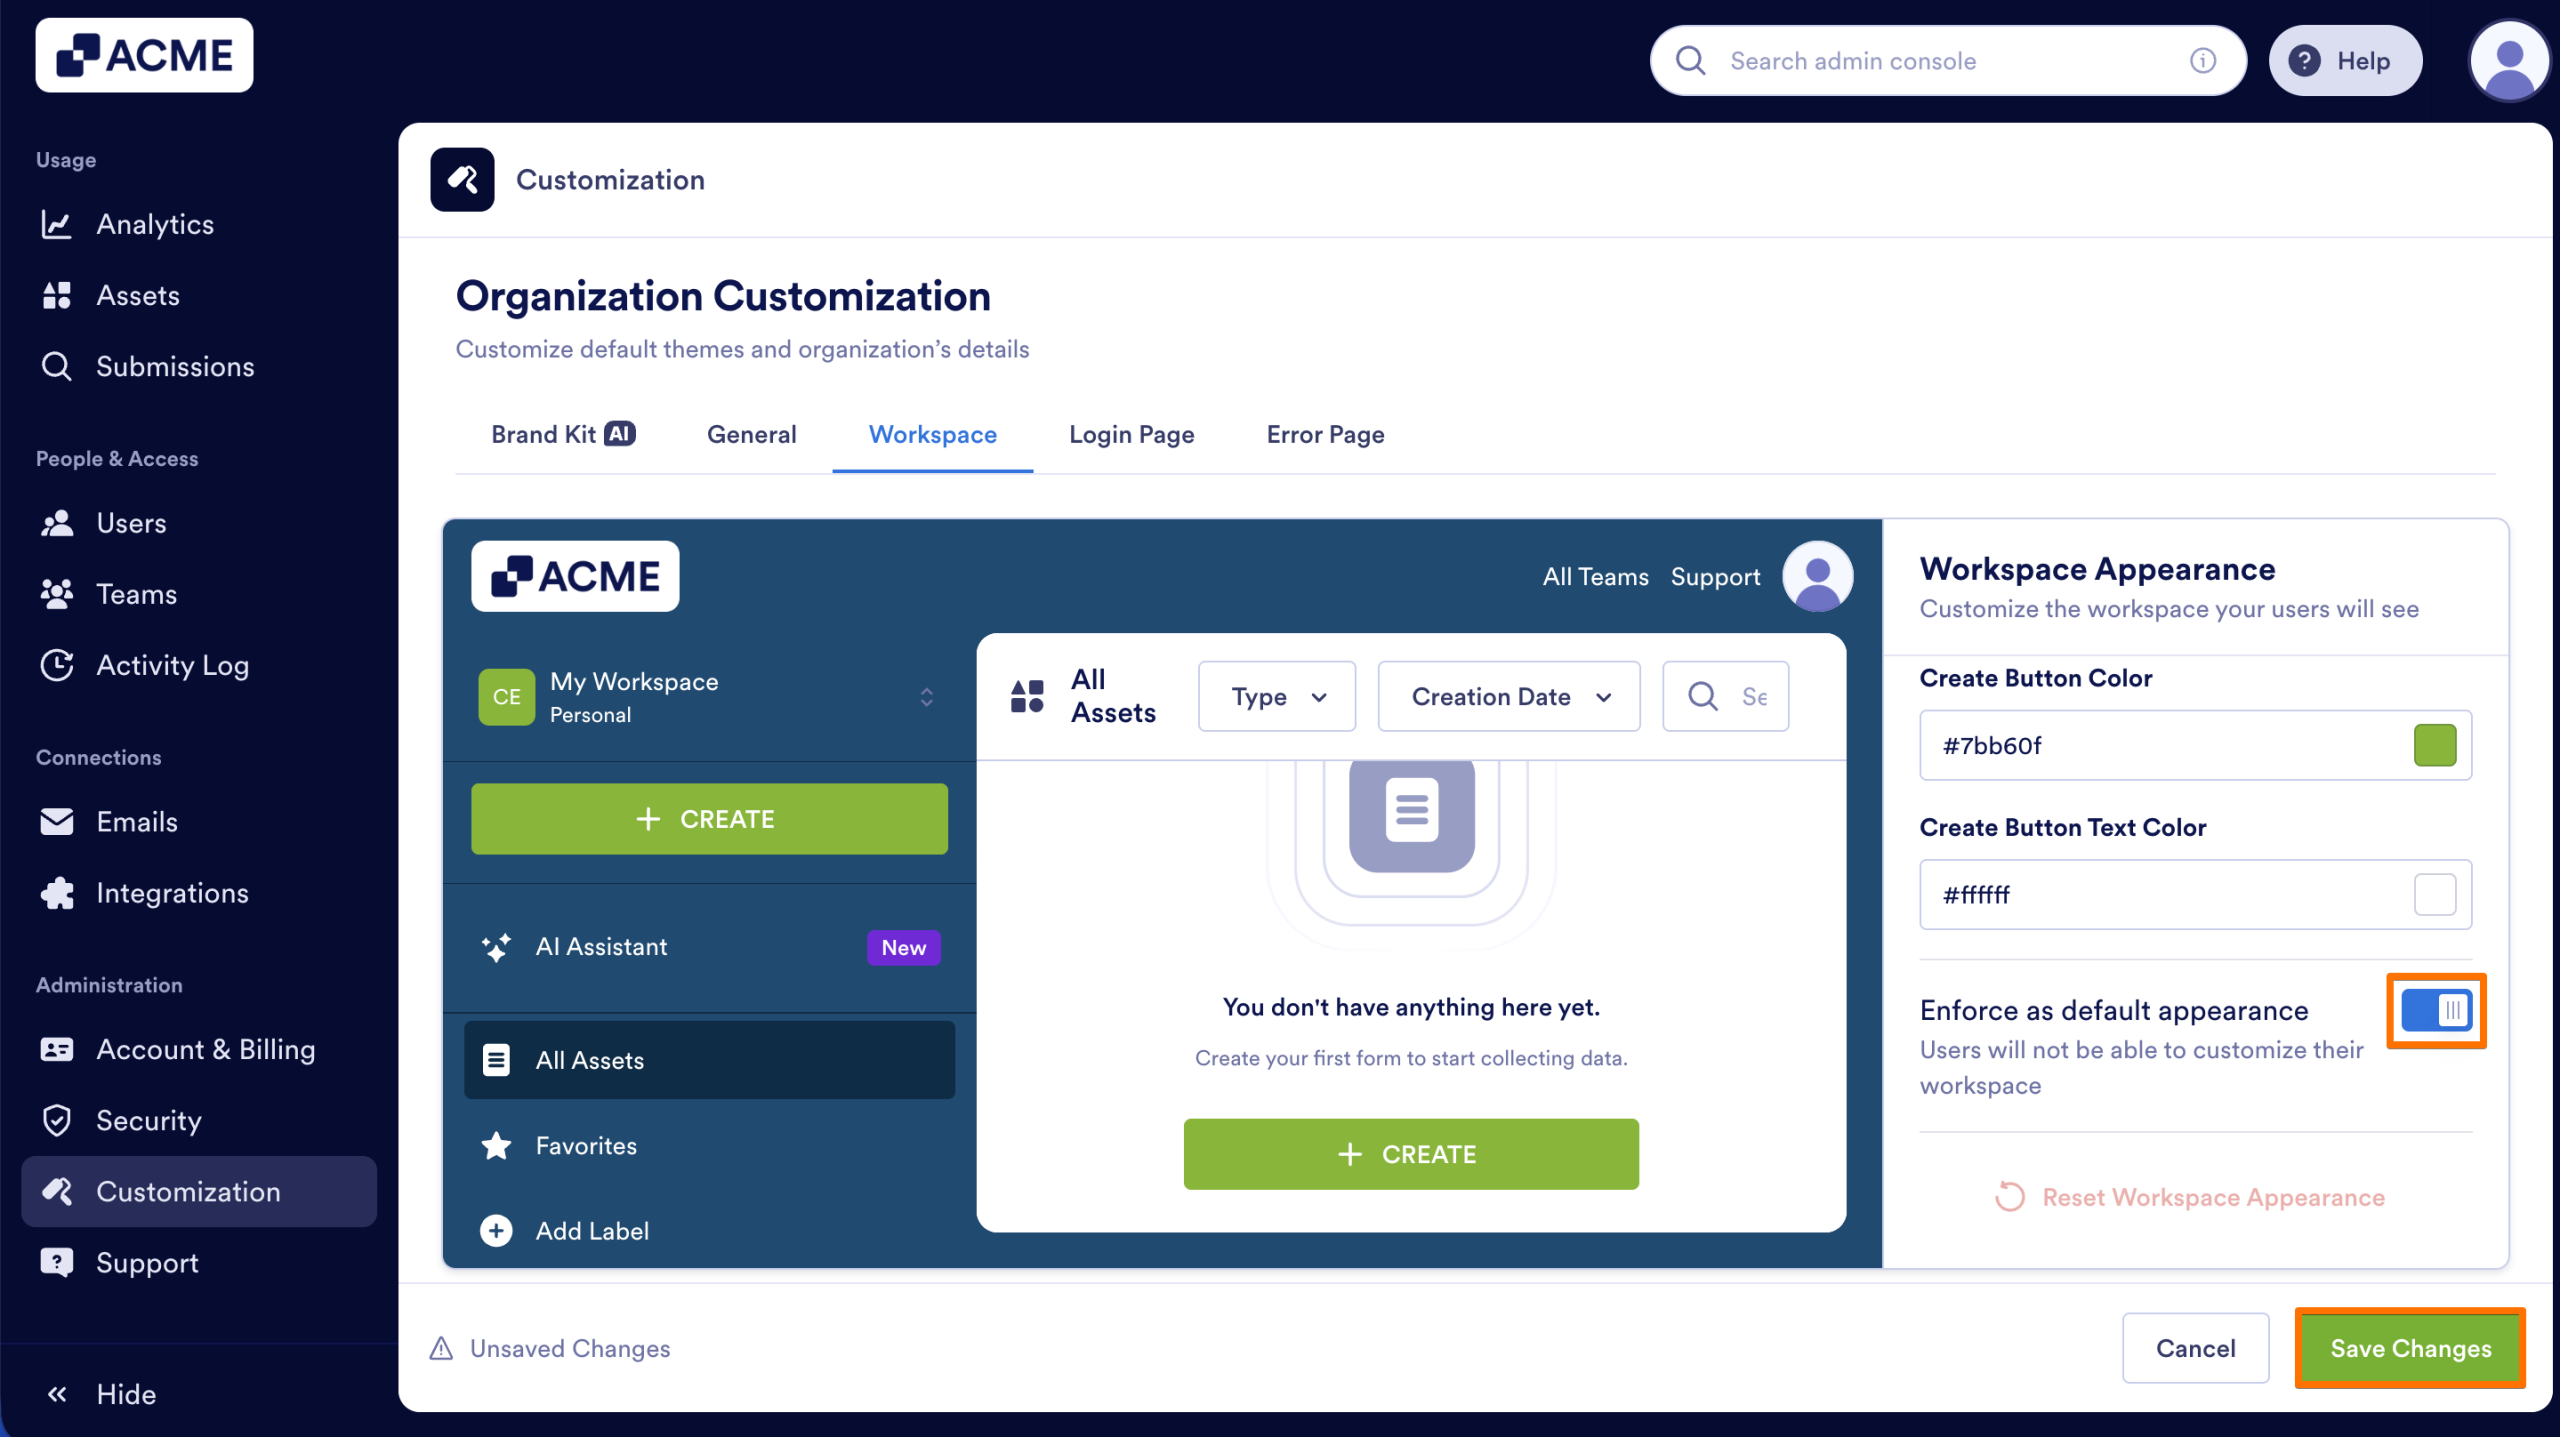
- Color — Set the Background to one of the preset colors or a custom color. Toggle Gradients on or off, and select the colors for the Create button and its text.
- Image — Set the Background to an image for your Workspace. Click on the Plus icon to upload an image, and match the colors for the Create button and its text.
- Next, scroll down to the bottom of the page, and toggle on Enforce as Default Appearance to set this as the appearance for all Workspaces for the organization and prevent it from being altered by users.
- Finally, click on Save Changes.
Reset Workspace Appearance
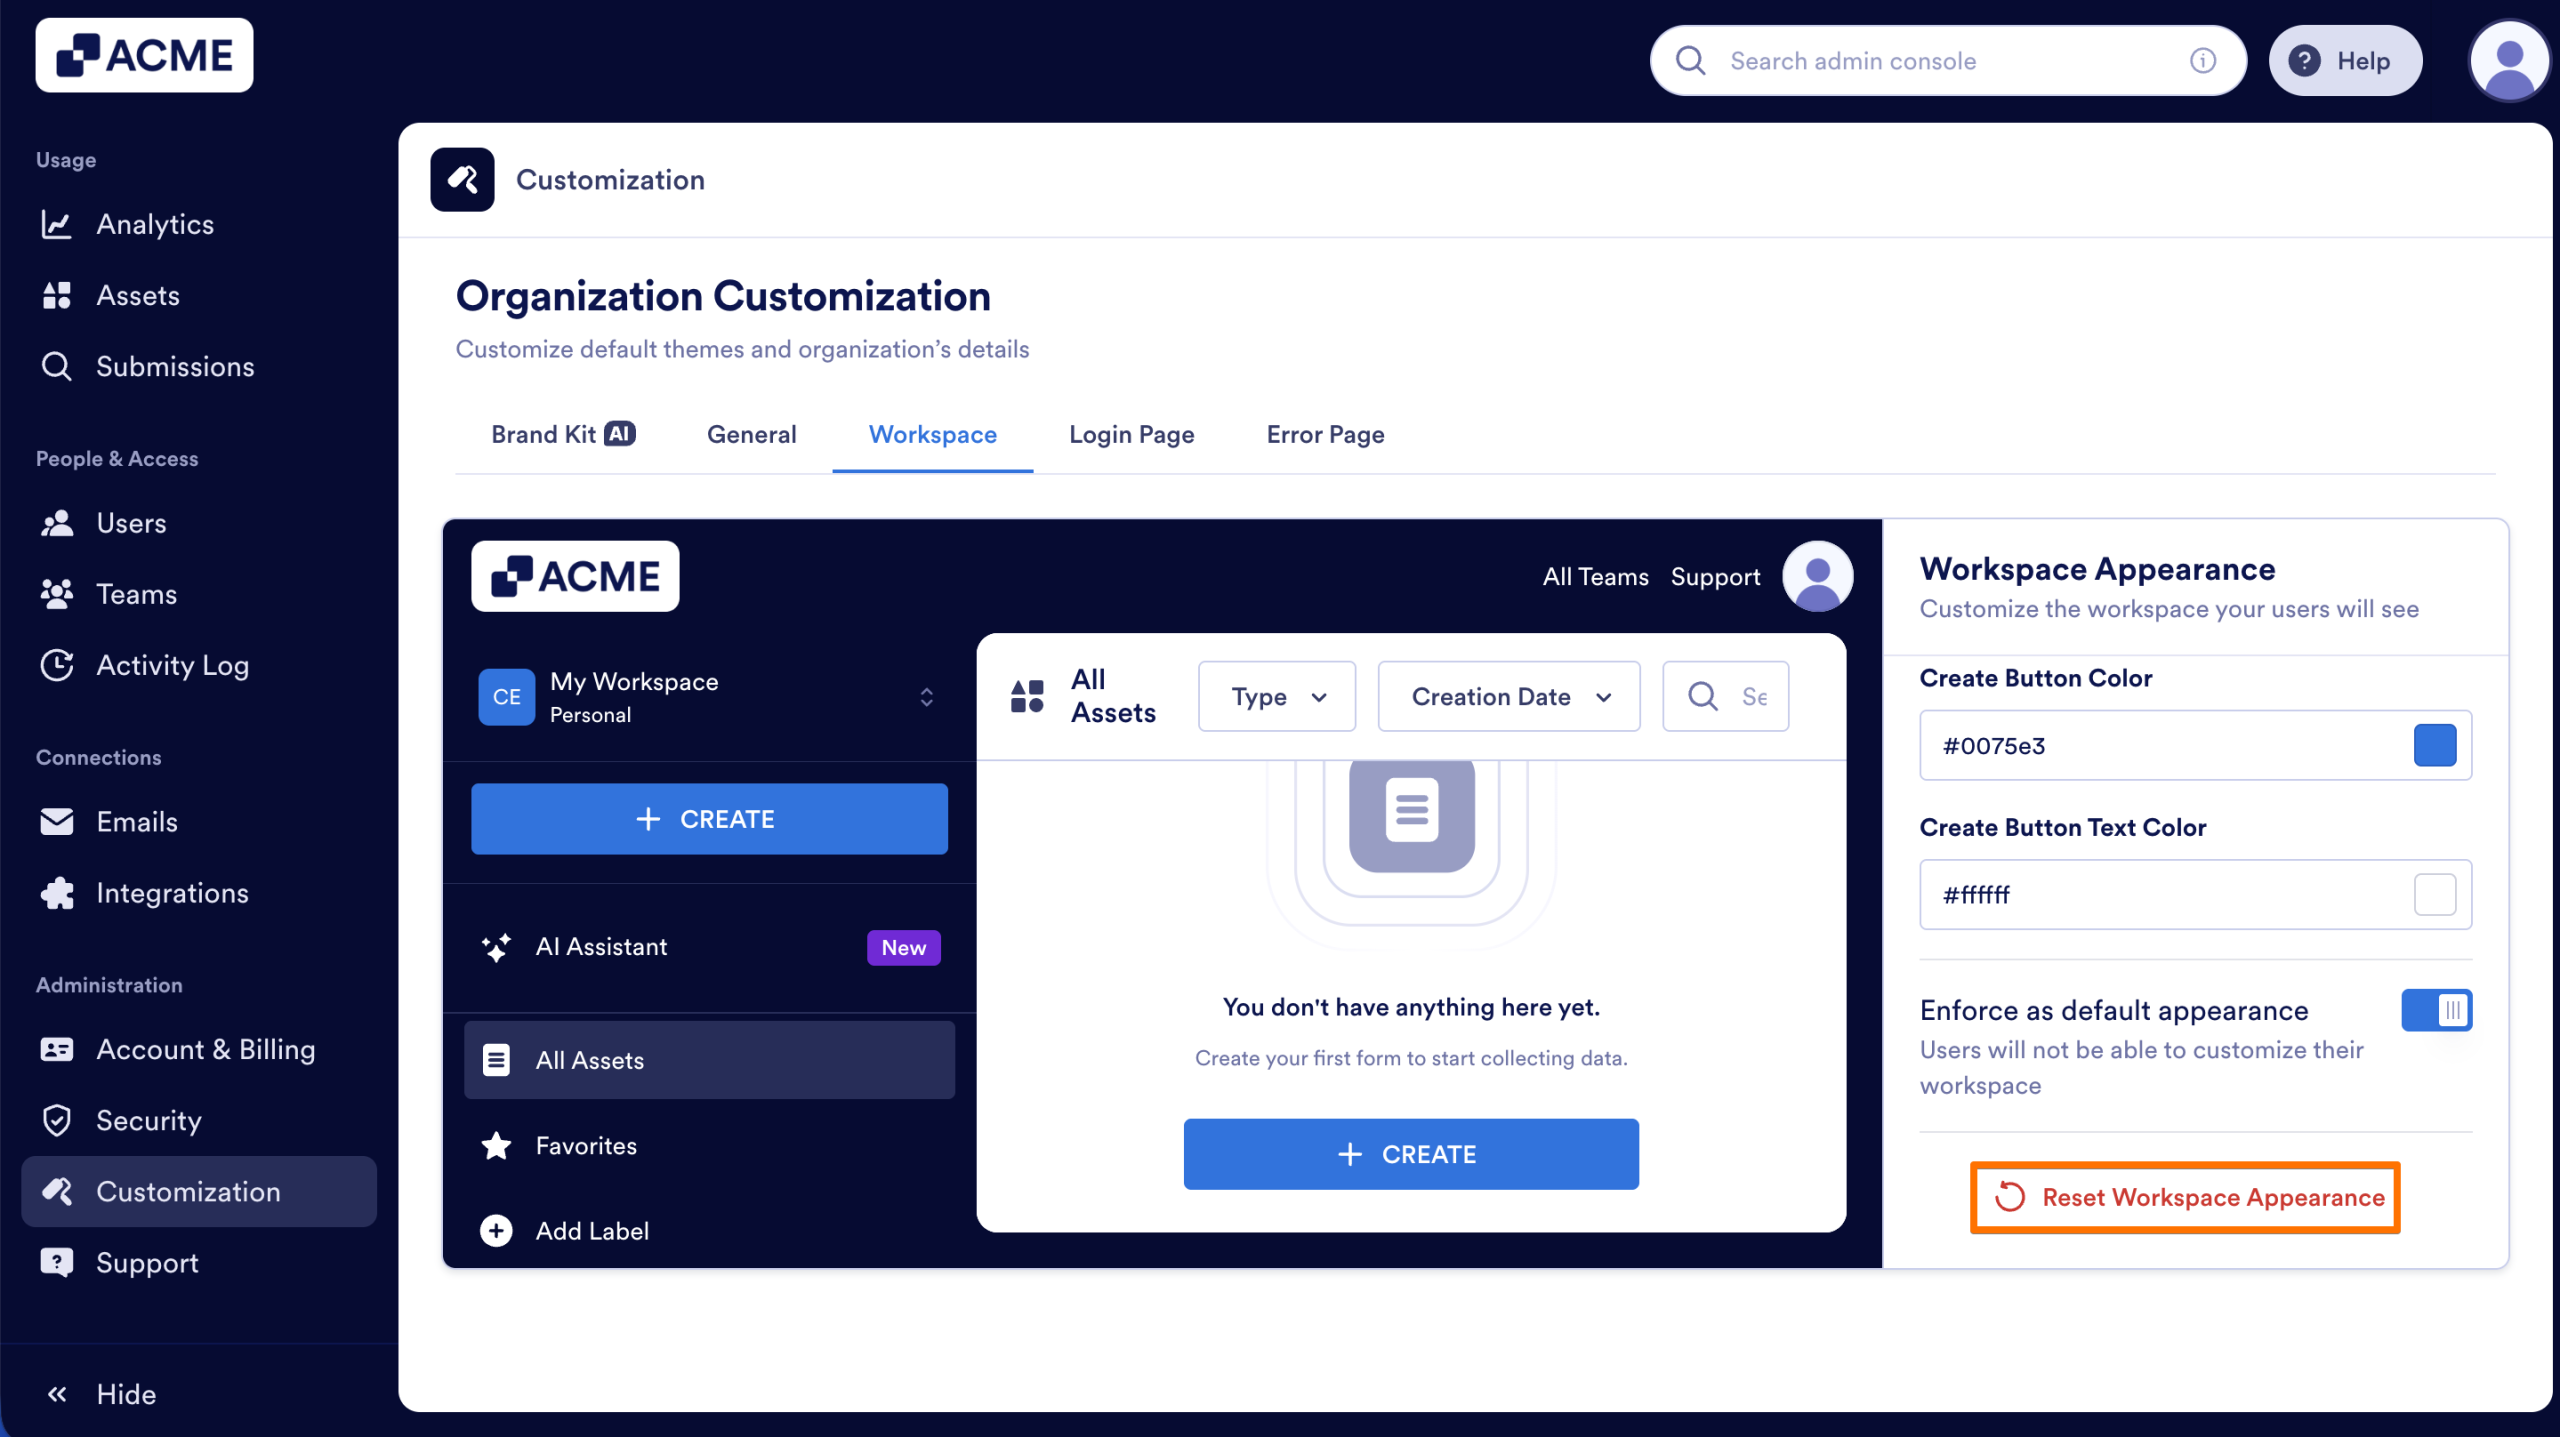
You can reset your workspace appearance to restore the default layout and visual settings.
- To bring back the default look, go to the bottom of the Workspace Appearance section and click on Reset Workspace Appearance.
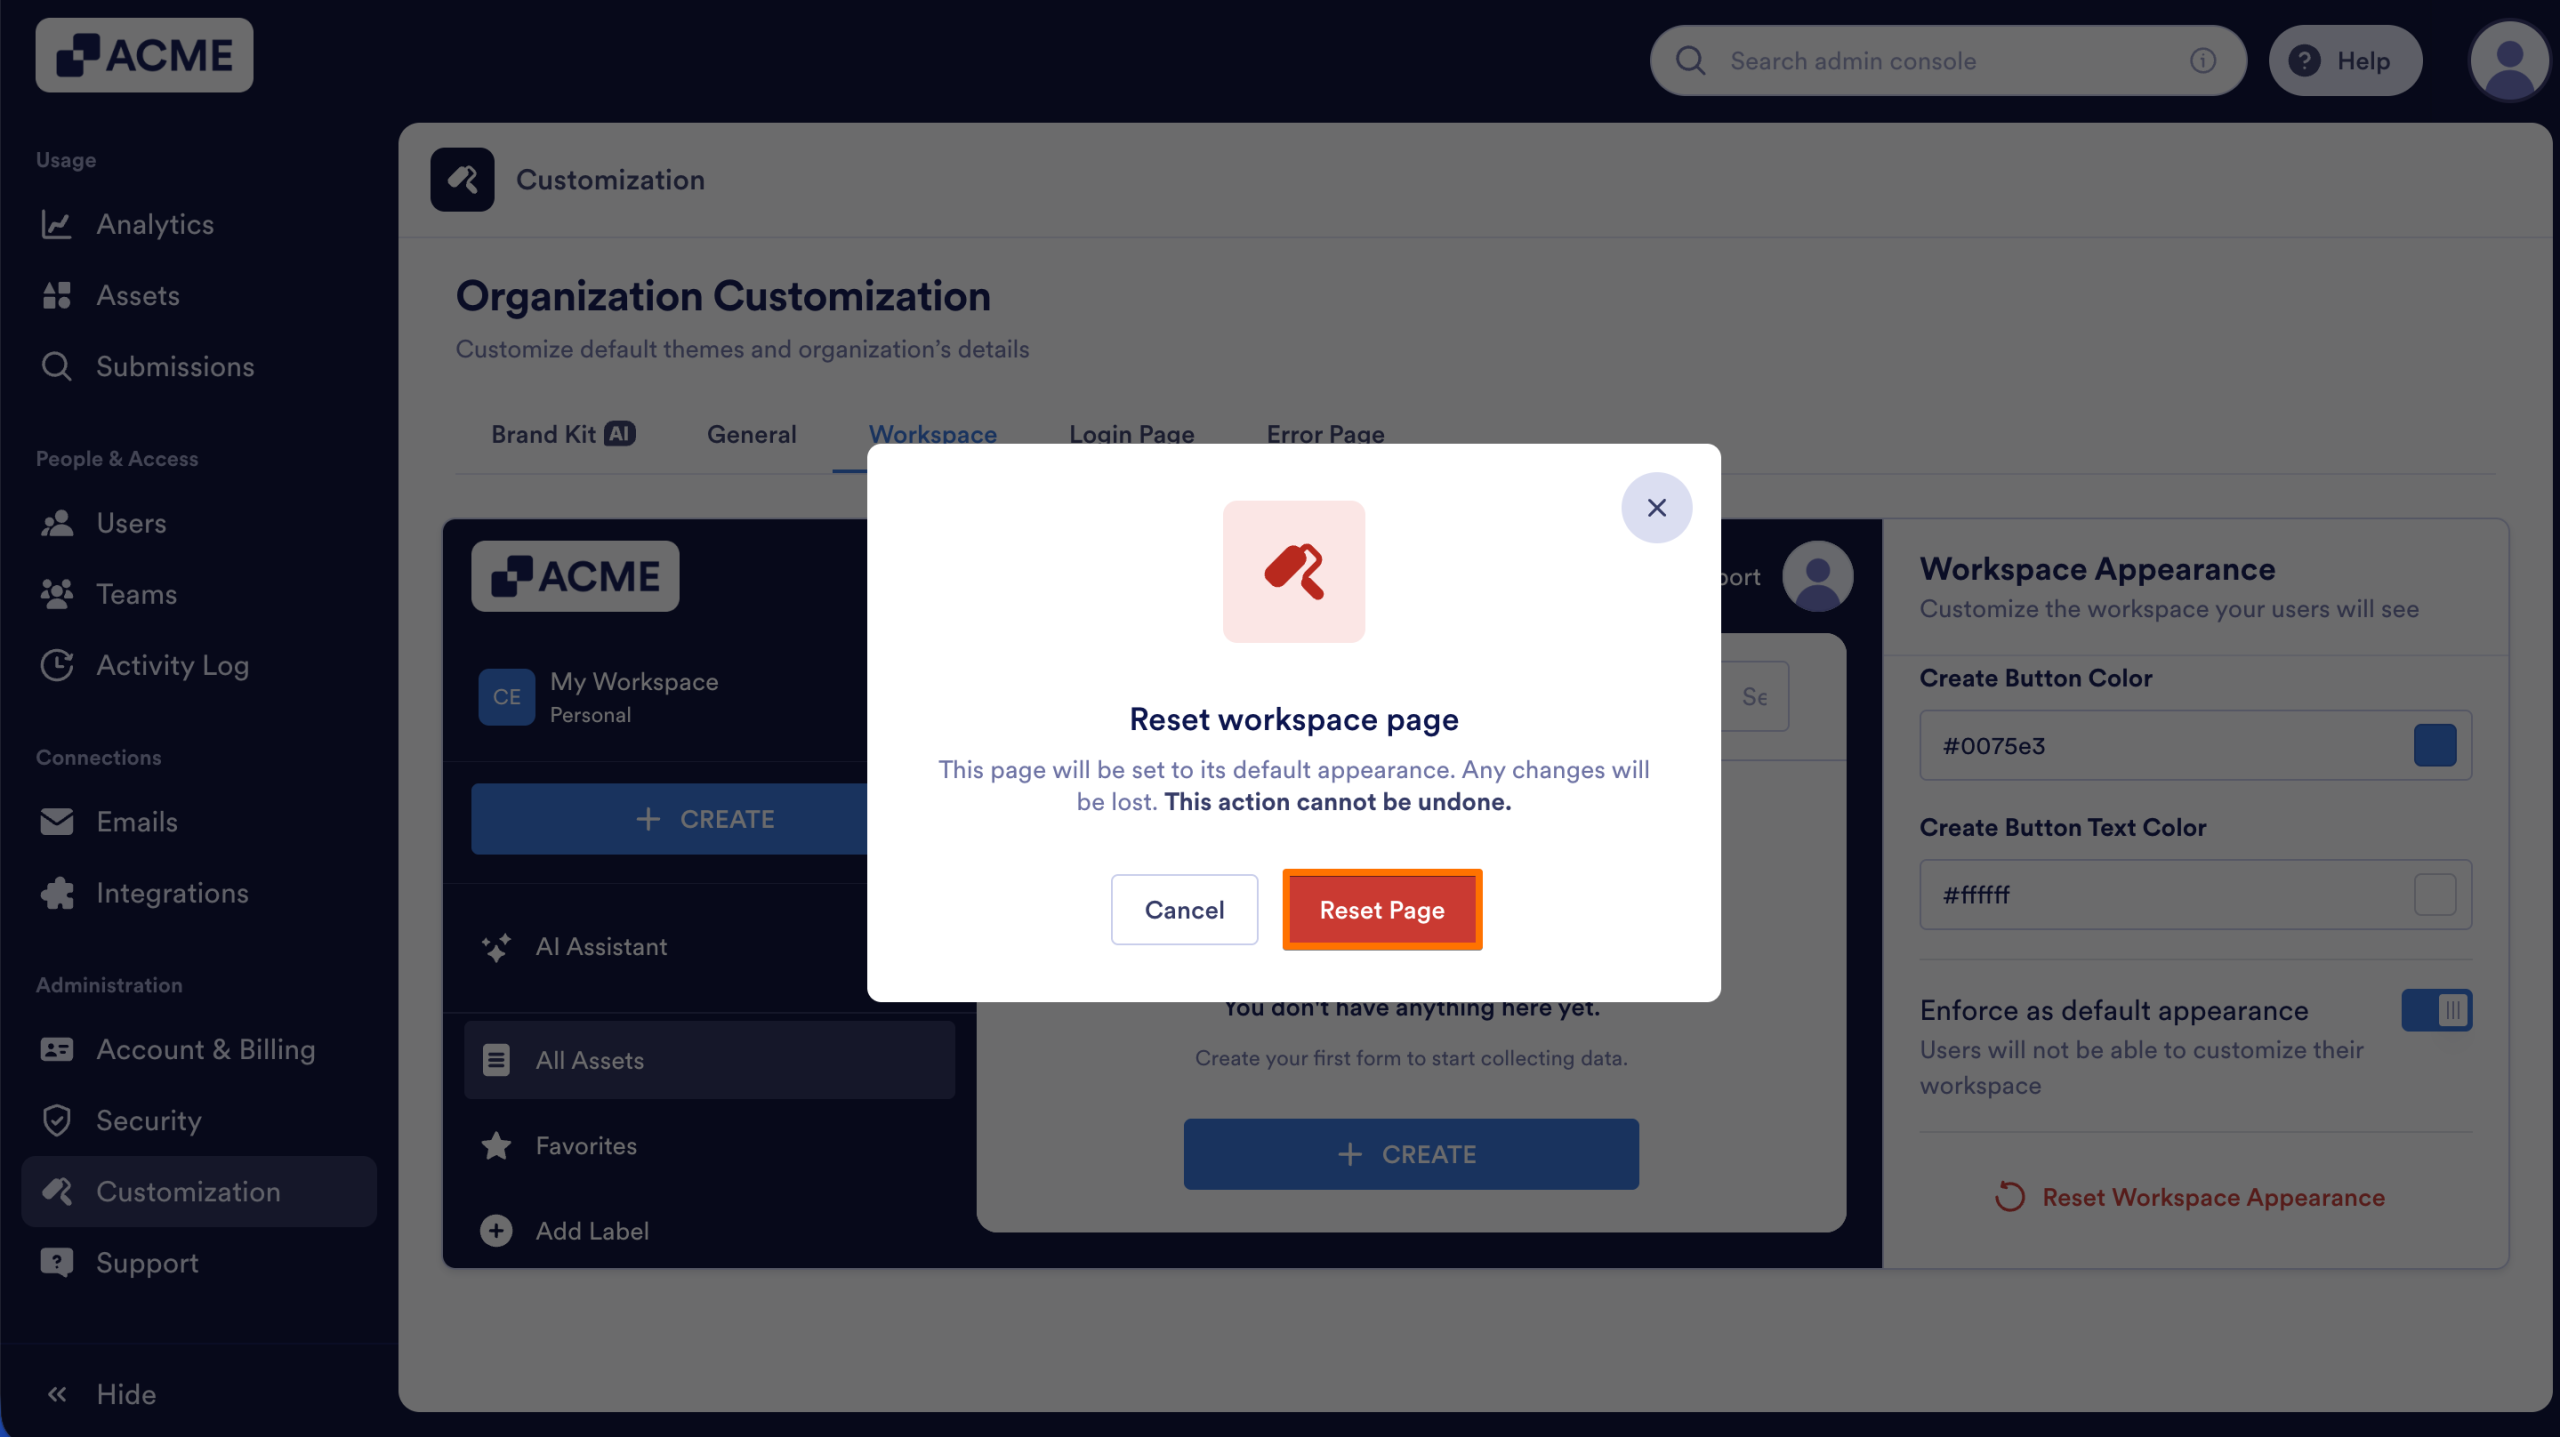
- Click on Reset Page.

Send Comment: