You can customize your Boards to fit the way your team works best. Whether you’re managing projects, tracking tasks, or organizing workflows, you have the flexibility to shape everything around your process. You can set priorities, monitor progress, and collaborate effortlessly with your team—all in one place.
With these customization options, staying organized and keeping projects on track becomes a whole lot easier. It’s a simple, flexible way to streamline your workflow and boost productivity without the extra hassle.
Applying Theme in Your Boards
Customizing the look of your boards makes it easier to stay organized and adds a personal touch to your workspace. With built-in theme options, you can adjust the style and colors to match your workflow, team vibe, or even your own taste. It’s a simple way to make managing tasks feel a little more you—and a lot more engaging. You’ll just need to do this:
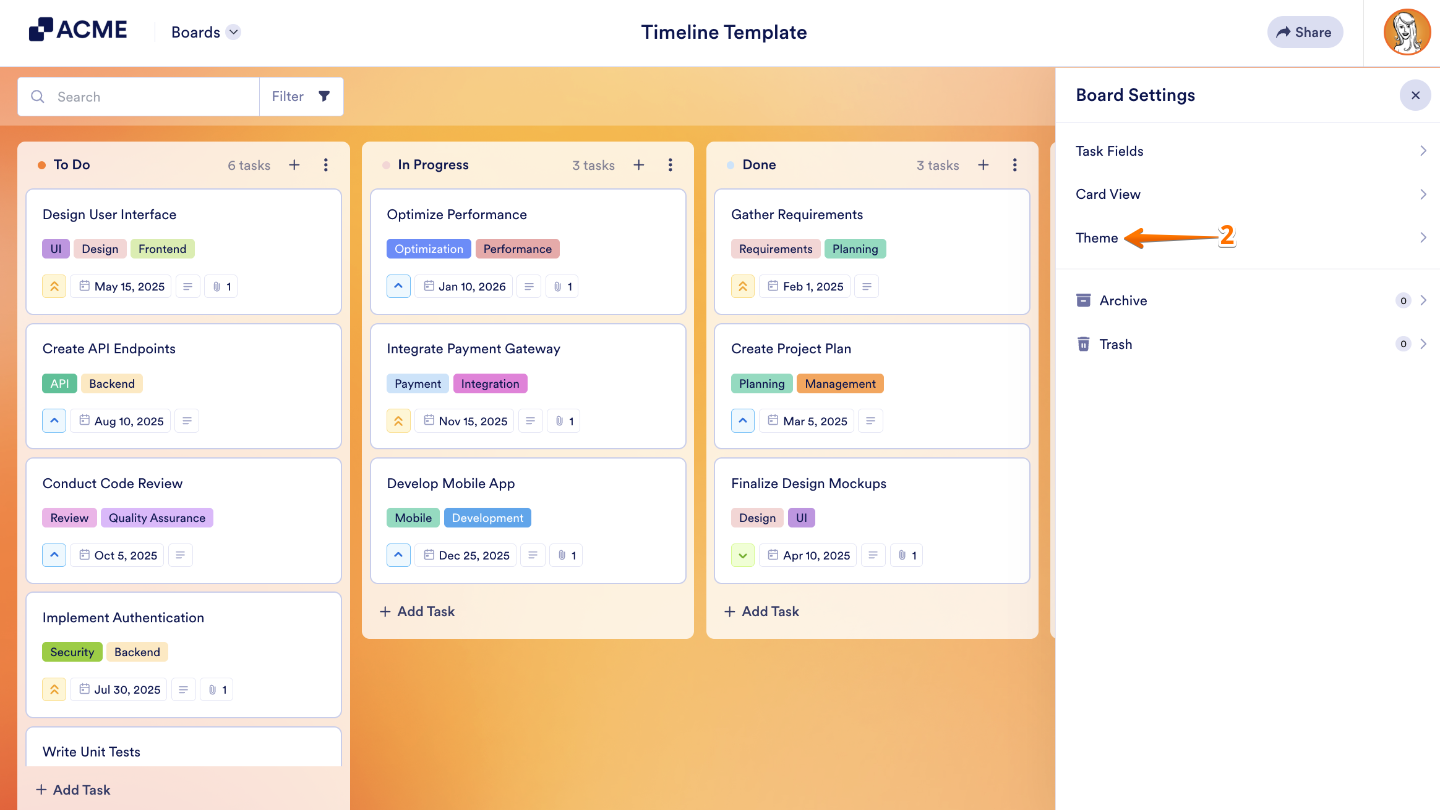
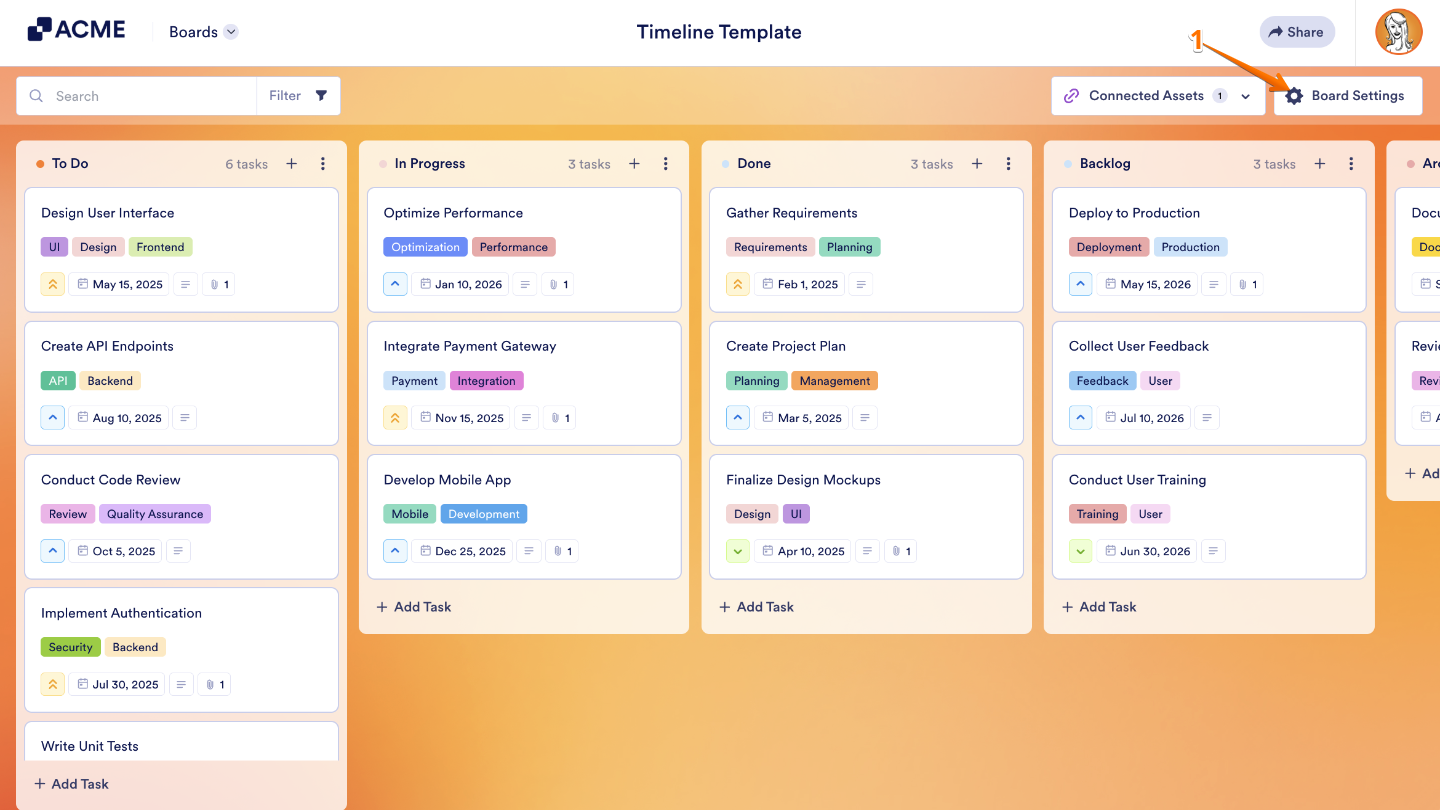
- On your Jotform Board, click on Board Settings in the top-right corner of the page.

- In the menu that opens, click on Themes.
- Now, choose a Preset Background Color or click on Choose a File to upload your own background image.
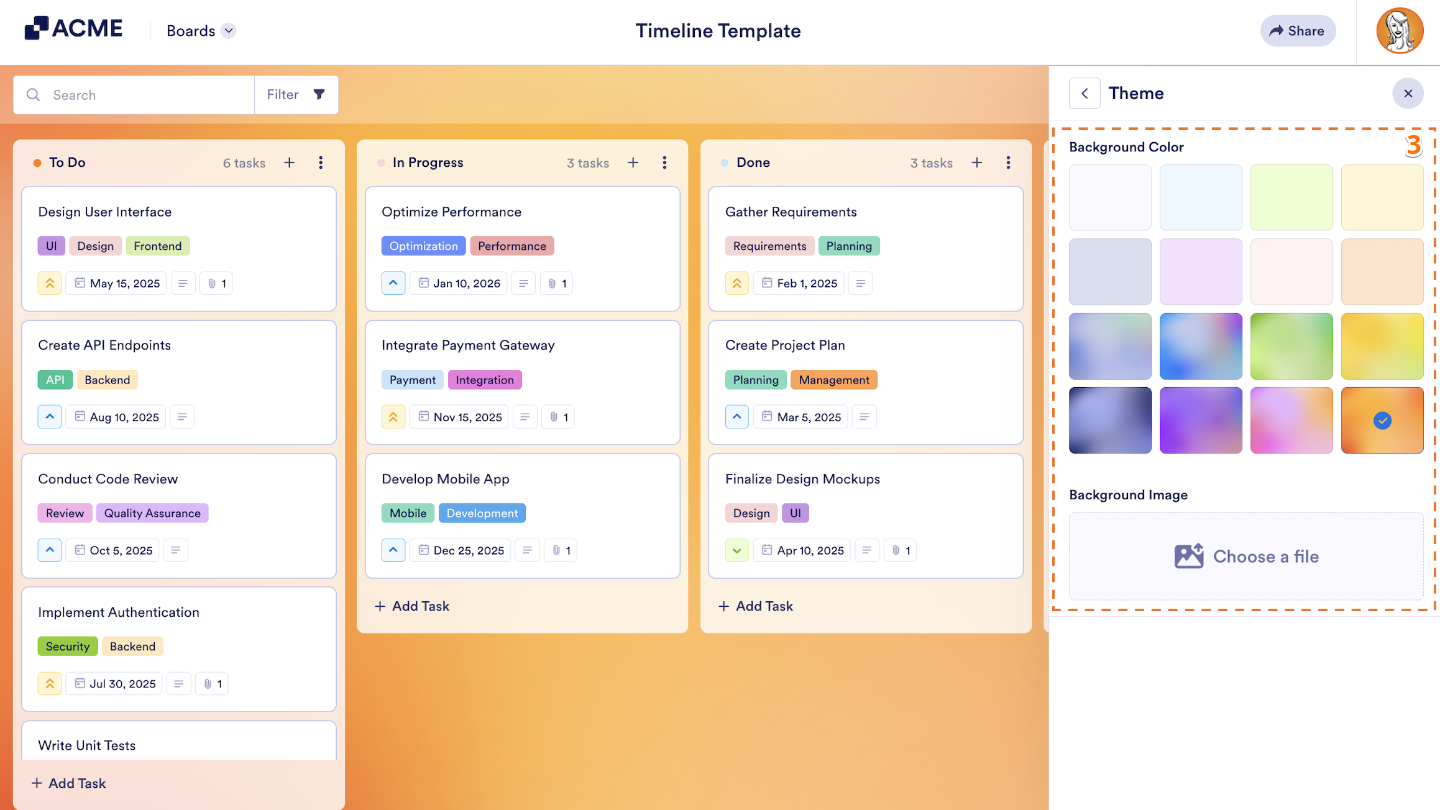
That’s it. Your chosen theme has now been applied to your board, giving it a fresh new look.
Editing the Card Layout
There are two simple ways to edit your card layout, giving you flexibility to work the way you like. You can make changes directly through the Board Settings, where you have full control over the look and organization of your cards. Or, if your board is connected to a form or other assets, you can adjust the layout through the Connected Assets, keeping everything synced and up to date. Both options make it easy to customize your workspace so it fits your workflow perfectly.
Editing Card Layout Through Board Settings
To customize what you see on your cards, just head to Board Settings to show or hide fields with ease. You can set it up like this:
- On your Jotform Board, click on Board Settings in the top-right corner of the page.
- In the menu that opens, click on Card View.
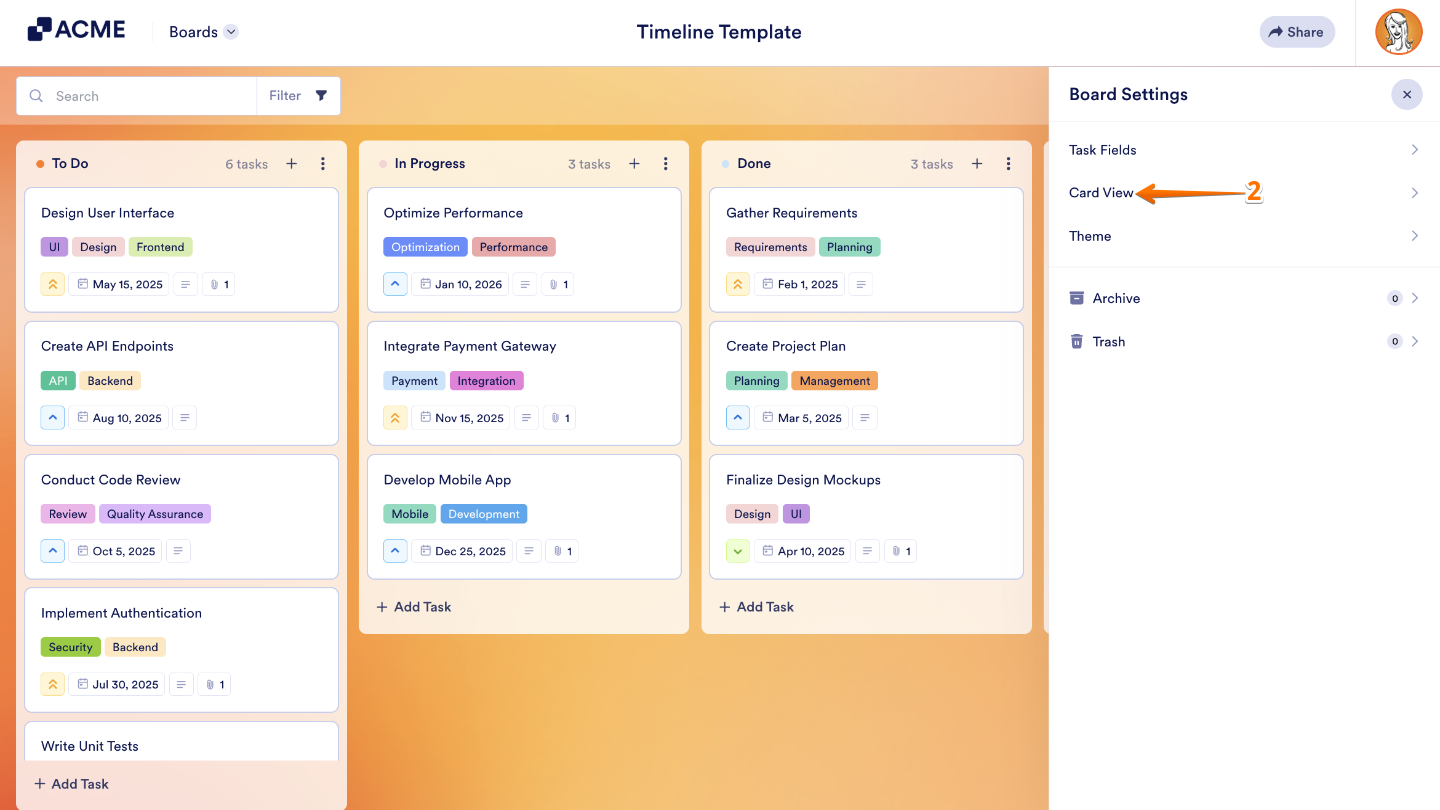
- Now, click on the Eye icon on the right side of a task field to hide or display it.
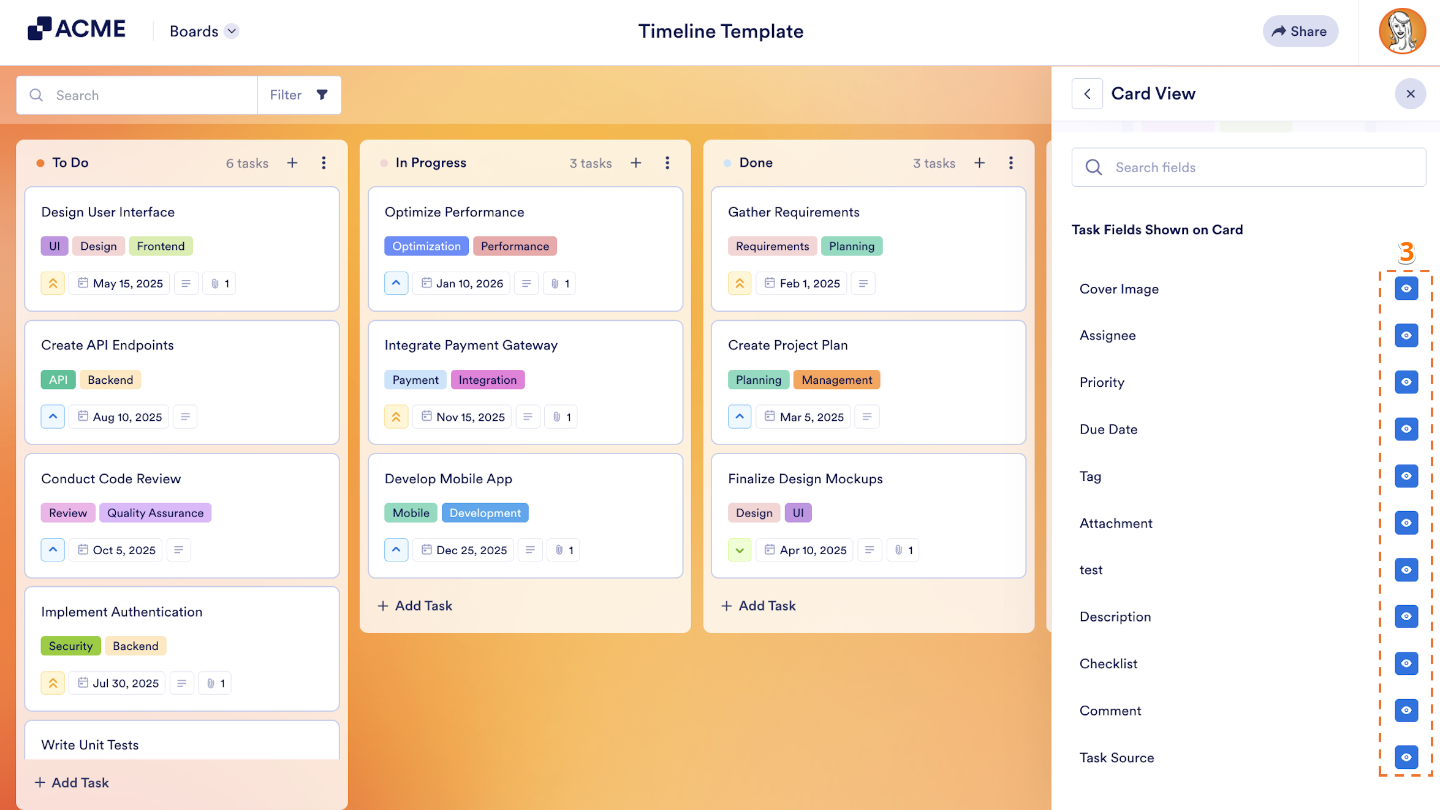
- While you’re here, you can also preview the new card to see what it’ll look like.

That’s it, you’re all set. Your card layout has now been successfully updated through the Board Settings.
Editing Card Layout Through Connected Assets
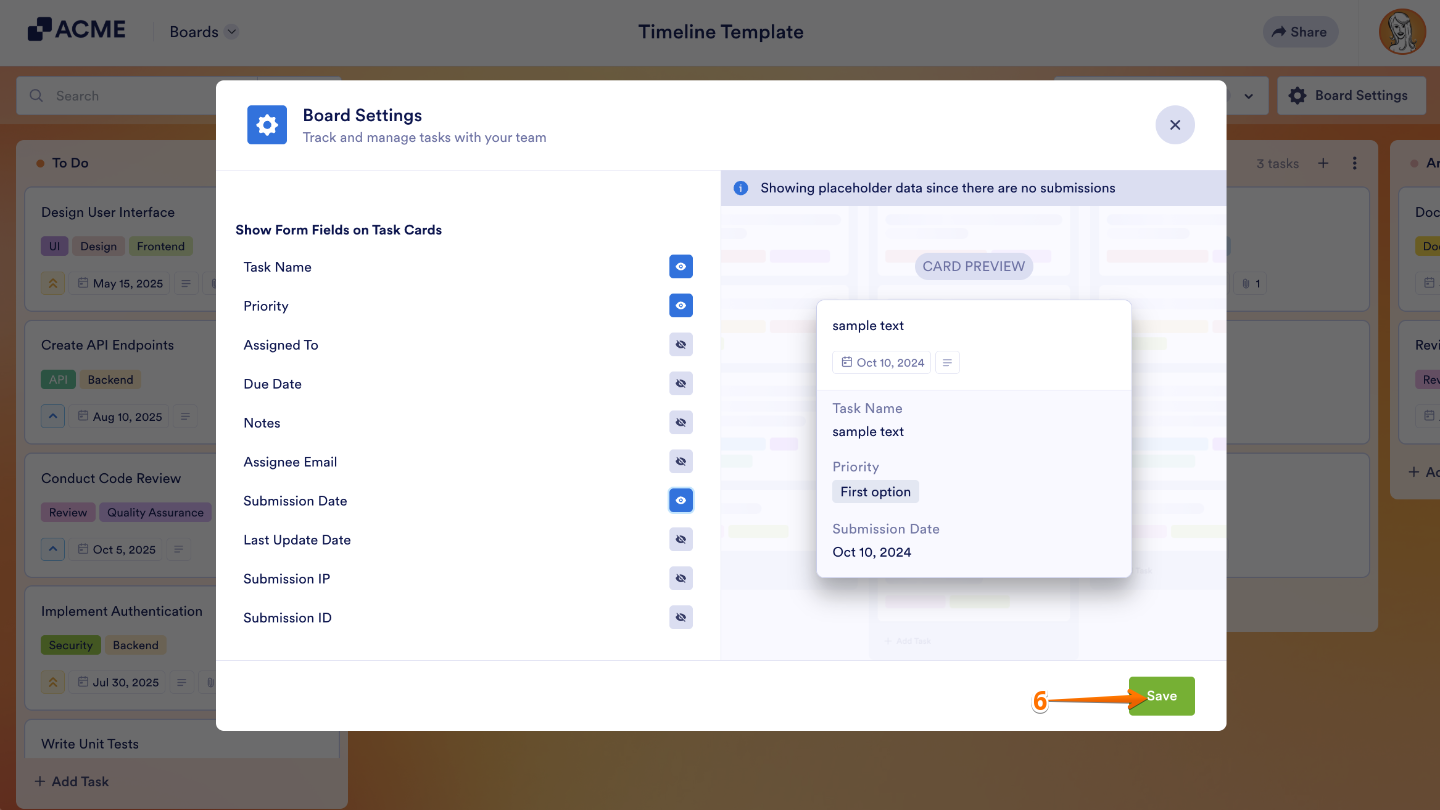
If your board is already connected to a form, you can also customize your card layout through the Connected Assets—making it easy to adjust fields without leaving your board. Here’s a quick how-to:
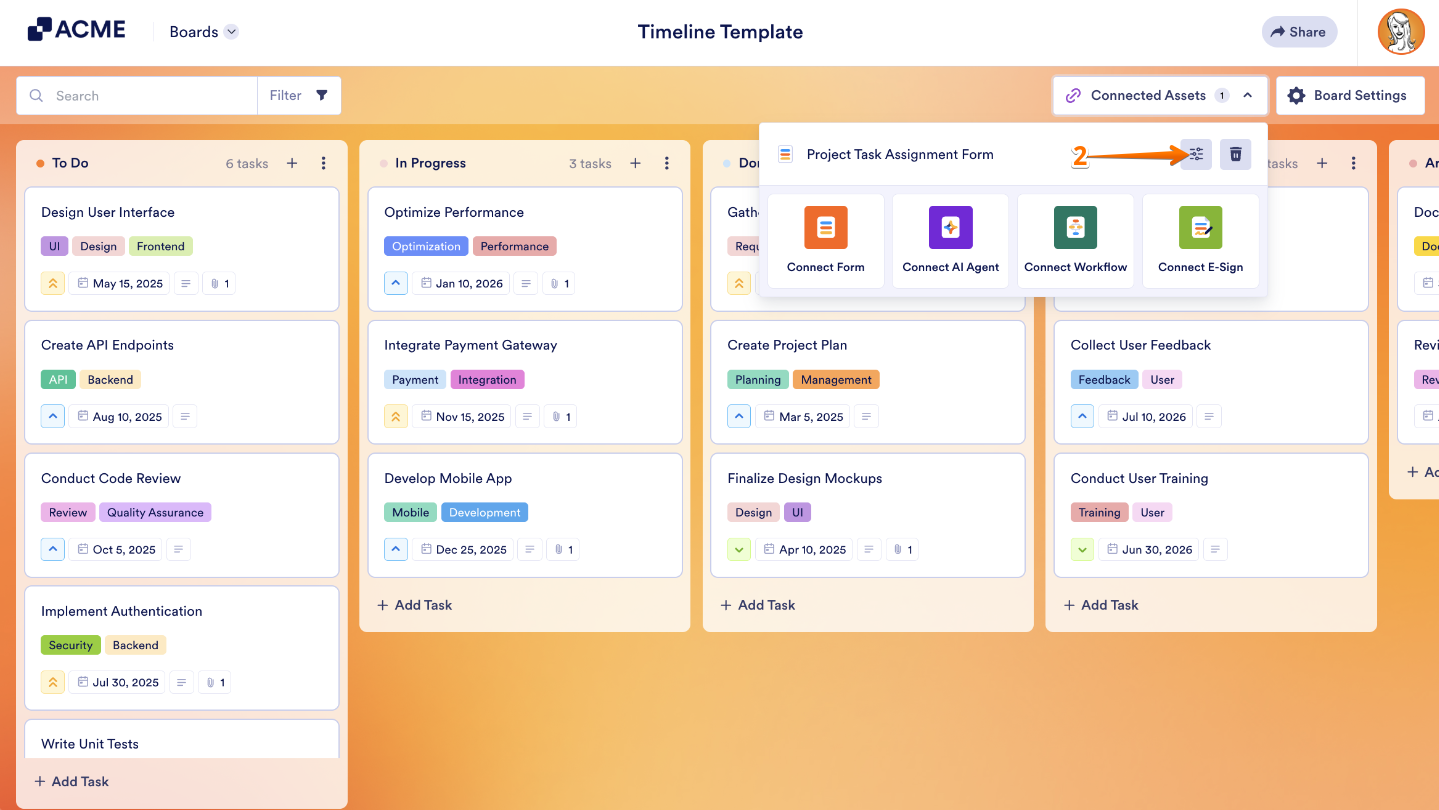
- On your Jotform Boards, click on Connected Assets at the top menu.

- Then, in the menu that shows up, click on Slider Icon.
- Now, in the window that opens, you can match the Task Field to the Form Field and Add a New Field if needed.
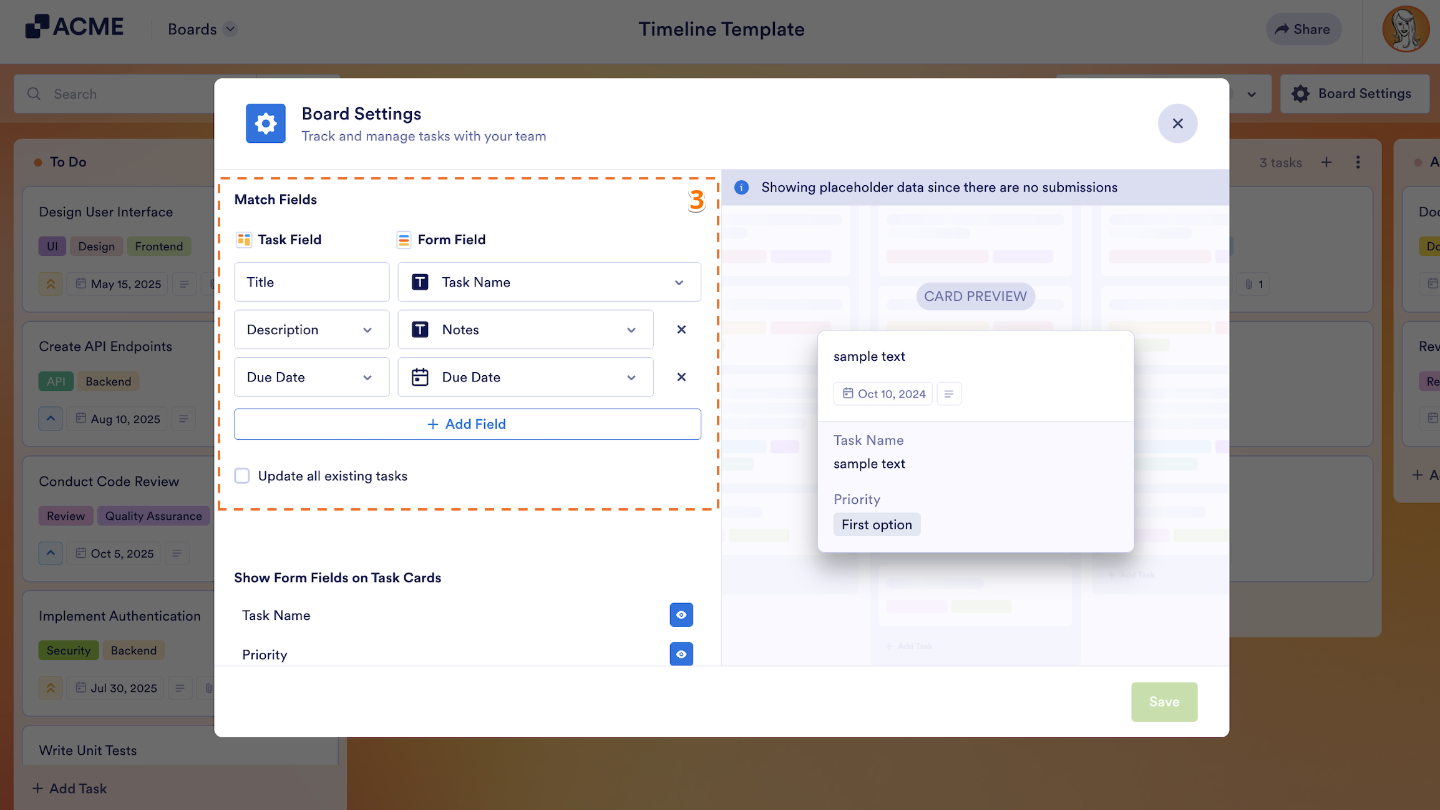
- Under the Show Form Fields on Task Card section, you can click on the Eye icon to hide or display the task fields.
- While you’re here, you can also preview the new card to see what it’ll look like.
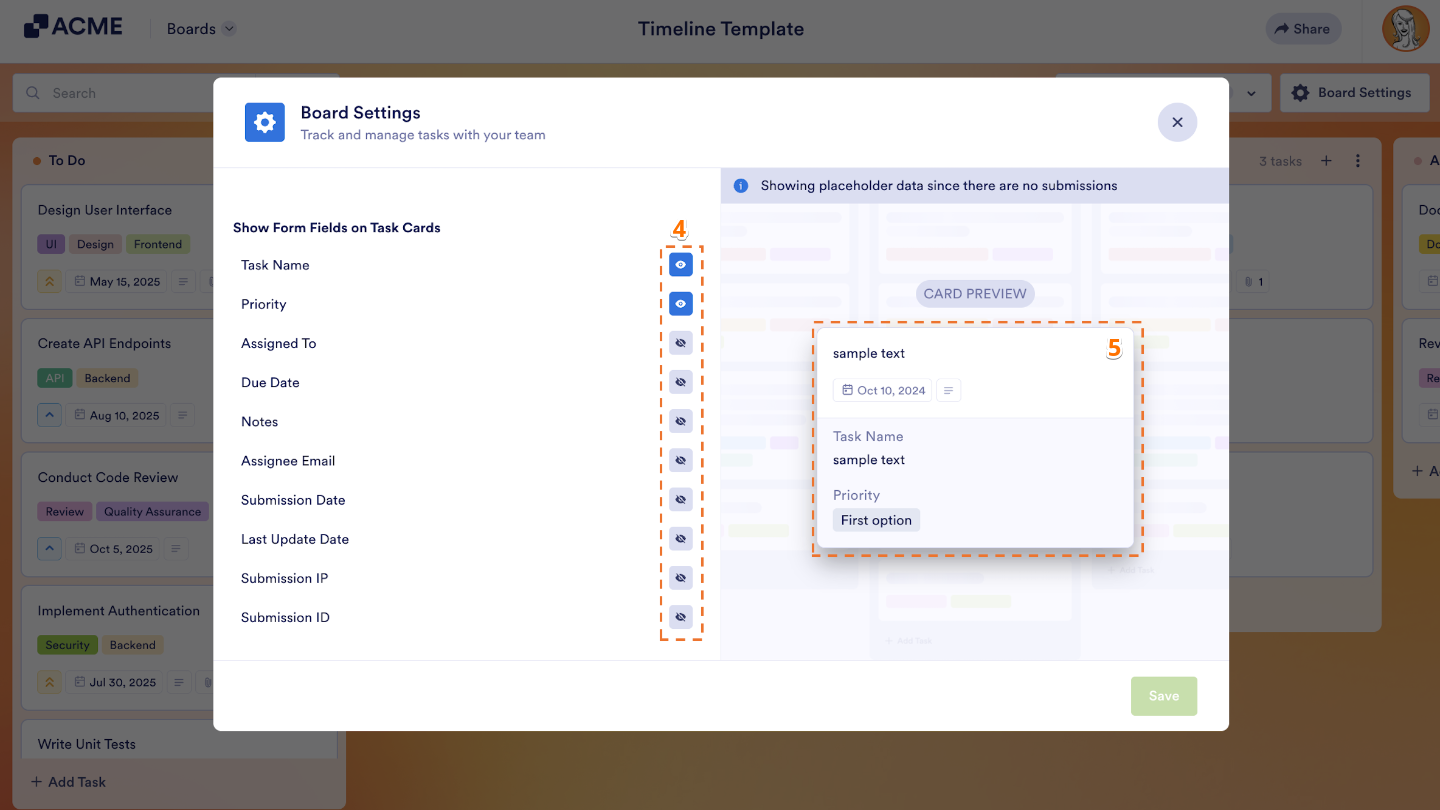
- Finally, click on Save at the bottom of the window to save your changes.
That’s it, you’re all set. Your card layout has now been successfully updated.
Managing Groups in Boards
Boards let you take full control of your workflow, giving you the flexibility to rename, reorganize, and manage your groups however it works best for you. Whether you’re adjusting for a new project, rearranging priorities, or just keeping things tidy, customizing your groups helps you stay organized and on top of your tasks. It’s a simple way to make your workspace work for you—so you can focus on what really matters without getting bogged down in clutter.
Adding a Group
You can also create a new group to keep your tasks organized and make your workflow easier to manage. It’s easier than you think:
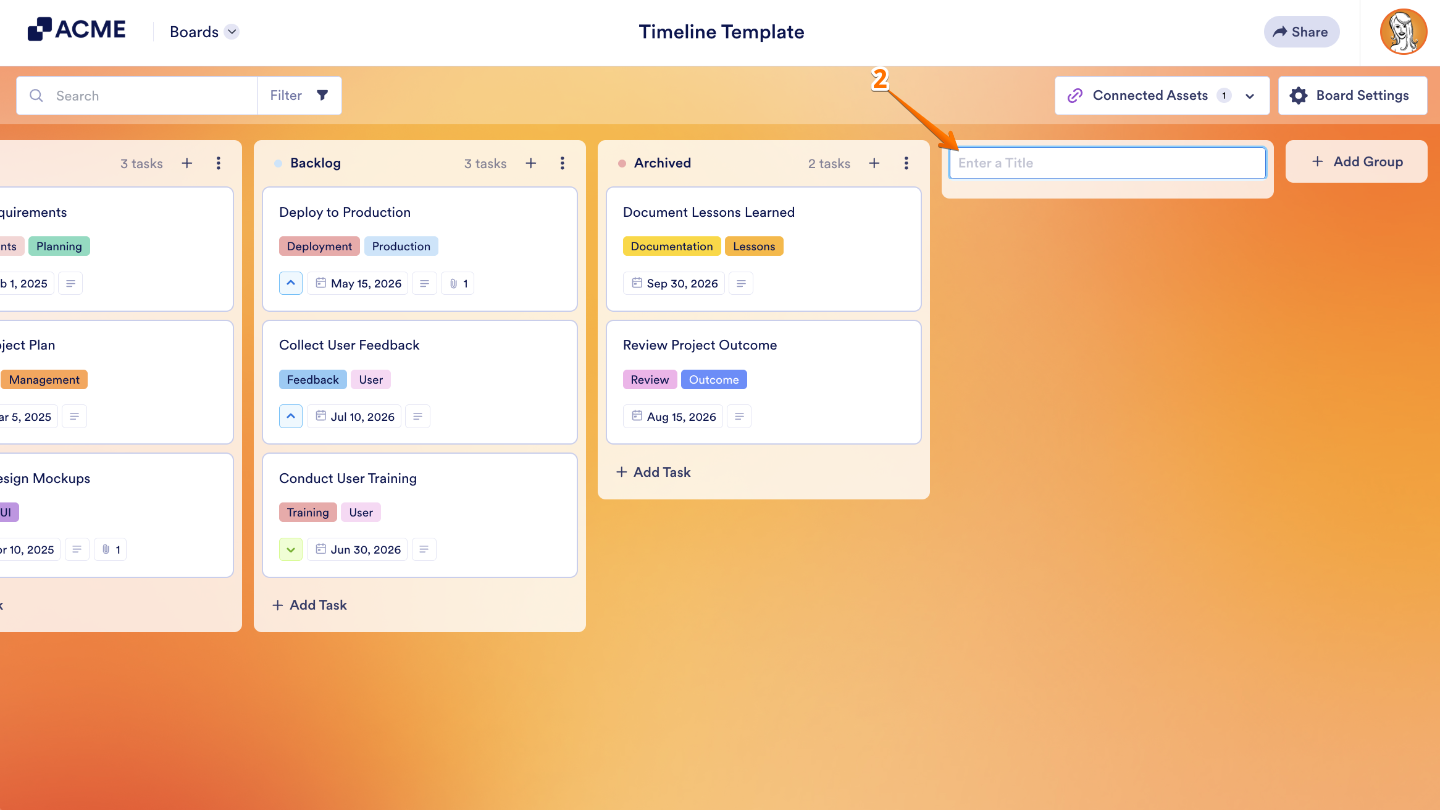
- On your Jotform Board, click on + Add Group on the top-right side of your board.

- Then, enter a Title for your group.
As an alternative, you can:
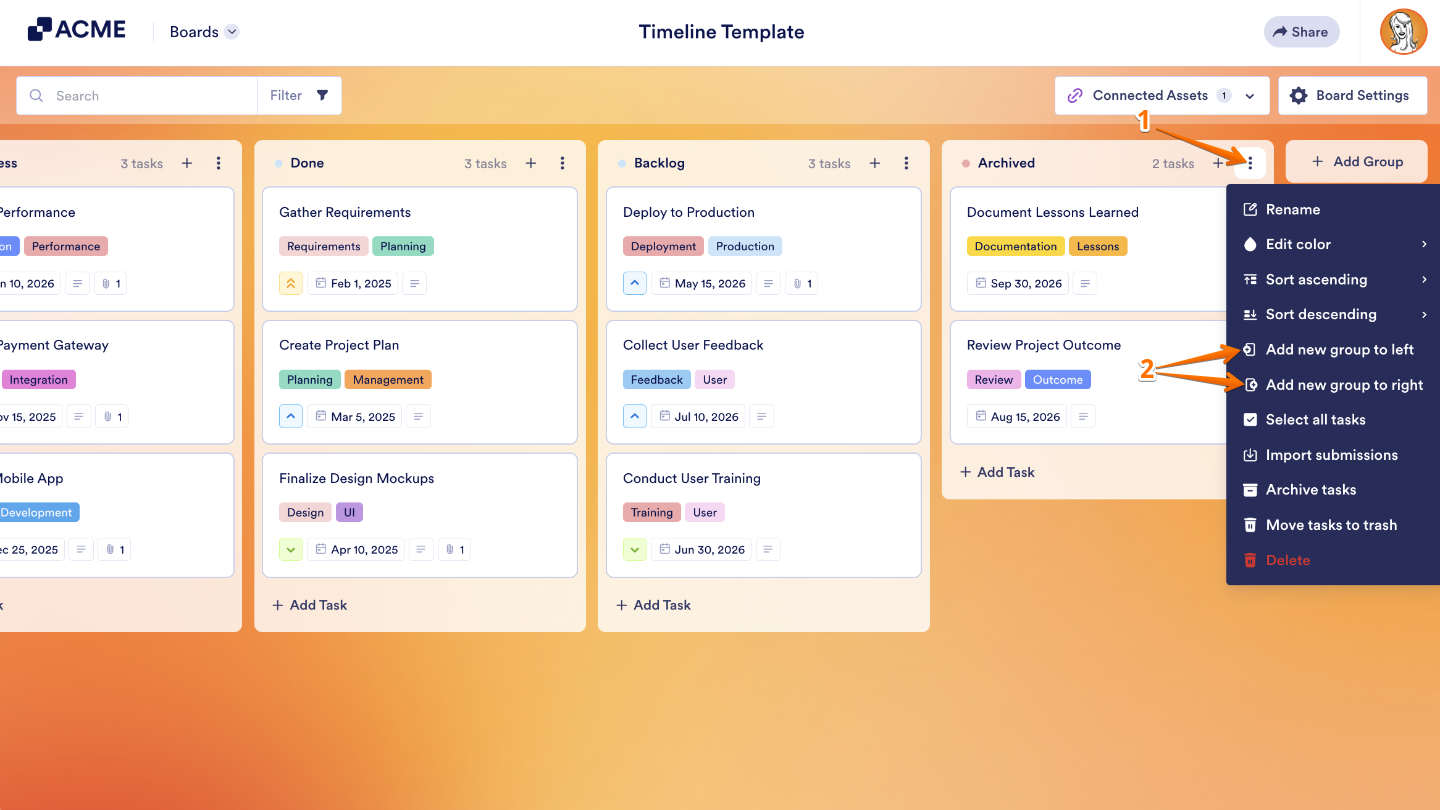
- Click on the Three Dots icon on the top-right side of your group.
- Then, select Insert Group to Left or Insert Group to Right to place a new task where you want it.
You’ve successfully added a new group to your board. Now you can start organizing your tasks just the way you want. Whether it’s a fresh project, a new team category, or simply a way to keep things more structured, adding groups helps you stay on top of your workflow. It’s a small step that makes a big difference in keeping everything clear, organized, and easy to manage.
Renaming a Group
You can rename a group to better match its purpose or keep your workflow clear and organized. It’s a great way to make your board feel more personalized and easier to navigate. This is how it’s done:
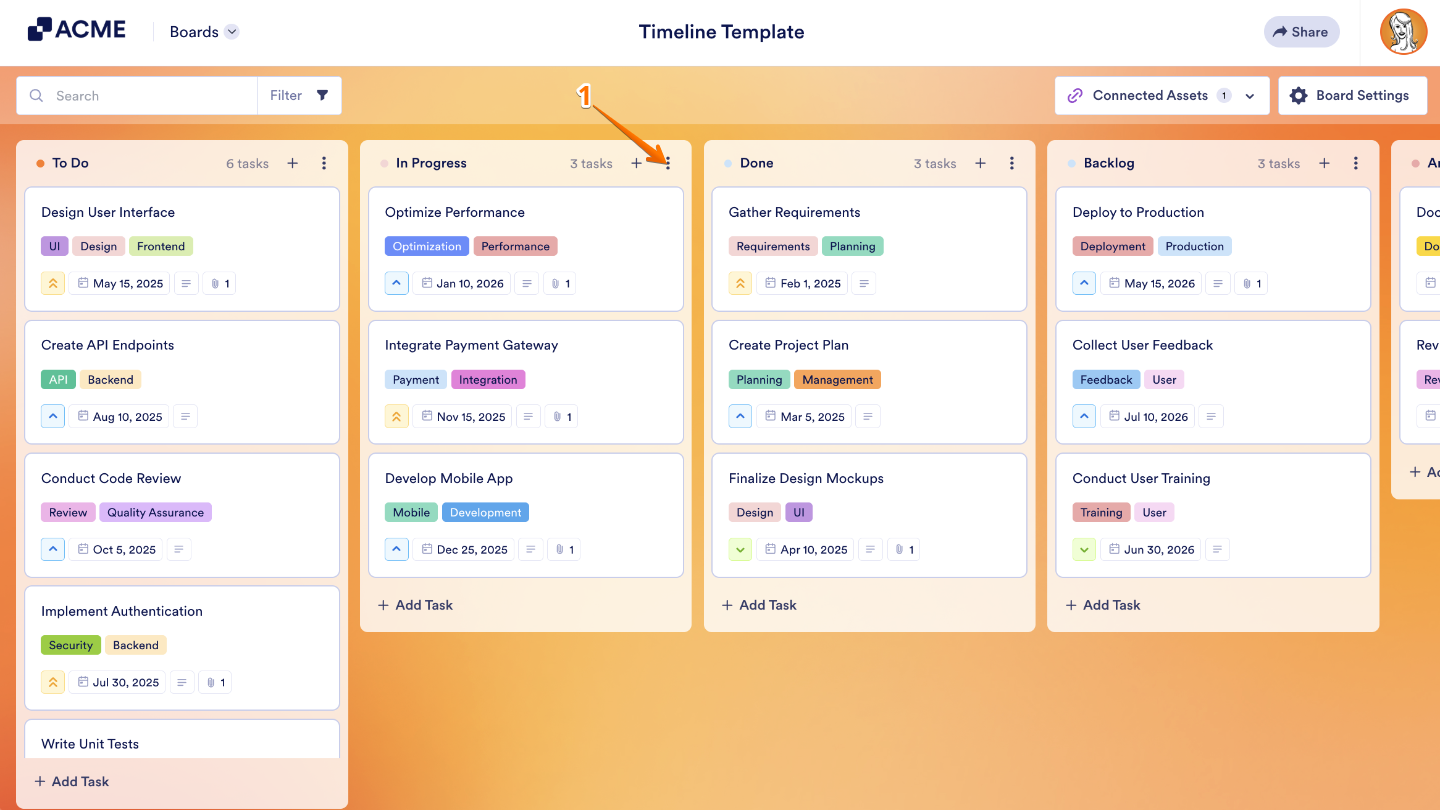
- On your Jotform Board, click on the Three Dots icon on the top-right side of your group.
- Then, in the Dropdown menu that comes up, click on Rename.

As an alternative, you can double-click on the Group Title to edit it.

That’s it. Your group has now been successfully renamed and is ready to use.
Deleting a Group
If a group is no longer needed, you can easily remove it from your board. You can do it in just a few steps:
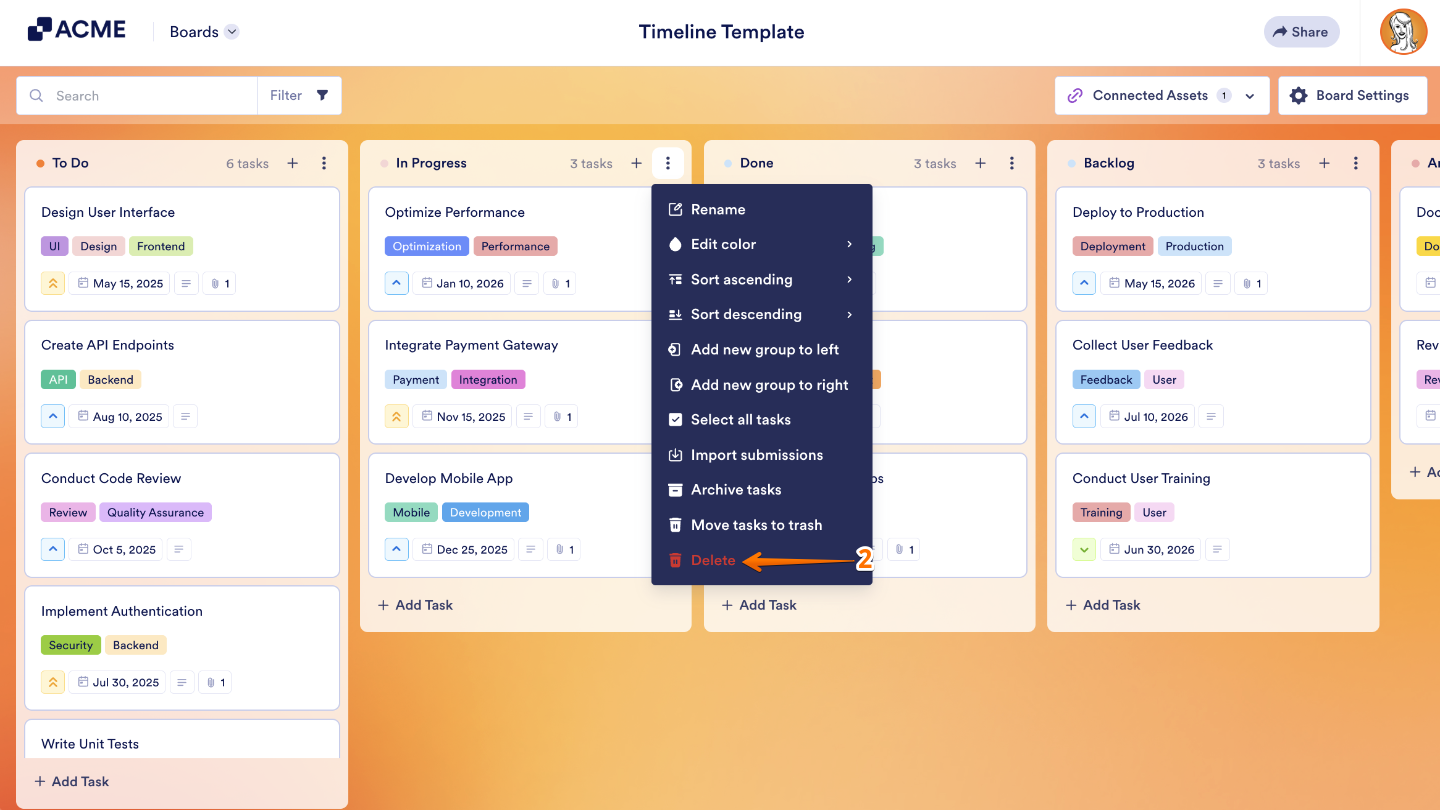
- On your Jotform Board, click on the Three Dots icon on the top-right side of the group that you want to delete.
- Then, in the Dropdown menu that comes up, click on Delete.
- In the Confirmation window that pops-up, click on Yes, Delete, and you’re all set.
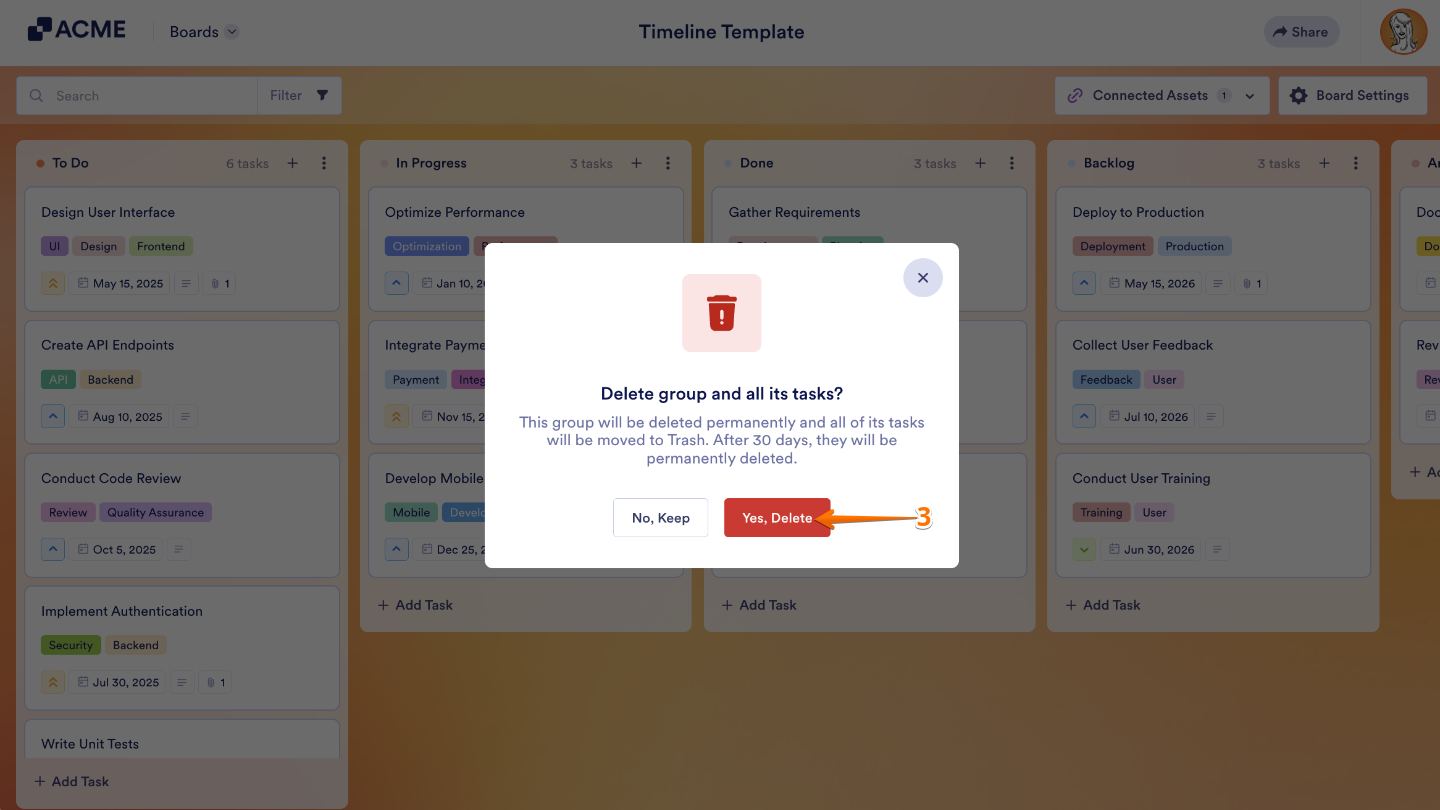
That’s it. The group has been successfully deleted.
Managing Task Fields on Boards
You can fully customize your task fields to match the way you and your team work. Add new fields, tweak existing ones, and adjust important details like assignees, priorities, and due dates. This flexibility lets you capture exactly the information you need, keep tasks organized, and make sure everyone knows what’s most important. By tailoring your task fields to fit your workflow, managing projects becomes smoother, clearer, and a lot more efficient.
Adding New Task Fields
You can add new task fields to any group based on what you need. To get going, here’s what you’ll do:
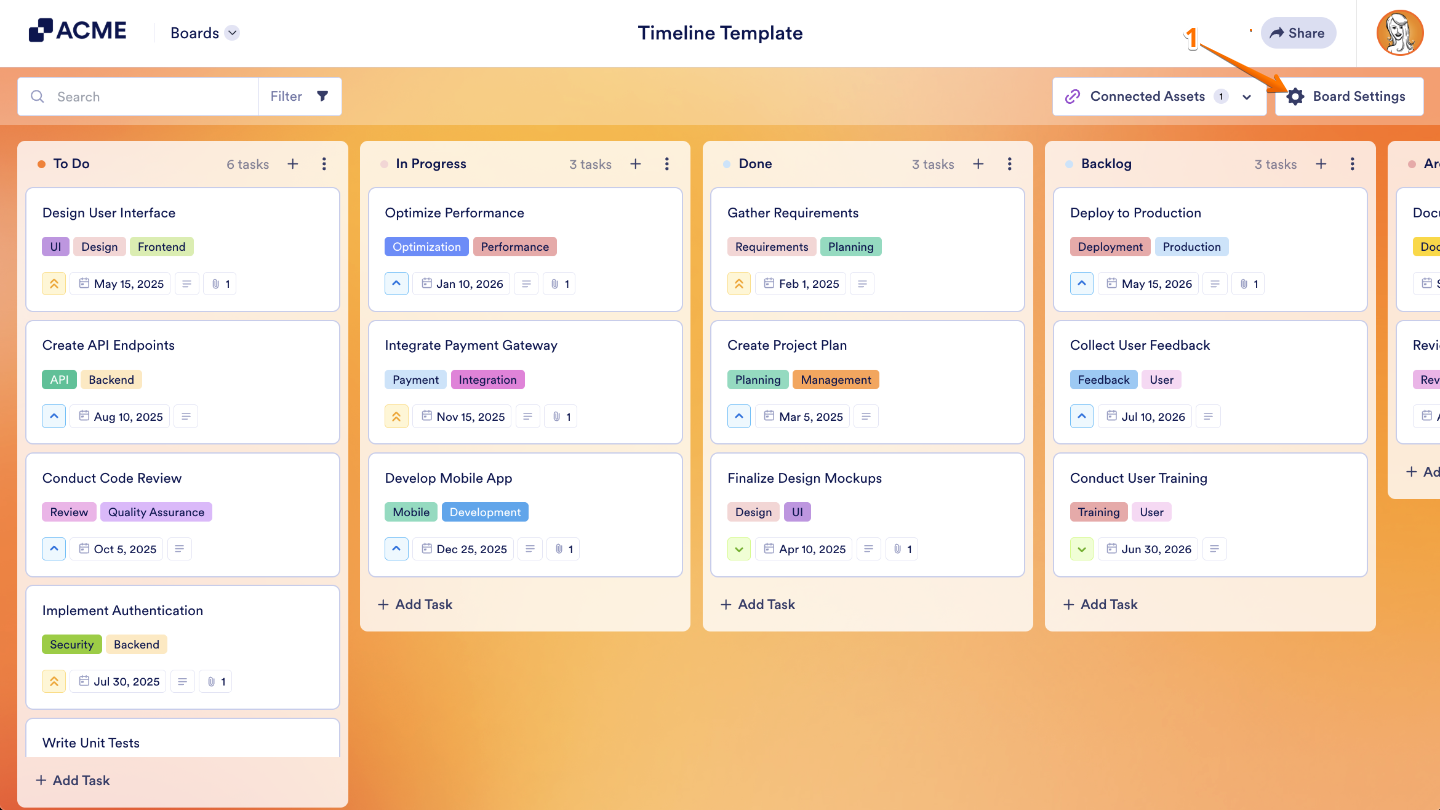
- On your Jotform Board, click on Board Settings in the top-right corner of your screen.
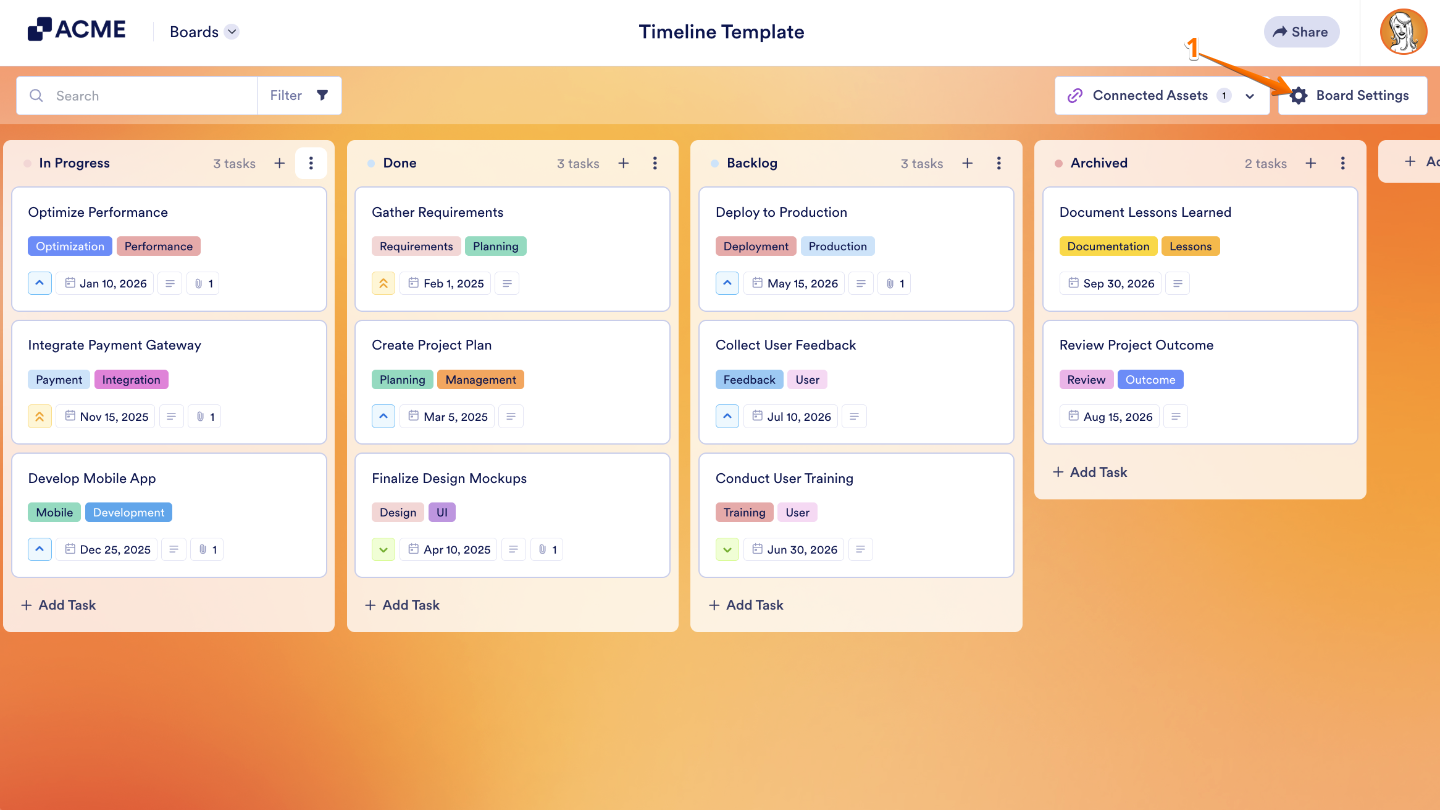
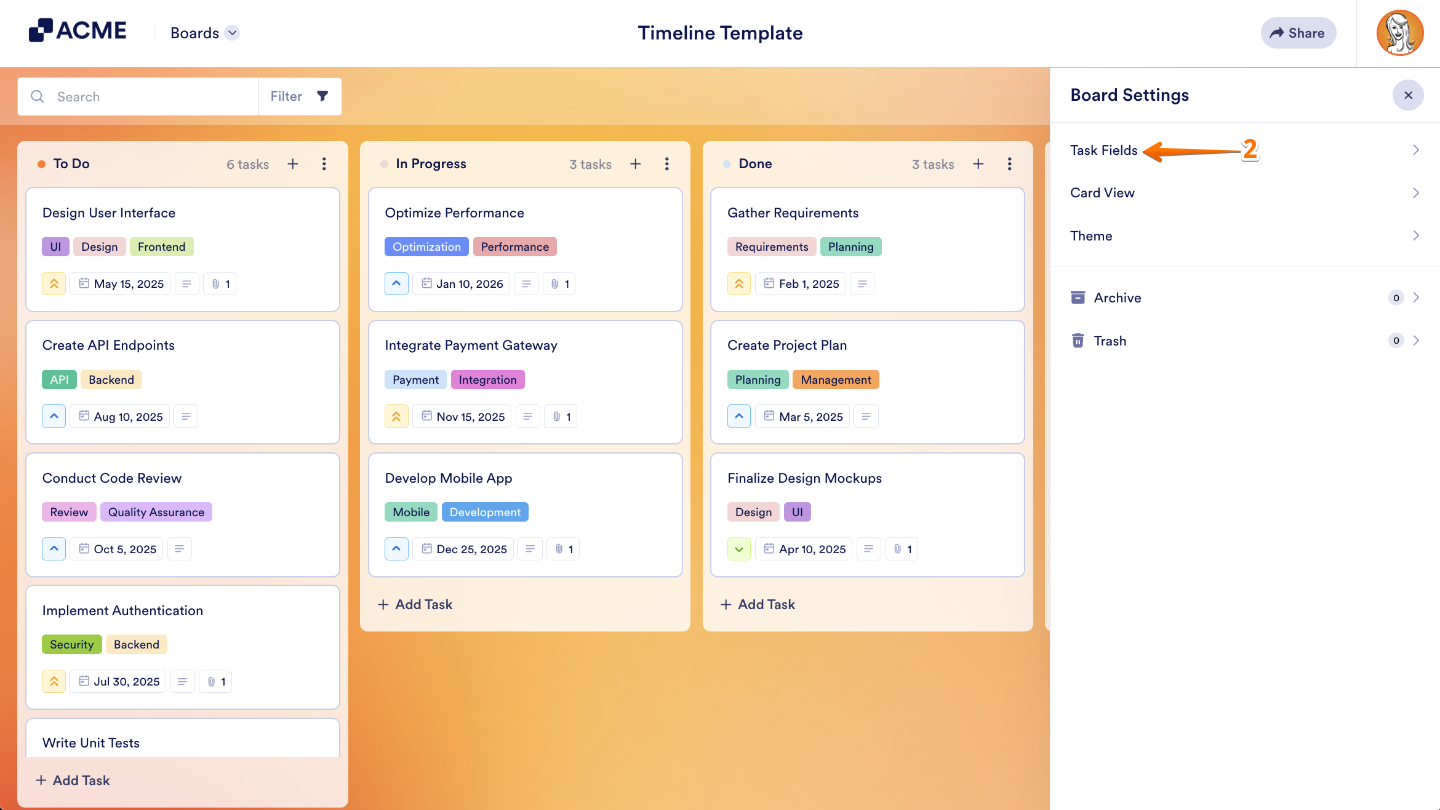
- In the menu that opens, click on Task Fields.
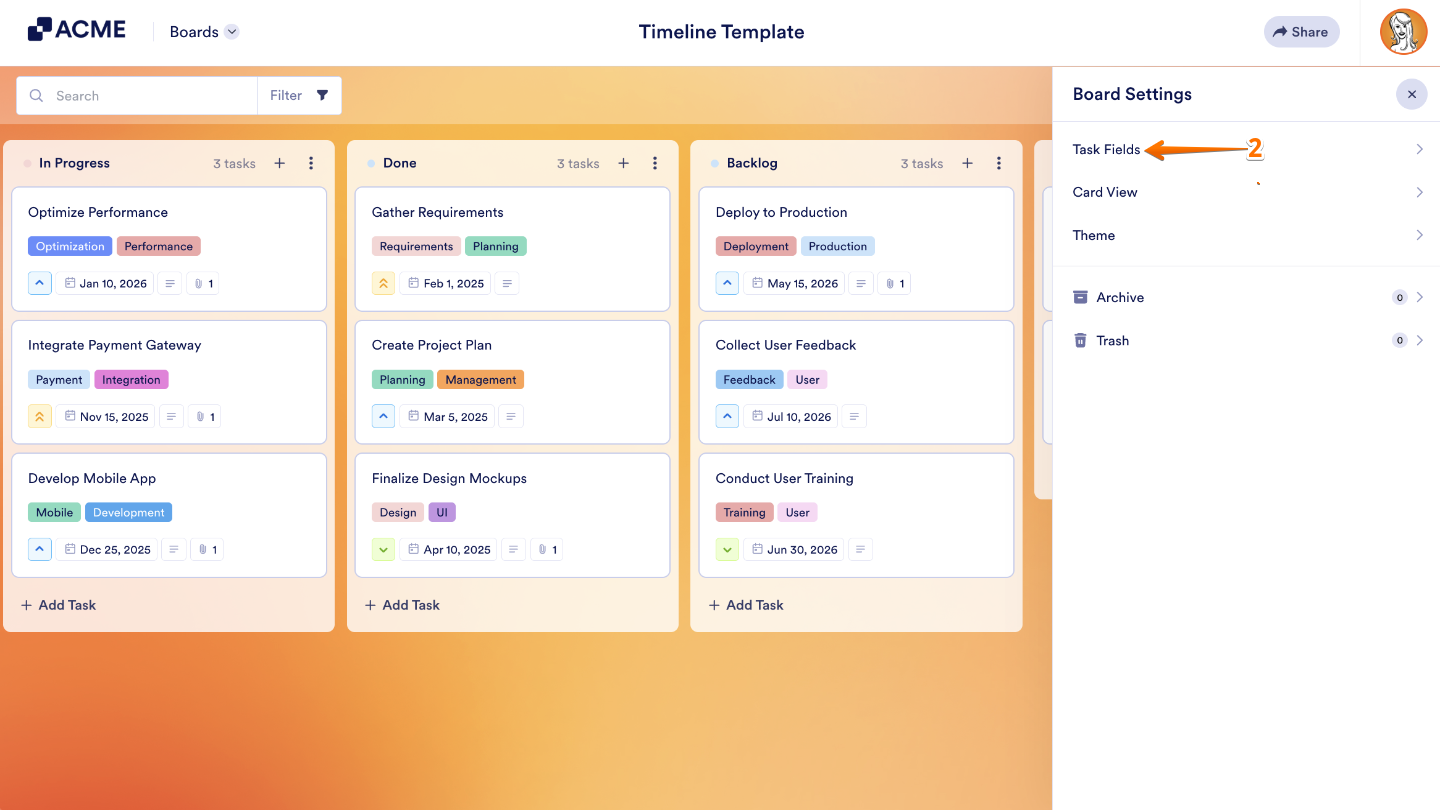
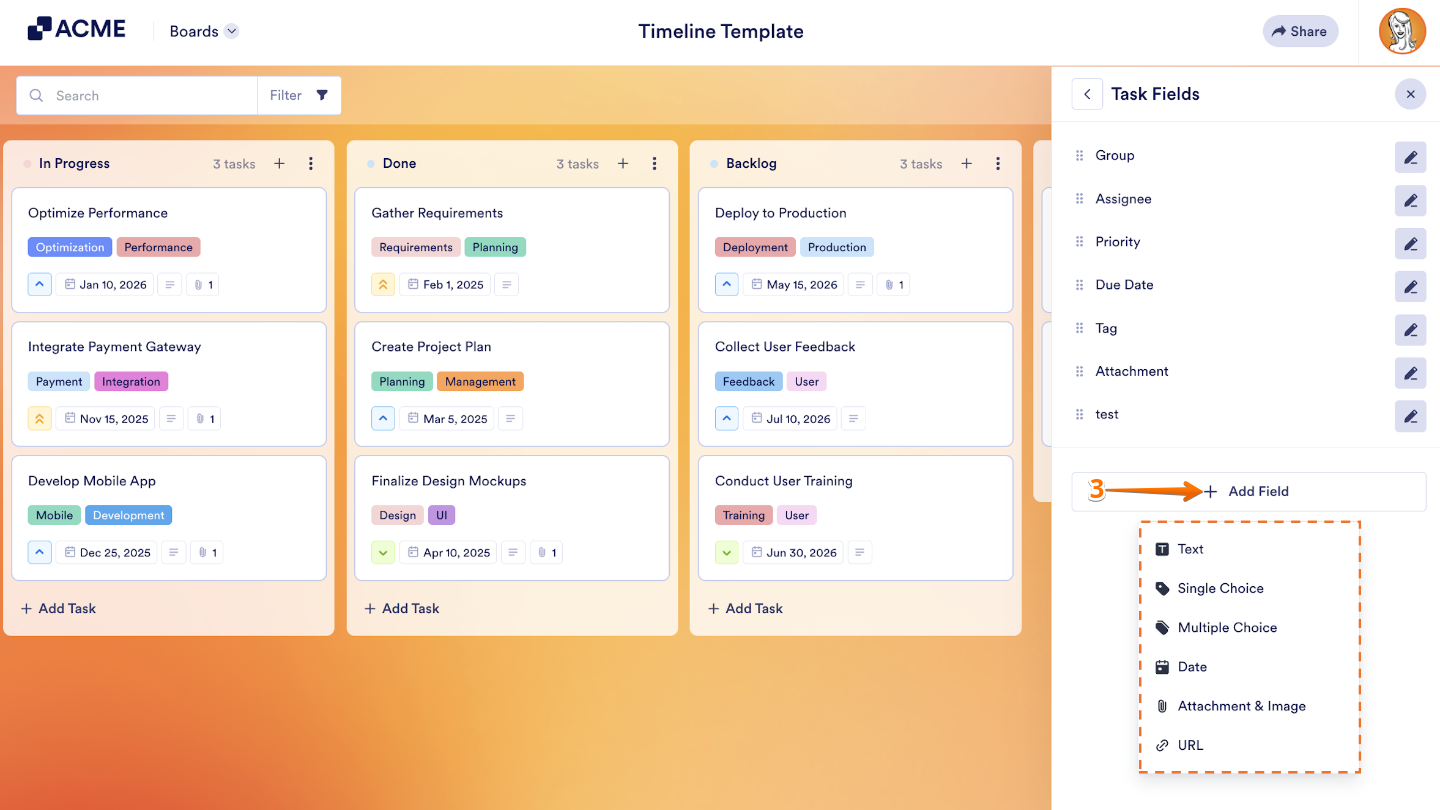
- Now, click on +Add Field and select from the following fields:
- Text — Enter a plain text response.
- Single Choice — Select one option from a predefined list.
- Multiple Choice — Choose multiple options from a predefined list.
- Date — Pick a date from the calendar.
- Attachment & Image — Upload a file or an image.
- URL — Enter a web link.
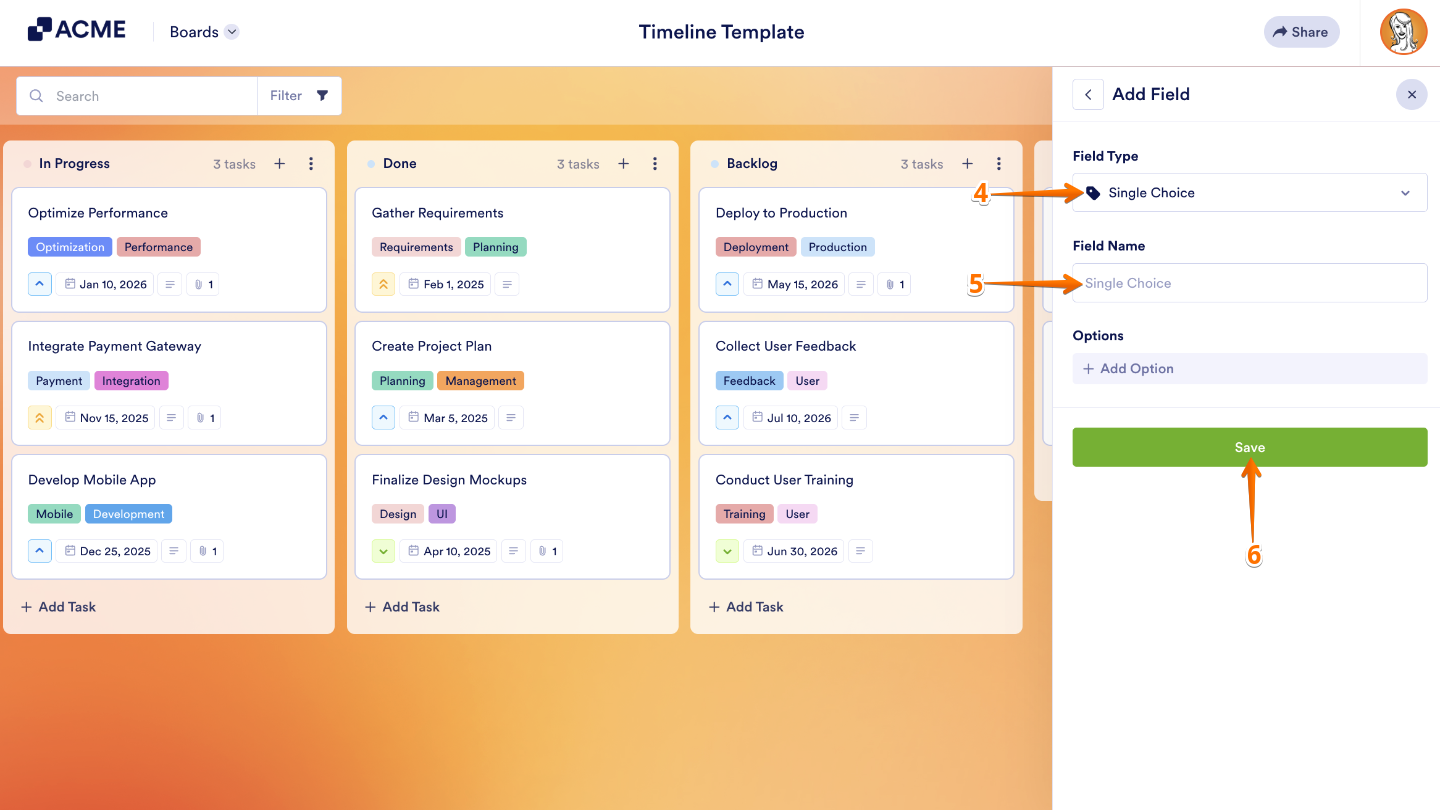
- Click on the Field Type section if you want to change the type to a different one.
- Then, under that, in the Field Name section, enter a name for the field.
- Finally, click on Save, and you’re all set.
That’s it. You’ve successfully added a new task field and it’s ready to use.
Note:
- You can only add 5 custom fields on your board.
- All the added fields will appear in all the tasks on the board.
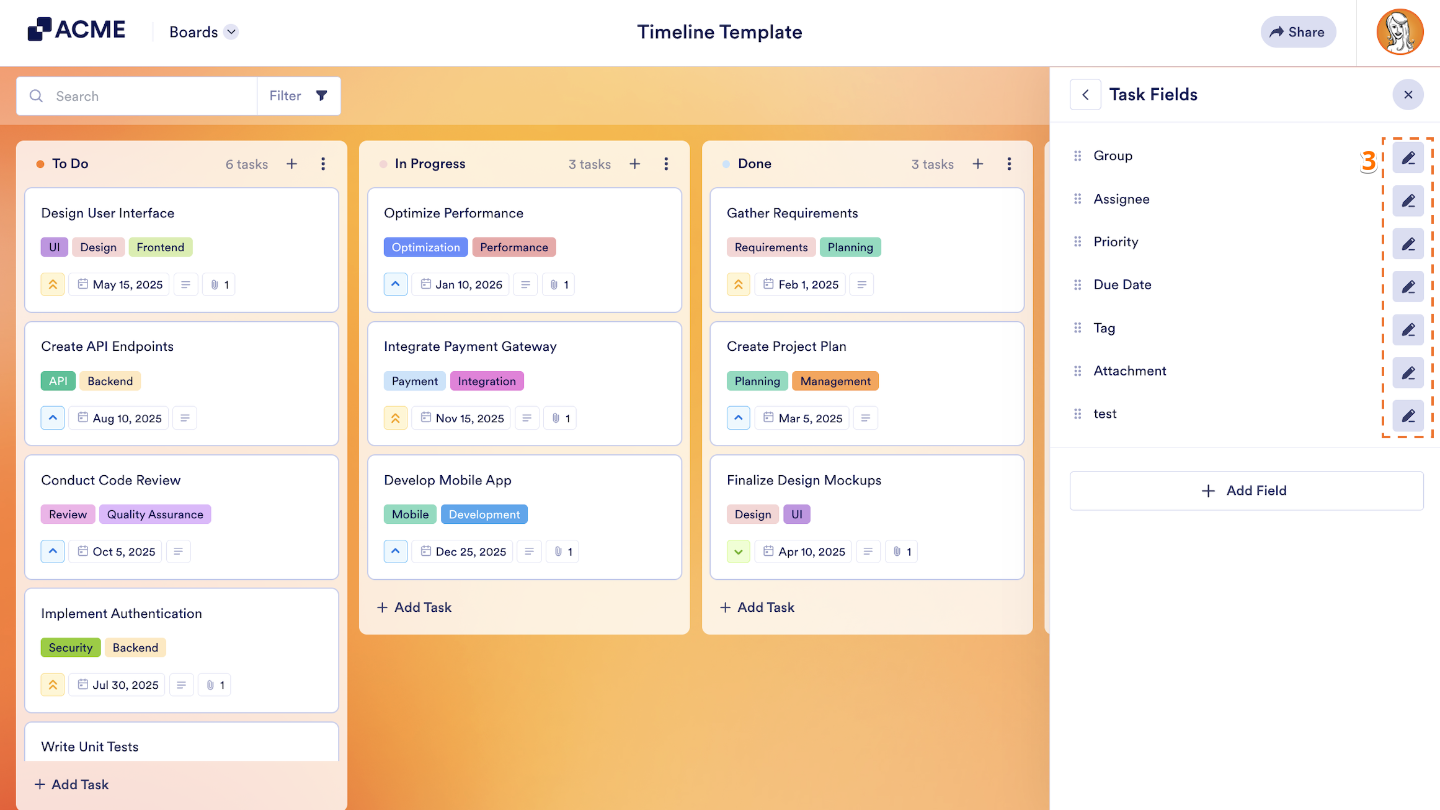
Editing Task Fields
You can easily edit groups, assignees, priorities, due dates, and tags right from the Board Settings to keep your tasks organized and running smoothly. Here’s the quick way to do it:
- On your Jotform Board, click on Board Settings in the top-right corner of the page.
- In the menu that opens, click on Task Fields.
- Now, click on the Pencil icon on the right side of the task field you want to change or update, and then configure it the way you want it.
All done. Your task fields have been updated and are ready to go.

Send Comment: