As an admin, you can manage which integrations are visible or hidden for your organization directly from the Admin Console. This helps control which tools your users can connect to and ensures compliance with internal policies or security standards. You can access and update integration visibility settings in just a few steps.
Accessing Integration Visibility Settings
- In the Admin Console, click on Integrations on the left side of the screen.
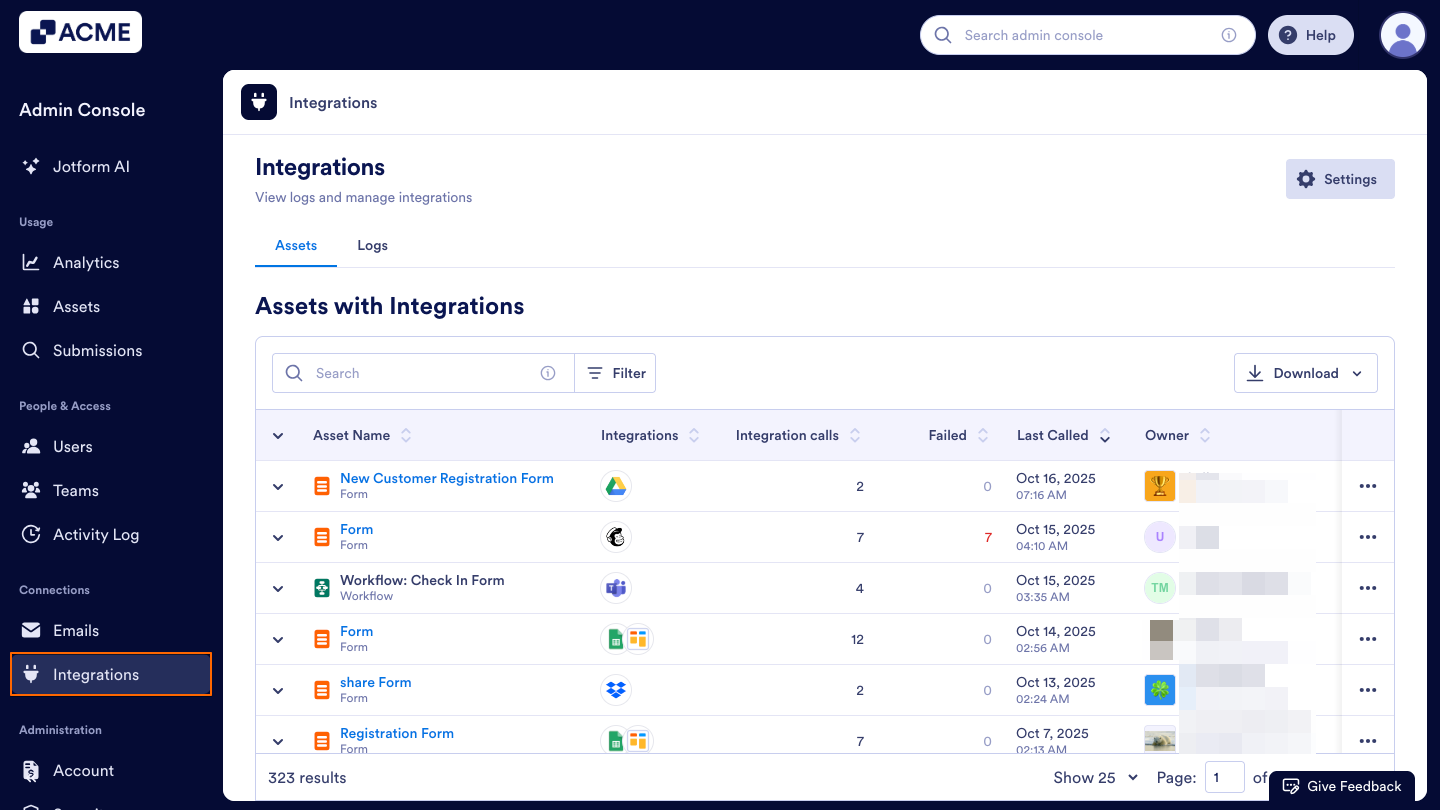
- Click on the Settings button in the top-right corner of the page.

Integrations List
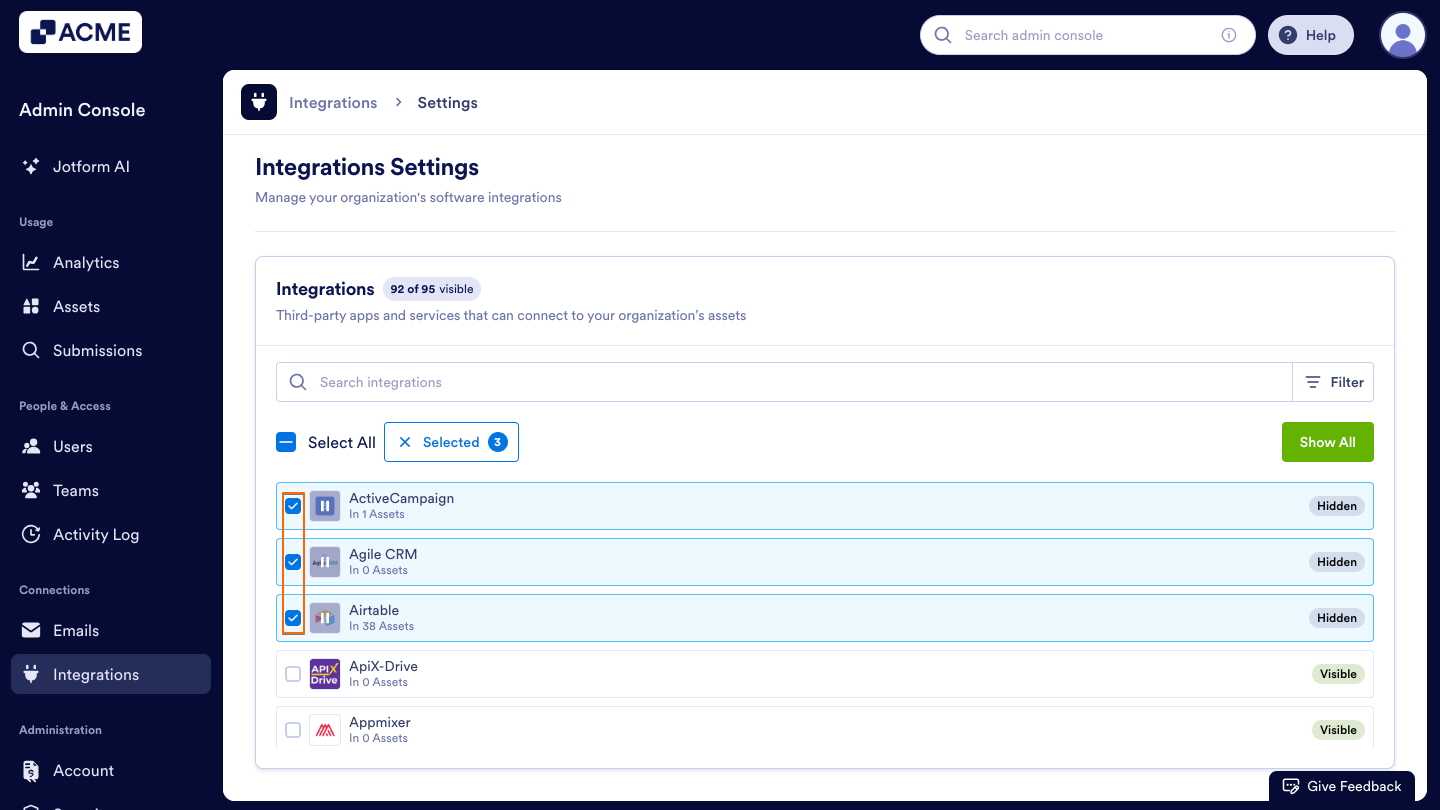
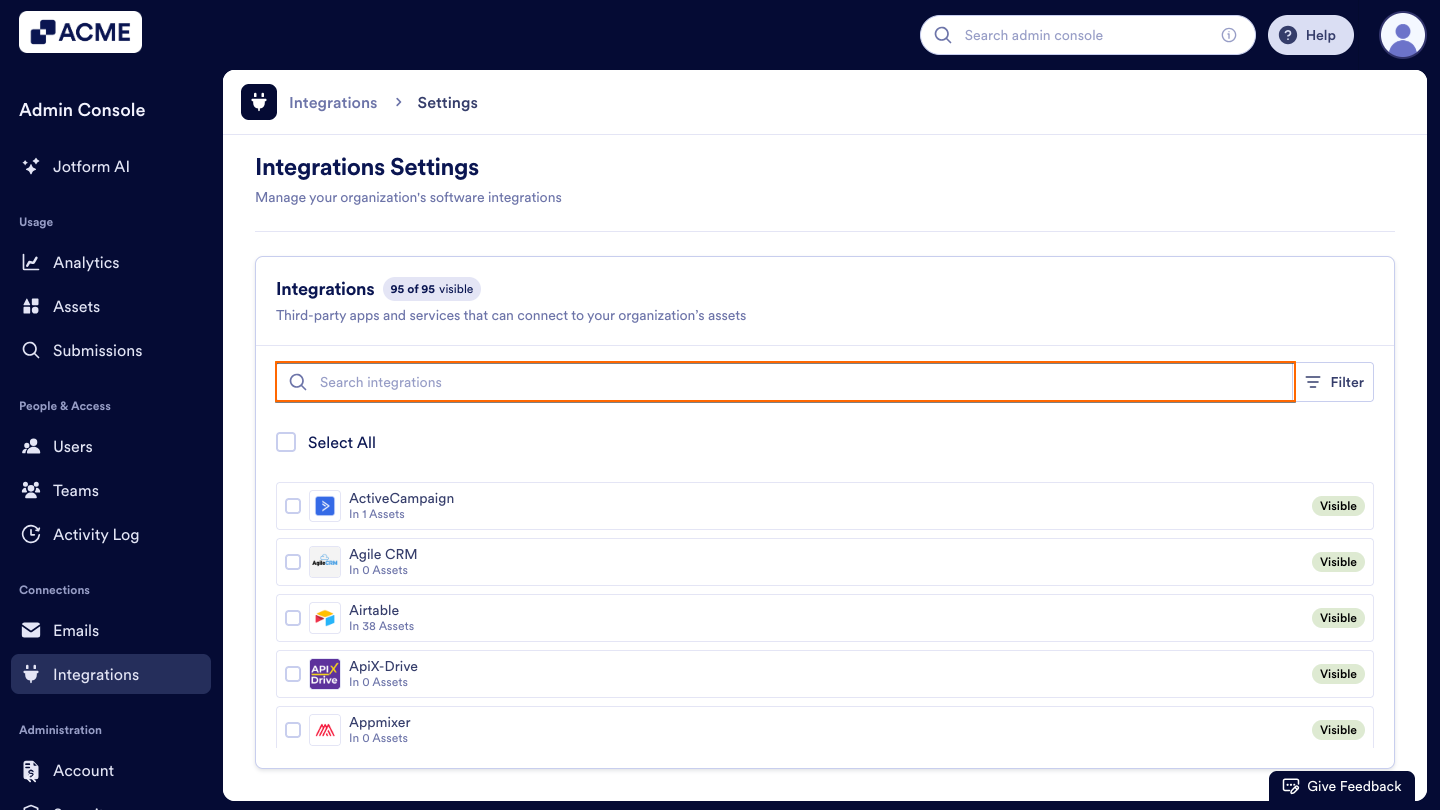
In the Integrations section of the Admin Console, you’ll see a list of all Integrations available to your organization. Each row in this list displays important details about every integration:
- Integration Name: The name and icon of the connected service, such as Mailchimp, Google Sheets, or Microsoft Teams.
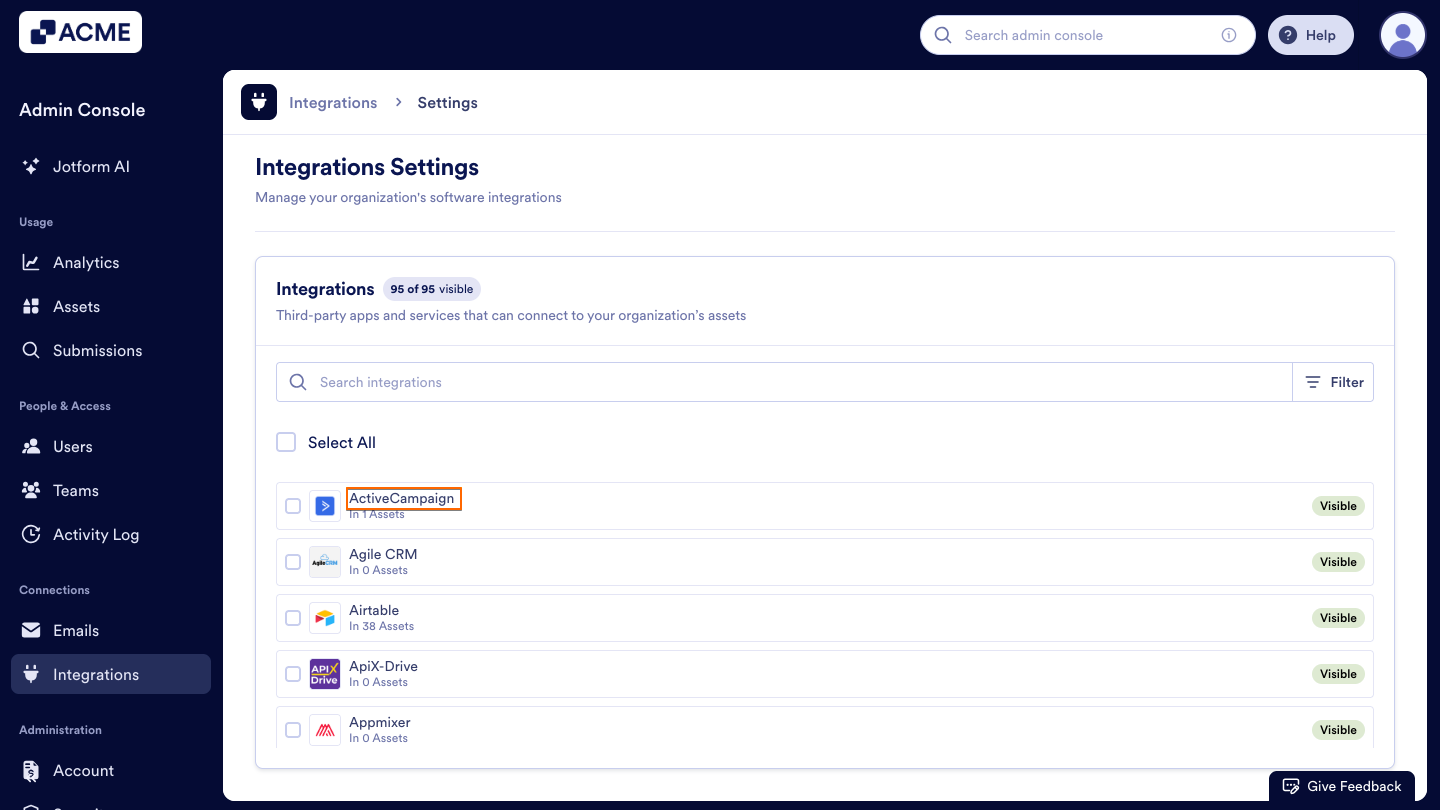
- Assets Number: The total number of assets (for example, Forms, Tables, Workflows, or Reports) currently connected to that integration.

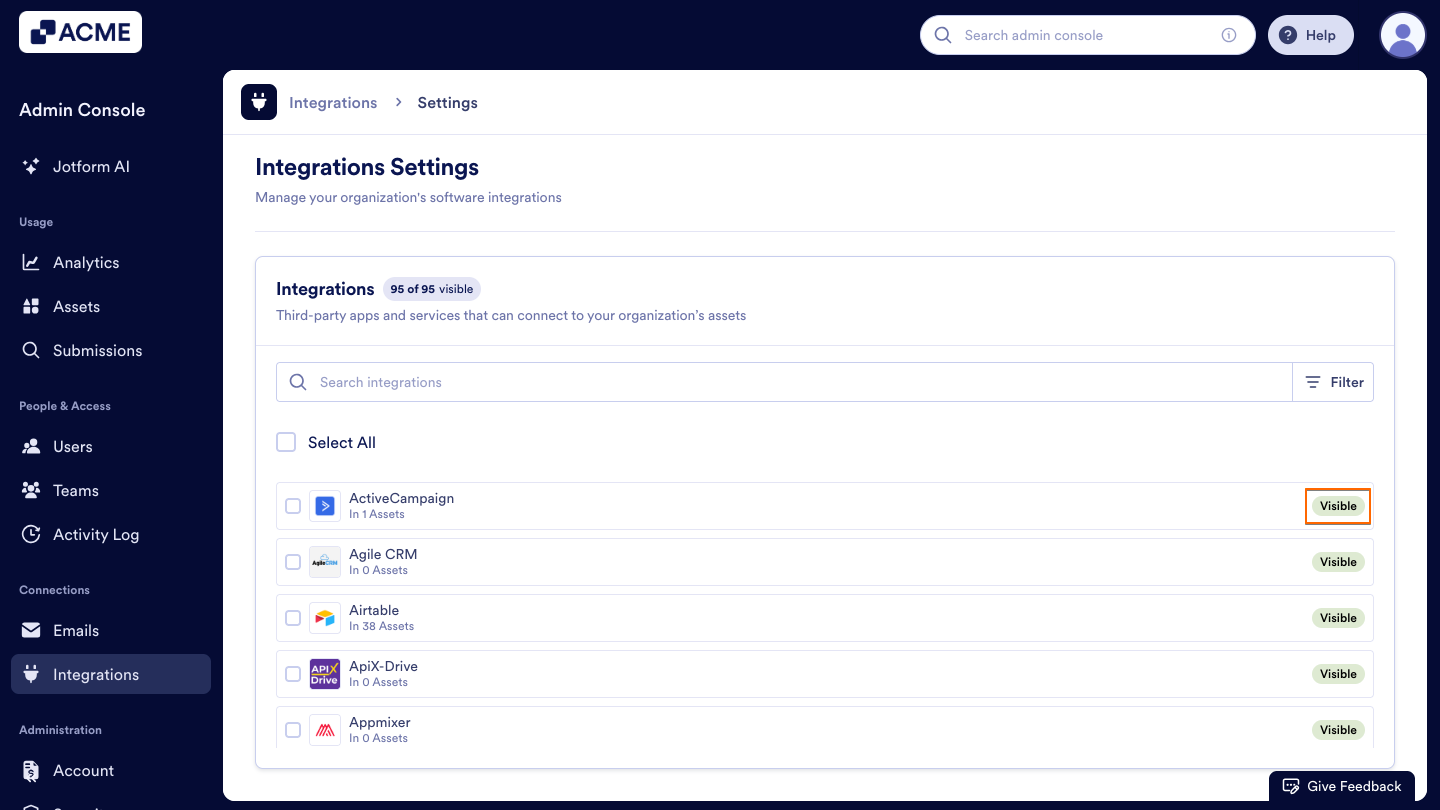
- Visibility Status: Shows whether the Integration is currently Visible or Hidden to users. Visible Integrations can be used freely, while Hidden ones are disabled from being added to new assets.
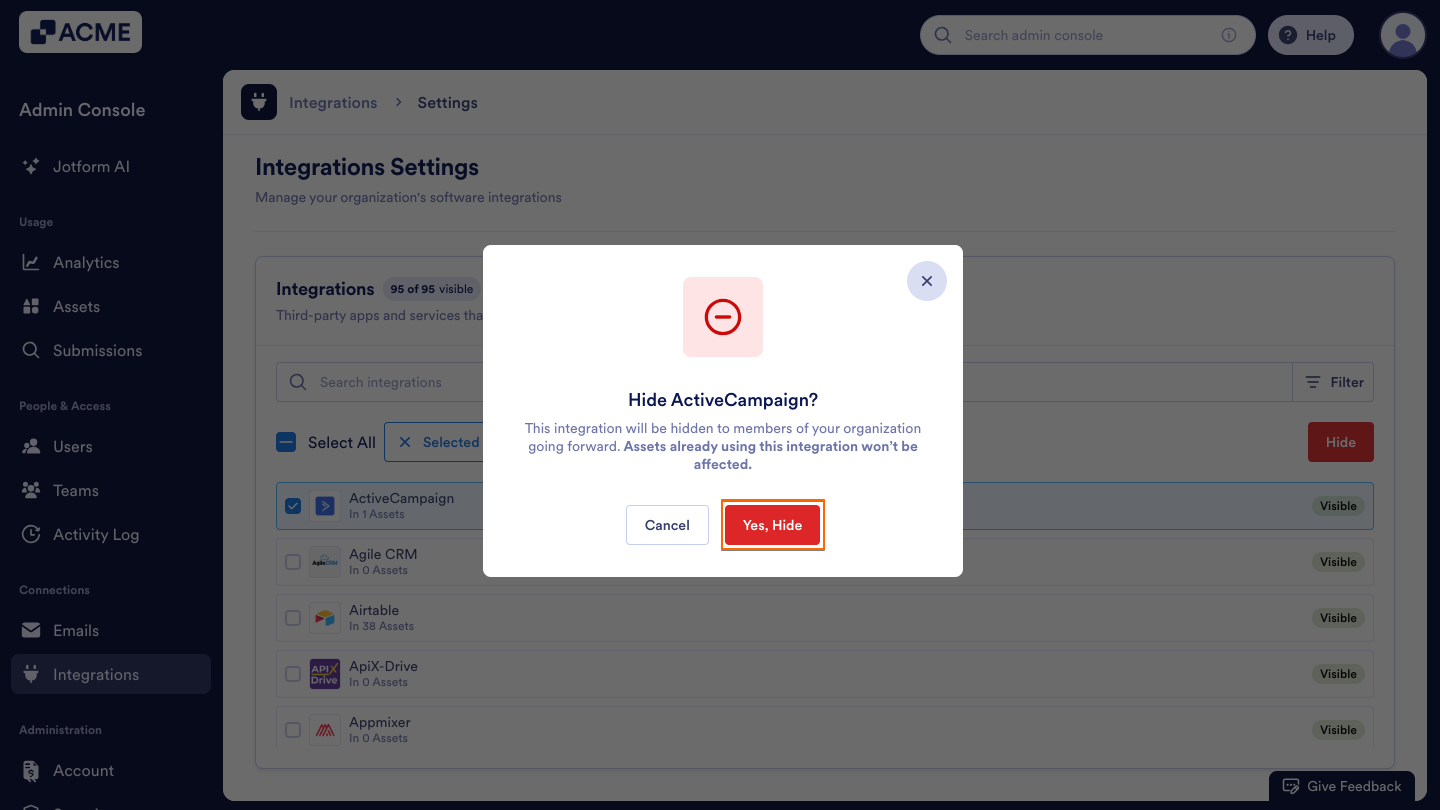
How to Hide an Integration
If you want to temporarily or permanently disable an Integration, you can easily hide it from your organization’s list of available connections.
- Click on the checkbox next to the Integration you want to hide.
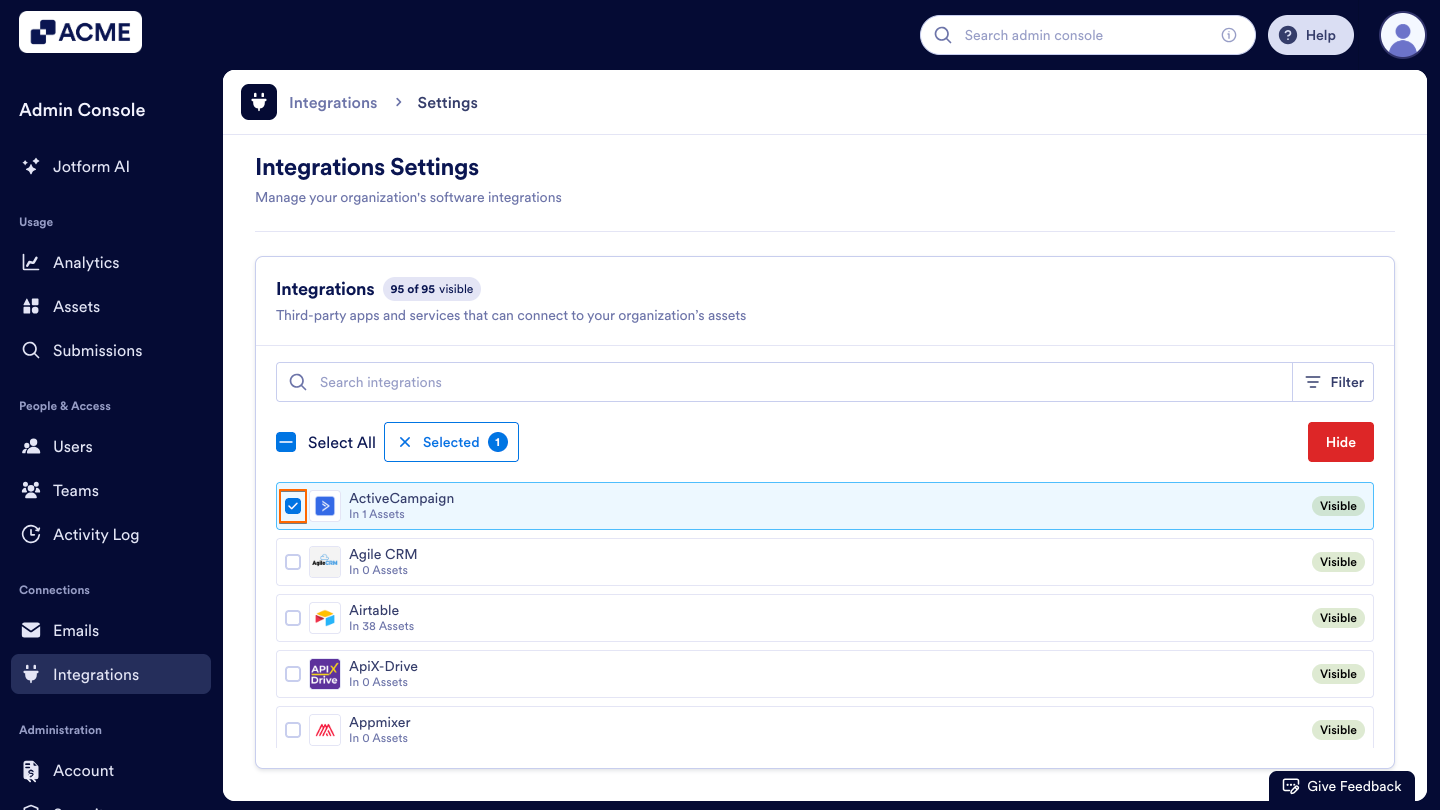
- Select the Hide button that appears on the right side.
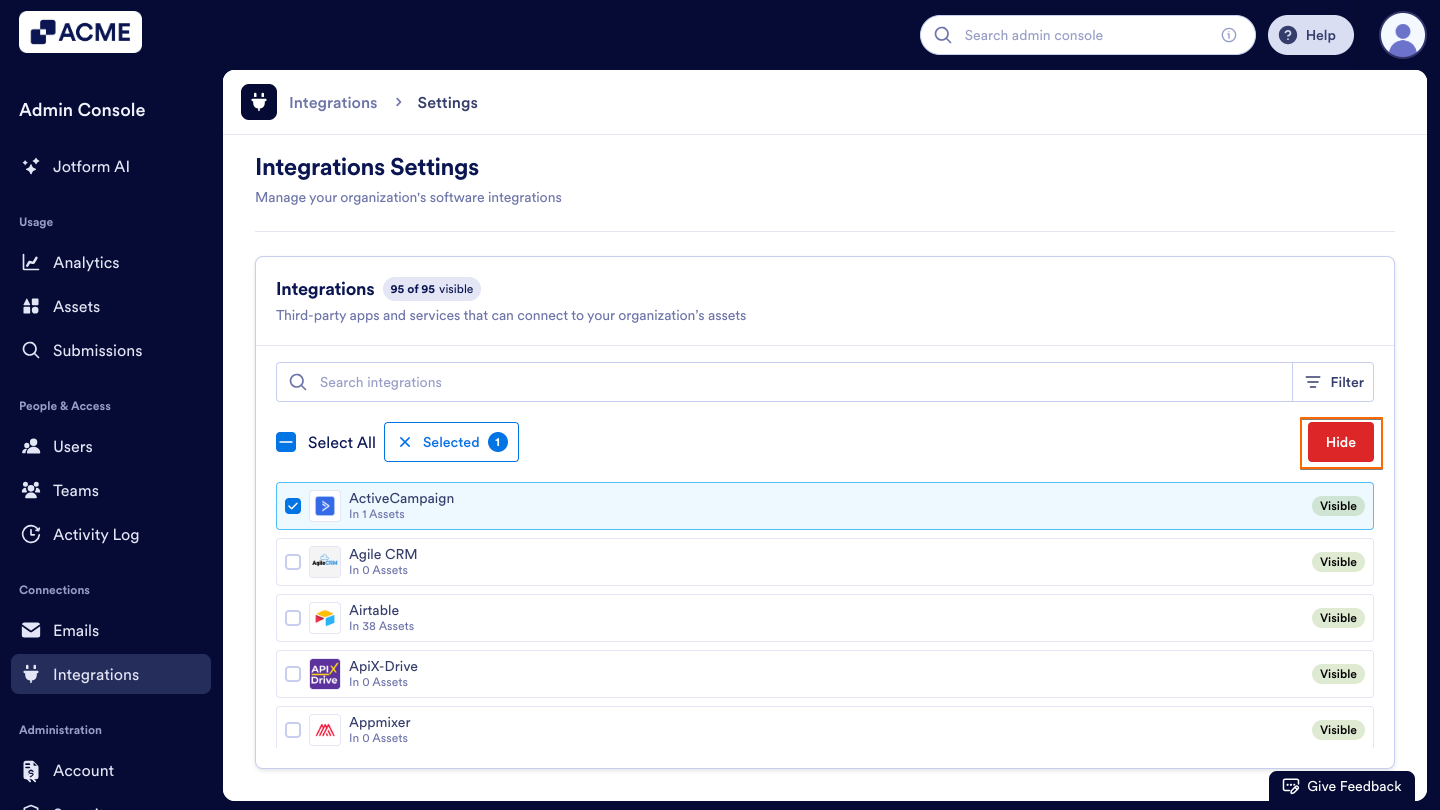
- Click on the Yes, Hide button.
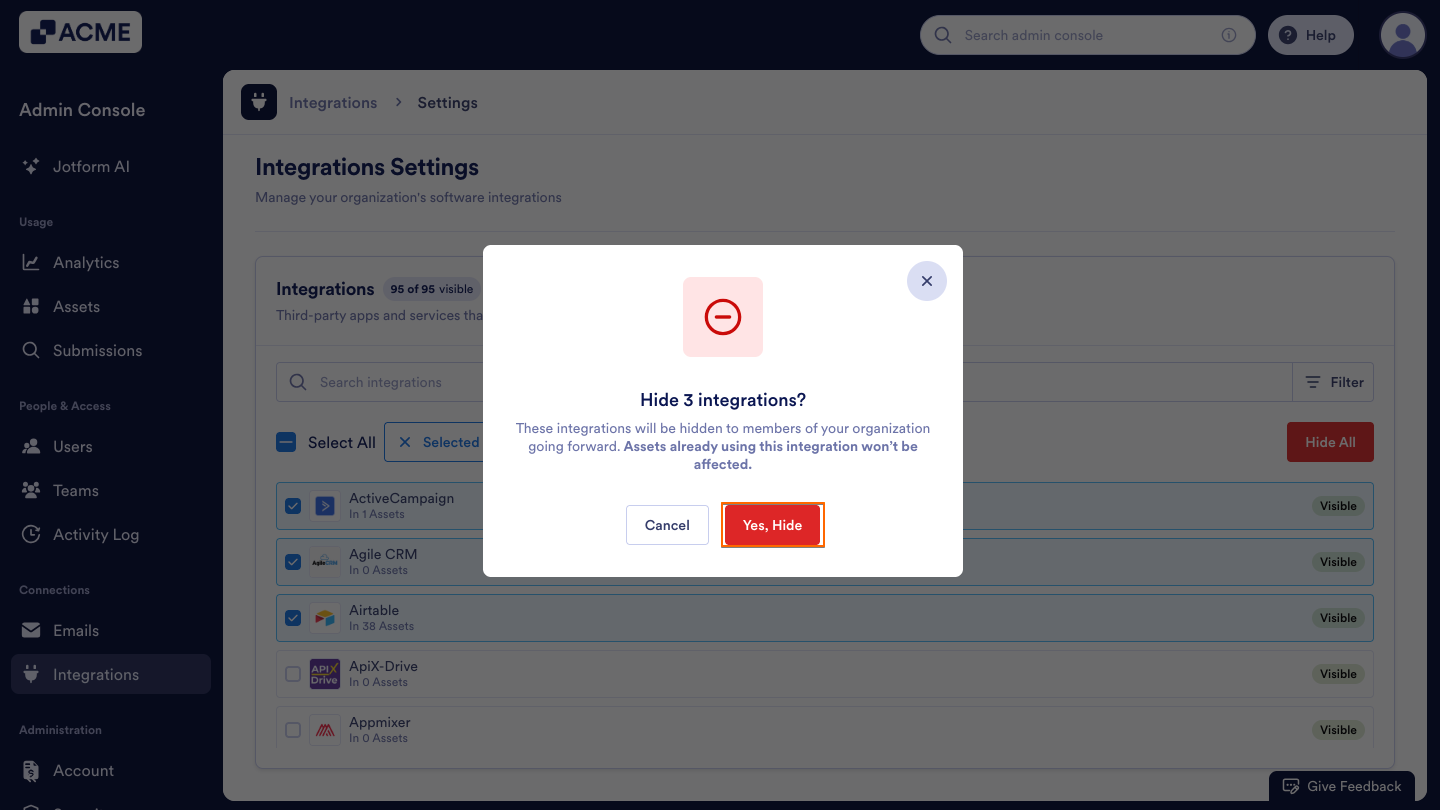
How to Hide Integrations in Bulk
- Click on the checkboxes next to the Integrations you want to hide.

- Select the Hide All button that appears on the right side.

- Click on the Yes, Hide button.
Note: Hiding an integration doesn’t delete existing connections . Users who already have this integration configured can continue to use it unless manually disconnected.
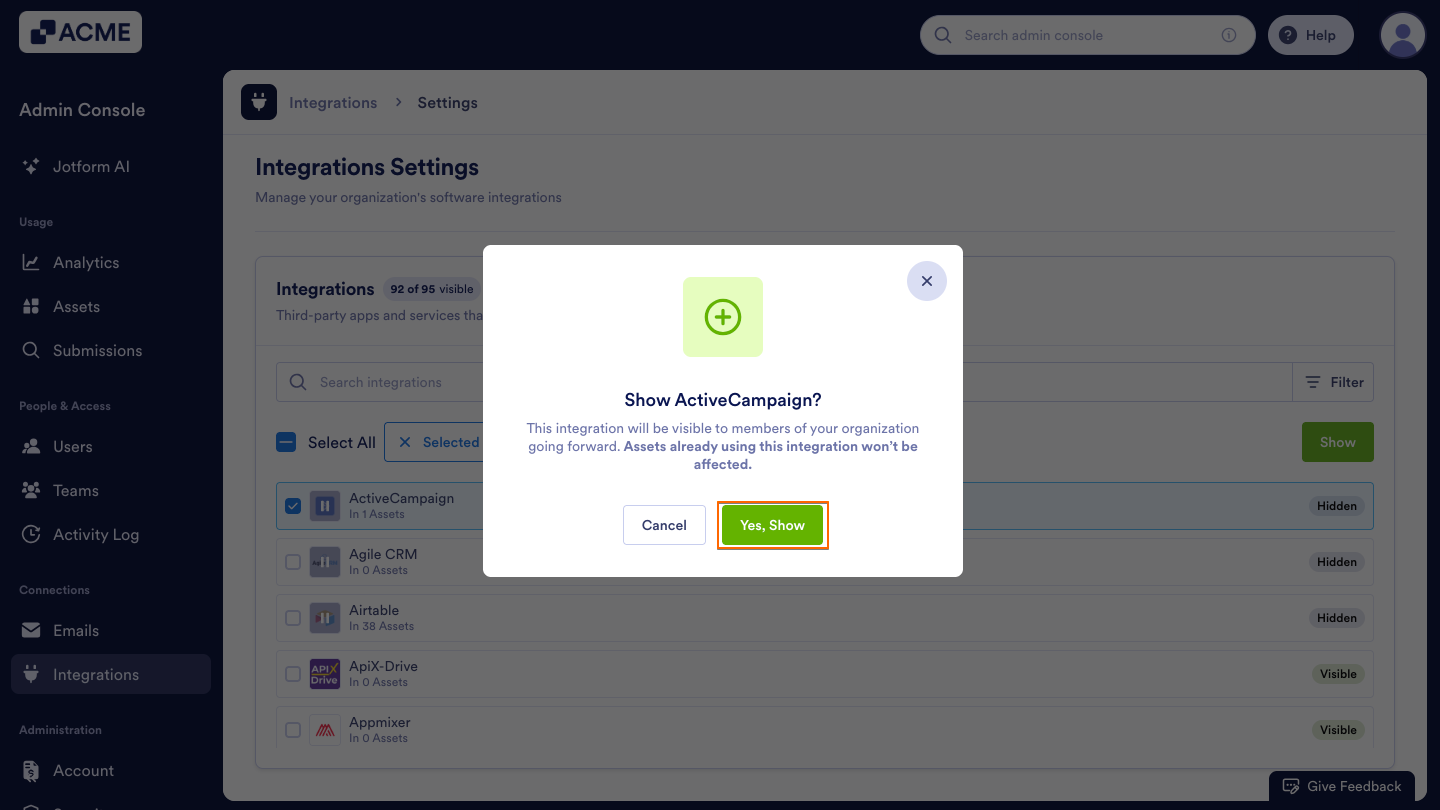
How to Show an Integration
If you want to make a hidden integration available again, you can easily show it from your organization’s list of available connections.
- Click on the checkbox next to the Integration you want to show.

- Select the Show button that appears to the right of the Integration.
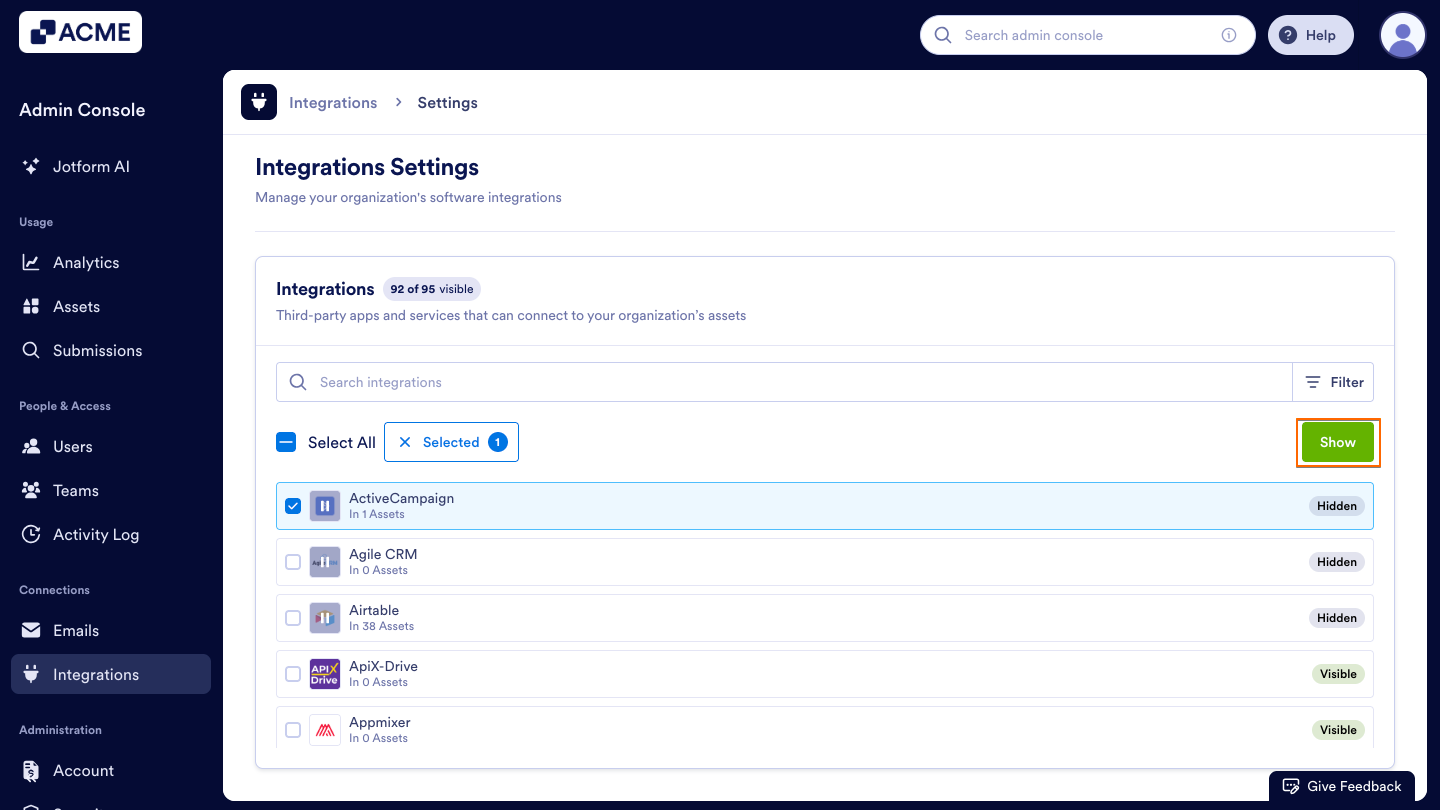
- Click on the Yes, Show button.
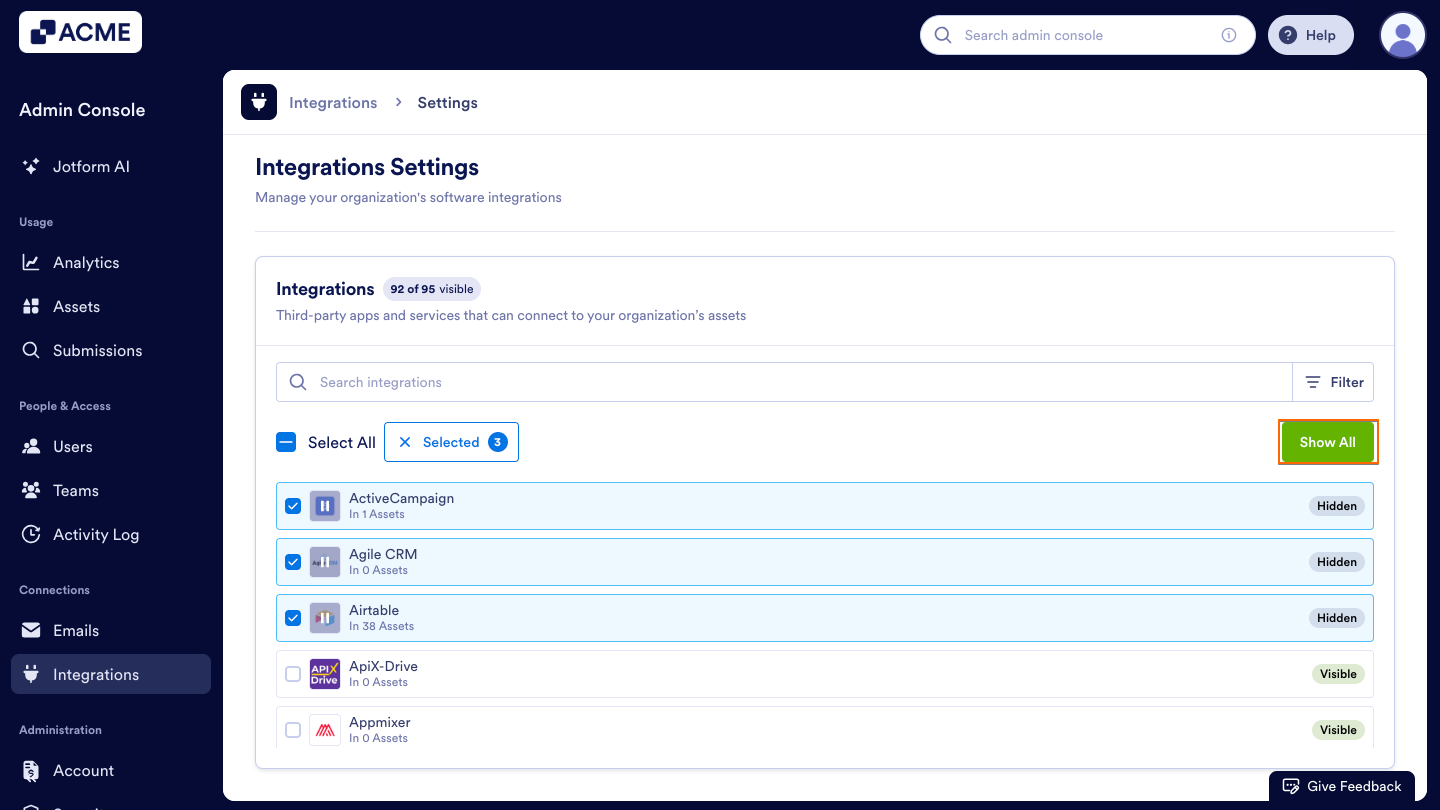
How to Show Integrations in Bulk
You can also show multiple integrations at once using bulk actions.
- Click on the checkboxes next to the Integrations you want to show.
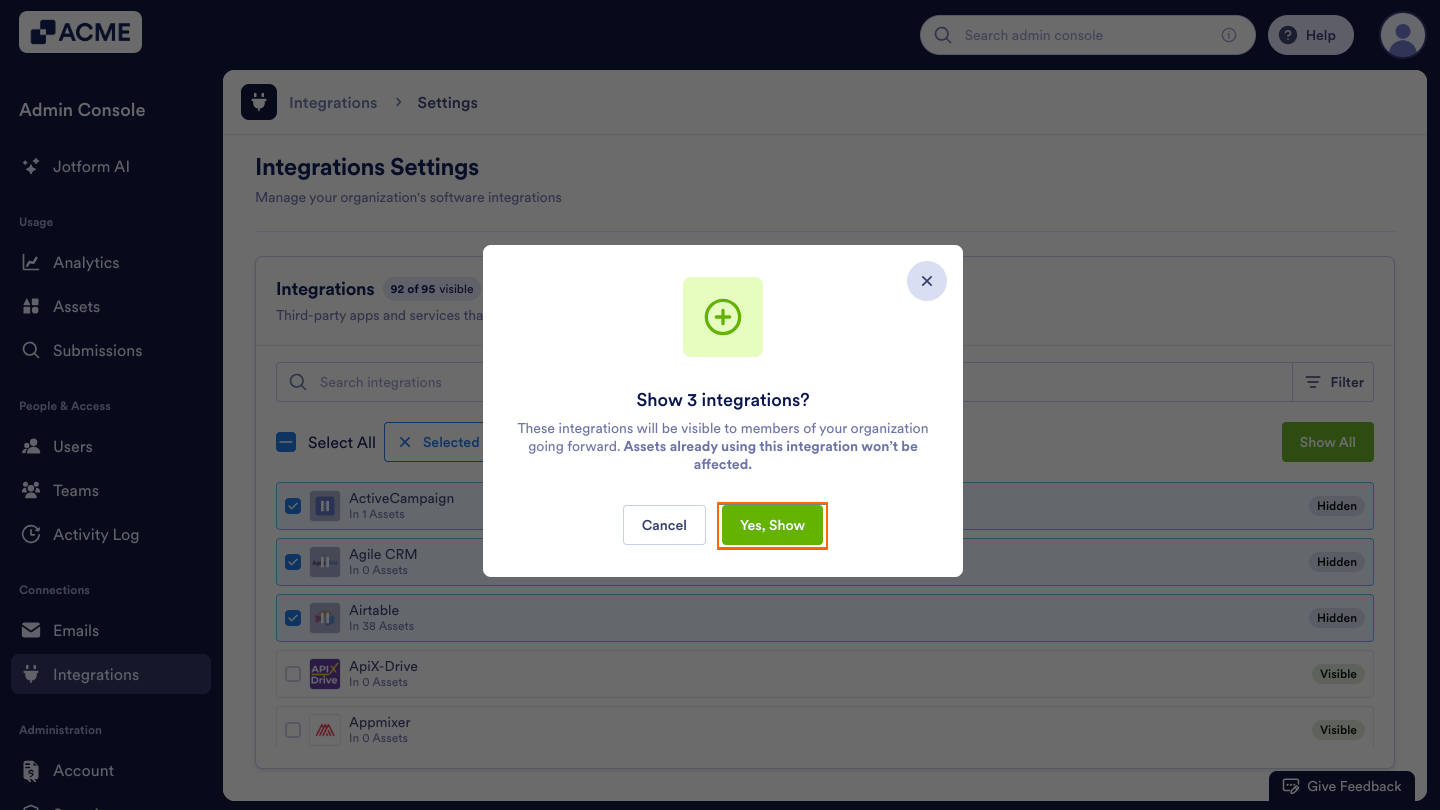
- Select the Show All button that appears below the Filter icon on the right side of the screen.
- Click on the Yes, Show button.
Navigating the Integrations List
You can quickly find and organize Integrations in the Integrations List using the Search bar and Filter options.
Search Bar
You can use the Search bar to find specific Integrations by name. Start typing an Integration’s name, and matching results will appear instantly in the list.
Filter Button
You can click on the Filter button to refine the integrations list based on specific criteria. You can apply multiple filters together to narrow your view.
- Assets: Filter integrations by the number of assets connected, using options such as More Than, Less Than, or Equals.
- Category: Filter integrations by their category or function type (for example, CRM, communication, or automation).
- Visibility: Filter integrations based on their current status — Visible or Hidden.

Once filters are applied, the Integrations list will automatically update to show only the matching results. You can clear filters at any time by selecting Clear All in the Filter menu.

See also:
- How to Access and Manage Each Asset’s Integration List in Your Organization from the Admin Console
- How to View Your Organization's Integration Logs from the Admin Console
- How to Manage Payment Integration Settings Organization-Wide in the Admin Console
- How to Configure Organization-Wide Email Settings in the Admin Console
- How to View Organization-Wide Logs in the Admin Console

Send Comment: