As an admin, maintaining a high-level view of organizational efficiency is critical. The Admin Console provides a centralized hub where you can monitor, modify, and analyze every workflow within your organization, regardless of the original creator. This guide walks you through accessing the workflow management tools, enabling you to optimize performance through real-time analytics and direct submission oversight.
 How to Archive or Unarchive Workflows in Your Organization from the Admin Console
 How to Trash or Restore Workflows in Your Organization from the Admin Console
 How to Analyze Workflow Usage in your Organization from the Admin Console
 How to Enable or Disable Individual Workflows in Your Organization from the Admin Console
Viewing and Managing Options
- View Workflow: Use this to view the live workflow.
- View Analytics: Use this to view the workflow’s analytics.
- Edit Workflow: Click this option to open the workflow in Builder Mode and change its design, settings, or logic.
- View Submissions: View submissions related to the workflow.
- Archive: Move the workflow to the archive for storage without deleting it.
- Unarchive: Restore an archived workflow to active status.
- Move to Trash: Use this to delete the workflow.
- Restore: Recover a trashed workflow and return it to active status.
- Purge: Permanently delete the workflow from the Trash.
Process
Let’s walk through the process of accessing these options together:
- In the Admin Console, click on Assets on the left-hand menu.
- Next, click on Workflows to load all workflows on your server.
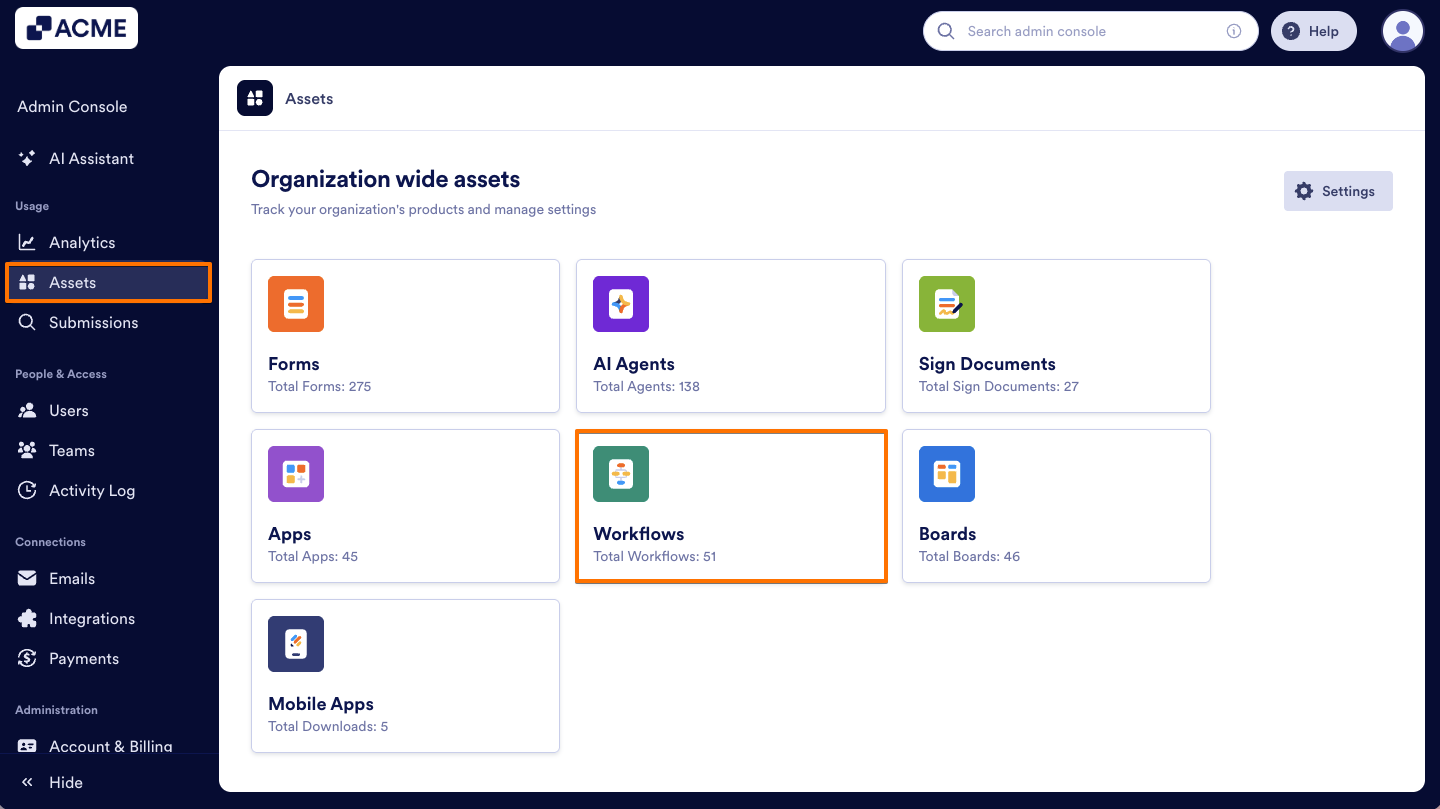
- Now, find the workflow you’d like to manage and click on the Three dots icon to access the Menu.
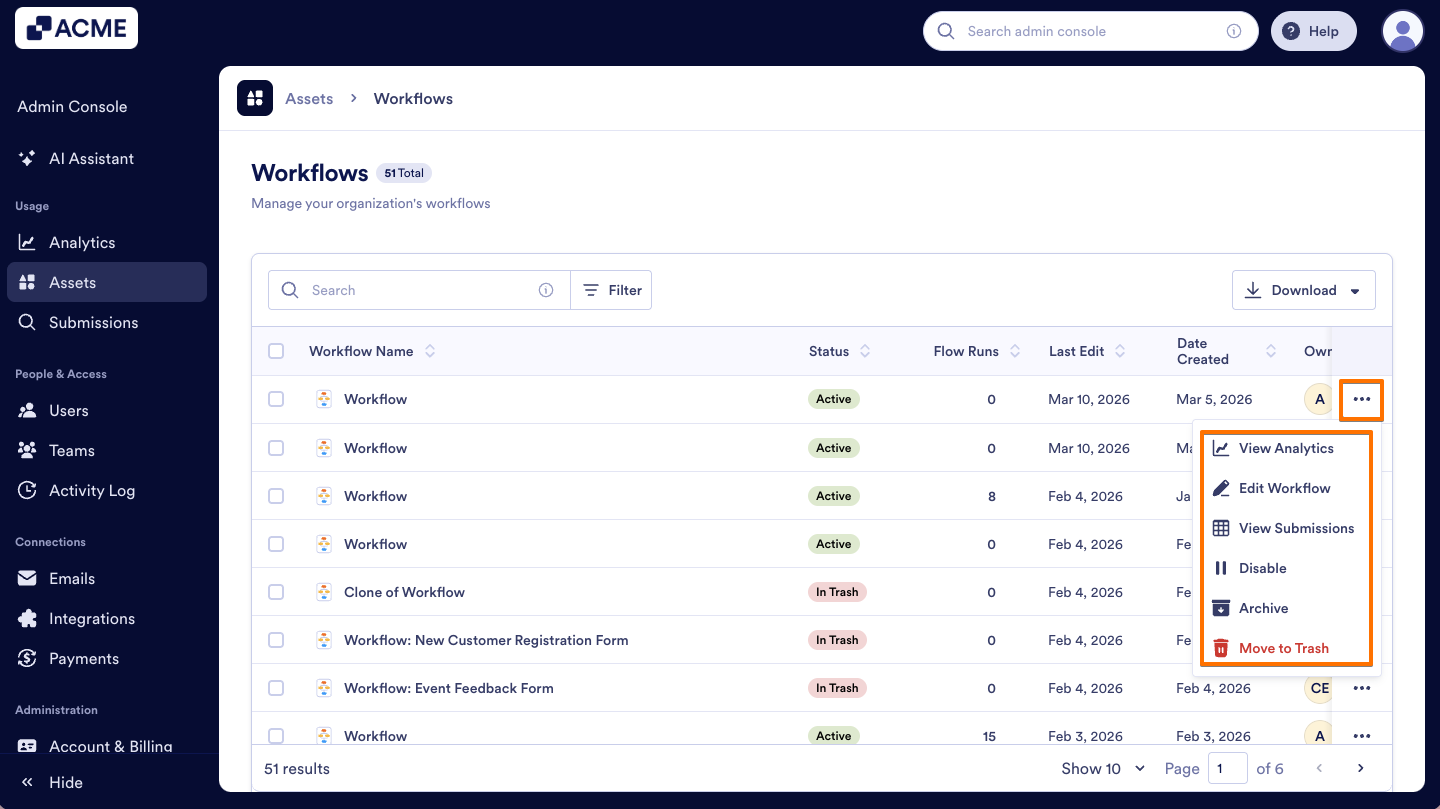
After accessing the menu, we can start selecting the options. Here’s what you can do:
View Analytics
- Select the View Analytics option from the menu.

- You will be taken to the page where all the data about your workflow is displayed, including flow runs and participants.
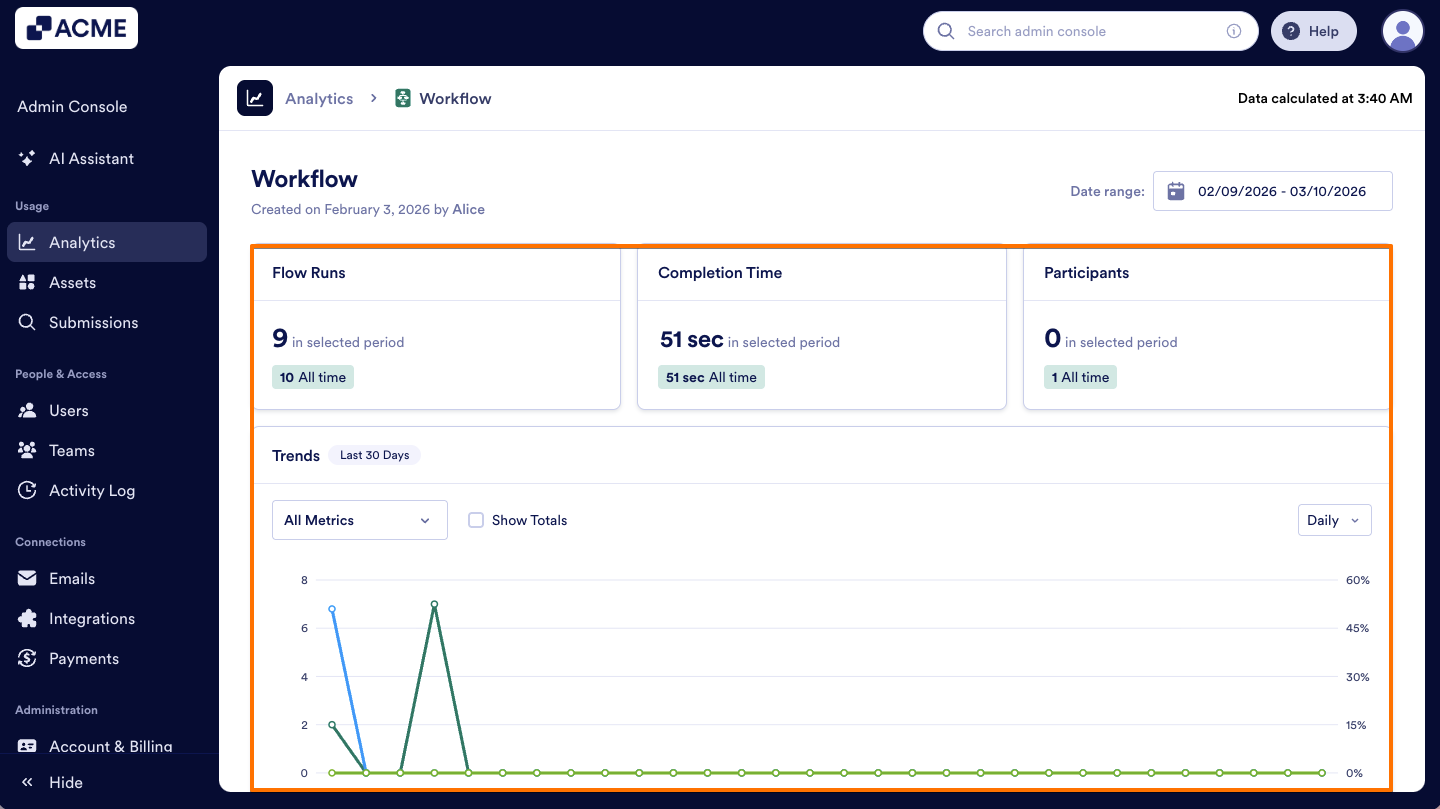
For more information about Workflow Analytics, you can check out our guide: How to Analyze Workflow Usage in Your Organization from the Admin Console
Edit Workflow
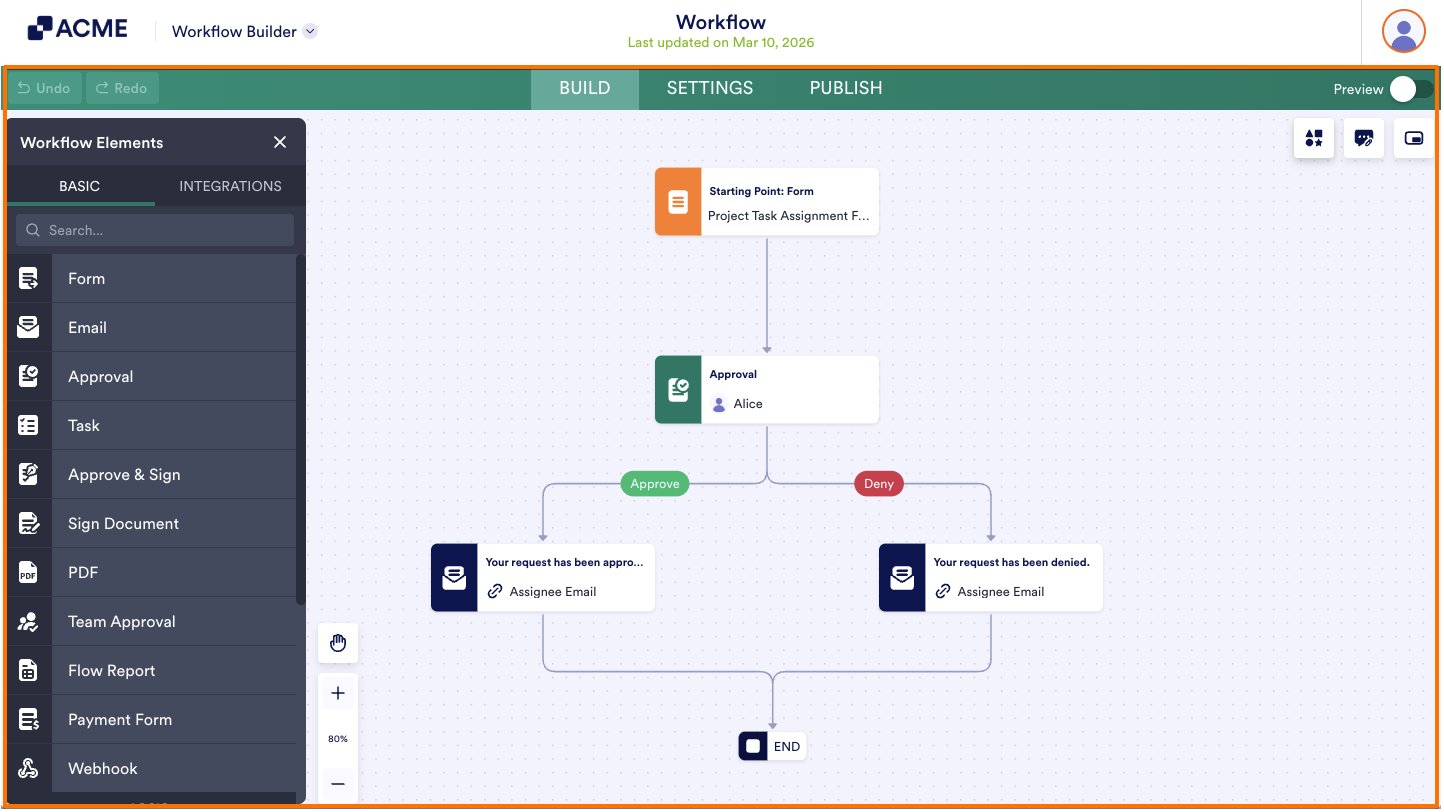
- Click on Edit Workflow.
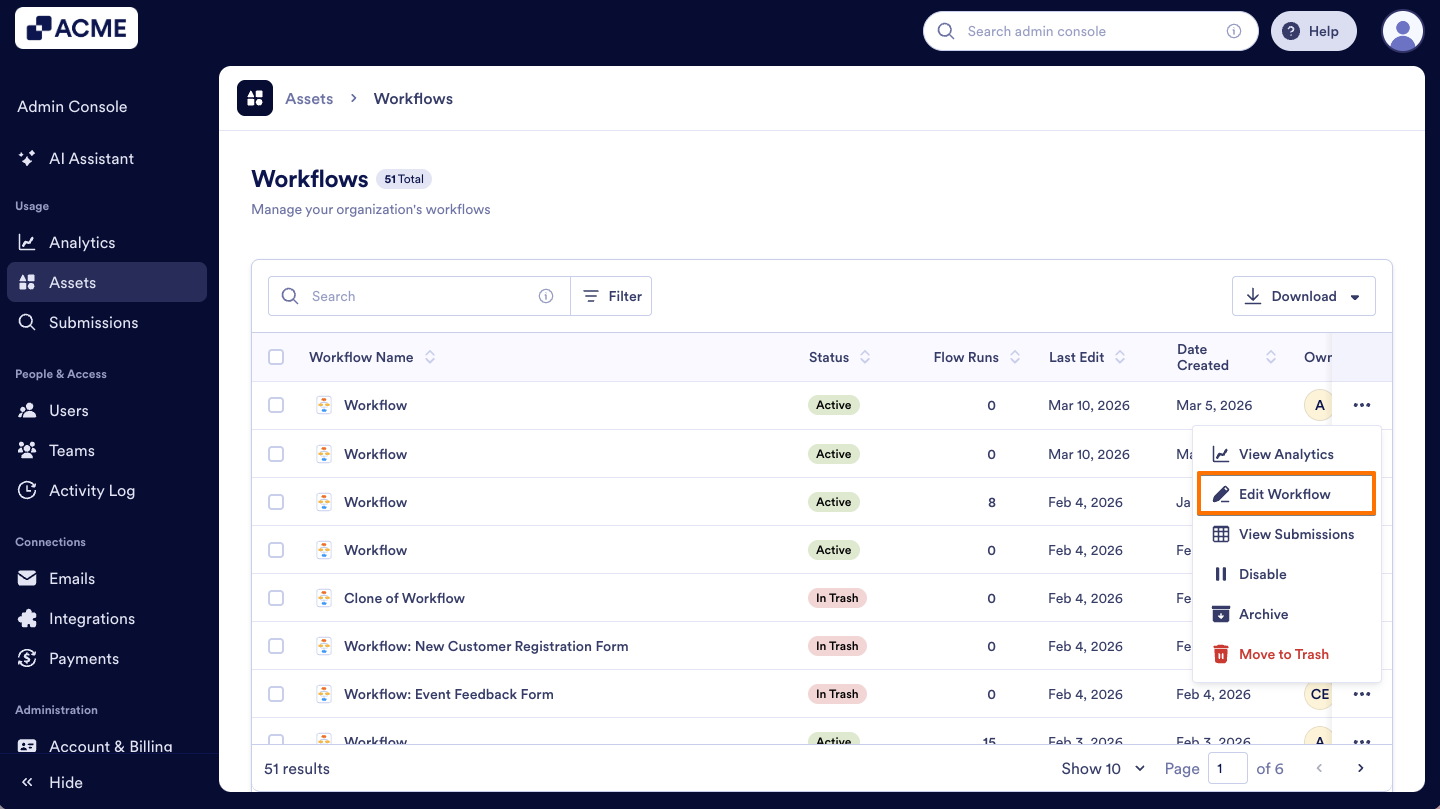
- This opens the Workflow Builder, where you can modify the workflow according to your needs.
Note
If the workflow belongs to another user, a red notification at the bottom of the page will display the asset owner’s username.
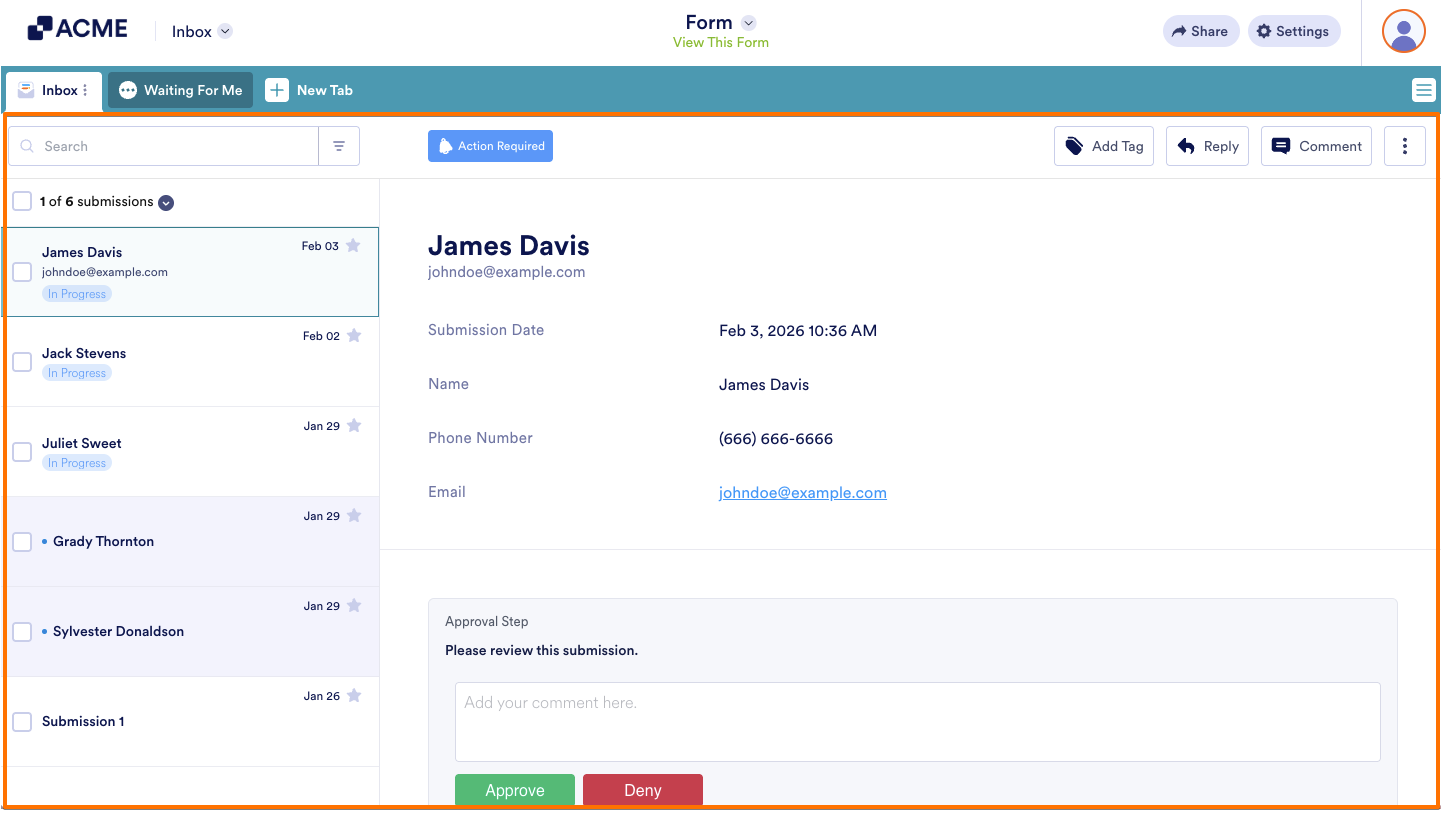
View Submissions
- From the menu, select View Submissions.
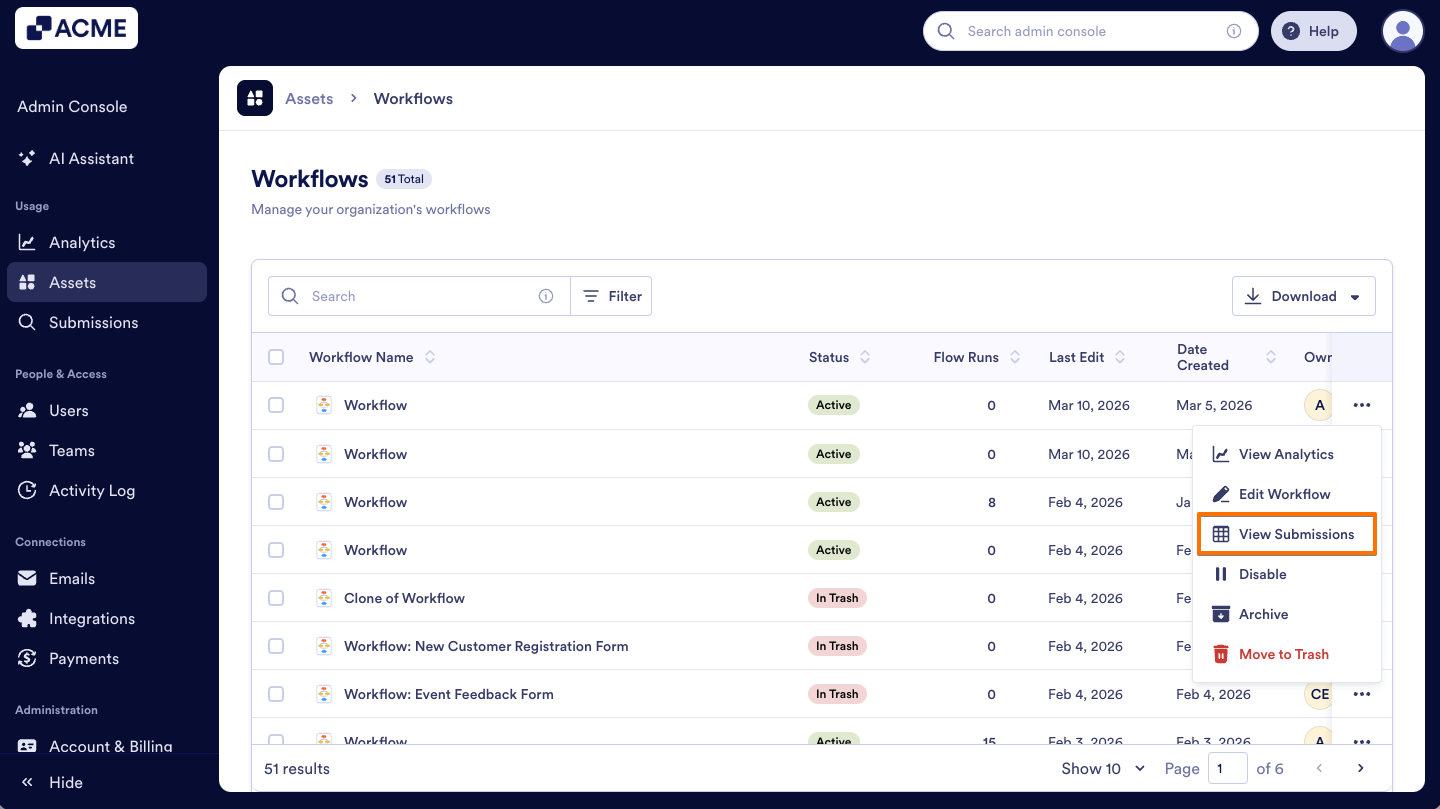
- You will be directed to the Inbox for that specific workflow to review all entry data.
To learn more about managing data within the Inbox, you can check out How to Search and Filter Submissions in Inbox and How to Download Submissions in Inbox.
Disable
- Select Disable from the Three dots menu.
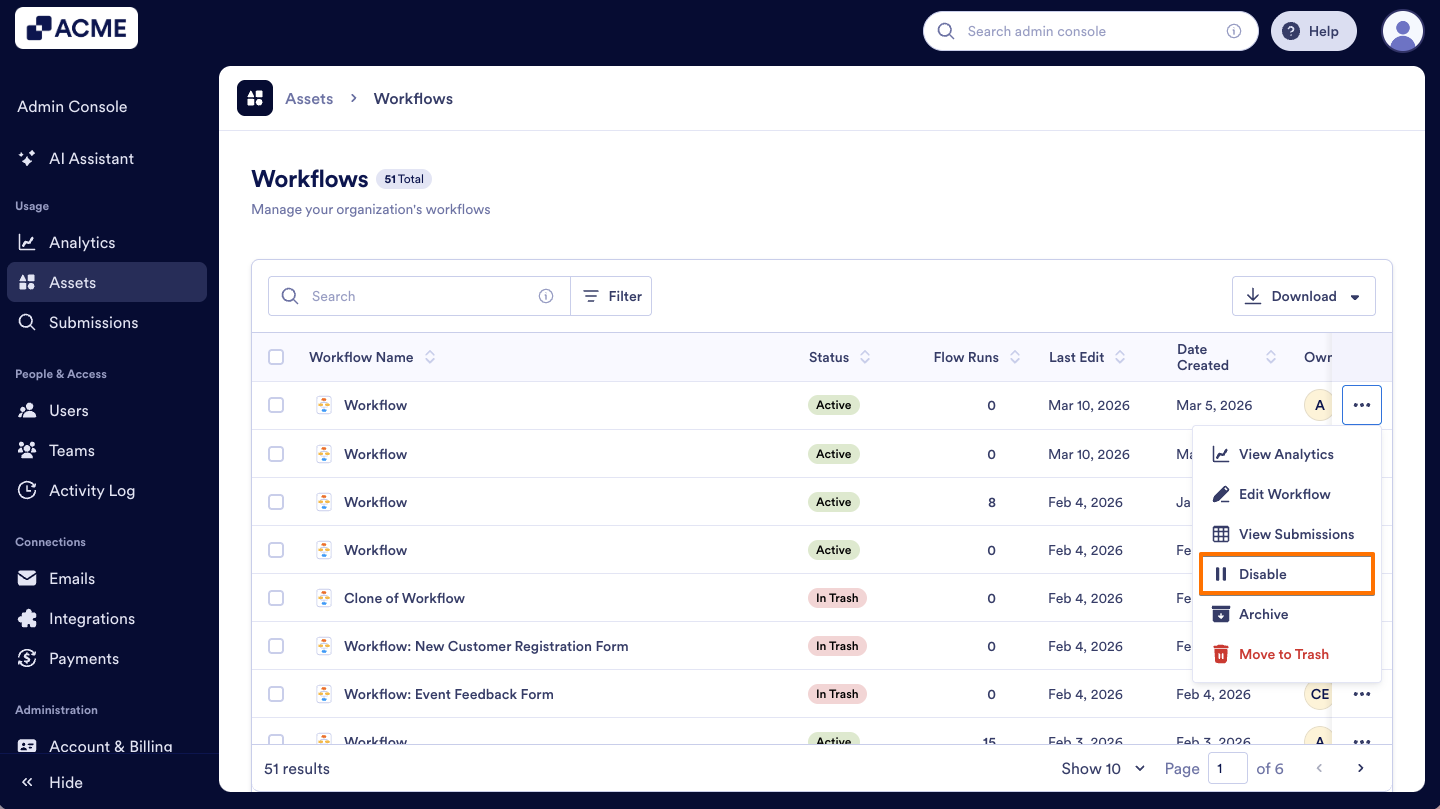
- After clicking, your assets will be Disabled until you manually enable them again

To learn more about disabling and enabling workflows, check out our guide: How to Enable or Disable Individual Workflows in Your Organization from the Admin Console
Archive
- In the menu, select Archive.

- Now your workflow will be stored and will no longer be active, keeping it accessible for future reference without cluttering your main workspace.

To unarchive the workflow or perform these actions in bulk, refer to our guide: How to Archive or Unarchive Workflows in Your Organization from the Admin Console
Move to Trash
- In the Three dots menu, select Move to Trash.
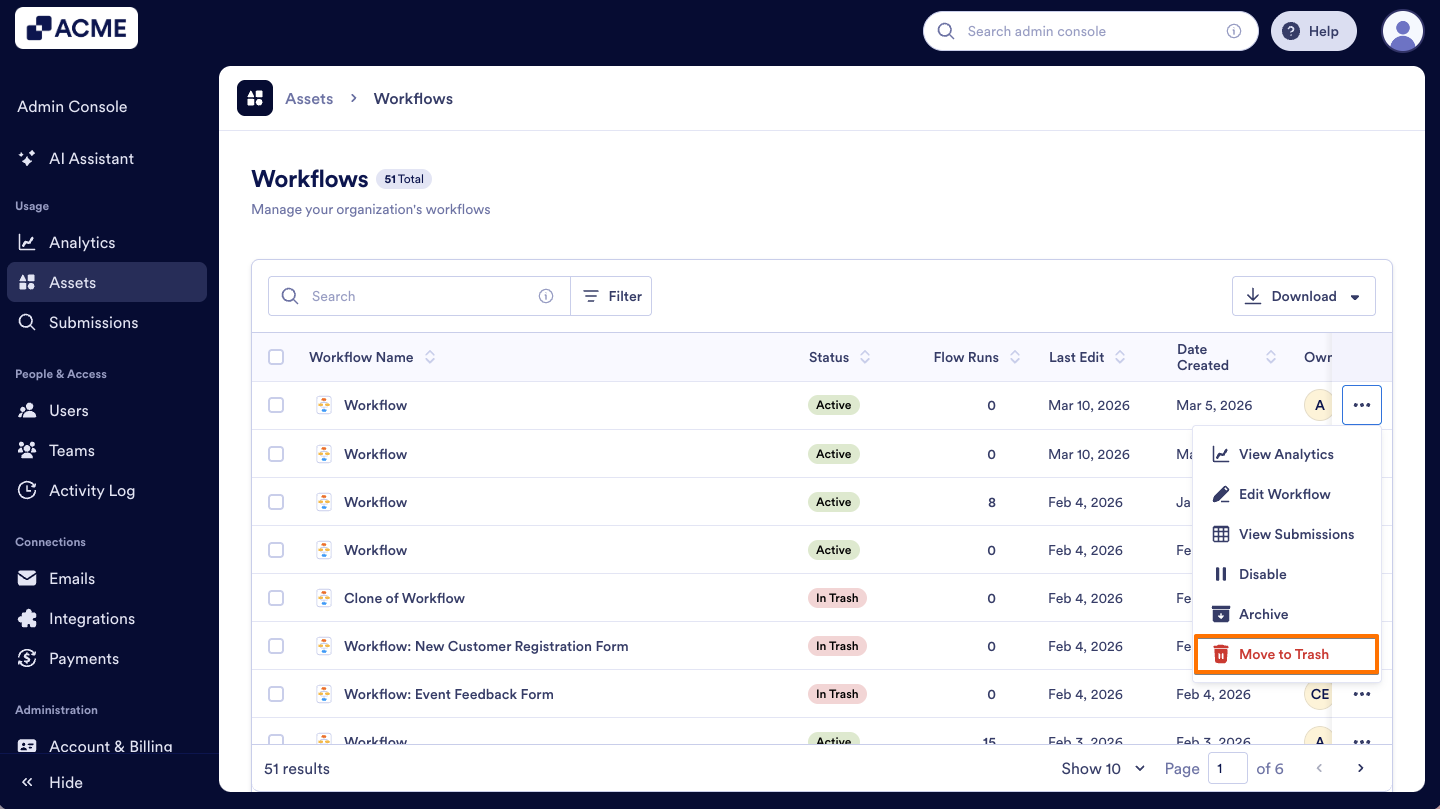
- After deleting the workflow, it will be moved to the creator’s Trash.

For more detailed information, check out our guide: How to Trash or Restore Workflows in Your Organization from the Admin Console
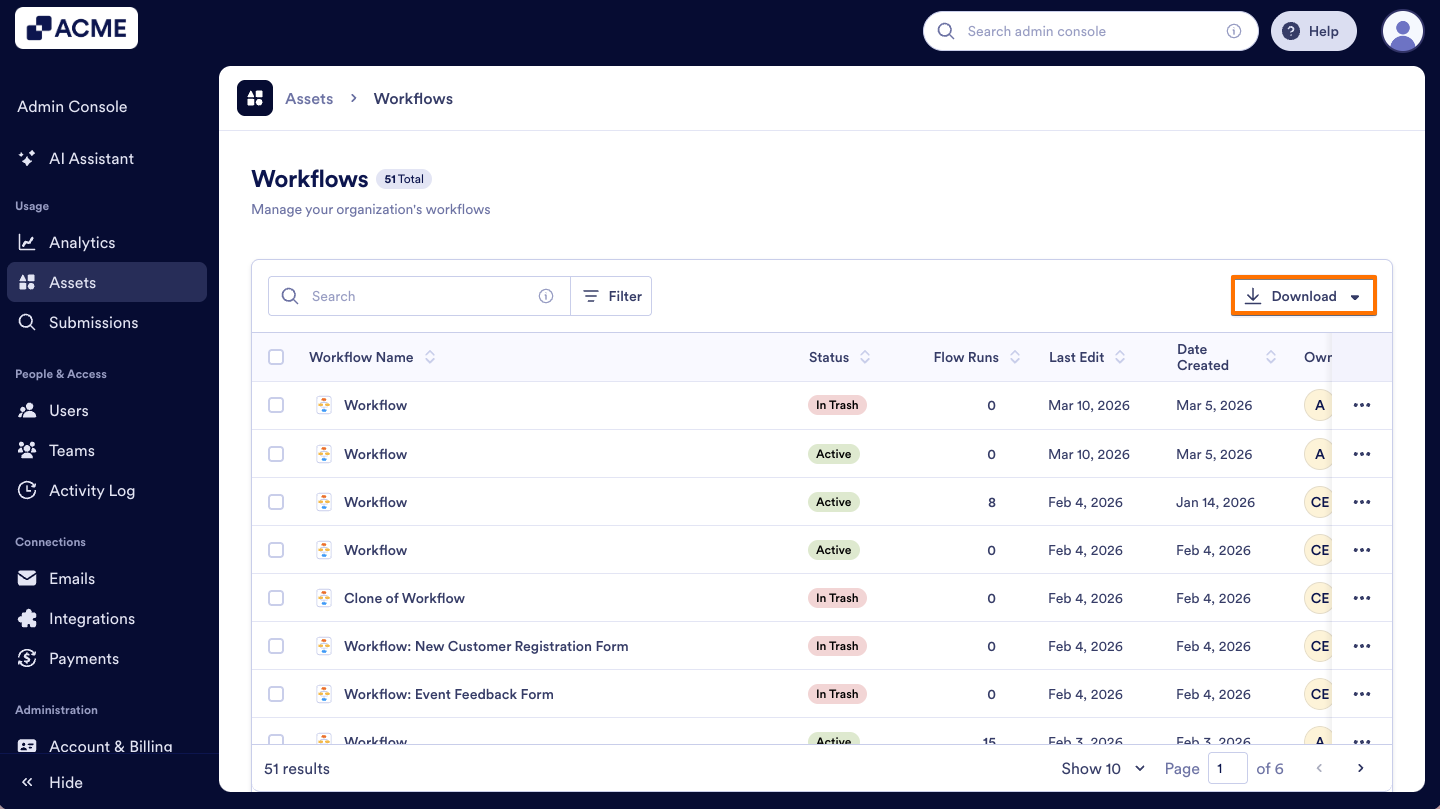
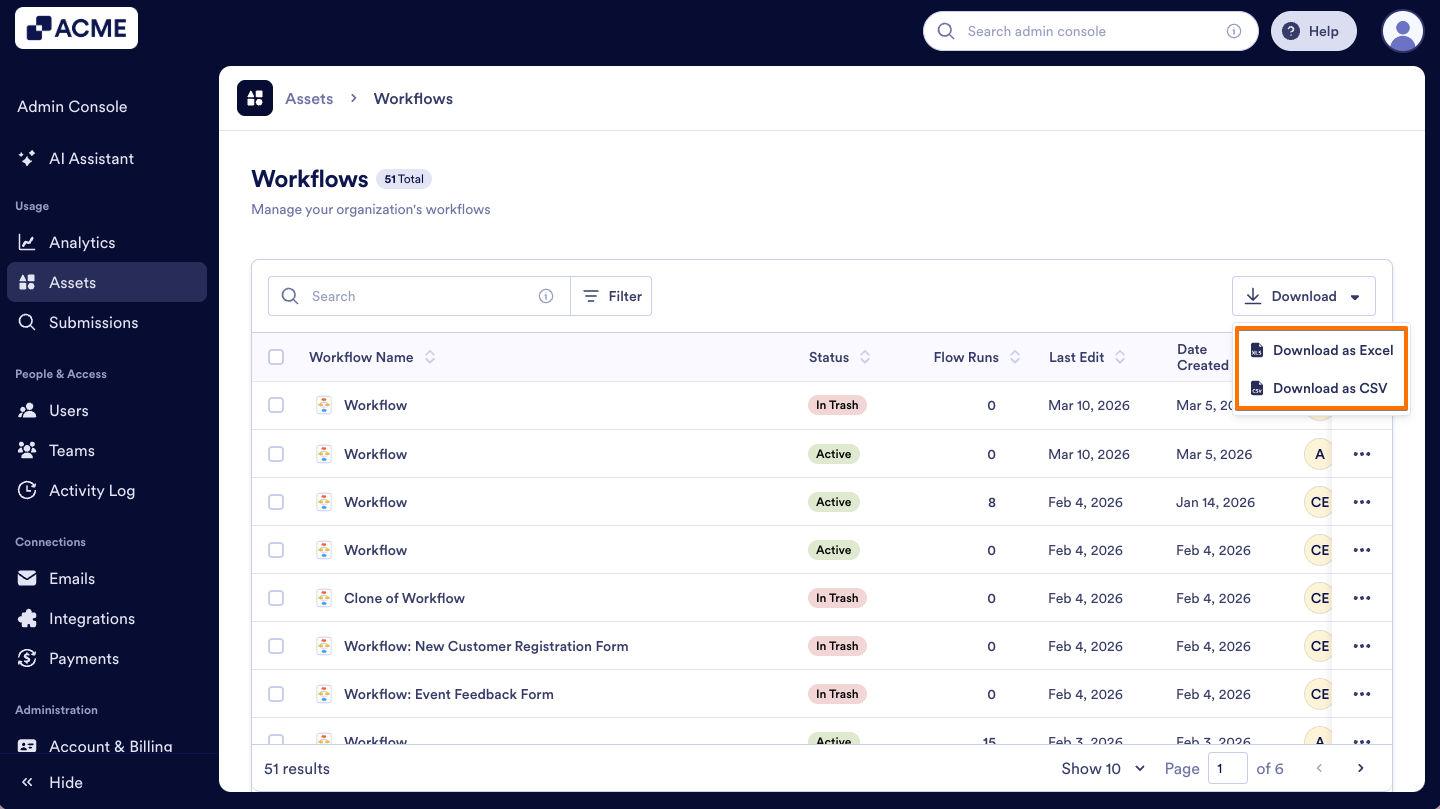
Downloading Workflow Information
You can also download a quick overview of document information, including the Workflow ID, owner, and edit/creation dates:
- In the Workflow Assets page, on the upper right of the list, click on the Download dropdown.
- And select Download as CSV or Download as Excel.
Filtering Workflows
The Filter menu allows you to drill down into specific subsets of your organization's data. Here's how:
- In the Admin Console’s Workflows Assets page, click the Filter button on the right side of the Search bar.
- Select filters based on your search criteria, and the matching workflows will appear automatically.
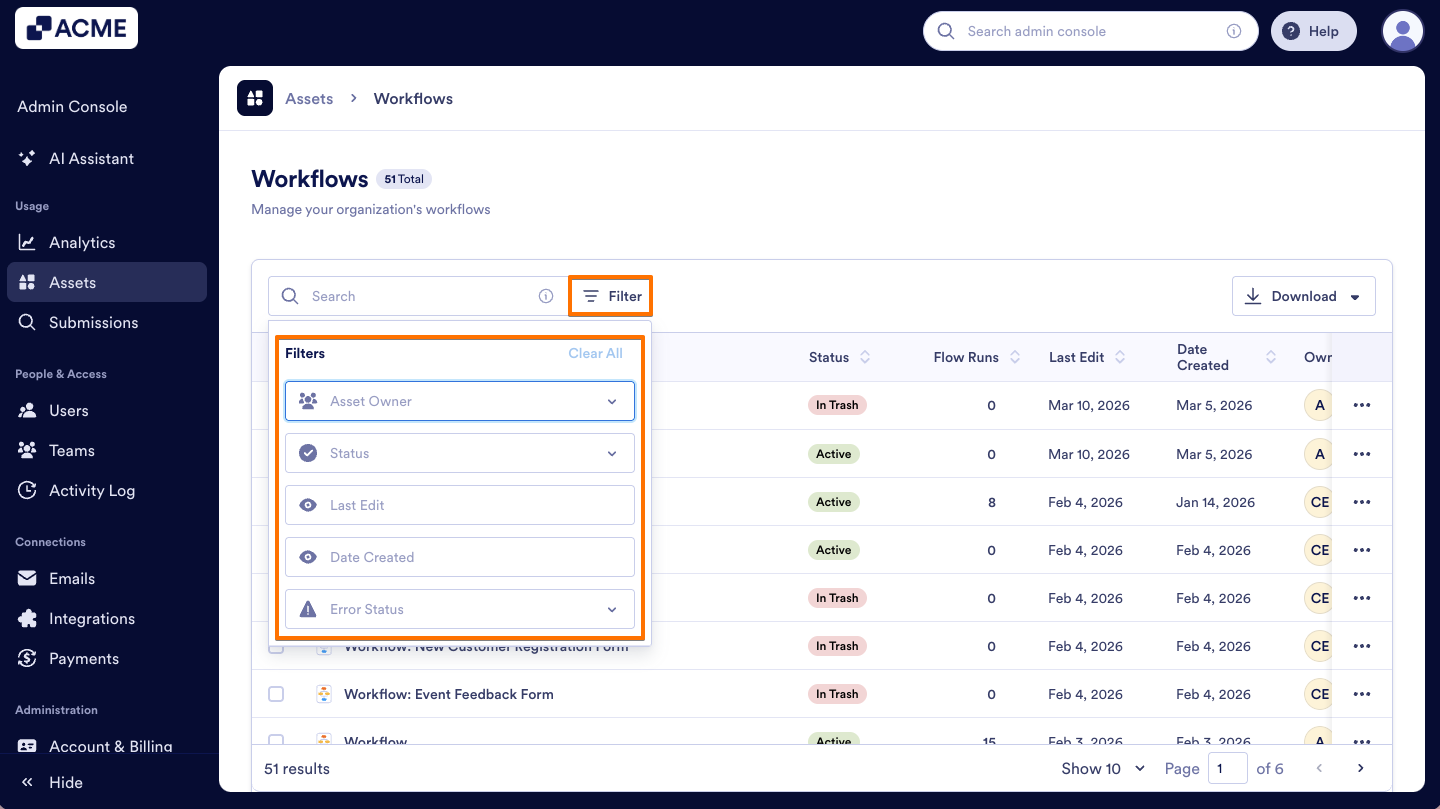
- Asset Owner: Filter between workflows owned by individual Users or those owned by a Team.
- Status: View workflows that are Active, Auto-disabled, Disabled, In Trash, or Archived.
- Last Edit: Filter workflows by the date they were last modified.
- Date Created: Filter workflows by their creation date.
- Error Status: Filter for workflows With or Without Errors to quickly identify and troubleshoot technical blockers.
- Finally, if you want to delete all filters, you can click on Clear All.

How to Search Workflows
Use the Search Bar at the top of the workflow list to quickly locate specific workflows, as shown in the screenshot below:

You can search using any of the following criteria:
- Workflow Name or ID: Find a specific process by its title or unique identifier.
- Owner Information: Search by the Name or Email of the individual who created the workflow.
Sorting the Workflows
To organize your workflows by a specific category, simply click on the Column Header of the data you wish to prioritize.
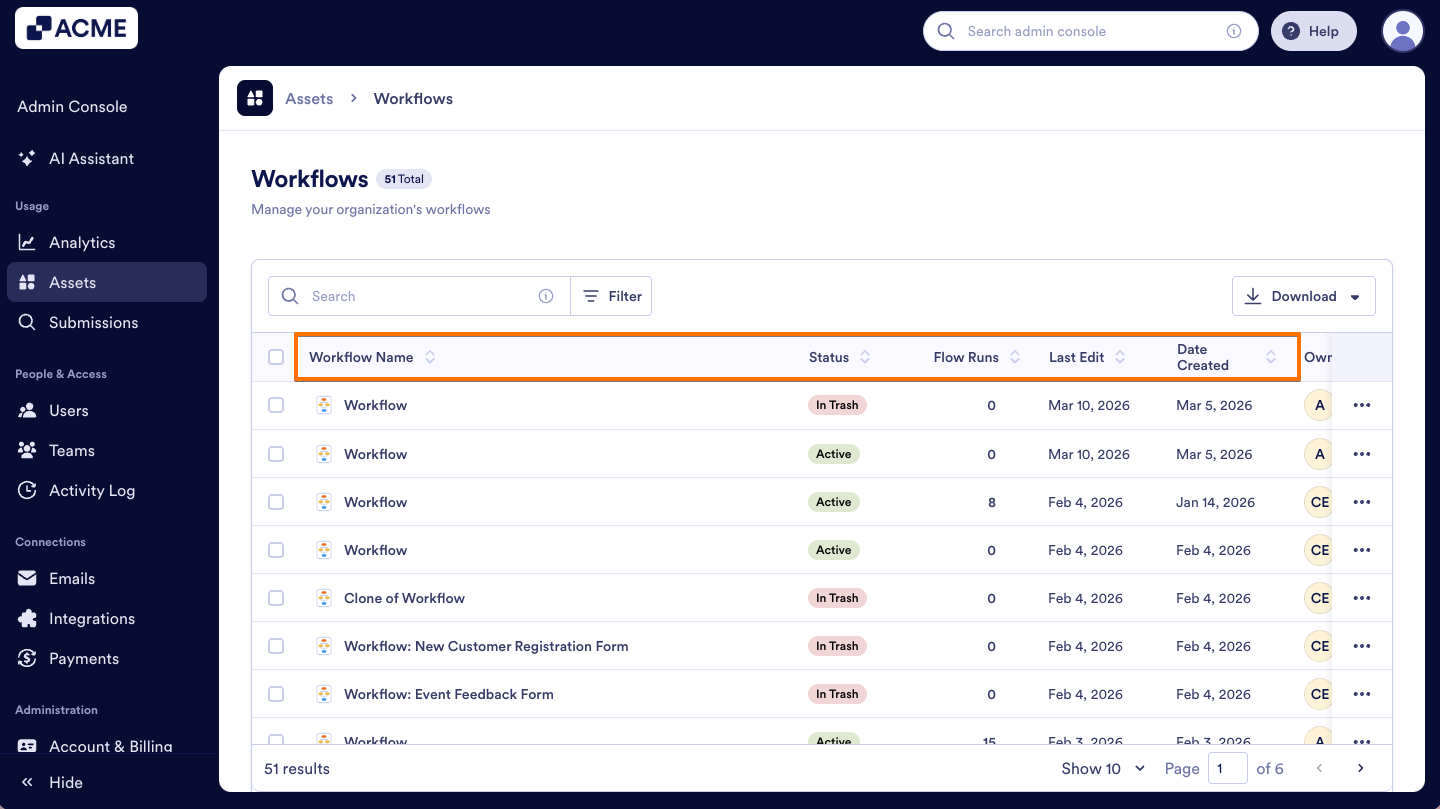
- Workflow Name: Click to arrange your list alphabetically (A-Z or Z-A).
- Status: Group workflows by their current operational state to view all Active, Disabled, Auto-disabled, Trashed, and Archived items together.
- Flow Runs: Sort by volume to identify your most active or underutilized processes.
- Last Edit: Click to sort workflows by most recently updated assets.
- Date Created: Click to sort workflows by your organization’s original creation order.
Note
Clicking a column header once will sort the data in ascending order (e.g., A-Z or oldest to newest). Clicking the same header a second time will reverse it to descending order.

Send Comment: