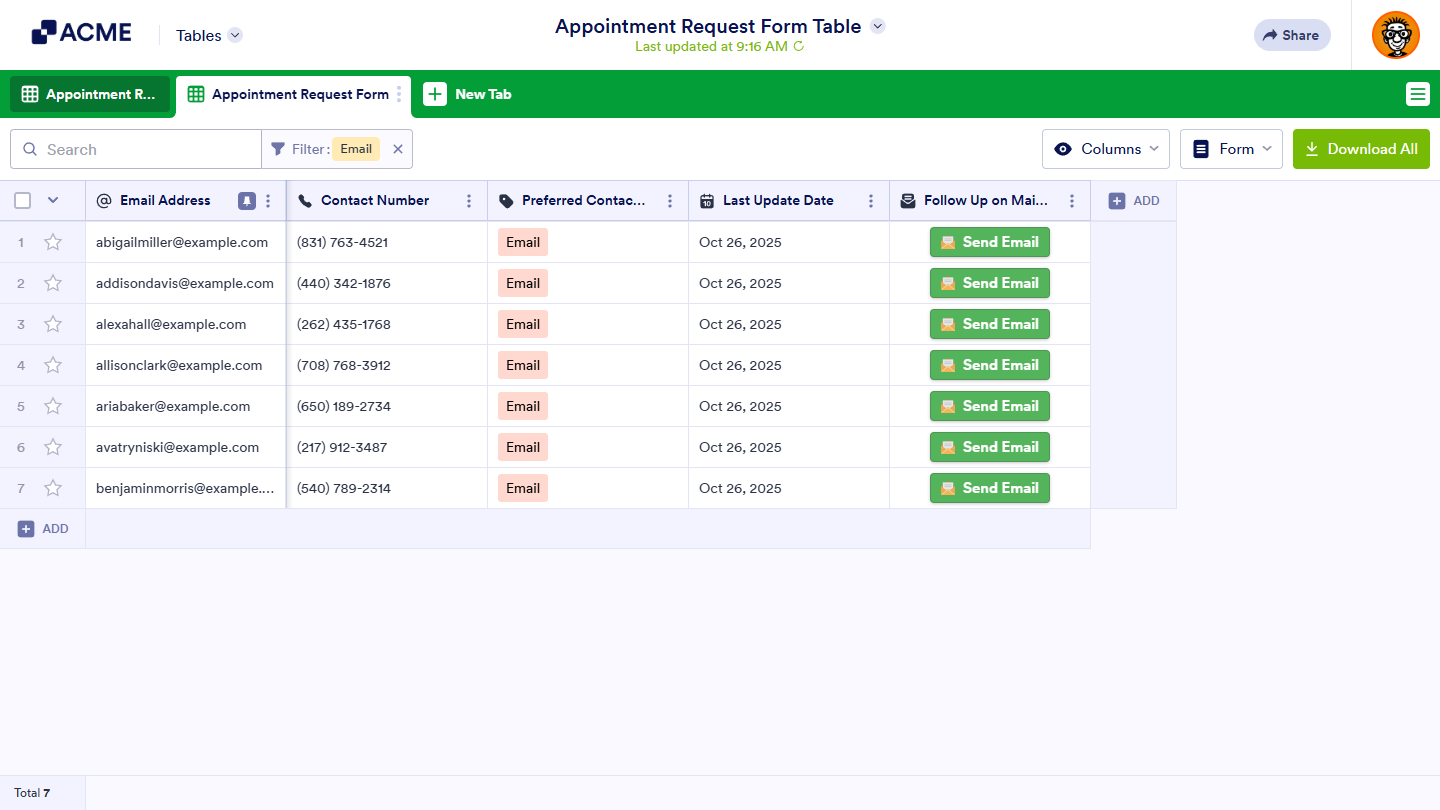
Tables provide an easy way to view and manage form submission data in one place. They’re designed for collaboration, so you and other users within your organization can review, organize, and work on shared data together.
Adding different views gives you the flexibility to display and interpret submissions in the format that fits your needs. Each view offers a unique way to organize and analyze data, helping teams and individuals stay on top of information that matters most.
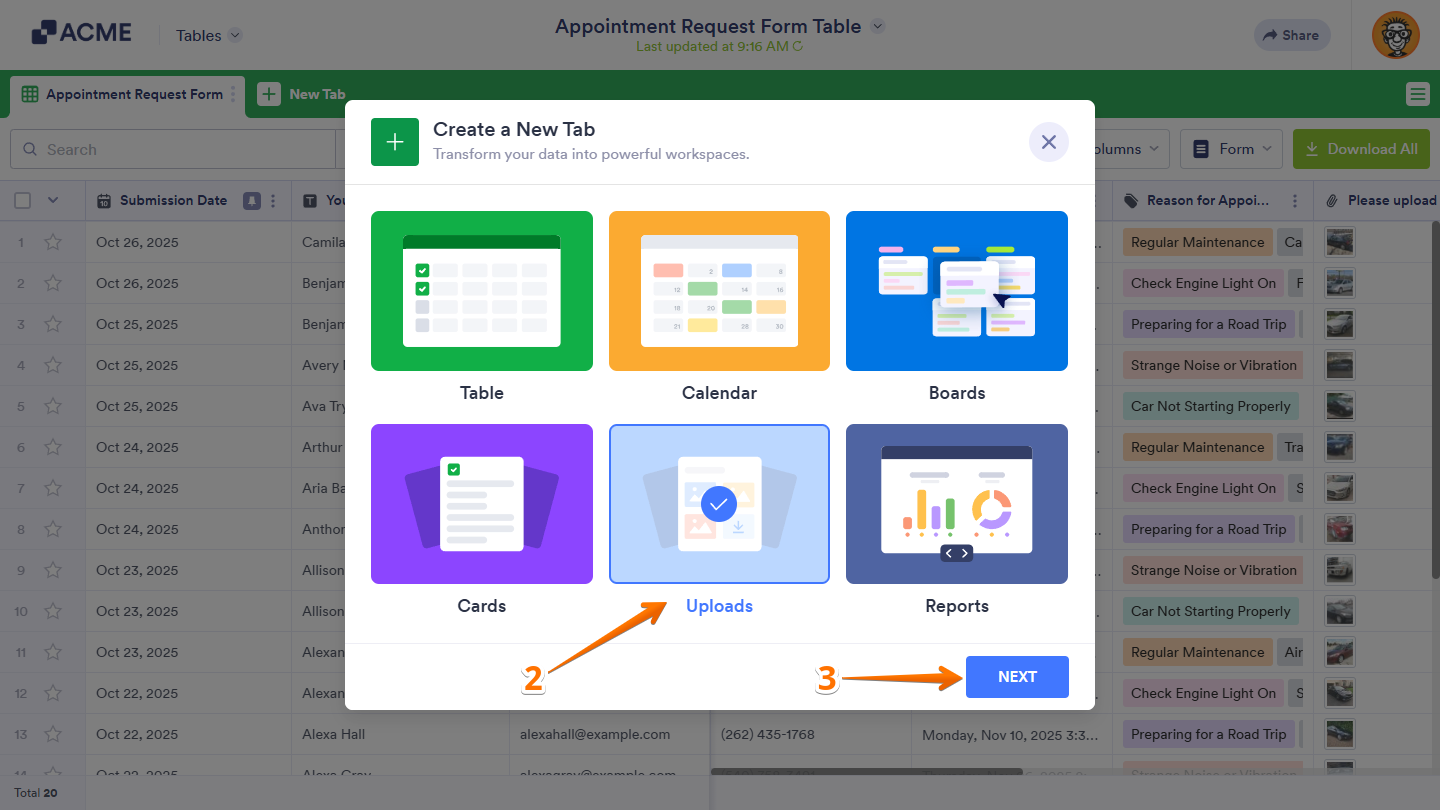
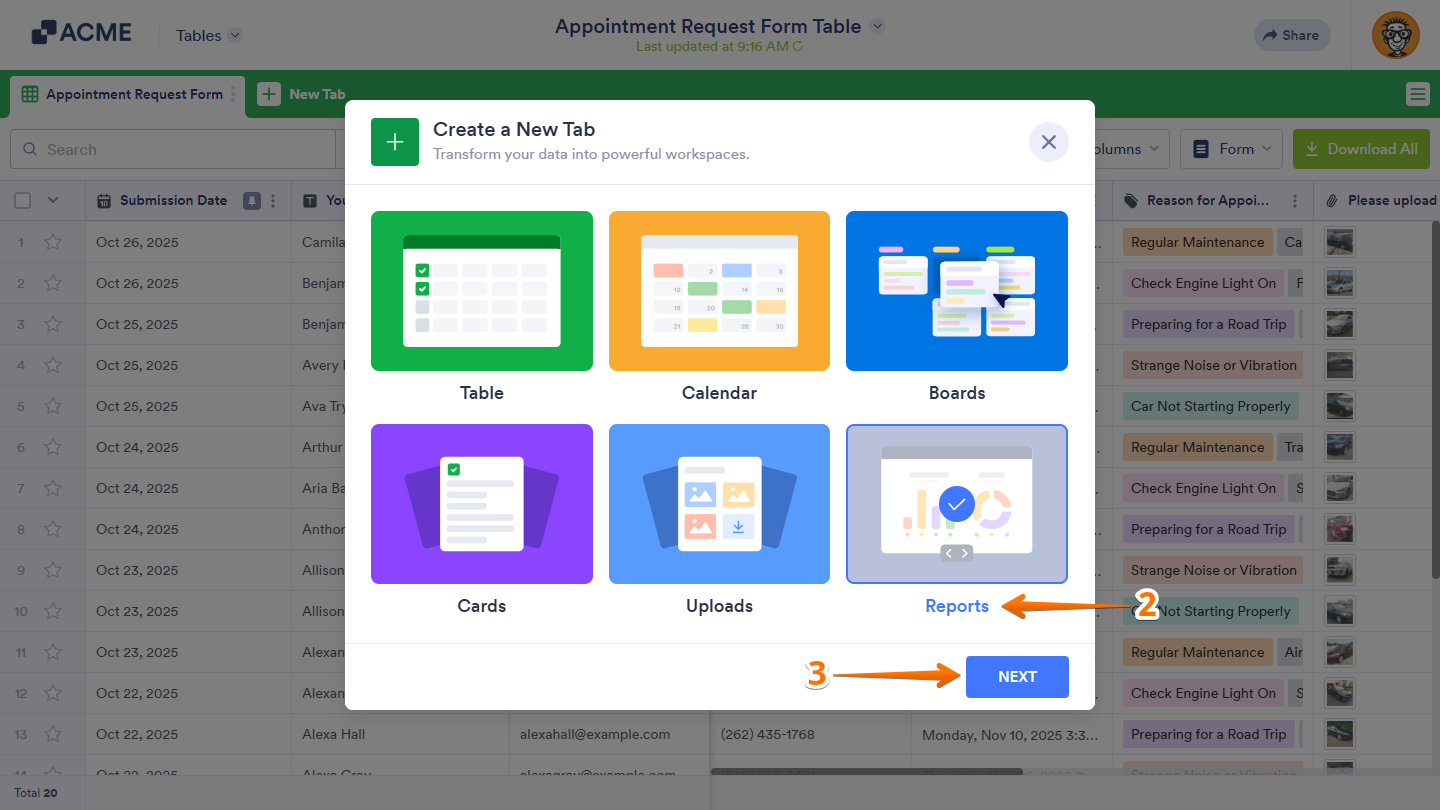
You can add any of the following view types to your table to manage submission data in different ways:
Creating Table View
Even though the main Table view is already available, you can add additional Table views on new tabs to focus on different sets of submission data by filtering or adjusting which columns are visible. This lets you analyze and organize information for specific purposes without changing the original Table view. You can set it up like this:
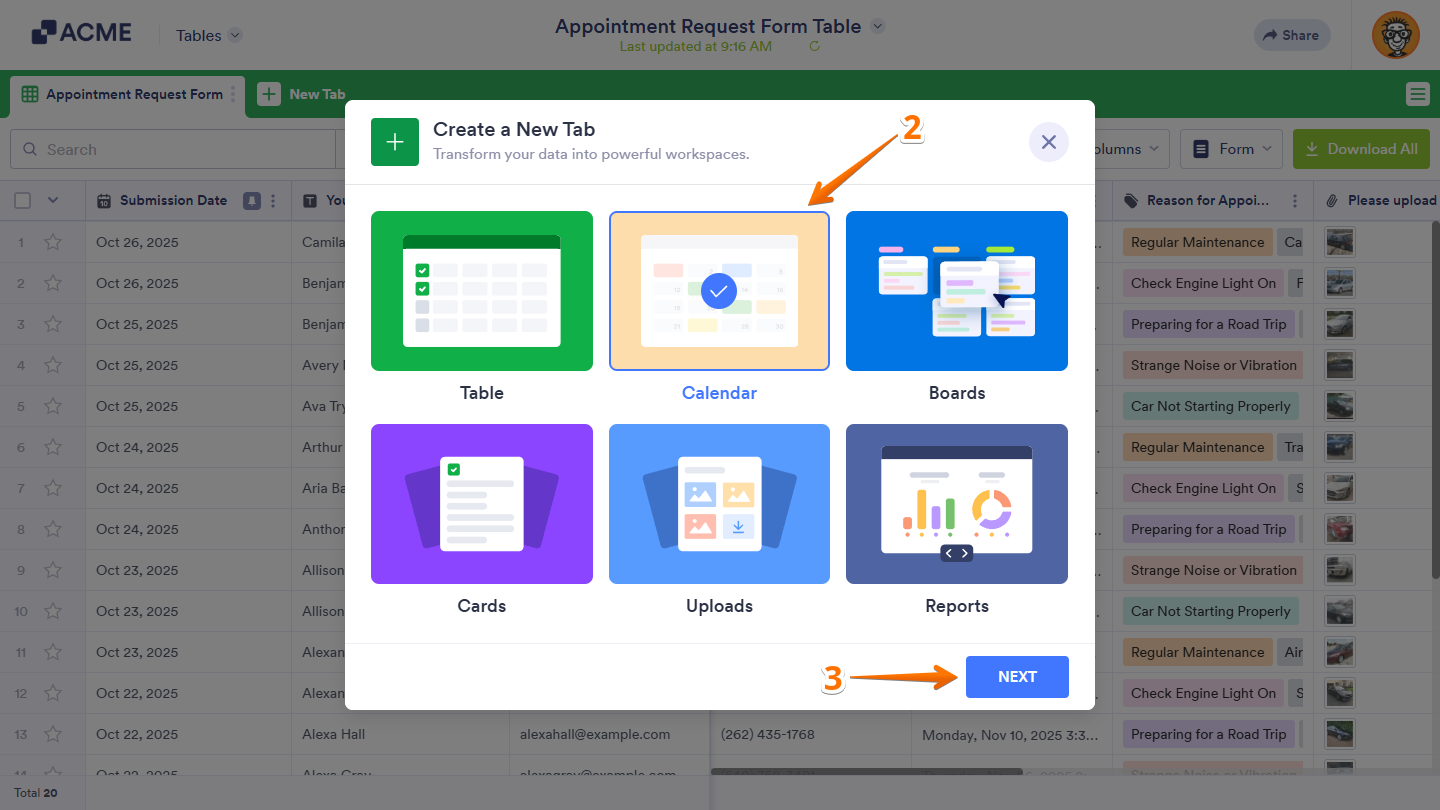
- In Tables, click on New Tab.
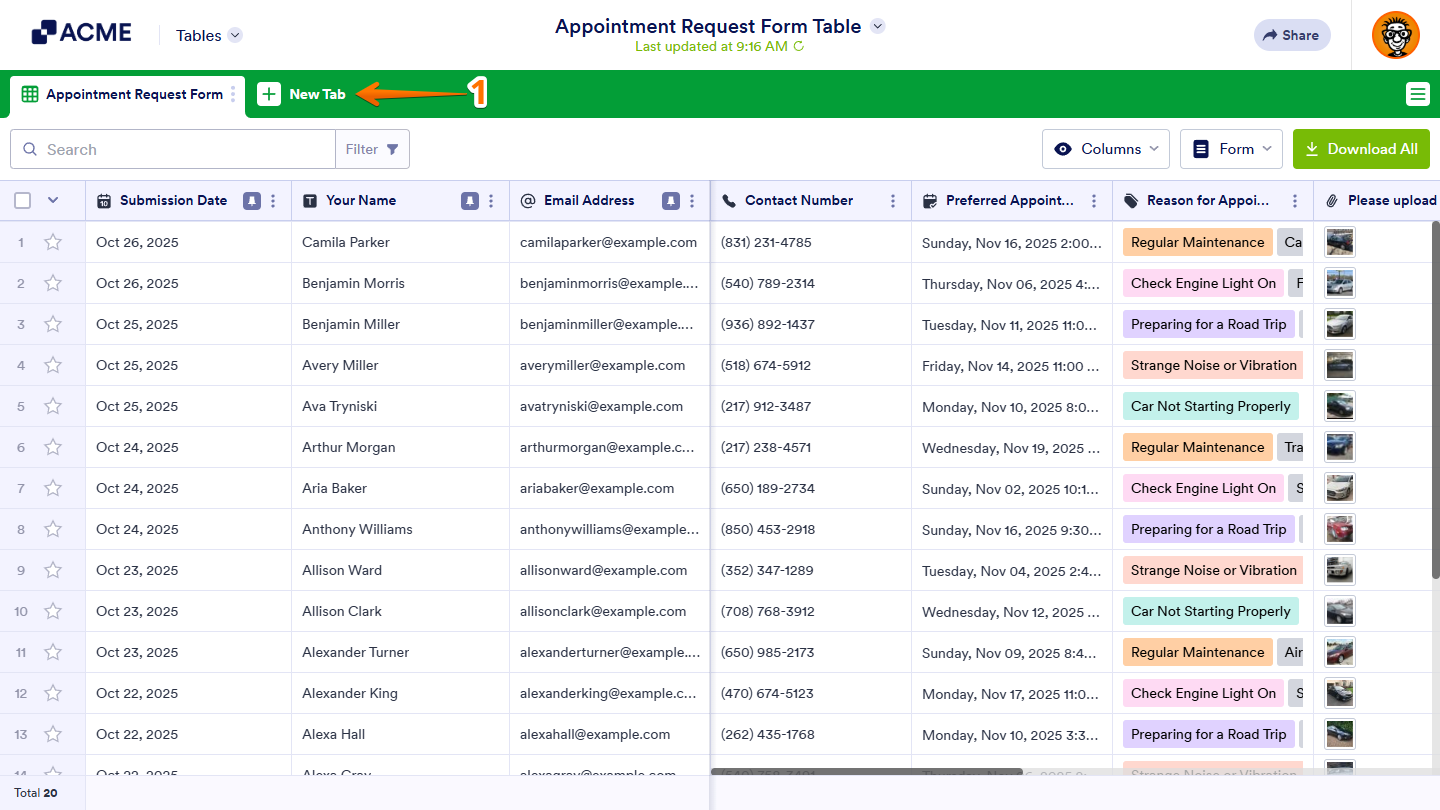
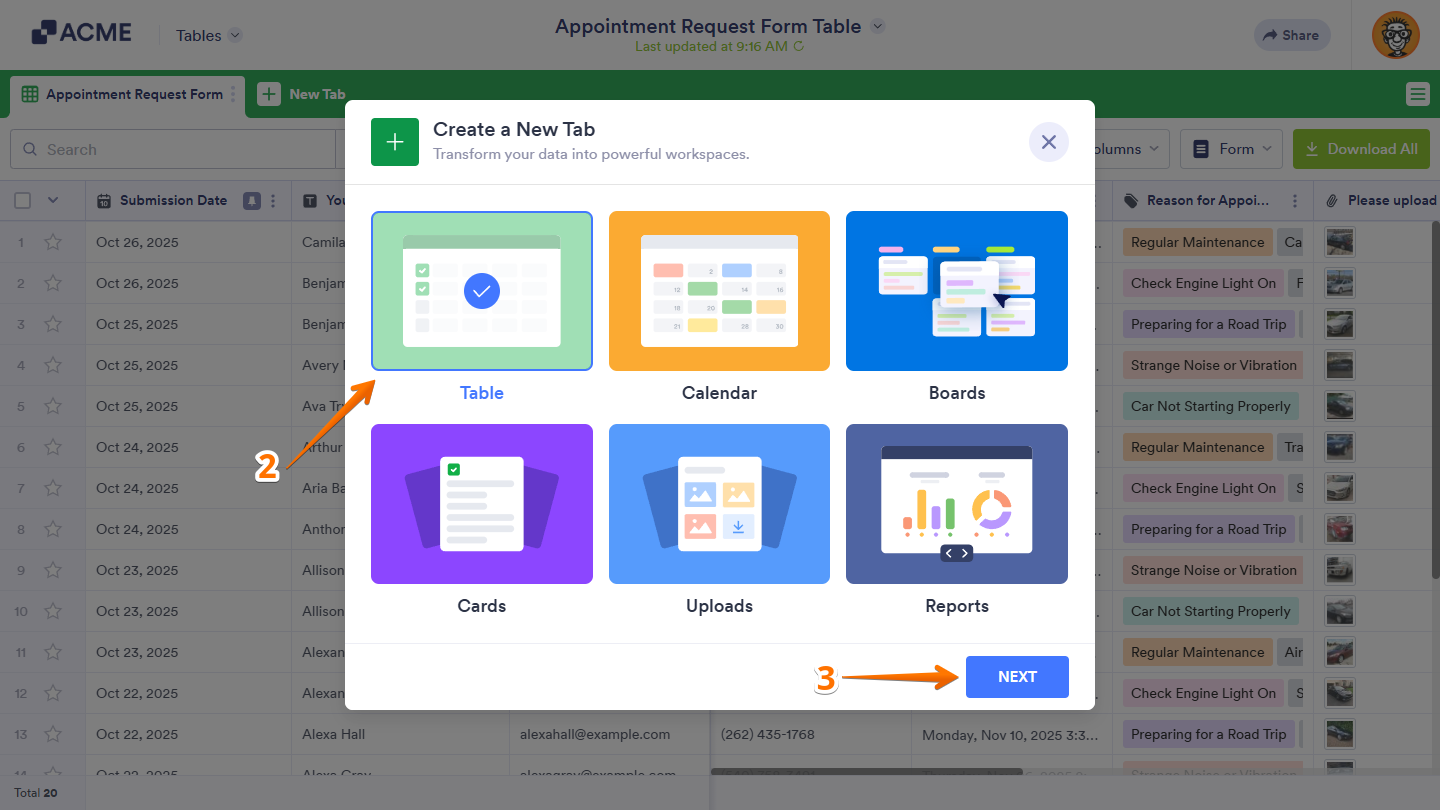
- Now, in the Create a New Tab window, select Table.
- Then, click on Next.
- In the Create Table View window, choose Connect to Form, and then click on Next.

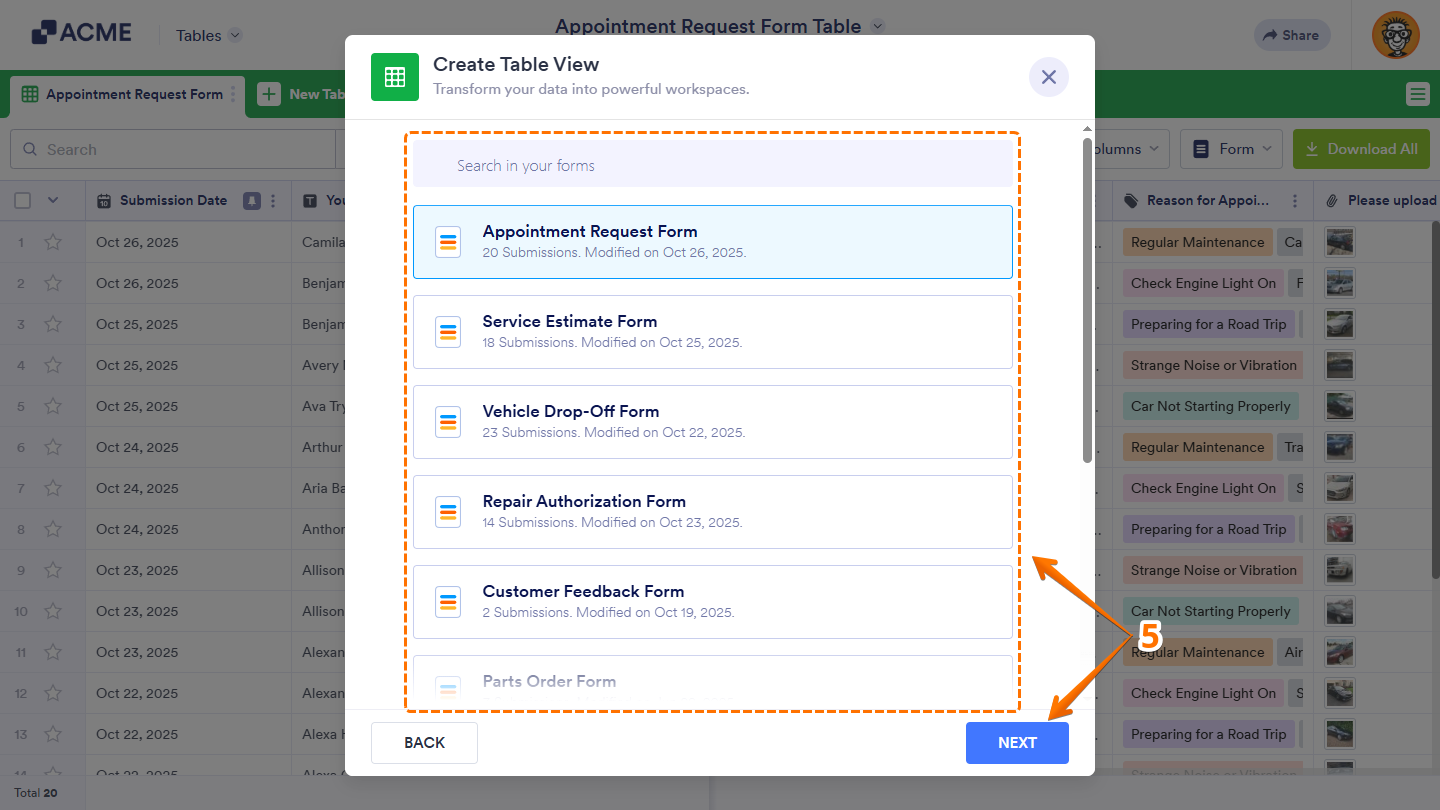
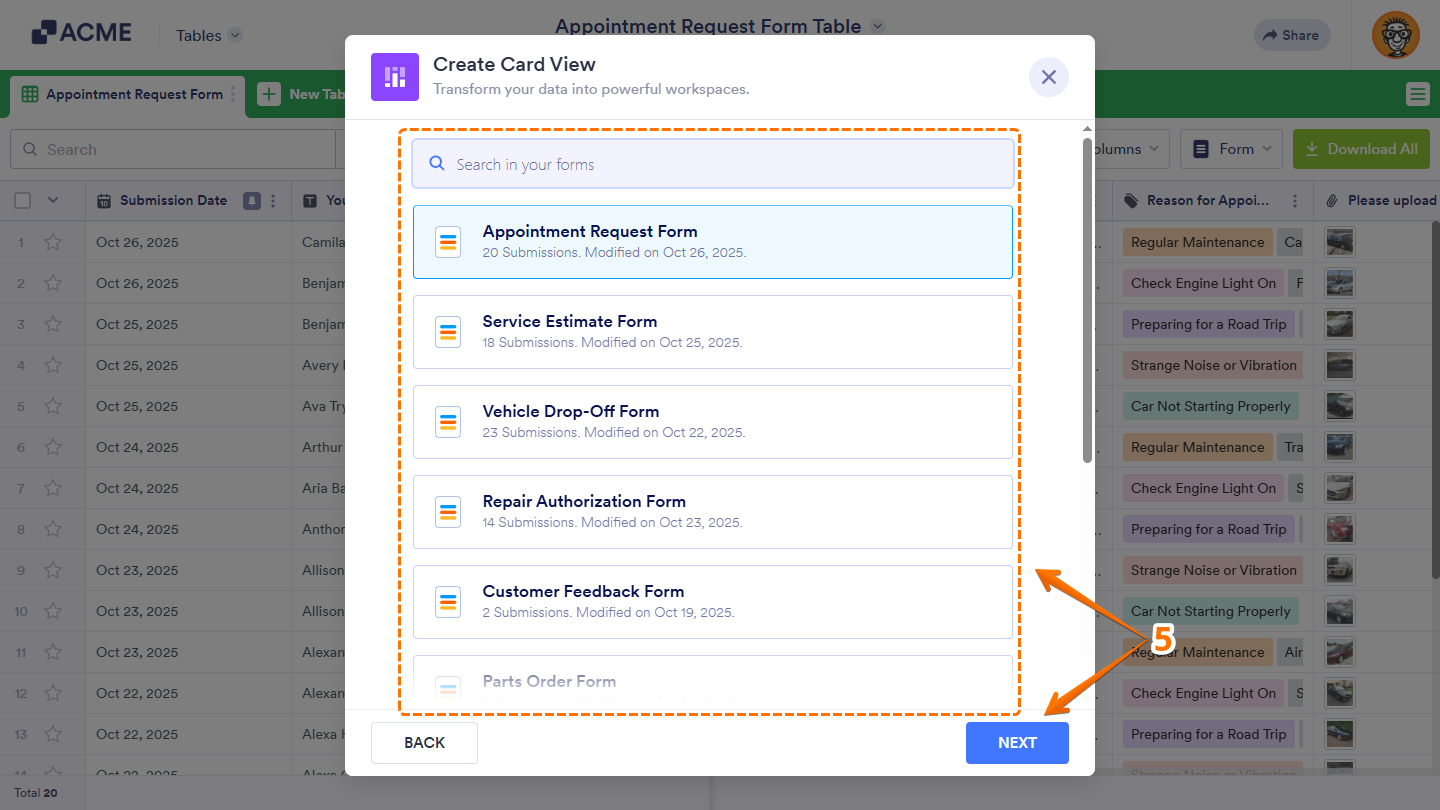
- Now, select the form you want to display submissions in a new or different Table view, and then click on Next again. Use the Search bar at the top of the form list to find a specific one easily.
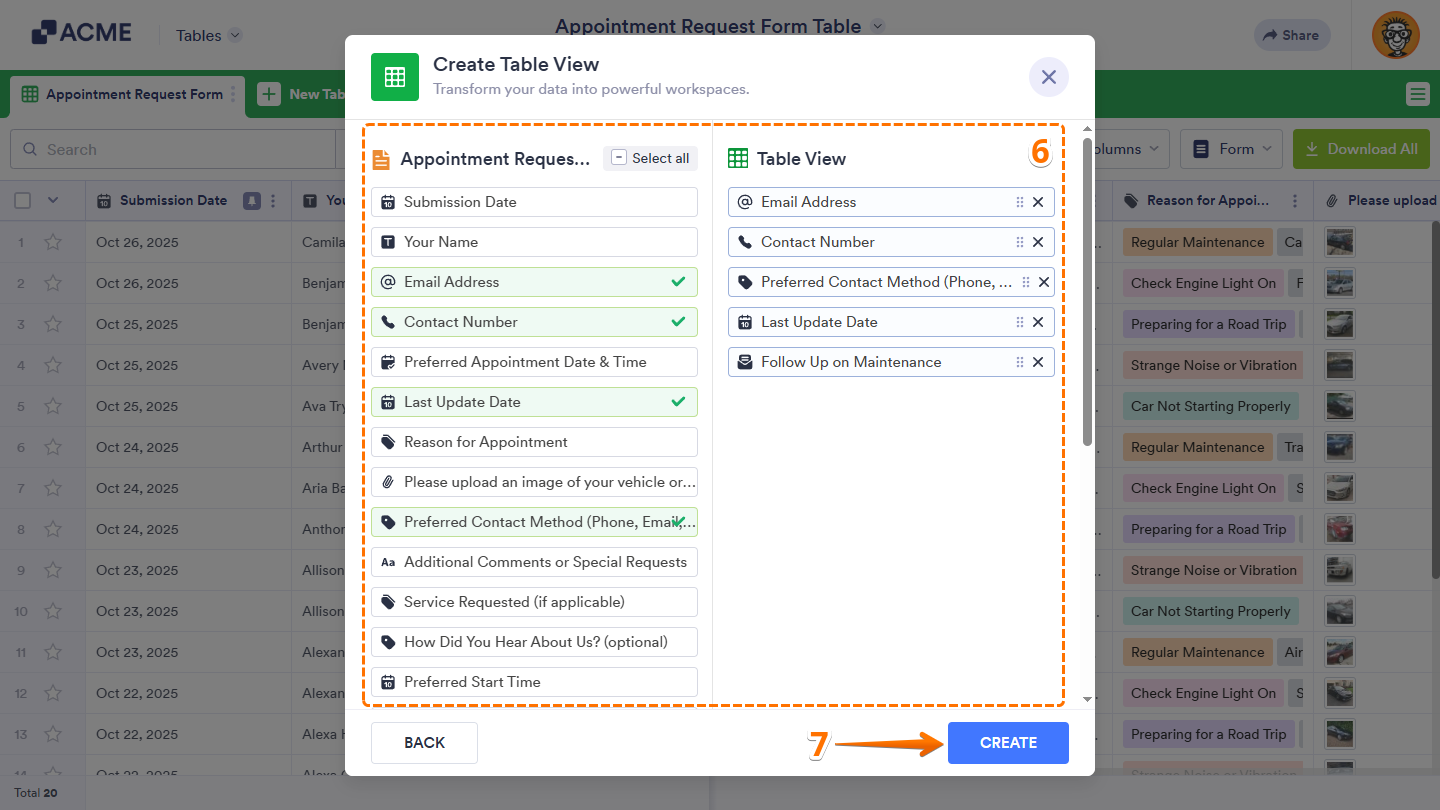
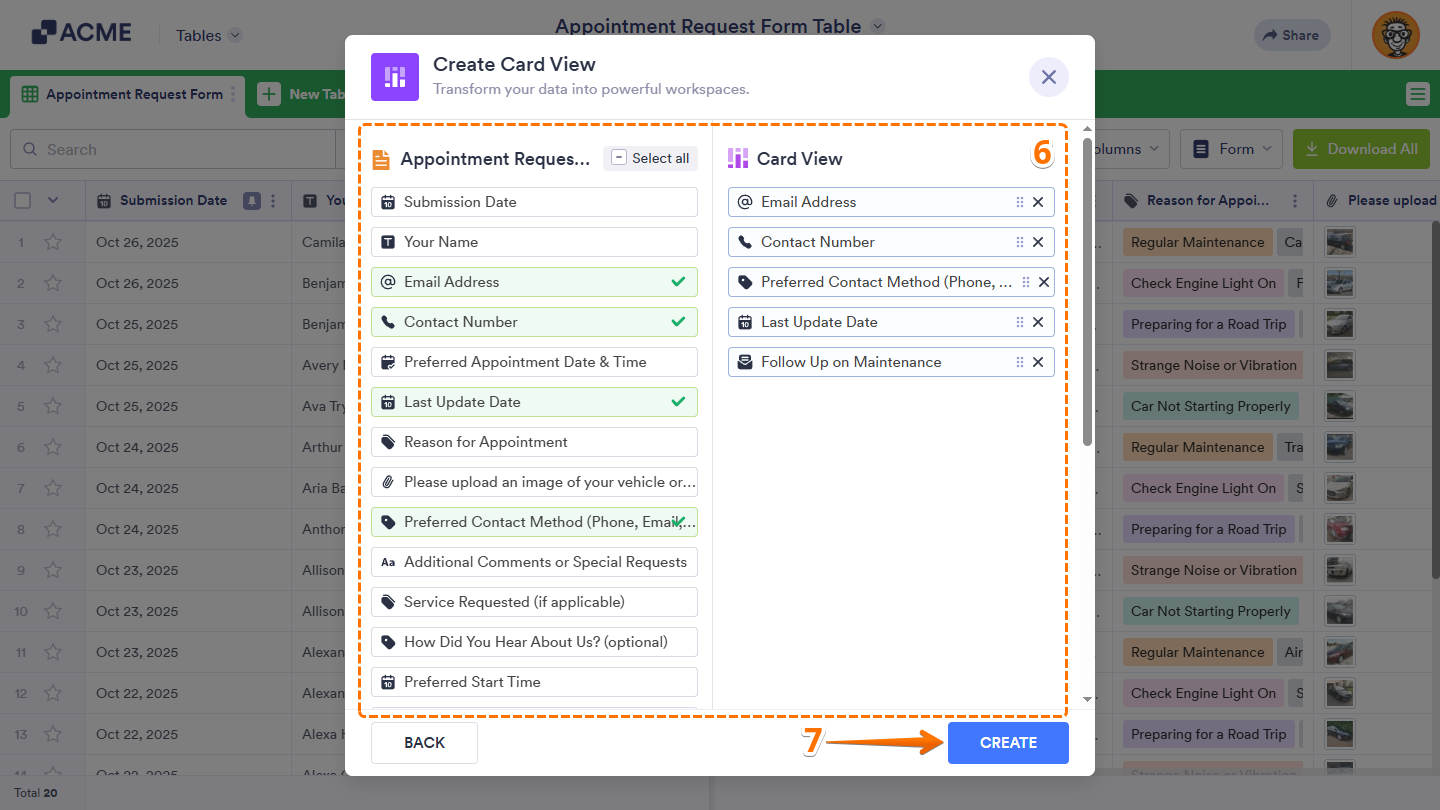
- After that, in the Form Fields List section on the left side of the window, select the fields you want to appear in the card of each submission. Or, just drag and drop them to where you want them to be in the Card View section on the right.
- Once everything’s set, click on Create.
That’s it. Now, your new tab will display submissions in another Table view.
Creating Calendar View
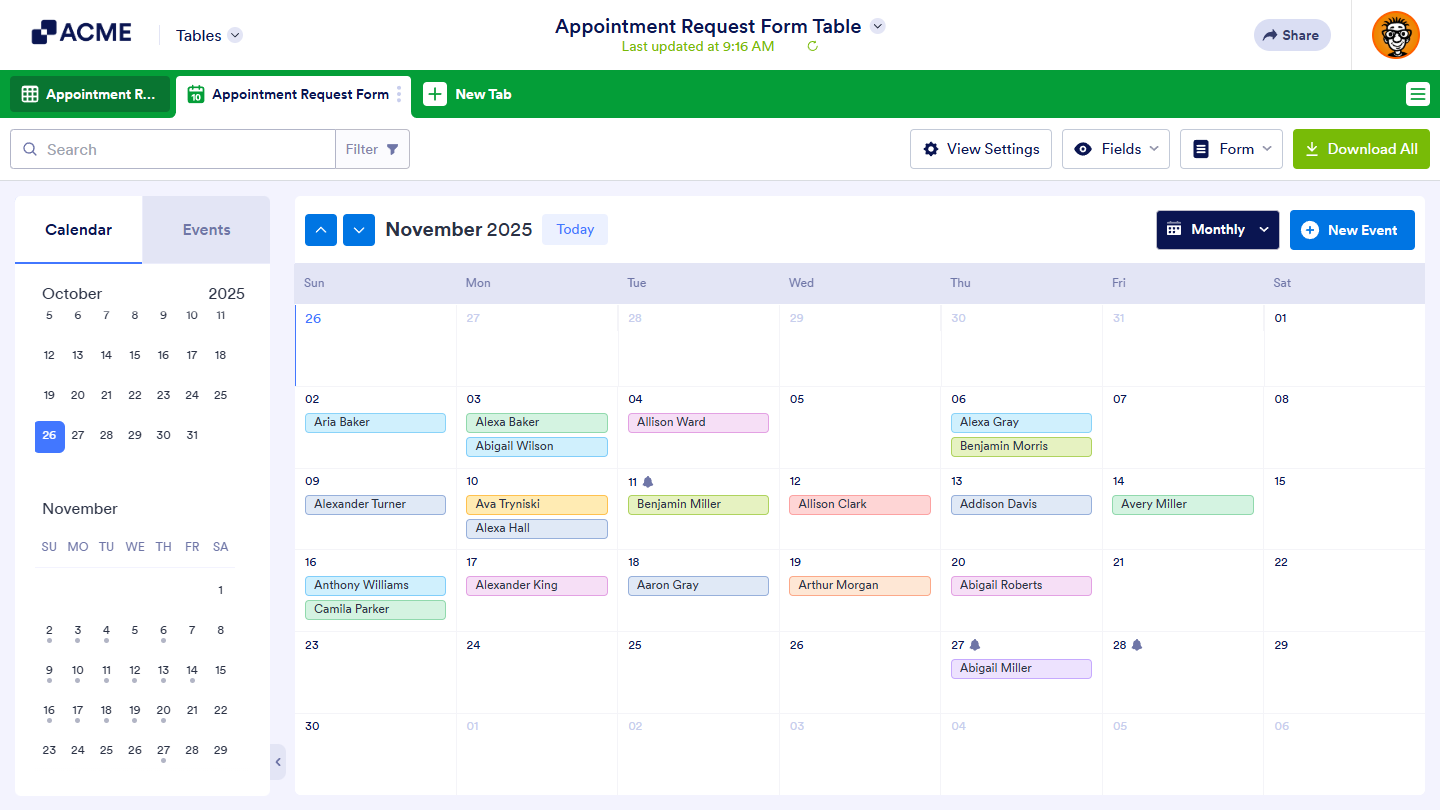
The Calendar view helps you display form submissions as events, giving you a visual way to track schedules, appointments, or activities directly from your table. Getting started is simple—here’s what to do:
- In Tables, click on New Tab.
- Now, in the Create a New Tab window, select Calendar.
- Then, click on Next.
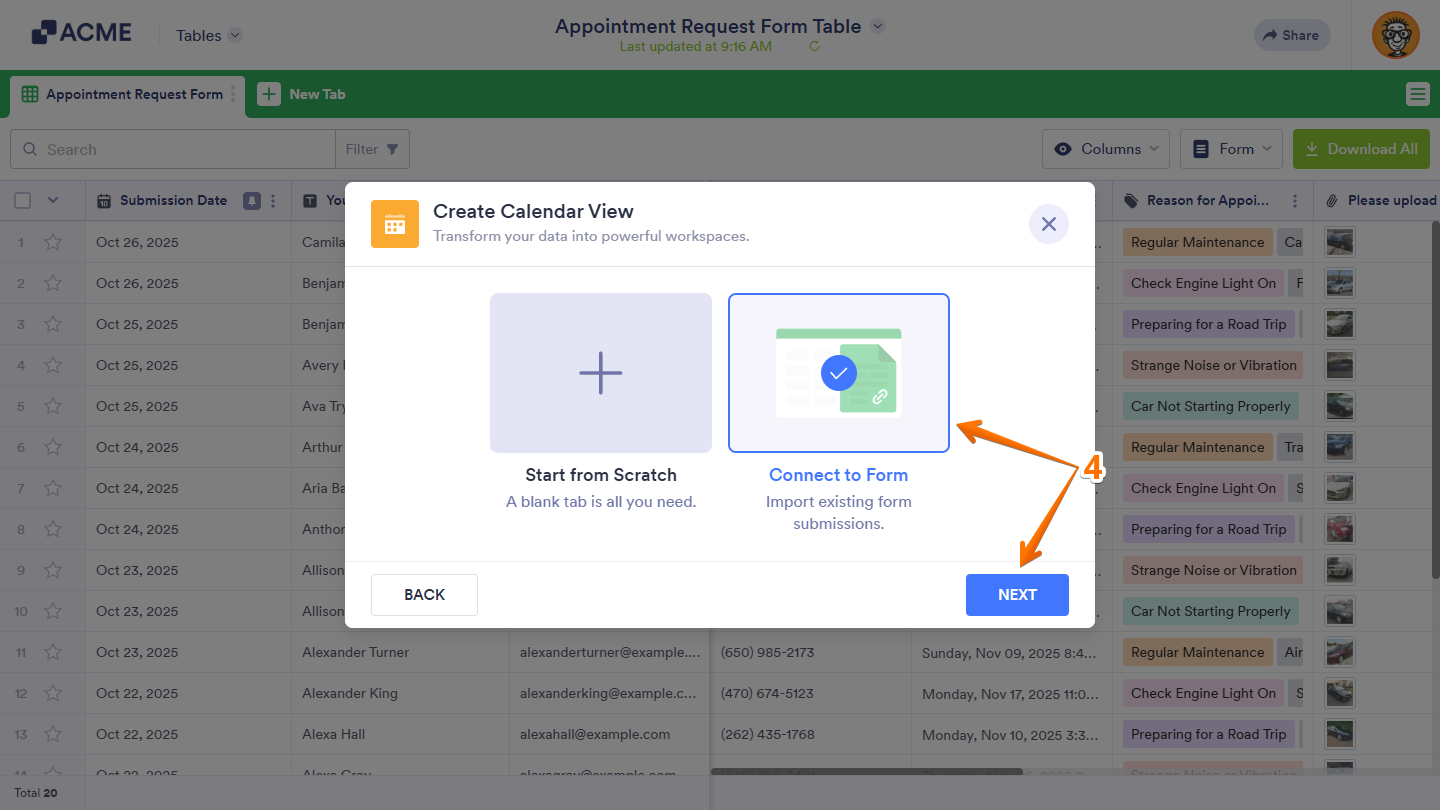
- In the Create Calendar View window, choose Connect to Form, and then click on Next.
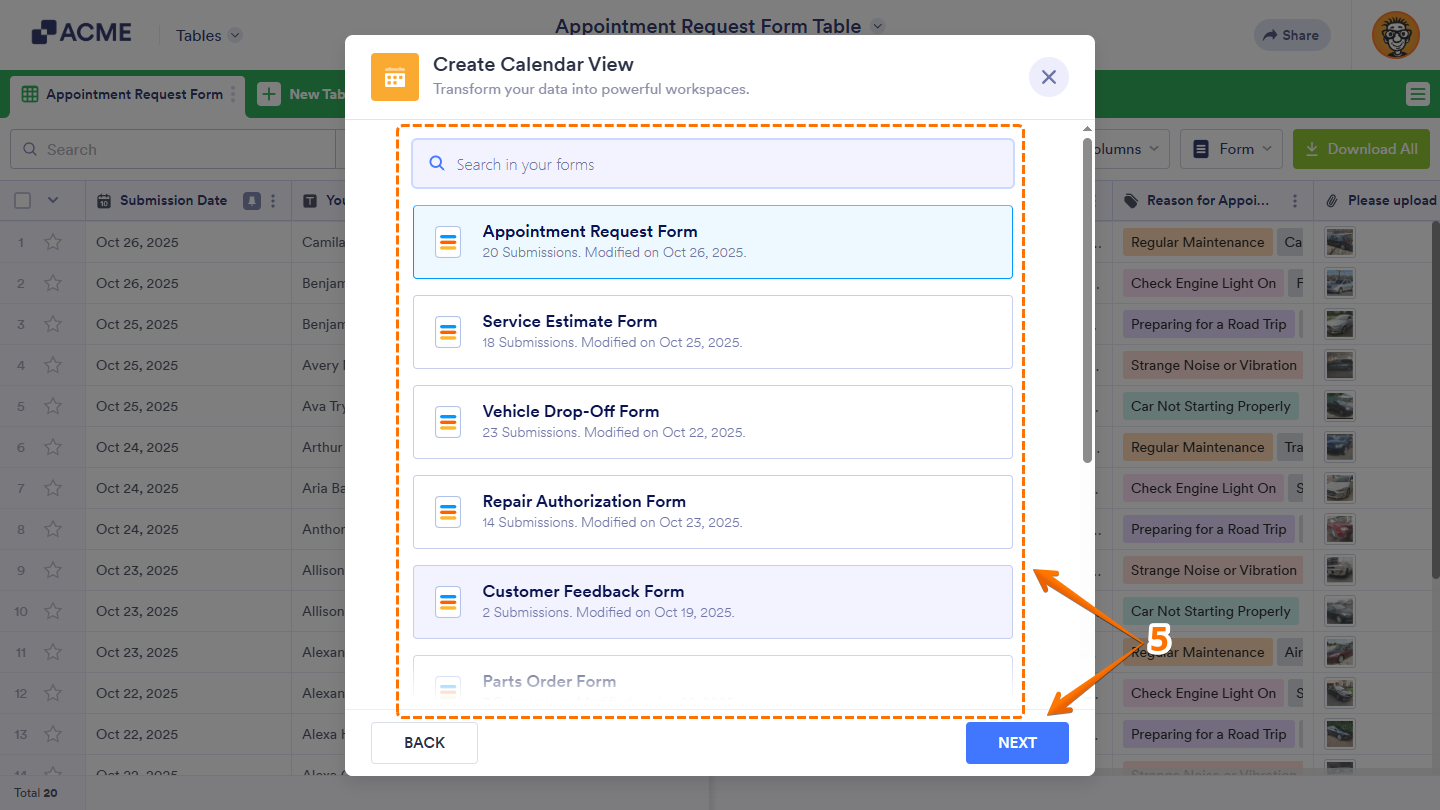
- Now, select the form you want to display submissions in Calendar view, and then click on Next. Use the Search bar at the top of the form list to find a specific one easily.
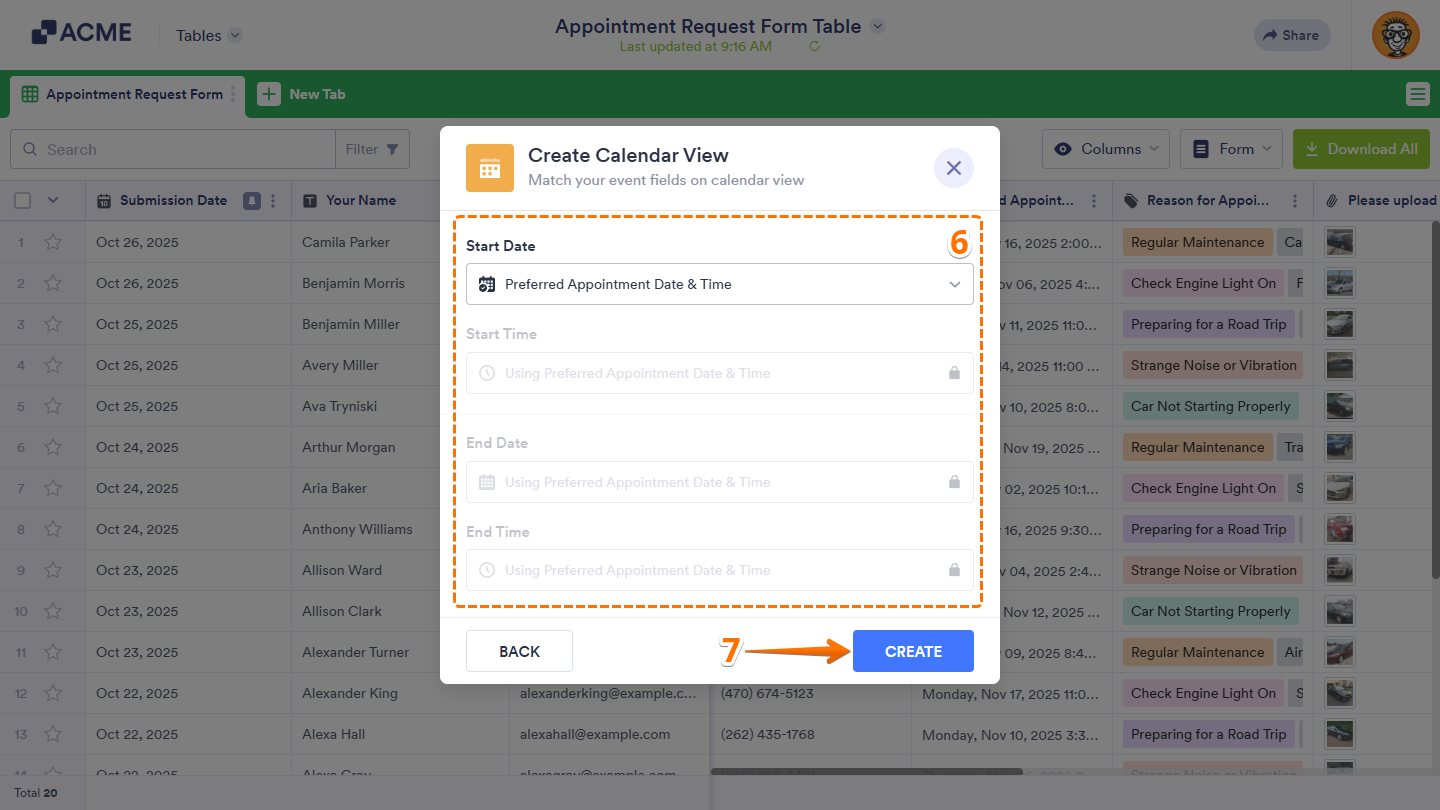
- After that, set up the date and time fields that will determine where each submission appears in the calendar.
- Once you’re done, click on Create.
That’s it. Now, your new tab will display form submissions in a Calendar view.
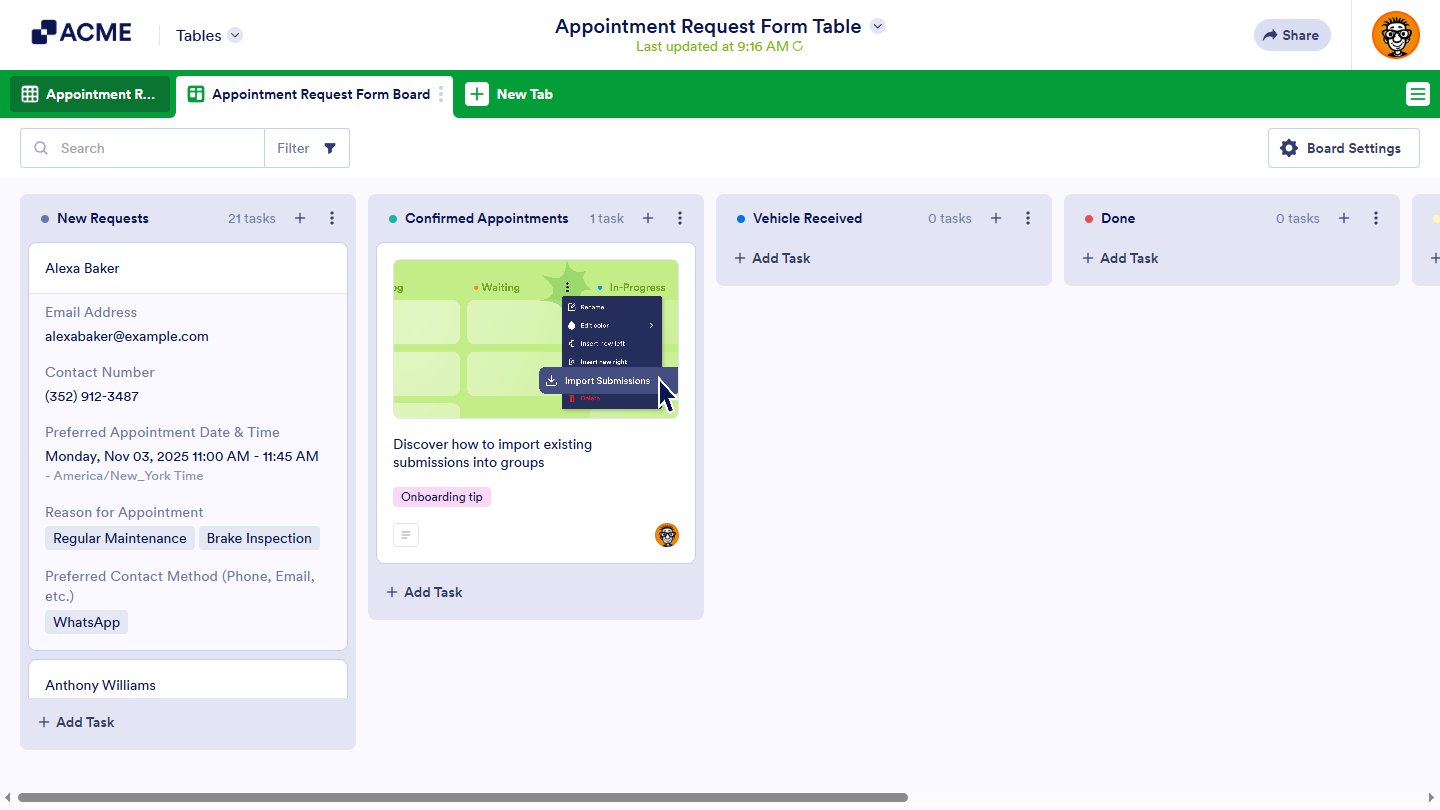
Creating Boards View
The Boards view lets you organize form submissions into movable cards grouped by category, status, or progress — all within your table. It’s ideal for tracking tasks, managing approvals, or visualizing workflows. Setting it up takes no time at all—here’s how:
- In Tables, click on New Tab.
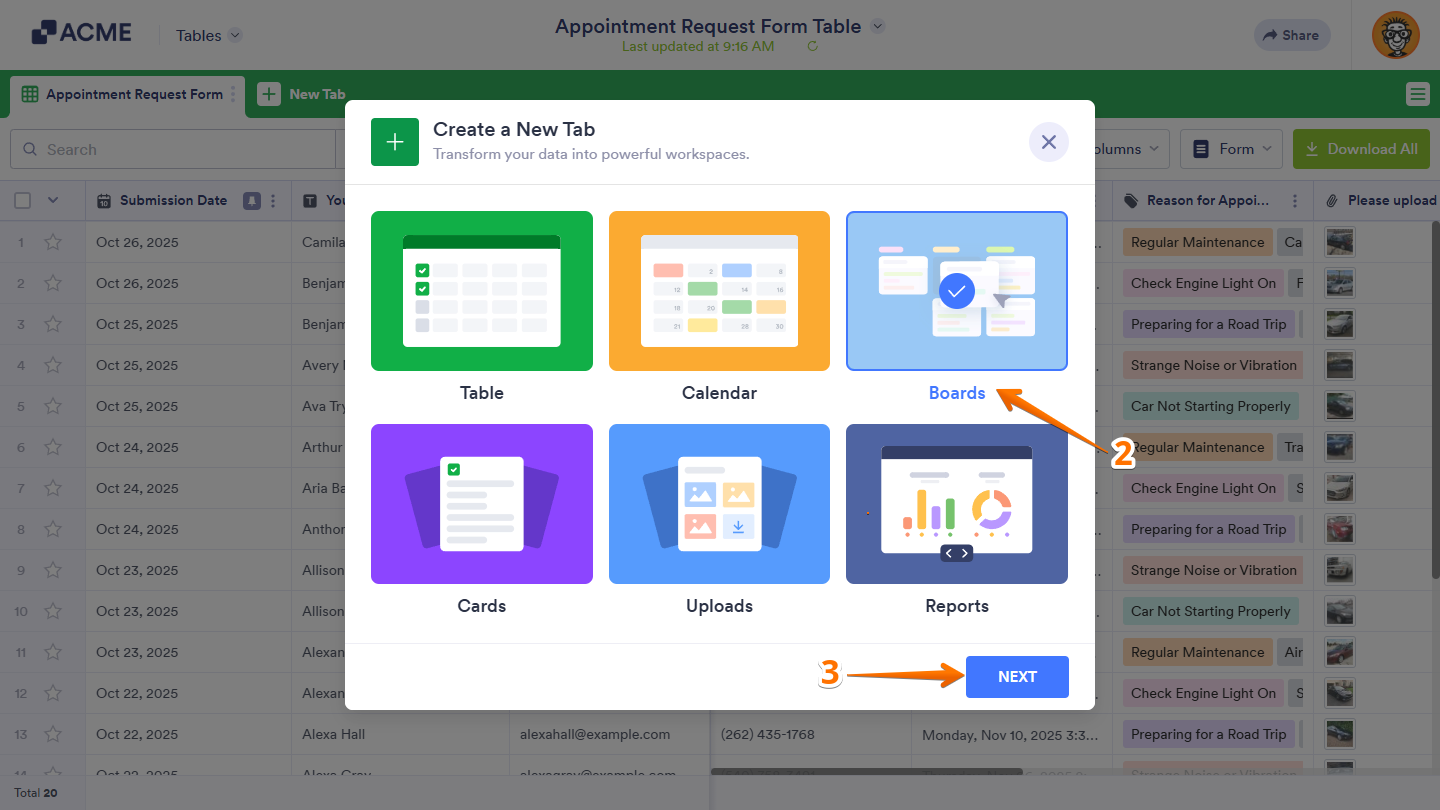
- Now, in the Create a New Tab window, select Boards.
- Then, click on Next.
- In the Create Board View window, set up the following options:
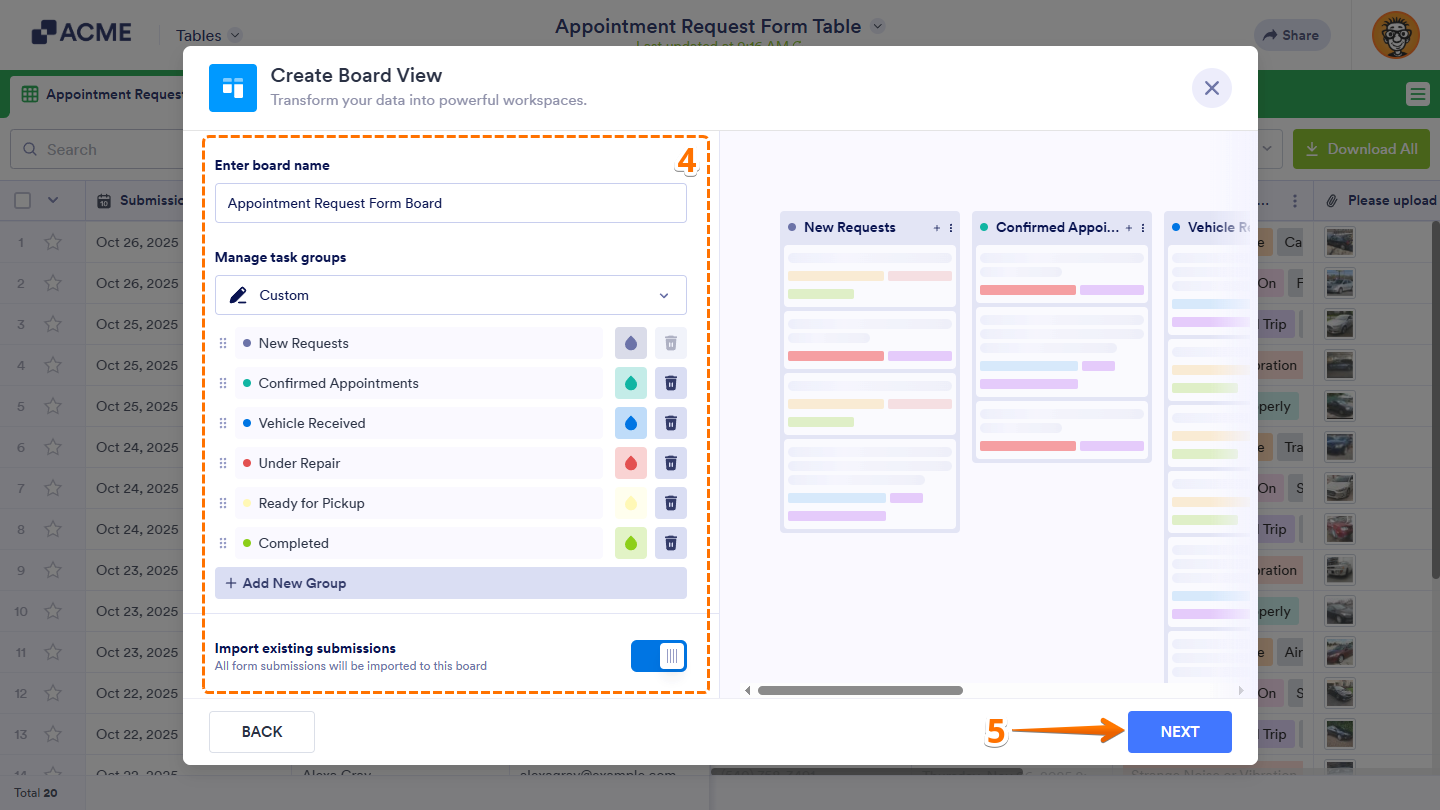
- Board Name — Enter the name of your board, which also appears as the tab title in your table.
- Manage Task Groups — Select a Dropdown or Single Choice field in your form to create groups using its options. Or, keep the Custom option selected if you want to add and customize your own set of groups.
- Import Existing Submissions — Keep this toggled on to import all existing submissions in your board immediately, or turn it off if you want to import them later or add only upcoming submissions.
- Then, click on Next:
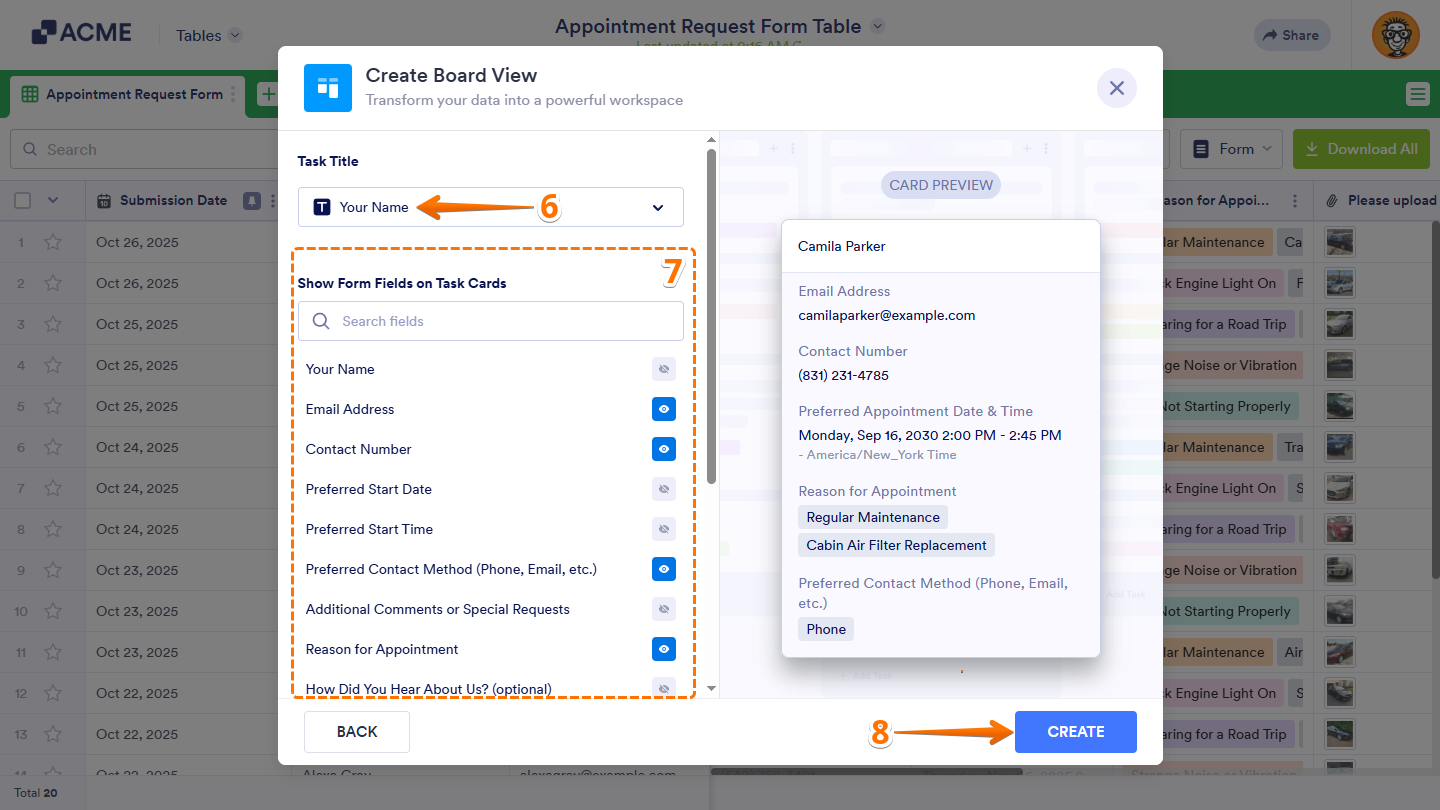
- Now, click on the Task Title Dropdown menu, and then select a form field from which the title of each task on your board will get its value.
- Next, in the Show Form Fields on Task Cards section, click on the Eye icon on the right side of a form field to display its real-time value on the task cards. Or, use the Search bar at the top of the Form Fields List menu to find one easily. You can display up to five (5) form fields on your task cards.
- Once everything’s set, click on Create.
That’s it. Now, your new tab will display form submissions in a Board view.
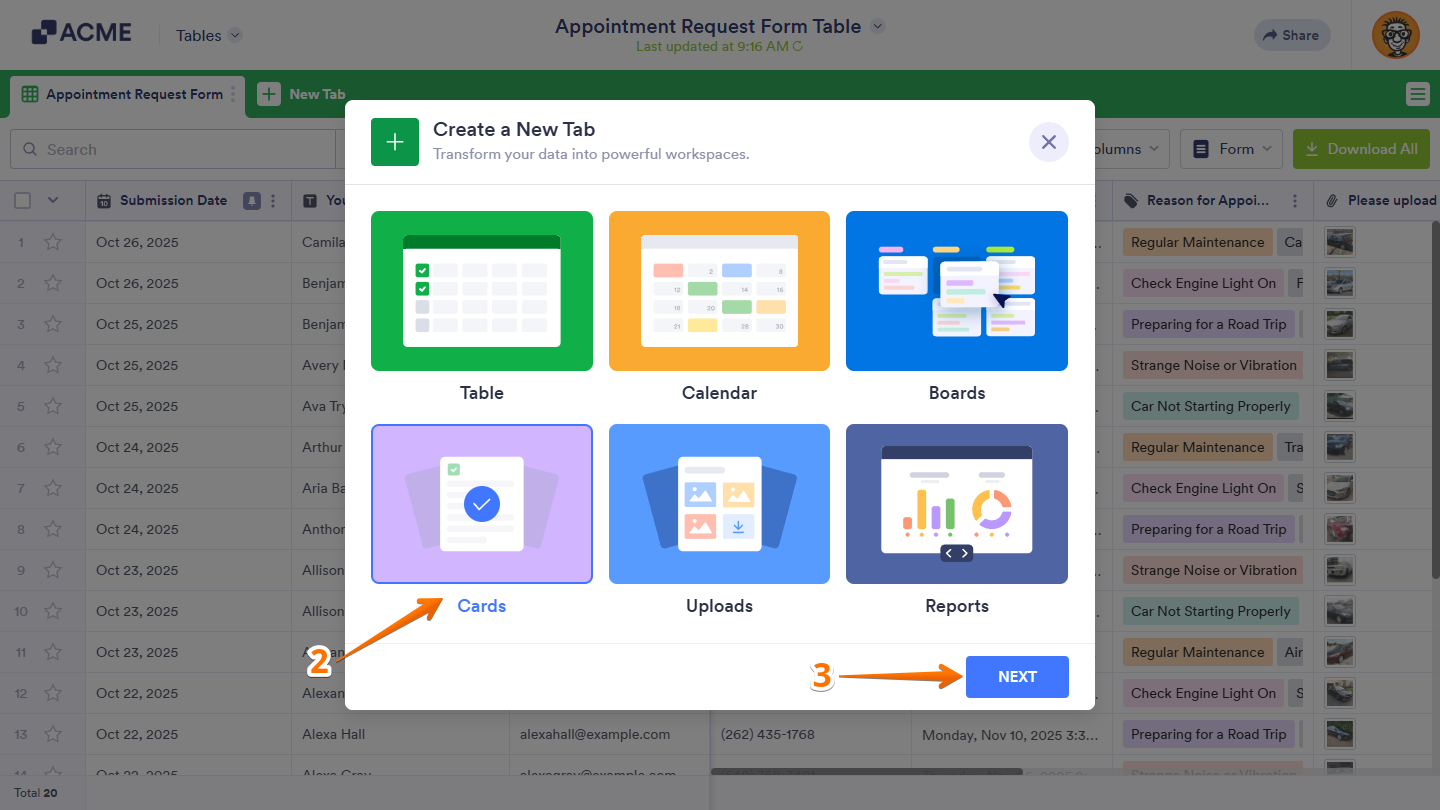
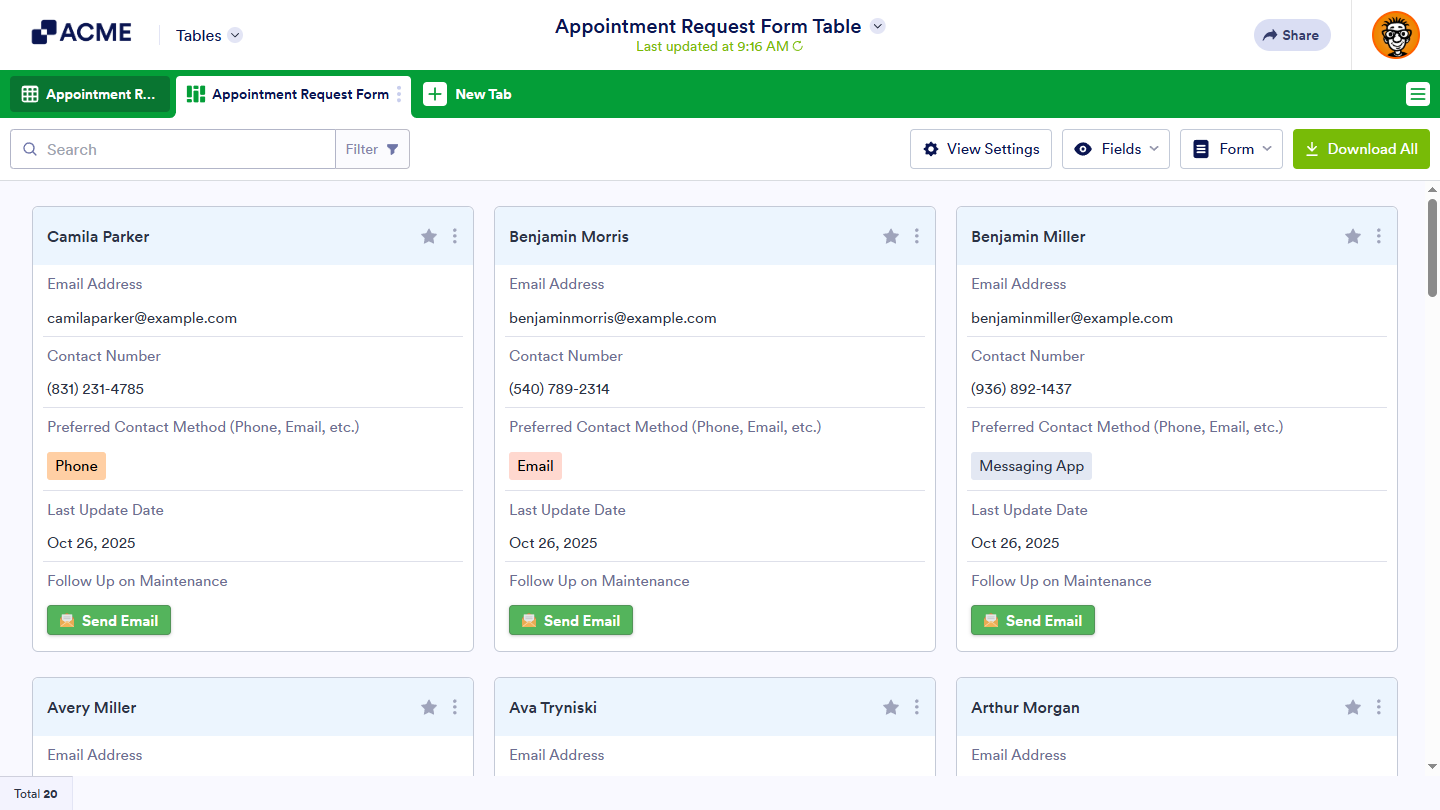
Creating Cards View
The Cards view displays each form submission as an individual card on a new tab, giving you a visual and organized way to review information at a glance. It’s perfect for summarizing contacts, tasks, or records with key details upfront. You can do it in just a few steps:
- In Tables, click on New Tab.
- Now, in the Create a New Tab window, select Cards.
- Then, click on Next.
- In the Create Cards View window, choose Connect to Form and then click on Next.
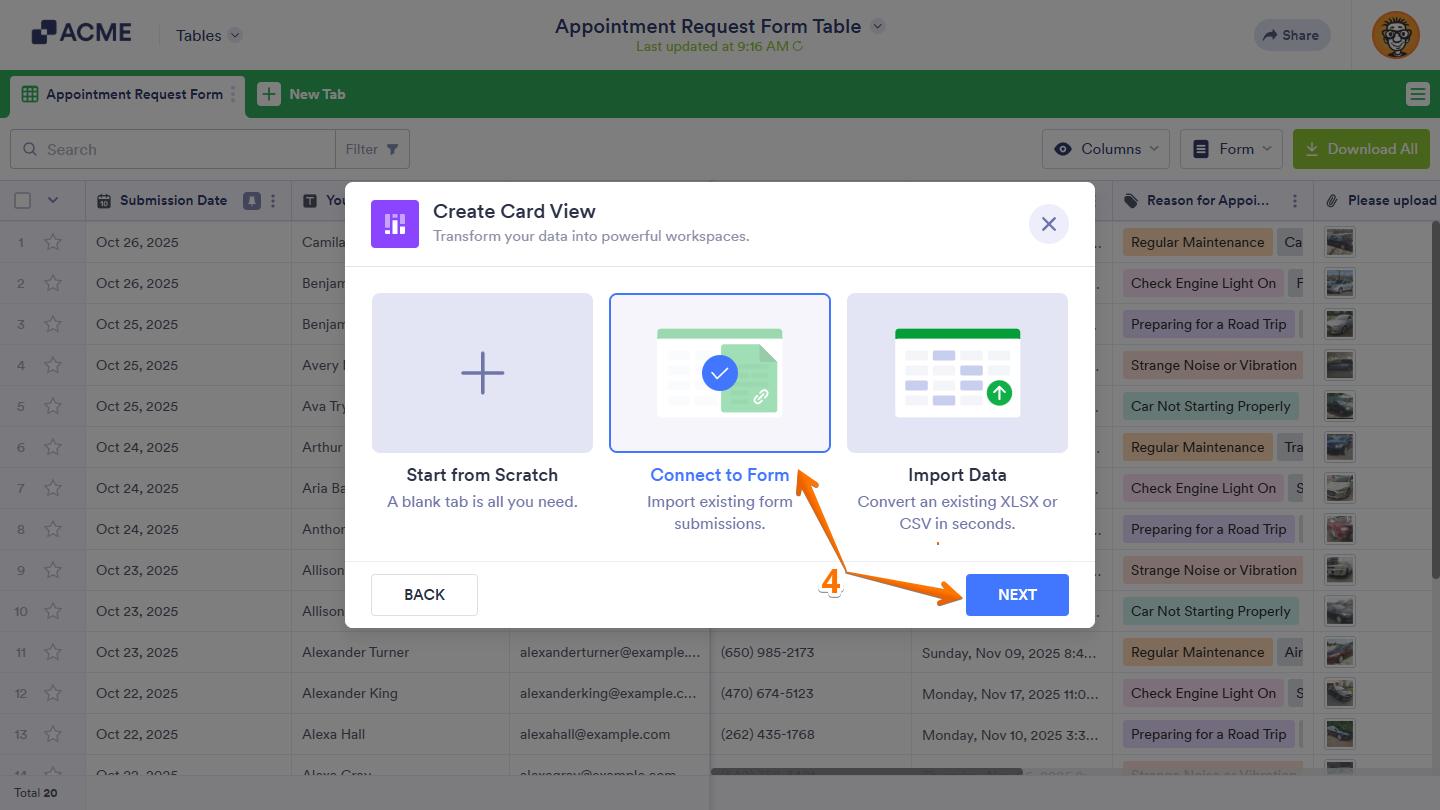
- Now, select the form you want to display submissions in Cards view, and then click on Next. Use the Search bar at the top of the form list to find a specific one easily.
- After that, in the Form Fields List section on the left side of the window, select the fields you want to appear in the card of each submission. Or, just drag and drop them to where you want them to be in the Card View section on the right.
- Once everything’s set, click on Create.
That’s it. Now, your new tab will display form submissions in a Cards view.
Creating Uploads View
The Uploads view organizes uploaded files from your connected form into a folder-style layout on a new tab. It’s perfect for managing images, documents, or other files, and you can group them using folder titles for easier access. You can set it up like this:
- In Tables, click on New Tab.
- Now, in the Create a New Tab window, select Uploads.
- Then, click on Next.
- In the Create Upload View window, choose Connect to Form and then click on Next.
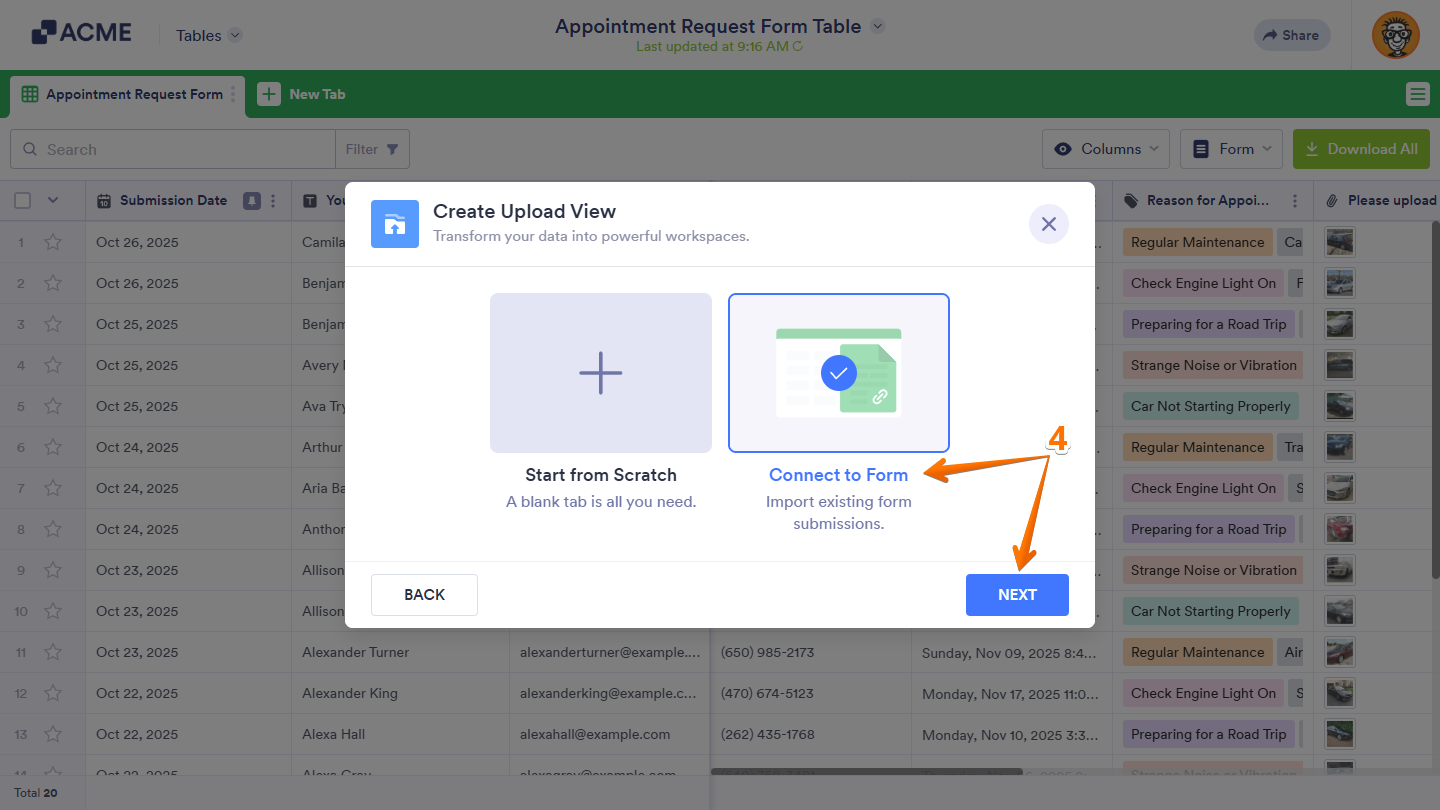
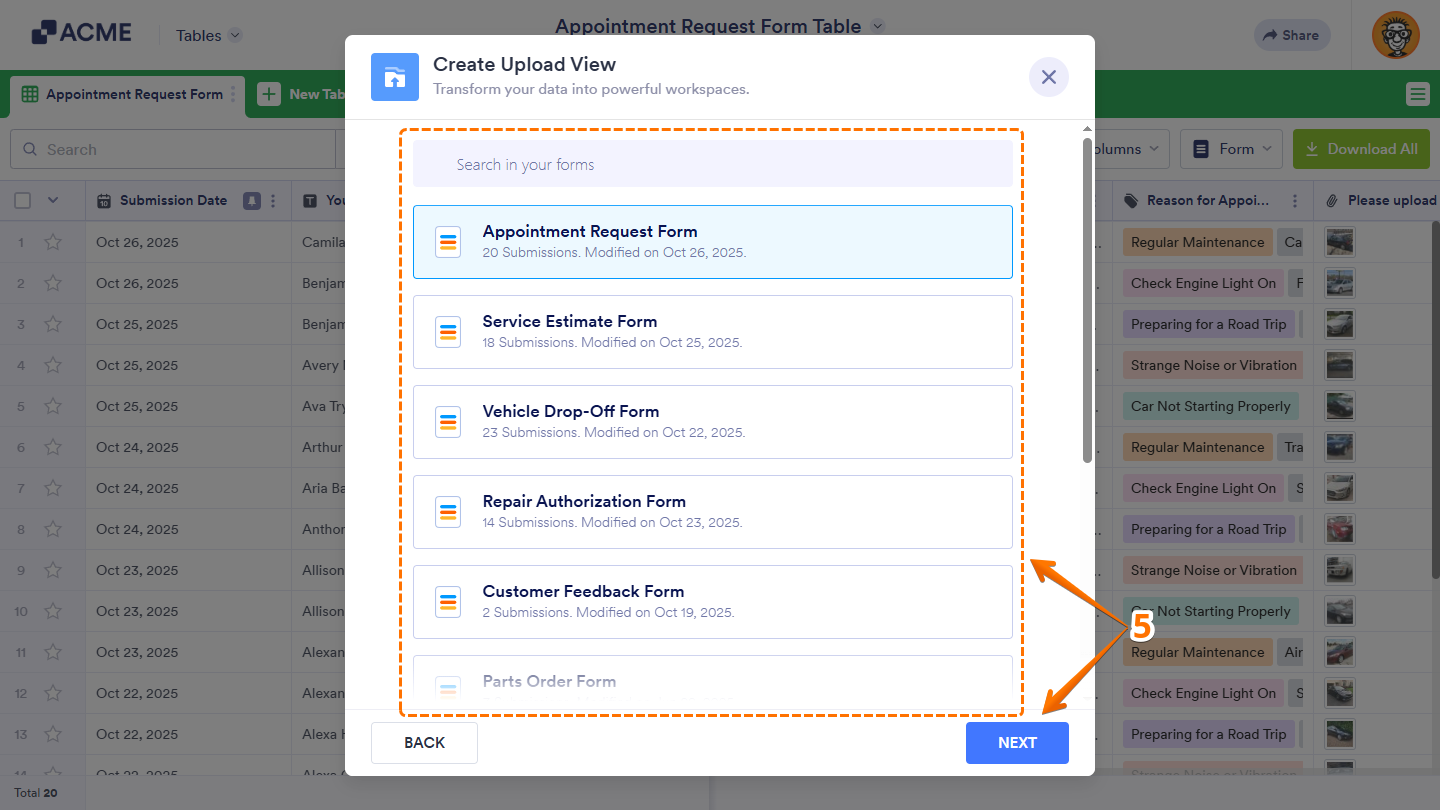
- Now, select the form you want to display uploaded files from in Uploads view, and then click on Next. You can also use the Search bar at the top of the list to quickly find a specific form.
- After that, click on the Card Title Dropdown menu and then select a form field, from which the title of each upload entry will get its value.
- Next, on the right side of Hide Empty Uploads, toggle it off if you want to show entries without attachments, or keep it on to display only those with uploaded files.
- Once everything’s set, click on Create.

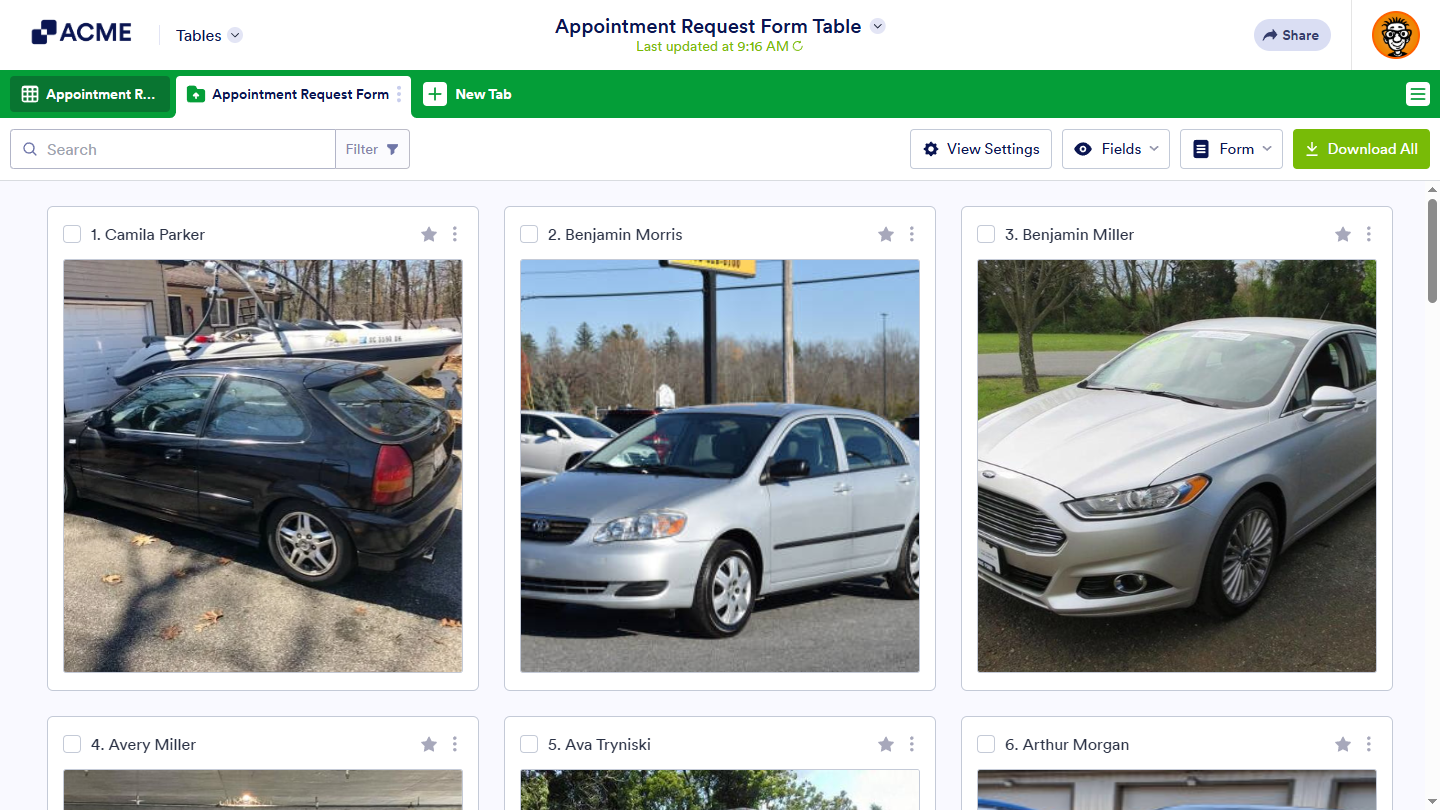
That’s it. Now, your new tab will display uploaded files from form submissions in a folder-style view.
Creating Reports View
The Reports view lets you turn submission data into visual summaries using charts and graphs, making it easier to spot trends, compare responses, or share insights with your team. It’s great for presenting data clearly without leaving your table. You can do it in just a few steps:
- In Tables, click on New Tab.
- Now, in the Create a New Tab window, select Reports.
- Then, click on Next.
- In the Create Report View window, select the form you want to generate a report from, and then click on Next. You can also use the Search bar at the top of the list to quickly find a specific form.

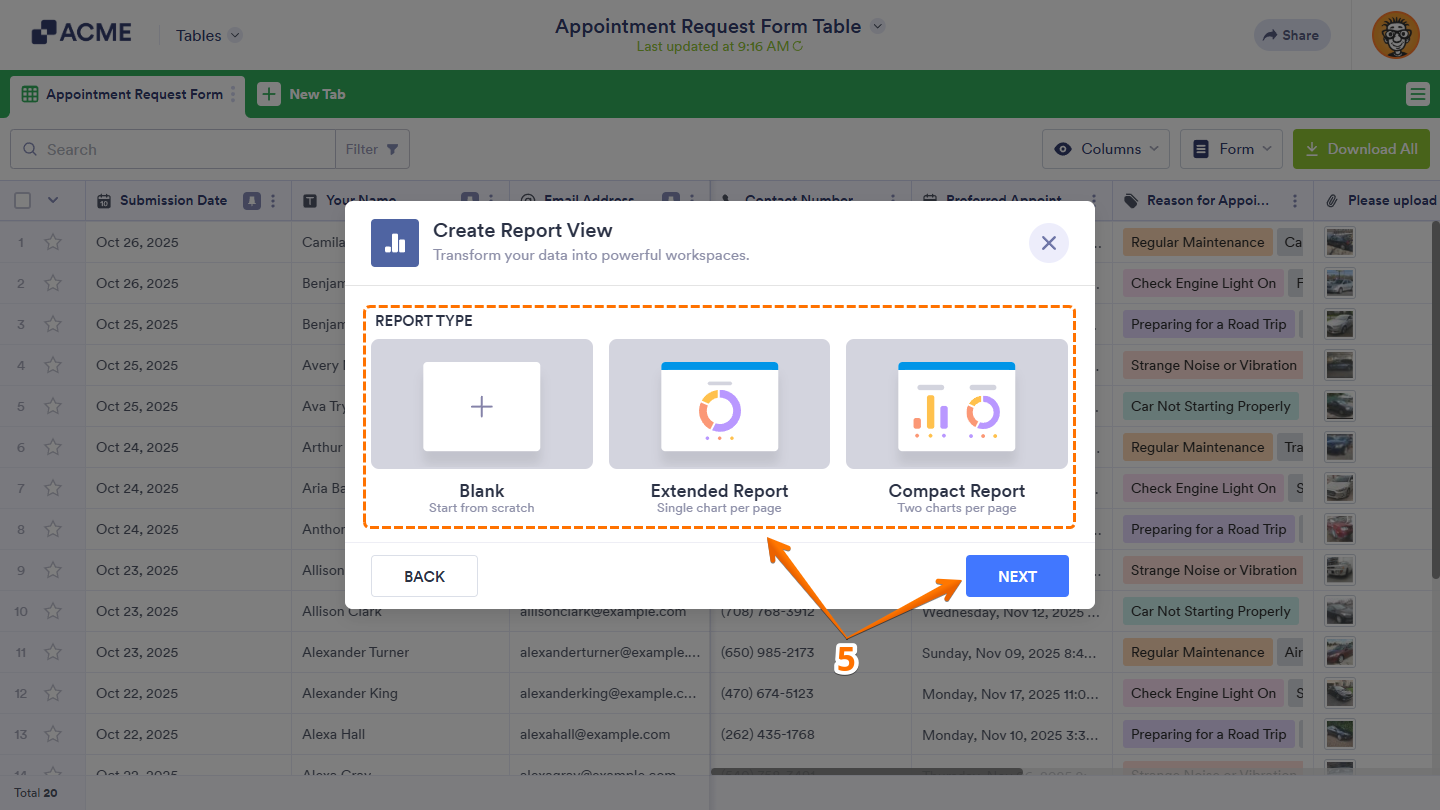
- After that, select one of the following report types and then click on Next.
- Blank — Creates an empty report so you can build it from scratch.
- Extended Report — Automatically generates charts and graphs based on supported form fields, with one chart per page by default.
- Compact Report — Automatically generates charts and graphs based on supported form fields, with two charts per page by default.
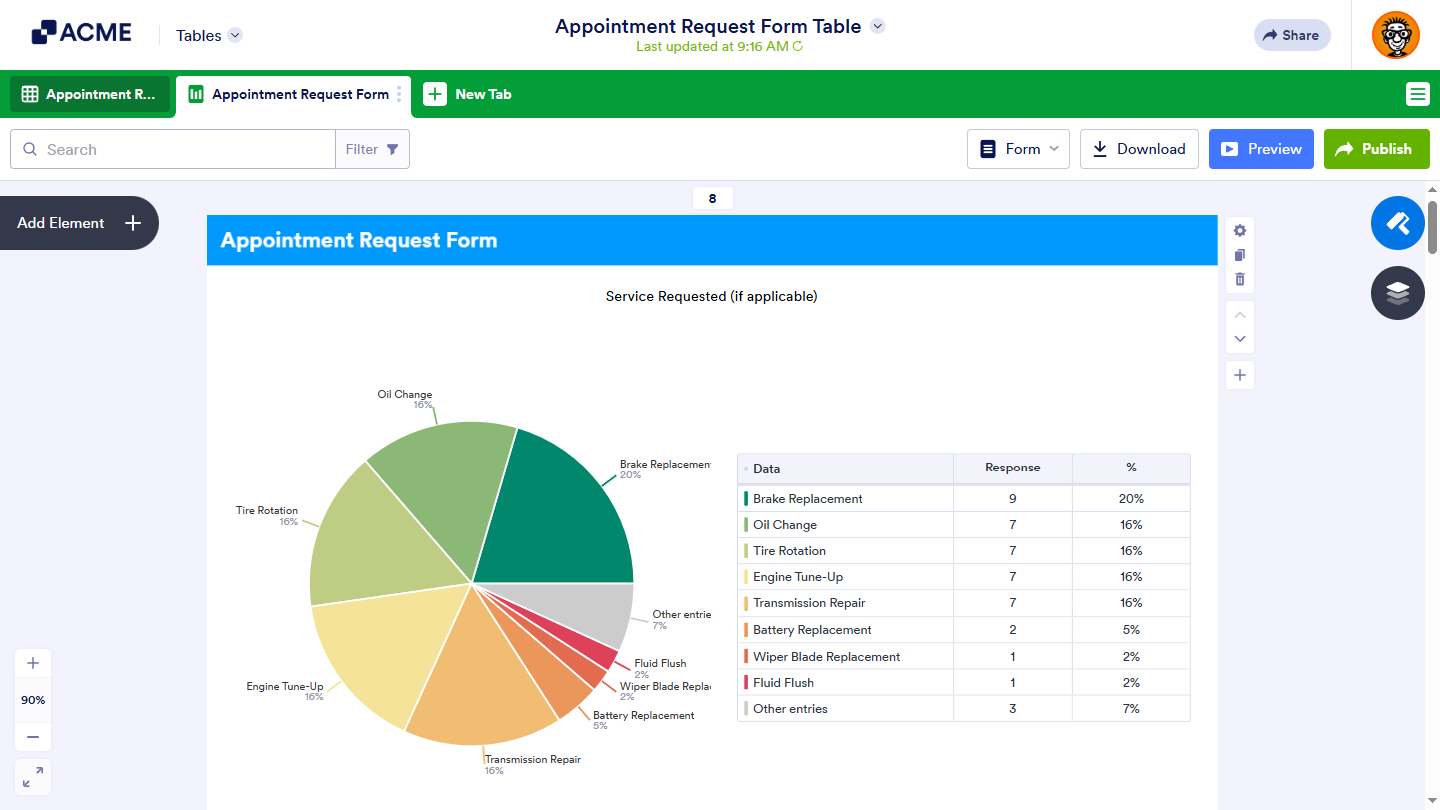
That’s it. Now, your new tab will open with your selected report type, where you can add report elements, set up charts, and customize their style as you like.

Send Comment: