The PDF Editor allows you to customize the PDF copy of your submissions. You can add additional elements to the document and style it with a custom theme. However, if you want to print the form with the user’s data and print it the way you designed it, the PDF editor can’t do it for you. We have the below workarounds for printing the form with the user’s data.
The basic requirement for this method is to have the Print button on your form. See Print Button on Forms for more information.
Utilizing Emails and Edit Link to Print Submissions
The first method is to utilize the email templates and the Edit Link. It’s useful for your future submissions. Here’s how you can do that:
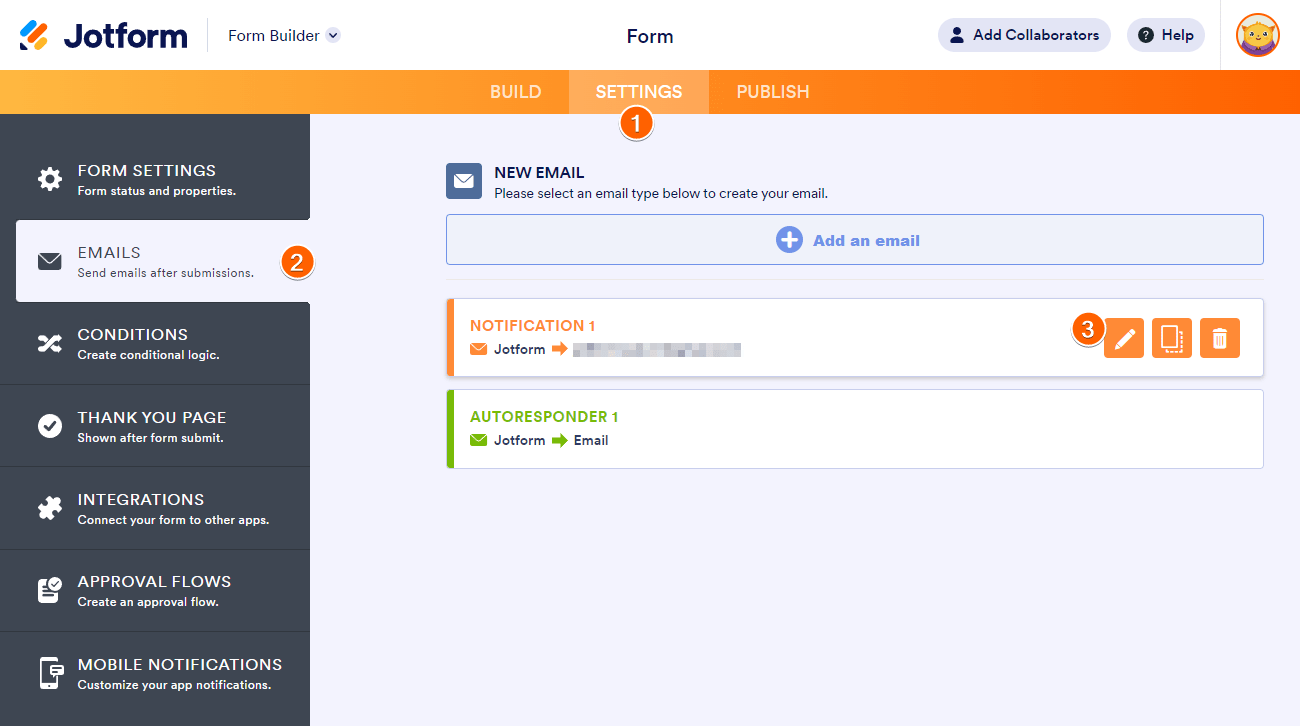
- In the Form Builder, go to the Settings tab.
- Click Emails on the left panel.
- Hover to your email template, and click the Pencil icon to edit.
- Insert a new row in the email template using the visible table tools.
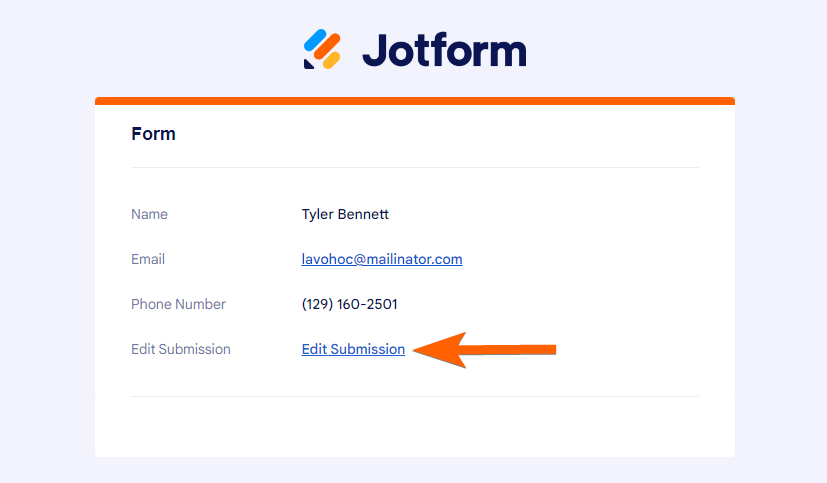
- In the new row, add the Edit Link tag;
{edit_link}. You can type this manually or click the +Form Fields button on the toolbar to add it.

The form converts the Edit Link tag to a full edit URL when your users submit the form. You’ll have to click the edit link in the notification email to open the form with the user’s data.
At this stage, you’ll only need to click the Print button to print the complete form. That’s it!
Utilizing Jotform Tables to Print Submissions
While we can not go back in time and set the email notification to enable us to print the old submissions, this is still possible through Jotform Tables. The method still involves editing the submission. Below are the steps to do that:
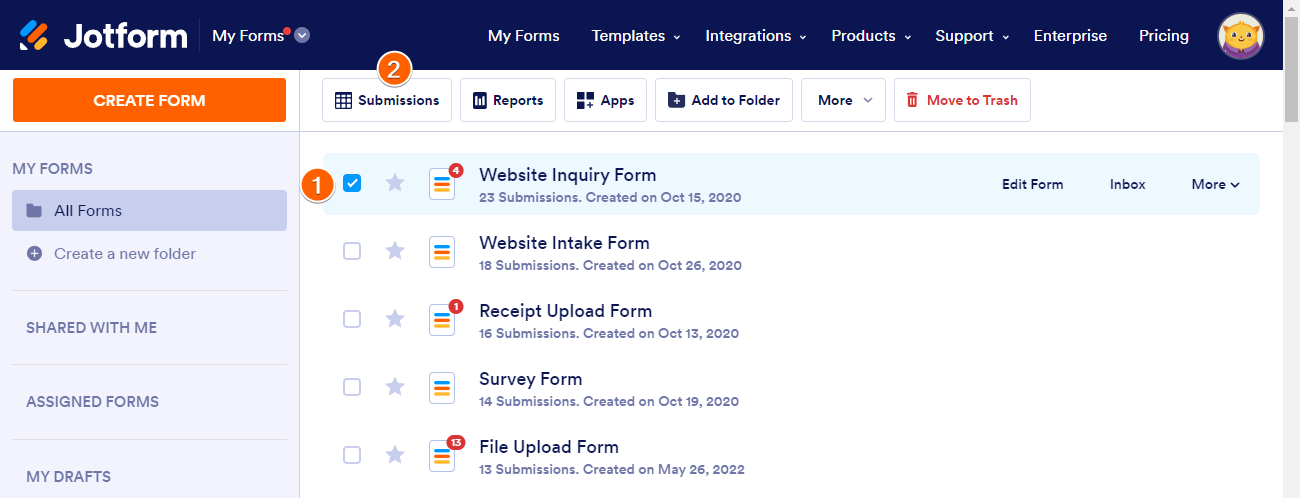
- On the My Forms page, select the form.
- Click the Submissions button at the top to view your form’s Jotform Tables.
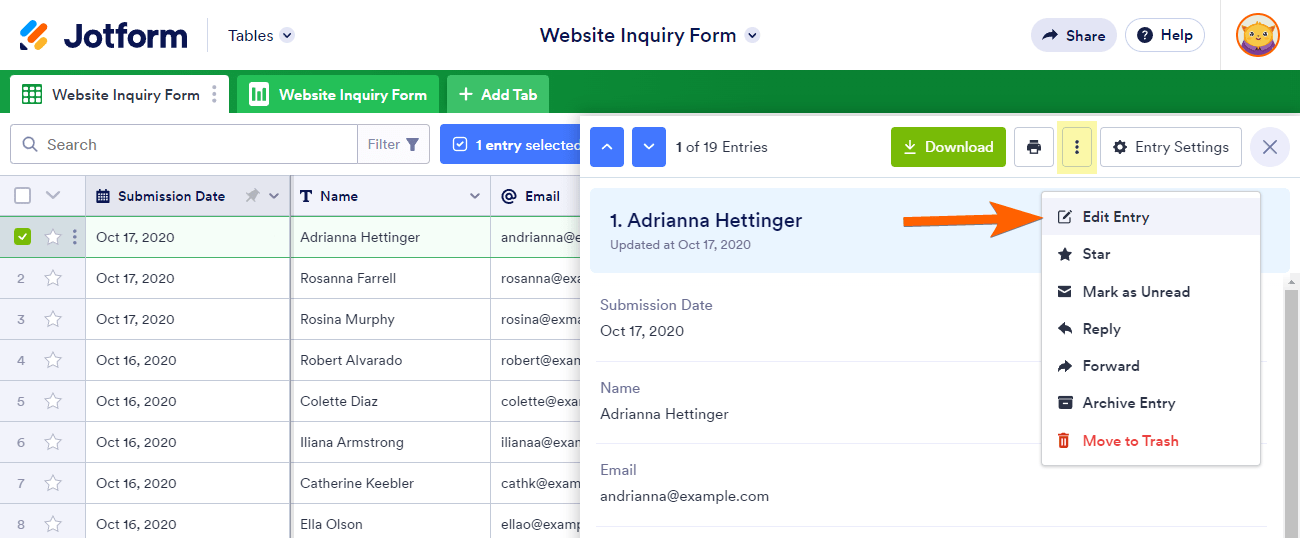
- In Jotform Tables, view the submission you want to print.
- In the View Entry window, click the More icon (kebab or 3-vertical dots icon).
- Finally, click the Edit Entry option from the options.
Your form will open up in the edit mode, so all of your data should be clearly shown to you. All you need to do now is utilize the print button on your form to print it, and that’s it!

Send Comment:
3 Comments:
More than a year ago
It would be nice if there would be a way to jump to a specific page in the form, so that the “Print” is easier to get to. I have an 11page form, and clicking through all those pages is quite cumbersome.
More than a year ago
Hello,
I have created one form which has two separate parts (Part 1. the initial application. Part 2. further info which you can only fill in after your entry has been accepted). The questions for Part two are enabled by putting in a reference code at the top of the form which is given after acceptance.
My problem is that the replies therefore come as 2 separate submissions. How can I now consolidate those into one single form?
More than a year ago
Hello Customer Support.
How do I print a response in the same layout as I created it. For example in my form I have contact number and email address in the 2 columns in the same row. The print format changes to 1 question per row.