Update
We’re thrilled to share that the new version of our PDF Editor is now live.
If you’ve already used the Customize PDF Report feature, you’ll feel right at home. But if you’re looking to explore even more ways to create personalized PDF reports, you can try combining a few third-party tools to achieve exactly what you need.
You can check out the documentation and help guide for Autocrat right here—it’s a great place to learn how everything works and get step-by-step instructions.
Here’s a Test Form we’ve prepared for you. Feel free to give it a try using your active email address. After you submit the form, you’ll receive an email with the PDF document attached — just like it would work in a real setup!
You can use this workaround for the following use case scenarios:
- A highly customized contract with the submission data on it.
- A certificate you want to send to your users based on their submission data.
- You want a PDF copy of the submission, but you have your format or design.
- You need to create multiple PDF files based on one submission.
Here are the prerequisites to setting up this integration:
- You must have the form fully created.
- You should integrate the form with Google Sheets.
- You must install the Autocrat add-on in the integrated Google Sheet of the form.
- Your Google Docs template, where your form data will be merged and converted into a PDF document.
- You have the folder in your Google Drive account to store the created PDF document for each submission.
Installing the Autocrat Extension
Once your form is connected to Google Sheets, the next step is to install Autocrat. It’s quick and easy to set up. Here’s the quick way to do it:
- While viewing the spreadsheet linked to your form, click the Extensions menu at the top.
- In the dropdown menu, click on Add-ons.
- Then, click on Get add-ons.
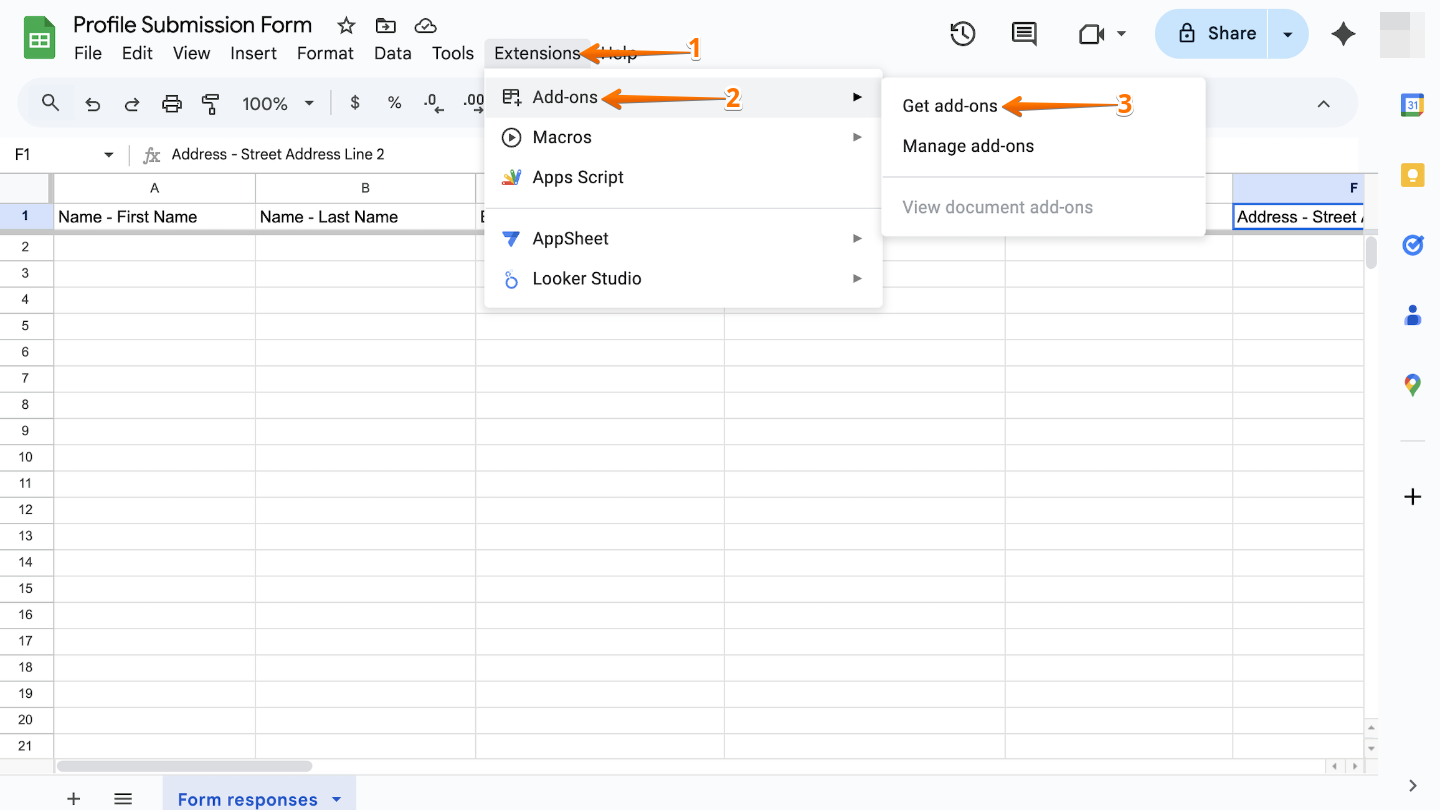
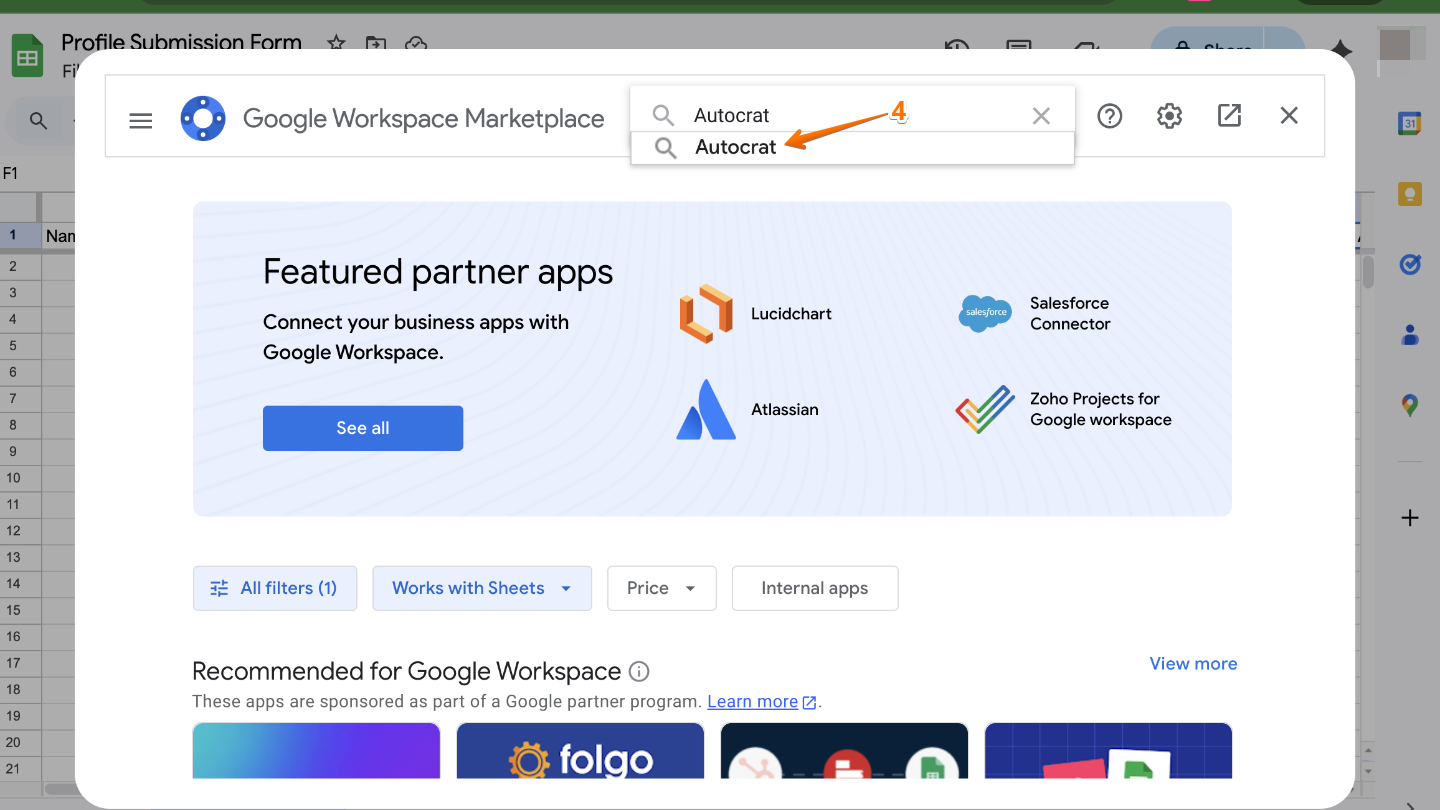
- Next, in the Google Workspace Marketplace window that comes up, search for Autocrat, and then click on it.
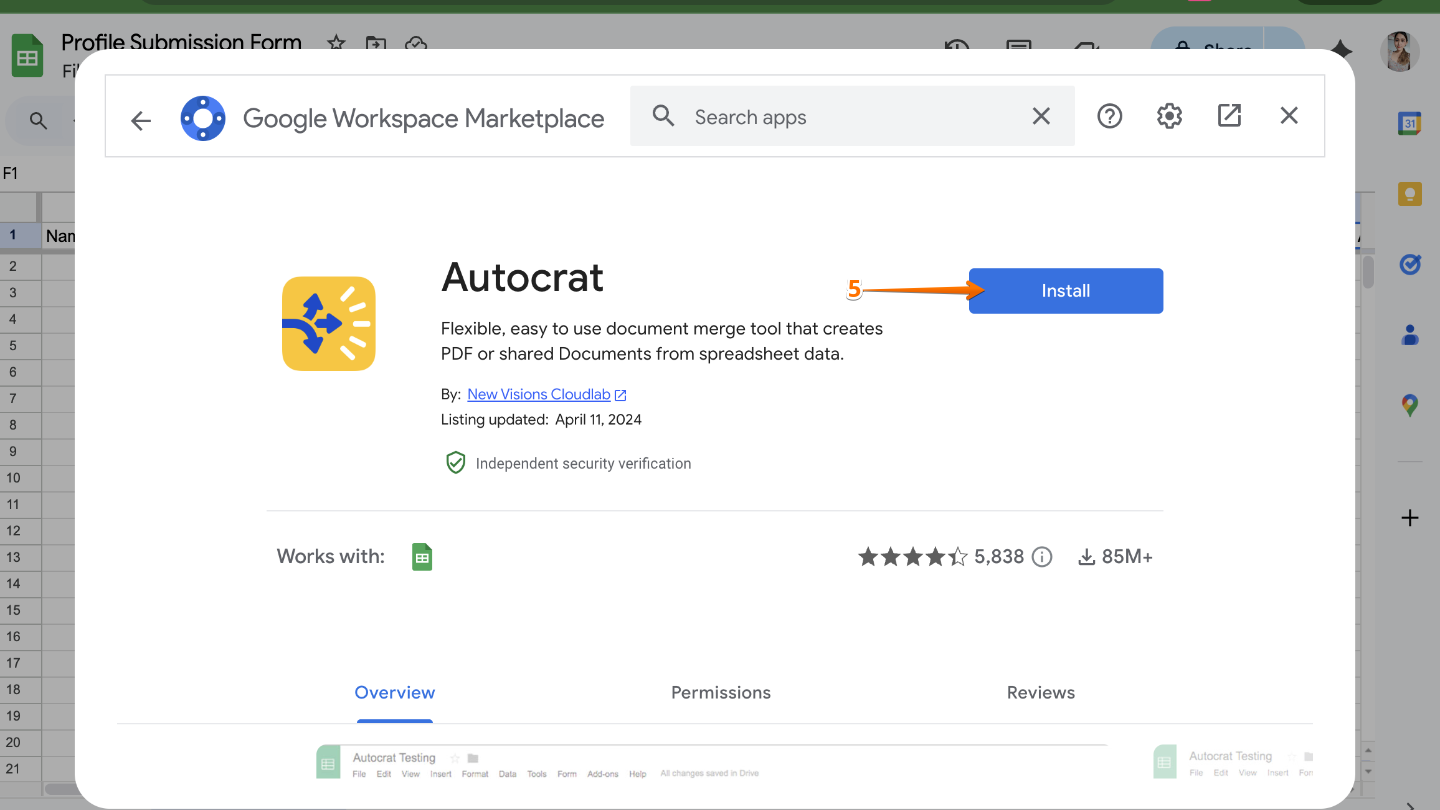
- Now, click on Install. You’ll need to grant permission at this step. Once that’s done, you’re all set.
Preparing the Google Doc Template
Before setting up the Autocrat extension, make sure you’ve prepared your Google Doc—this will be the template used for merging your form data later on. To get going, here’s what you’ll do:
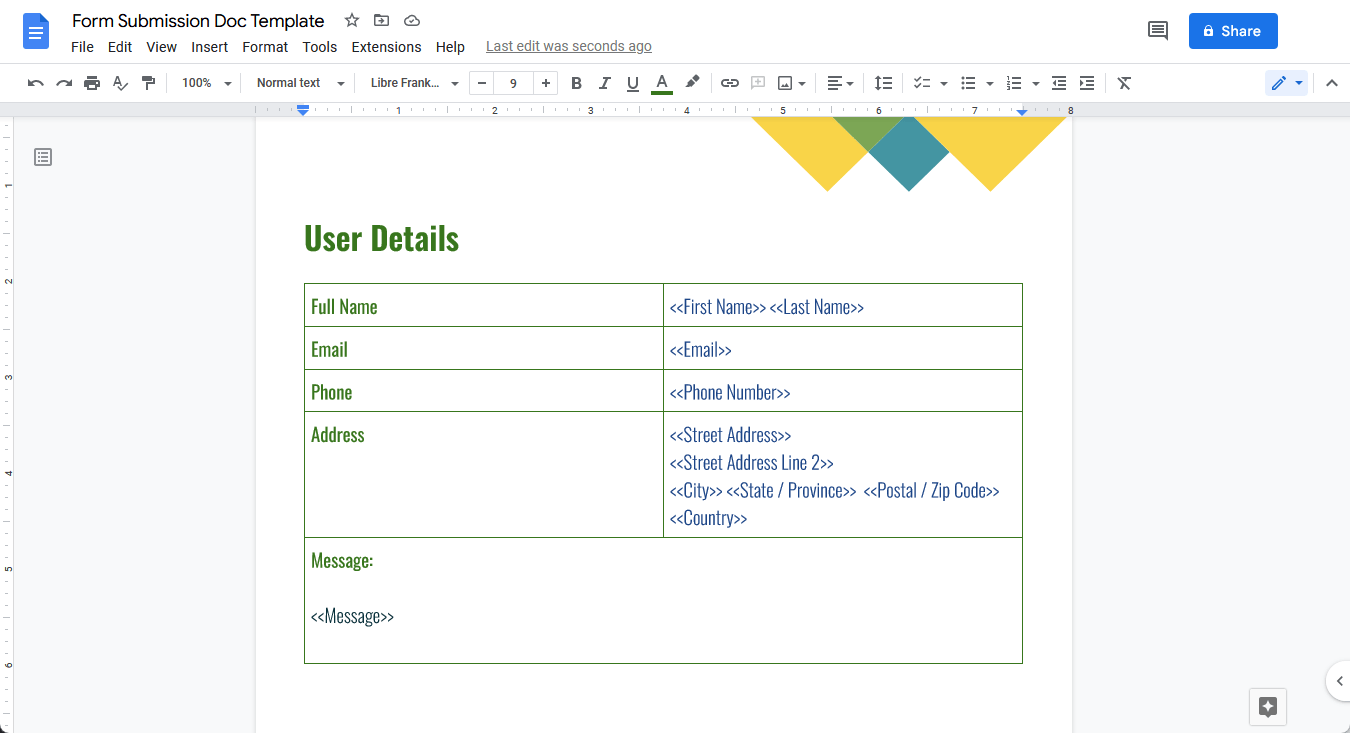
- Open your Google Docs template.
- Then, go to the sections where you want to insert data from your form.
- Lastly, enclose the column label from your integrated Google Sheets file in double angle brackets. For example, if the label is First Name, write it as <<First Name>> in your document.
Setting up the Autocrat Extension
Once you’ve set up your Google Doc template, you’re ready to move on to Autocrat. This is where you’ll create the PDF document and set it up to be sent automatically by email. Here’s the quick way to do it:
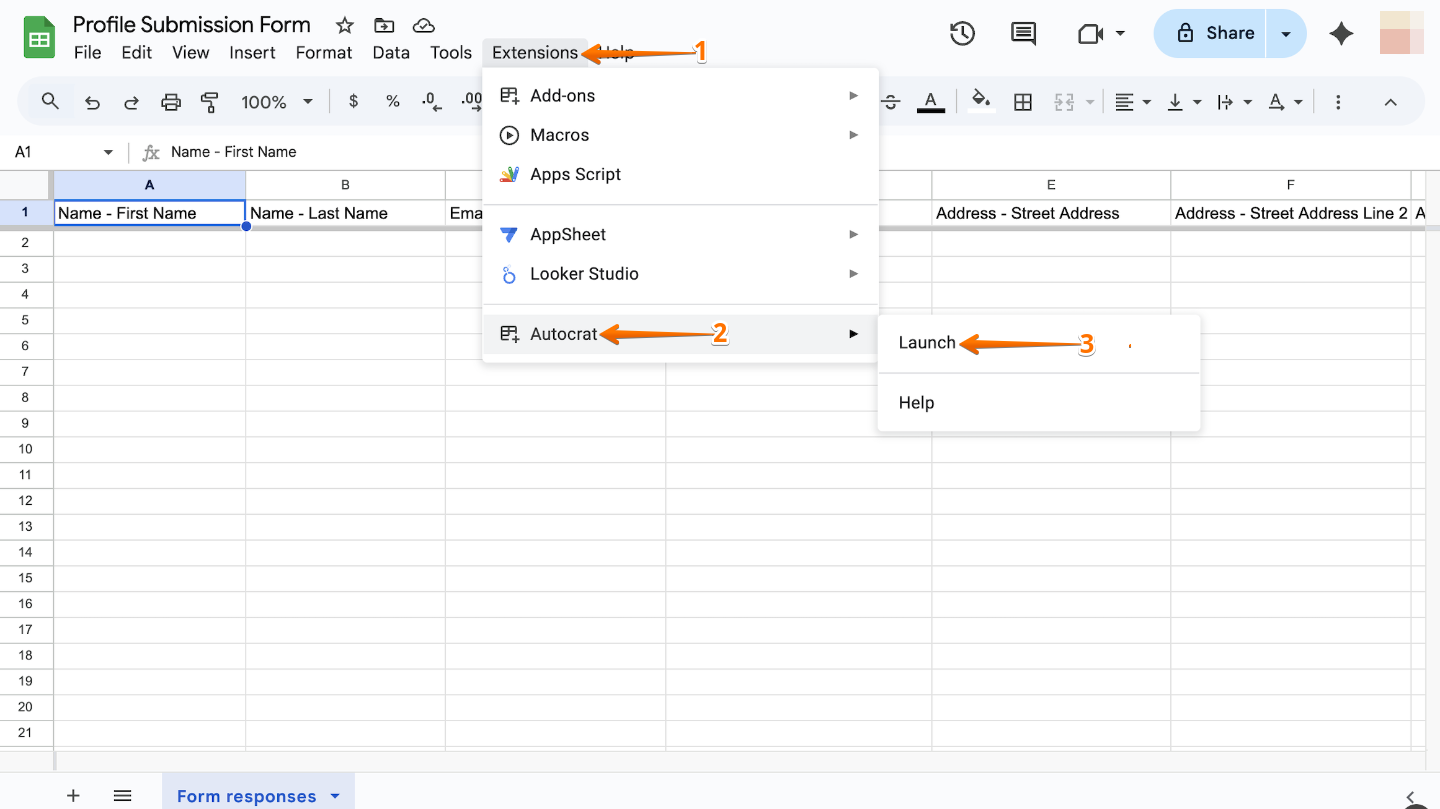
- While viewing the spreadsheet linked to your form, click the Extensions menu at the top.
- In the dropdown menu, click on Autocrat.
- Then, click on Launch.
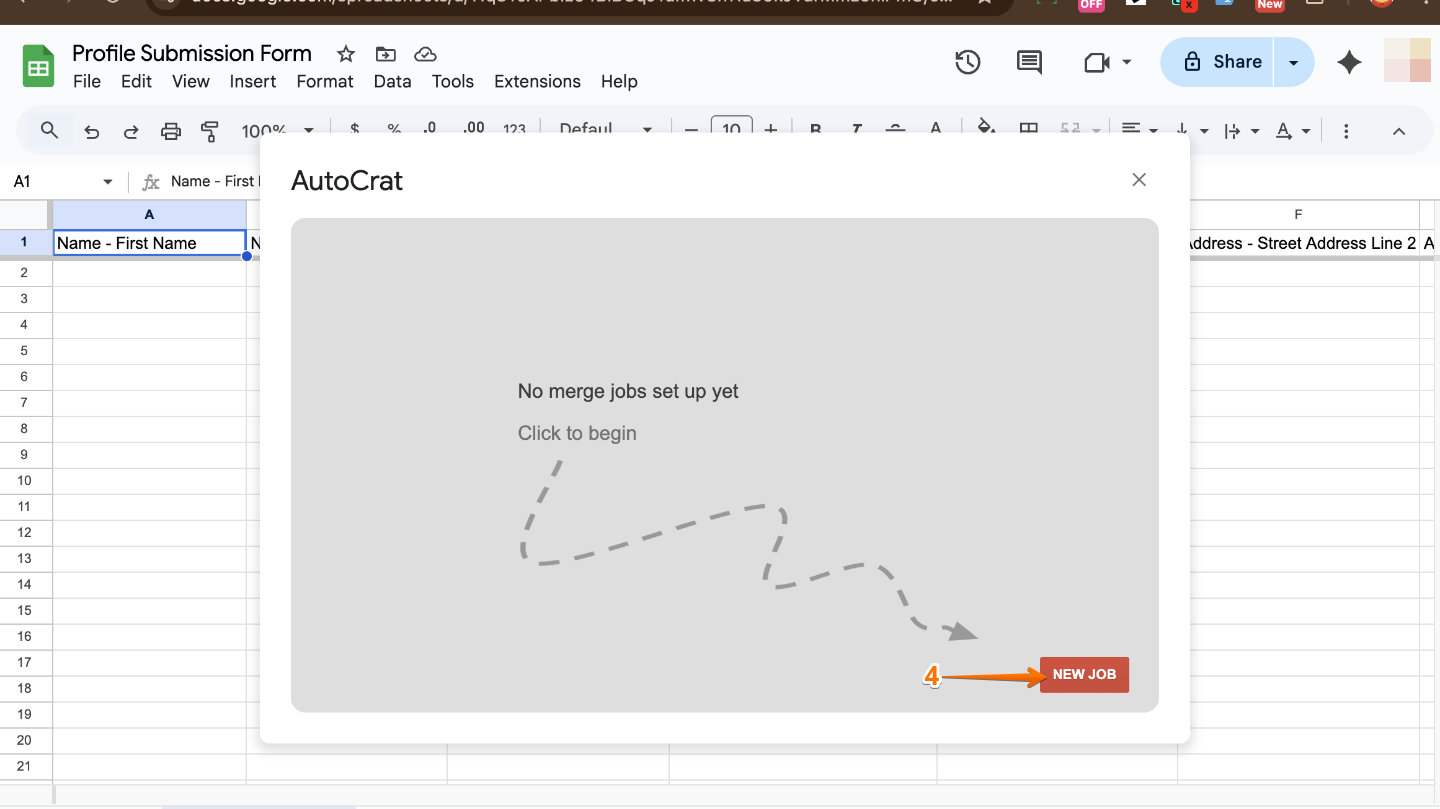
- Now, in the AutoCrat window that comes up, click on New Job.
Note
The “job” term here means a “task” that will run based on some conditions or triggers.
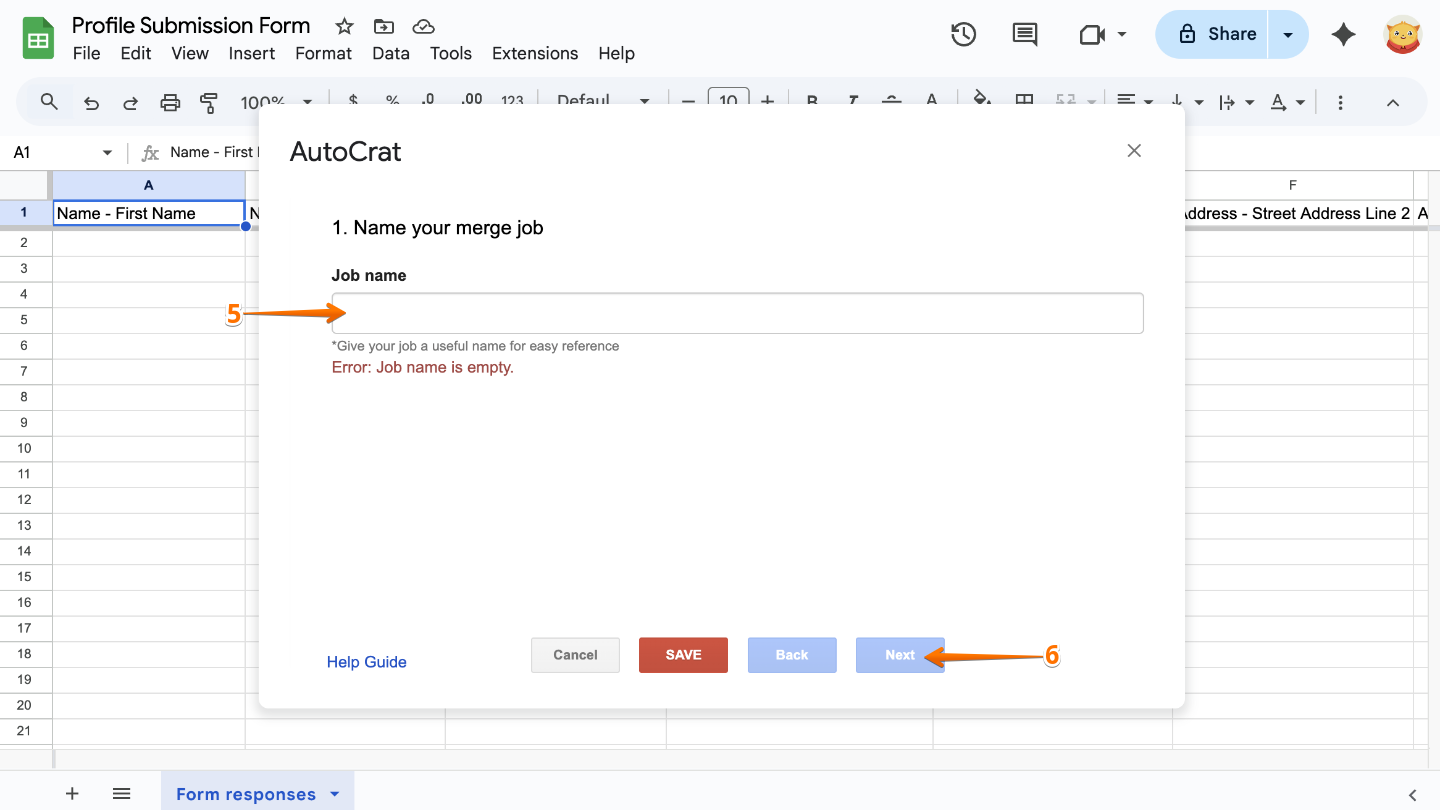
- Next, enter a Job Name in the field provided.
- Once you’re done, click on Next.
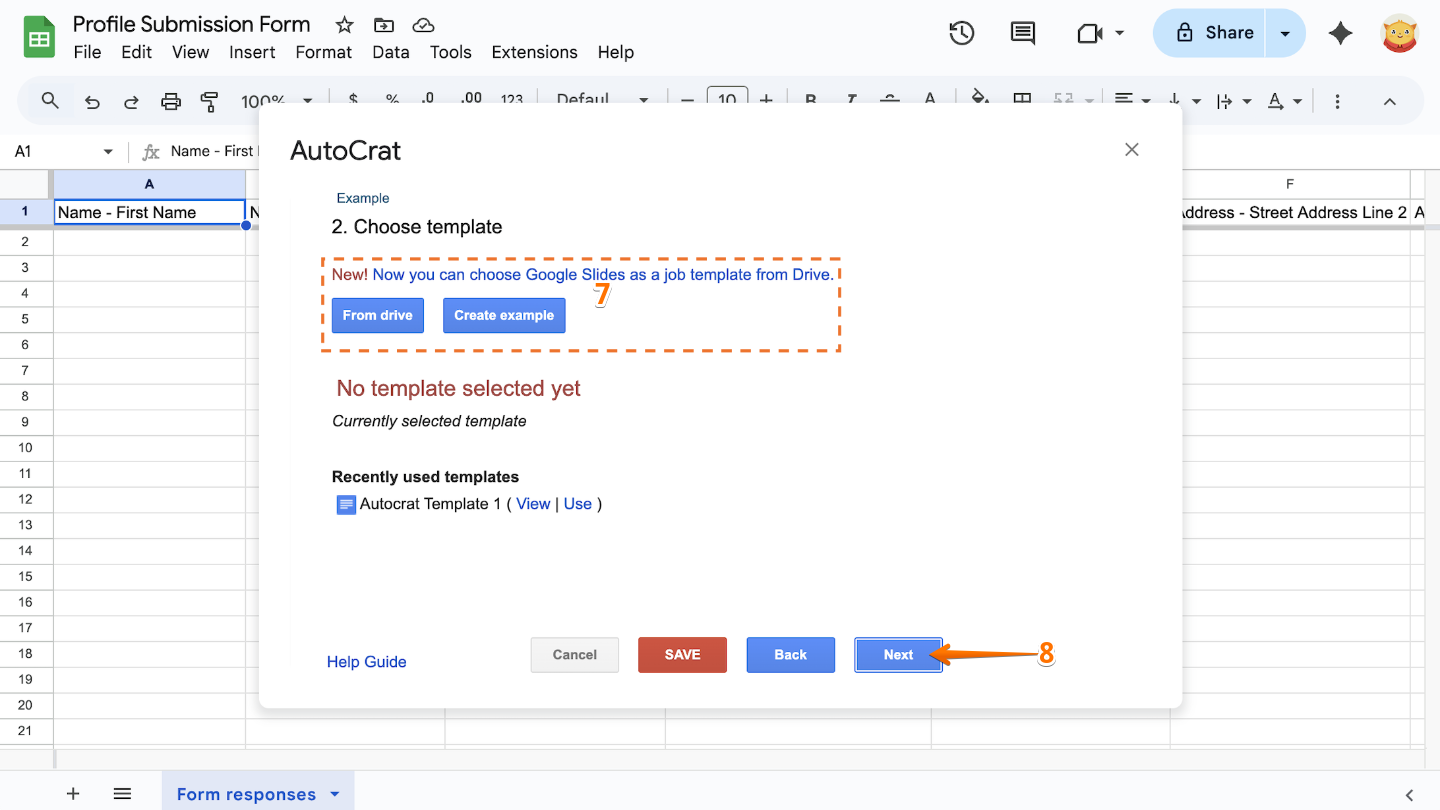
- Click on From Drive or Create button to choose the template that you prepared earlier.
- After that, click on Next.
- Map the integrated sheet as the source data to the Google Doc template. Autocrat automatically does this for you, provided that you have correctly placed the field labels from Google Sheets. And then click on Next to proceed.
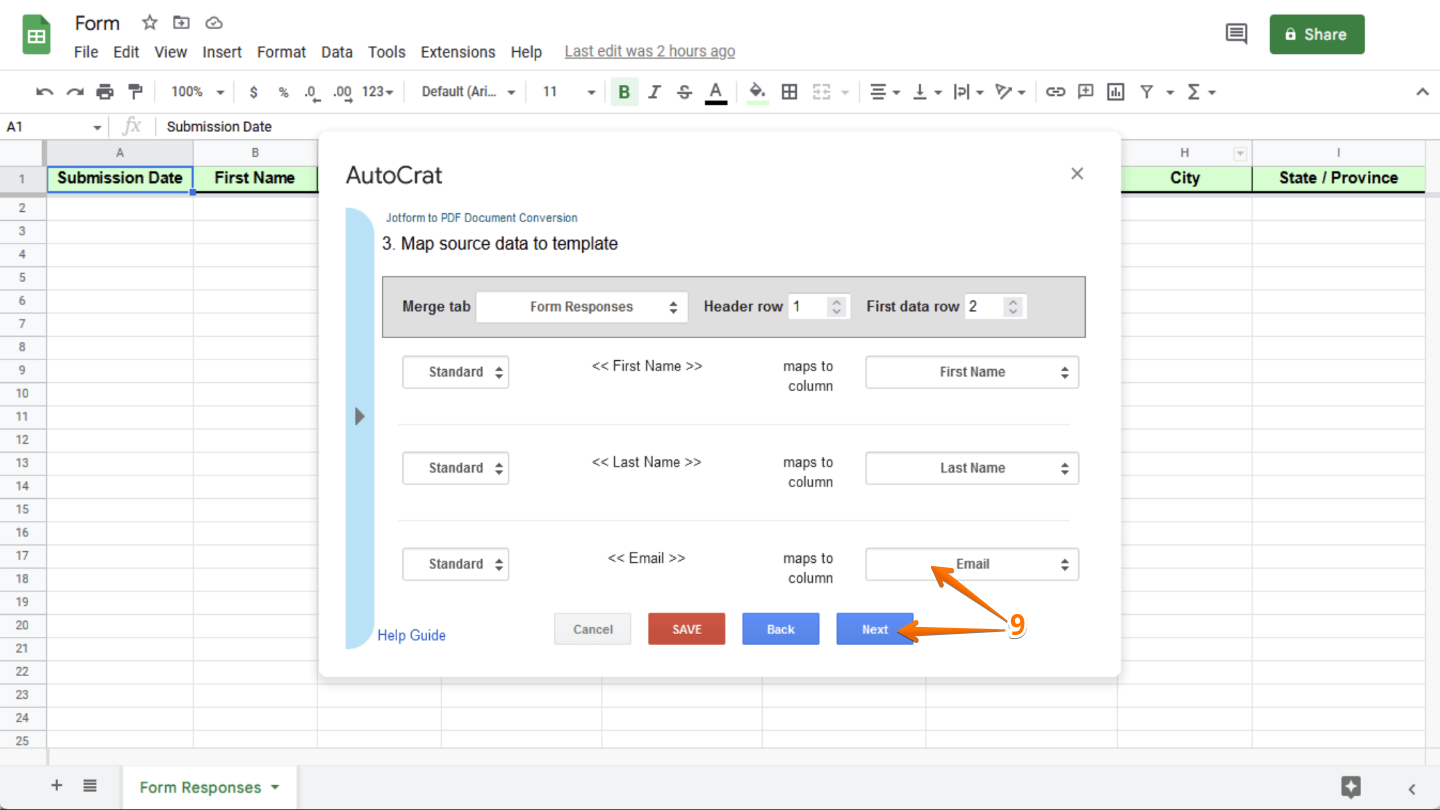
Note
If your form includes an Upload field, make sure to choose the Hyperlink data type for it instead of Standard. This way, the uploaded file will appear as a clickable link in your merged document.
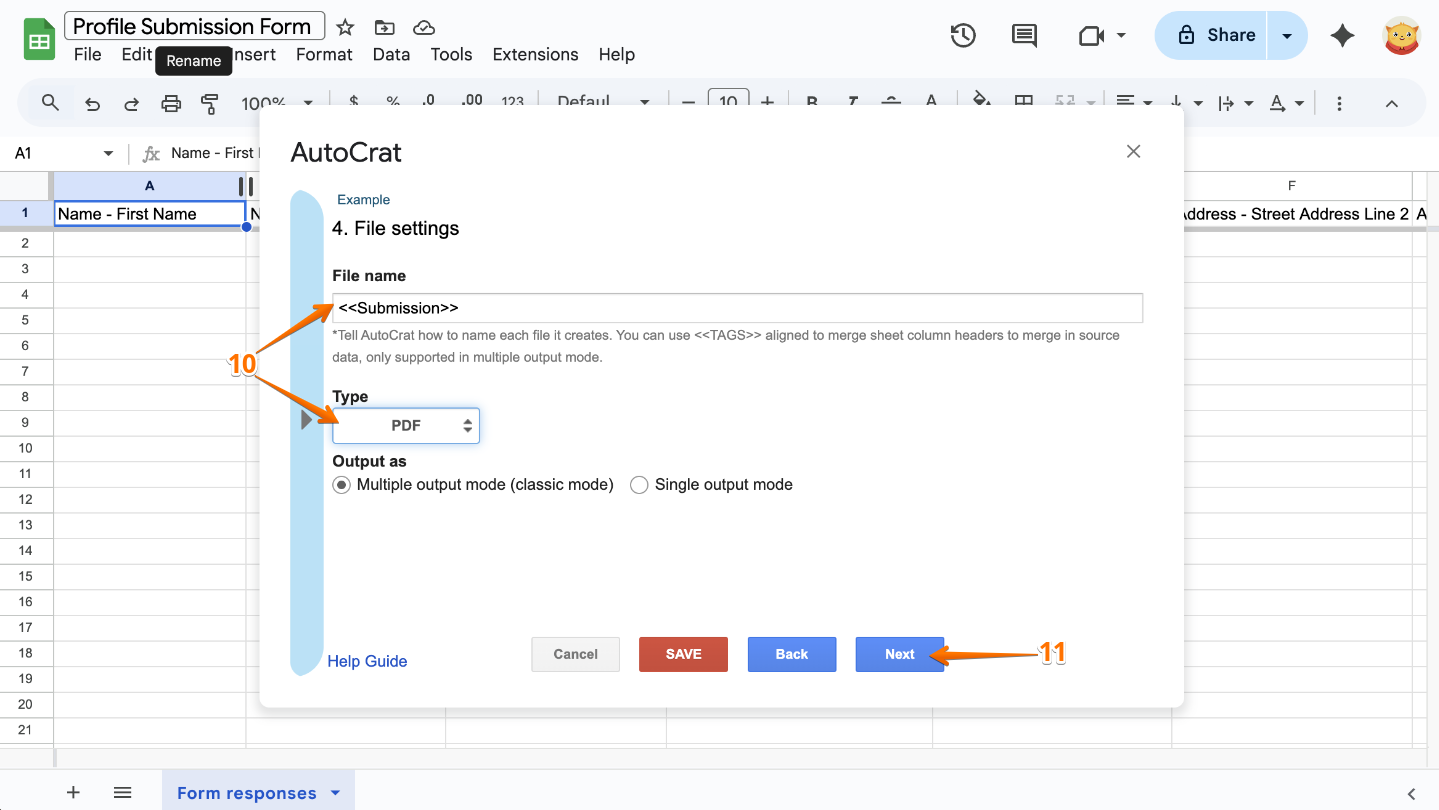
- In the File Settings, enter the name of the files that Autocrat will create. For example, you can use the dynamic values from the form, such as the Submission ID. In this case, enter <<Submission ID>>. And then select PDF as the Type.
- Once you’re done, click on Next.
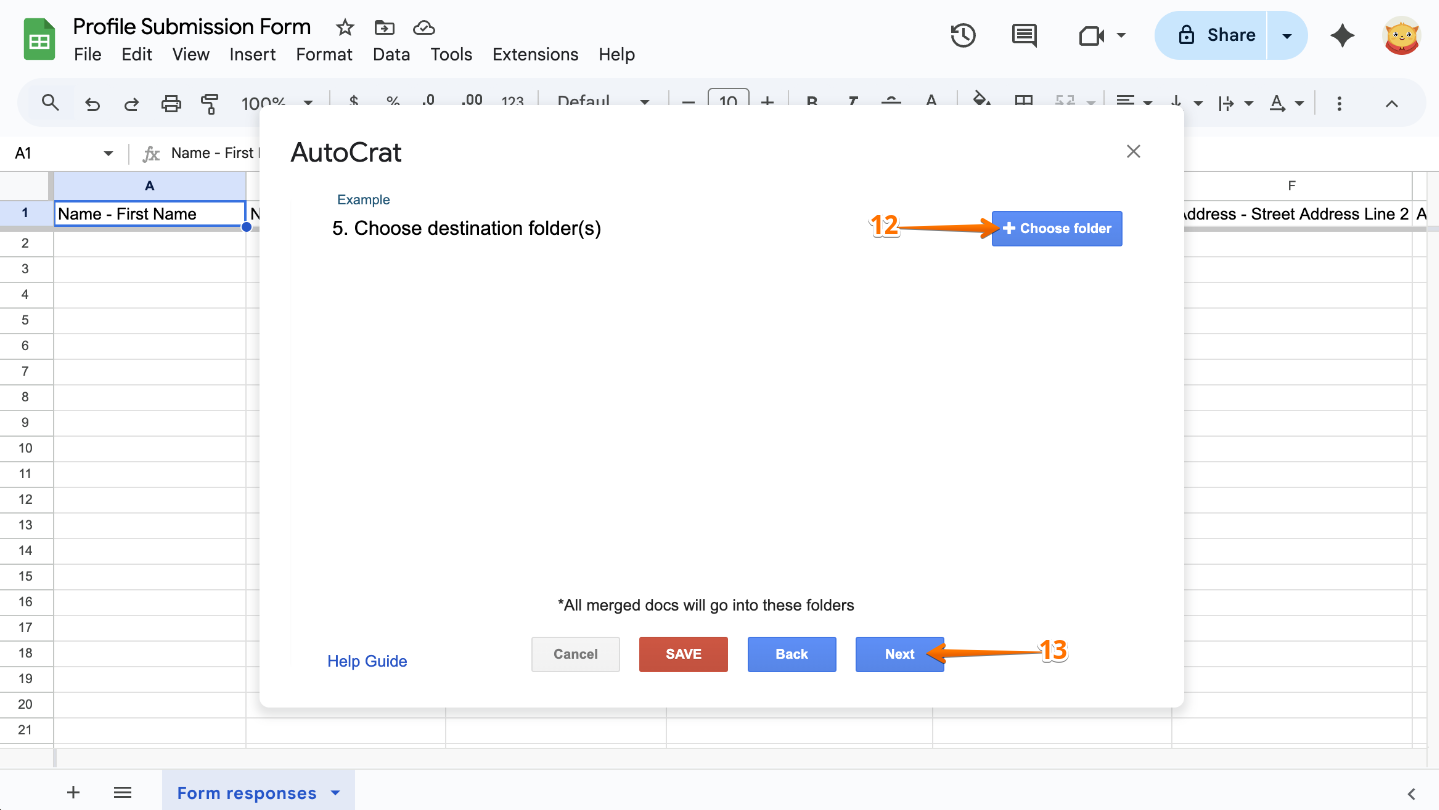
- Click on Choose Folder to choose the destination folder where the PDF document will be stored.
- Once the folder is set, click on Next.
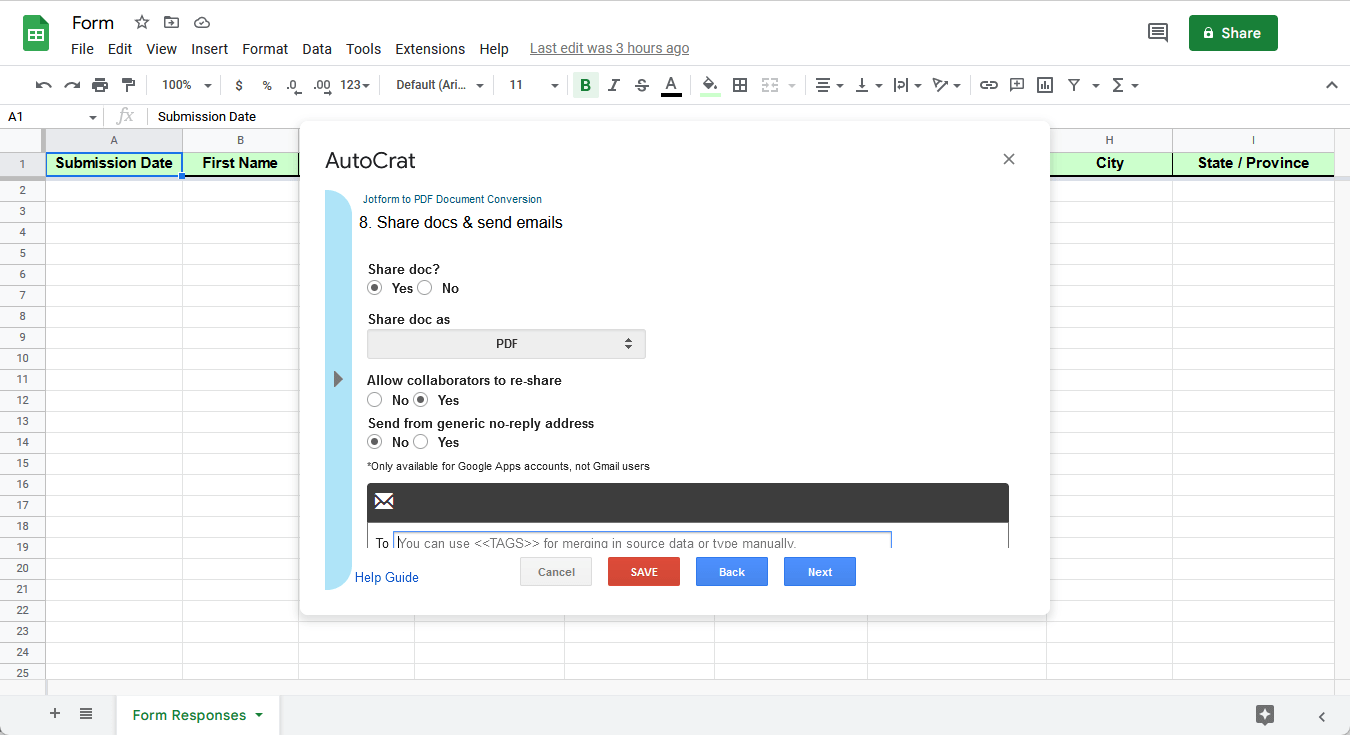
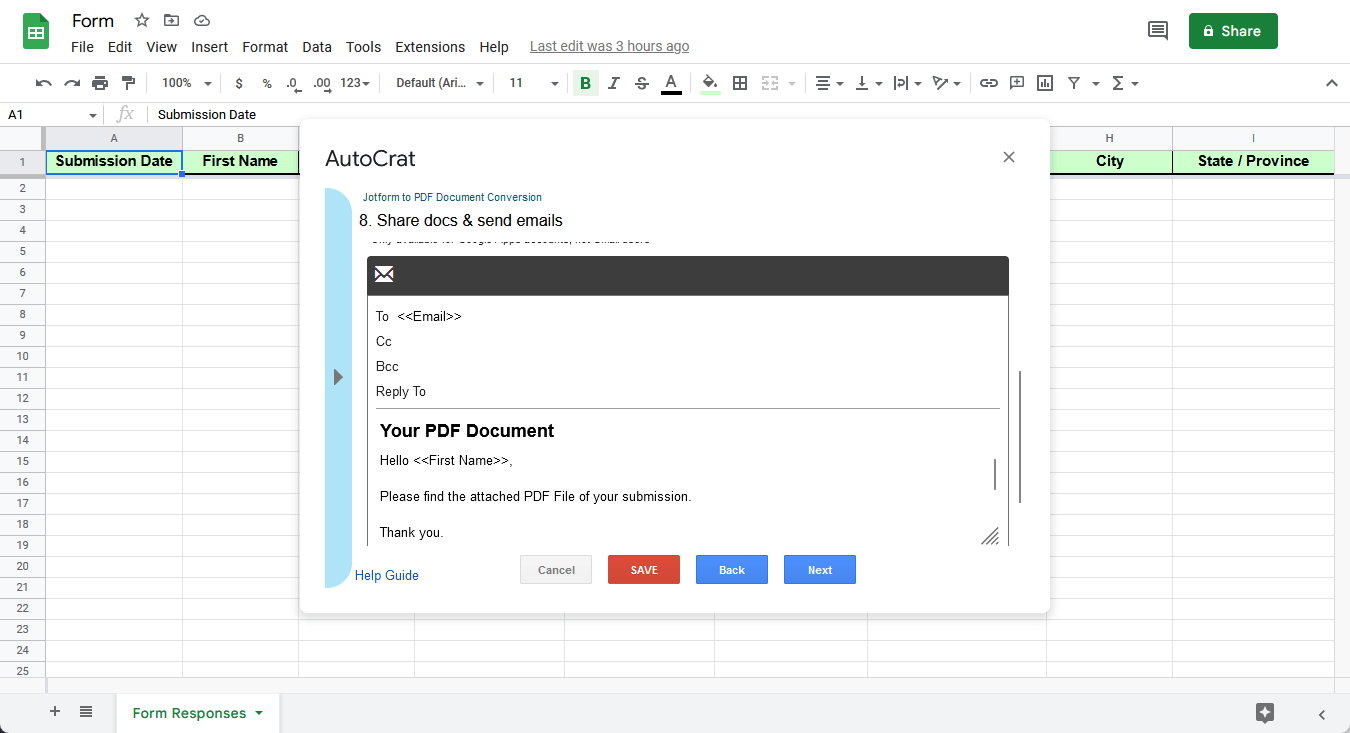
- Skip both Add dynamic folder reference and Set merge condition, and proceed to Share docs & send emails. In this window, set the following:
- Share doc to Yes.
- Share doc as PDF.
- Allow collaborators to re-share to No.
- Send from generic no-reply address to No.
- Type <<Email>> into the To box.
- Enter a Subject for the email.
- Compose a message.
Note:
- If you’re signed in with a Google Workspace account, set Send from generic no-reply address to Yes. This lets Autocrat use a no-reply address from your organization’s domain as the sender.
- If you’re using a regular Gmail account, Autocrat will automatically send the email from your Gmail address instead.
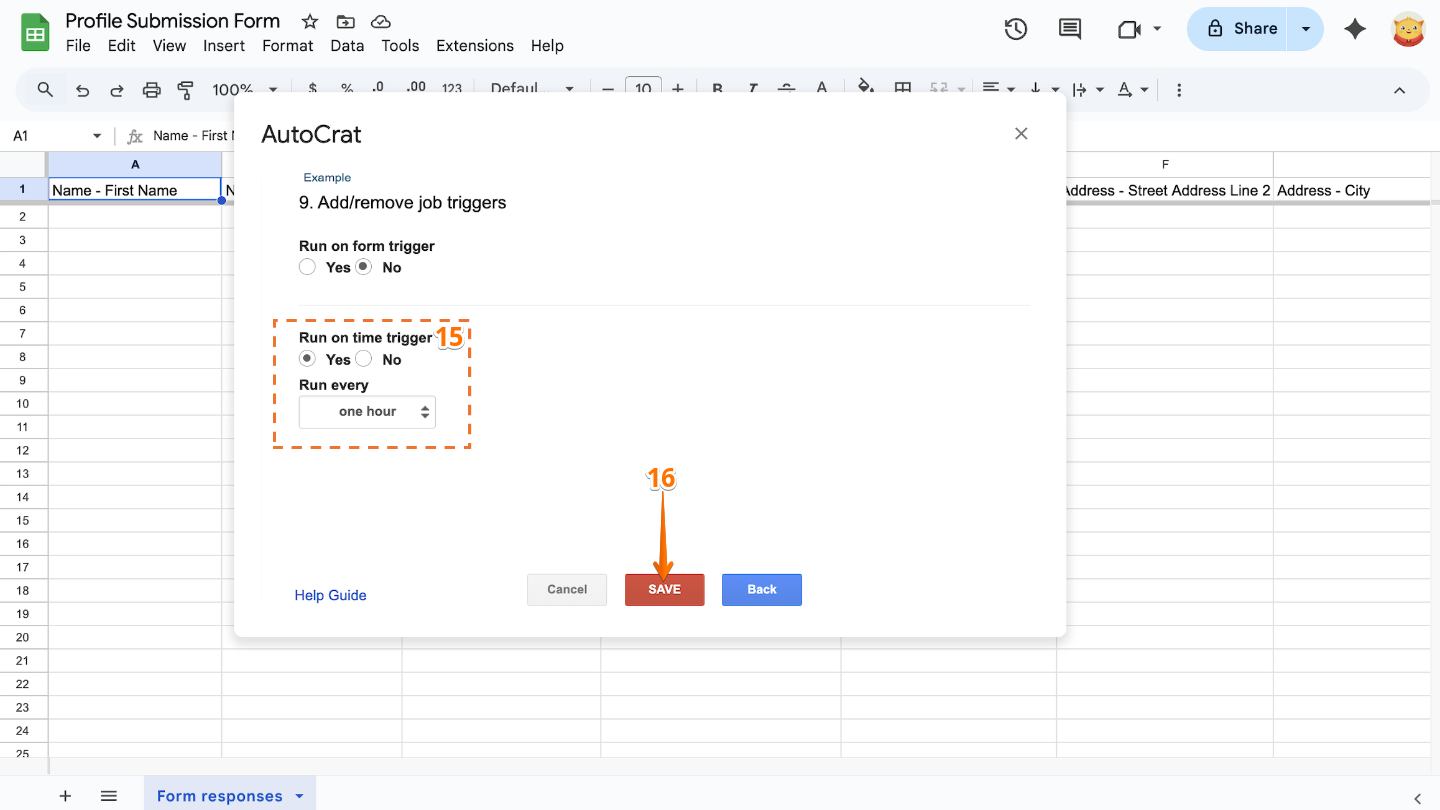
- Select Yes from the Run on time trigger. Choose One Hour from the selection.
- Finally, click on Save.
Autocrat refreshes automatically every hour at minimum. If you’d like to run the job right away, simply open Autocrat again in your integrated sheet and click the Run icon to start it manually.
If you have any questions, suggestions, or feedback about this guide, we’d love to hear from you. Feel free to share your thoughts in the comments below.

Send Comment: