When setting up Okta Single Sign-On (SSO), you’ll need to configure Attribute Statements as part of your application settings. These statements tell Okta which user details to pass to your SSO Prefill settings in your organization. They help with user provisioning and access control—and they can also personalize the experience by prefilling forms with details like names, emails, and phone numbers.
Notes
- Before you can set up SAML attribute mapping, be sure you’ve already created and configured your SAML app in Okta. Take a peek at our guide on How to Set Up Okta SSO in Your Organization to learn more.
- You can now let users log in using either Single Sign-On (SSO) or their email and password. You also have the option to require SSO for guest users.
Configuring SAML Attribute Statements for the Custom SAML App
To pass user details like name and email from Okta to your organization, set up Attribute Statements in your Okta Admin Console. To get going, here’s what you’ll do:
- Log in to your Okta My Apps Dashboard, and then in the top-right corner of the page, click on Admin to open your Admin Console page.

- On the Admin Console page, in the menu on the left, click on Applications.
- Then, in the Dropdown menu that opens, click on Applications.
- In the Applications section on the right, click on the Custom SAML 2.0 App you created for Jotform SSO.

- On the Custom SAML 2.0 App page, click on the General tab.
- Next, in the SAML Settings section, click on Edit.

- Then, on the Edit SAML Integration page, under the General Settings tab, click on Next.

- Now, under the Configure SAML tab, in the Attribute Statements (Optional) section, configure these settings:

- Next, while still under the Configure SAML tab, scroll down to the bottom and click on Next.

- Finally, under the Feedback tab, click on Finish.

Notes
- You can add additional attributes in Okta by defining them in the Attribute Statements section, along with their corresponding Profile Attributes—just like the ones shown above. Take a look at Okta’s guide on View the Okta Default User Profile for more details.
- Make sure to also populate these attributes in each user’s profile in Okta. If the user details aren’t provided, those fields will appear blank in your SSO-enabled form.
Setting Up SAML Attribute Mapping on Your Organization
After setting up the Attribute Statements, the attributes won’t show in your SSO Prefill settings until you’ve added them through the SAML Attribute Mapping on your organization. Here’s how to set it up:
- On your My Workspace page, click on your Avatar/Profile picture in the top-right corner of the screen.
- Then, in the Dropdown menu that comes up, click on Admin Console to open your Admin Dashboard page.

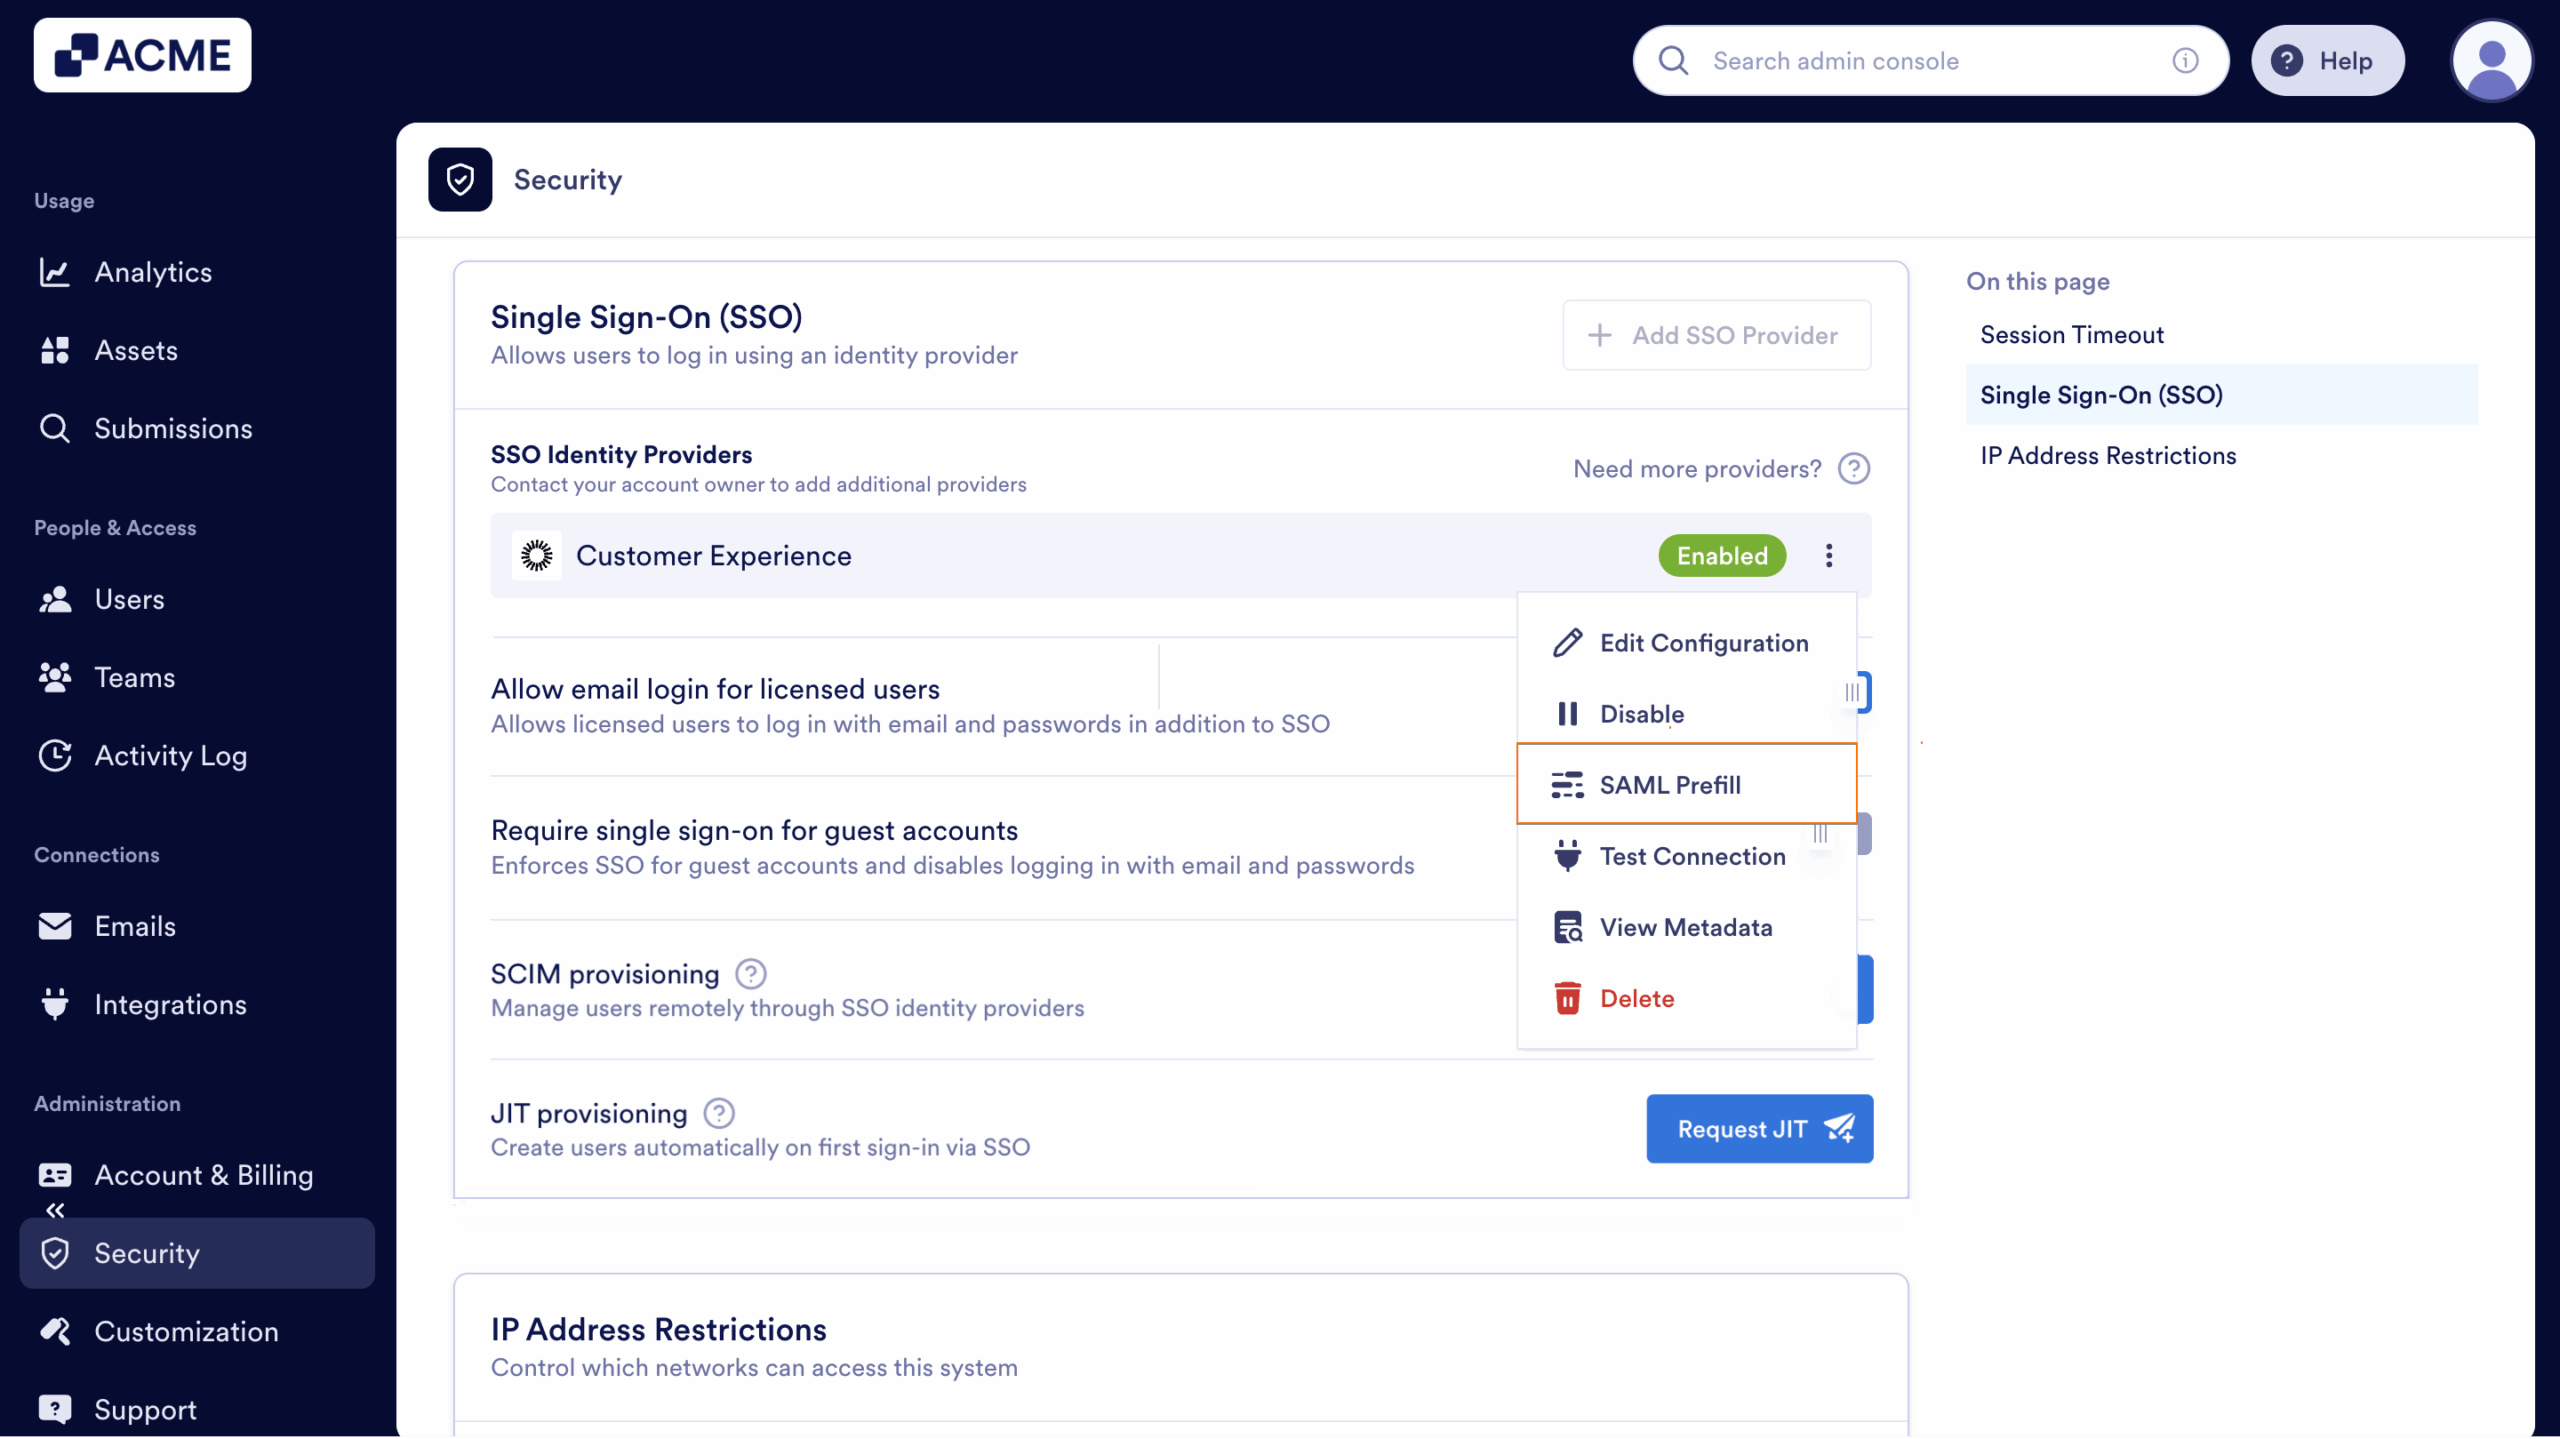
- Next, in the menu on the left, click on Security.

- Scroll down to the Single Sign-On (SSO) section and click on the Three Dots icon for the SSO Connection.

- Then, select SAML Prefill.
- Log into your Okta Account.

- Add New Mapping to start mapping the SAML Attribute Values to the Corresponding Name on Form Builder boxes and Attribute Type Dropdown menus.
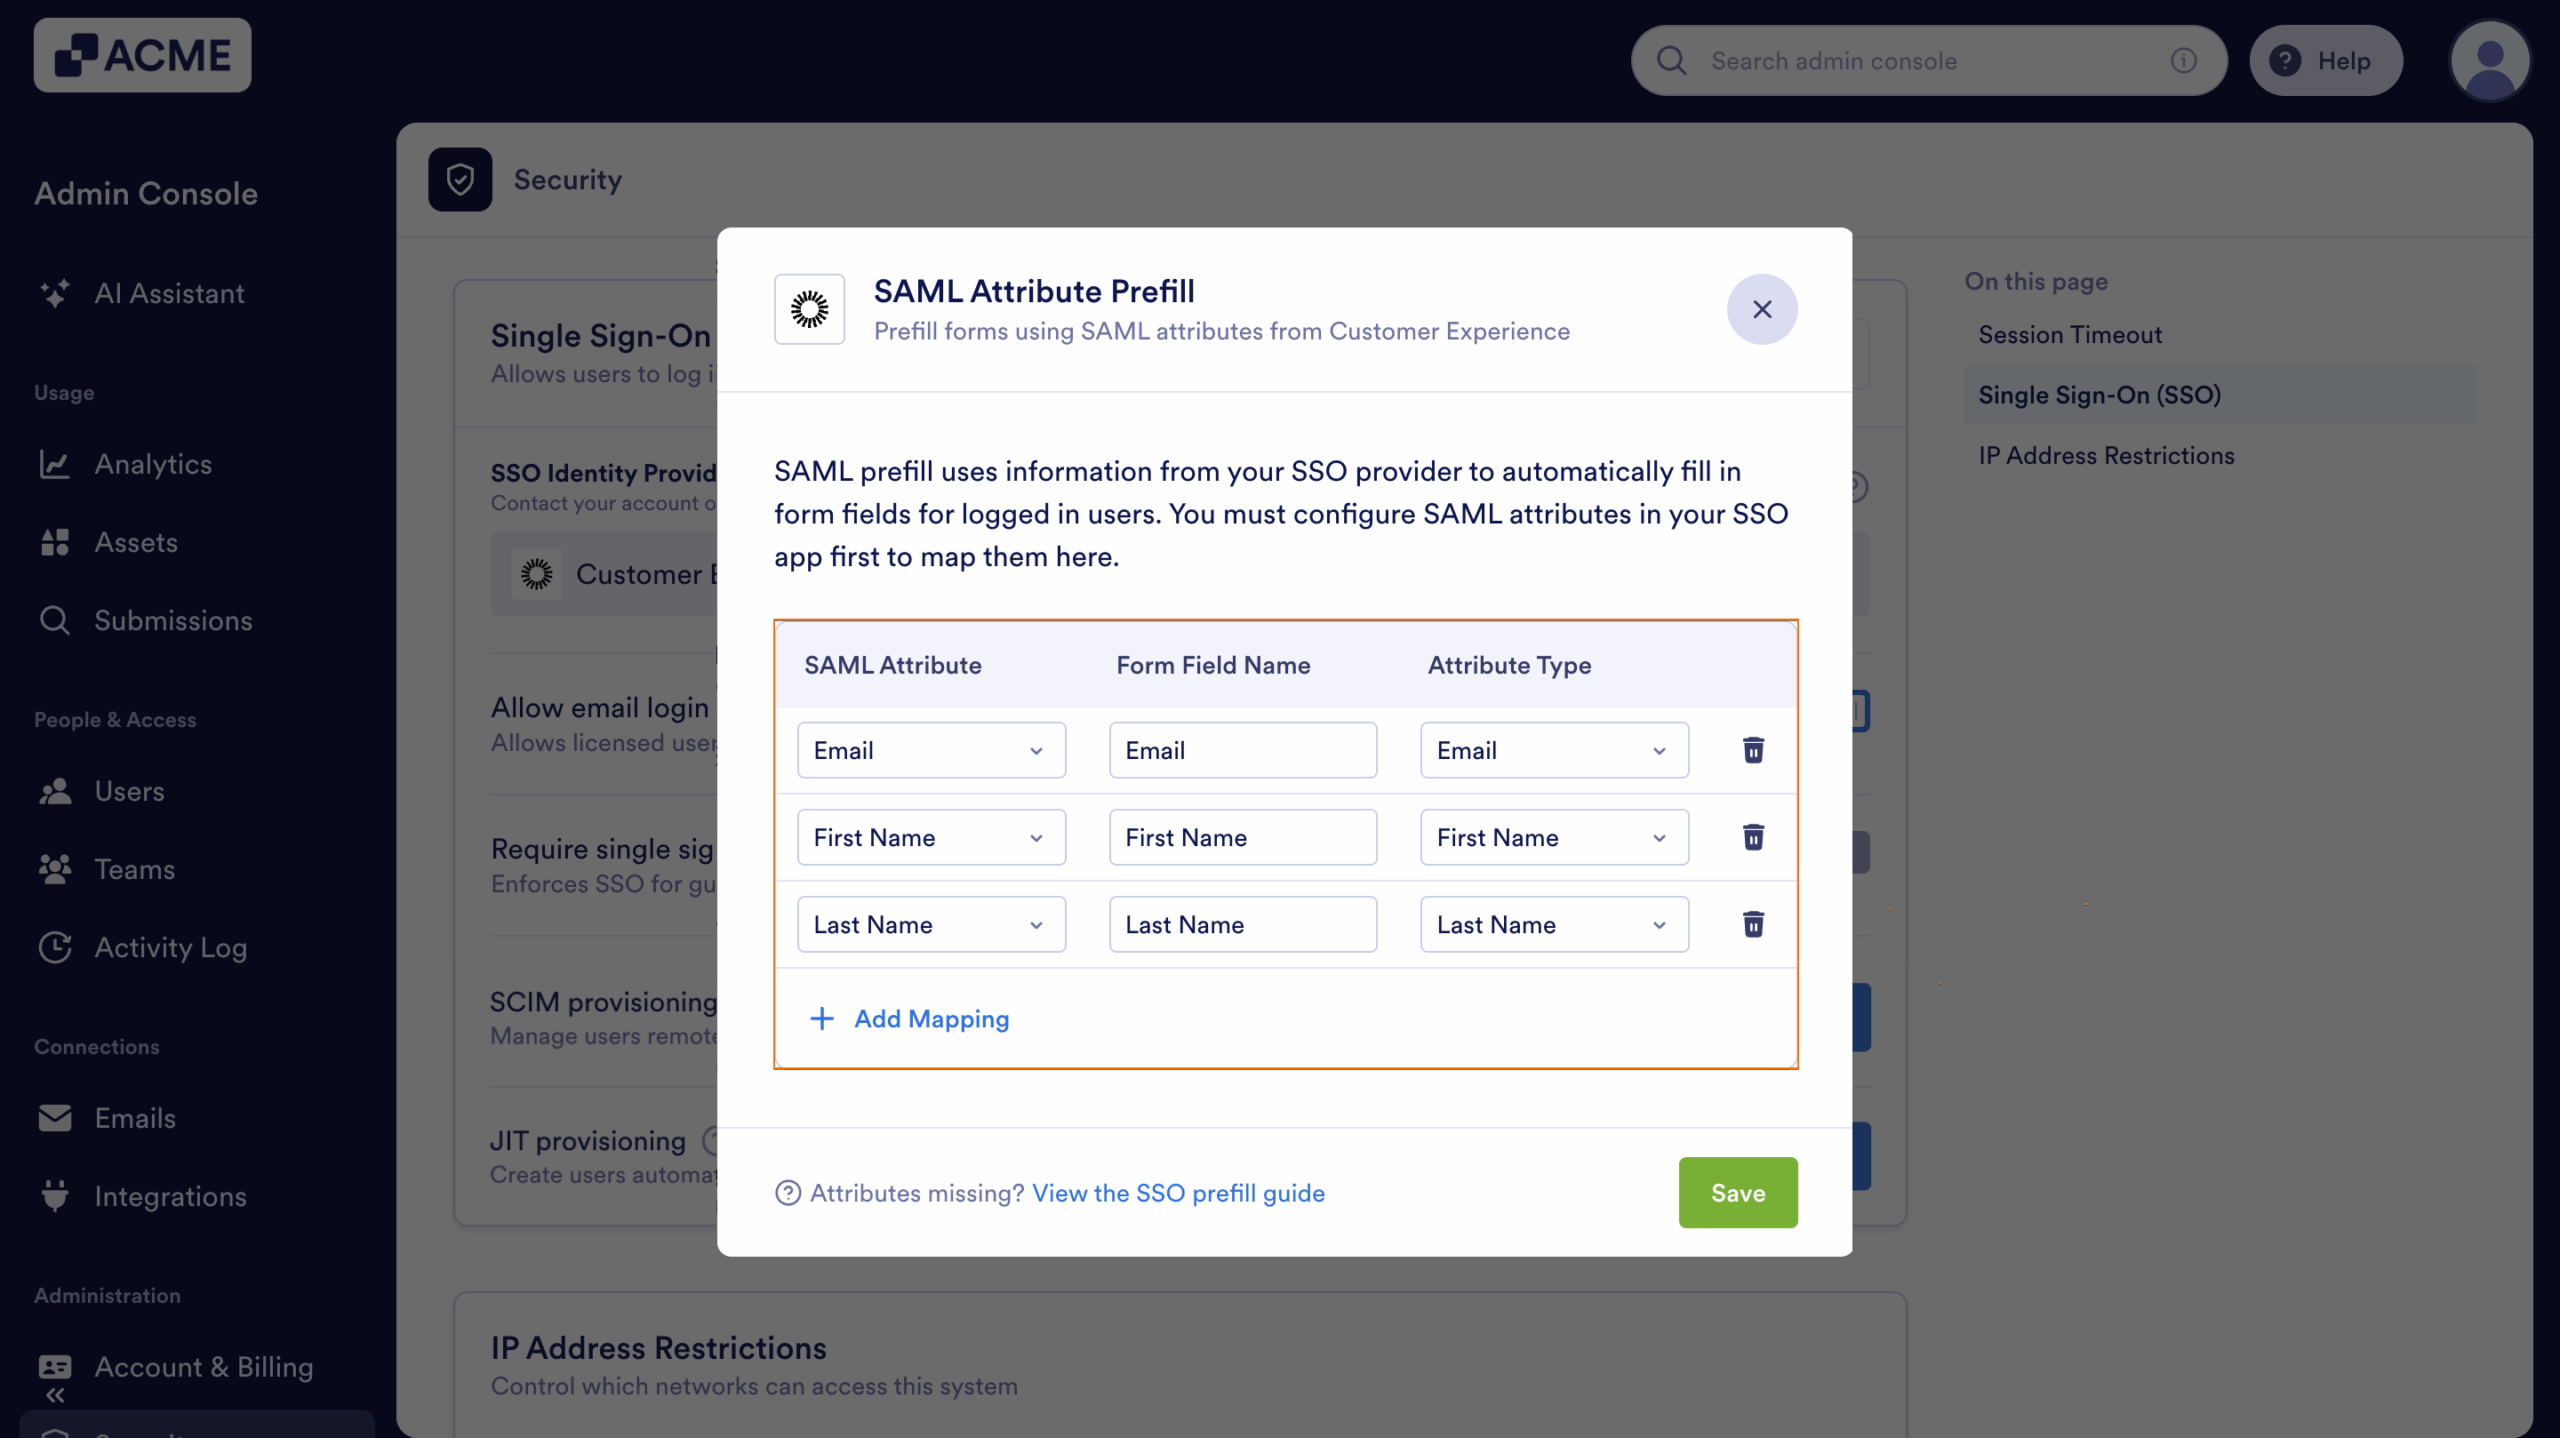
- Now, click on Save, and you’re ready to go.

Note
Attribute Types for first name, last name, and email are automatically provided. To map additional fields, you can manually enter the SAML attribute values along with the matching field names from Form Builder—there’s no need to choose an Attribute Type.

Send Comment: