Workflows help you automate processes by connecting forms, actions, and logic into a single flow. In this guide, we’ll go over creating workflows directly from a workspace, as well as from an existing form.
Create a Workflow from the Workspace
- In My Workspace, click the Create button in the upper left-hand corner of the page.
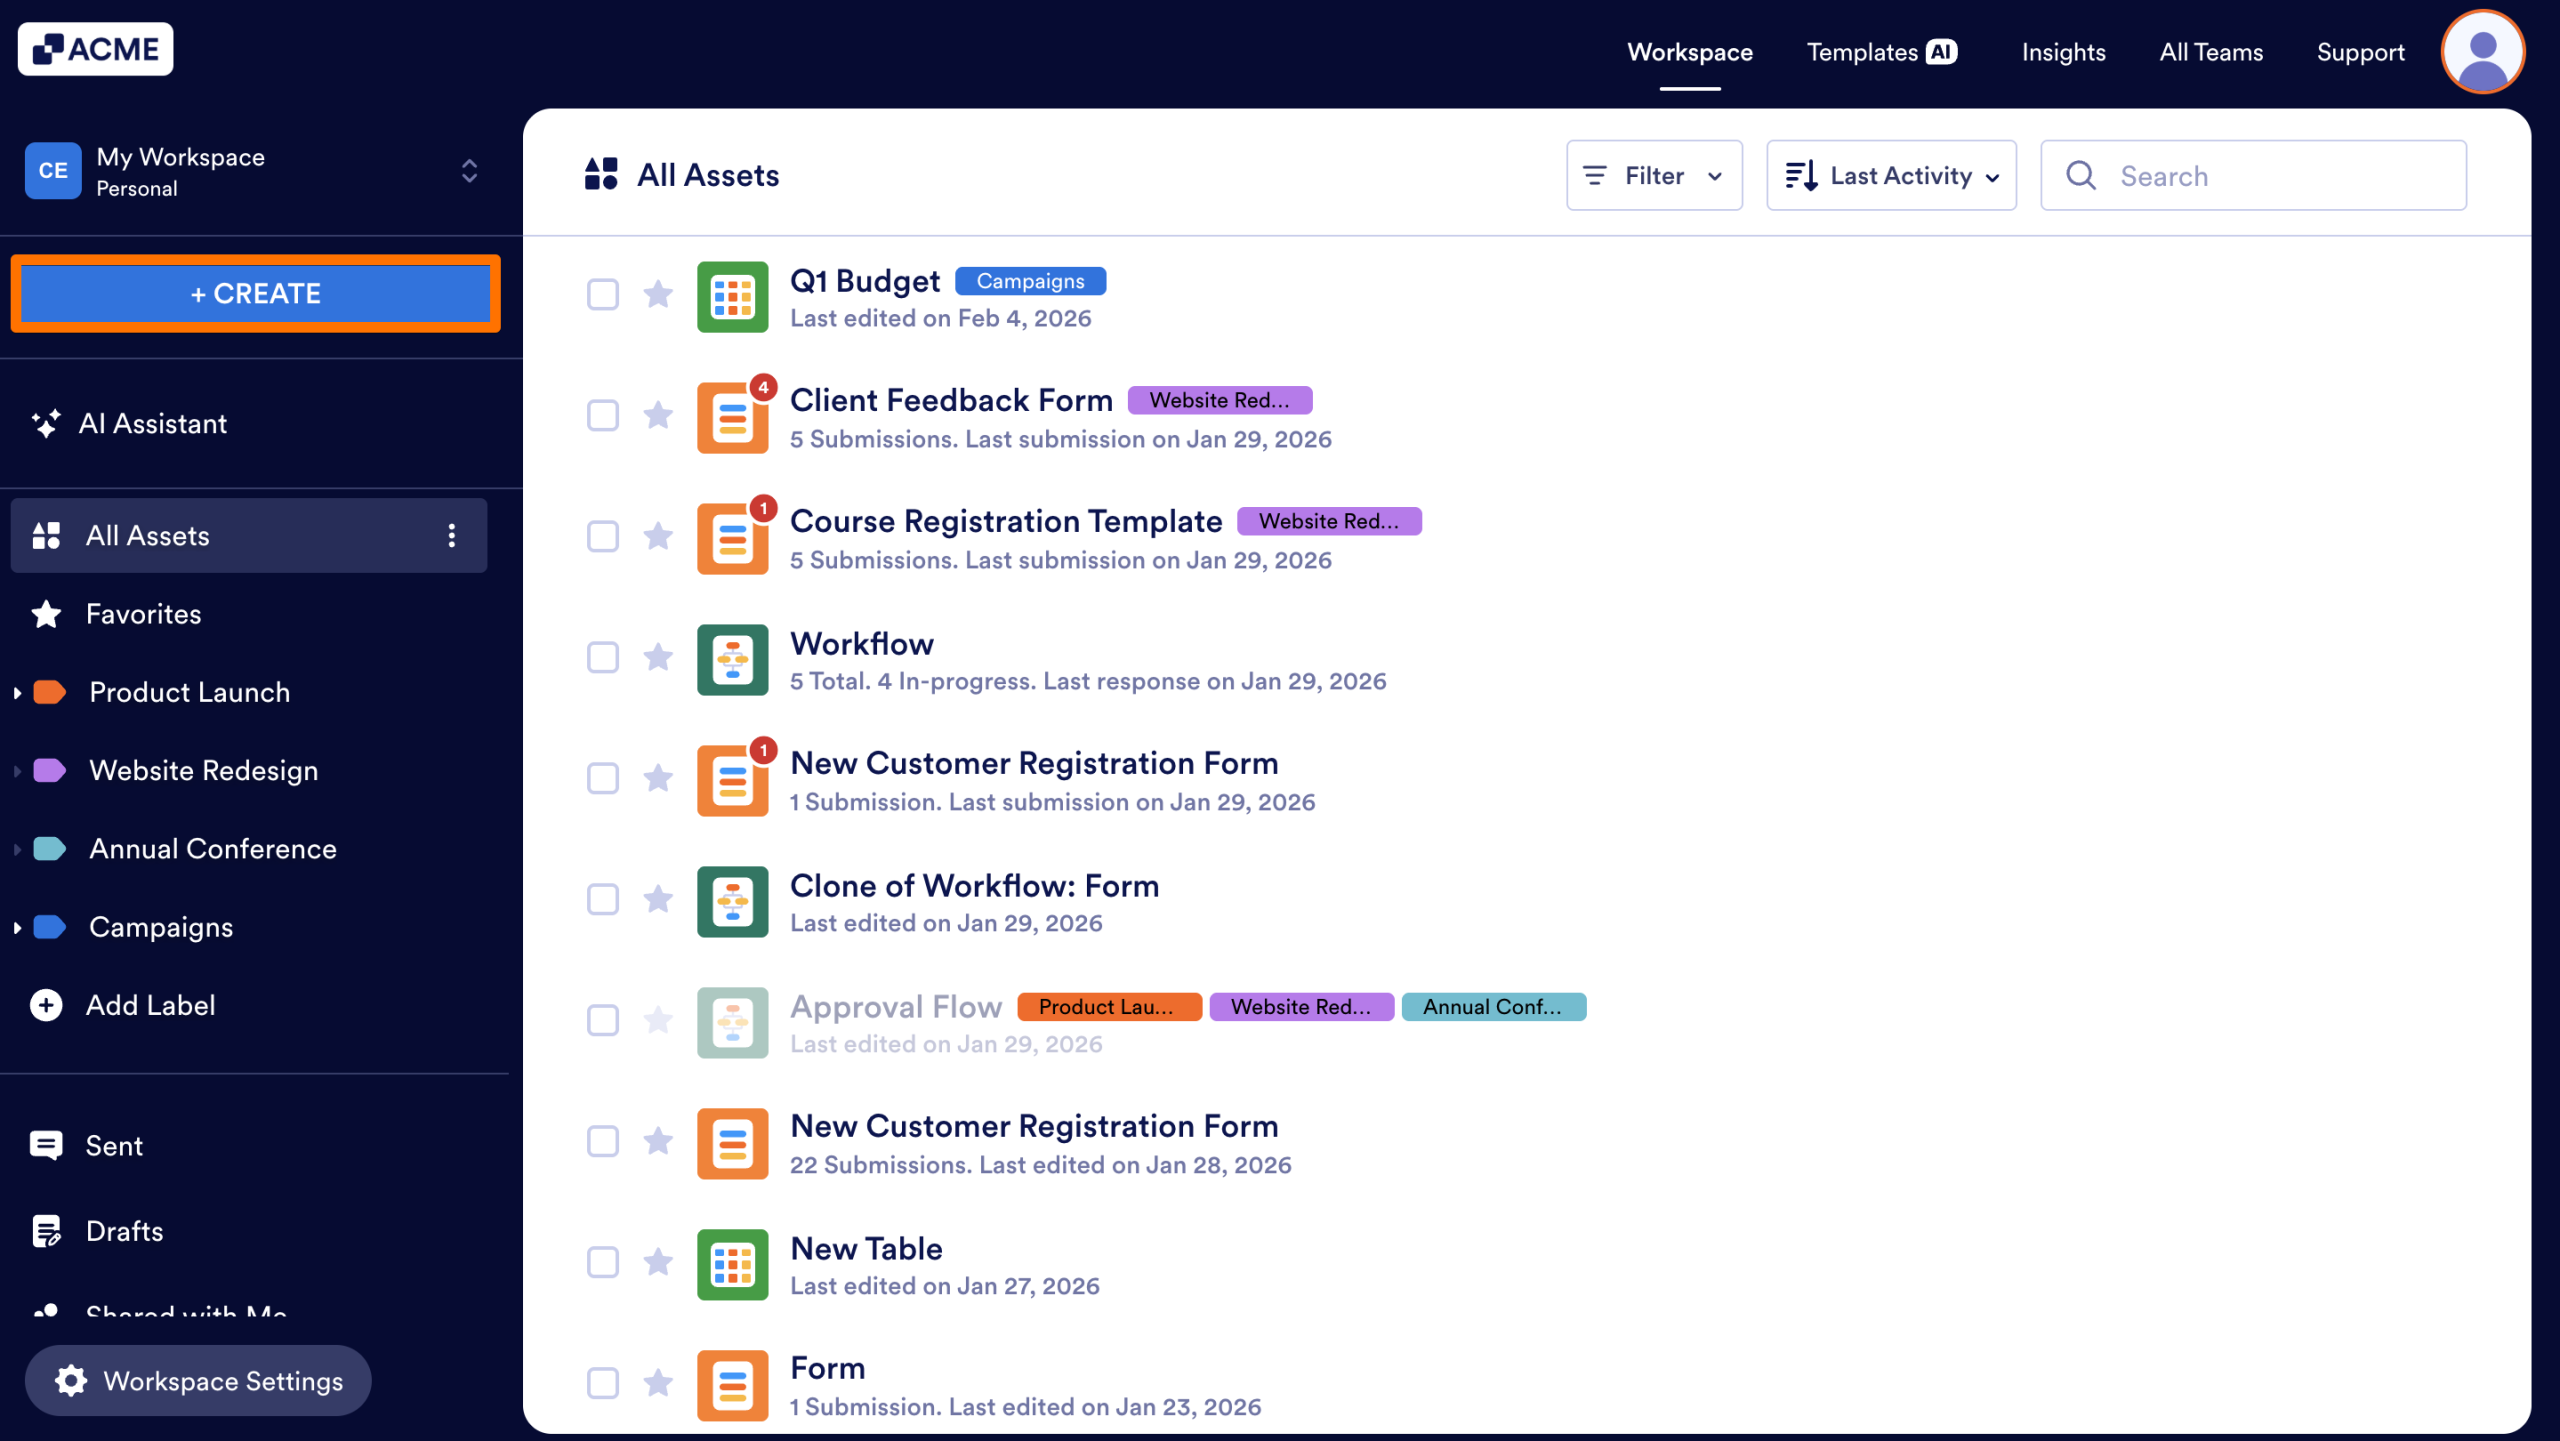
- Then, select Workflow.

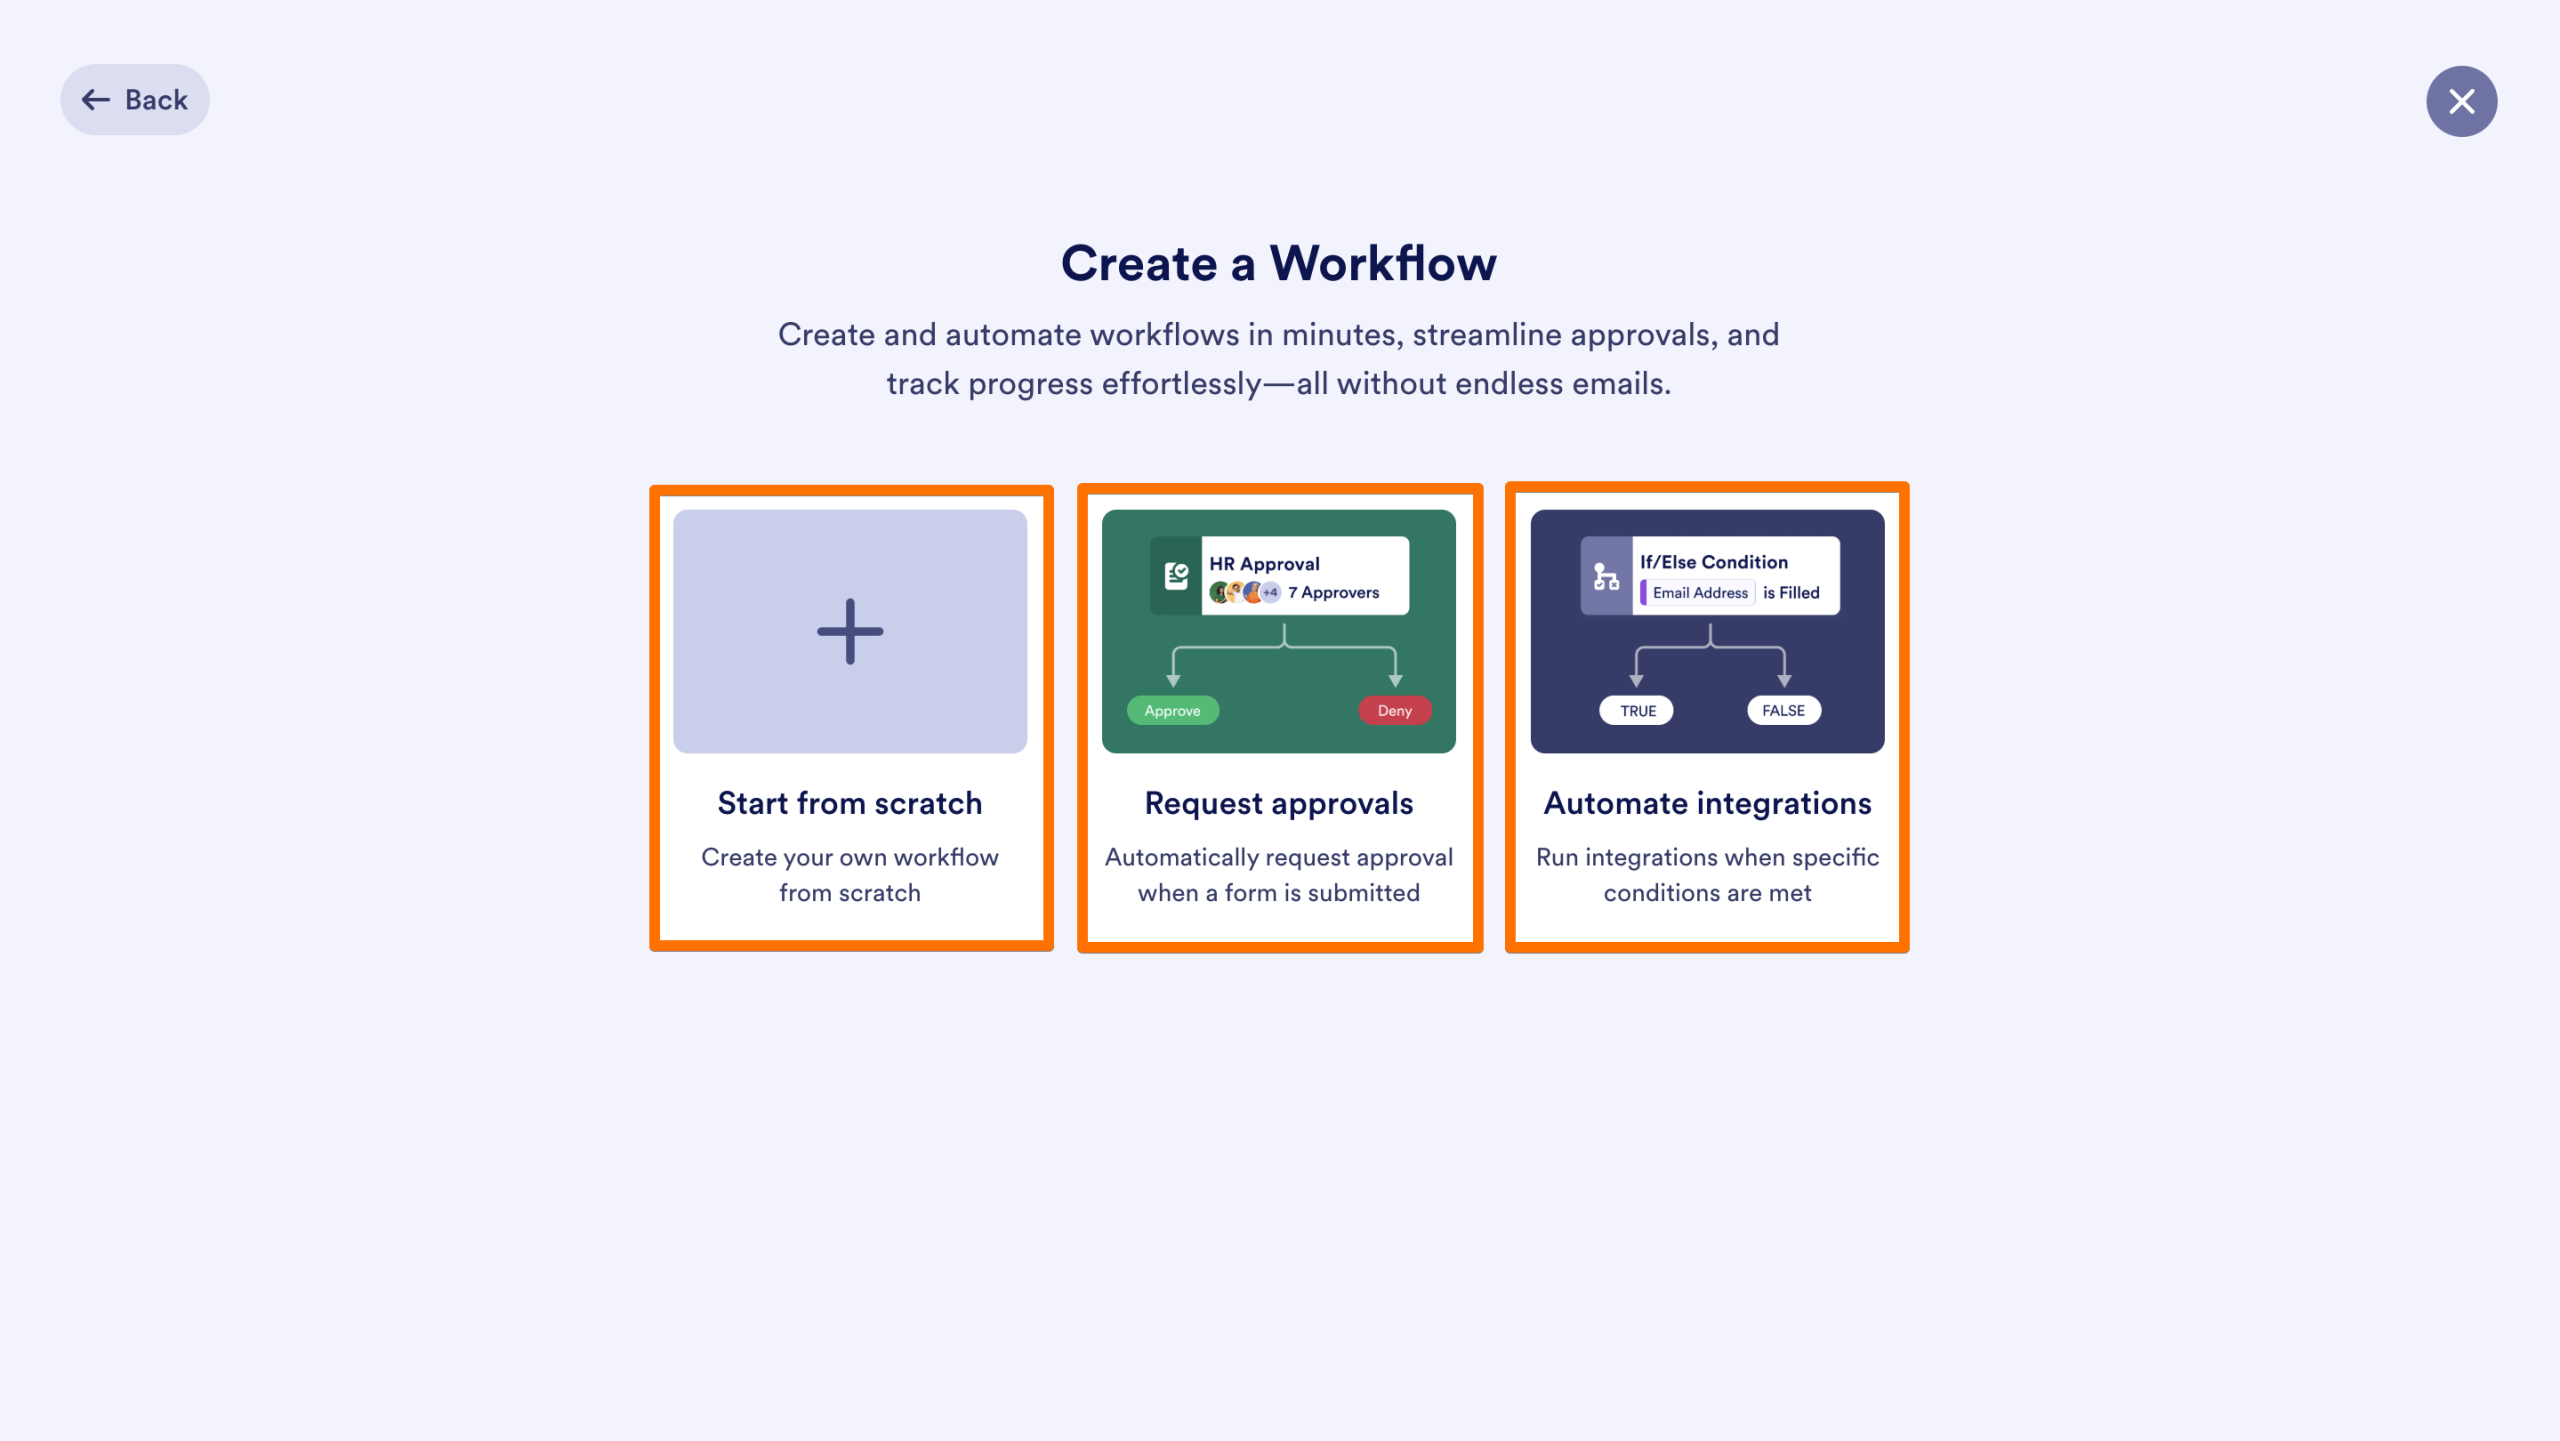
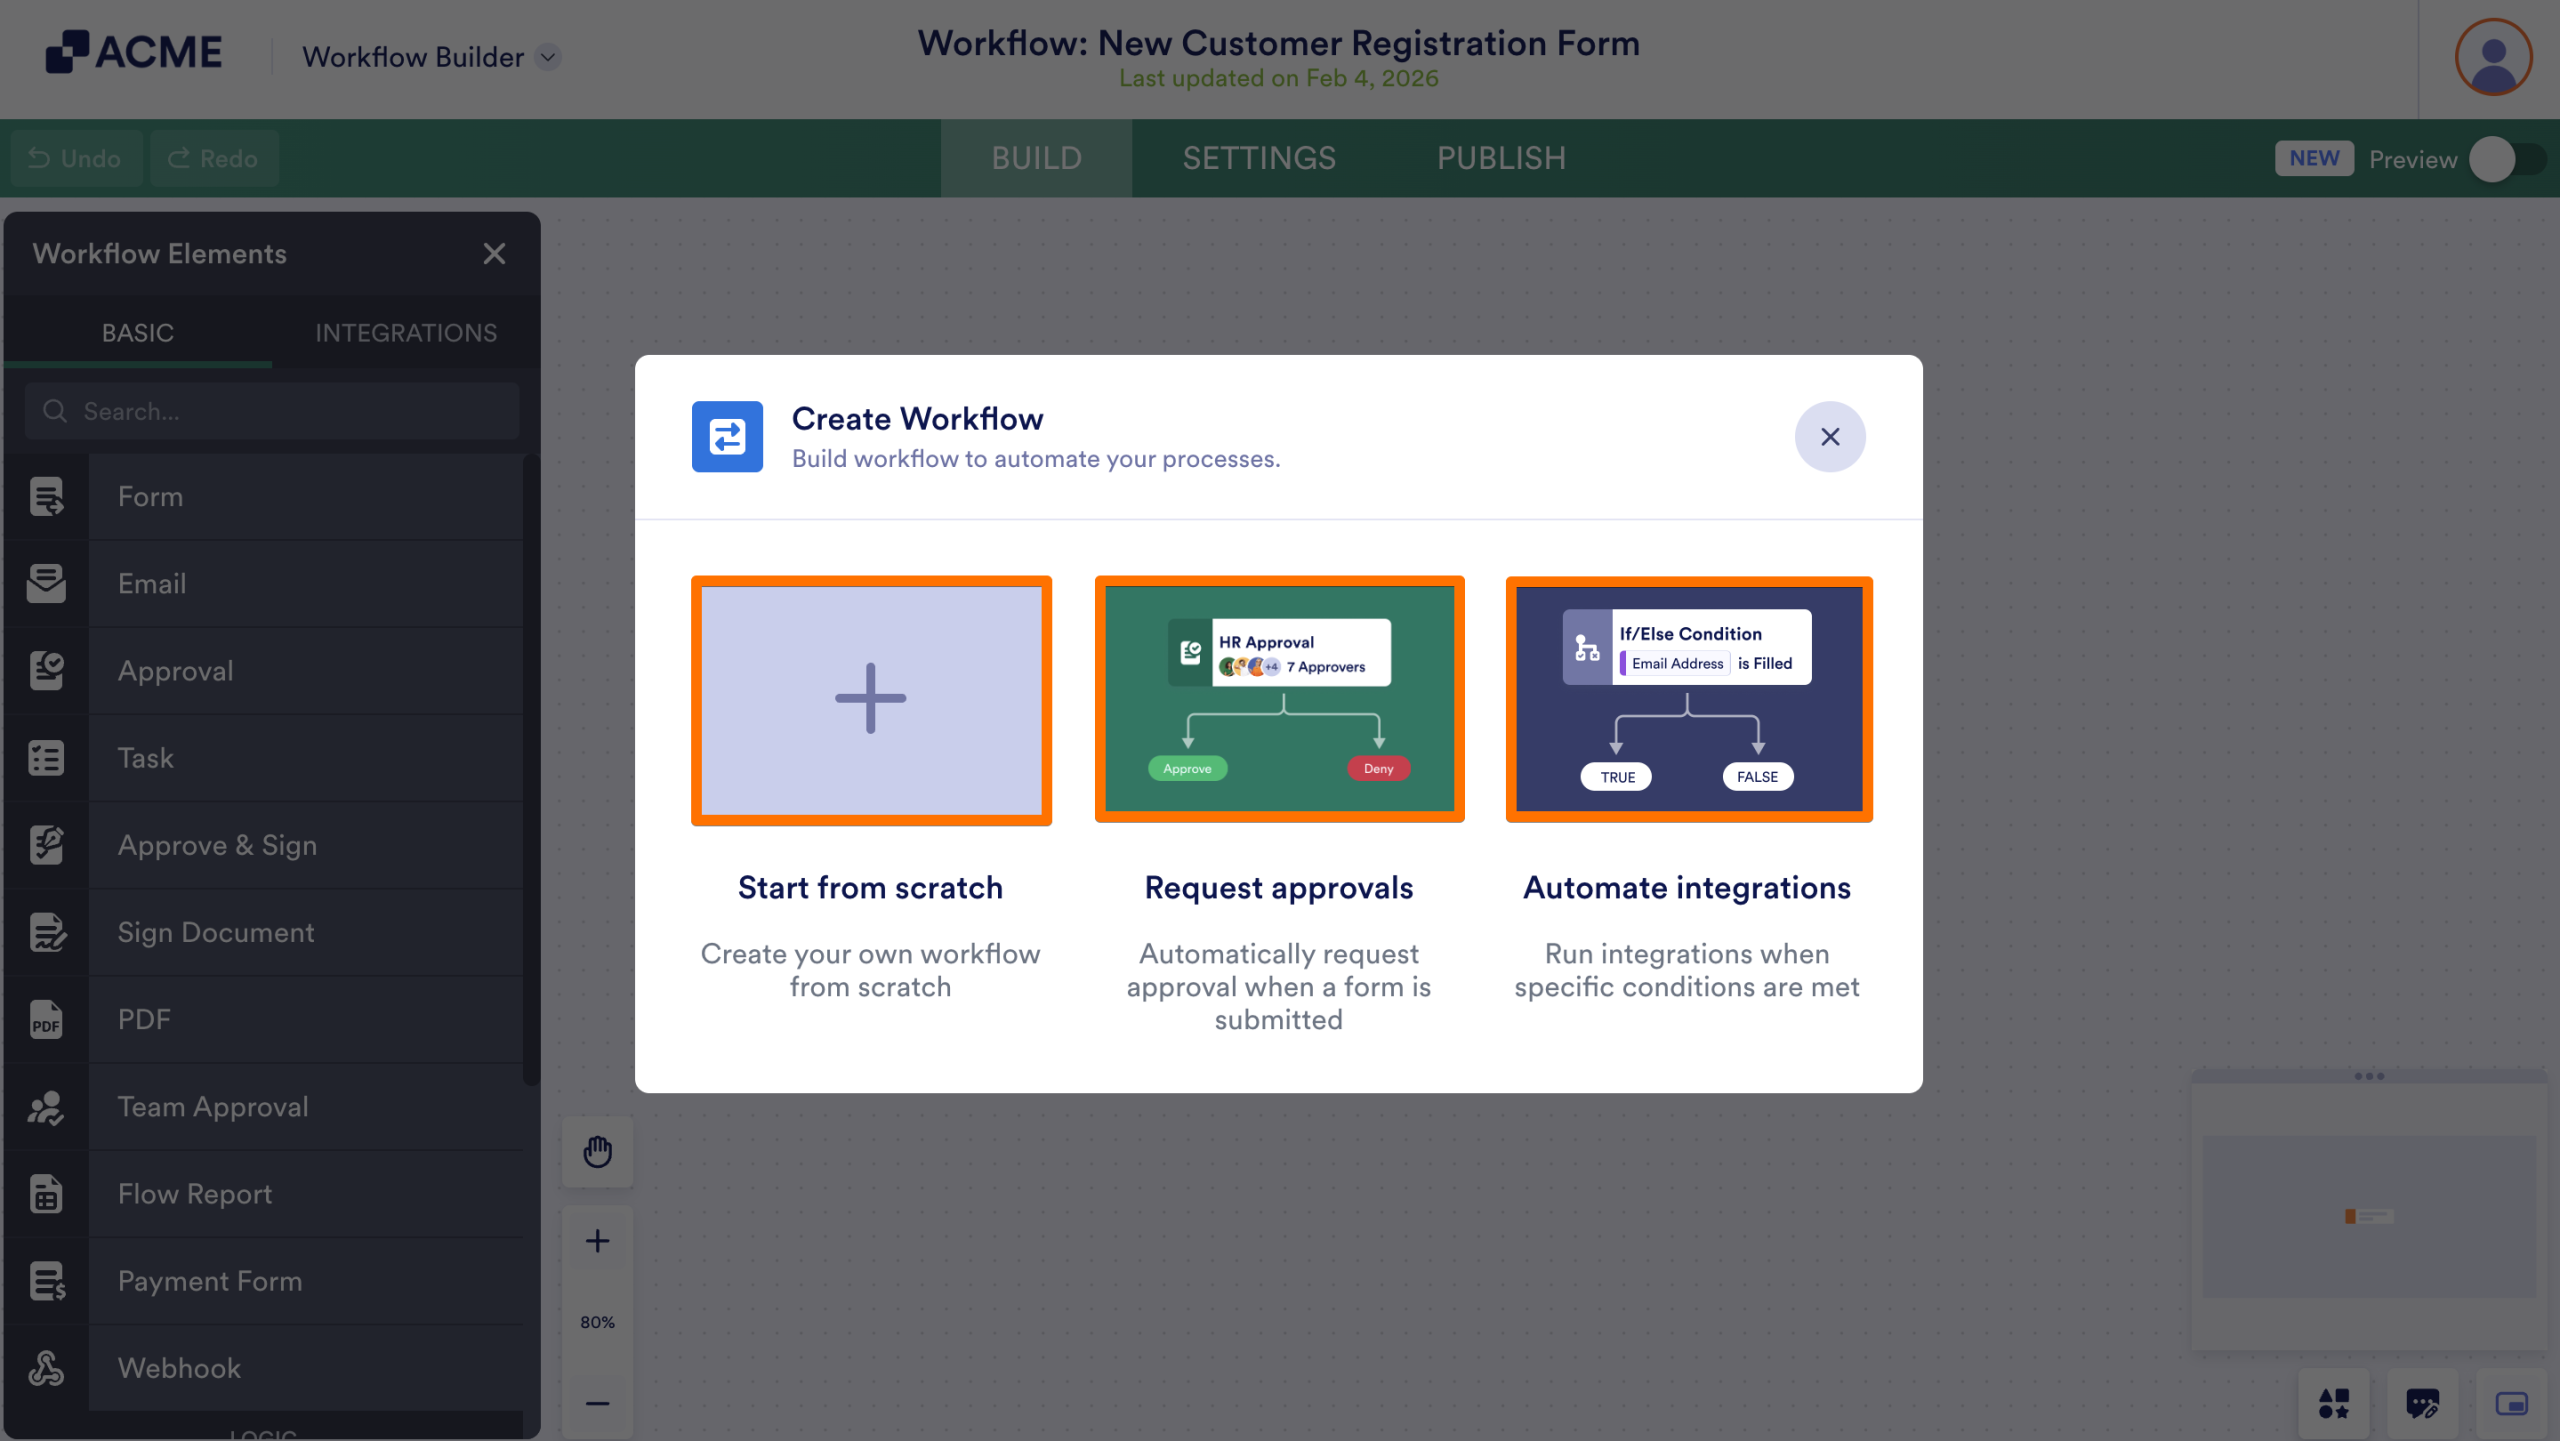
- On the next page, select how you’d like to build the workflow:
- Start from scratch: Create a workflow from the ground up. Add steps, conditions, approvals, integrations, and linked forms based on your needs.
- Request approvals: Create a workflow designed for approval processes. This option lets you automatically request approvals when a form is submitted and route the submission to one or more approvers.
- Automate integrations: Create a workflow that runs integrations when specific conditions are met. This option is useful for connecting your data with other tools and automating actions based on form responses.
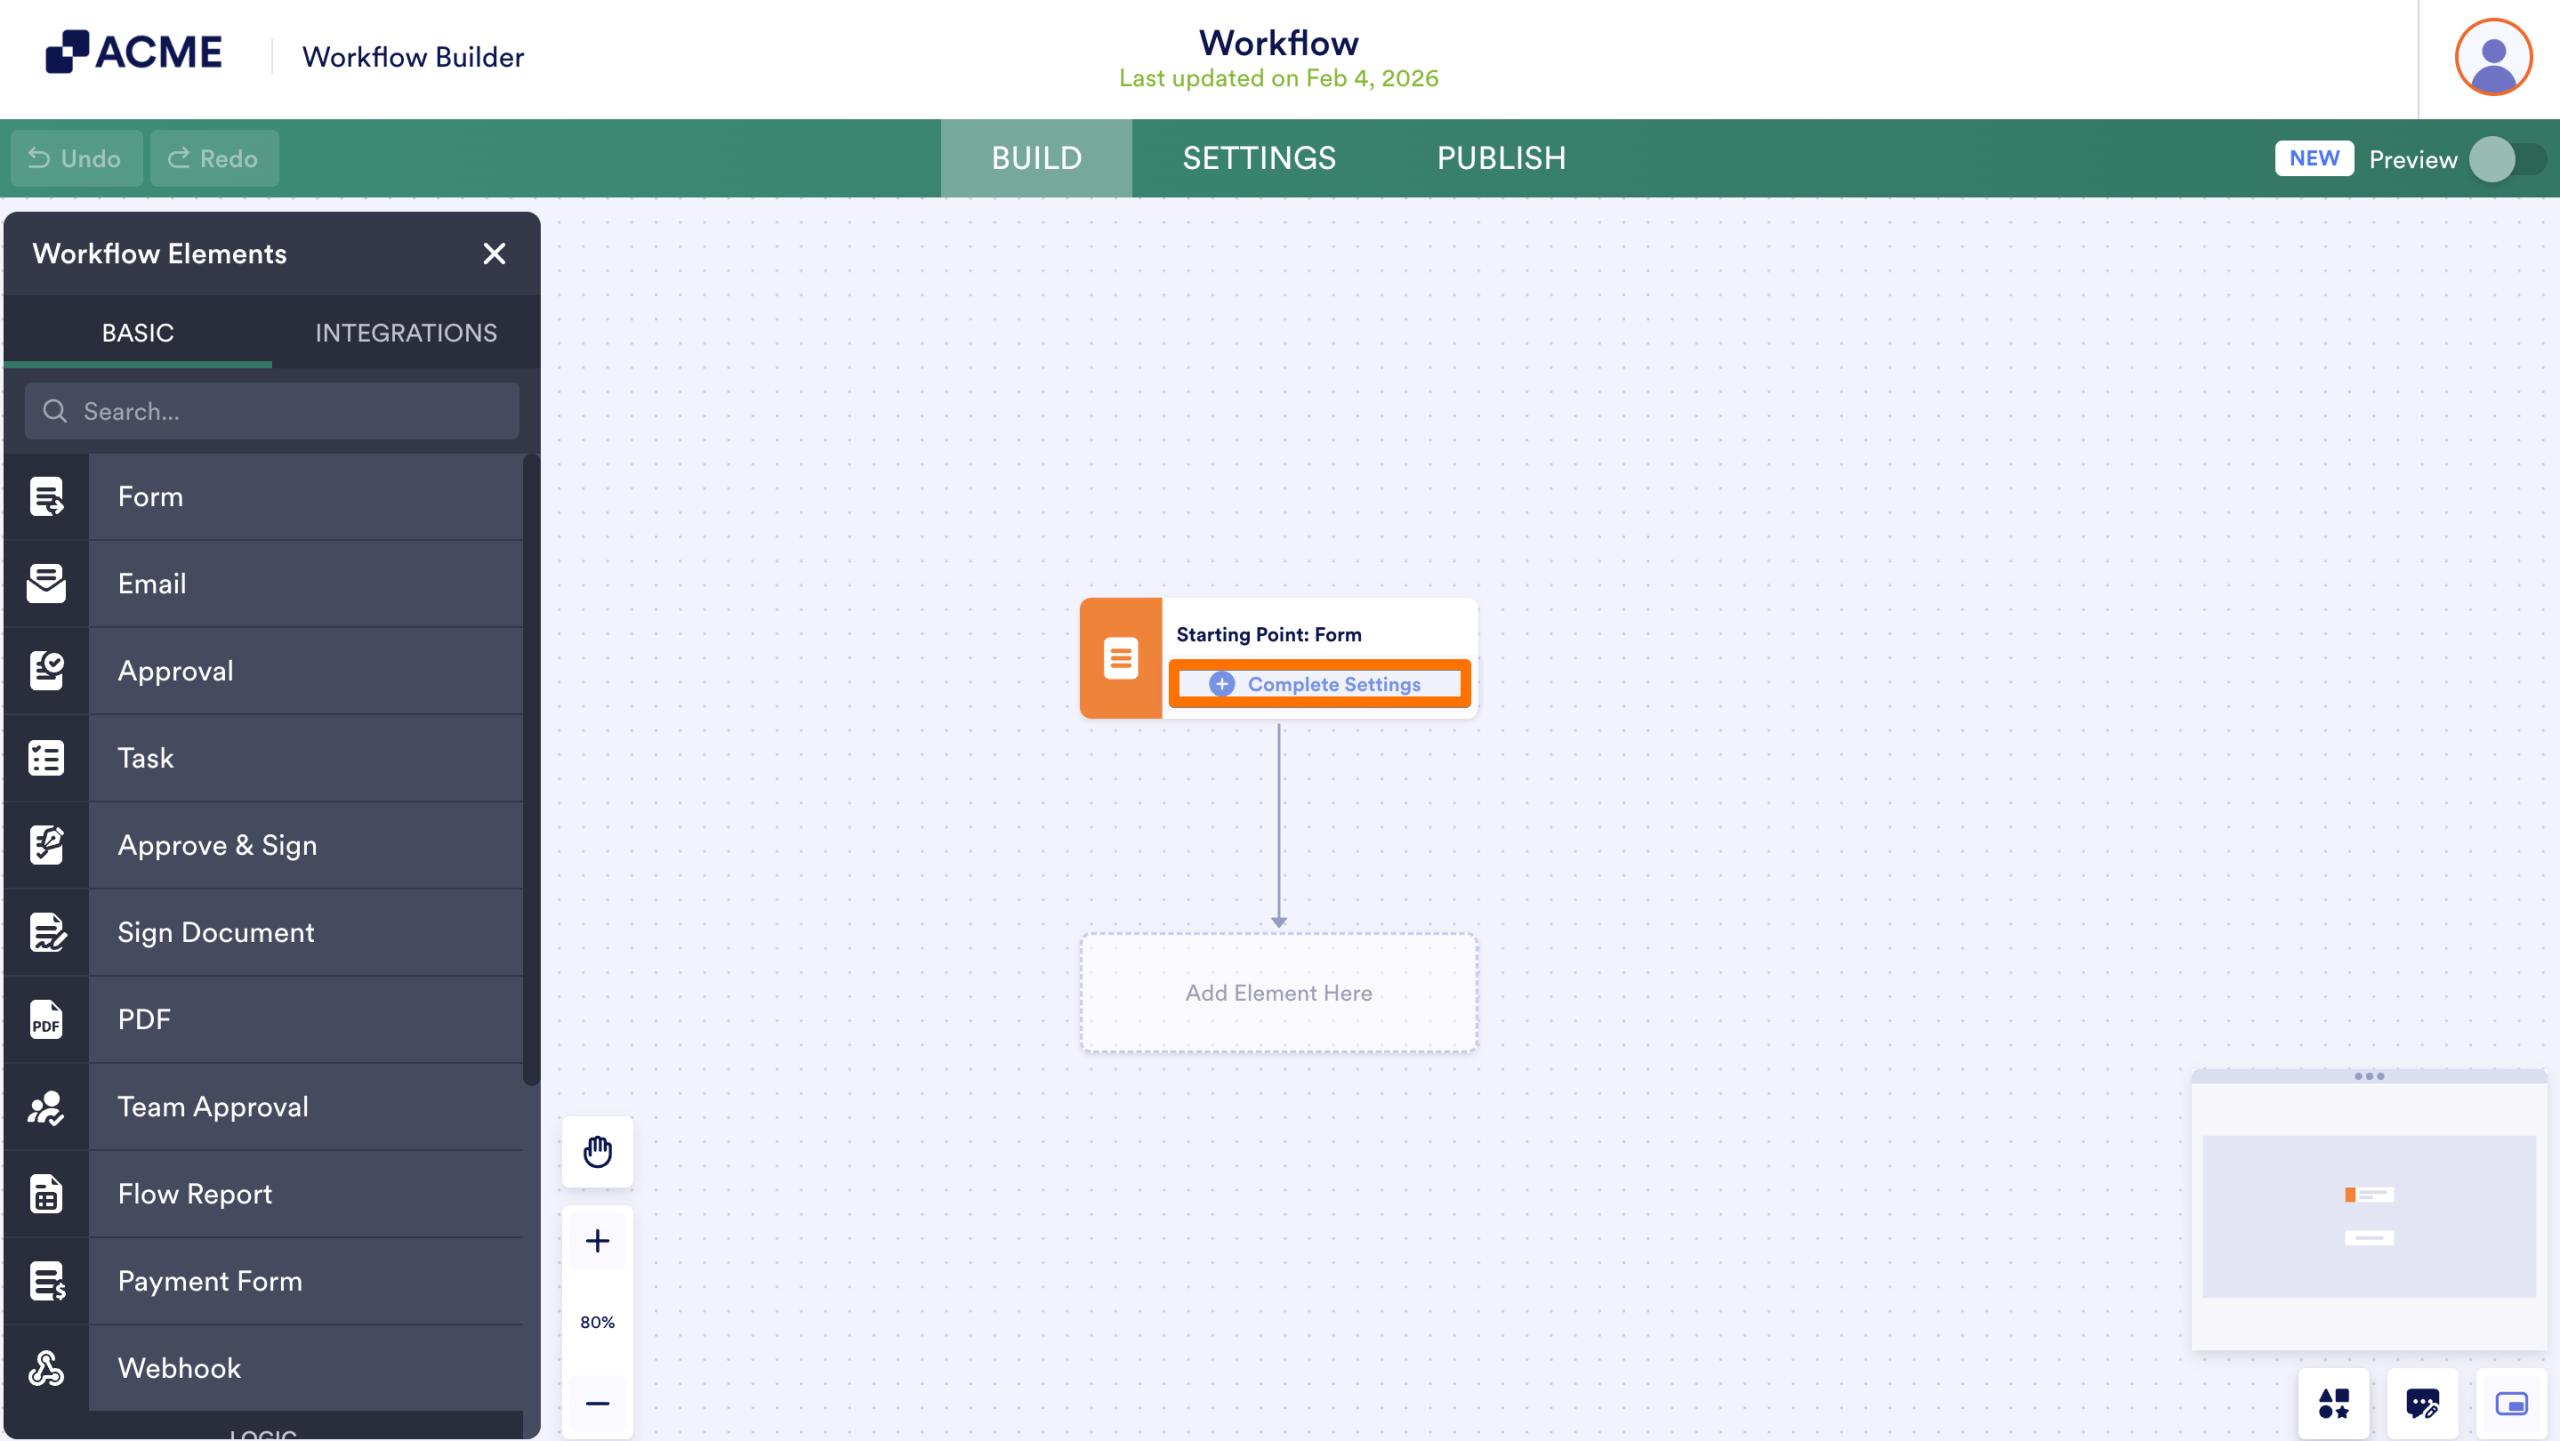
- To connect a form, click on Complete Settings.
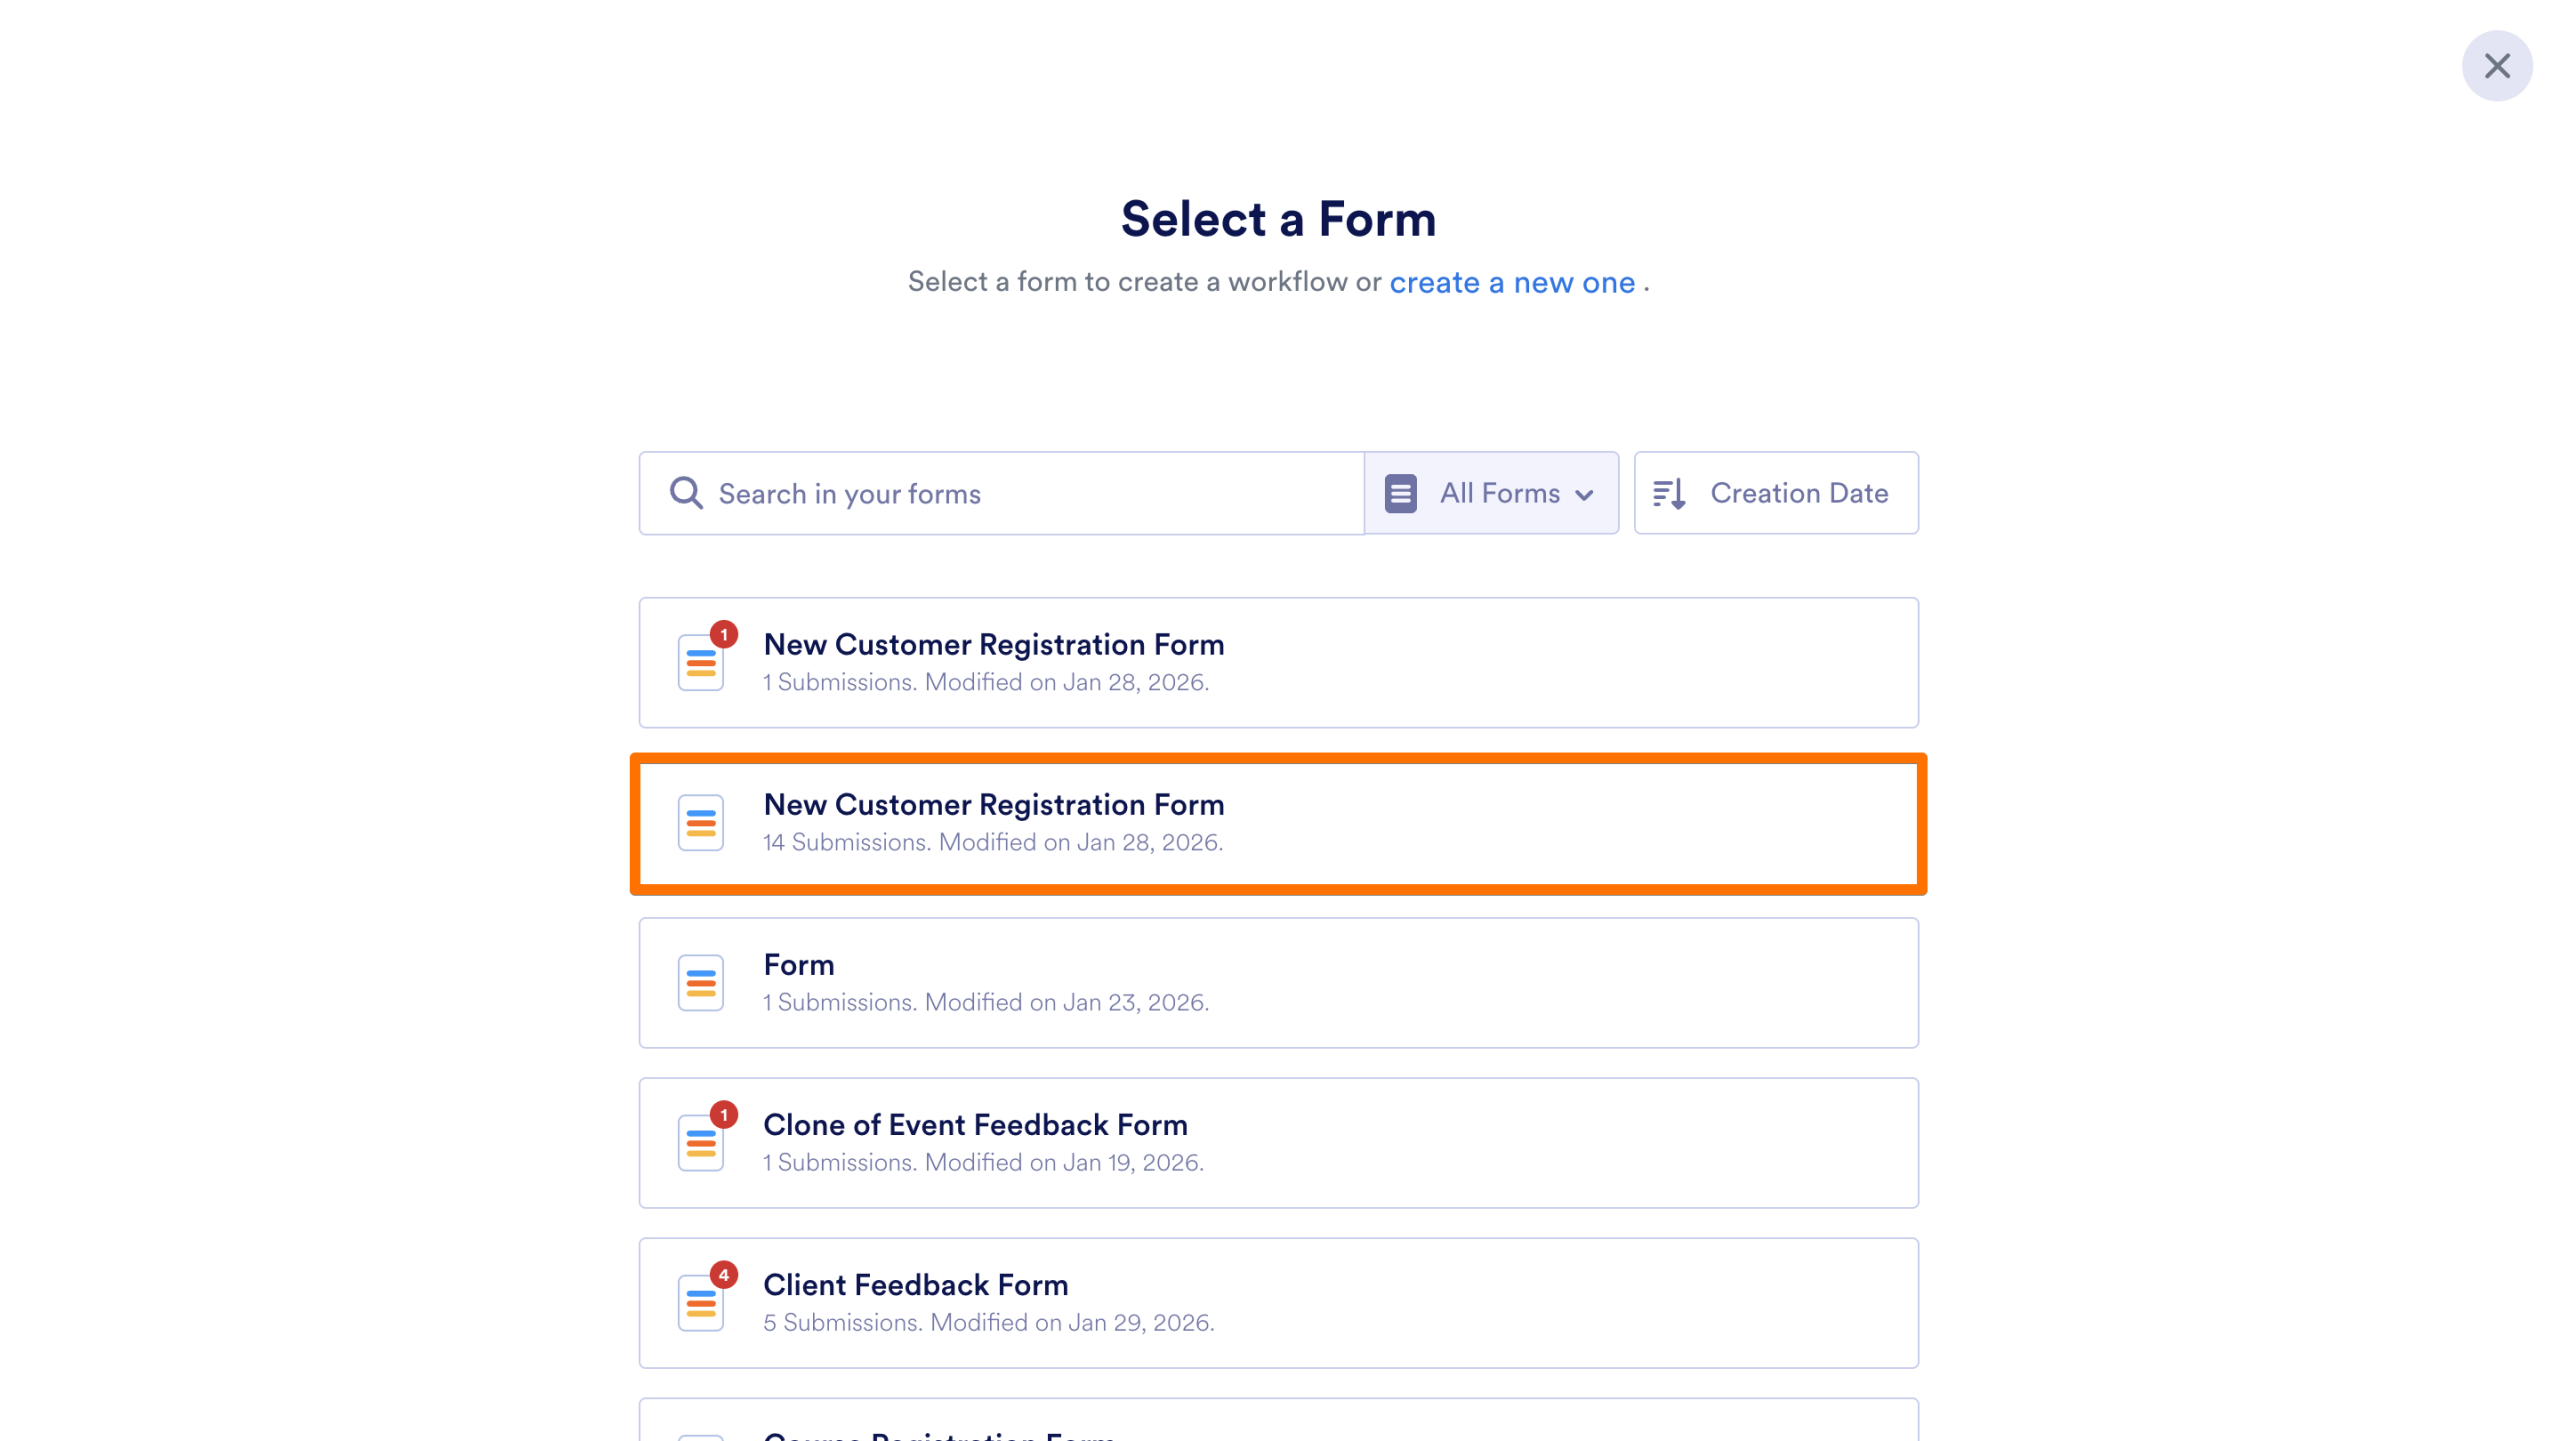
- Then, select a form from the list.
The workflow is added to My Workspace. For help creating a Workflow in a Team Workspace, check out our guide How to Create Workflows in a Team Workspace.
Create a Workflow from a Form
When you create a workflow from a form, the workflow is automatically connected and ready to run. This is the fastest way to create a working workflow.
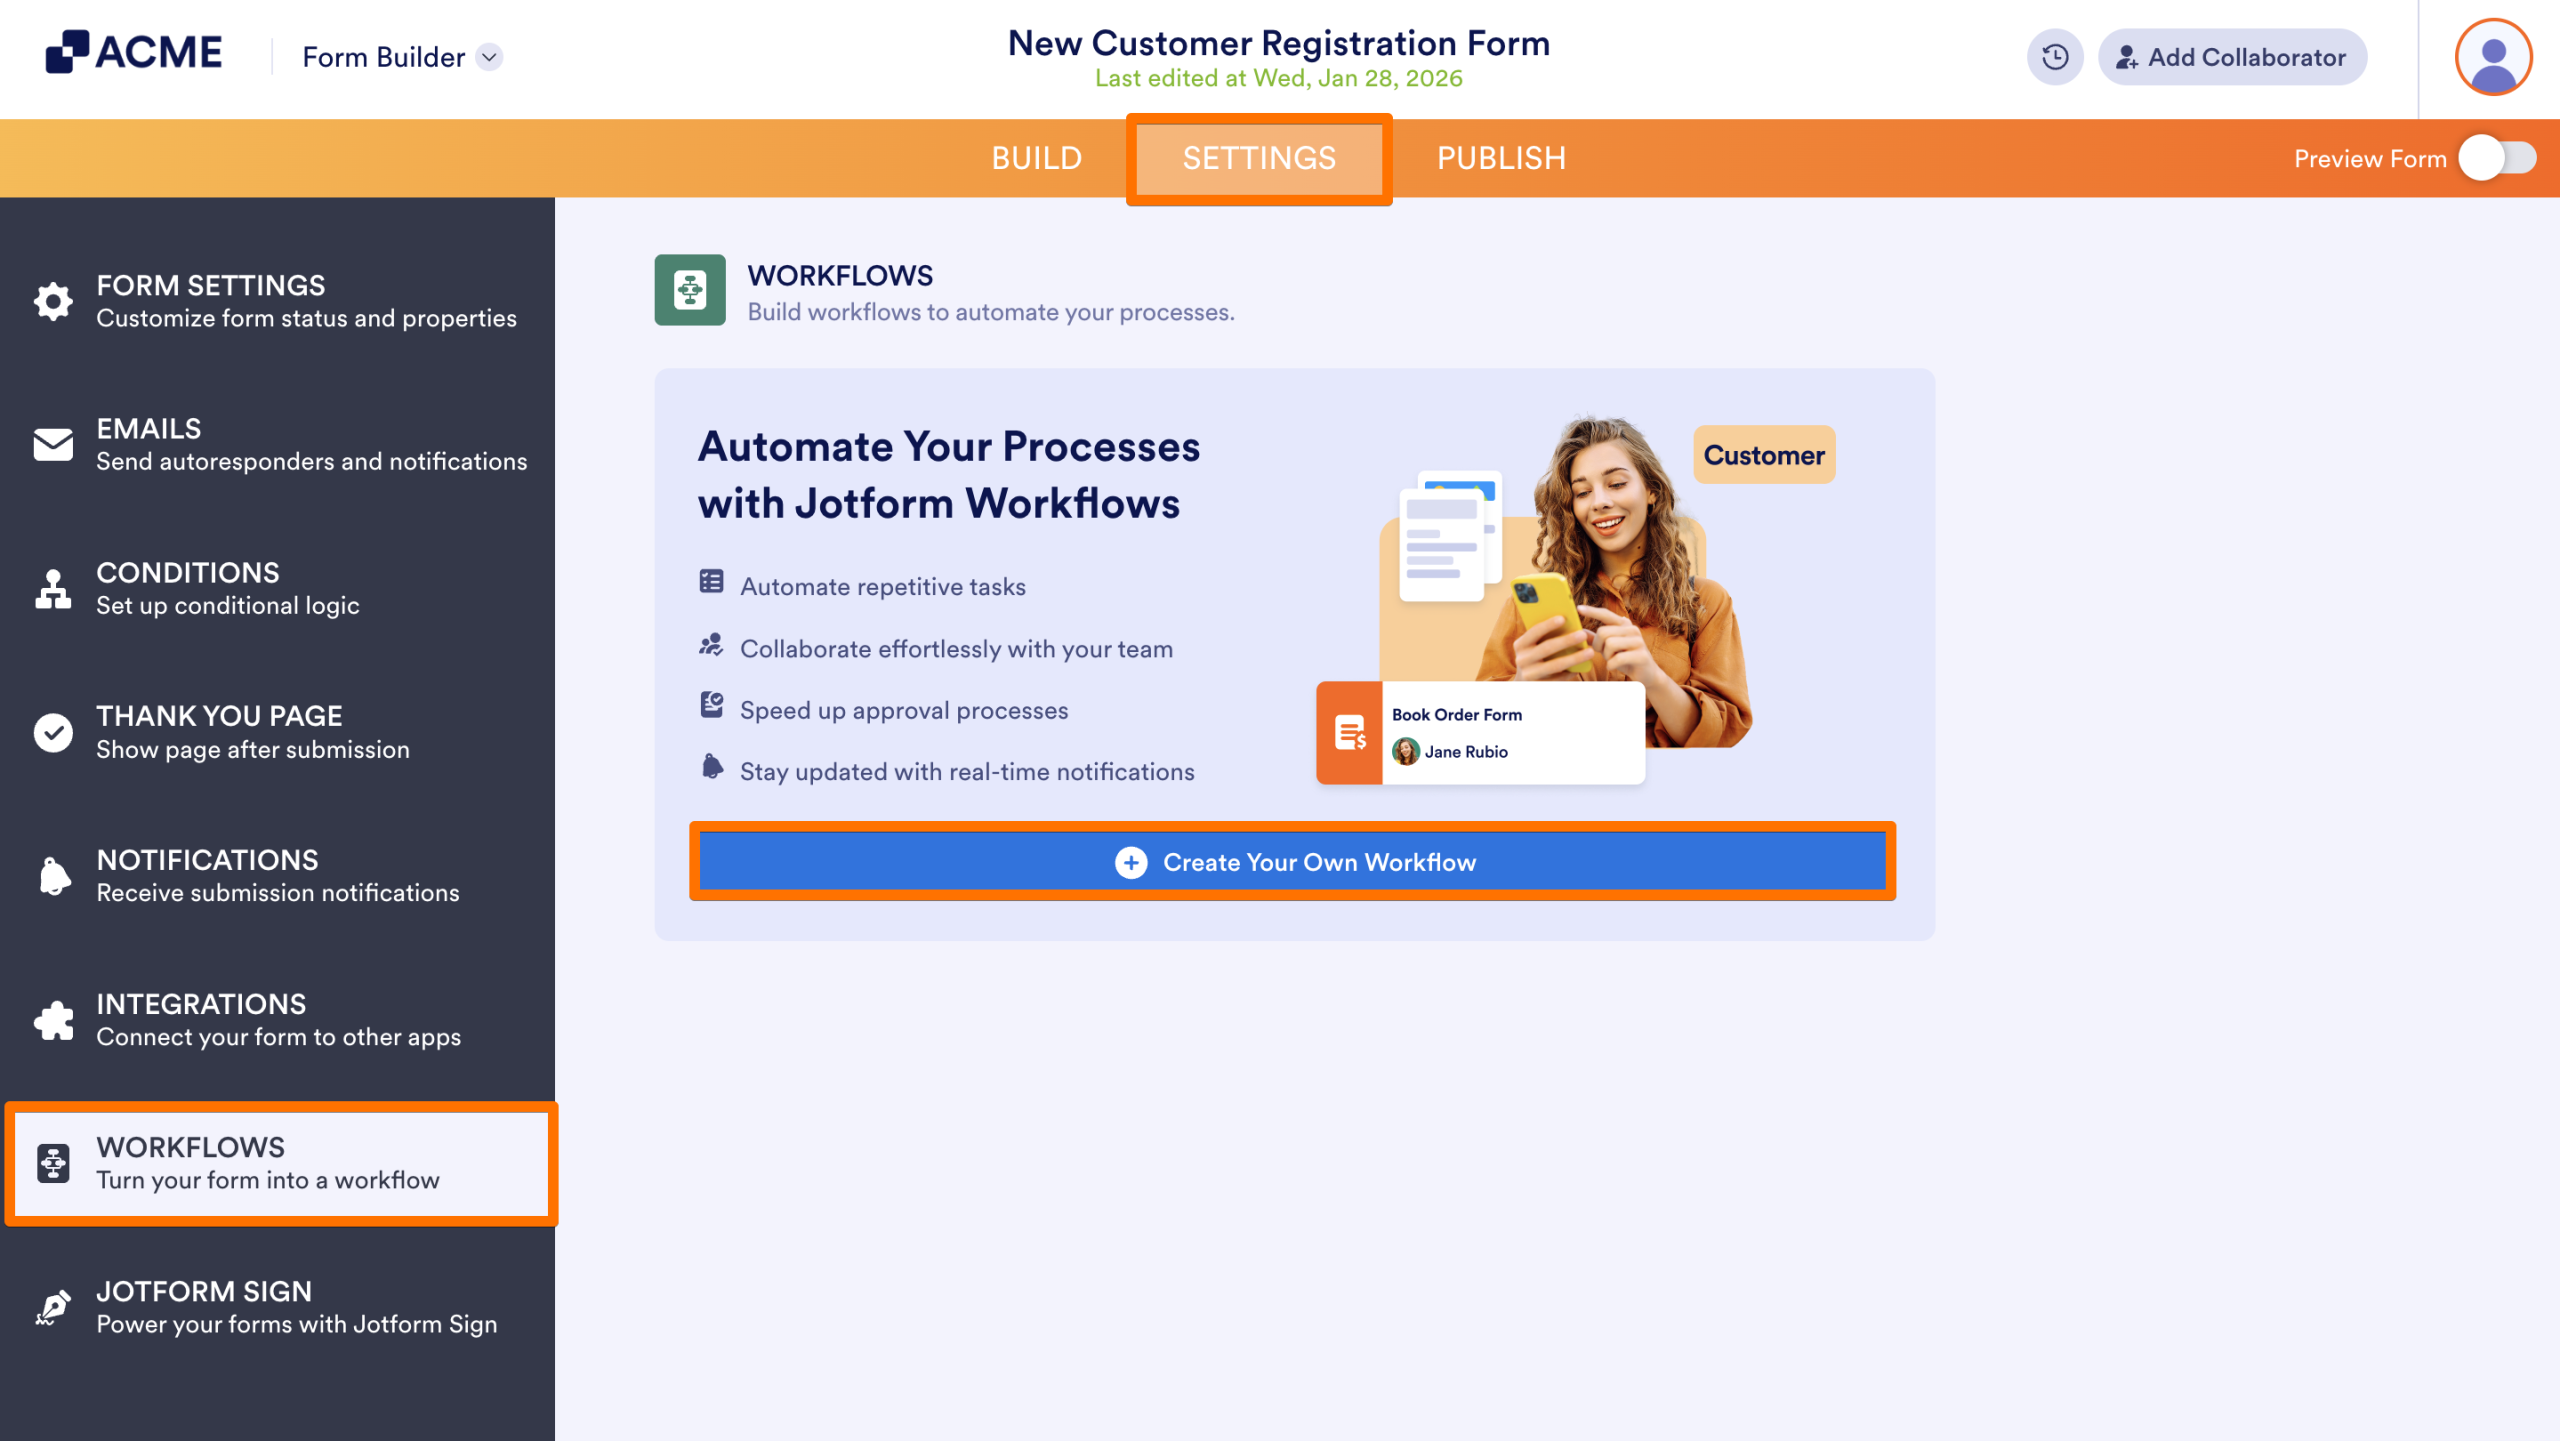
Create a Workflow from Form Settings
- In the Form Builder, select Settings, in the orange navigation bar at the top, click on Settings.
- In the left menu, select Workflows.
- Click on Create Your Own Workflow.
- Configure your workflow as needed.
- Start from scratch: Create a workflow from the ground up. This option gives you full control to add steps, conditions, approvals, and integrations based on your needs.
- Request approvals: Create a workflow designed for approval processes. This option lets you automatically request approvals when a form is submitted and route the submission to one or more approvers.
- Automate integrations: Create a workflow that runs integrations when specific conditions are met. This option is useful for connecting your data with other tools and automating actions based on form responses.
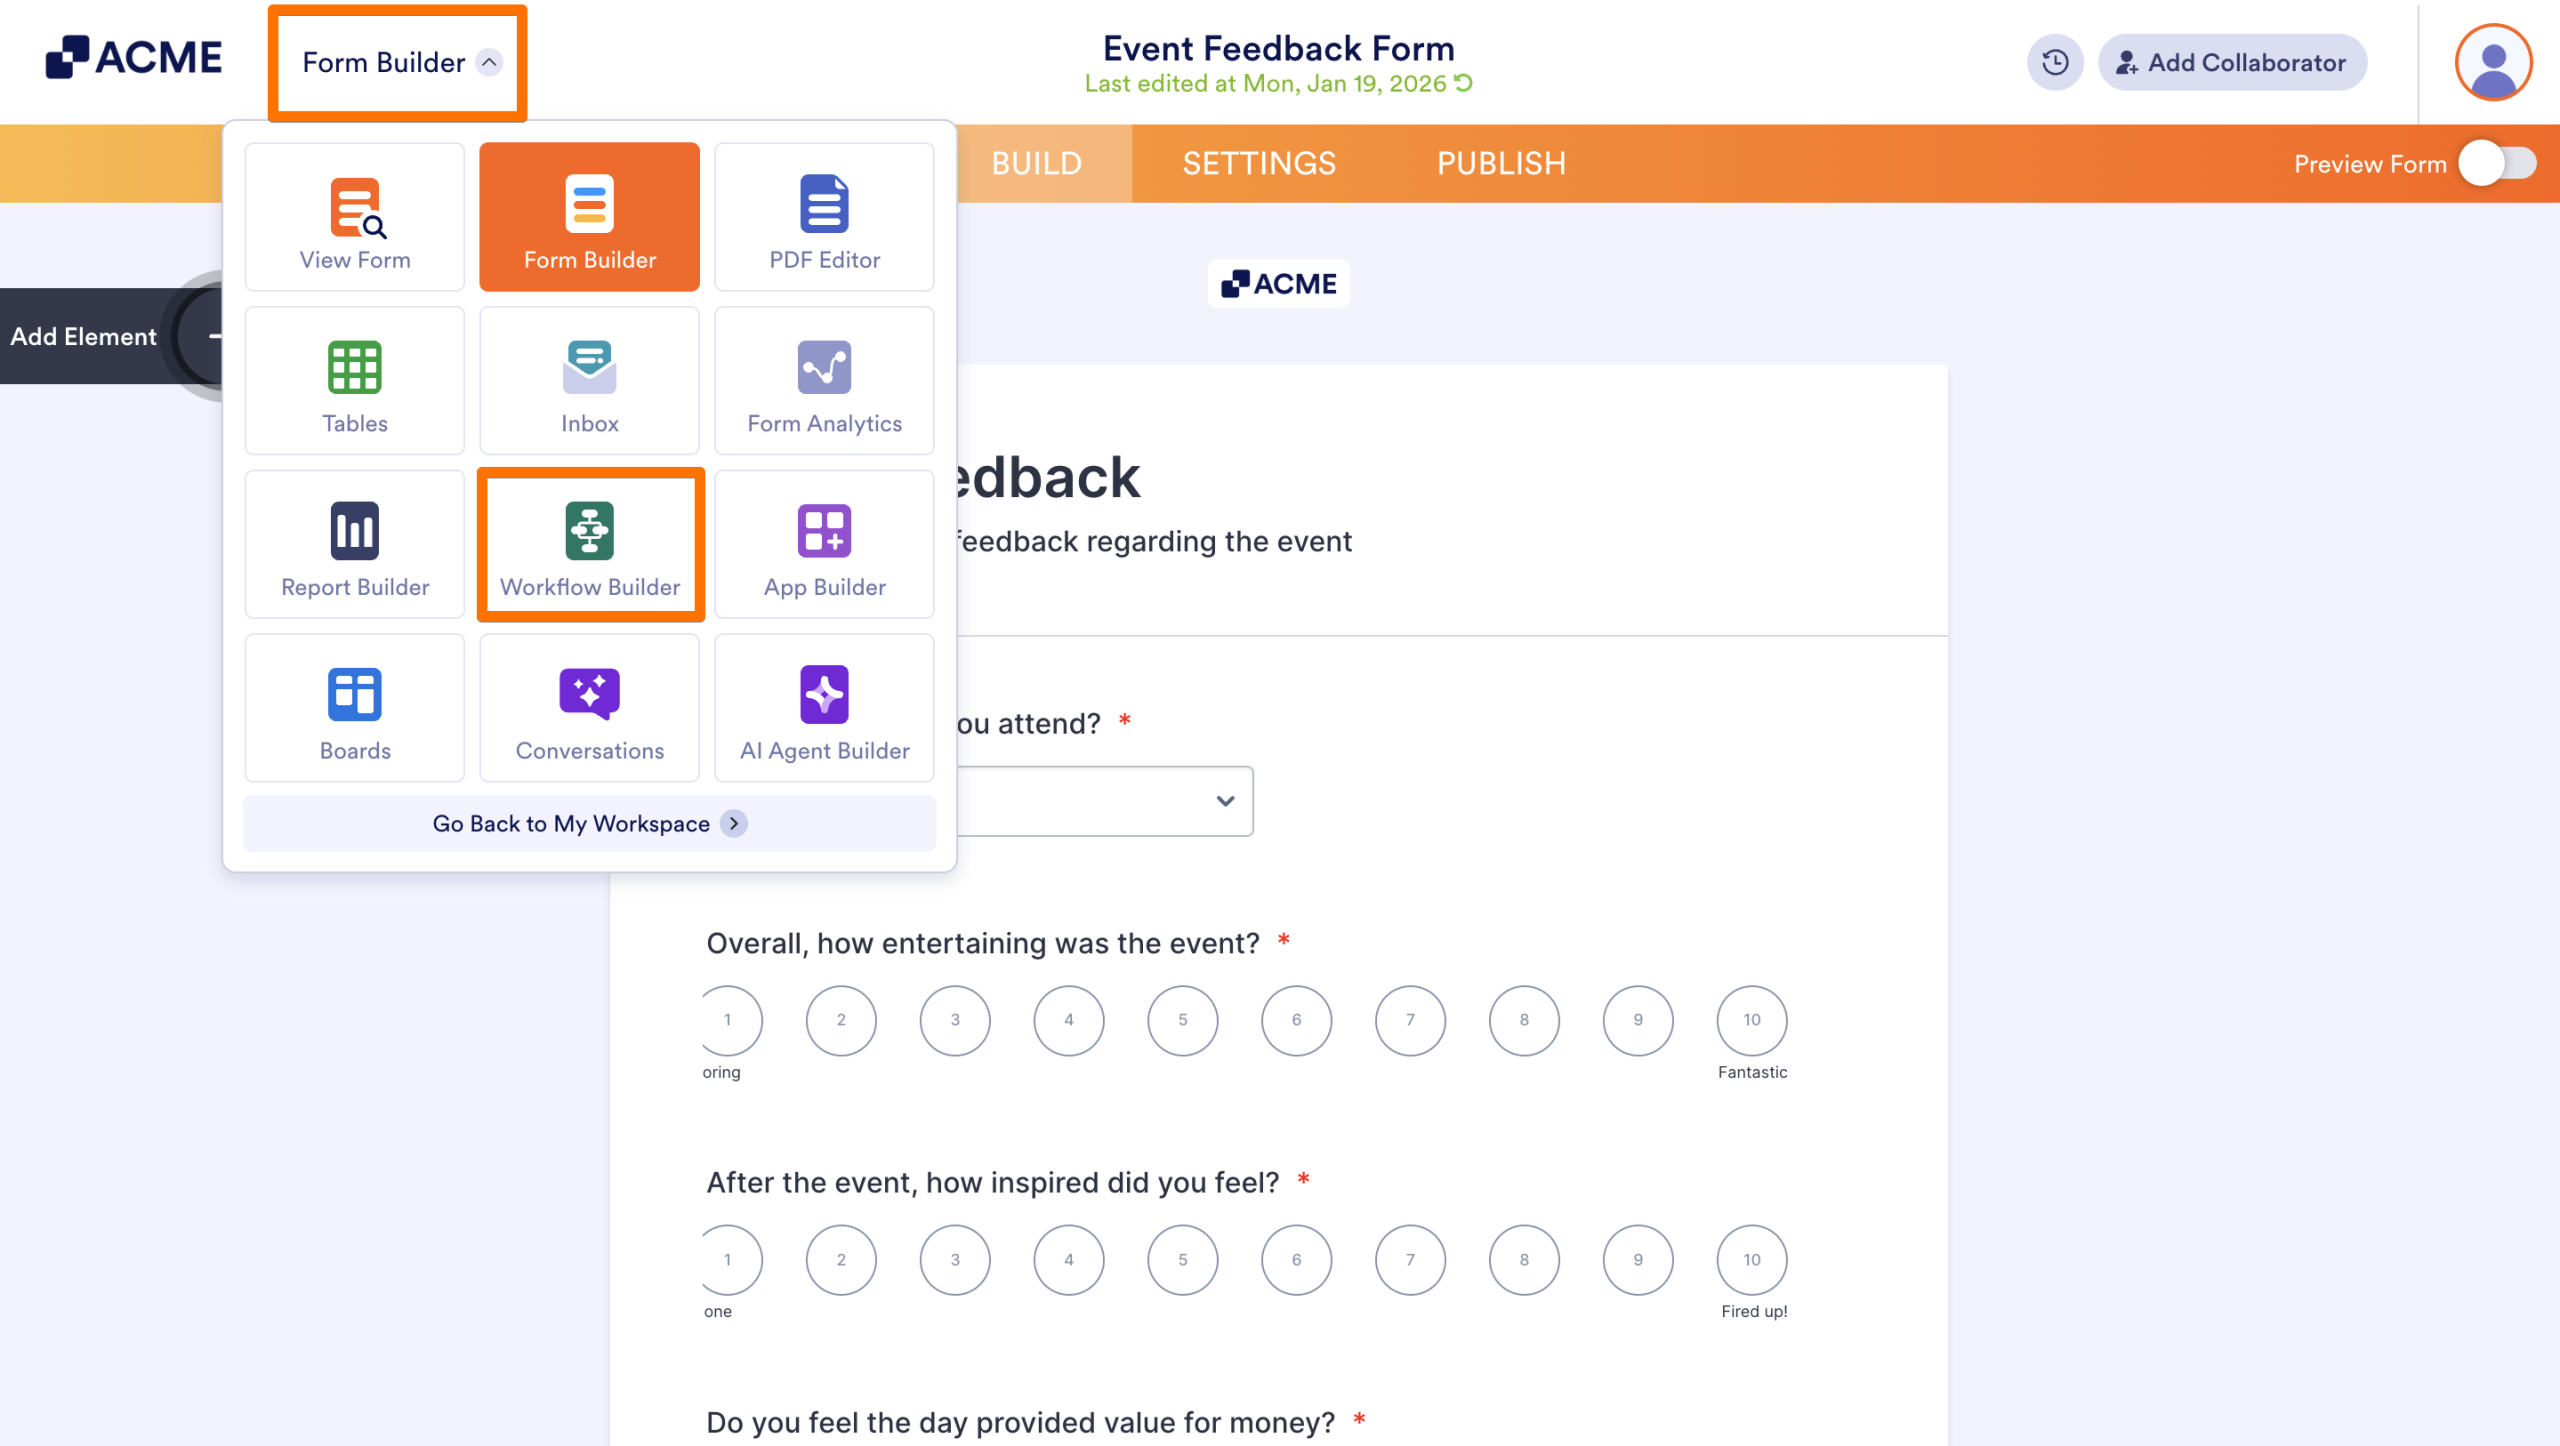
Create a Workflow from the List Picker
- In the Form Builder, click on the dropdown menu, or List Picker, in the upper left-hand corner of the page, next to your logo.
- Select Workflow Builder from the menu.
- Configure your workflow as needed.
- Start from scratch: Create a workflow from the ground up. This option gives you full control to add steps, conditions, approvals, and integrations based on your needs.
- Request approvals: Create a workflow designed for approval processes. This option lets you automatically request approvals when a form is submitted and route the submission to one or more approvers.
- Automate integrations: Create a workflow that runs integrations when specific conditions are met. This option is useful for connecting your data with other tools and automating actions based on form responses.

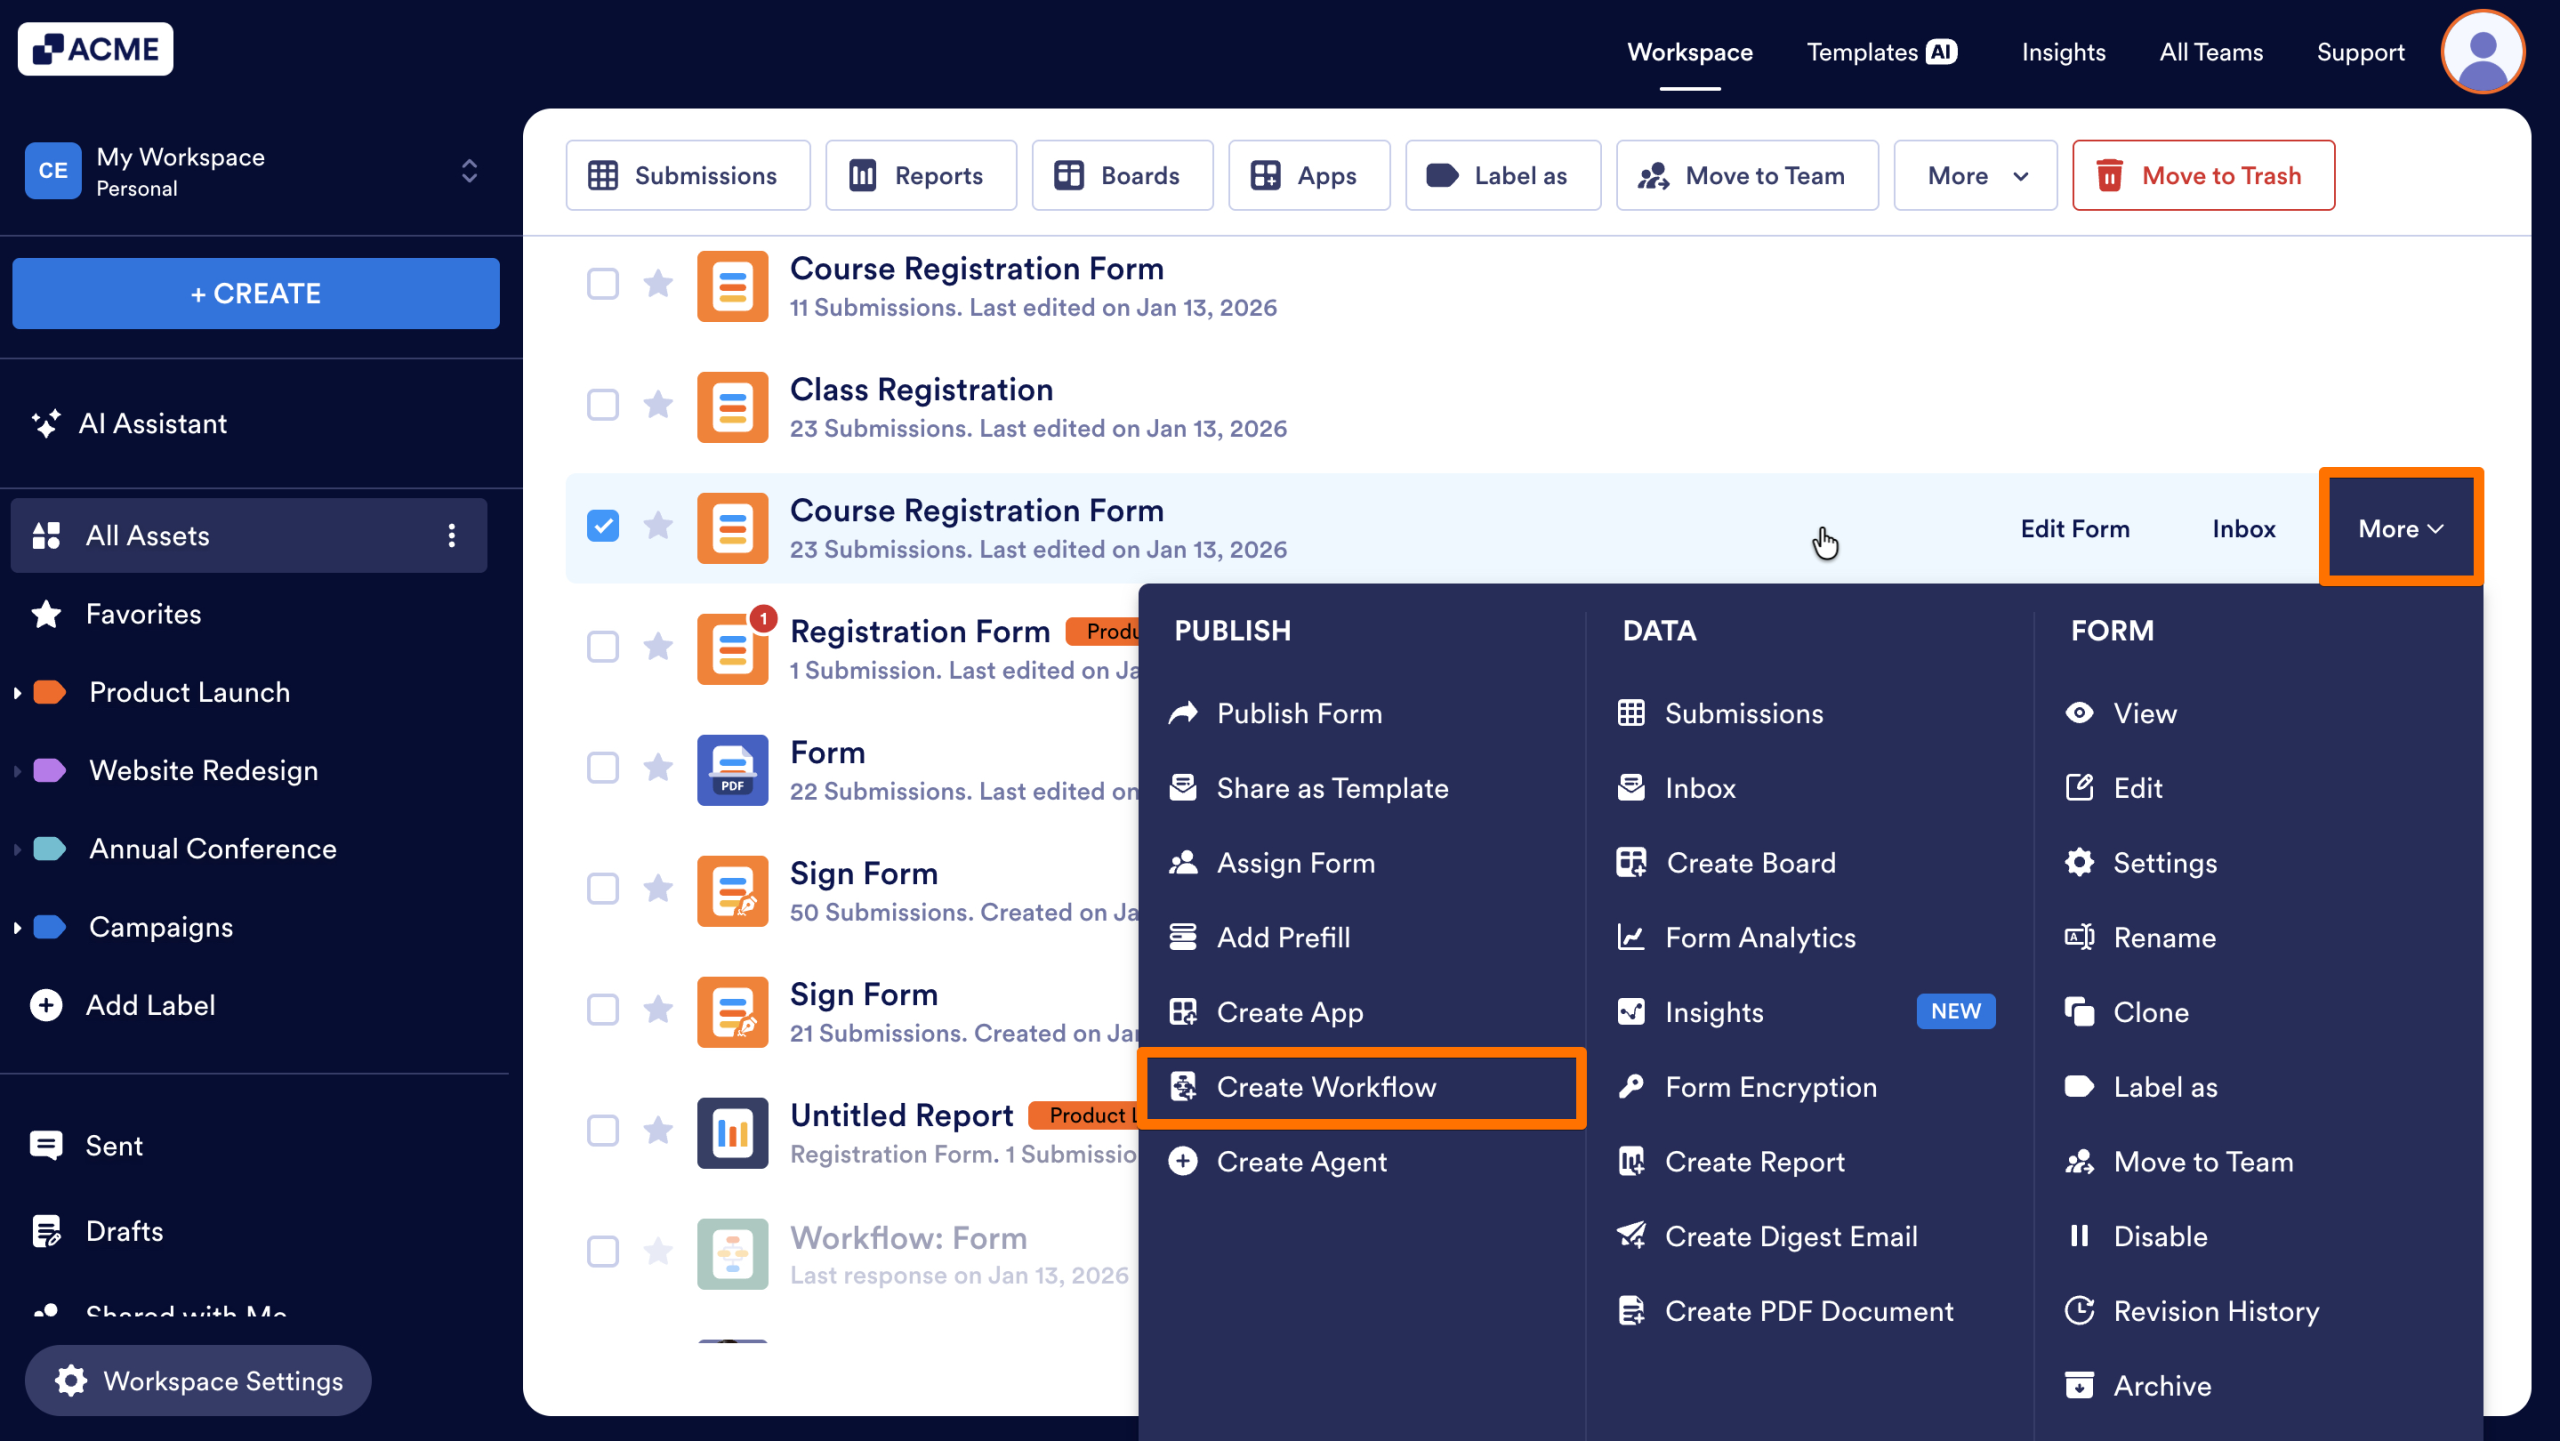
Create a Workflow from a Form in the Workspace
- In the Workspace where the form is located, hover over the form and click on More.
- Under Publish, select Create Workflow.
A new workflow is created and automatically connected to the selected form.
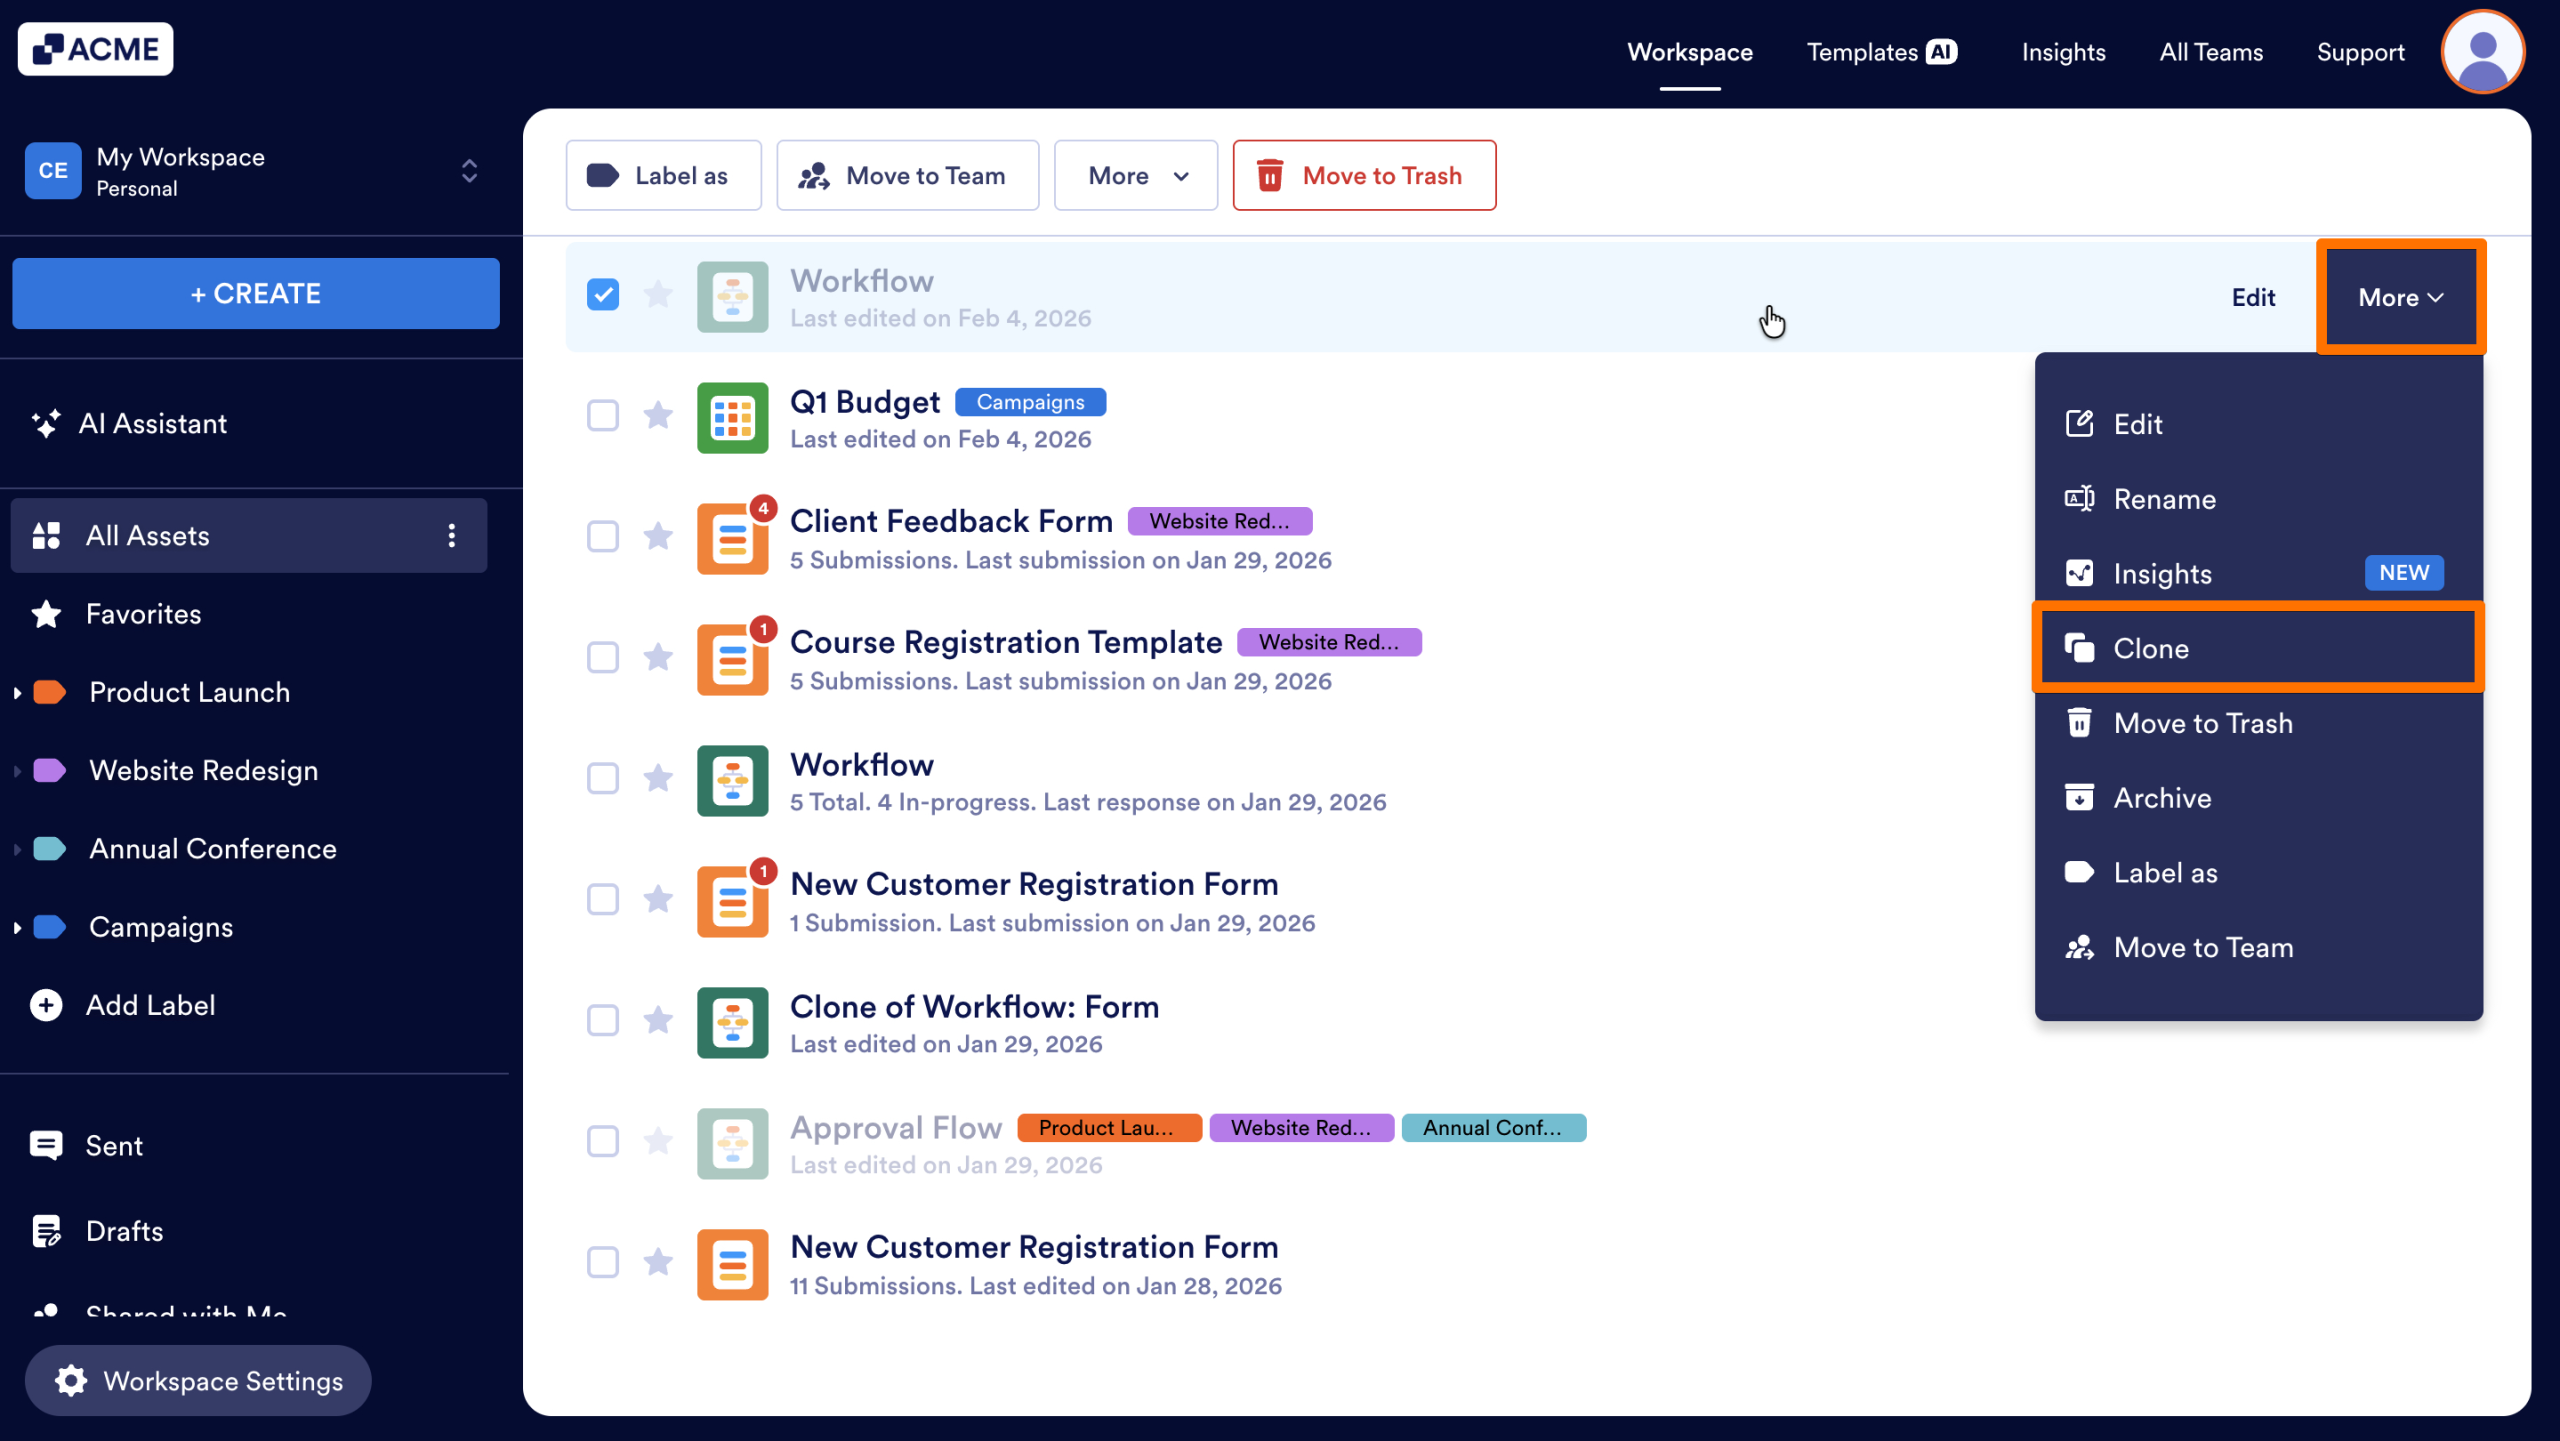
Clone an Existing Workflow
Cloning lets you reuse an existing workflow’s structure and make changes without affecting the original.
- In the Workspace where the workflow is located, hover over the workflow and click on More.
- Select Clone.
- Review or update the Workflow Name.
- If your workflow is connected to a form, choose one of the following options:
- Clone workflow and forms: Create a copy of the workflow along with a clone of any connected forms.
- Clone workflow: Create a copy of the workflow only and connect forms afterwards.
- Finally, click Clone Workflow.
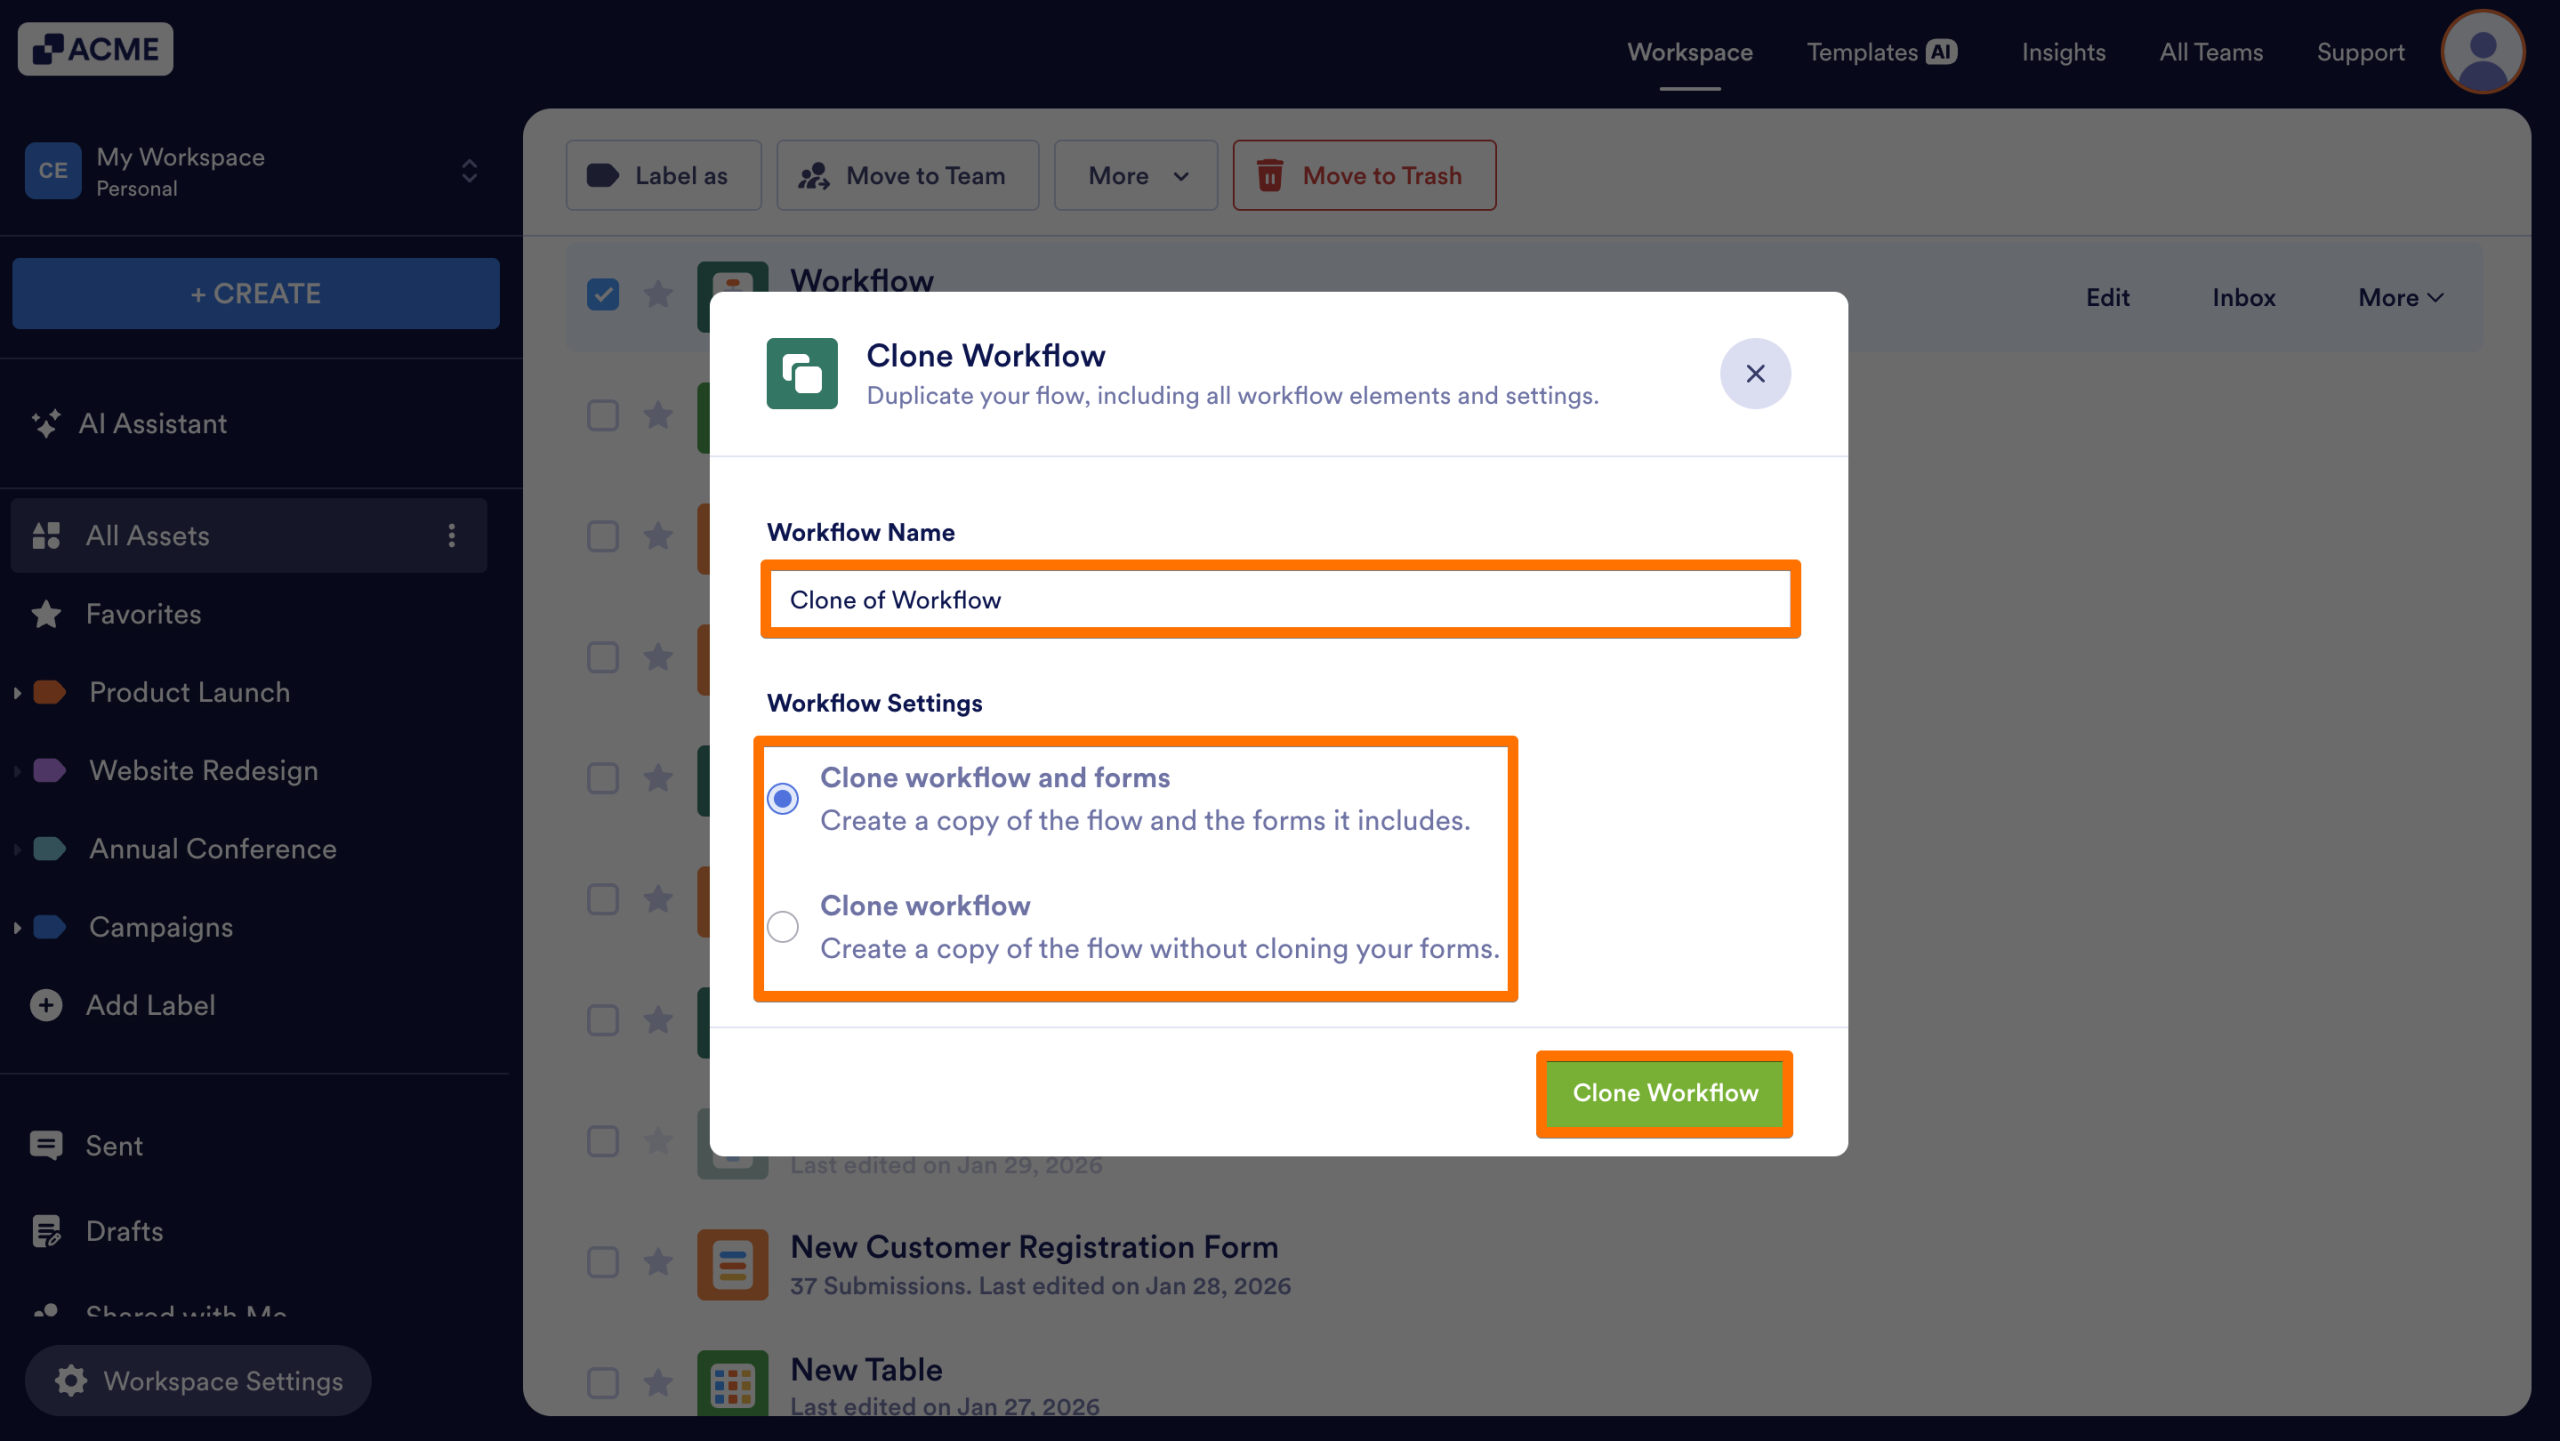
A new workflow is created in the same workspace and can be edited independently.

Send Comment: