Jotform’s Configurable List widget lets you collect multiple types of information in a single section by adding rows with dropdowns, text fields, date pickers, and more. This helps you keep your form shorter and more organized while still capturing detailed inputs from users.
Here are a few ways to use it:
- Shorten the overall length of your form.
- Let users select a time, date, and reason for appointments.
- Accept multiple product orders in one form.
- Collect structured responses for surveys or applications.
Adding and Setting Up the Configurable List Widget
Whether you’re starting fresh or updating a form, adding and setting up the Configurable List widget takes only a few steps. Here’s a quick how-to:
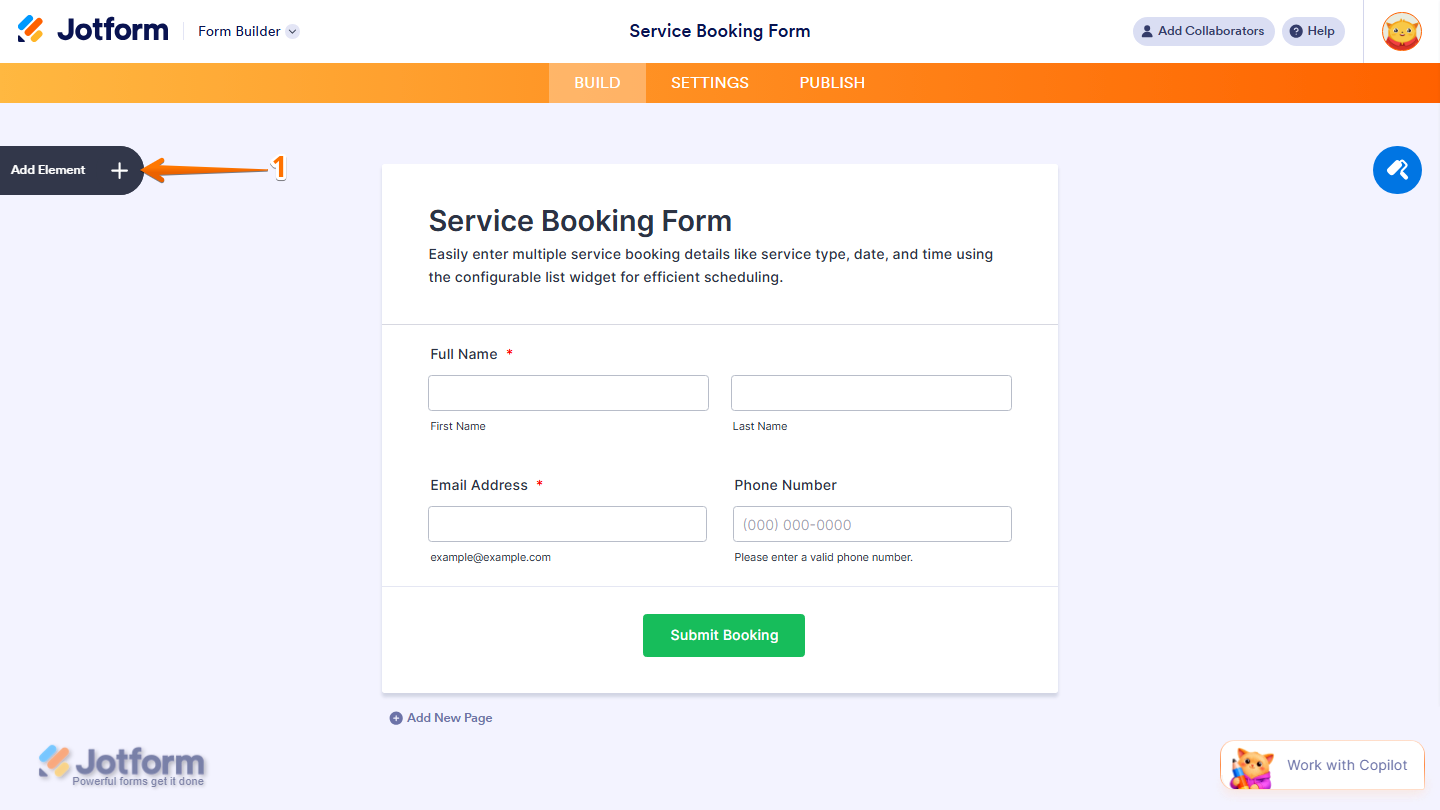
- In Form Builder, click on Add Element on the left side of the page.
- Now, in the Form Elements menu, under the Widgets tab, click on Configurable List. Or, just drag and drop it to where you want it to be on your form.

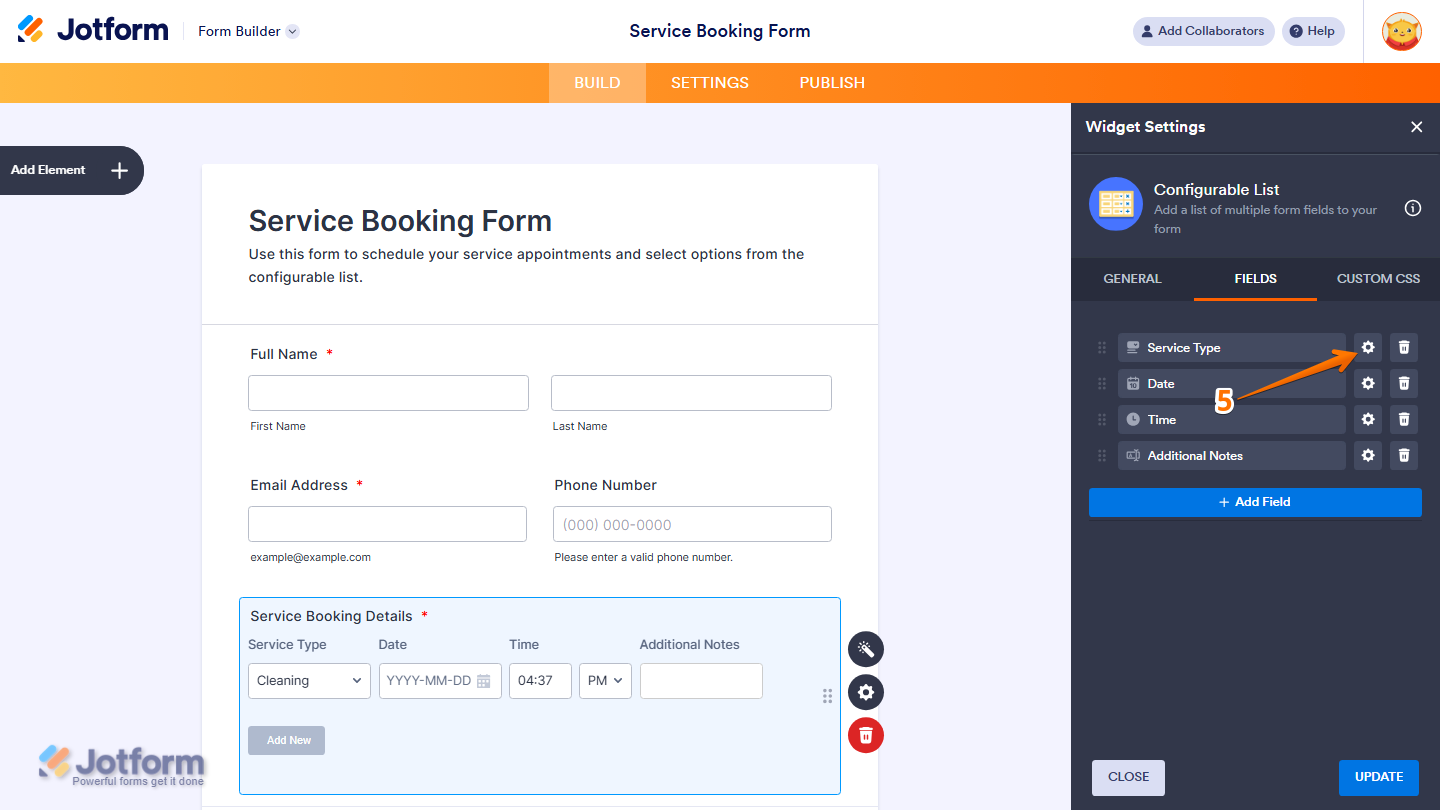
- Next, in the Widget Settings menu that opens on the right side of the page, under the Fields tab, click on Add Field and select the type of field you want to add:
- Short Text — Add a single-line text field for brief answers.
- Number — Allow users to enter numeric values.
- Dropdown — Provide a list of options in a dropdown menu.
- Date — Let users select a date.
- Single Choice — Allow users to select one option from a list.
- Multiple Choice — Allow users to select more than one option.
- Paragraph — Add a multi-line text field for longer responses.
- Long Text — Similar to Paragraph, for extended input.
- Time — Let users select or enter a time.

Note
By default, the Configurable List widget comes with pre-added fields, Short Text, Dropdown, Calendar, and Time. You can keep, edit, or delete these fields depending on your needs.
- Now, to rename a field, click directly on its name in the Fields and type your preferred label.

- Then, to configure a field’s settings, click on the Gear icon next to it.
- Next, to rearrange the order of your fields, drag and drop them using the Six Dots icon on the left side of each field.

- Now, to remove a field, click the Trash Can icon on the right side of the field.

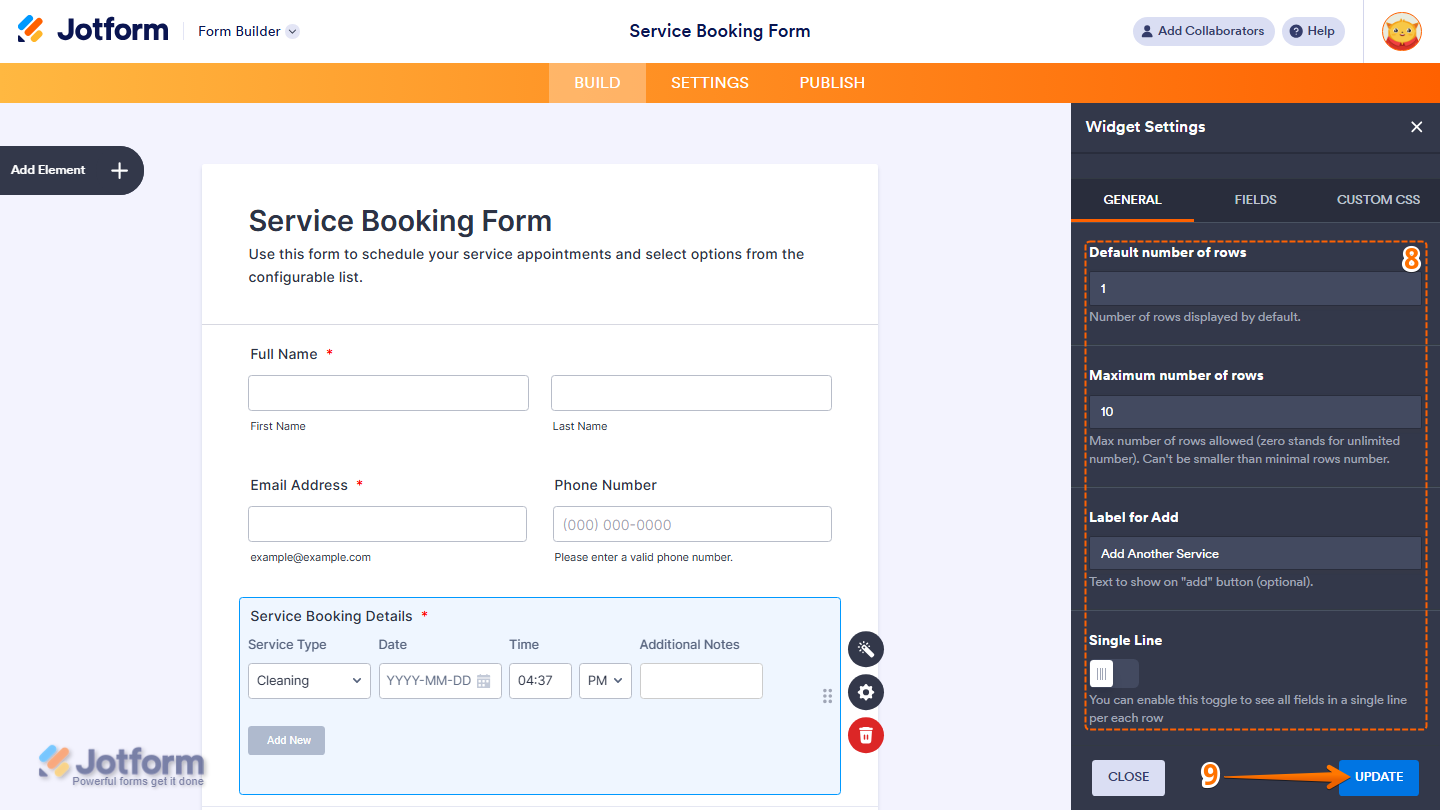
- Next, click on the General tab to configure the following settings:
- Default Number of Rows — The number of rows displayed by default.
- Maximum Number of Rows — The maximum number of rows allowed. Set it to 0 to allow unlimited rows.
- Label for Add — Optionally customize the text shown on the Add button.
- Single Line — Toggle this on to display all fields in a single line per row.
- Finally, once everything is set, click on Update and you’re all set.
That’s it. You’ve successfully added and set up the Configurable List widget on your form.

Wondering how it looks in action? Check out this demo form.
Making a Configurable List Field Required
If you want to make sure that a specific field in your Configurable List is filled out before the form is submitted, you can mark it as required. Here’s how to do it:
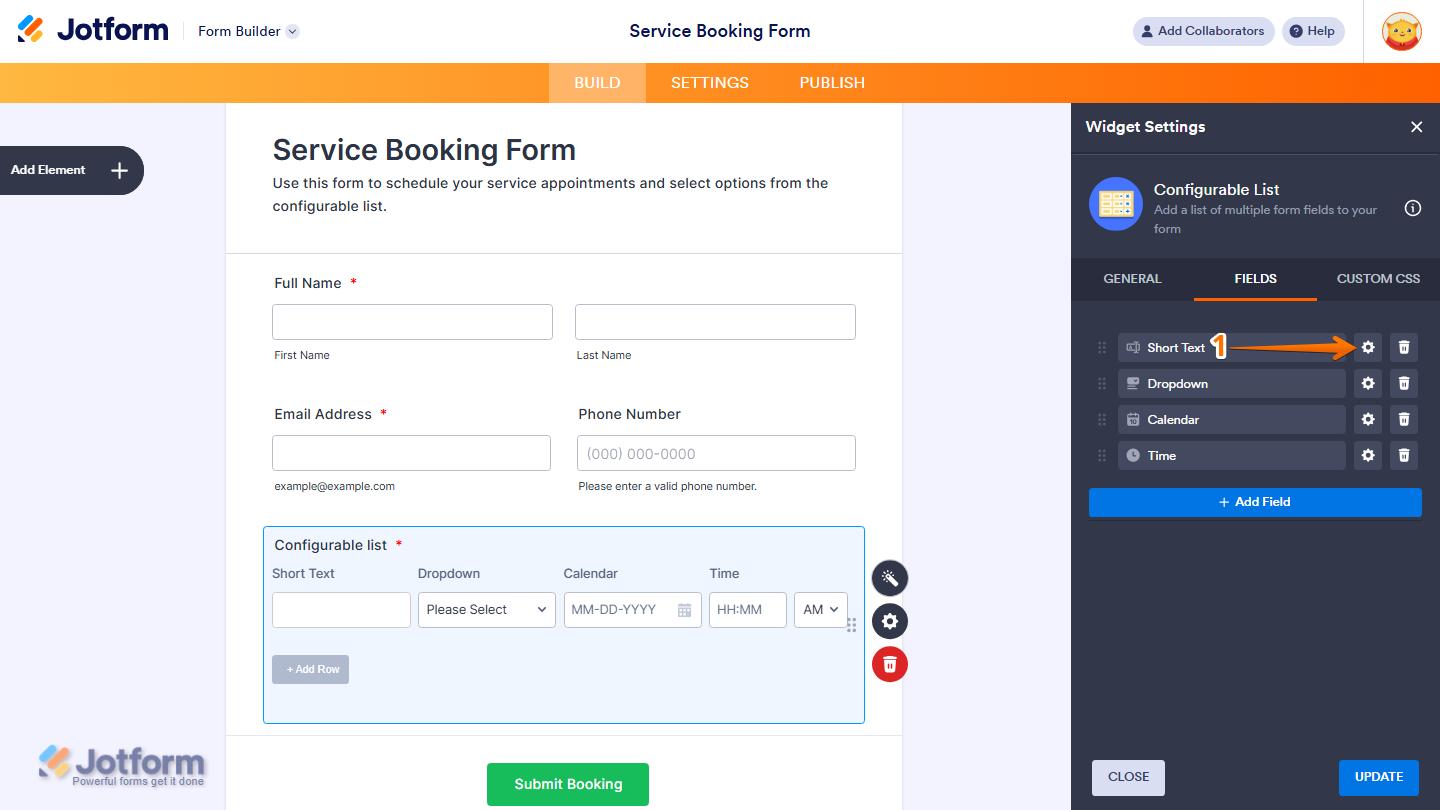
- While you’re in the Configurable List Widget Settings menu, under the Fields tab, click on the Gear icon next to the field you want to make required. For example, the Short Text field.
- Now, toggle on the Required option.
- Then, click on Go Back button to return to the fields list.
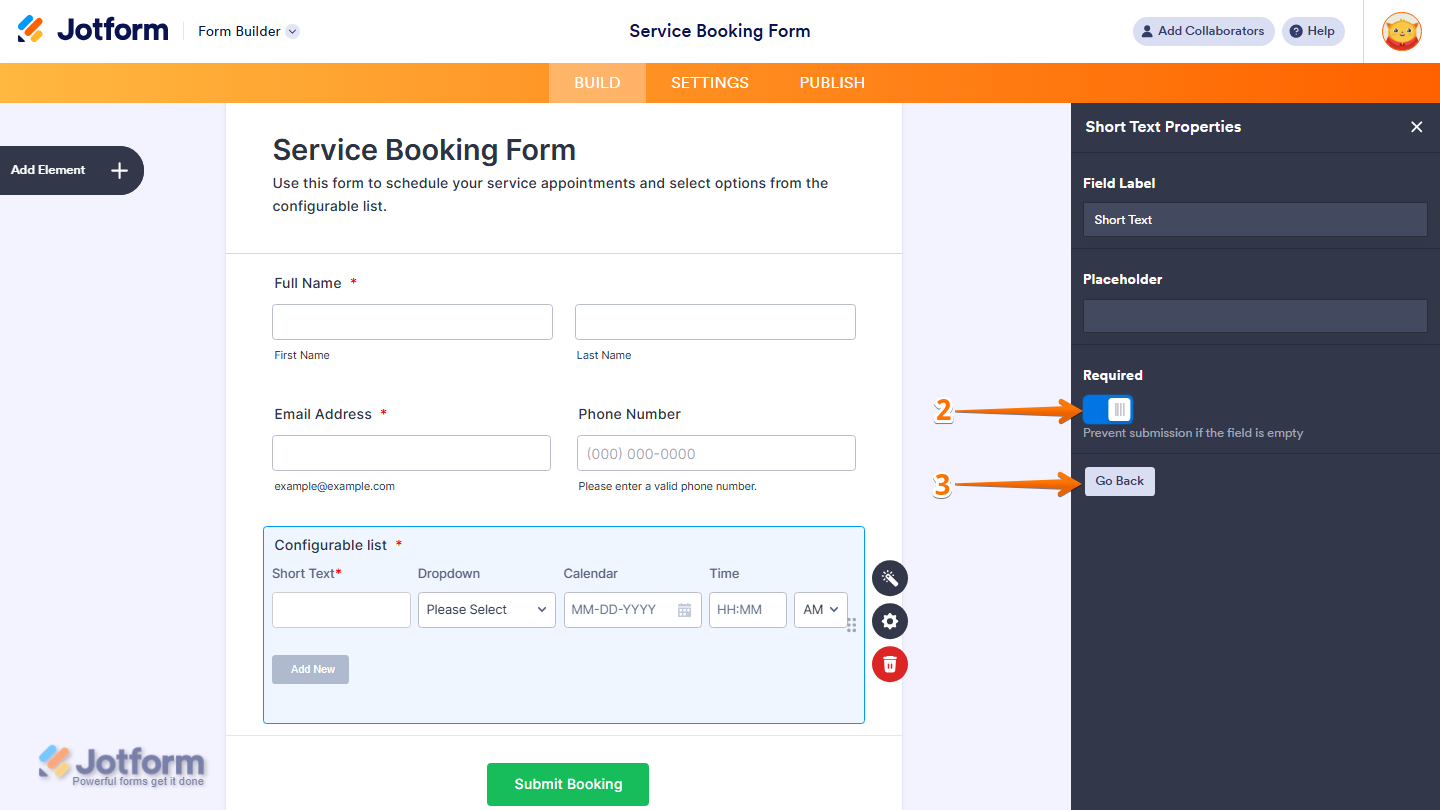
- Finally, click on Update to save your changes, and you’re all done.

Now, the field will be marked as required, and users won’t be able to submit the form without filling it out.
Note
- For advanced styling of the Configurable List widget, you can add your own custom CSS code under the Custom CSS tab in the Widget Settings. Our guide on How to Inject CSS Codes to Widgets walks you through everything.
- You can also configure the widget properties, like alignment, labels, size, visibility, and more, to control how it looks and behaves in your form. Check out our guide on How to Access and Configure the Question Properties of a Widget to learn more.

Send Comment:
294 Comments:
March 20, 2026
I would also love for you to add File Upload capability to the Configurable List widget. It would be SOOOO helpful.
February 24, 2026
Please add File Upload as a field type! It's the last thing I need to use this widget and it would save me HUNDREDS of input fields!
February 16, 2026
Hello
What is the best option to require 10-digit phone number?
February 10, 2026
Hi, is there any way to calculate totals in a configurable list?
February 3, 2026
Is it possible to display the dates in French?
January 23, 2026
How can we insert line breaks between certain fields?
December 8, 2025
i want my row to have 3 inputs can?
1. is Key in their identification number
2. Key in their Name
3. need to sign
Items 1 & 2 no issues but item 3 for signature can?
December 4, 2025
How do I add other in a checkbox dropdown, then let people input what "other" is with a free form entry field? molly@firefoundation.org
November 13, 2025
How can I change the date picker calendar to start on Sunday instead of Monday, i.e. S M T W T F S instead of M T W T F S S ?
September 30, 2025
None of the answers to the other comments are viewable. It leads to a 404 page.
September 25, 2025
Is this widget compatible with URL prefilling?
September 19, 2025
could you make the output on google sheets to create different collum for each category? since its share same collum for all the categories.
August 30, 2025
Can you prefill any of these columns
August 27, 2025
Hola, puedo agregar la opción de subir imagen o tomar foto a la lista configurable?
August 25, 2025
Yes, i have some question.. How we place each input data in a Configurable List into a single column in Google Sheets ??
August 11, 2025
How to place each input data in a Configurable List into a single column in Google Sheets
July 29, 2025
Hi, it looks like your Demo Form is broken. I have an error where Configurable List never renders in my forms in Edit or in Build. I clicked your Demo Form to compare, and it also renders blank.
Your form:
Is this a new issue? Are others experiencing this?
I'm on Windows, Mozilla Firefox.
July 20, 2025
I dont know the name of the button so I can change the color, it looks likes its not clickable
July 15, 2025
Hi, is there a way to have an [email] field that will detect if email was incorrectly input? Like it is in the Basic elements of Jotform?
June 28, 2025
Y COMO PUEDO PONER UN VALOR POR DEFECTO
June 8, 2025
Bonjour Jotform,
Je suis fan du widget "liste paramétrable". Je vous demande si possible de prévoir la possibilité de définir une masque de saisie lorsqu'on choisit l'option "number". Bien à vous
June 1, 2025
No meu, não aparece o campo de CUSTOM CSS
May 28, 2025
How can I allow the element to expand beyond 1000px? It currently stops growing at that width.
May 20, 2025
How can I include an escape operator for commas, such that when I create a dropdown menu, I could include values that contain commas, and not separate them as options?
May 12, 2025
Can this be used with images? I.e. add an image to the row, or a selection of photos using take photo?