Jotform makes it easy to connect your forms with ActiveCampaign so you can keep your contacts and email lists up to date without any extra work.
With Jotform’s ActiveCampaign integration, you can automatically send new form submissions straight to your ActiveCampaign account, helping you manage leads, grow your audience, and trigger follow-up campaigns in real time.
Connecting Your ActiveCampaign Account
Whether you’re creating a new form or updating an existing one, connecting your ActiveCampaign account takes no time at all—here’s how:
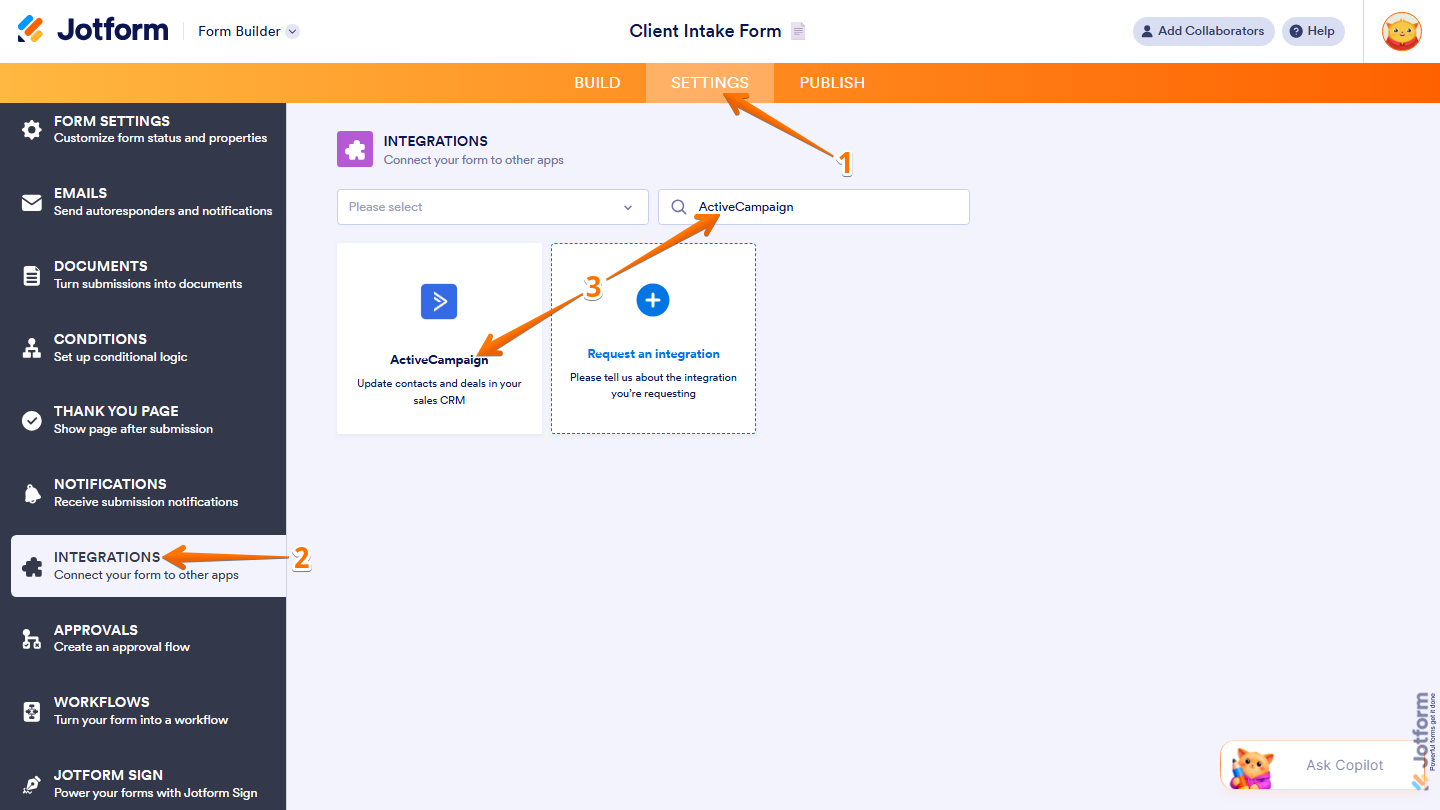
- In Form Builder, in the orange navigation bar at the top of the page, click on Settings.
- Then, in the menu on the left, click on Integrations.
- Now, search for ActiveCampaign, and click on it.
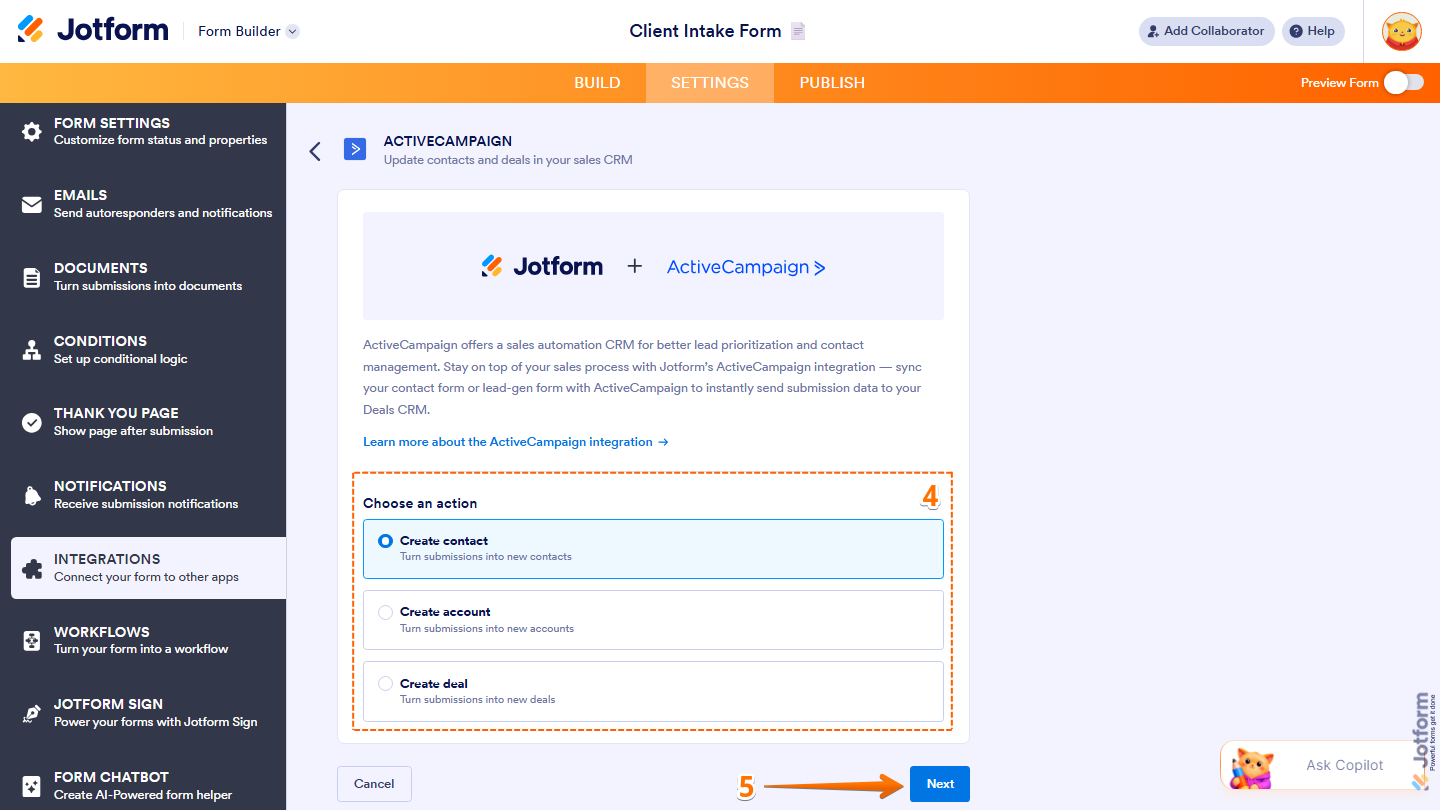
- Next, in the Choose an Action section, select what you want to do:
- Create Contact — Add a new contact to your ActiveCampaign list.
- Create Account — Create a new account entry.
- Create Deal — Add a new deal to your pipeline.
- Then, click on Next.
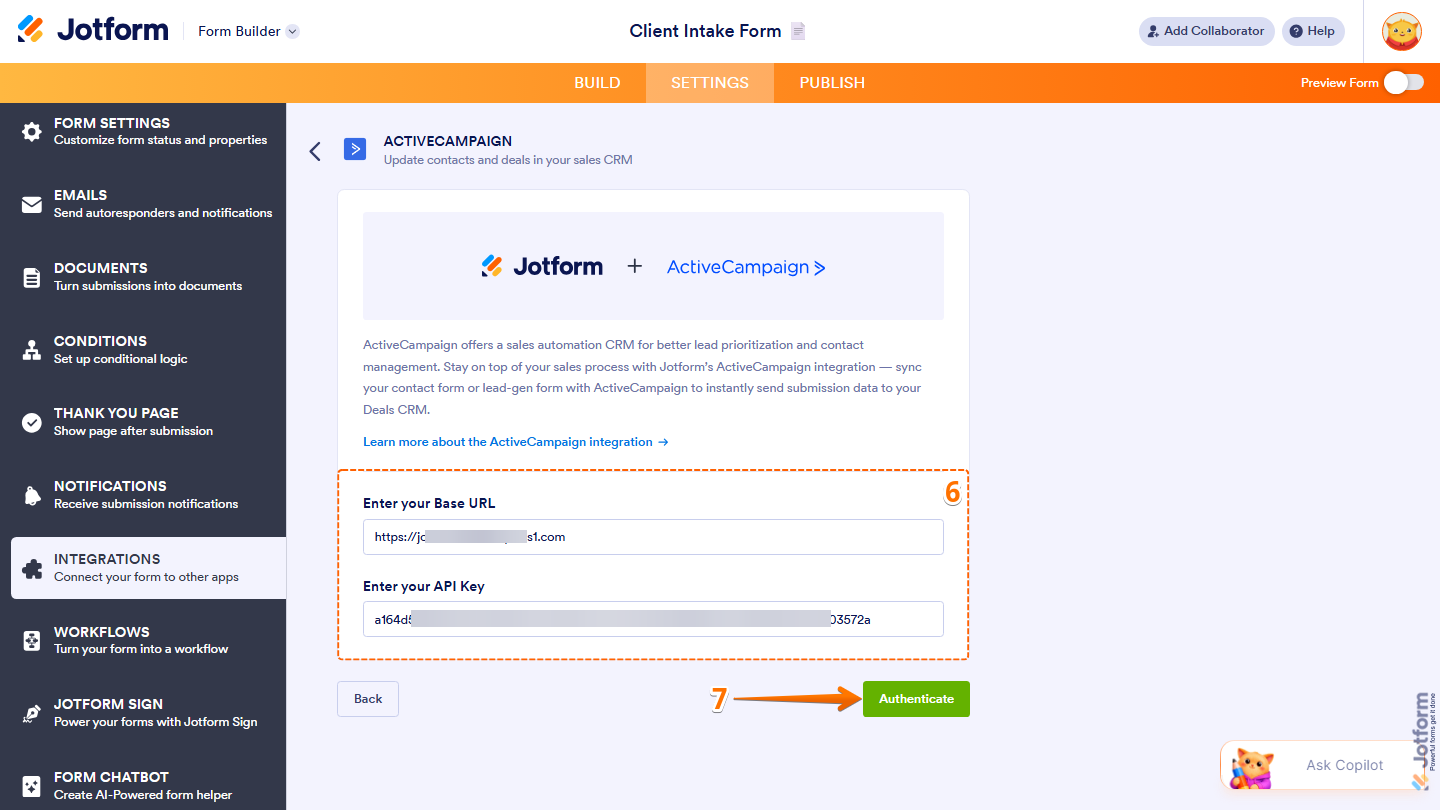
- Now, fill in these details:
- Base URL — Your ActiveCampaign account URL.
- API Key — Your unique API key from ActiveCampaign.
- Then, click on Authenticate.
Note
If you’re not sure how or where to get your Active Campaign Base URL and API Key, check out this support article from Active Campaign on Getting Started with the API to learn more.
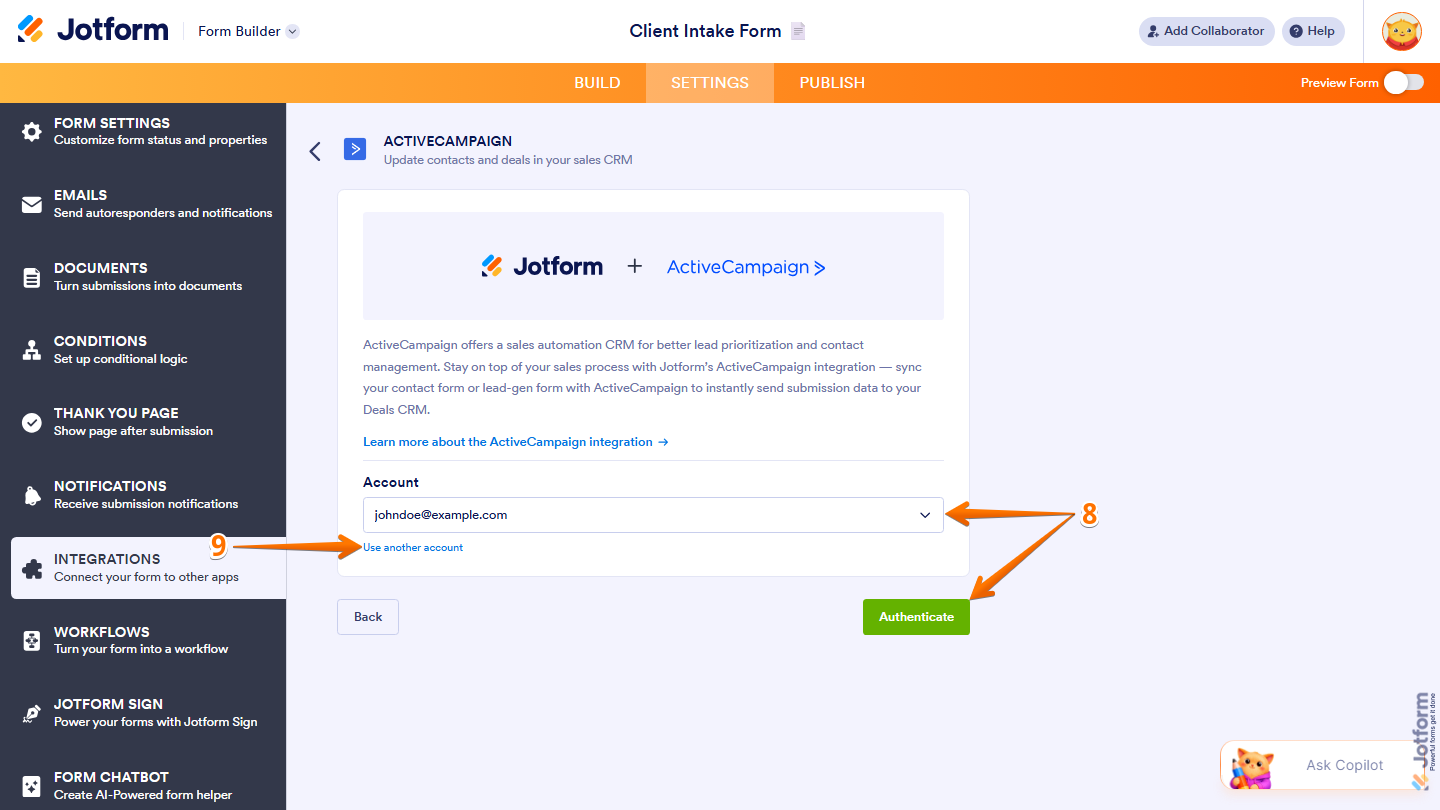
- If you’ve logged in before through one of your other forms, select that Microsoft SharePoint account from the Dropdown menu and then click on Authenticate.
- Or, to use a different one, click on Use Another Account.
That’s it for connecting your ActiveCampaign account. Now, you can continue with your selected action below.
Creating a Contact
Once your account is connected, you can start adding new contacts to your ActiveCampaign list automatically through your form submissions. You’ll just need to follow these simple steps:
- In the next screen, after authenticating your account, set up these things:
- Select List — Choose the ActiveCampaign list where the contact will be added.
- Match Your Fields — Map your form fields to the corresponding ActiveCampaign fields. The Email field is required, so make sure your form includes an Email element. Click on Add Field to map additional fields.

- Then, scroll down to the bottom and continue setting up these things:
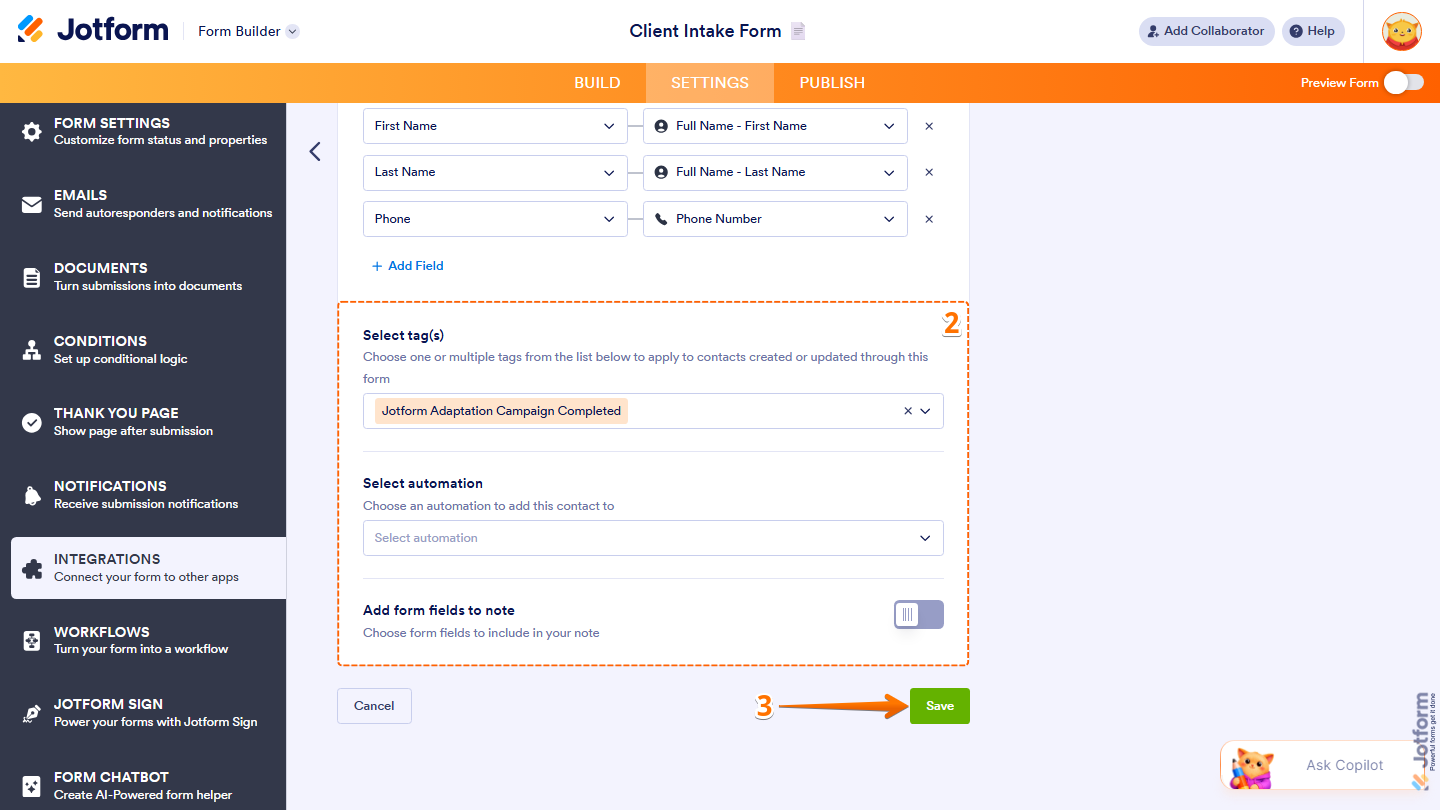
- Select Tag(s) — Choose one or more tags to assign to the contact.
- Select Automation — Add the contact to a specific automation in your ActiveCampaign account.
- Add Form Fields to Note — Toggle this on to include form responses as a note in the contact profile. You can customize the note title using your form fields.
- Now, click on Save, and you’re all set.
Creating an Account
You can also create a new account entry in ActiveCampaign using the information collected from your form. To get this working, just set it up like this:
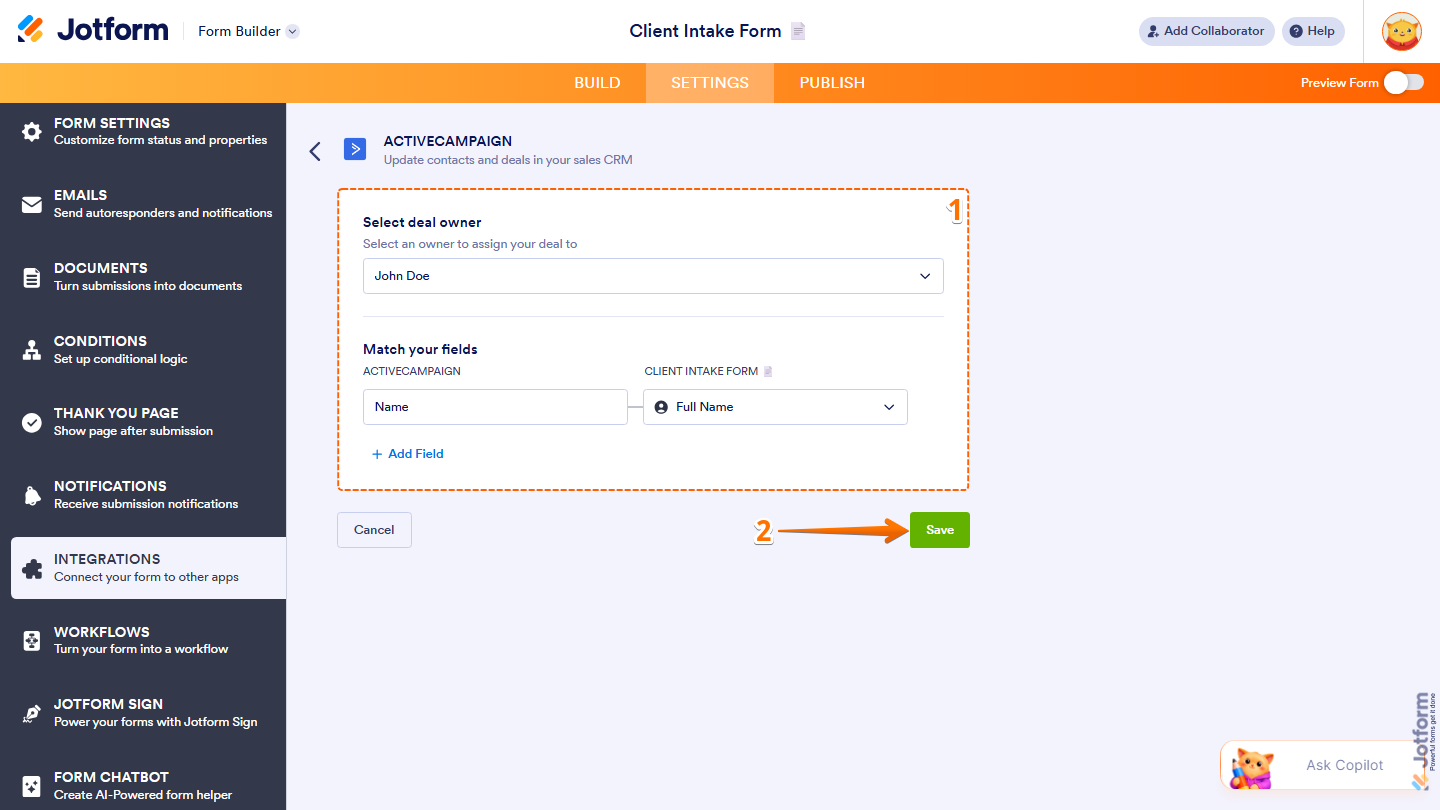
- In the next screen, after authenticating your account, complete these fields:
- Select deal owner — Choose an account owner from the dropdown to assign ownership of the account created from form submissions.
- Match Your Fields — Map your form fields to the corresponding ActiveCampaign fields. The Name field is required, so make sure it is properly mapped. You can also map the Account URL if needed. Additional fields cannot be mapped when creating an account.
- Now, click on Save, and you’re done.
Creating a Deal
If you want to track opportunities more easily, you can automatically add new deals to your ActiveCampaign pipeline from your form submissions. Here’s how to set it up:
- In the next screen, after authenticating your account, configure these fields:
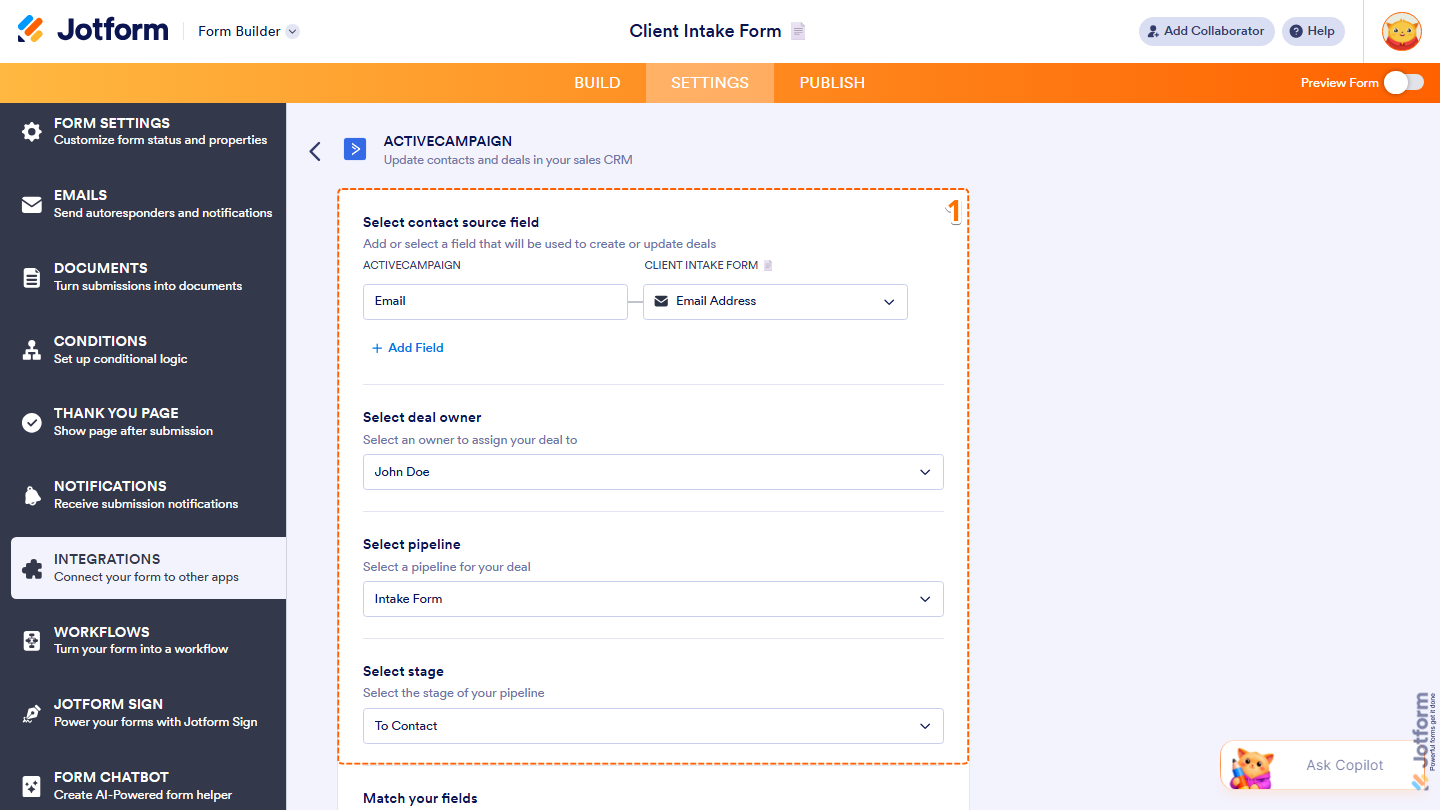
- Select Contact Source Field — Choose or add a field that will be used to create or update the deal.
- Select Deal Owner — Choose an owner from the dropdown to assign the deal.
- Select Pipeline — Select the pipeline where the deal will be added.
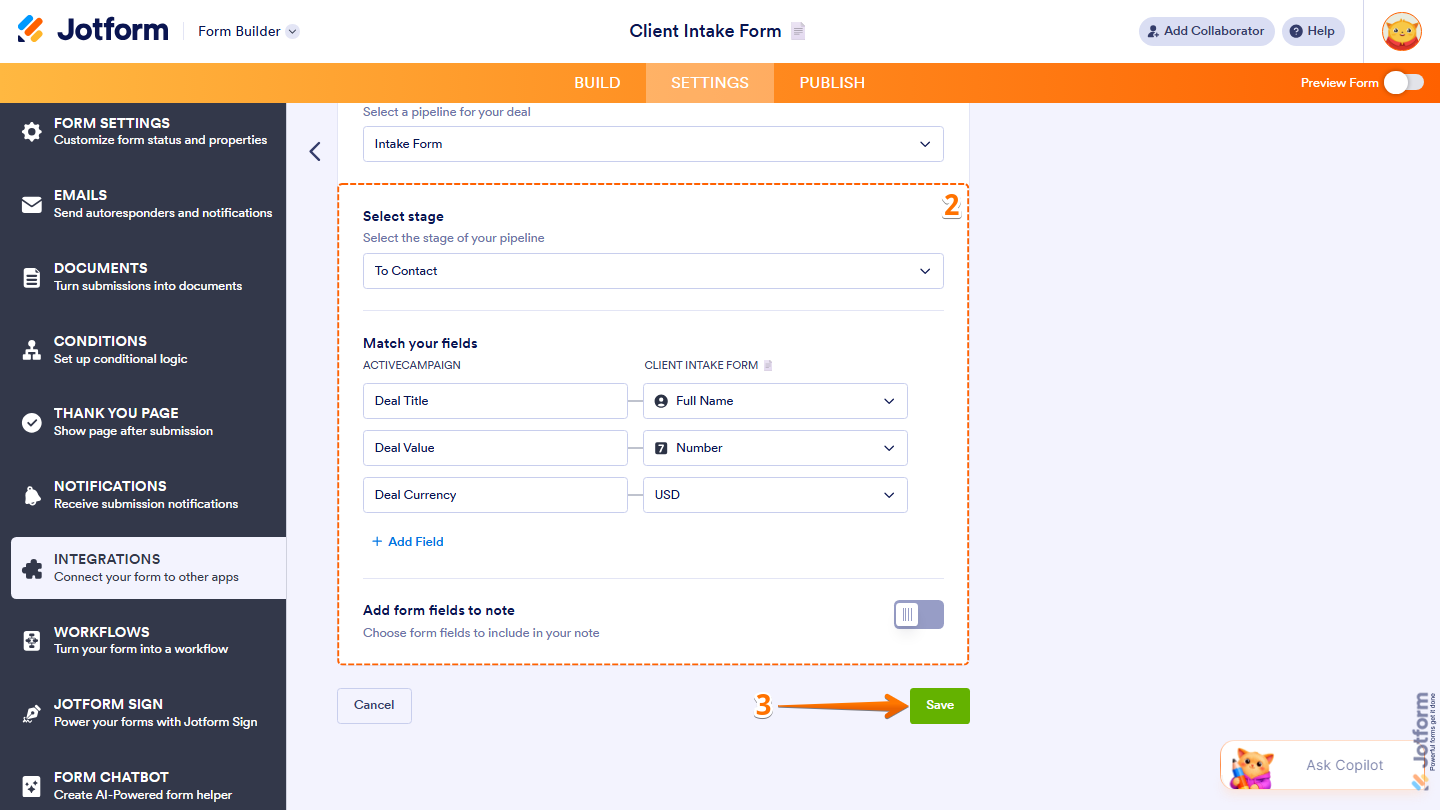
- Select Stage — Choose the stage within the selected pipeline.
- Then, scroll down to the bottom and continue to configure these fields:
- Match Your Fields — Map your form fields to the required ActiveCampaign deal fields such as Title, Value, and Currency. Click on Add Field to map additional fields.
- Add Form Fields to Note — Toggle this on to add a note to the deal. You can customize the note title using your form fields and choose which form fields to include in the note.
- Now, click on Save, and you’re good to go.
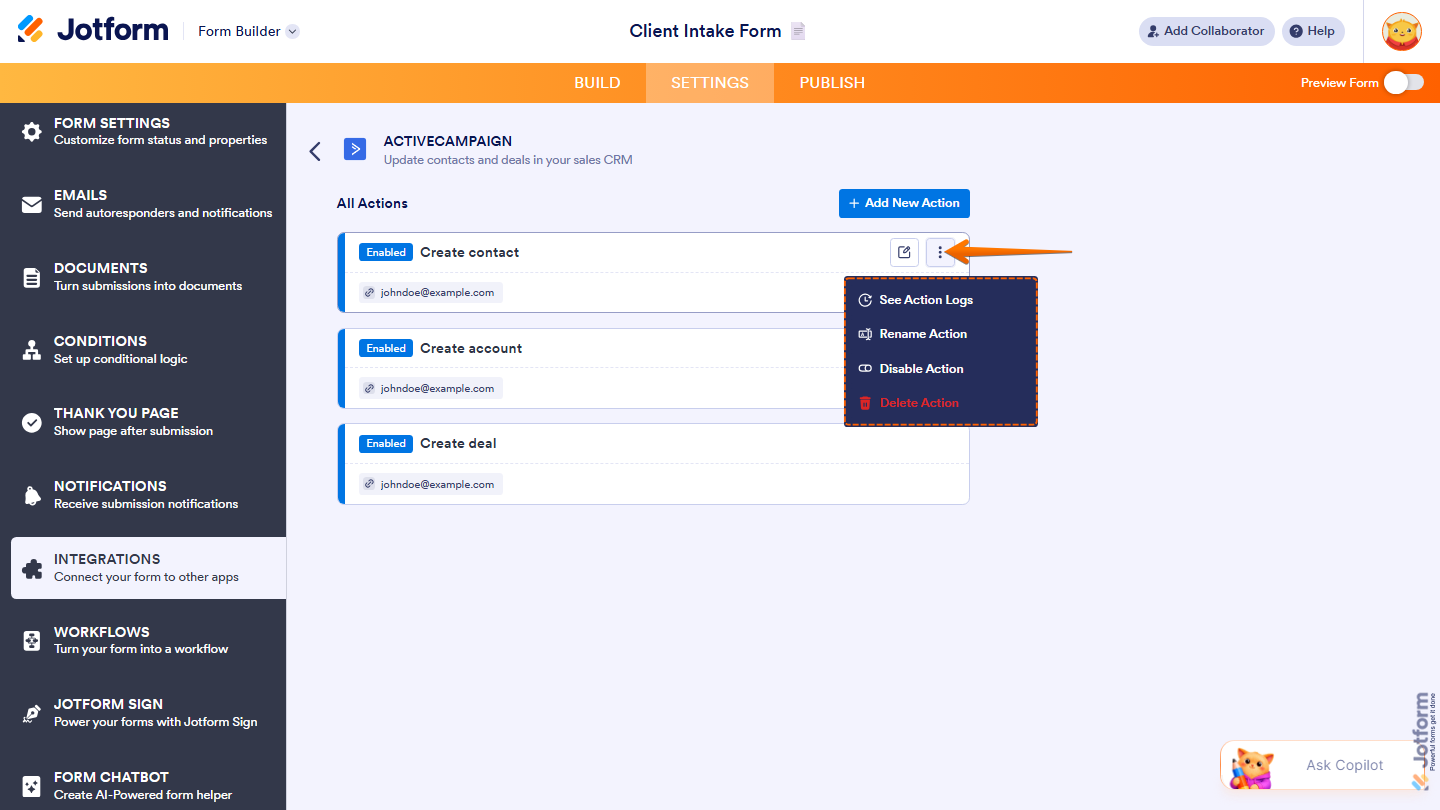
Managing ActiveCampaign Integration Actions
After saving the integration, you’ll see the action you’ve set up on the page. Hover your mouse over it and click on the Pencil icon to edit it or the Three Dots icon to access more options:
- See Action Logs — View successful and failed runs. It’s helpful for troubleshooting.
- Rename Action — Change the action’s title.
- Disable Action — Temporarily stop the integration from sending data.
- Delete Action — Remove the action from your form.
And that’s it. Your form is now connected to ActiveCampaign, so new submissions will automatically flow into your account and keep your contacts, deals, or accounts up to date without any extra work.
Pro Tip
You can also integrate ActiveCampaign with Jotform Sign by following the steps above. Head to Jotform Sign Builder and set up the integration as this guide outlines.

Send Comment:
2 Comments:
April 23, 2025
Is there no longer an option to update a contact?
June 4, 2022
Je vous remercie pour le service et pour le soutien.Car votre guide m'a beaucoup aidé.
Merci