Zapier allows you to integrate different web applications to automate your ideal workflows. For example, you can send a custom email through Gmail for each form submission or add form submitters to your Google Contacts.
In Zapier, you can use Jotform to trigger an event to your chosen app for each form submission. And, you can also integrate Jotform to trigger actions such as Assigning Forms, Assigning Prefilled Forms, and Creating Submissions.
Setting Up Zaps in Form Builder with a Dedicated Integration
Jotform has a wide range of Zapier-powered apps for you to select from. Here’s how to find and integrate them with your form:
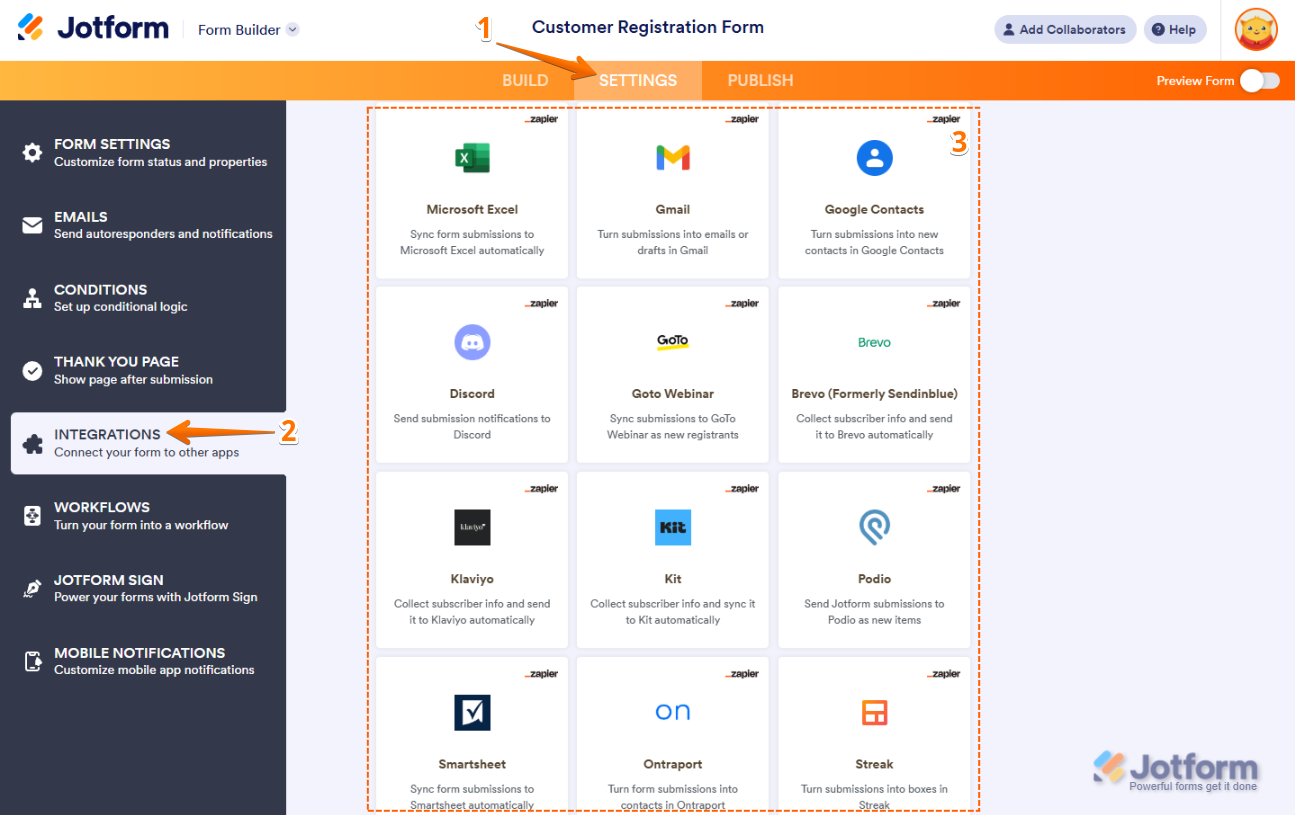
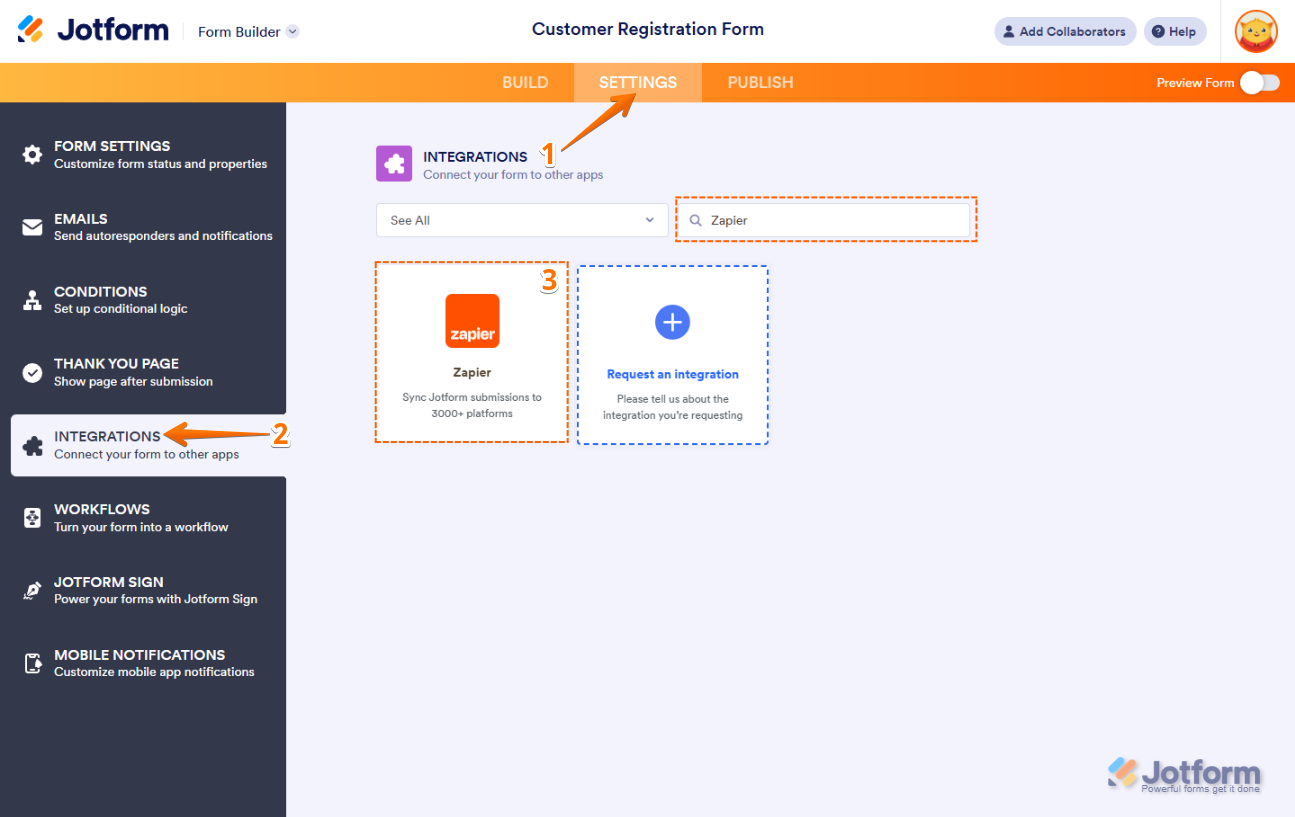
- In Form Builder, in the orange navigation bar at the top of the page, click on Settings.
- In the menu on the left side of the page, click on the Integrations tab.
- Then, scroll down, and select from the following dedicated Zapier Integrations:
- Gmail
- Google Contacts
- Discord
- Goto Webinar
- Klaviyo
- Kit
- Podio
- Smartsheet
- Ontraport
- Streak
- Copper
- Salesforce Pardot
- Mailgun
- Agile Crm
- Notion
- LeadConnector
- Flodesk
- Follow Up Boss
- Close
- ClickSend SMS
- SimpleTexting
- Drip
- Omnisend
- Chili Piper
- Freshsales Classic
- StockTwits
- GrowSurf
- CallHippo
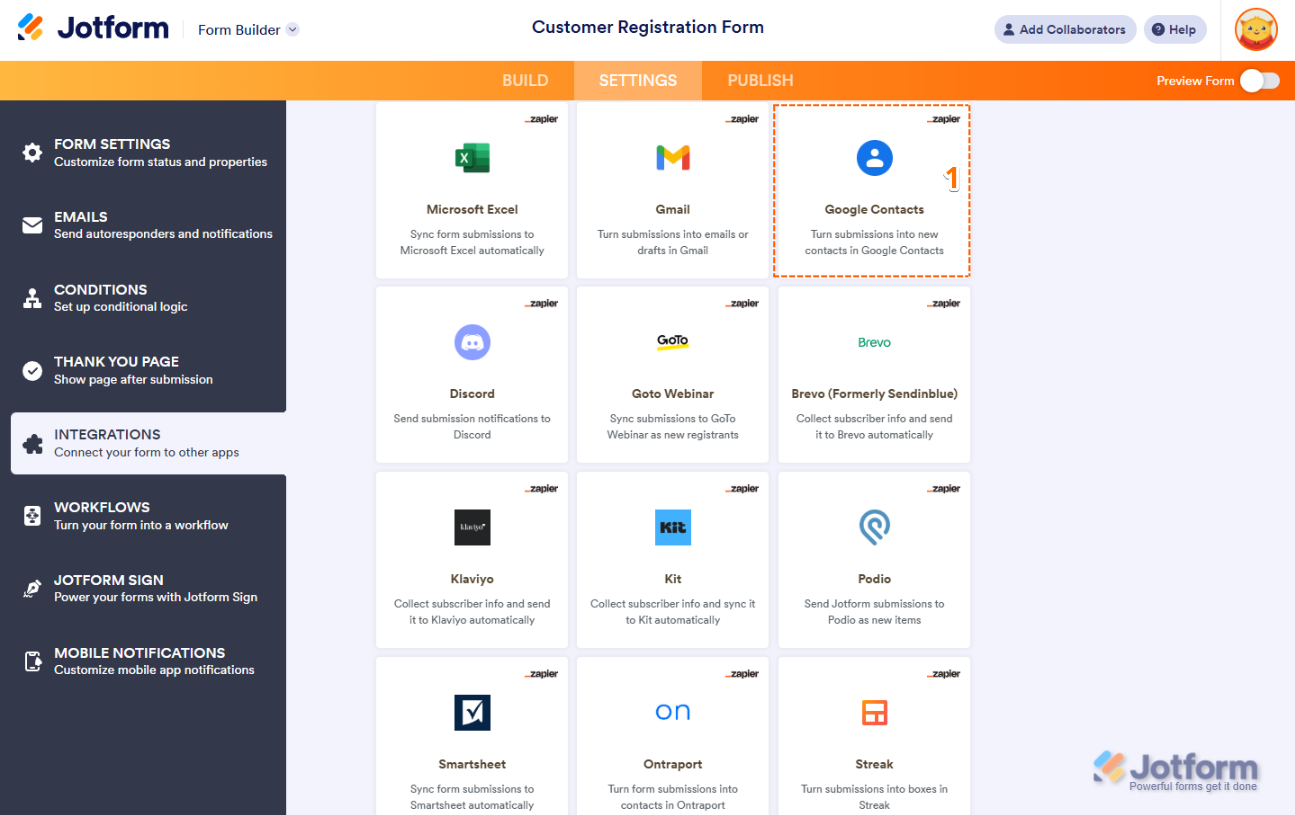
So, as an example, let’s integrate Google Contacts.
- In the Integrations list, select Google Contacts.
- Then, click on Use this Zap next to the Zap Template you want to use.
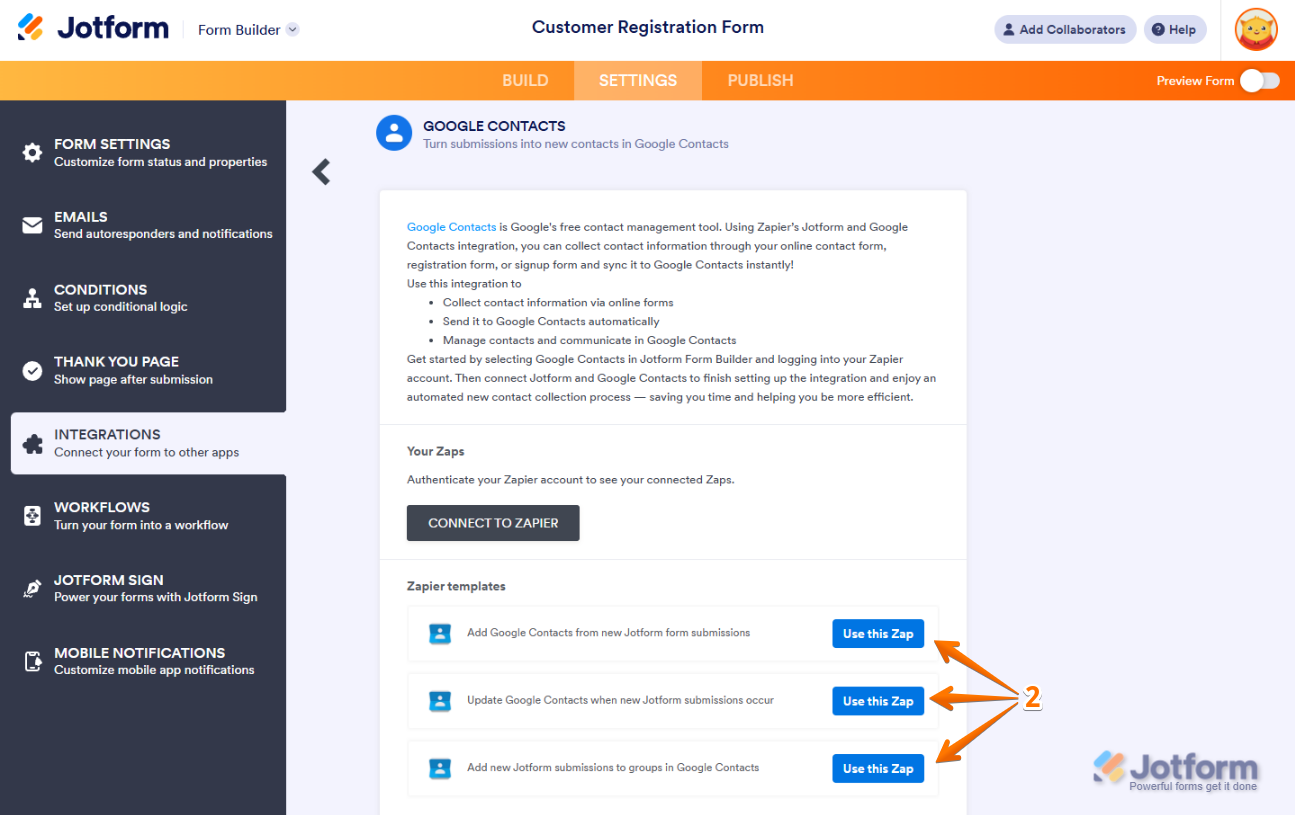
- Now, follow the prompts to complete the integration.
Setting Up Zaps with the Zapier Integration in Form Builder
The Zaps mentioned above and their templates are also available with the main Zapier Integration. Here’s how to find and integrate them with your form:
- In Form Builder, in the orange navigation bar at the top of the page, click on Settings.
- In the menu on the left, click on Integrations.
- Then, search for Zapier and click on it.
- Now, click on Connect to Zapier to connect to your Zapier Account.
- Or, search for a Zap in the Zapier Templates Search bar, and then click on Use this Zap next to the Zap.

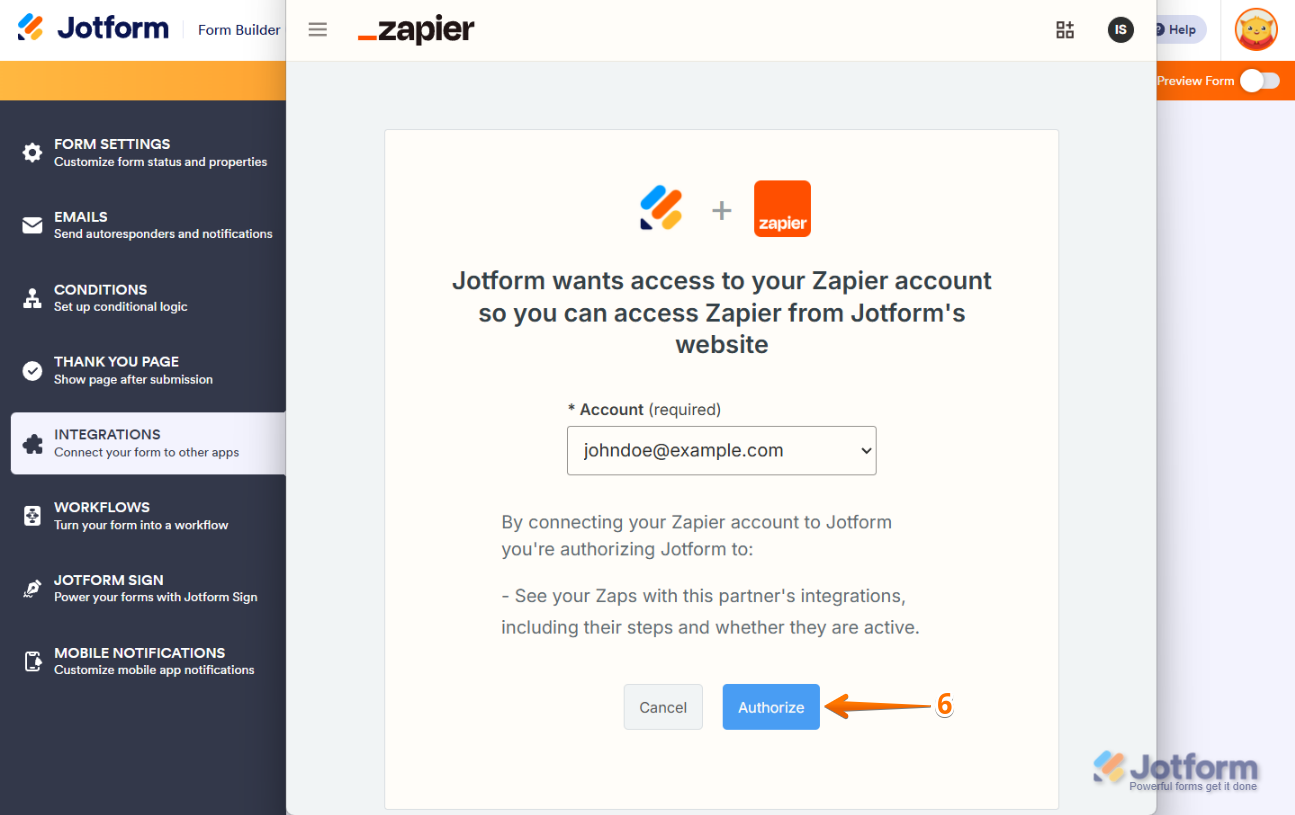
- Assuming you clicked on Connect to Zapier, log in to your Zapier account, and then click on Authorize.
If you’ve previously connected the current form with Zapier, you’ll see that its connected apps through Your Zaps section.
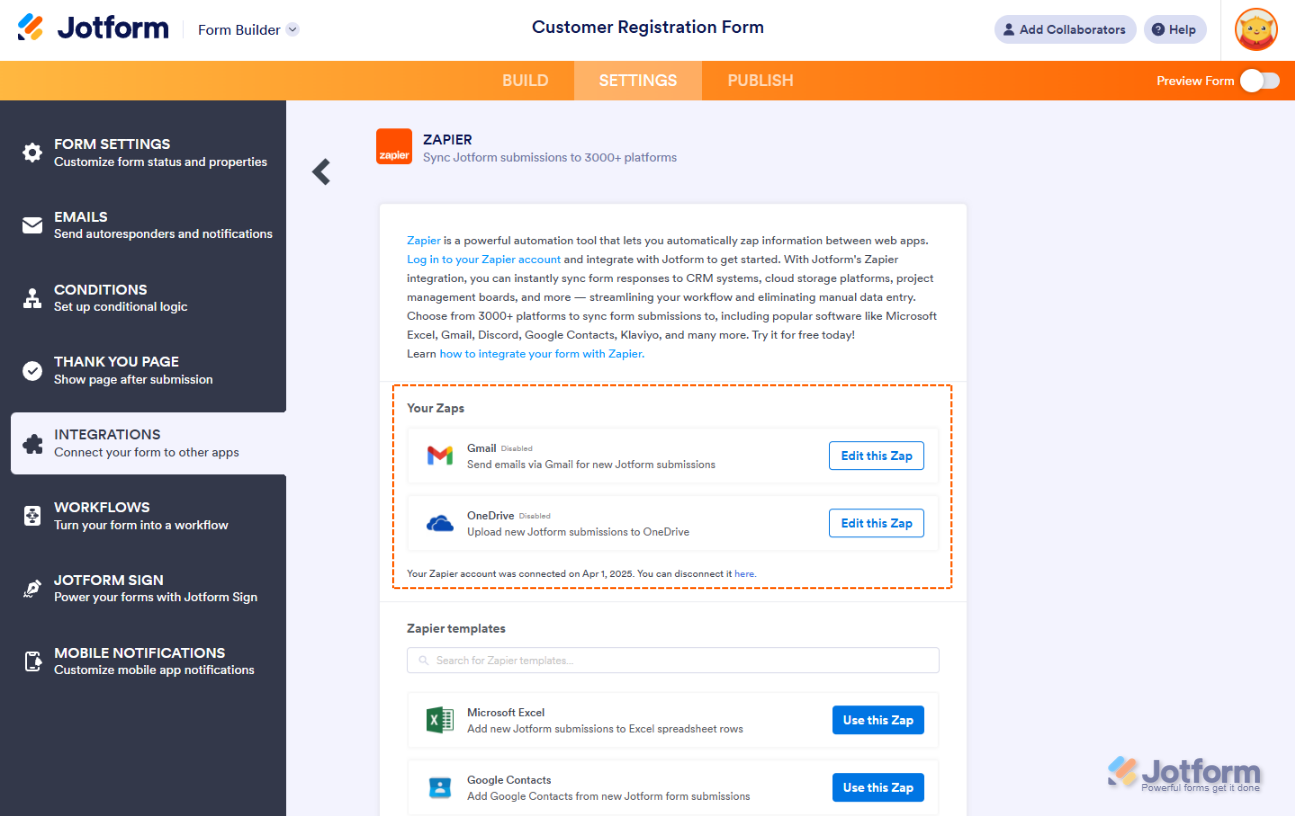
- Now, in the Zapier templates list, click on Use this Zap next to the one you want to use. Let’s use Google Contacts as an example.

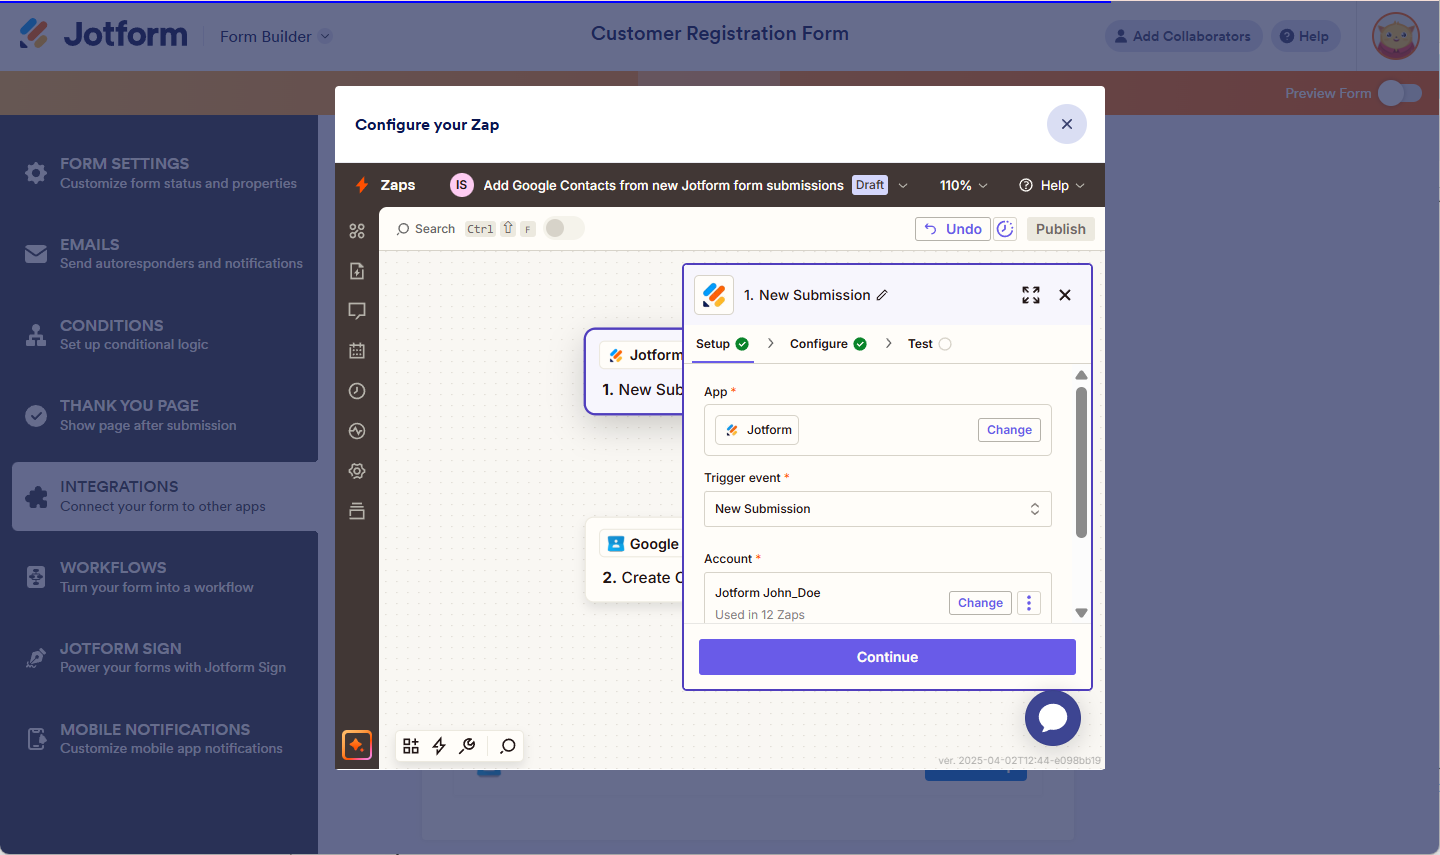
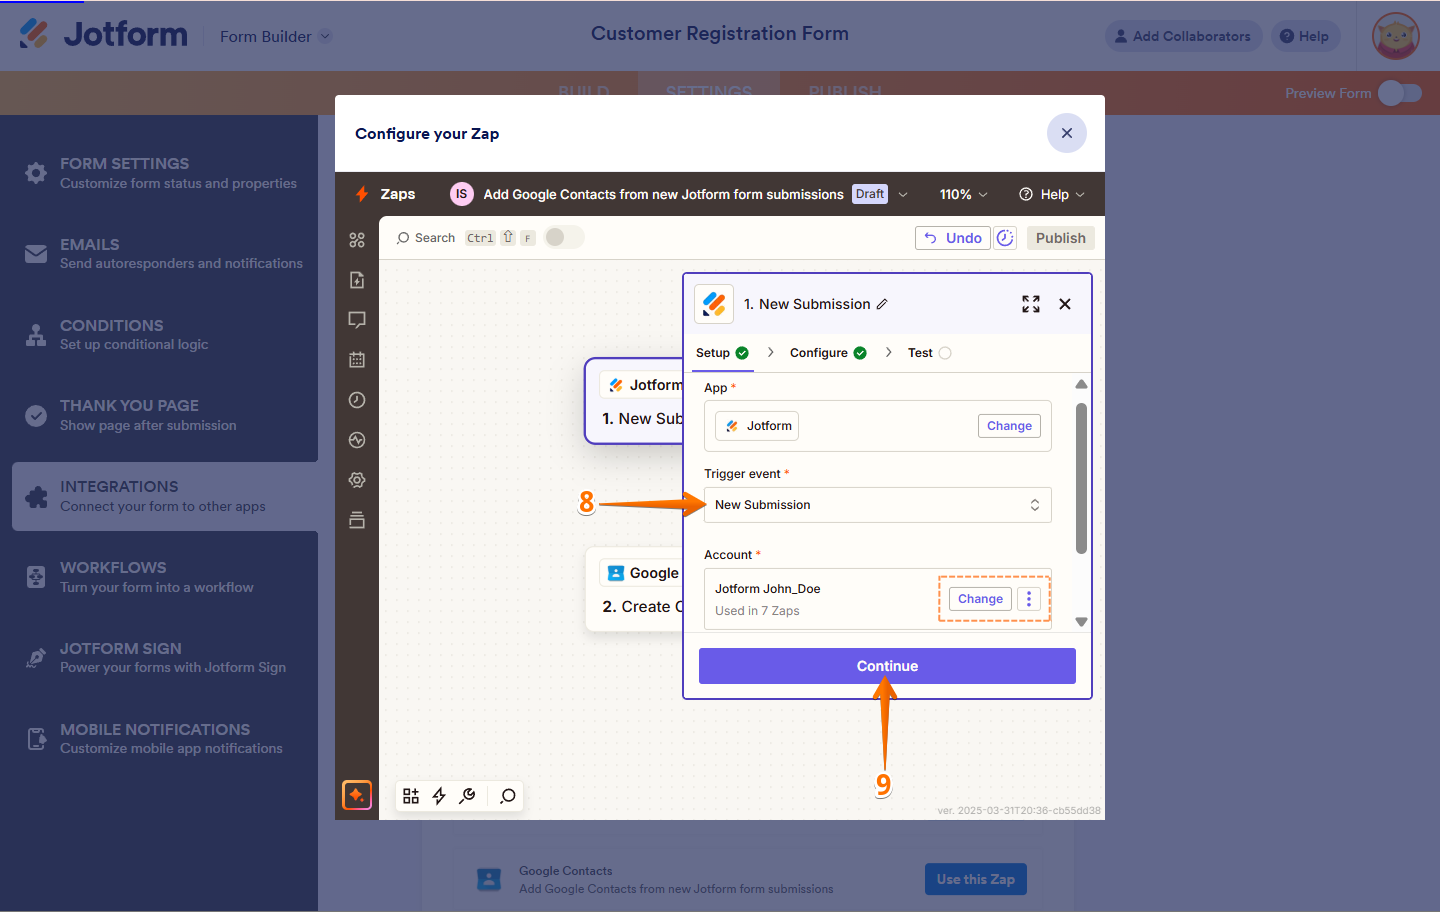
- Under the Setup tab, select your Trigger Event and, if you want to switch to a different Jotform account, click on Change.
- Then, click on Continue.
- Next, Under the Configure tab, select your form in the Dropdown menu and click on Continue.

- Now, click on Test Trigger.
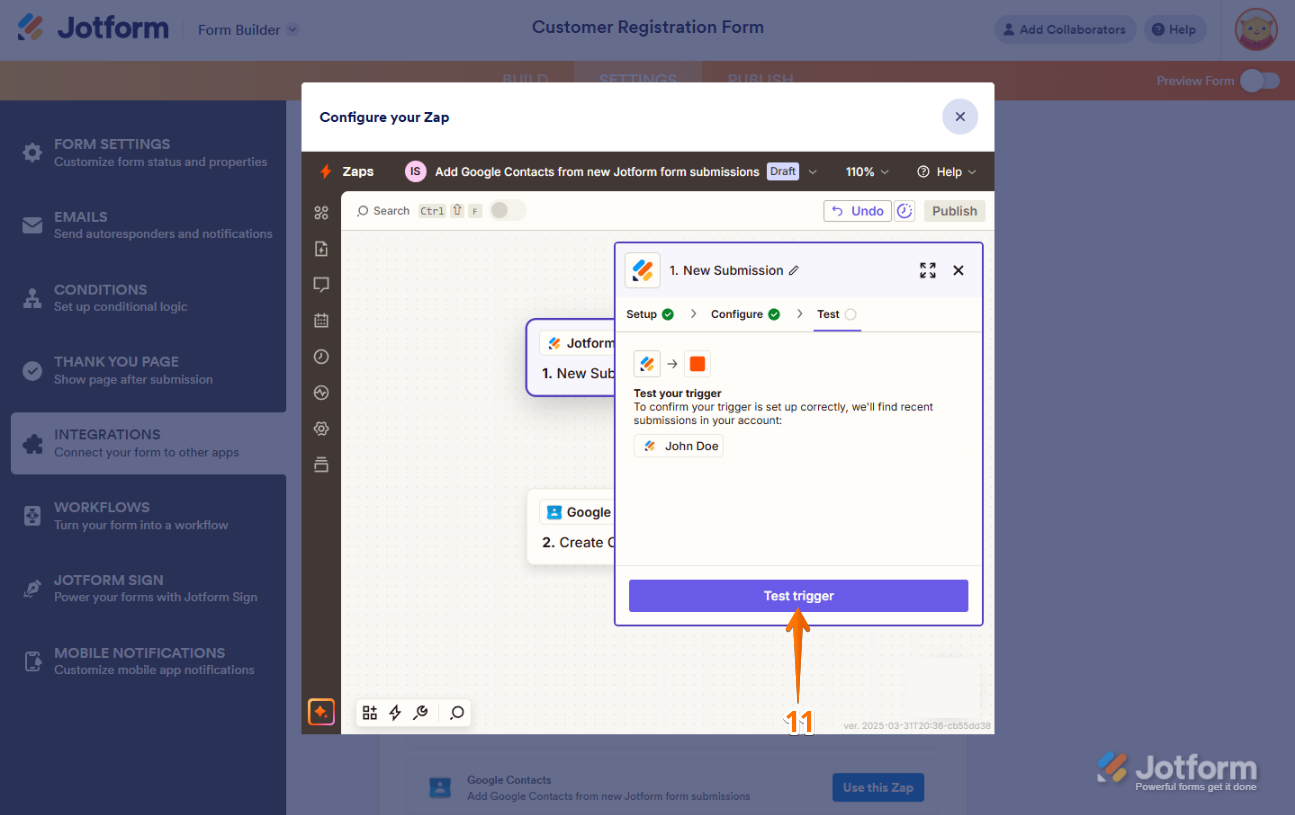
- If everything looks good after testing, click on Continue With Selected Record.

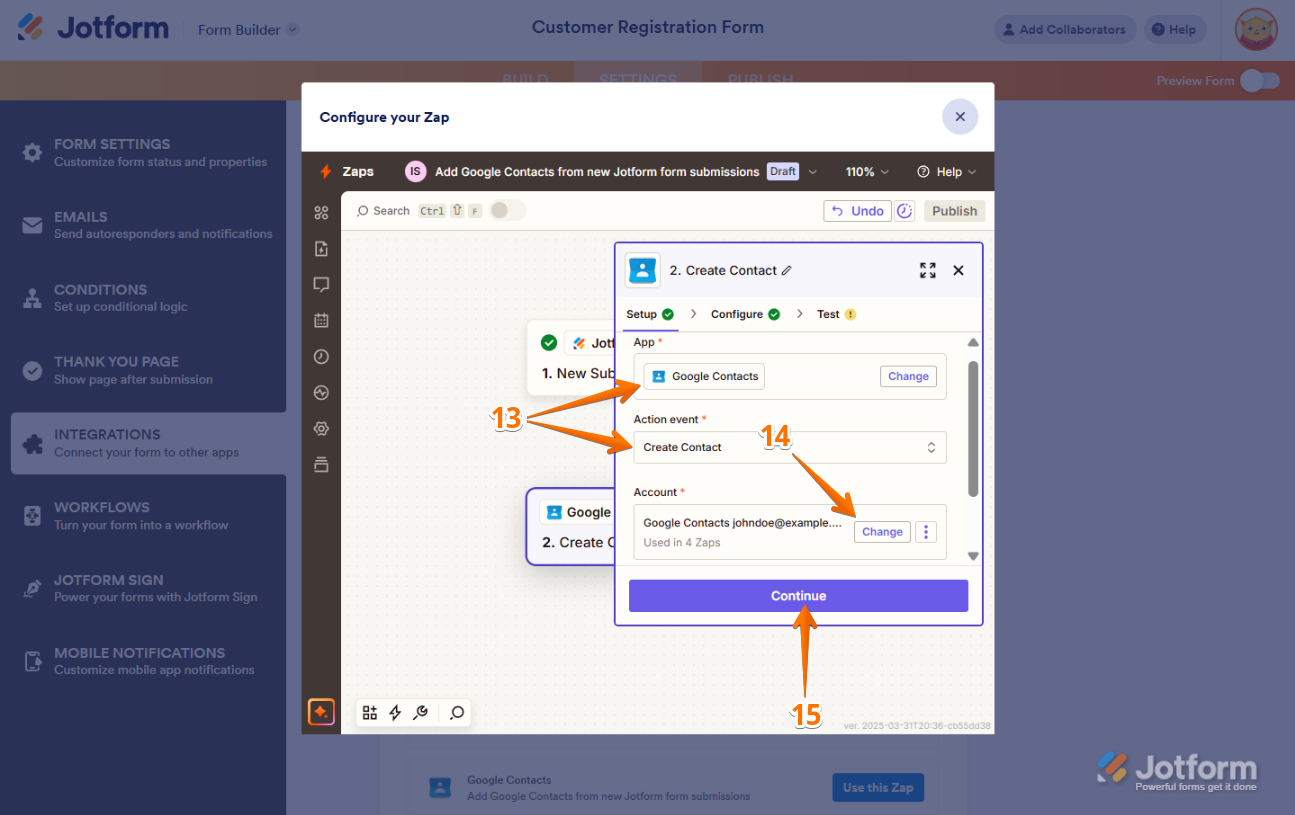
- Now, the integration automatically sets up the App & Action Event options based on the Zapier template you chose.
- If you want to switch the Google Contact account that you connected to a different one, click on Change.
- Then, click on Continue.
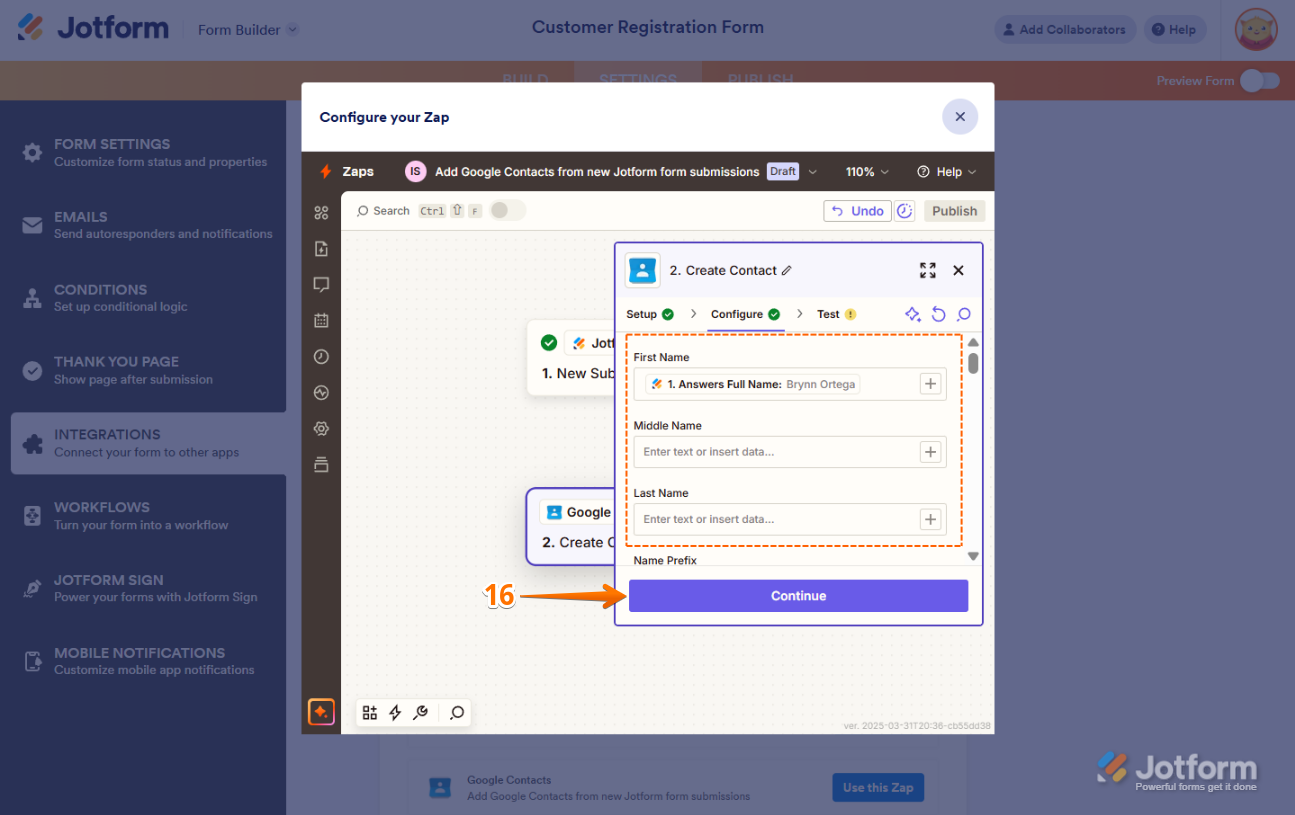
- Under the Configure tab, map your Jotform form fields to Google Contacts accordingly, and then click on Continue.
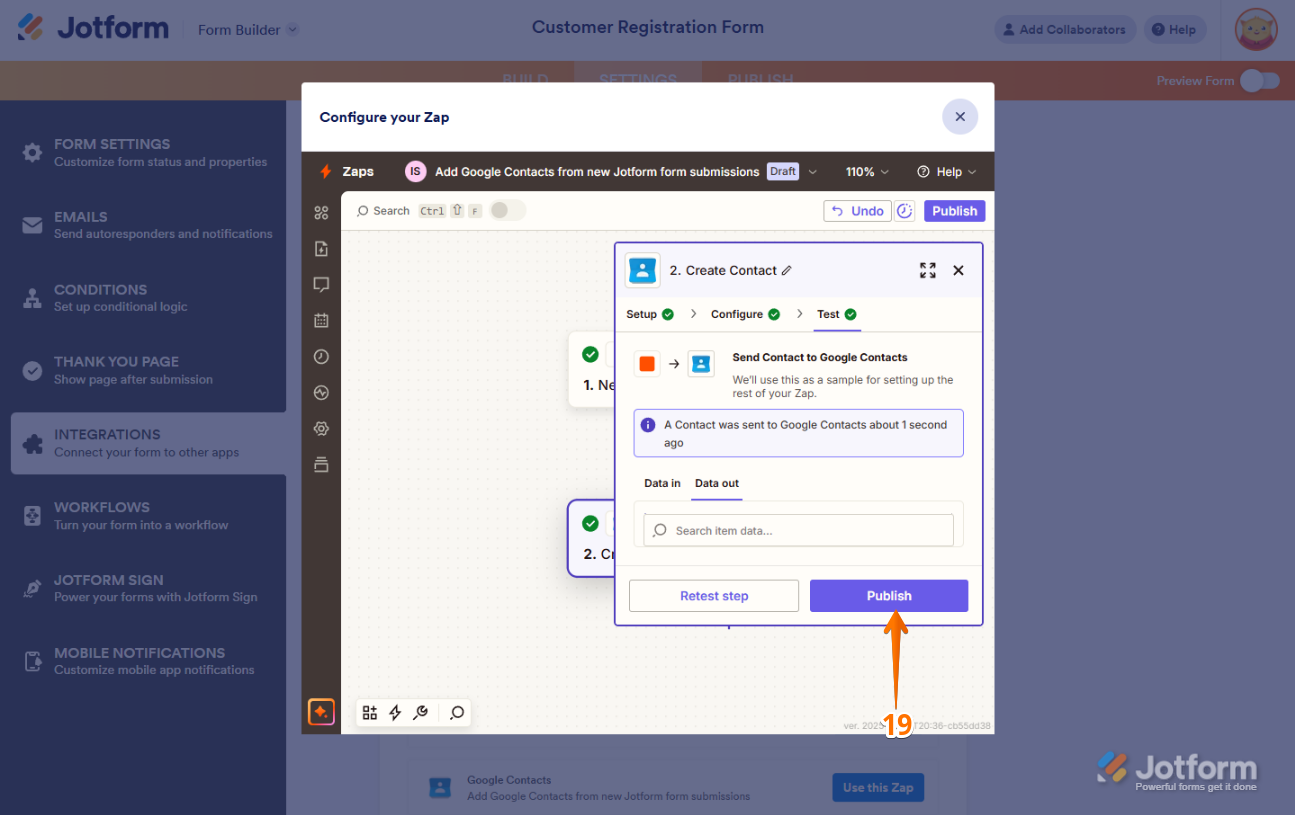
- Now, click on Test Step to ensure the integration works correctly.

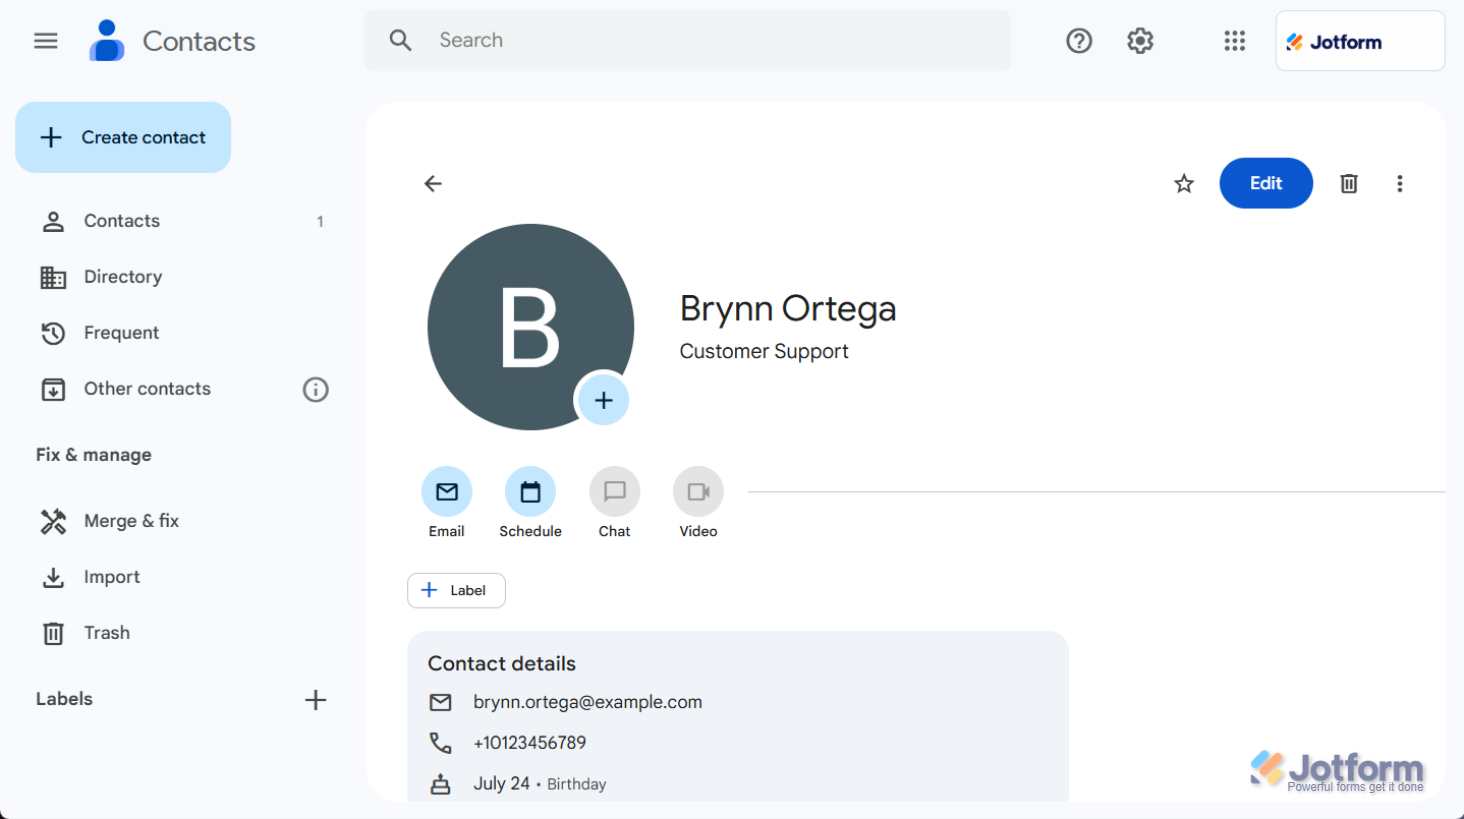
- Now, go to your Google Contacts and find the test data. If you see the contact, then you’re all set.
- Finally, click on Publish to publish or enable your Zap.
Note
Based on your Zapier Plan, you may not see the data instantly due to your plan’s update time. You may need to go to Zapier’s website and run the Zap manually.


Send Comment:
2 Comments:
September 11, 2024
Good morning, please can you confirm if the Zapier integration is available with all plans or if not which we would need to sign up to in order to integrate. We are a small business so would be looking at the more basic plans ideally. Thanks. Jen
May 29, 2024
How do I do this? (See email from Zapier) Update your Zaps that use the Jotform (1.3.2) integration by June 3, 2024...