Authorize.Net’s exclusive, fully integrated electronic check payment method lets you accept and process payments from bank accounts directly through your website or the Authorize.Net Virtual Terminal. eCheck.Net is an Authorize.Net payment service that allows merchants to accept electronic check payments for goods and services purchased via several methods, including mail order/telephone order and e-commerce websites.
Jotform’s new integration with eCheck.Net supports e-commerce. You can use WEB as eCheck Type.


An electronic check works much like a regular check. But instead of using a paper check to provide their bank account, routing number, and payment authorization, the customer provides the merchant with the necessary payment information through other methods, allowing the merchant to process the information electronically.

How to Integrate Your Forms with eCheck.Net?
Create a new form or edit your existing form and follow the steps below to integrate eCheck.Net into your form.
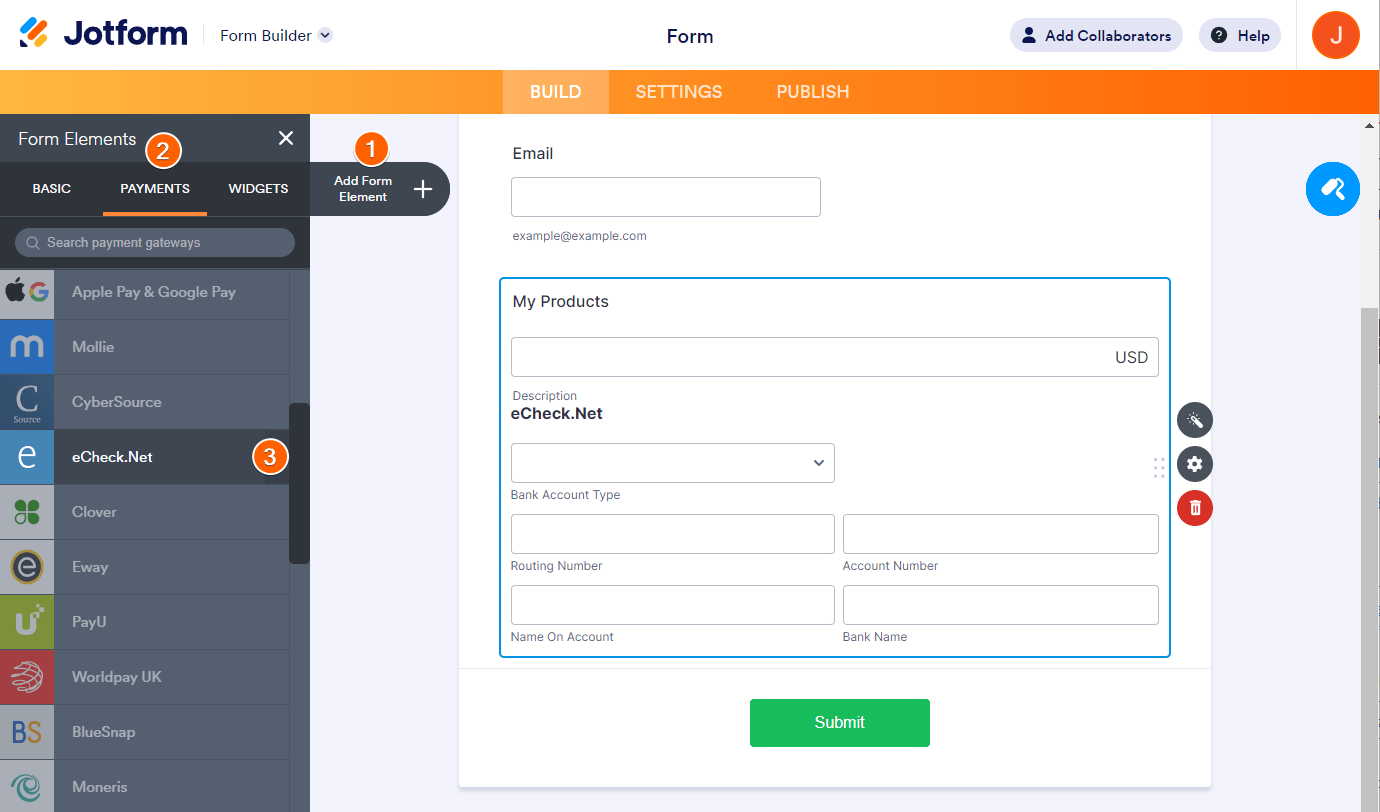
- In Form Builder, click the Add Form Element button on the left side of the screen.
- Go to the Payments tab.
- Click eCheck.Net from the list to add. You can also drag and drop it into your form.
Note
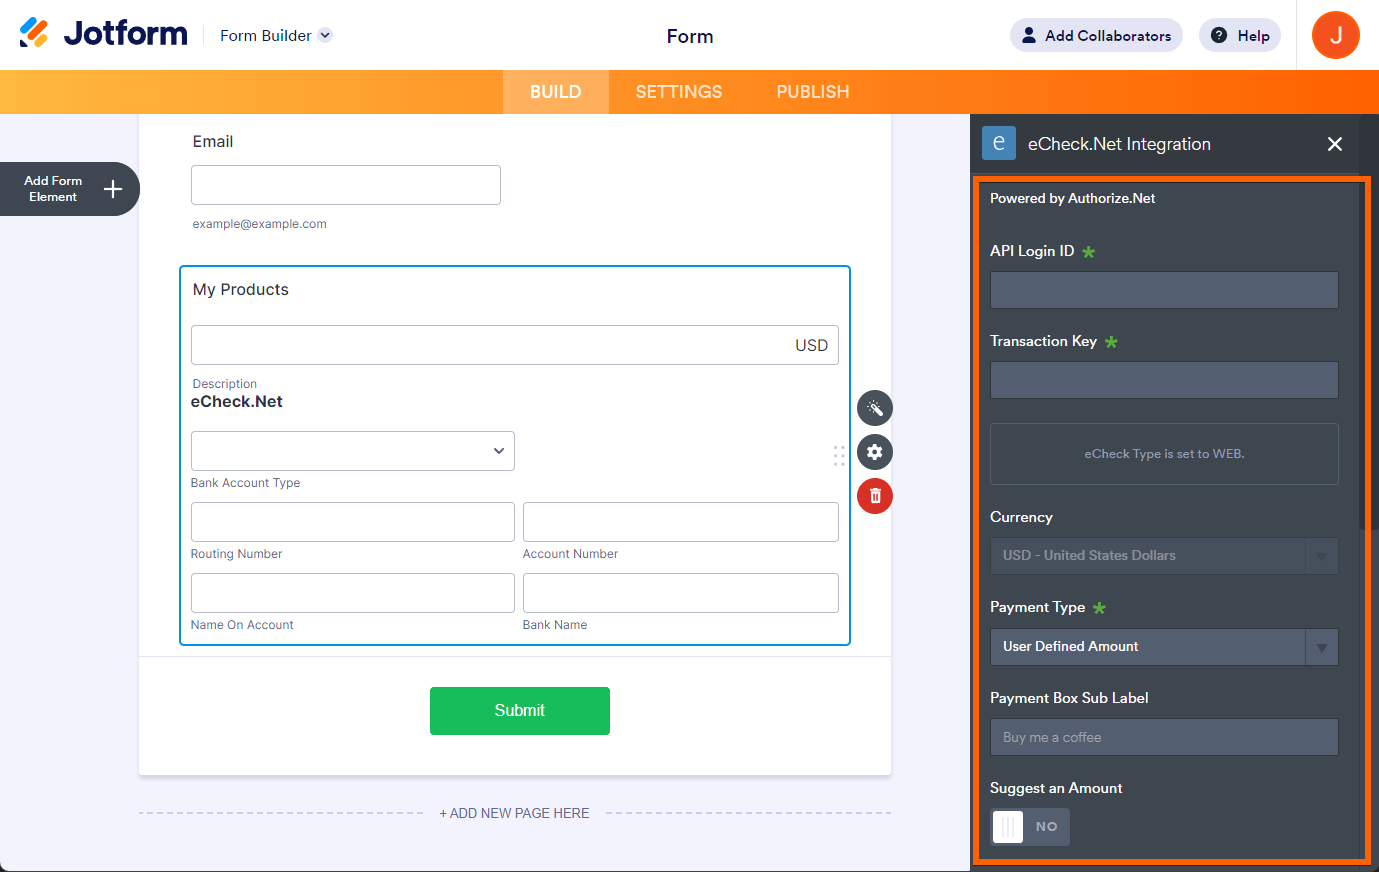
When you add eCheck.Net, its Payment Settings will automatically open. If not, click the Wand icon to open it.
- In the Payment Settings, set up the following:
- API Login ID & Transaction Key — eCheck.Net is an Authorize.Net payment service. The API Login ID and Transaction Key are the same credentials you can obtain from your Authorize.Net account. Visit How to Obtain API Login ID and Transaction Key for more details.
- Currency — eCheck.Net supports USD only.
- Payment Type — With eCheck.Net, you can only set up a user-defined payment. You can predefine an amount or set it to fetch a value from the calculation widget.
Under the Additional Gateway Settings, you’ll find a few additional options, which include the following:
- Ask Billing Information to Customer — This will display a dropdown where you can select an Address field as the Customer’s Billing Address.
- Sandbox Mode — Toggle this to Yes if you want to test eCheck.Net without using a real Bank account. For this to work, you need a Sandbox account from Authorize.Net. Visit Authorize.Net – Testing eCheck for more details on how you can test eCheck payment.
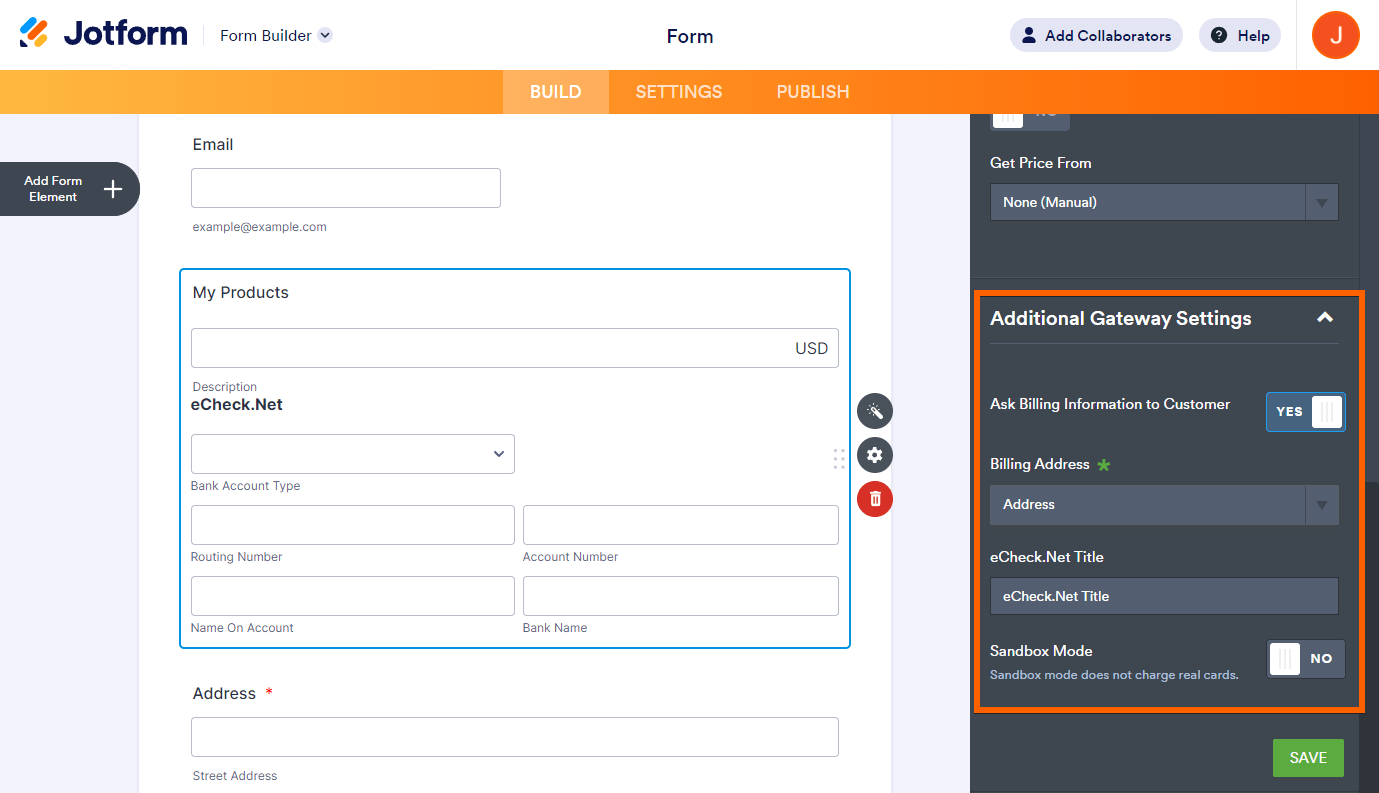
- Finally, click the Save button at the bottom to complete the integration.
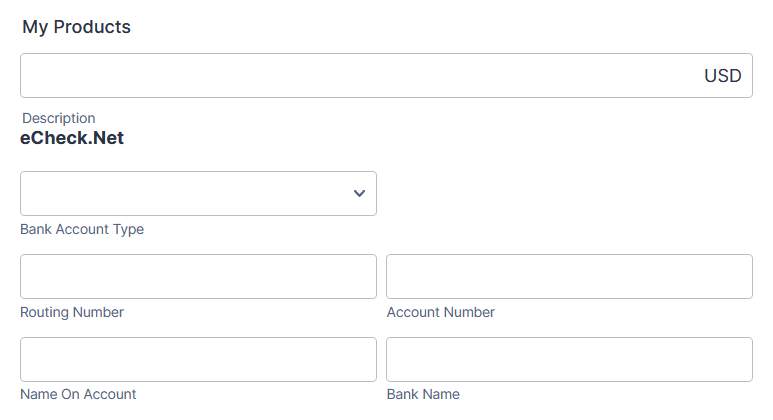
Form Preview
eCheck.Net form fields are different than credit card fields. Form fillers should select their Bank Account Type (checking or savings), Routing Number, Account Number, etc.
You can have a look at the following Jotform blog post to learn more: New Integration: Collect Electronic Checks Using eCheck.Net
Do you have any questions or suggestions about Jotform’s eCheck.Net integration? Please post them in the comments below.

Send Comment:
2 Comments:
More than a year ago
I would like if U could send me the application survey were I fill it in and get pay id payment to my bank account pla
More than a year ago
Hello,
Is it possible to set up a recurring payment using eCheck.net?