Jotform’s Adobe Sign widget makes it easy to collect legally binding signatures without the hassle of printing, scanning, or emailing documents back and forth. With just a few clicks, your form can include a secure, professional signature field powered by Adobe Sign—perfect for contracts, agreements, waivers, and more. It’s a simple way to streamline your workflow and keep everything digital, fast, and stress-free.
Here are a few ways to use it:
- Collect Legally Binding Signatures on Contracts — You can use the Adobe Sign widget to send contracts and agreements for secure, legally binding electronic signatures. This eliminates the need for printing, scanning, or mailing documents.
- Automate Employee Onboarding Documents — The widget works well for sending offer letters, NDAs, or policy acknowledgments to new hires. Once the form is submitted, documents can automatically be routed for signature.
- Secure Client Agreements and Service Contracts — Freelancers and businesses can use the widget to collect signed service agreements before starting a project. This ensures all terms are formally approved and documented.
- Process Approval Workflows Digitally — The Adobe Sign widget allows you to set up multi-step approval processes. Documents can be routed to different signers in a specific order for efficient authorization.
Notes
- To use this widget, you’ll need to have an Adobe Sign account set up first.
- Once completed through Adobe Sign, the signed documents are legally binding, giving you added peace of mind.
Adding and Setting Up the Adobe Sign Widget
Add the Adobe Sign widget to your form so users can easily sign documents online using Adobe Inc.—no paperwork, printing, or extra steps required. It’s easier than you think:
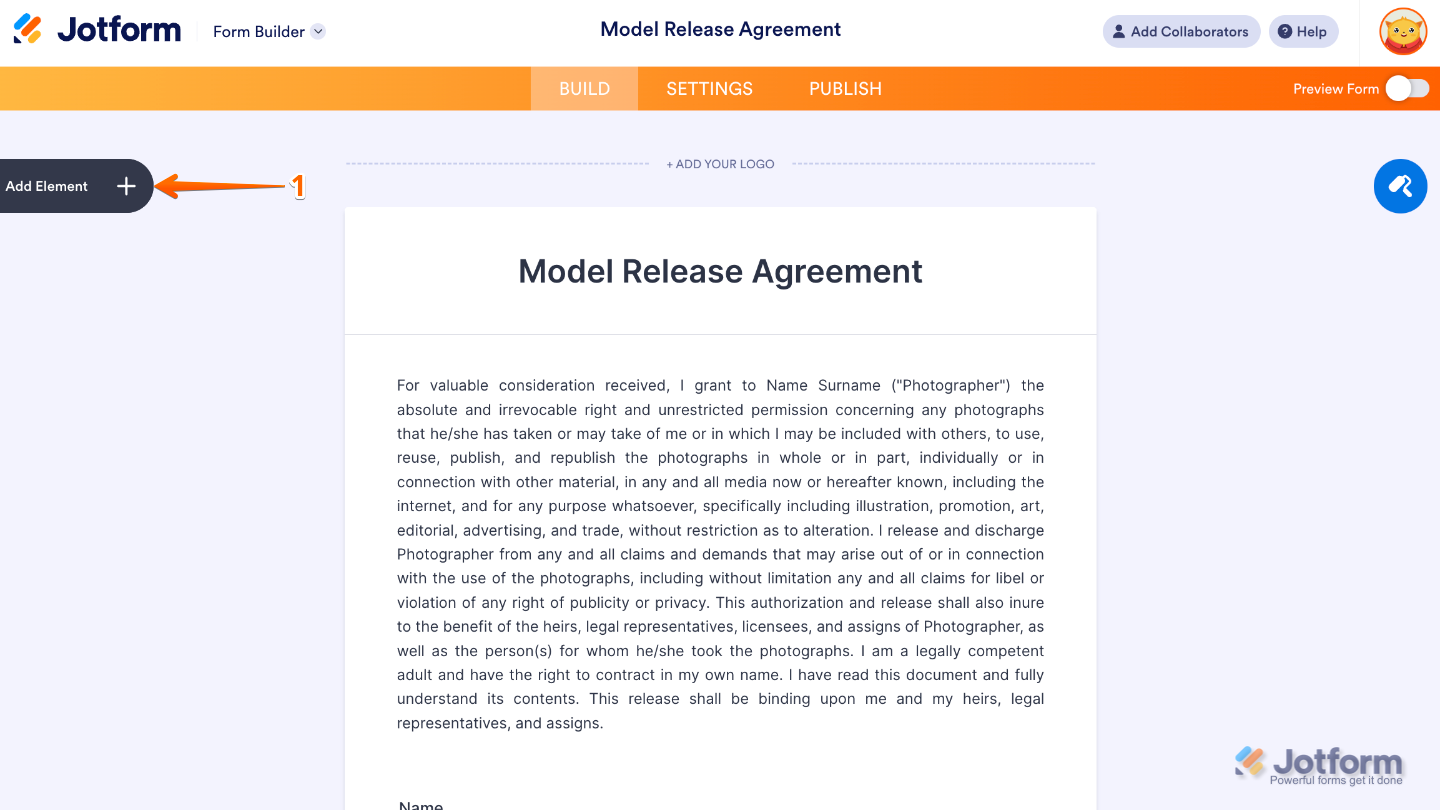
- In Form Builder, click on Add Element on the left side of the page.
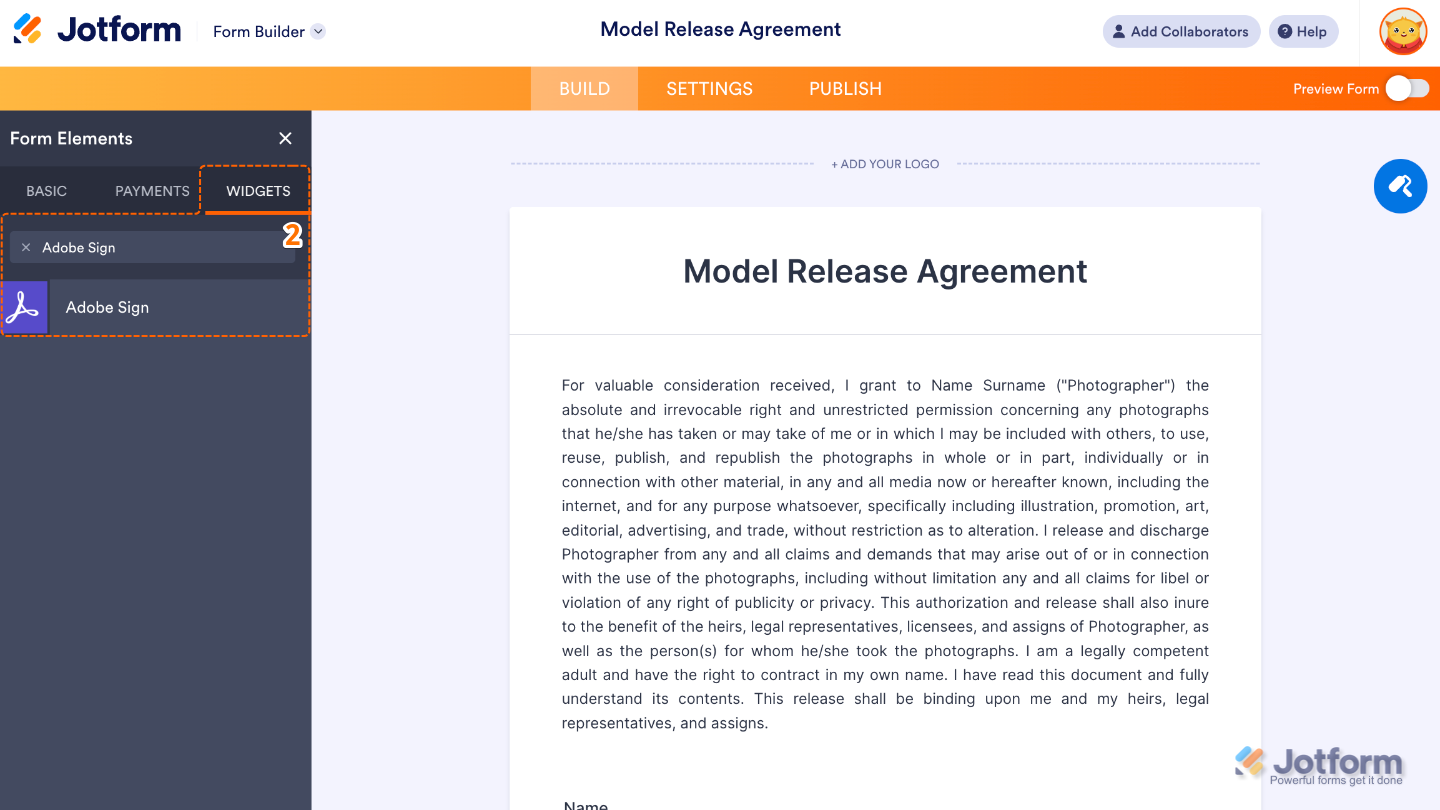
- Now, in the Form Elements menu, under the Widgets tab, search for Adobe Sign and then click on it. Or, just drag and drop it to where you want it to be on your form.
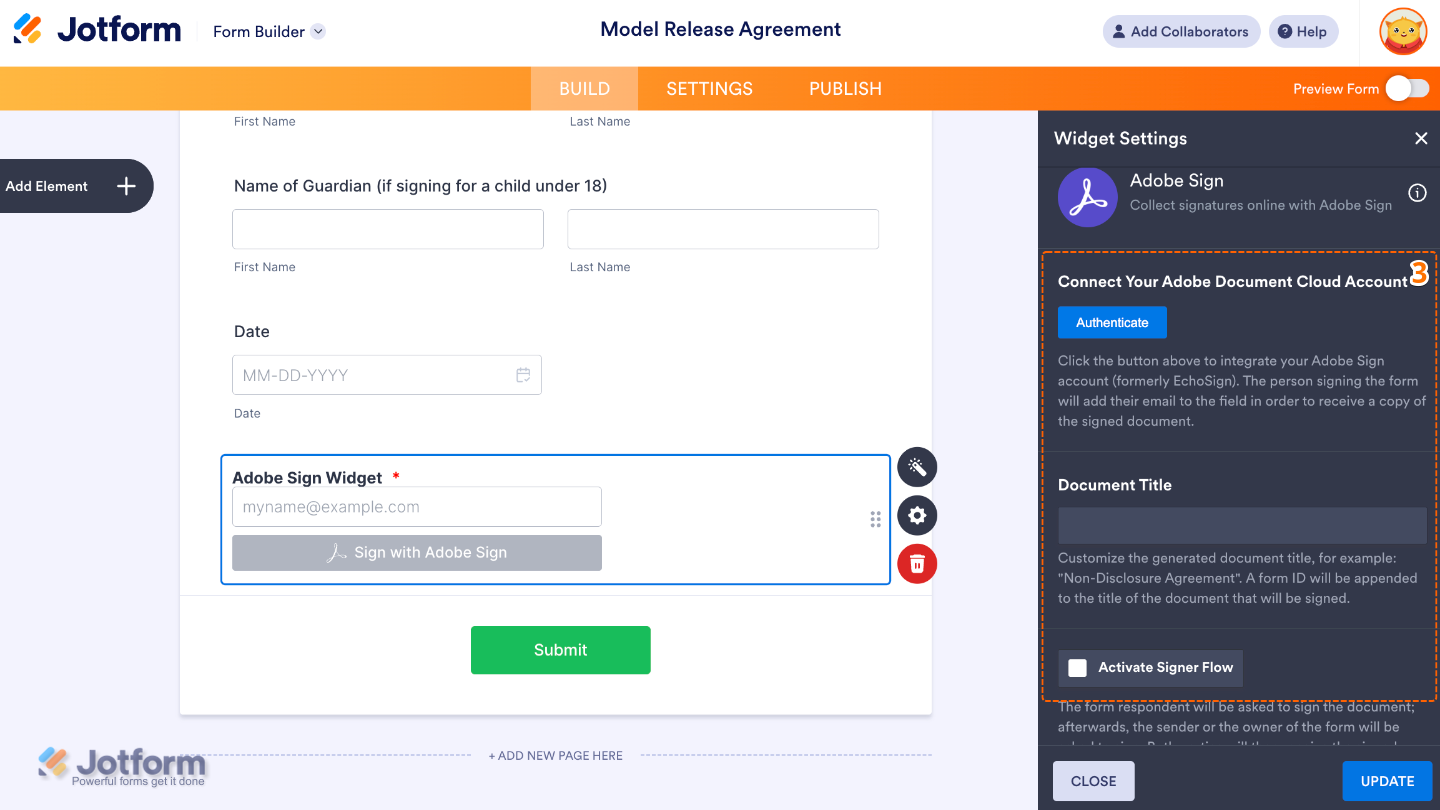
- Next, in the Widget Settings window that opens on the right side of the page, set up the following options:
- Connect Your Adobe Document Cloud Account — Click on Authenticate to connect your Jotform account with Adobe Document Cloud, making it easy to use Adobe Sign for collecting e-signatures.
- Document Title — Type in the title for your document. This is what signers will see and how it will appear in your Adobe Sign records.
- Activate Signer Flow — Check the box to turn on Adobe Sign for your form, making it easy for users to sign electronically without any hassle.
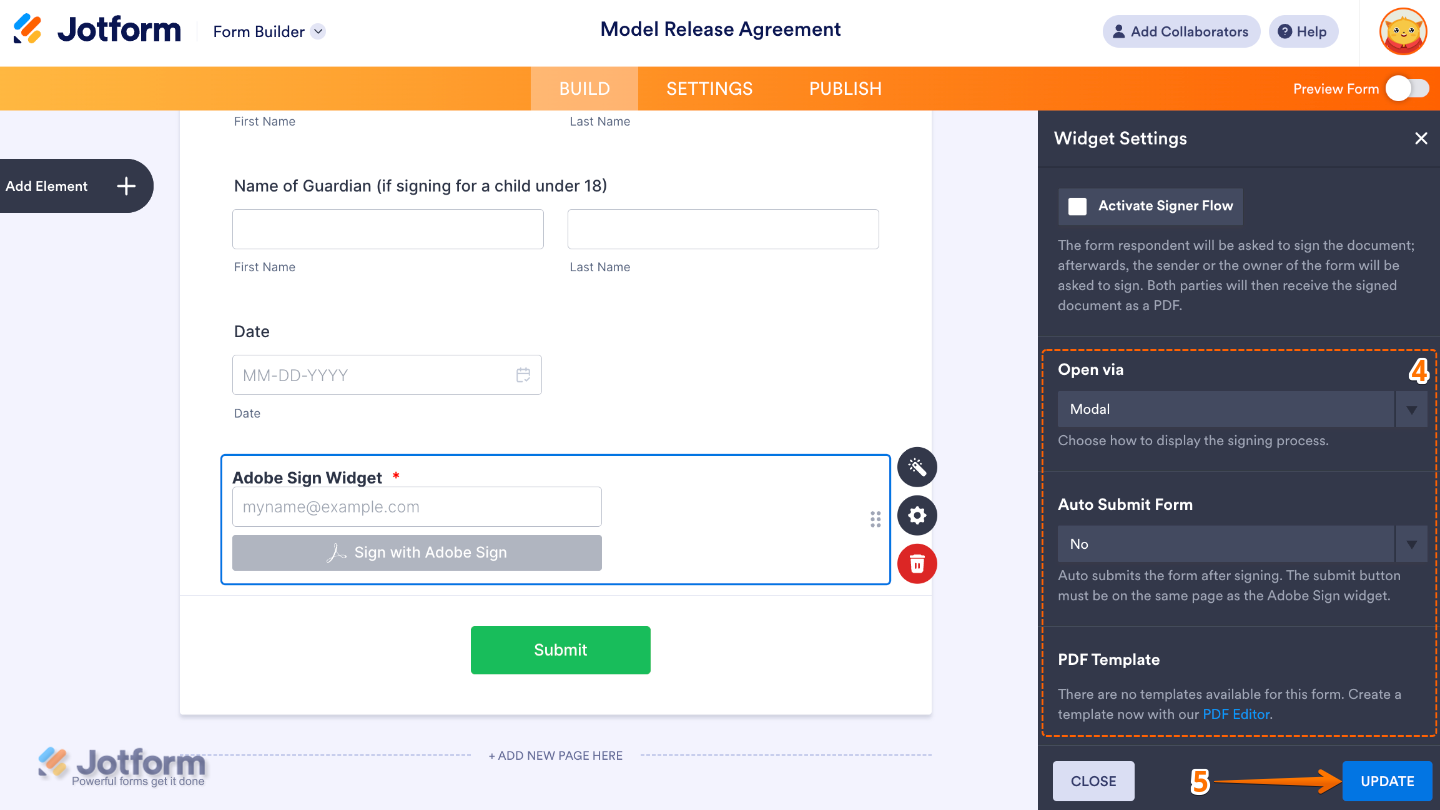
- Then, scroll down to the bottom and continue to set up these options:
- Open Via — Choose how you’d like the Adobe Sign document to open for the signer; right inside the form or in a new window—whichever feels more convenient.
- Auto Submit Form — You can set it to automatically submit the form once the signing is done, making the whole process smooth and hassle-free.
- PDF Template — Lets you choose a specific PDF from your Adobe Document Cloud to use as the document for signing.
- Once you’re done, click on Update.
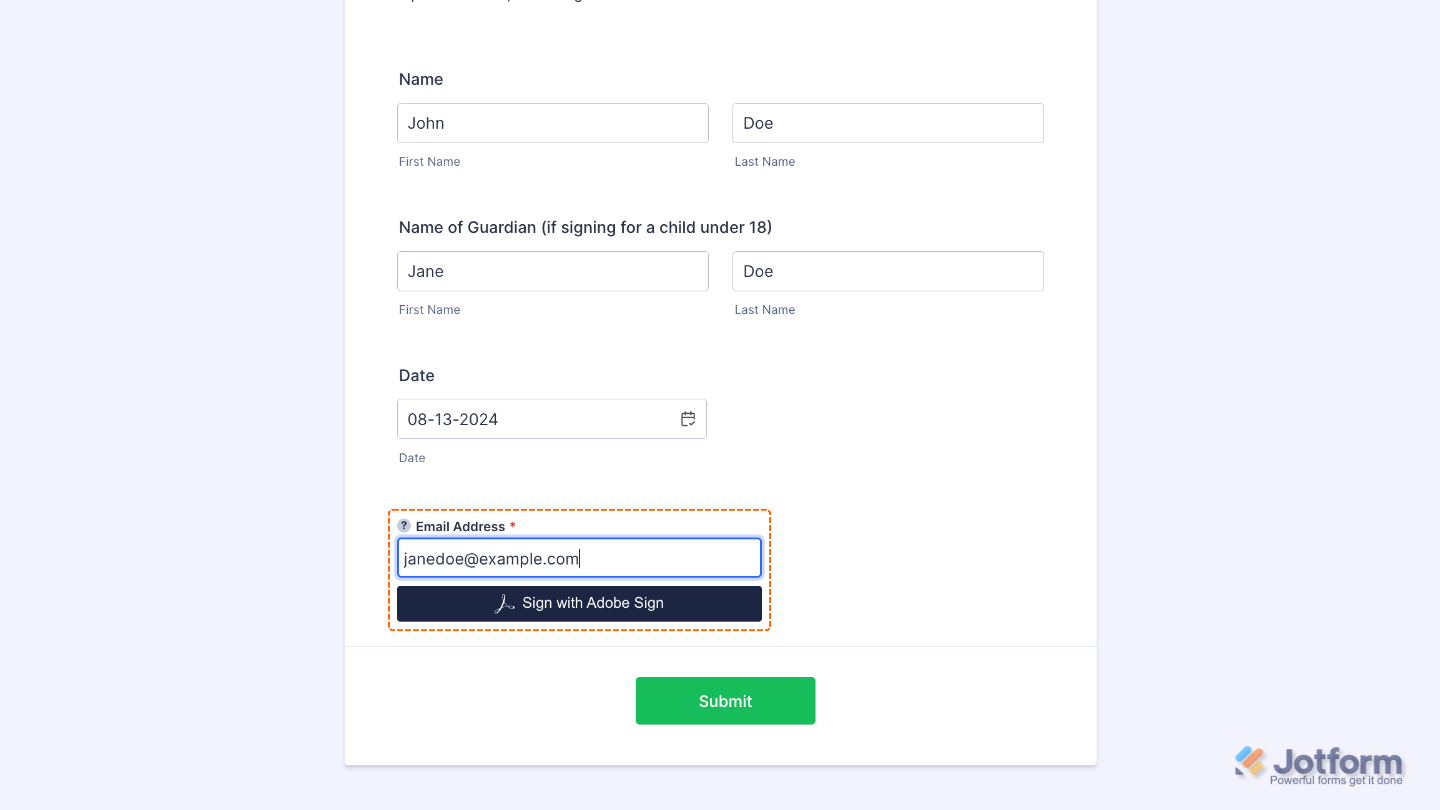
That’s it. You’ve successfully added and set up the Adobe Sign widget to your form. Now, you have a field in your form that lets people sign documents securely and instantly—making the whole process faster, easier, and completely paper-free. Curious how it works on a live form? Check out this Demo Form.
If you’d like to tweak how your Adobe Sign field looks, simply click the gear icon to open its properties and adjust the settings to match your needs.
Pro Tips
- Set up your form’s email notifications so you get signed copies right away.
- Keep your agreement text clear and concise so users know exactly what they’re signing.
- Test the entire signing process from start to finish to make sure it’s smooth and hassle-free for your users.

Send Comment: