If you have a multi-page form, Jotform’s Form Tabs widget is a great way to keep things organized and user-friendly. With this, you can turn each page of your form into a labeled tab, making it easier for users to navigate through sections step by step. It’s especially helpful for complex forms by reducing visual clutter and helping users stay focused. Whether you’re building a multipart application, survey, or registration form, this widget helps keep everything neat and organized, no coding needed.
Here are a few ways to use it:
- Organize Long Forms — Split your form with lots of questions into sections (like “Personal Info,” “Preferences,” or “Payment Details”) so users can move through it step by step without feeling overwhelmed.
- Make Navigation Simple — Tabs work like a built-in roadmap. Users always know where they are in the form and can jump back to any section if they need to review or edit something.
- Improve the Look and Feel — Tabs give your form a polished, professional look—almost like a mini app. It’s clean, modern, and super user-friendly.
- Keep Different Types of Info Separate — Perfect for forms that collect a variety of details, like job applications, event registrations, or surveys. Each tab can focus on one type of information, making everything easier to digest.
Notes
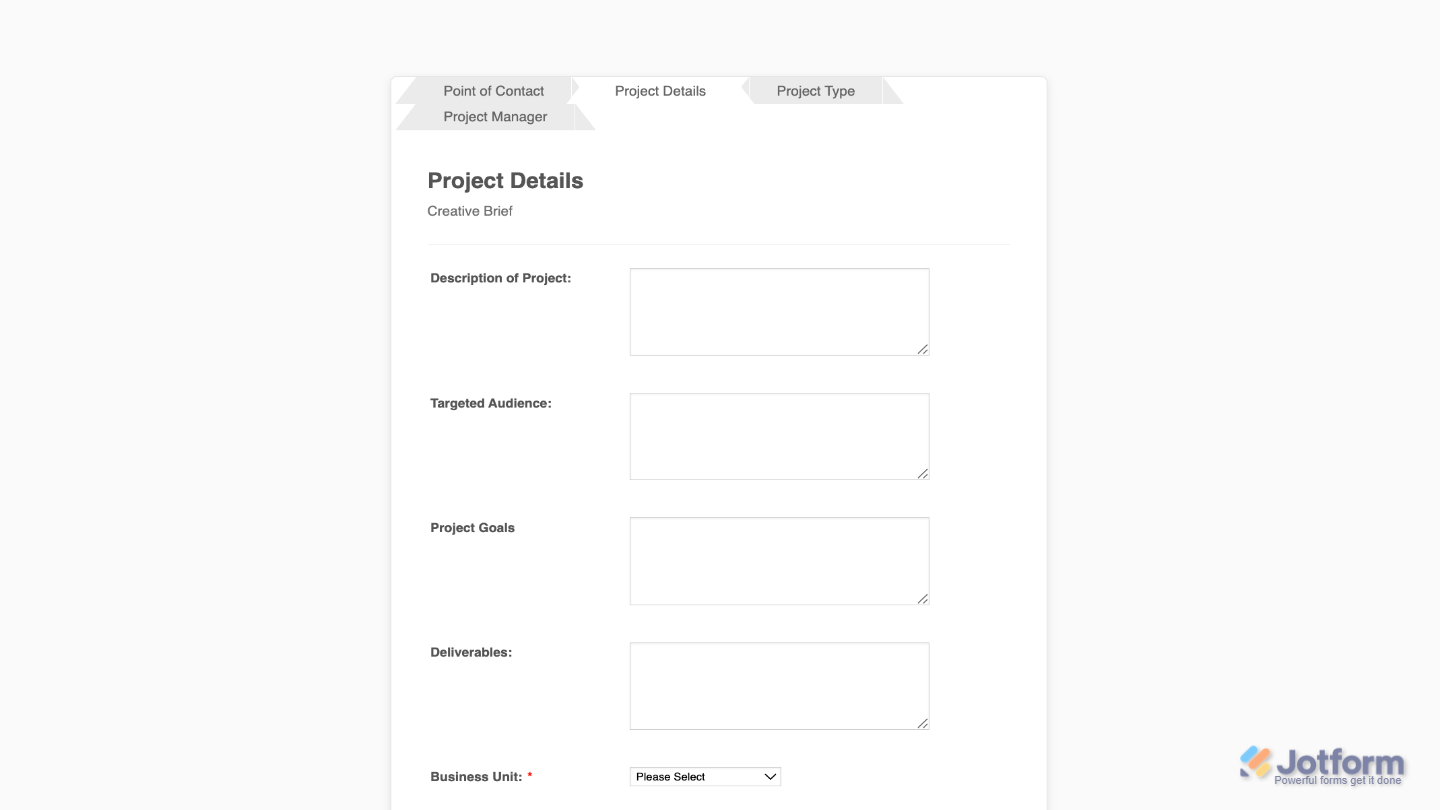
- Each tab represents a page in your form, and you can name them in a way that clearly describes each section.
- The tabs appear at the top of the form and stay visible as users move through it, making navigation smooth and intuitive.
Adding and Setting Up the Form Tabs Widget
Setting up clickable tabs for your multipage form helps users move smoothly between sections. Keeping things clear, organized, and stress-free. Here’s a quick how-to:
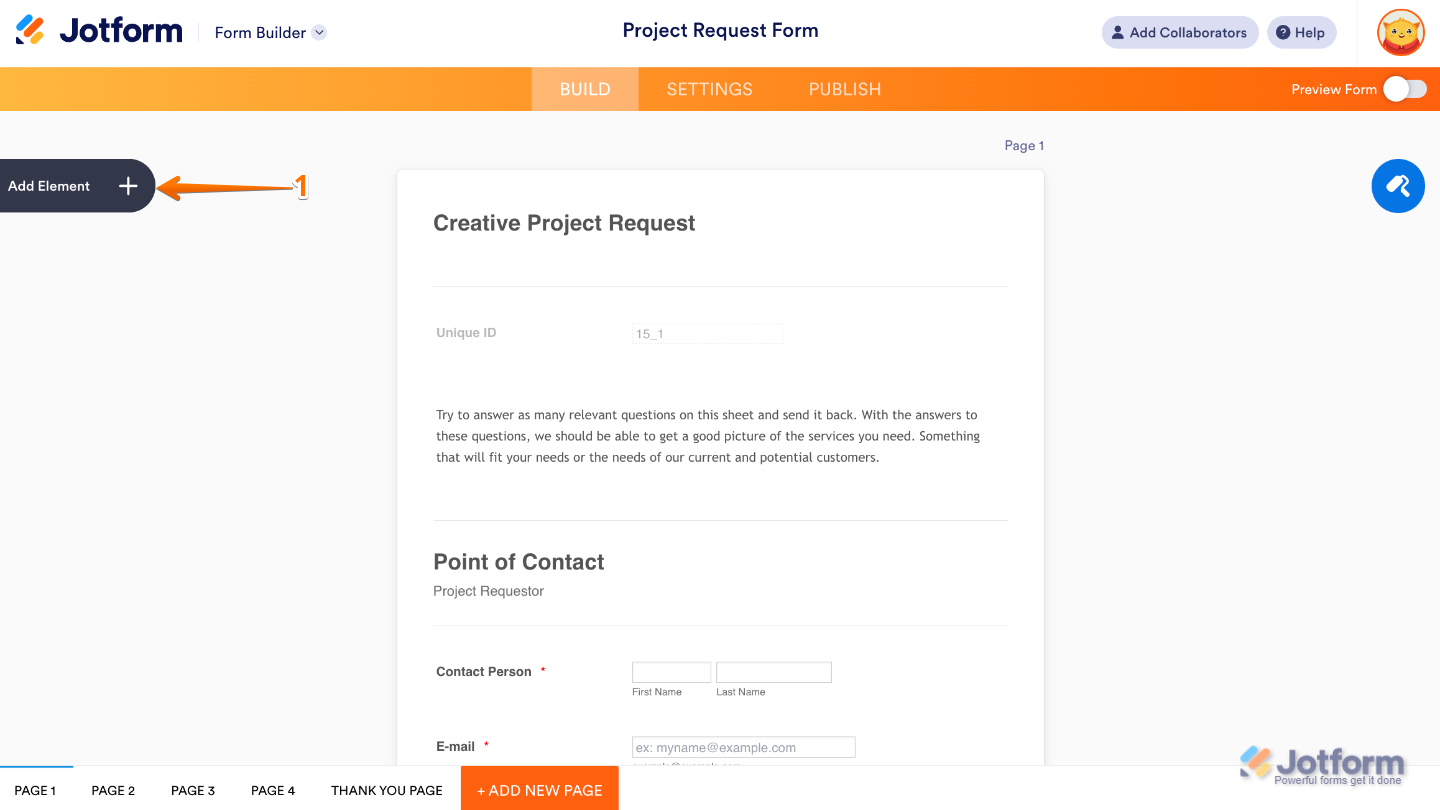
- In Form Builder, click on Add Element on the left side of the page.
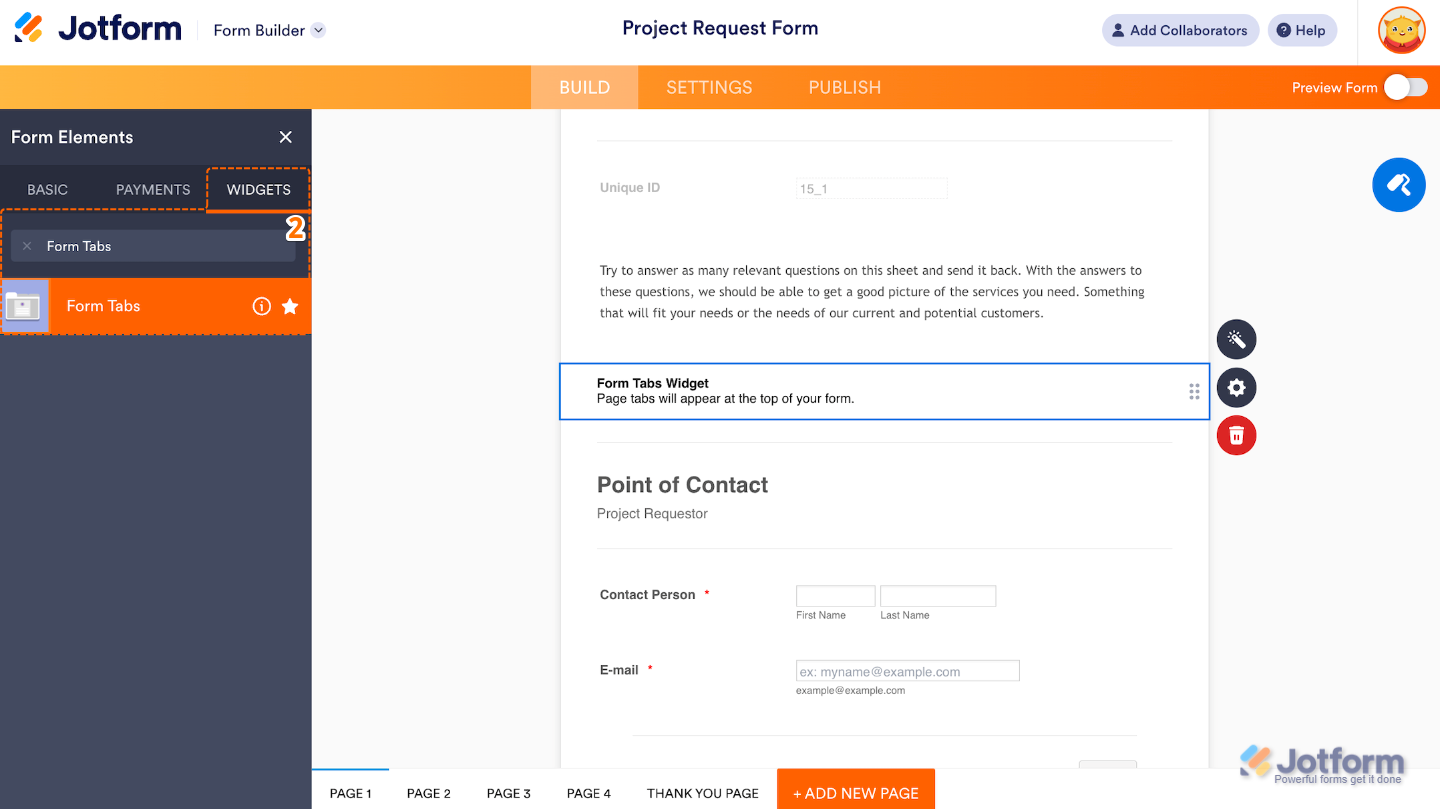
- Now, in the Form Elements menu, under the Widgets tab, search for Form Tabs and then click on it. Or, just drag and drop it to where you want it to be on your form.
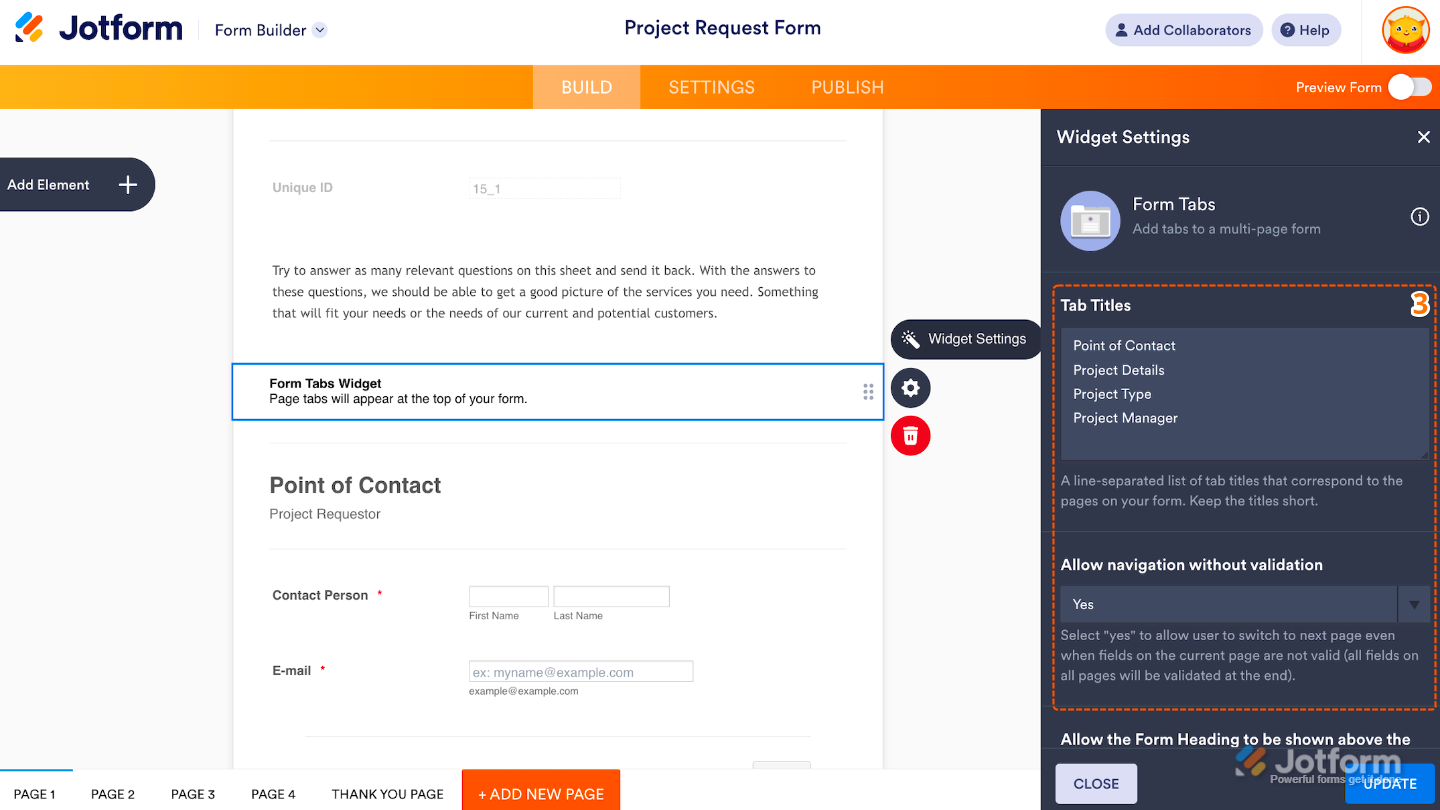
- Next, in the Widget Settings window that opens on the right side of the page, set up the following options:
- Tab Titles — Enter custom titles (one per line) to name each tabs, so users know what they are about.
- Allow Navigation Without Validation — When enabled, this allows users to freely click between tabs without needing to fill out or validate each section first.
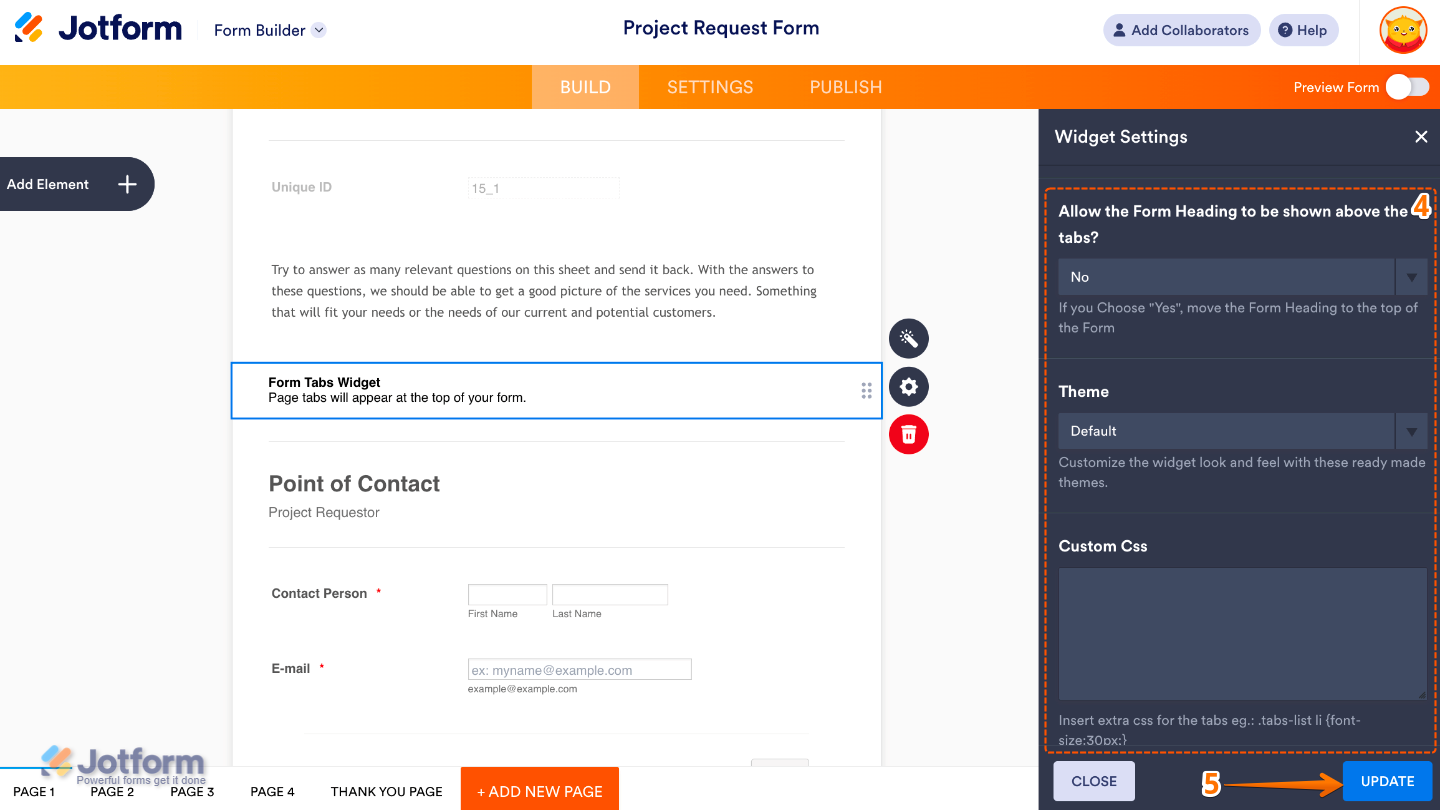
- Then, scroll down to the bottom and continue to set up these options:
- Allow the Form Heading to be Shown Above the Tabs — Set this up to specify whether the main form title or heading appears above the tabs.
- Theme — This will let you choose a visual style for the tabs.
- Custom CSS — For advanced styling, you can add your own custom CSS here.
- Once you’re done, click on Update.
That’s it. You’ve successfully added and set up the Form Tabs widget to your form. Now, you’ve turned each page of your multipage form into a clickable tab, giving users a clean, step-by-step navigation experience. To see how it looks on a live form, check out this Demo Form.
To further customize your Form Tabs field appearance, just click on the Gear icon to open its properties.

Send Comment: