Jotform’s Matrix Dynamique widget is a powerful tool that lets users add as many rows as they need, right inside your form. Each row follows the same structure, making it perfect for gathering structured, repeatable data. It’s a flexible way to collect repeated sets of information—like item lists, team members, or session details.
Here are a few ways to use it:
- Collect Multiple Items or Entries — Perfect for listing products, services, or options when users might need to submit more than one. Think “order forms” where people can add as many items as they need without filling out the form over and over.
- Gather Team or Group Details — If you’re signing up a team for an event or class, users can easily add names, roles, and contact details for everyone in the group.
- Track Inventory or Assets — Need to log equipment, tools, or materials? The widget gives users a flexible table to record item names, quantities, and other details.
- Build Customizable Checklists — Let users create their own lists—for example, tasks to complete, supplies to bring, or steps to follow—all in one neat place.
Adding and Setting Up the Matrix Dynamique Widget
Adding the Matrix Dynamique widget is a breeze. You can drop it into your form in just a few clicks and tweak it to fit exactly what you need—from the column labels to the row setup. Here’s the quick way to do it:
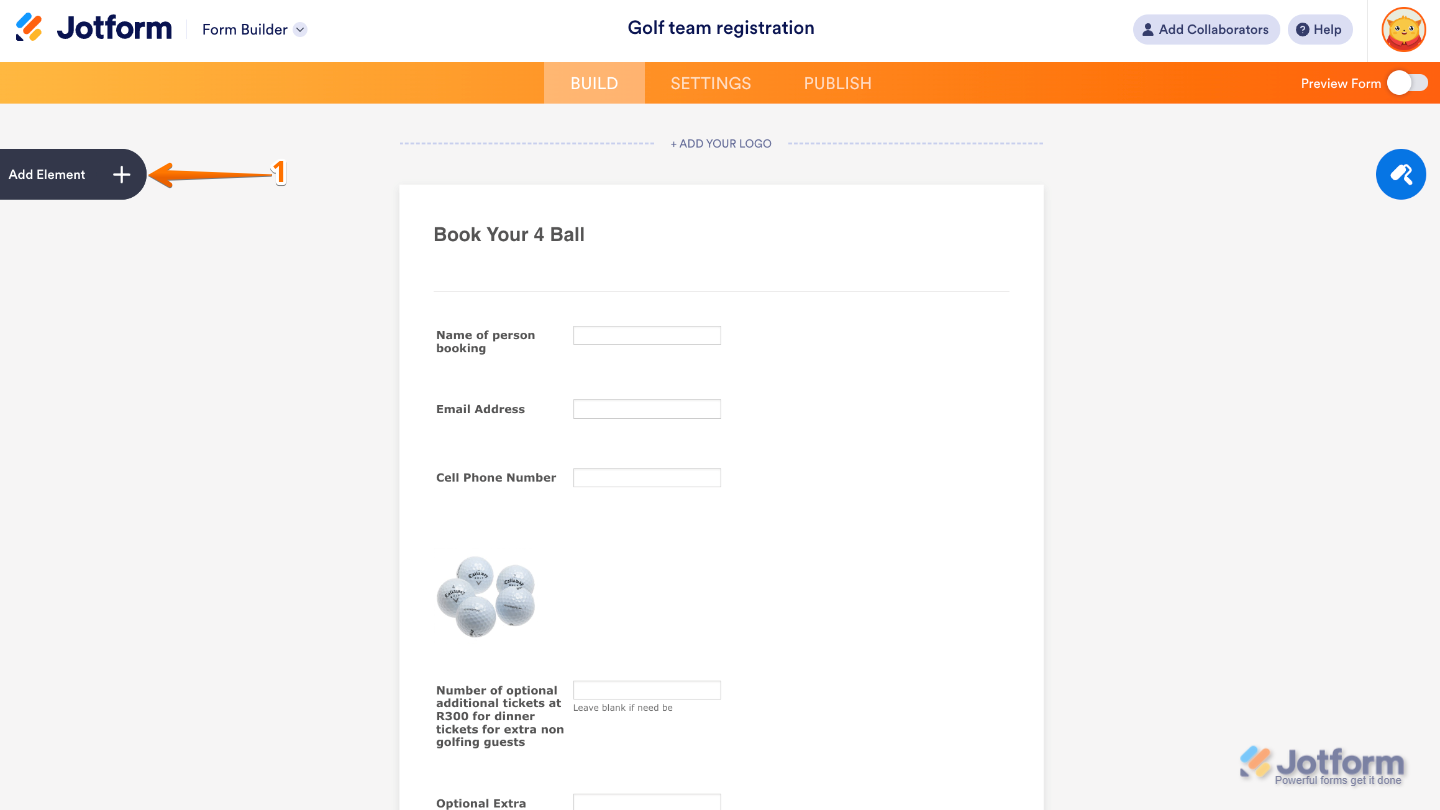
- In Form Builder, click on Add Element on the left side of the page.
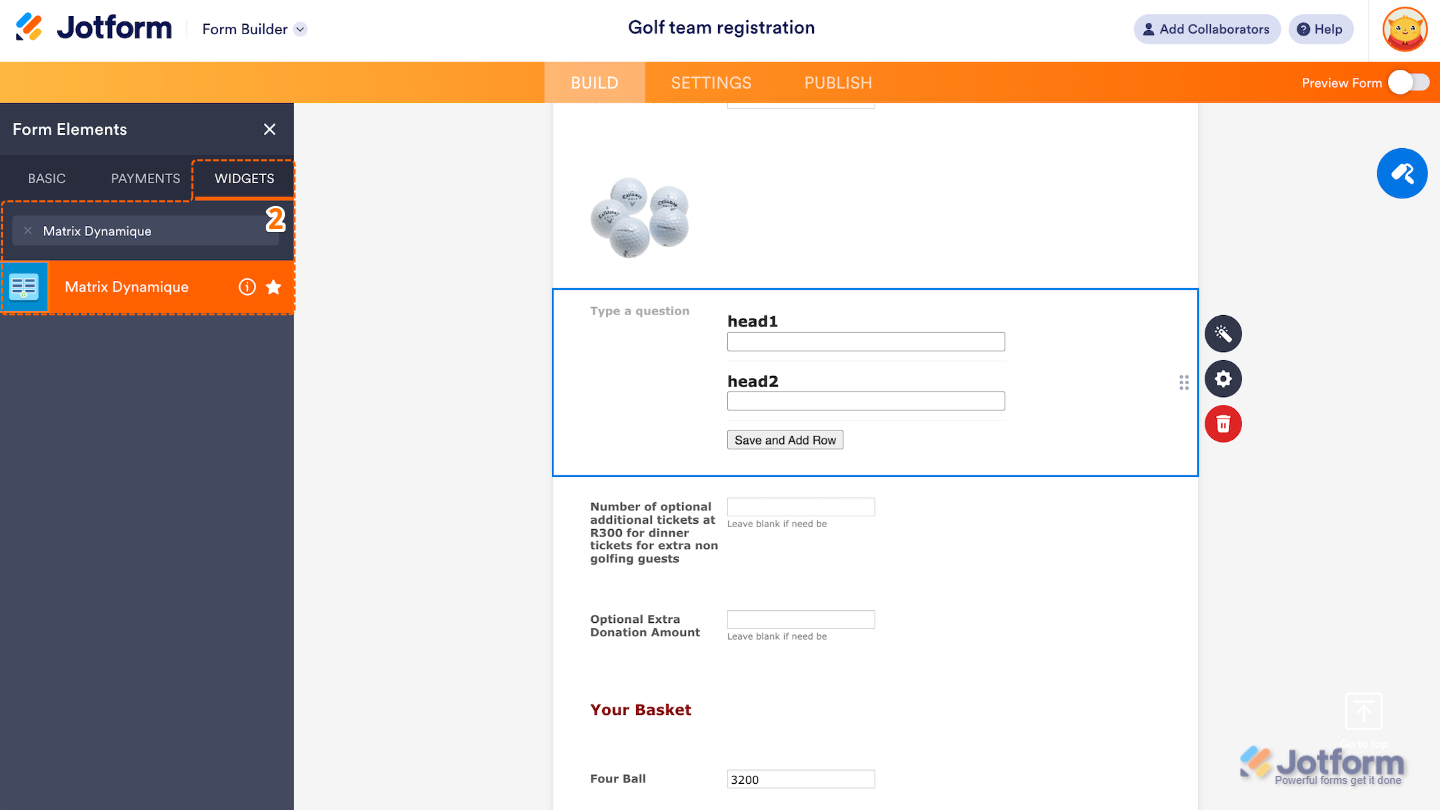
- Now, in the Form Elements menu, under the Widgets tab, search for Matrix Dynamique and then click on it. Or, just drag and drop it to where you want it to be on your form.
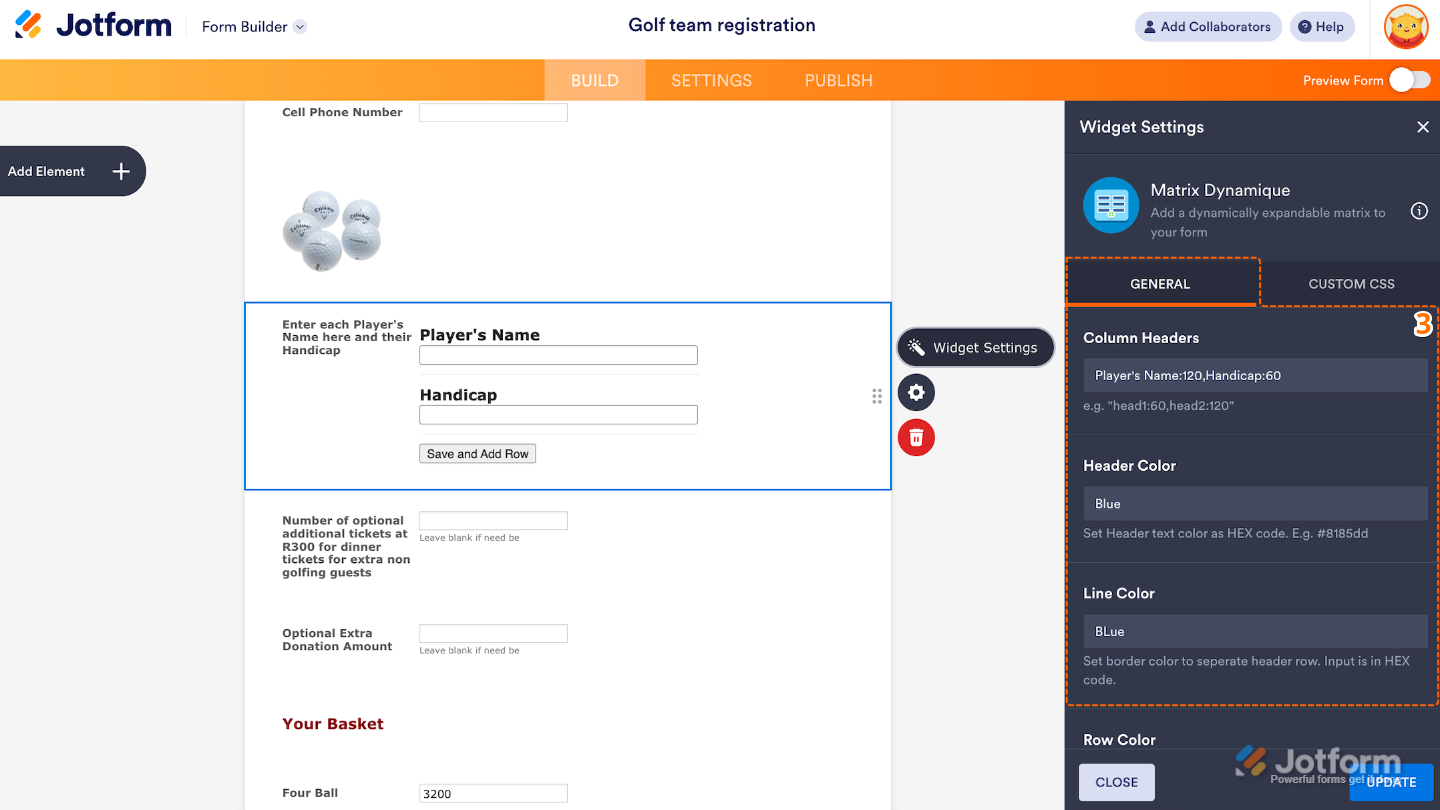
- Next, in the Widget Settings window that opens on the right side of the page, under the General tab, set up the following options:
- Column Headers — Give your columns clear, custom labels by typing them here. Just separate each label with a comma, and you’re good to go.
- Header Color — Pick a color for your column headers to make them pop if you want to add some personality.
- Line Color — Choose the color of the lines that separate your rows and columns to match your form’s style.
- Then, scroll down to the bottom and continue to set up these options:
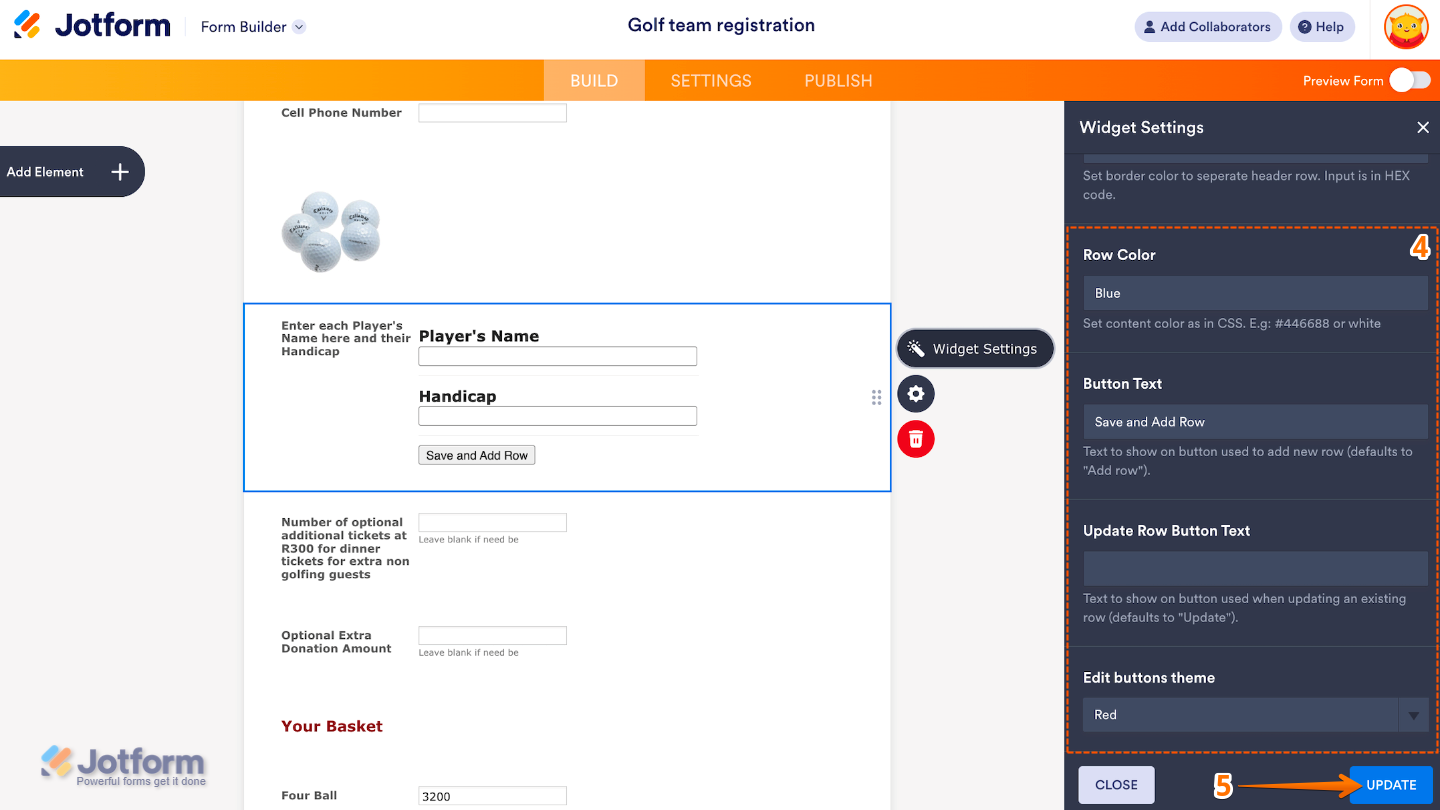
- Row Color — Pick the color you want for the text in each row. It’s a simple way to keep your table looking clean and easy to read.
- Button Text — Customize what the Save and Add Row button says. Make it match your form’s tone—maybe something like Add Another or Next Item.
- Update Row Button Text — Change the label for the Update button that appears when someone edits a row. You can make it say whatever feels right for your form, like Save Changes.
- Edit Buttons Theme — Choose a color theme for your edit and delete icons. You can go with Default, Grey, Black, Orange, or Red—and if you don’t change anything, it’ll stay Orange by default.
- Once you’re done, click on Update.
That’s it. You’ve successfully added and set up the Matrix Dynamique widget to your form. Now, you can start collecting repeating sets of information, like lists of attendees, inventory items, schedules, or multi-person details. A great way for collecting itemized lists, budgets, schedules, time logs, or grouped data in a single field. Curious how it works on a live form? Check out this Demo Form.

If you want to customize how your Dynamic Matrix field looks, simply click the gear icon to open its properties and tweak the settings to your liking.
Note
For advanced styling, you can add your own custom CSS under the Custom CSS tab in the widget settings and style the Matrix Dynamique field. Our guide on How to Inject CSS Codes to Widgets walks you through everything.
Pro Tips
- Keep your column headers short and clear so people can quickly scan the form and fill it out—this makes a big difference, especially on mobile.
- Don’t forget to test your form on a phone to make sure the matrix stays readable and easy to use on all devices.

Send Comment: