With Jotform, you can manage and control the users who access your app while logged in to their accounts—whether they opened it from the invitation email you sent, are viewing a page in your app that you’ve set to require login, or simply logged in while accessing the app through its direct link. This gives you a clear view of who is using your app, helping you stay organized and keep your app secure as it grows.
Whether you’re running a small team, sharing a private app with clients, or managing internal tools for your business, this feature makes it easy to track user activity and ensure the right people have access to the right content. It helps you maintain a smooth, controlled experience for everyone involved, while giving you confidence that your app is being used appropriately.
Viewing App Users
Viewing app users helps you see key details about who has accessed your app. You can view information such as their name, email address, when they first accessed your app or were invited, and the most recent time they opened it. Here’s how:
- In App Builder, in the purple navigation bar at the top of the screen, click on Publish.
- Then, in the menu on the left side of the page, click on App Users.

That’s it. Now, in the App Users section on the right, you can view all of this information at a glance and also perform the following changes and actions:
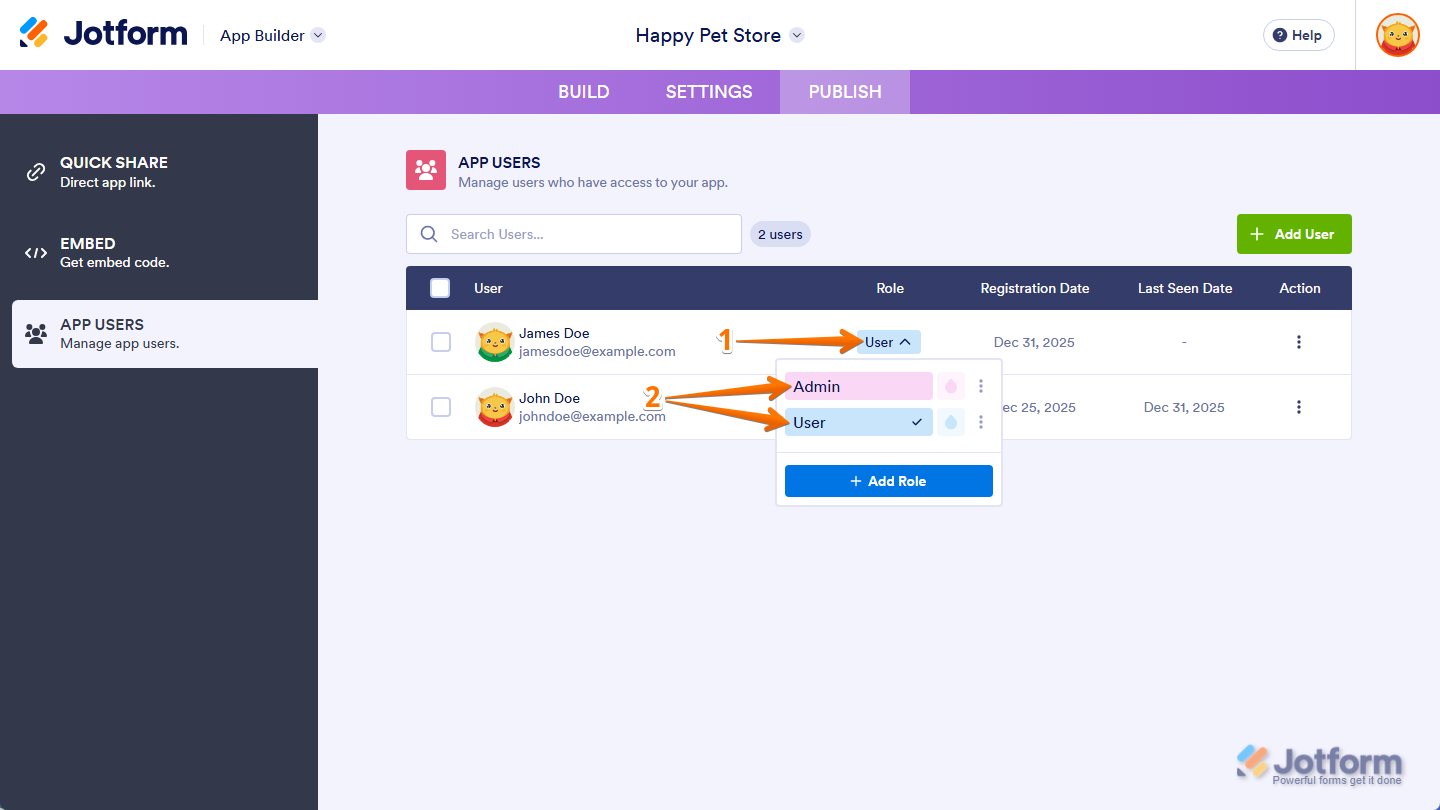
Changing App User Roles
Changing user roles lets you control what each person can see in your app. Assigning the right role helps manage visibility for pages and elements, so users only access content meant for them. You can do it in a few easy steps. Here’s how:
- While you’re in the App Users section under the Publish tab in App Builder, in the Role column, click on the current role next to the user you want to set a new role for.
- Then, in the menu that comes up, select a different Role option.
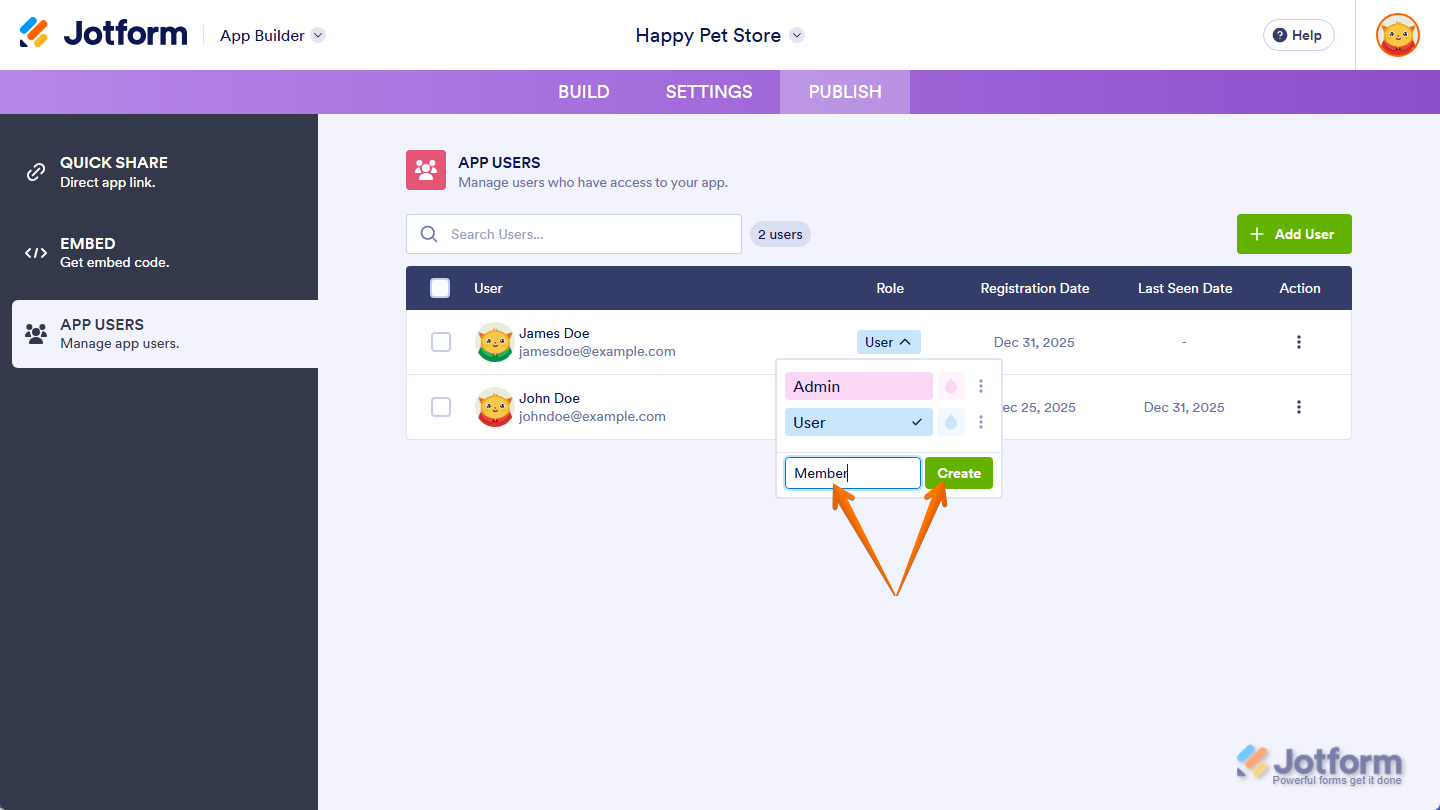
If the role you want to set for your app user isn’t available yet, click on Add Role at the bottom of the Role menu and, in the input box that appears, enter a new role and then click on the Create button next to it.
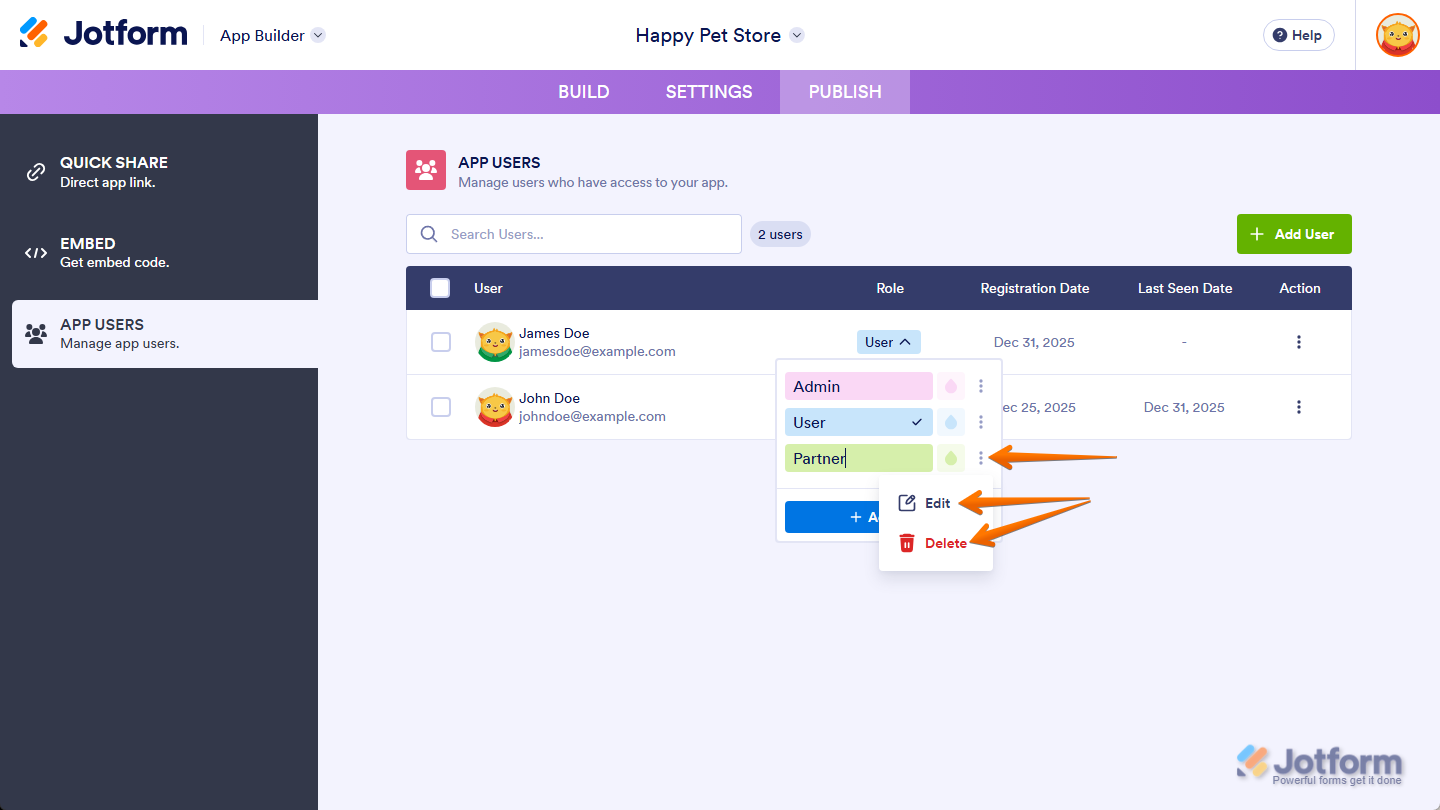
In the Role menu, you can click on the Ink Drop icon next to a role option to choose a different color for it. This helps app owners quickly identify roles at a glance and makes managing users easier, especially when working with multiple roles.
You can also click on the Three Dots icon on the right side of a role option to edit its name or delete roles you’ve added, helping you keep role names clear and organized as your app grows.
That’s it. You’ve successfully updated your app user’s role.
Note
Once a role is selected, the change takes effect right away and updates what the user can see the next time they access your app.
Adding App Users
Adding users lets you invite more people to access your app. This is useful when you’re expanding your team, sharing your app with clients, giving access to new users, or controlling what they can see based on their assigned roles. Follow these quick steps to get started:
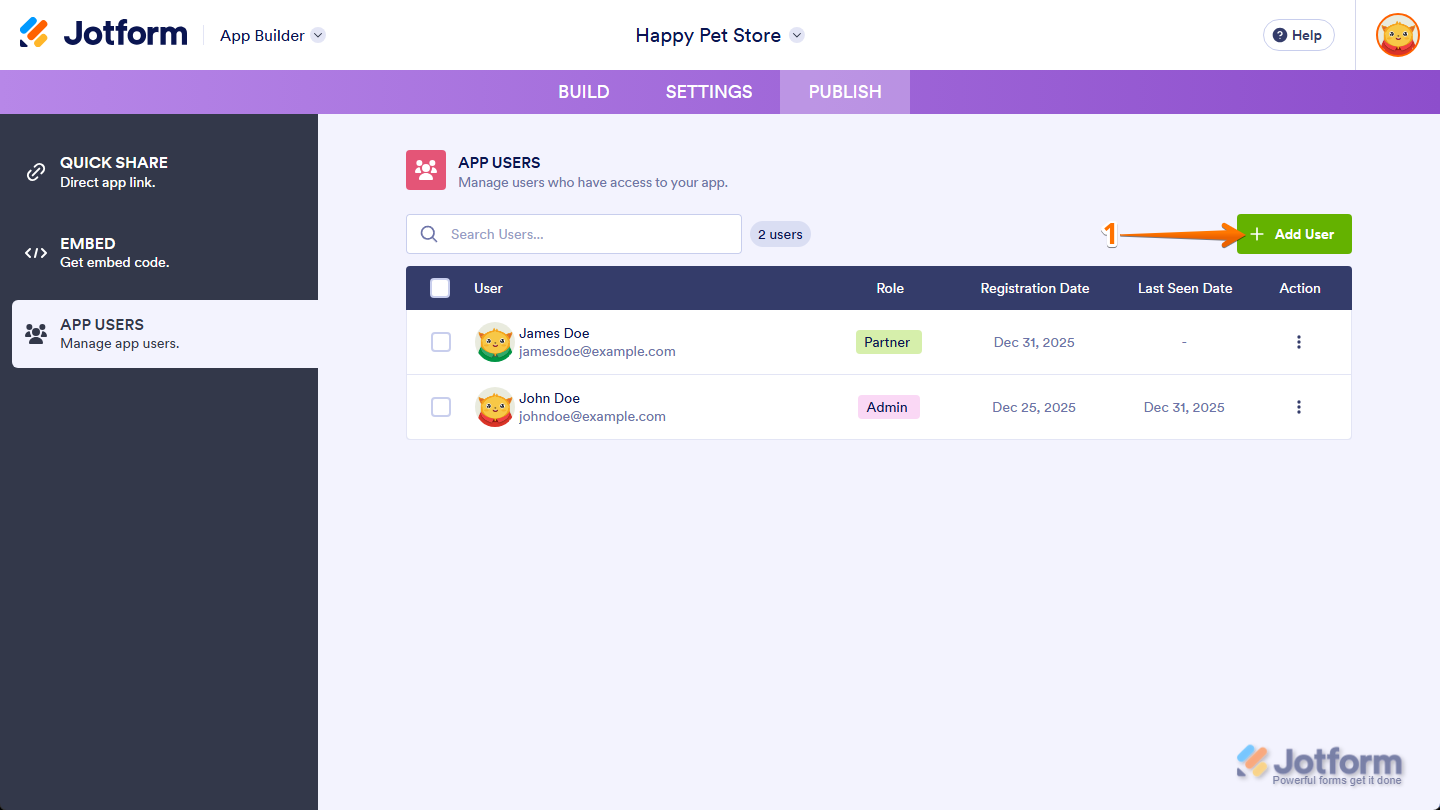
- While you’re in the App Users section under the Publish tab in App Builder, click on the Add User button on the top-right side of the App User table.
- Then, in the Add New User window, under the Invite By Email tab, enter the email addresses of the users you want to invite to use your app. Optionally, you can enter a message, which will be included in the invitation email.
- Once everything is set, click on the Send Invitation button.
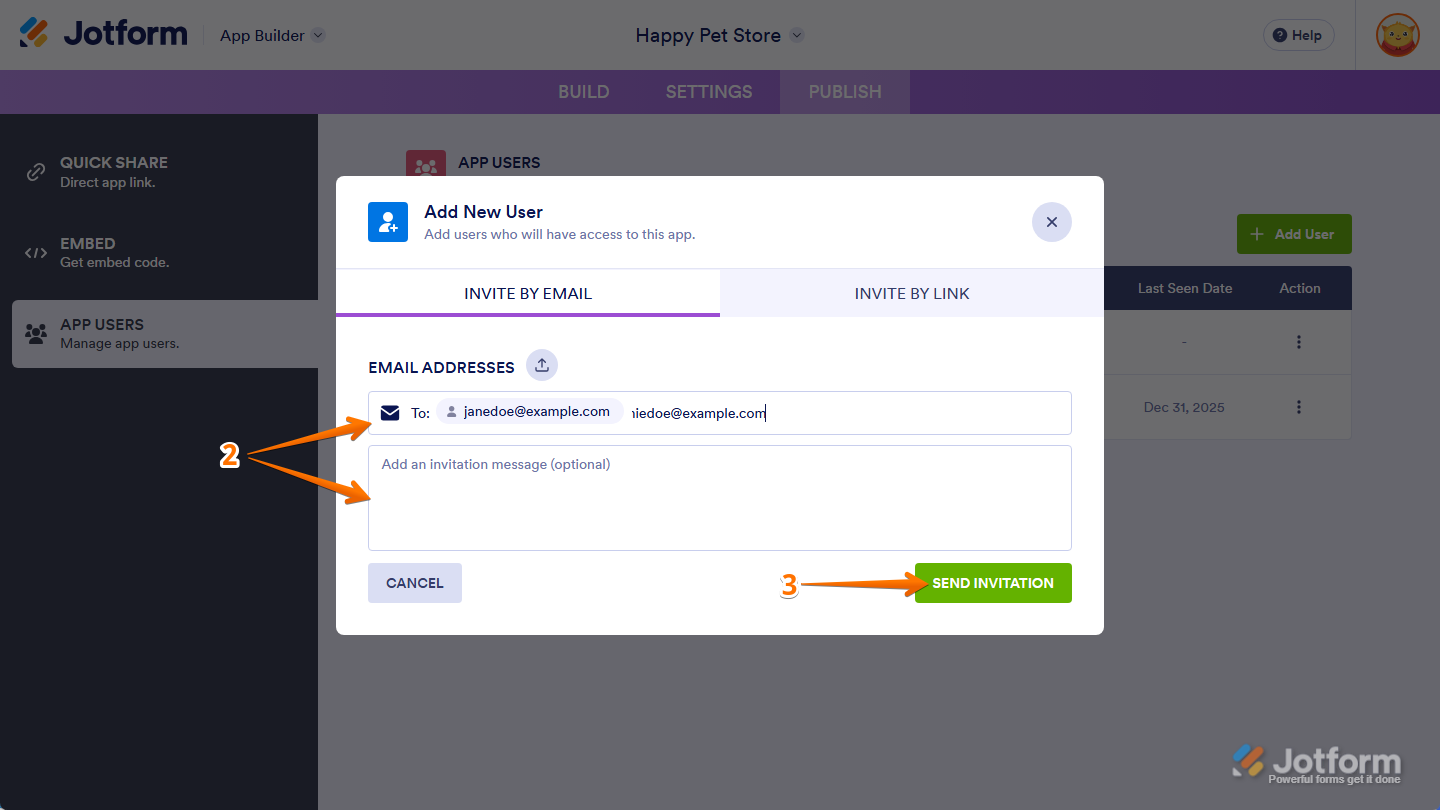
That’s it. You’ve successfully added new users, and you can now assign roles and manage their access.
Notes
- Invited users will be prompted to log in or sign up for an account when they open the app from the invitation email, even if the app is set to public.
- When inviting multiple users at the same time, each user receives a separate invitation email and won’t see who else was invited.
- Newly added app users are automatically assigned the second default role option.
Resending Invitations to App Users
You can resend invitations to make sure users get the link to access your app if they missed or can’t find the original email, or if they need the invite sent to them again. Follow these quick steps to get started:
- While you’re in the App Users section under the Publish tab in App Builder, in the Action column, click on the Three Dots icon on the right side of the user you want to resend the invitation to.
- Then, in the menu that comes up, select Resend Invitation.
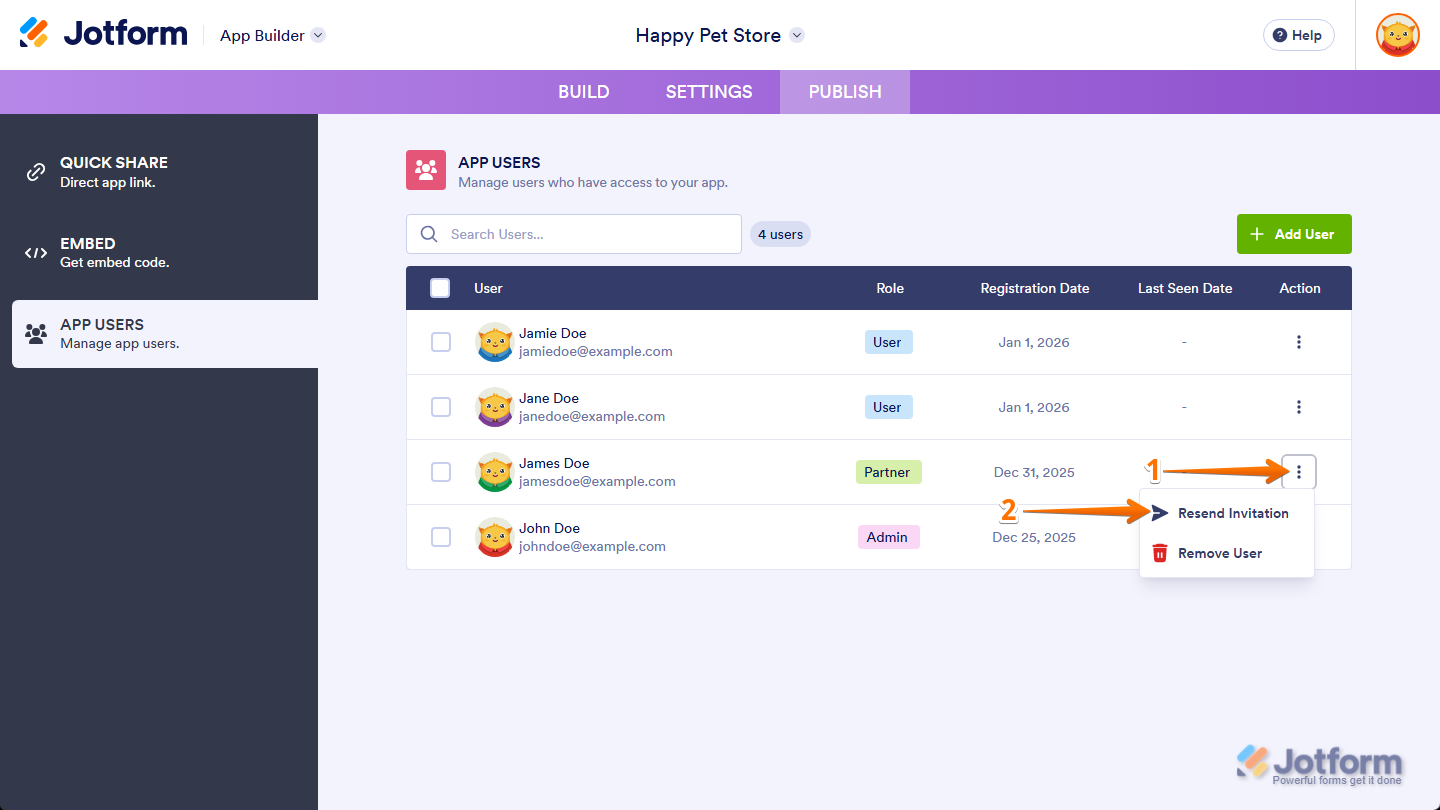
That’s it. The user will receive a new invitation email letting them know an app has been shared with them.
Note
You’ll only see the option to resend an invitation for users who haven’t accessed the app yet.
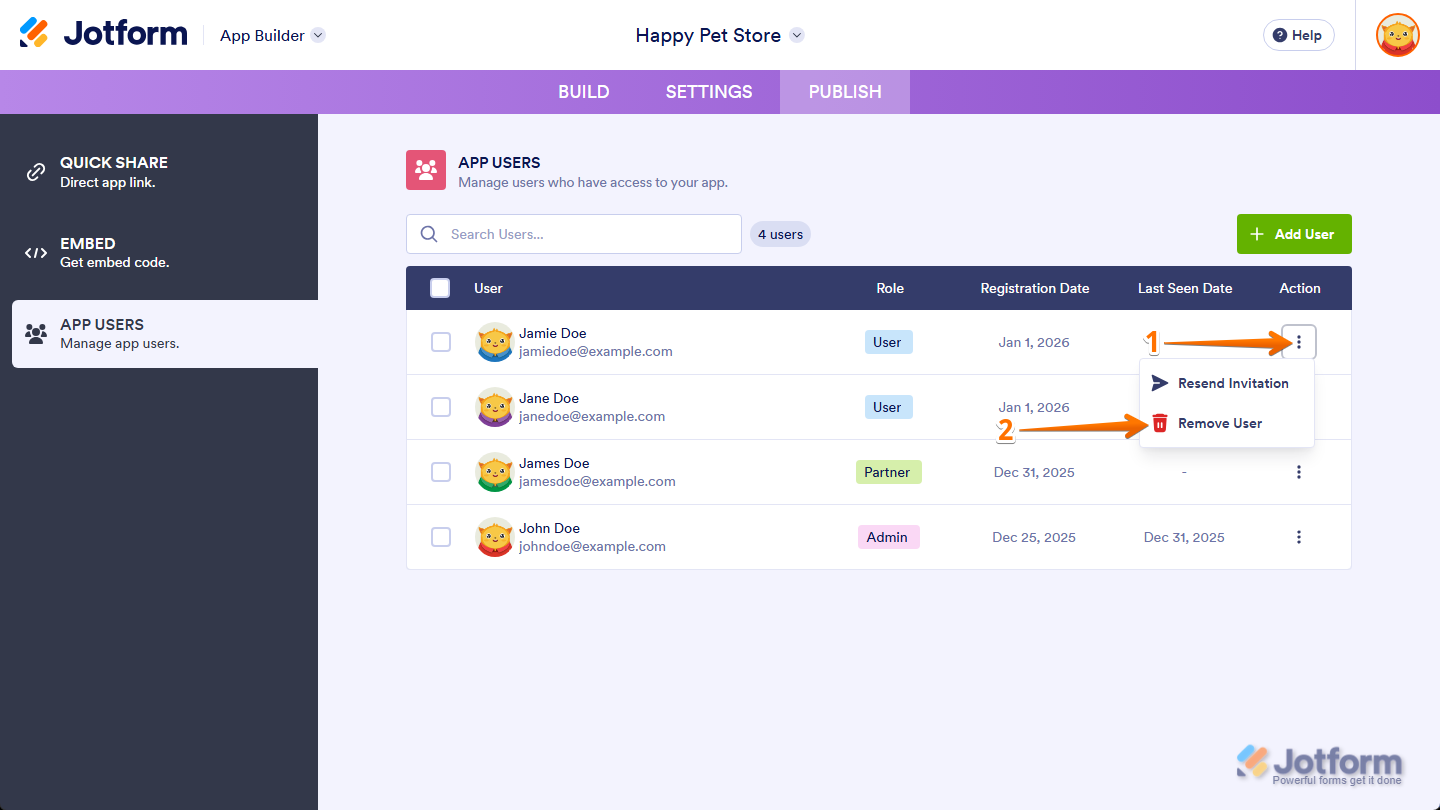
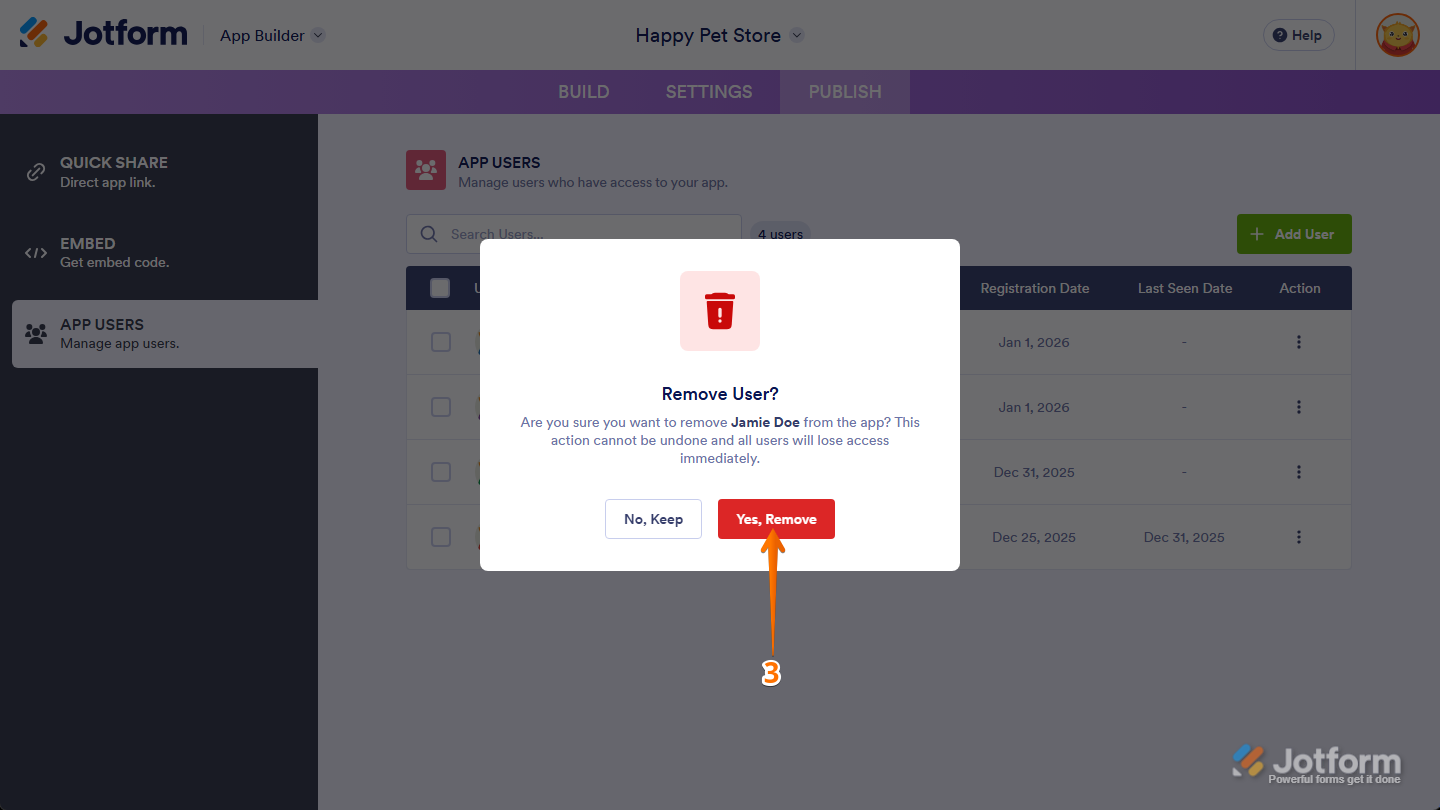
Removing App Users
Removing app users lets you revoke access for people who no longer need to use your app. This is helpful when someone leaves your team, access is no longer required, or you want to keep your app secure and up to date. Here’s what to do:
- While you’re in the App Users section under the Publish tab in App Builder, in the Action column, click on the Three Dots icon on the right side of the user you want to remove.
- Then, in the menu that comes up, select Remove User.
If you want to remove access for multiple users at the same time, put checks in the boxes next to their names in the App Users section, then click on the Remove Users button at the top-right of the App Users table first.
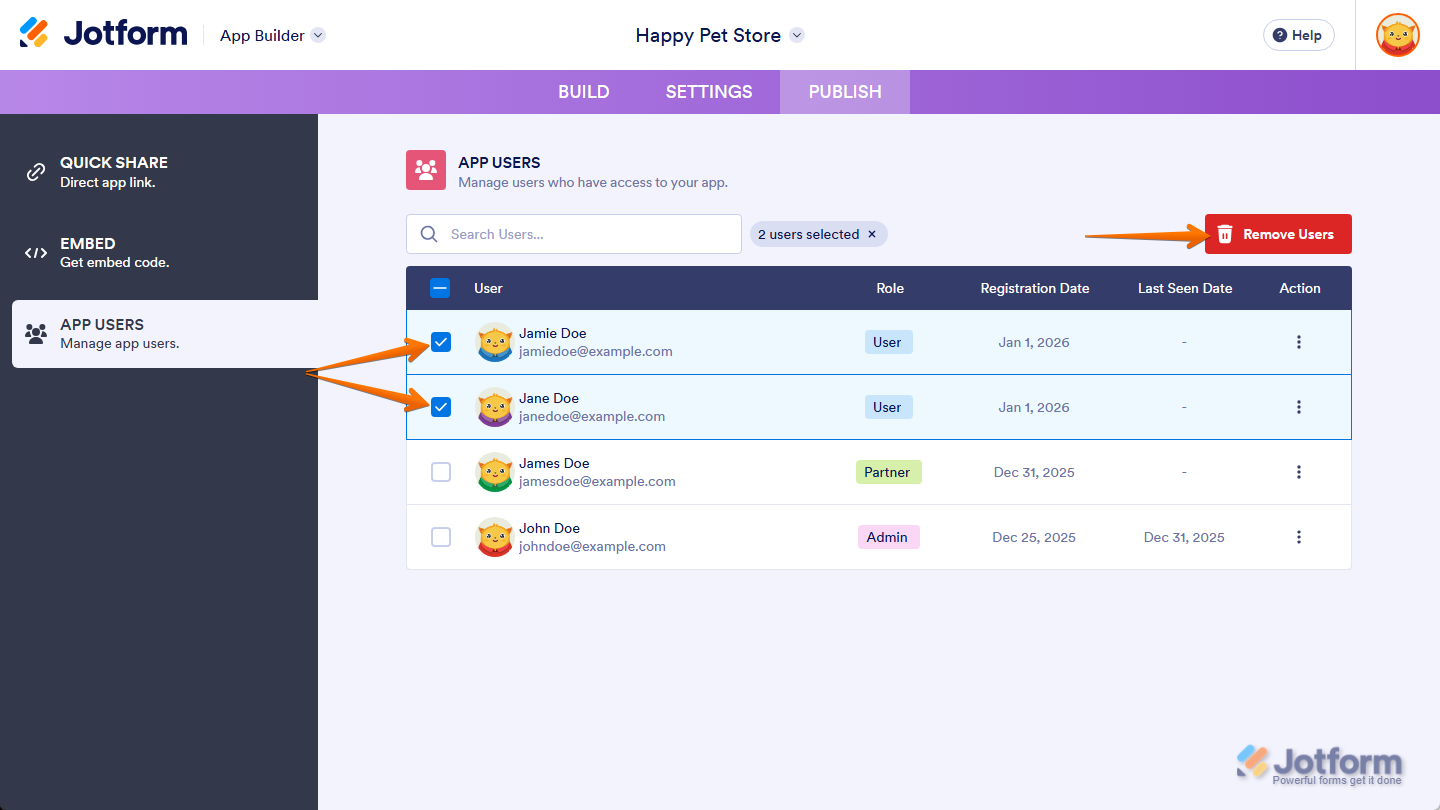
- Next, in the Confirmation window that pops up, click on Yes, Remove to proceed.
That’s it. The user is removed and no longer has access to your app.
Note
Once a user is removed, their access is revoked immediately. You can invite them again later if needed.

Send Comment: