With Jotform’s AI Agent, you can easily add a real-time chatbot to your app that helps users get support, ask questions, and explore features on their own. It only takes a few steps to integrate the AI Agent and customize how it looks and behaves to match your app’s experience.
Adding an AI Agent Chatbot to Jotform Apps
You can easily create a new AI Agent chatbot from scratch, use an existing one, pick from ready-made templates, or clone one of your own, all in just a few simple steps. Here’s how to do it:
- In App Builder, in the purple navigation bar at the top, click on Settings.
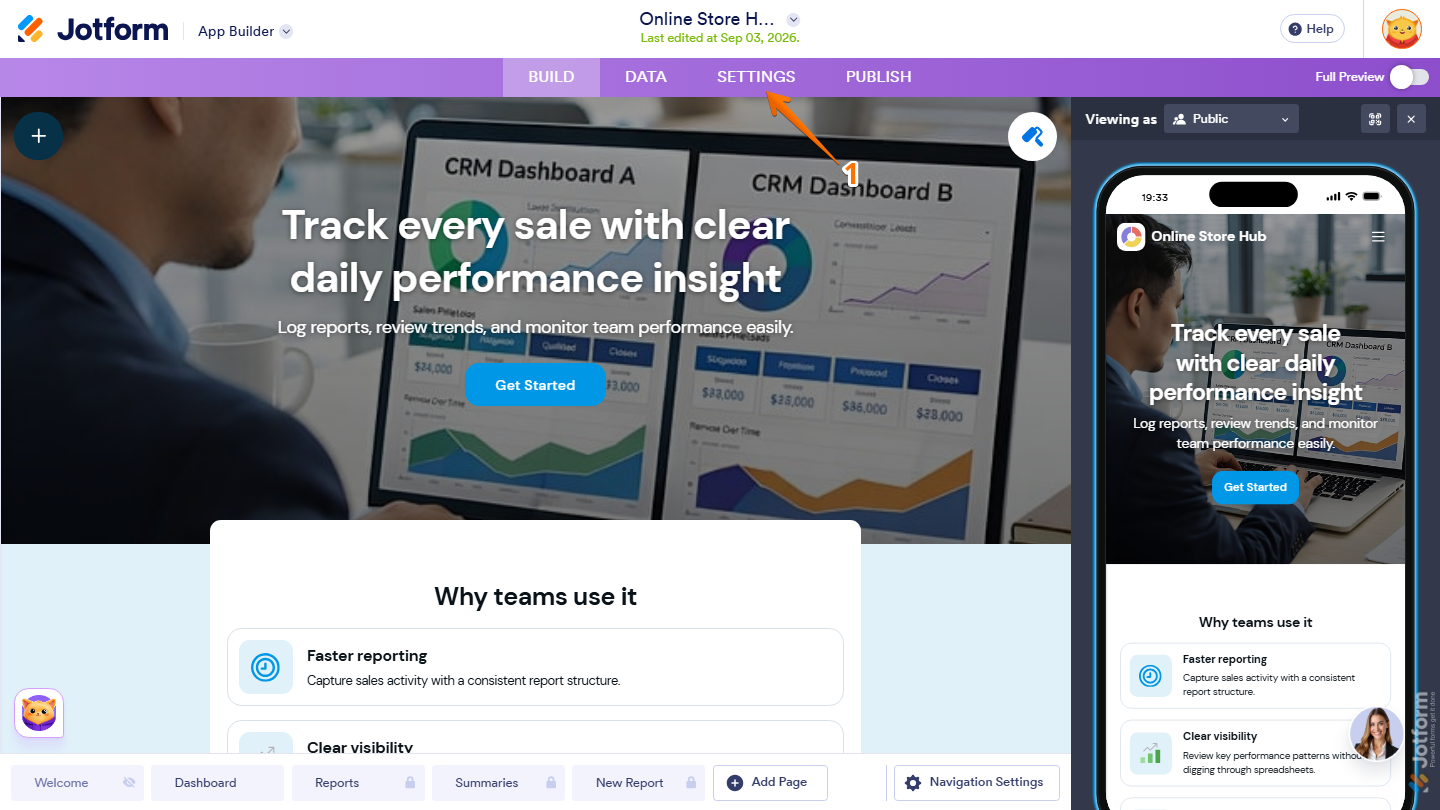
- Then, in the menu on the left, click on AI Chatbot.
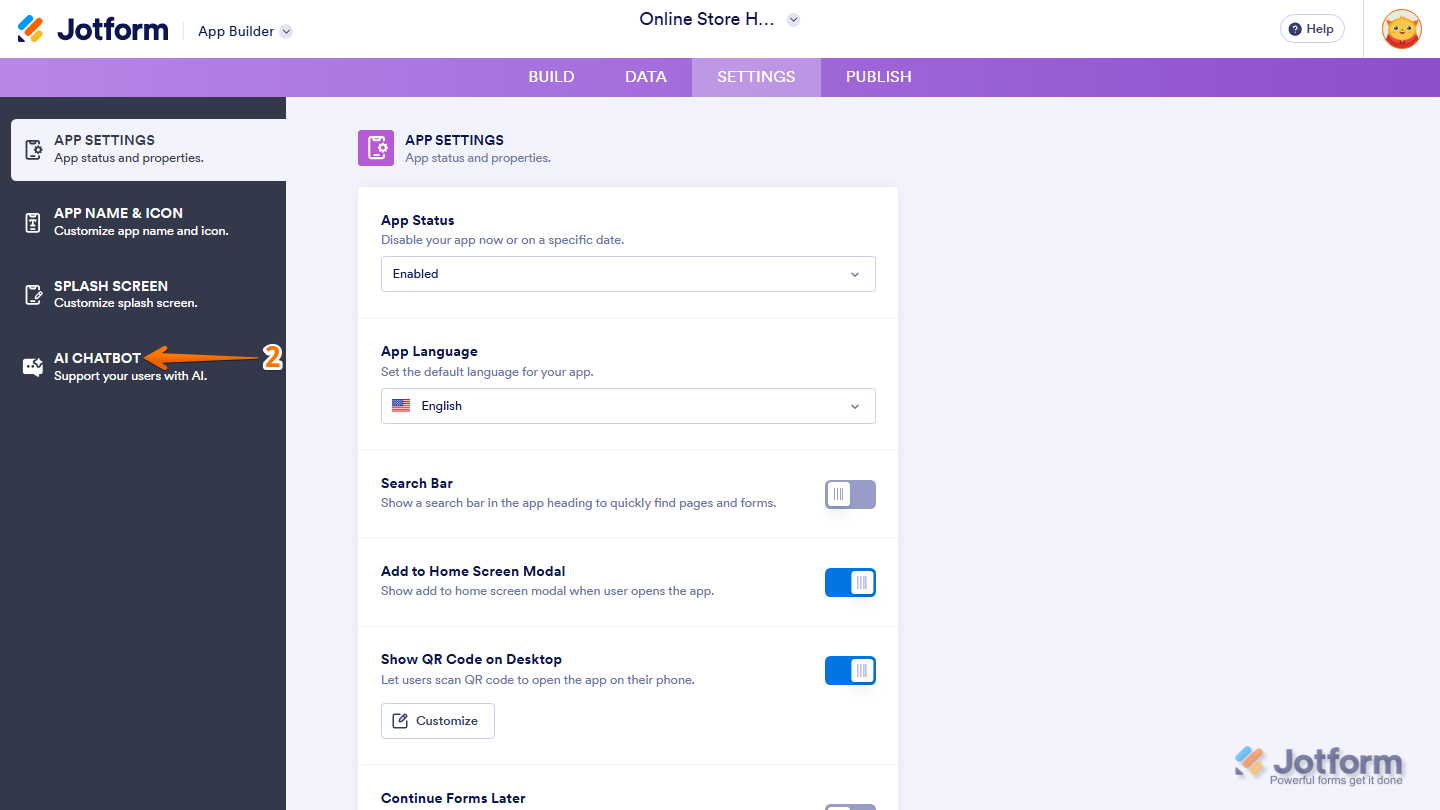
- Now, select how you want to create or add your AI Agent:
- Describe Your Chatbot AI — Describe what you want your AI Agent to do, and let AI create it for you.
- Select an Existing AI Agent — Choose from your library of AI Agents to get started quickly.
- Use Template — Select from the pre-designed AI Agents.
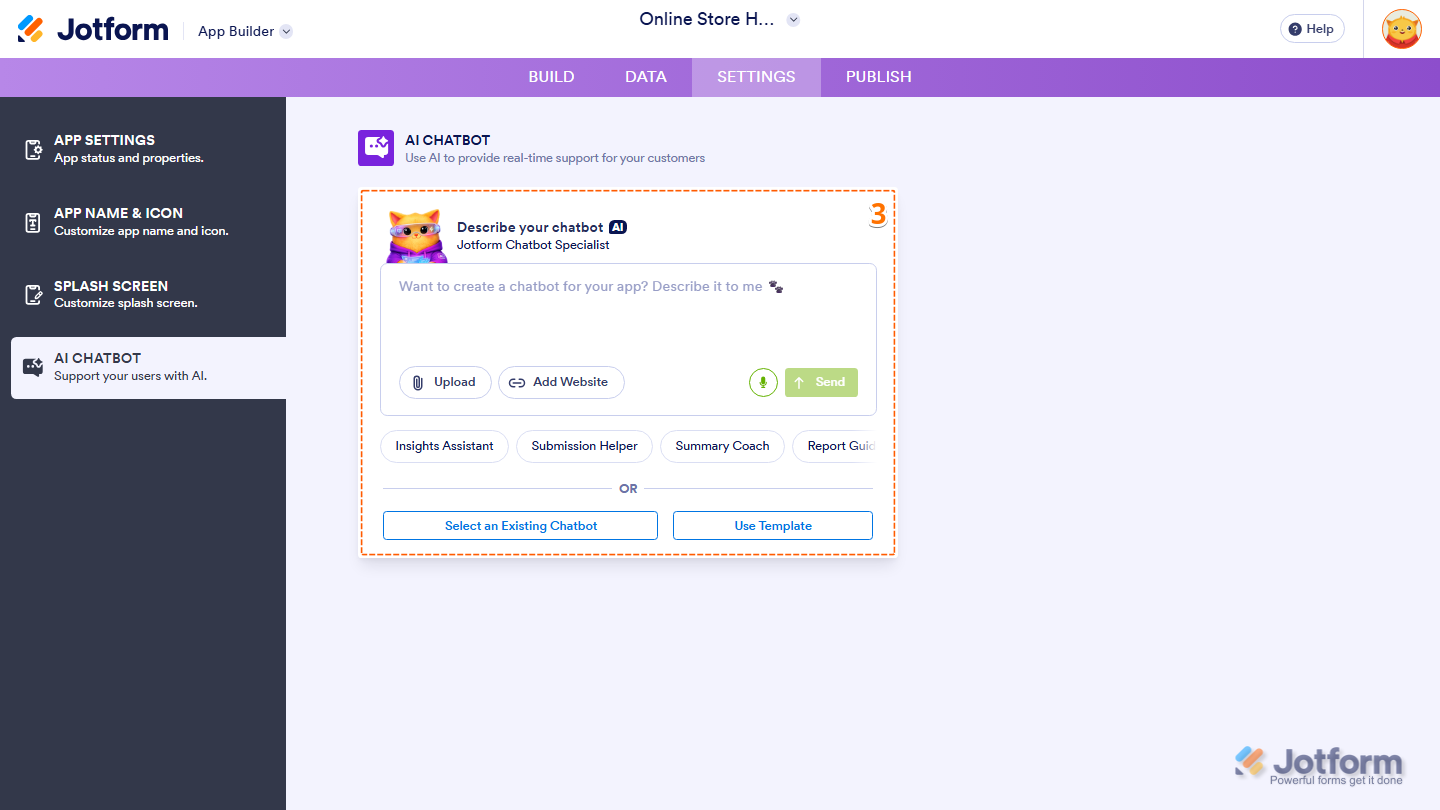
- If you selected Describe Your Chatbot AI, enter a description for your AI Agent in the box, or select one of the suggested options below.
- Once you’re done, click on Send.
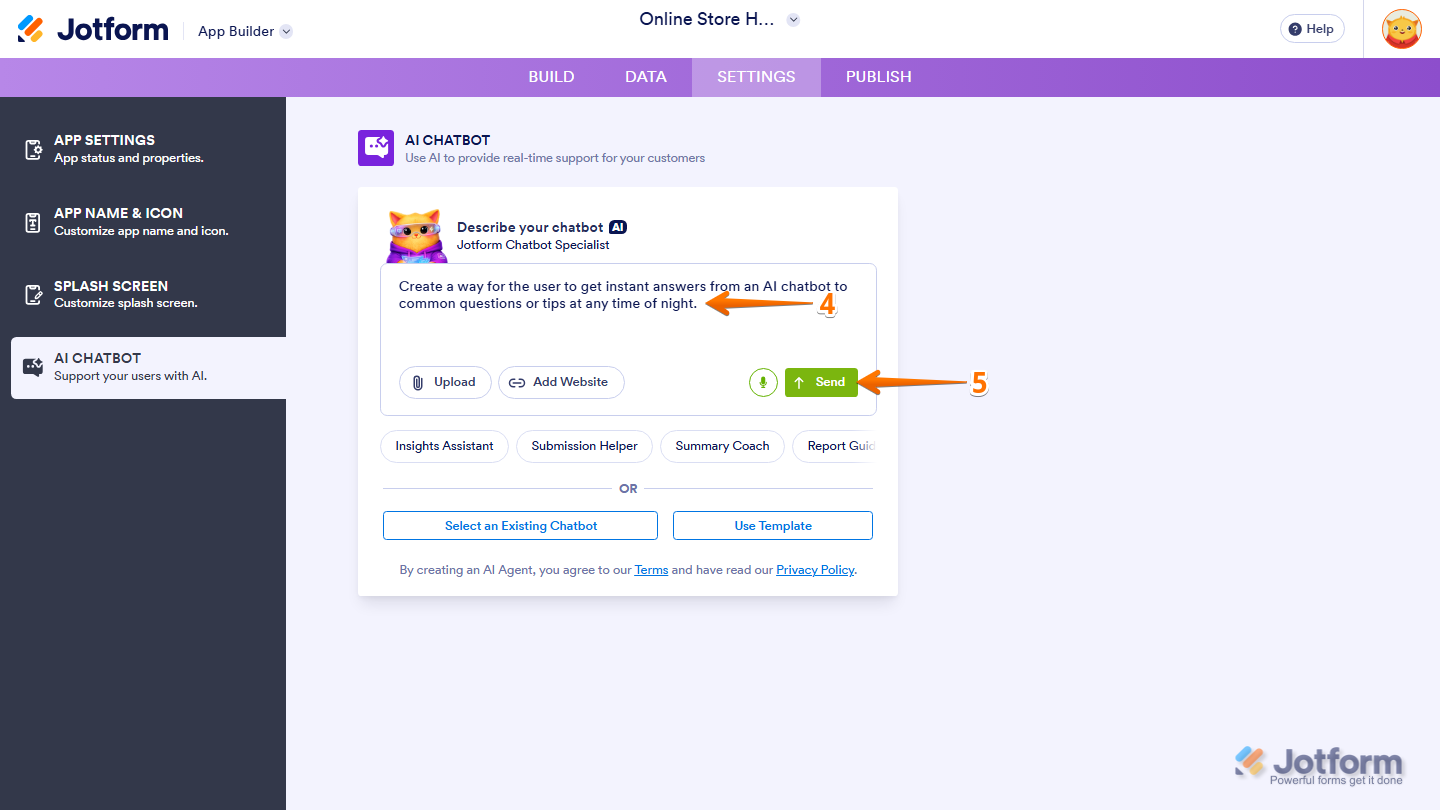
And that’s it! The AI Agent has been successfully added to your Jotform App.
Notes
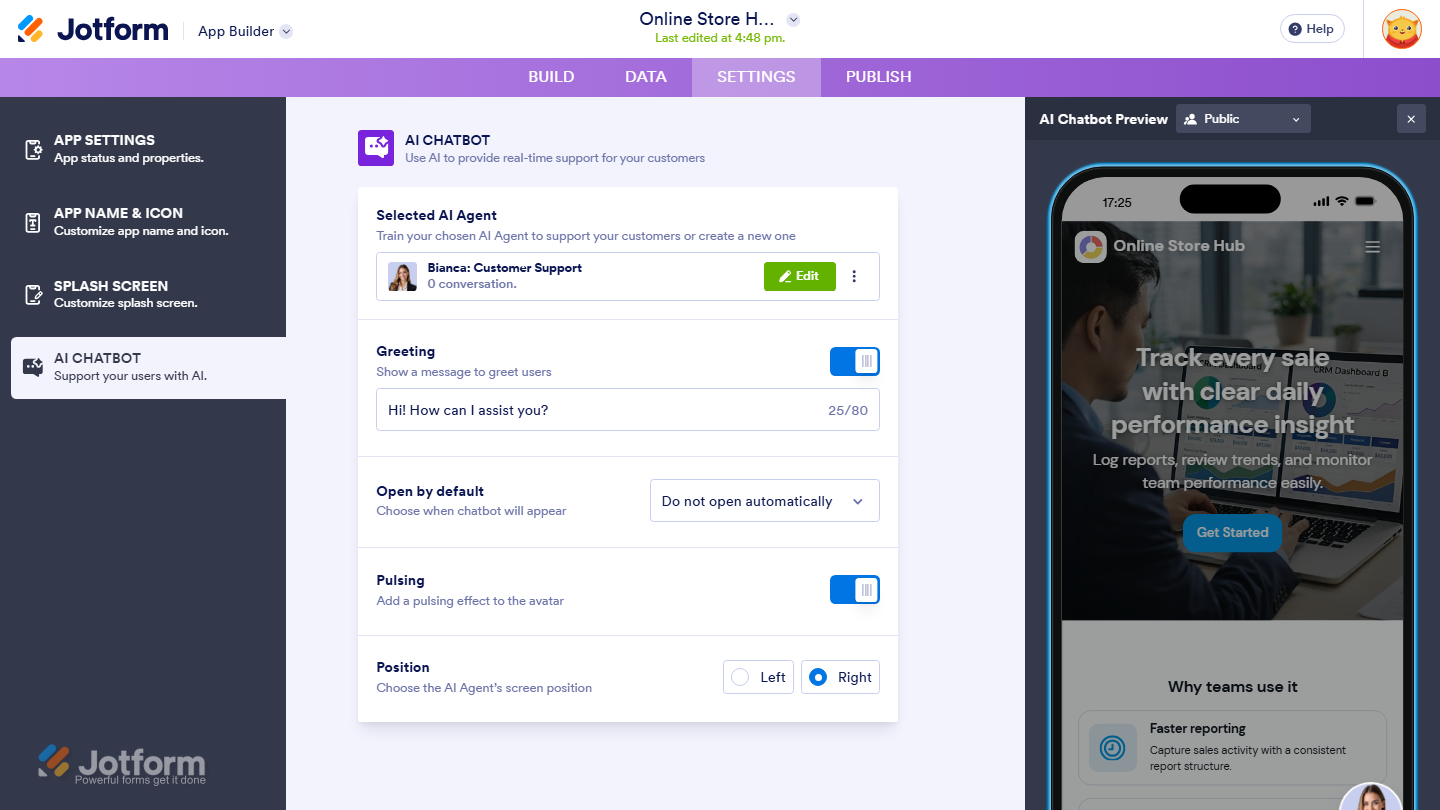
- Once you add an AI Agent chatbot to your app, a knowledge base is automatically created by crawling your app’s URL. This lets the agent learn your app’s content, enabling it to answer user questions more accurately using the information from the app.
- The AI Agent you create or add to your Jotform App will also be accessible in your Jotform Workspace.
Customizing Your AI Agent Chatbot
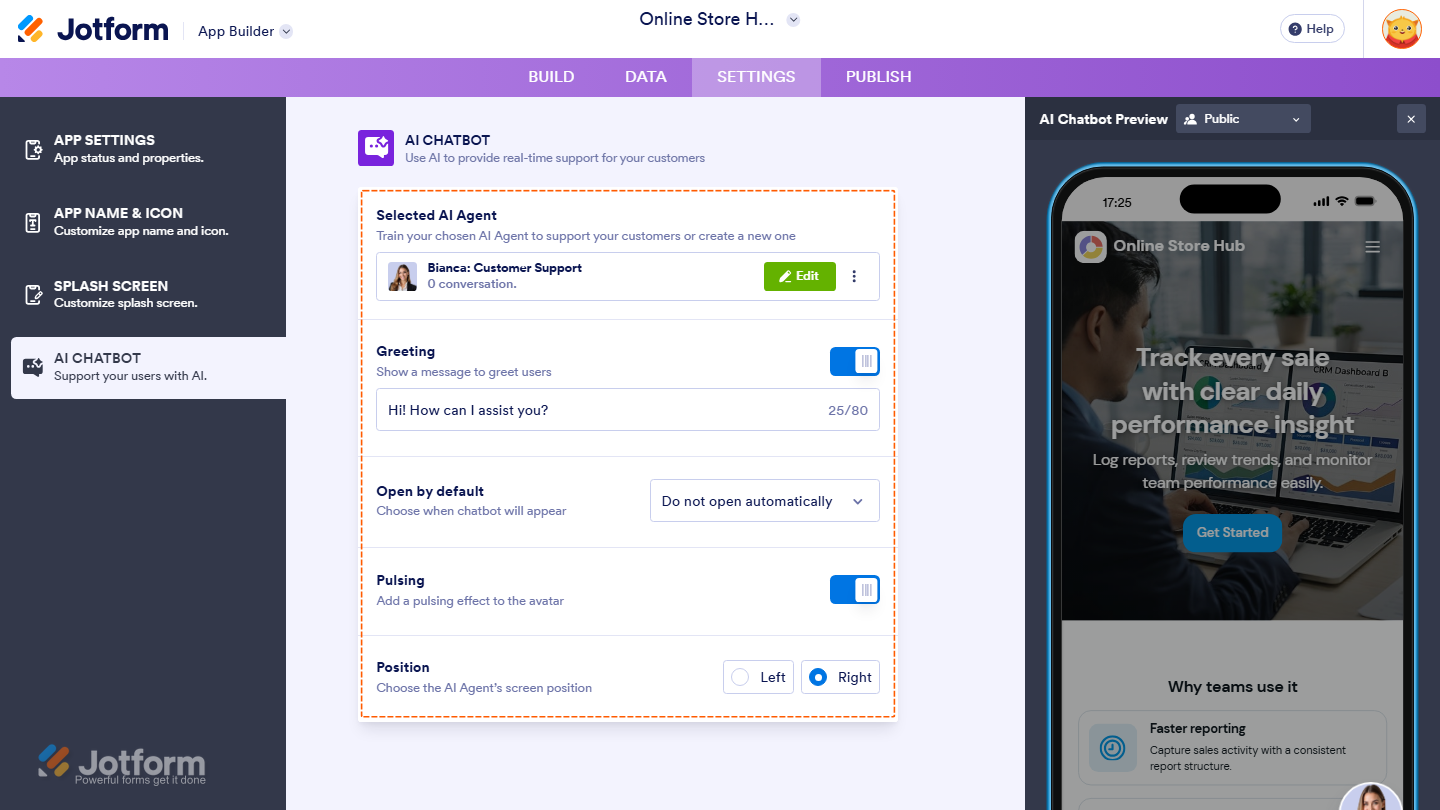
Once you’ve successfully added your AI Agent, you can customize it further based on what you need. Here are the options available in the AI Chatbot Settings:
- Greetings — Toggle this On to edit or customize the greeting message.
- Open by Default — Choose whether the Chatbot should open automatically or remain closed until it’s clicked on.
- Pulsing — Toggle this On to add a pulsing animation to the Chatbot icon.
- Position — Set where the Chatbot icon appears on the screen.
Note
The AI Chatbot Preview is displayed on the right side of the page, allowing you to see how your chatbot appears in the app as you customize its settings.
Managing Your AI Agent Chatbot
If you want to manage your AI Agent Chatbot—whether that means editing the agent, switching to another one, viewing conversations, adding knowledge, or removing it—you can do it all in one place. Here’s how:
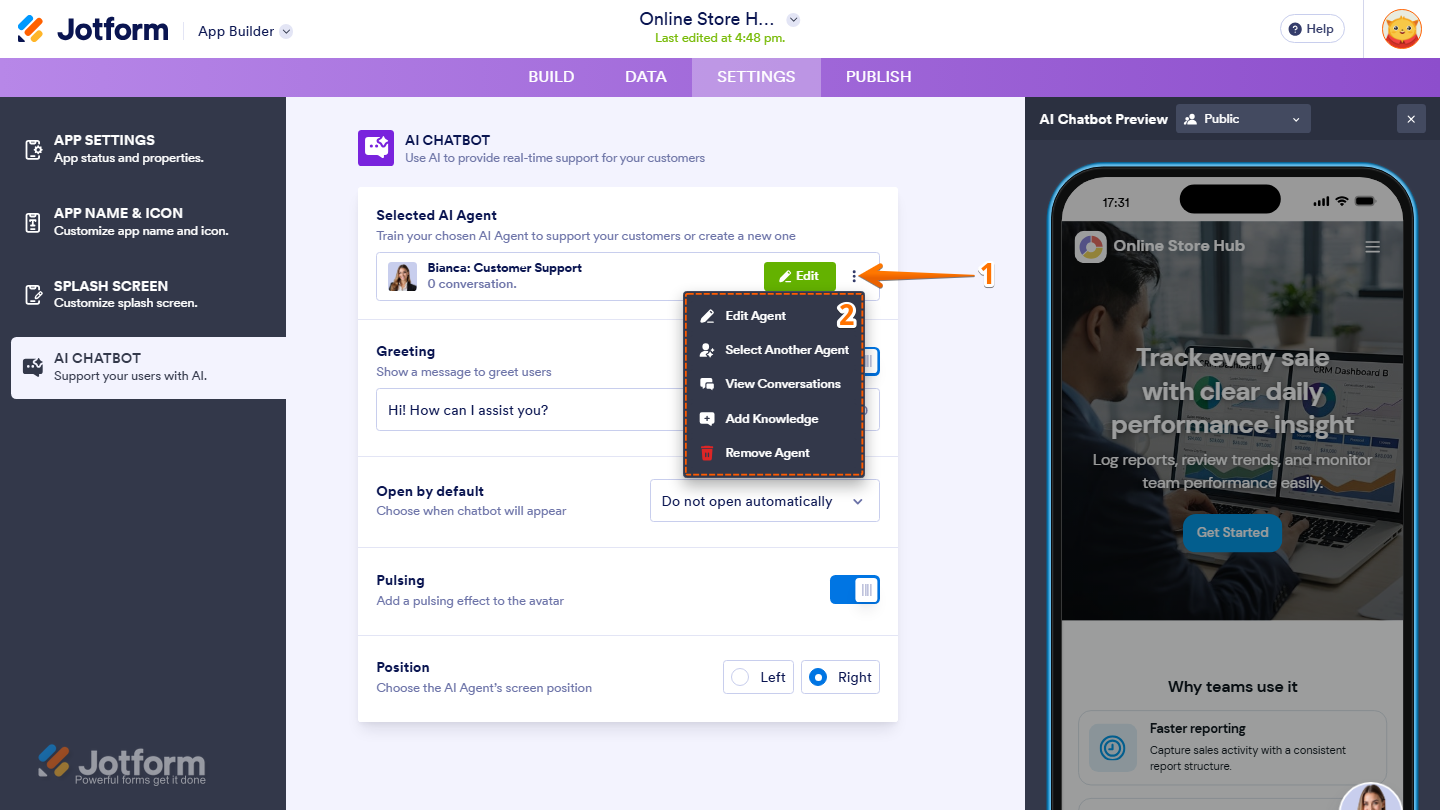
- While you’re in the AI Chatbot Settings, next to the Edit button, click on the Three Dots icon.
- Then, in the Dropdown menu that opens, you can do the following things:
- Edit the Agent — Update the agent’s name, prompts, tone, or behavior.
- Select Another Agent — Choose a different agent to use in your app.
- View Conversations — Check past interactions users have had with the agent.
- Add Knowledge — Add FAQs, documents, or other content to improve the agent’s answers. We’ve got a guide about How to Train Your AI Agent with more details about that.
- Remove Agent — Disconnect the agent from your app without deleting it.

Send Comment: