With Jotform, you can easily send form submission data as PDF copies and transfer uploaded files to your FTP server as soon as a form is submitted. This integration helps you keep submission records and uploaded documents stored outside your account, right on your own server. It’s a convenient way to support workflows that depend on external storage, internal systems, or long-term record keeping.
Setting up an integration that sends form submission data and file uploads to an FTP server is quick—here’s how:
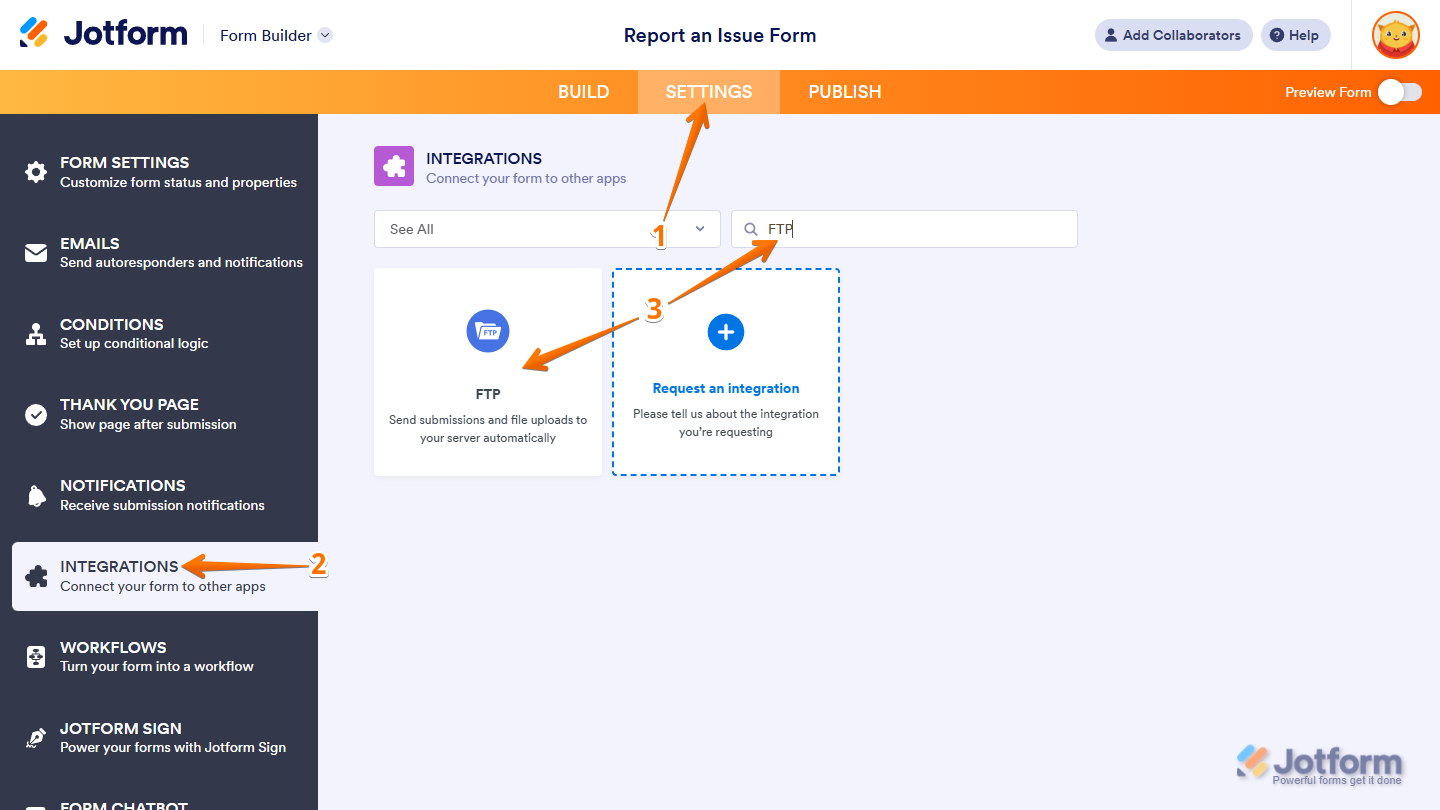
- In Form Builder, in the orange navigation bar at the top of the page, click on Settings.
- Then, in the menu on the left side of the page, click on Integrations.
- Now, in the Integrations section on the right, search for FTP and click on it.
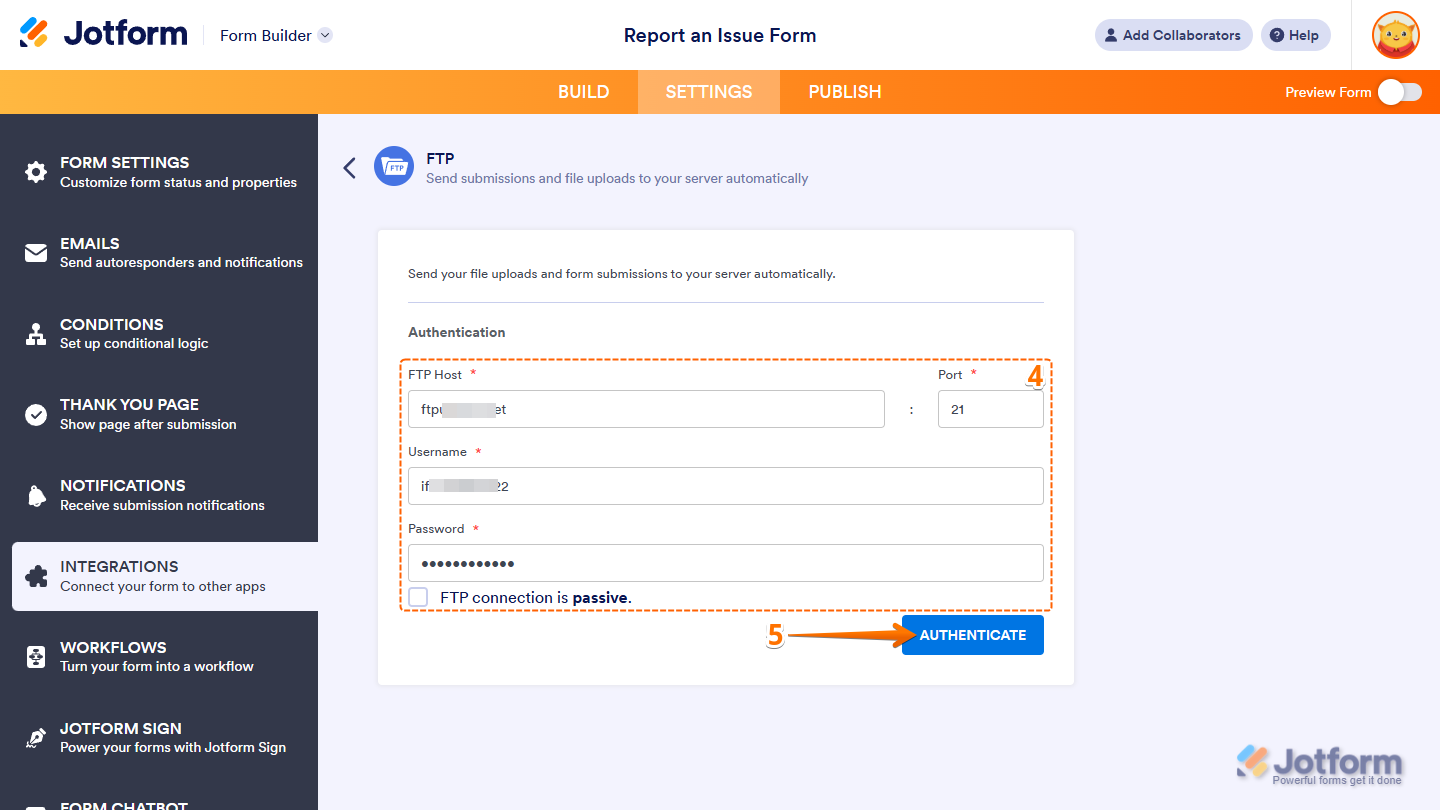
- Next, in the Authentication section, provide the following connection details:
- FTP Host — Enter the address of your FTP server.
- Port — Enter the port number your FTP server uses.
- Username — Enter your FTP username.
- Password — Enter the password associated with your FTP username.
- FTP connection is passive — Put a check in the box next to this option if your FTP server supports passive mode. If not, keep it unchecked.
- Then, click on the Authenticate.
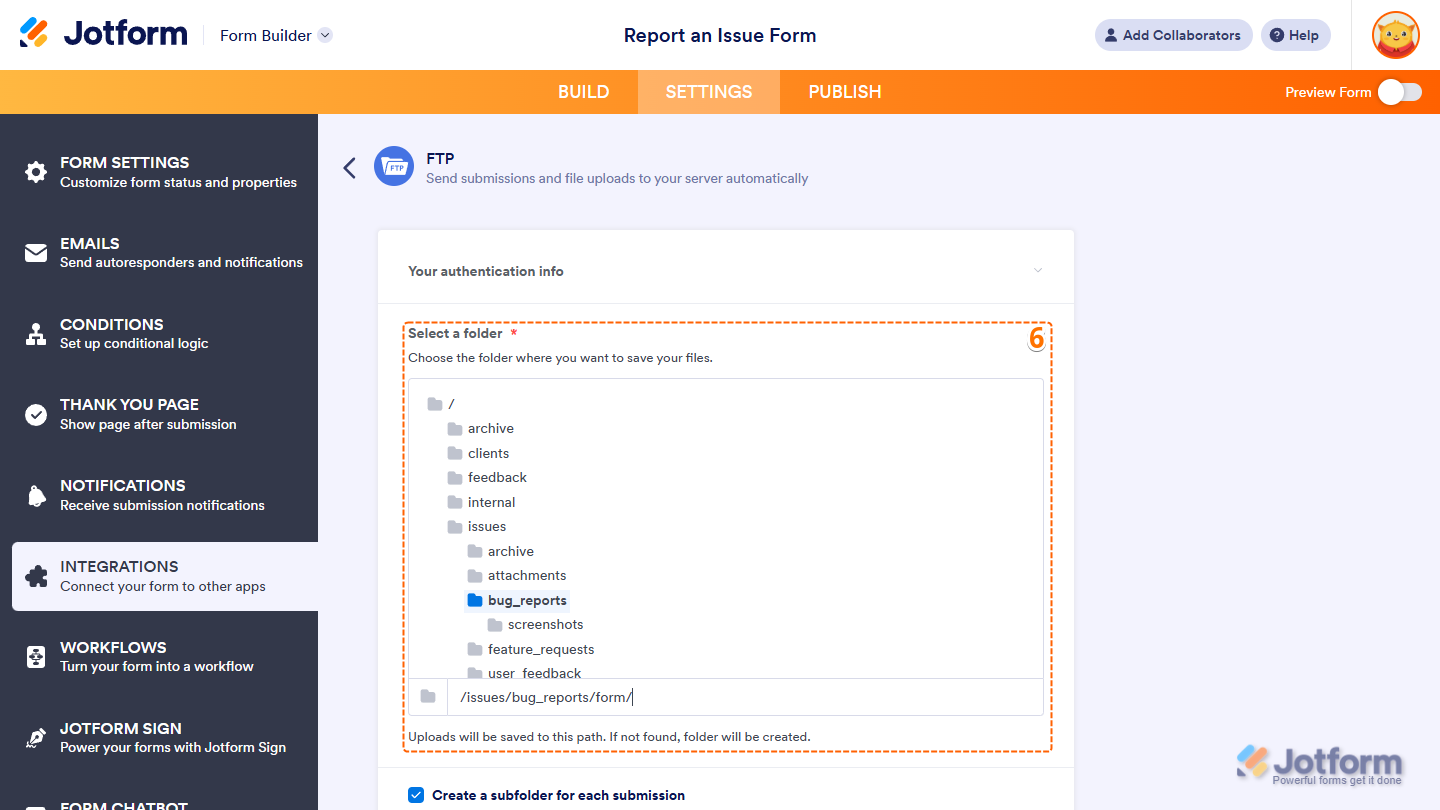
- Now, you’ll see the following settings you can configure:
- Select a Folder — Click on the subfolder on your server where you want the form’s Submission Folder to be created. Files from each submission will be stored inside that unless you’ve set the integration to create a separate folder for each submission.
Notes
- You can double-click a folder to view and choose nested subfolders, if available.
- If the subfolder you need isn’t listed, enter its name using the correct directory path format, starting with a forward slash and separating each nested folder with a forward slash (for example, /subfolder/subsubfolder/subsubsubfolder). The subfolder will be created automatically as soon as the integration is saved.
- Submission Folders are automatically named after your form’s title and will be created on your server the next time the form is submitted.
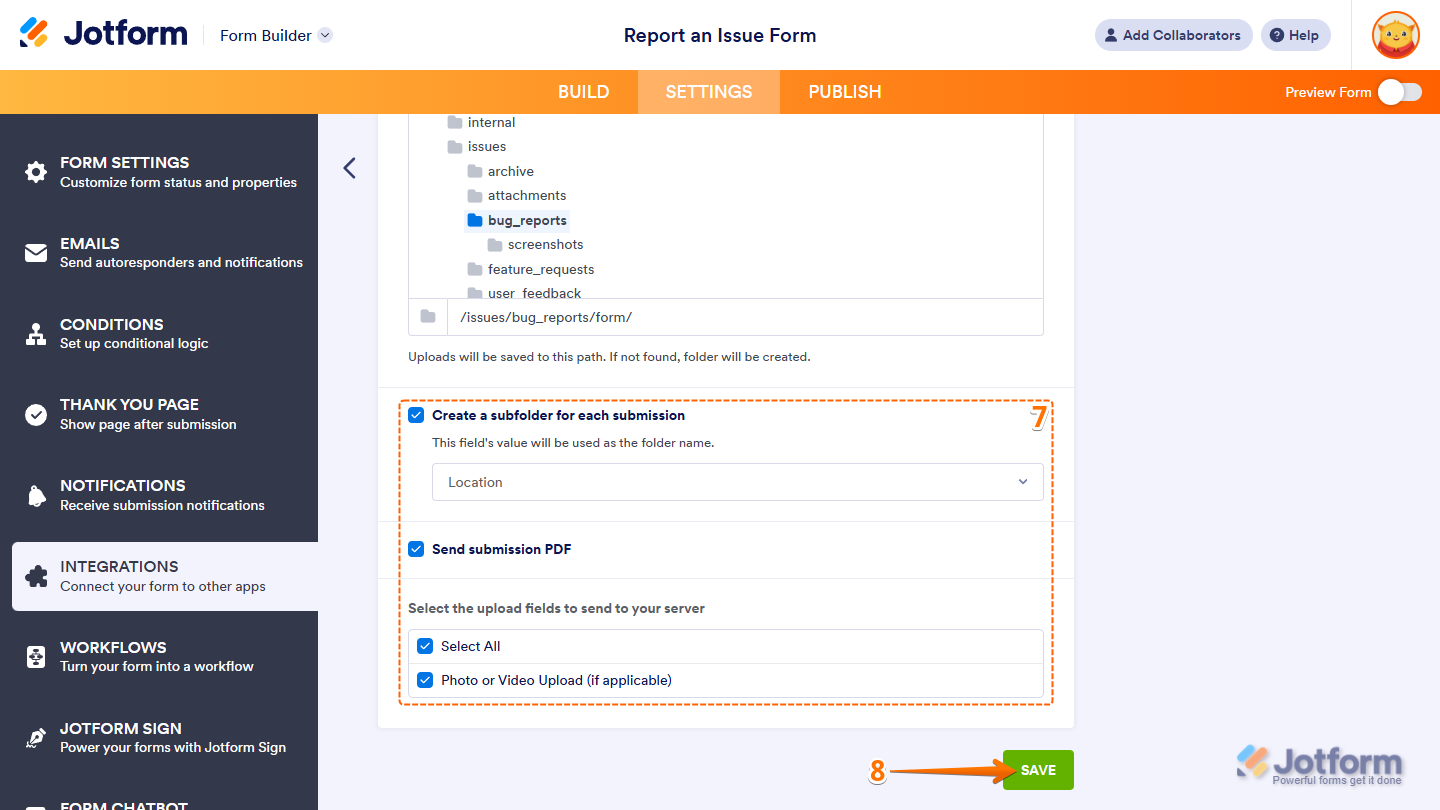
- Then, scroll down to the bottom and continue to set up these settings:
- Create a Subfolder for Each Submission — Remove the check in the box next to this option if you want all files to go into the same Submission Folder. Keep it checked and, in the dropdown menu below, keep Submission ID selected to create a separate subfolder for each submission, named using the ID. Alternatively, select a supported form field such as Name, Email, Short Text, Single Choice, or Dropdown to name each subfolder based on the field’s value during submission.
- Send Submission PDF — This option is available when your form has at least one basic File Upload field. Remove the check in the box next to it if you don’t want PDF copies of submissions sent to your server. Or, keep it checked to include it with each submission.
- Select the Upload Fields to Send to Your Server — This option is available when your form has at least one basic File Upload field. Put a check next to the name of the File Upload field you want files uploaded through it sent to your server. Or, put a check next to the Select All option to send uploaded files from all File Upload fields.
Note
You must keep Send Submission PDF or at least one File Upload field under the Select the Upload Fields to Send to Your Server section checked to save the integration.
- Once everything’s set, click on Save.
- Finally, click on Finish.
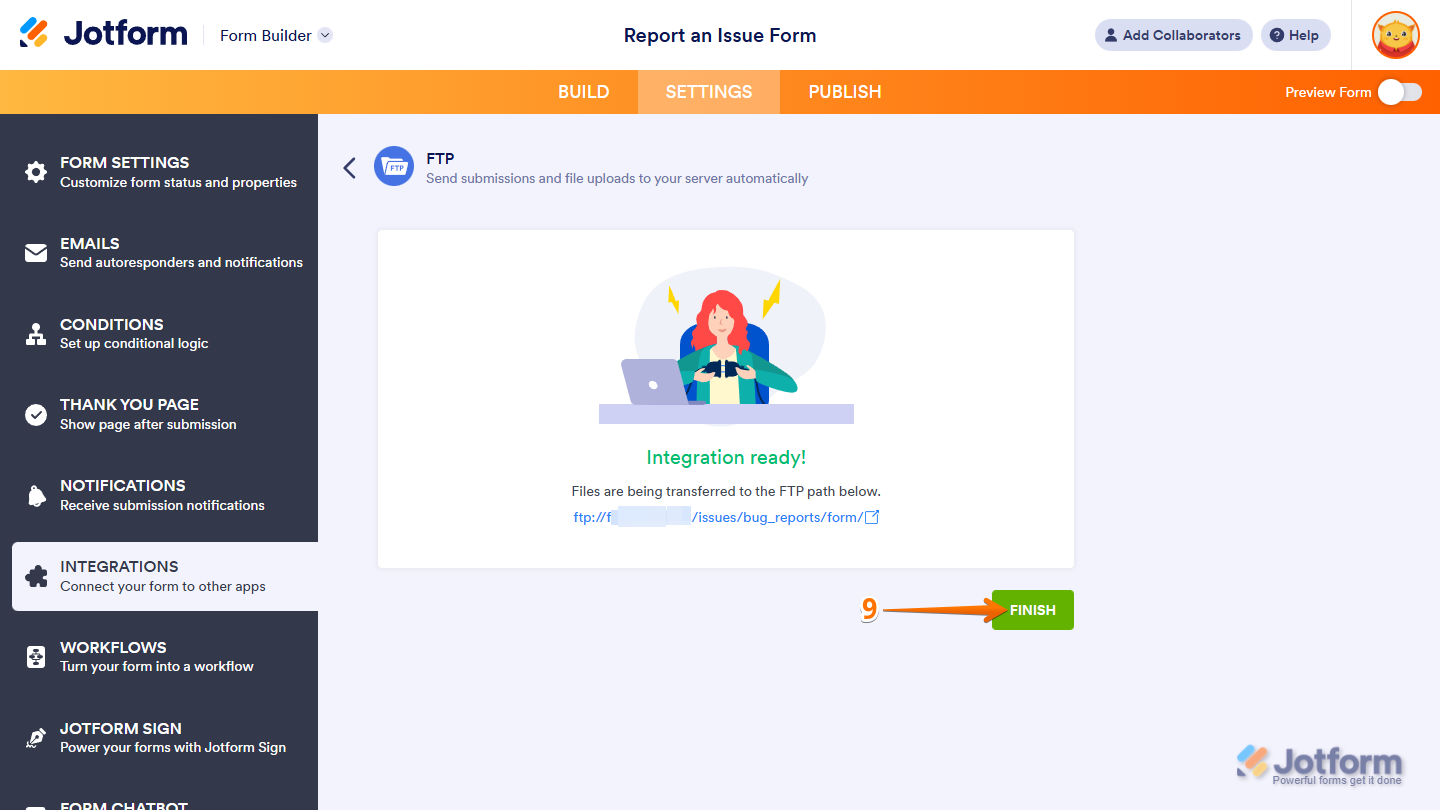
That’s it. Now, your form submissions and uploaded files will be sent to your FTP server automatically.

Send Comment:
38 Comments:
October 17, 2024
Can we have SFTP fonction?
January 4, 2024
How do I send completed forms and uploaded documents from the forms to a virtual desktop?
November 2, 2023
Hello, is there a list of IP's from Jotforms we can use in our FTP forwarding to restrict traffic only from Jotforms so we don't get unwanted FTP traffic to our server?
July 19, 2023
Can you please provide an IP Whitelist for FTP. The current whitelist IP's you provide July 2023 do not work.
Thanks!
March 8, 2023
What file format types to do support for audio, video, photos and text?
Thanks!
February 2, 2023
Does this support SFTP?
We collect PII and cannot use FTP for our use case.
January 7, 2023
No support for FTPS or SFTP? Would need this for HIPAA
August 11, 2021
I am consistently getting Authentication failed. Credentials are right, but on my server it shows a different IP every time I attempt FTP connection. Can you share what your IP addresses are so that I can whitelist them for this connection request?
December 30, 2020
I am getting a different window for submission where I cannot see settings icon. Pls advice.
November 9, 2020
In Step 3 above in the new Submission page, I don't see the Settings Icon so we can turn on FTP. Please advise
July 25, 2020
I am getting a different window for submission where I cannot see settings icon. Pls advice.
January 16, 2020
I have followed these steps, but am not able to see the actual directory of my FTP, I just see an arrow circle like its trying to load the directory and then it will finally say the directory is empty. And I end up getting a 502 Bad Gateway error when submitting the form (a time out that I have traced back to the FTP connectivity) I enter my credentials and I get the green check mark, I am also able to manually type in a path through from jotform and it creates those folders automatically into my FTP server (i see them created). But when I hit the "finish" button it cycles and cycle until I get an error:
We couldn't complete the integration with your server. This could be related to the file/folder permissions. Please check permissions and try again.
Here is the error returned by the server:
--
Cannot move file to server: /Jotform/2020 Focus on Nevada/README.txt.
Our IT department has confirmed that there are no permission issues.
I had this exact same issue last year and I thought I had resolved it. But I do not remember what it was.
December 8, 2019
I want to DOWNLOAD submissions by FTP. I am not successful at getting a full CSV of my submissions. May I go up to your FTP site and download my submissions? And if so, how?
October 11, 2019
What happend if we have the ftp non active
June 26, 2019
Hello,
I can't find a clear explanation of "How to Send Submission Data… via ftp" despite it being part of the title.
Could someone clarify if it is possible to send submission data from a form via ftp and not just an uploaded file from the upload field?
Thanks,
Pete
February 6, 2019
how can i set the file type for ftp to be either a CSV file, or even a TXT file? NOT a PDF
thanks
Tim
March 21, 2017
Can we determine the file format and the schedule of the export so nightly?
October 29, 2015
Keep up the good work guys!! (and girls!) I am a happy user of joyform!
October 29, 2015
Many thank you, this is very helpful We to Work!
And success always for jotform ... :)
October 29, 2015
Terima kasih banyak, ini sangat membantu kami untuk bekerja !
October 29, 2015
Good..JOB.............GUYS
October 28, 2015
Very nice, I like it! Cute picture too :)
October 28, 2015
Very nice! Thank you!
October 25, 2015
Very nice tool. But please, please don't change what is not broken for the sake of changing it. Jotform is great as it is :)
October 25, 2015
Please do not change it to much it works great the way it is. It's simple and usable for forms which it what it needs to be. I have used 5 of your forms just as they were basically and found them to work just fine for my website. Sometimes you can include to much or taper with what is ALREADY GOOD, and make it to complicated. Unless, your adding "new" features, my opinion is to leave it along! Just an opinion! Thanks dk4u. P.S. Was peeking at other forms with someone else, but no, I found I liked yours the best!