With Jotform, you can easily collect more accurate responses using the Checklist widget, which lets users select all options that apply within a single question field. This makes it a practical choice for surveys, quizzes, feedback forms, registrations, medical forms, and other types of data-collection forms that need multiple answers.
Here are a few ways to use it:
- Accept multiple answers for a single multiple-choice question.
- Offer an unlimited number of customizable options.
- Include a fillable “Other” option for additional responses.
- Hide unchecked fields from form submissions.
Whether you’re creating a new form or updating an existing one, you can add and set up the Checklist widget in a few easy steps. Here’s how to do it:
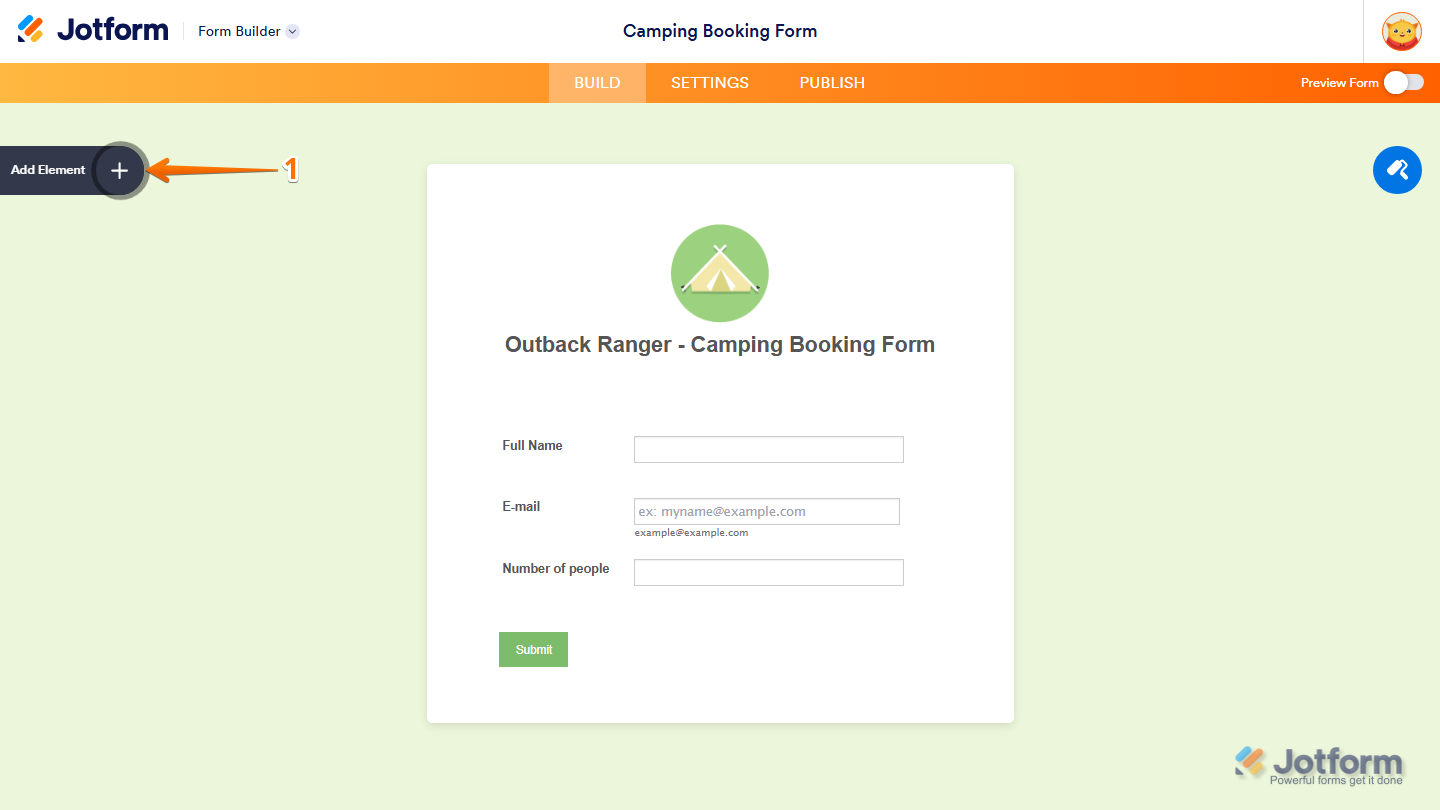
- In Form Builder, click on Add Element on the left side of the page.
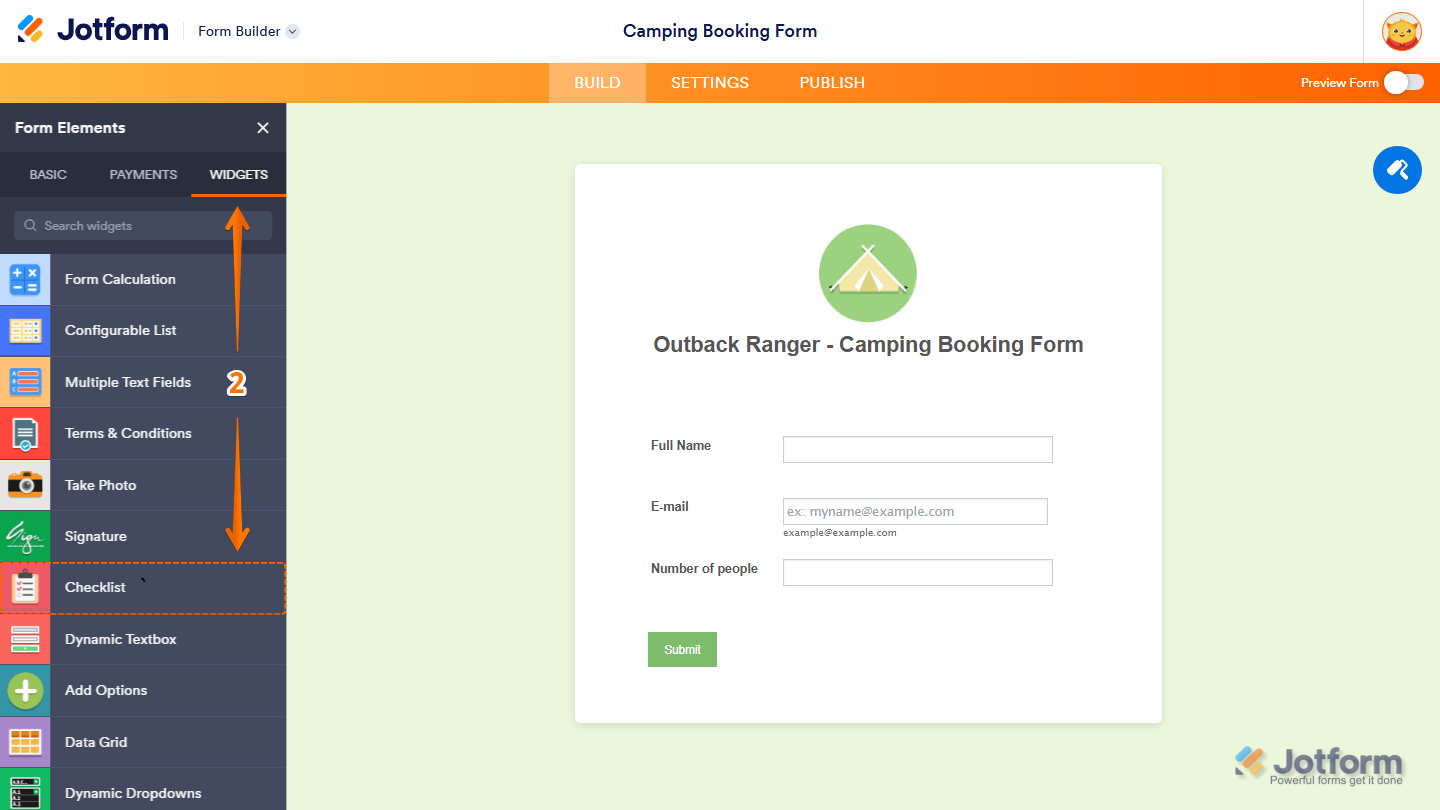
- Now, in the Form Elements menu, under the Widgets tab, click on Checklist. Or, just drag and then drop it to where you want it to be on your form.
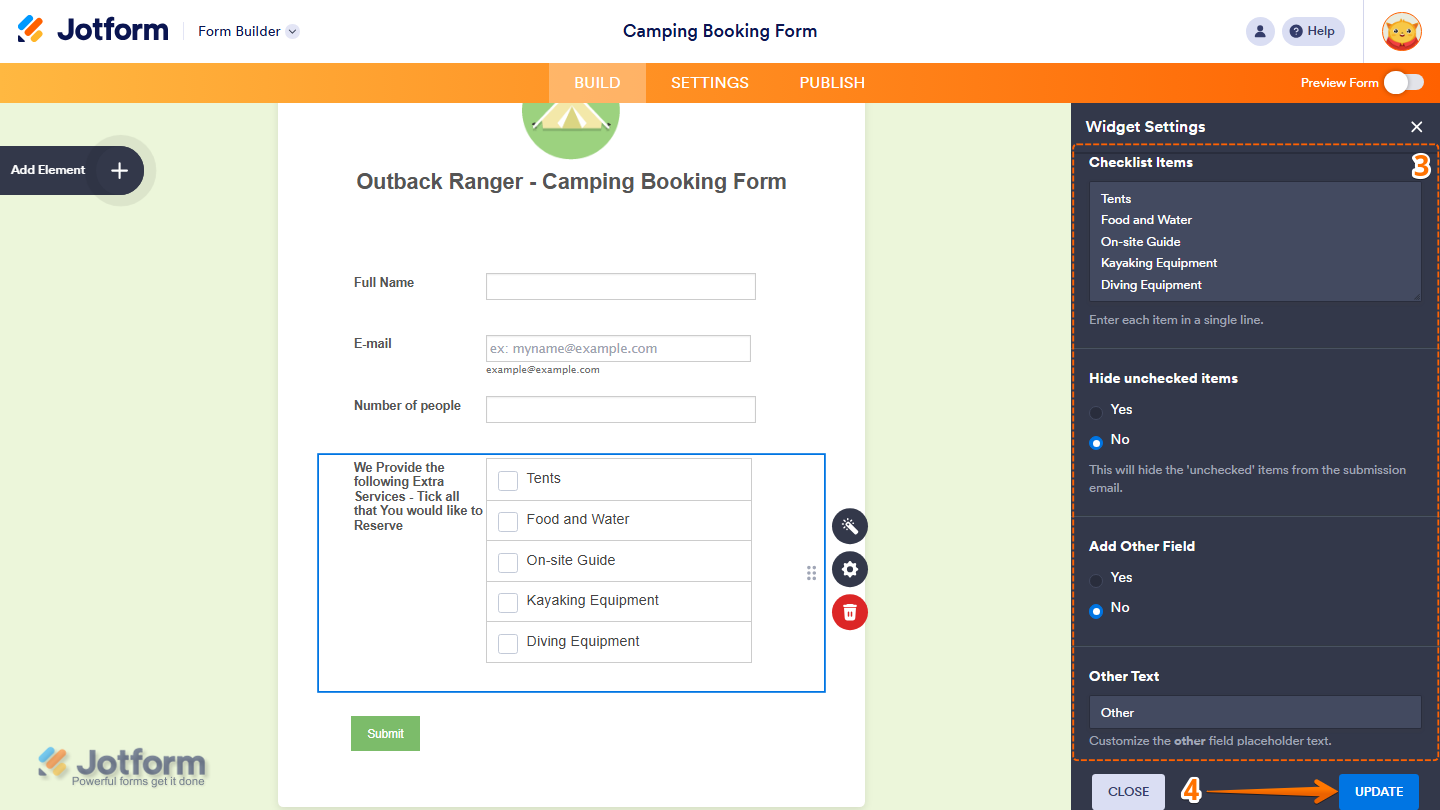
- Next, in the Widget Settings menu that opens on the right side of the page, under the General tab, you’ll see this list of settings you can configure:
- Once you’re done, click on Update.
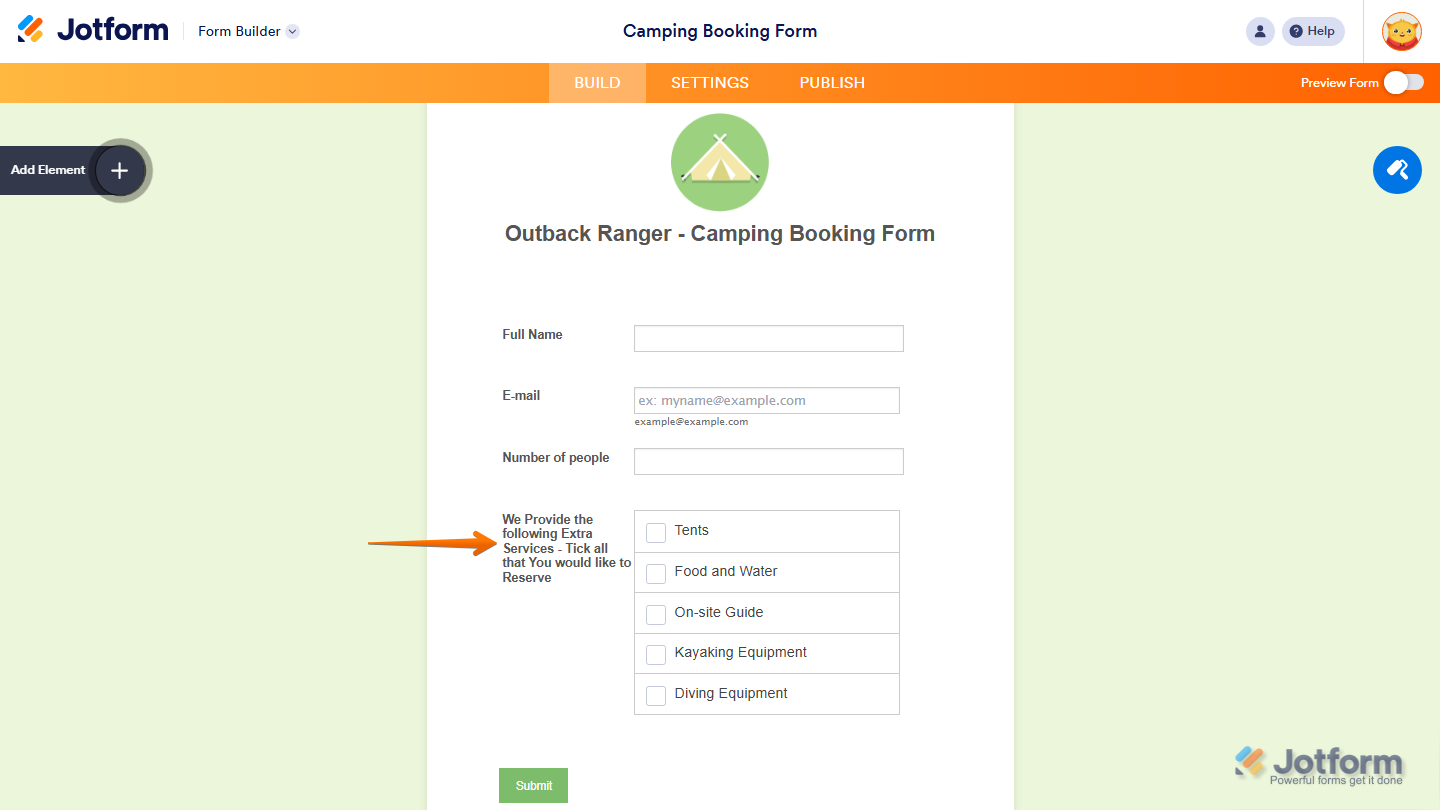
That’s it. You’ve successfully added and set up the Checklist widget on your form. You can test it on this demo form.
Note
- Checklist entries are submitted as a single combined field, not as individual fields.
- Changes to item labels only apply to new submissions.
- To style the fields and labels in the Checklist widget, you can inject custom CSS into the Custom CSS tab in the Widget Settings. Need help getting started? Our guide on How to Inject CSS Codes to Widgets shows you how to do it.
- You can also configure the widget properties, like alignment, labels, size, visibility, and more, to control how it looks and behaves in your form. Check out our guide on How to Access and Configure the Question Properties of a Widget to learn more.

Send Comment: