Your app’s navigation menu plays a big role in how easily users move around and find what they need. With two navigation options to choose from, you have the flexibility to design an experience that feels just right for your app and your audience.
You can go with a top navigation that uses a hamburger menu for a clean, organized look, or choose a bottom navigation with a horizontal layout that keeps key sections within easy reach. Both options are built to feel intuitive and user-friendly, helping your users navigate smoothly and confidently every time they open your app.
Note
The Navigation Settings option only appears and works if your app has multiple pages. If your app is set up as a single page, you won’t see this option until you add more pages.
Enabling Your App’s Top Navigation Menu
Enabling Top Navigation is quick and straightforward. Your app will use a clean top bar with a hamburger menu, giving users a familiar and organized way to move between pages. As long as your app has multiple pages, you’re just a few clicks away from setting it up—here’s how to do it:
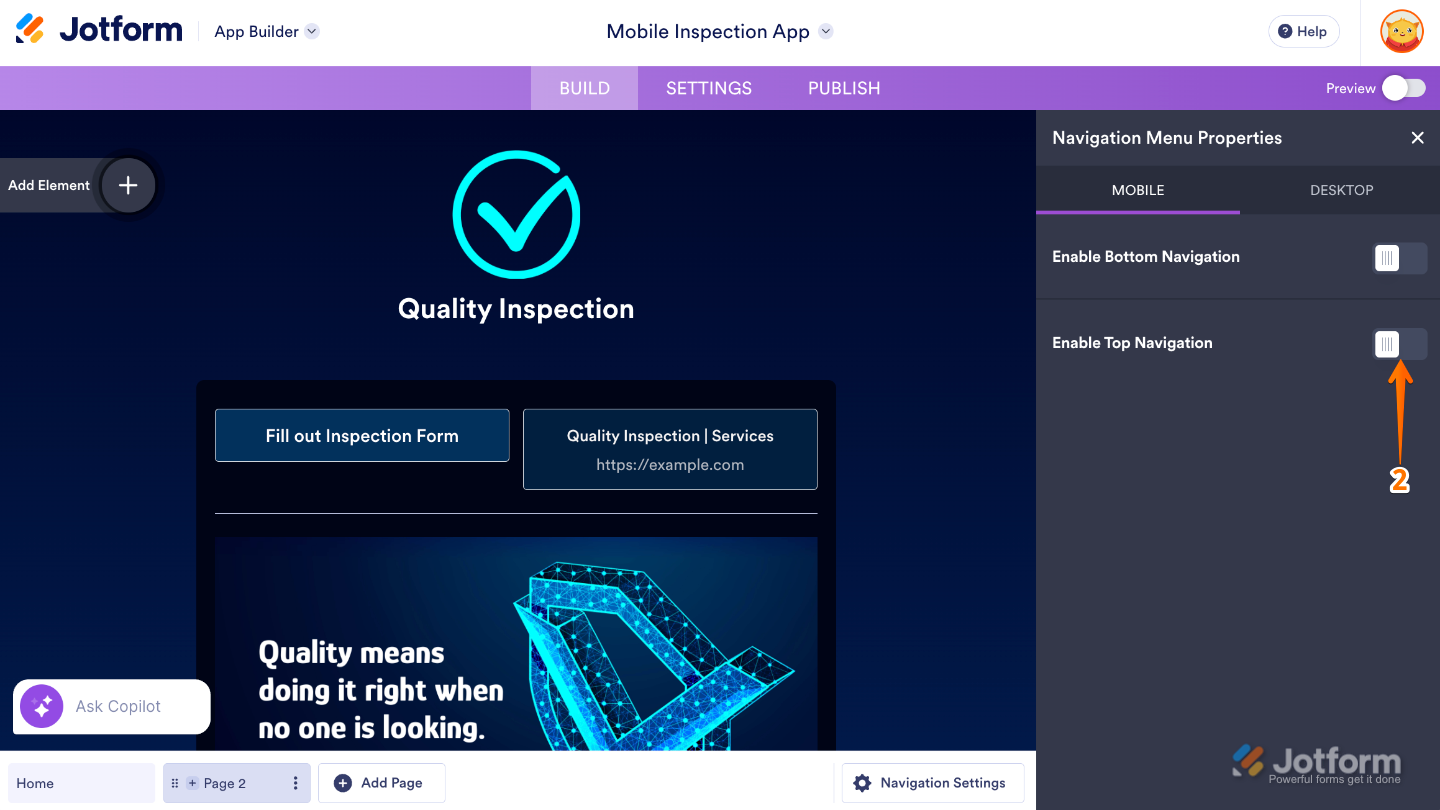
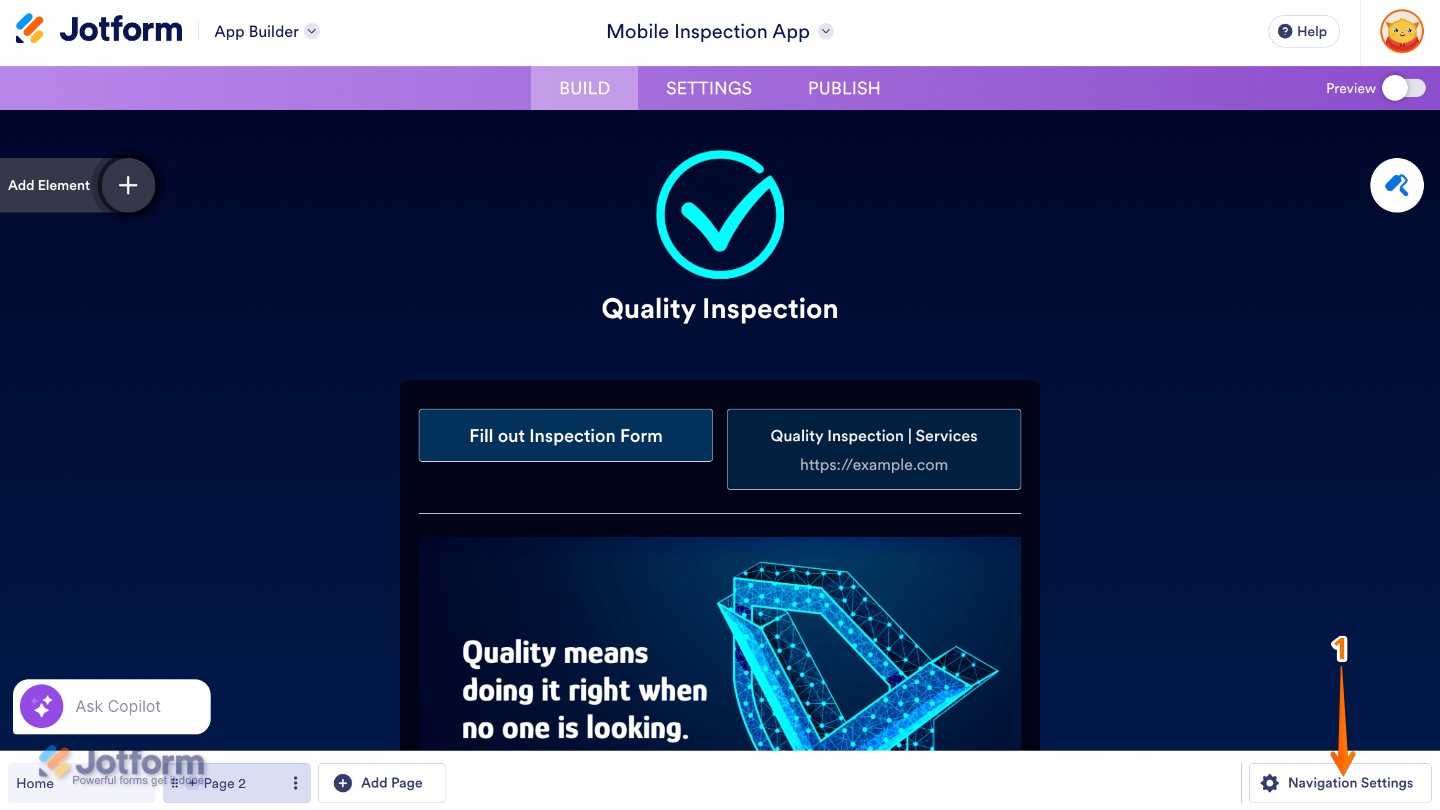
- In the App Builder, click on Navigation Settings at the bottom-right corner of the page.

- Then, in the Navigation Menu Properties that opens on the right side of the page, under the Action tab, toggle on Enable Top Navigation.
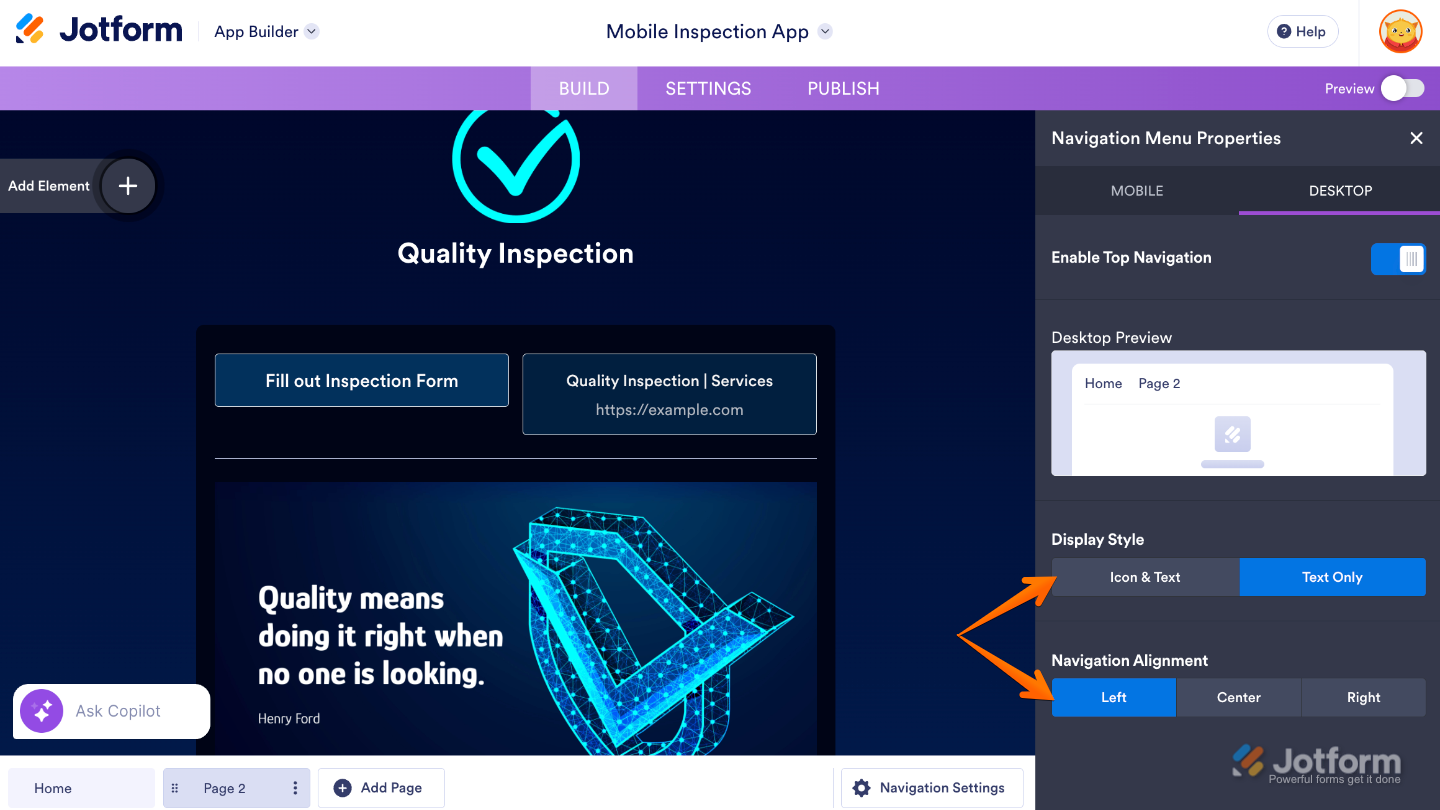
If you want your desktop app to use the same navigation setup, just switch to the Desktop tab and toggle Enable Top Navigation—your changes will apply there too. Once enabled, you’ll see the following options:
- Display Style — Choose how your navigation items look, show both the Icon and Text for clarity, or keep it sleek and simple by displaying the Icon Only.
- Navigation Alignment — Pick where you want your navigation to sit: Left, Center, or Right.
Now, when you preview your app, you’ll see your pages listed in the Three Lines icon at the top-left corner of the screen.

Enabling Your App’s Bottom Navigation Menu
Enabling Bottom Navigation is just as quick and hassle-free. This option places a horizontal menu at the bottom of the screen, giving users easy, one-tap access to your app’s main pages—perfect for mobile-friendly navigation. You can do it in just a few steps:
- In the App Builder, click on Navigation Settings at the bottom-right corner of the page.
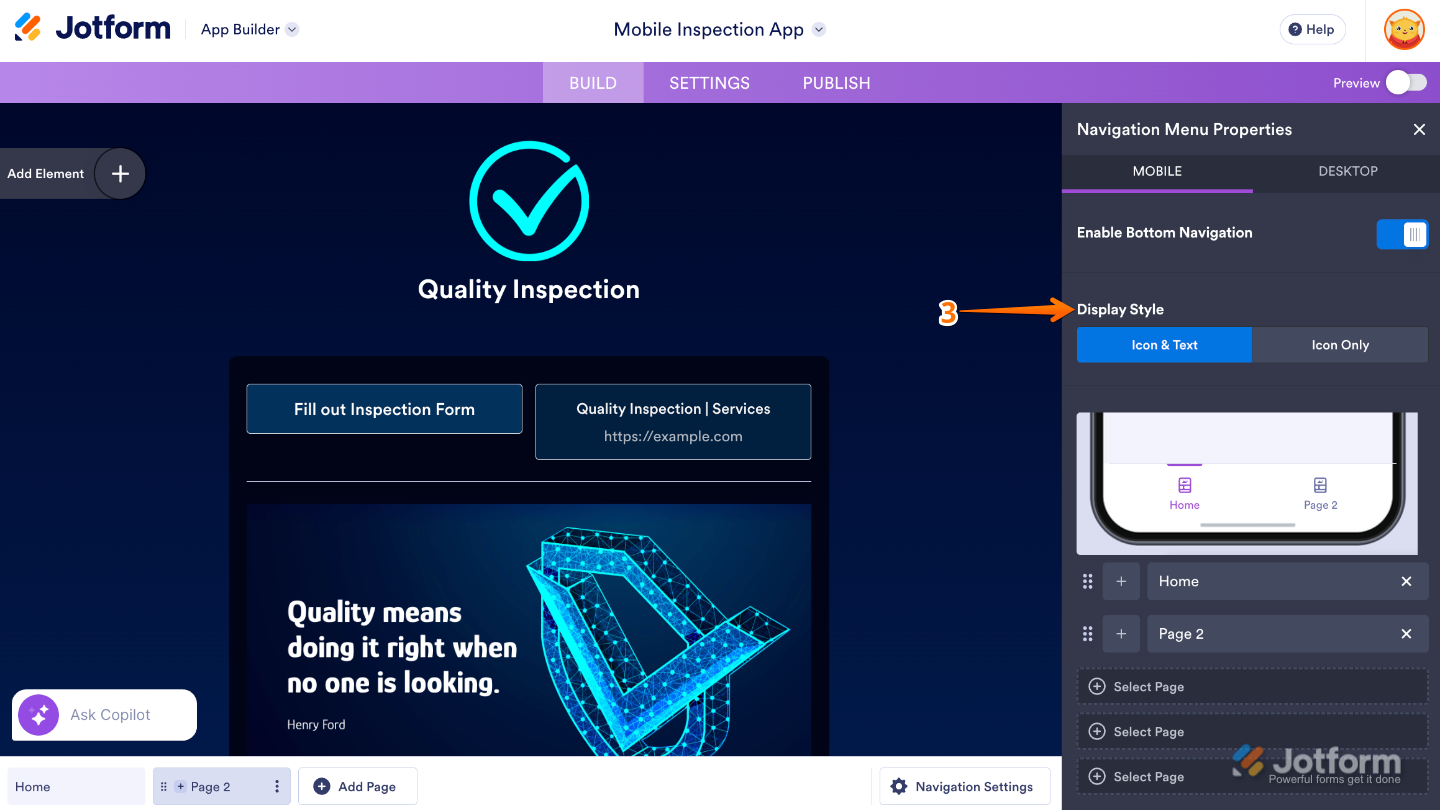
- Then, in the Navigation Menu Properties that opens on the right side of the page, toggle on Enable Bottom Navigation.
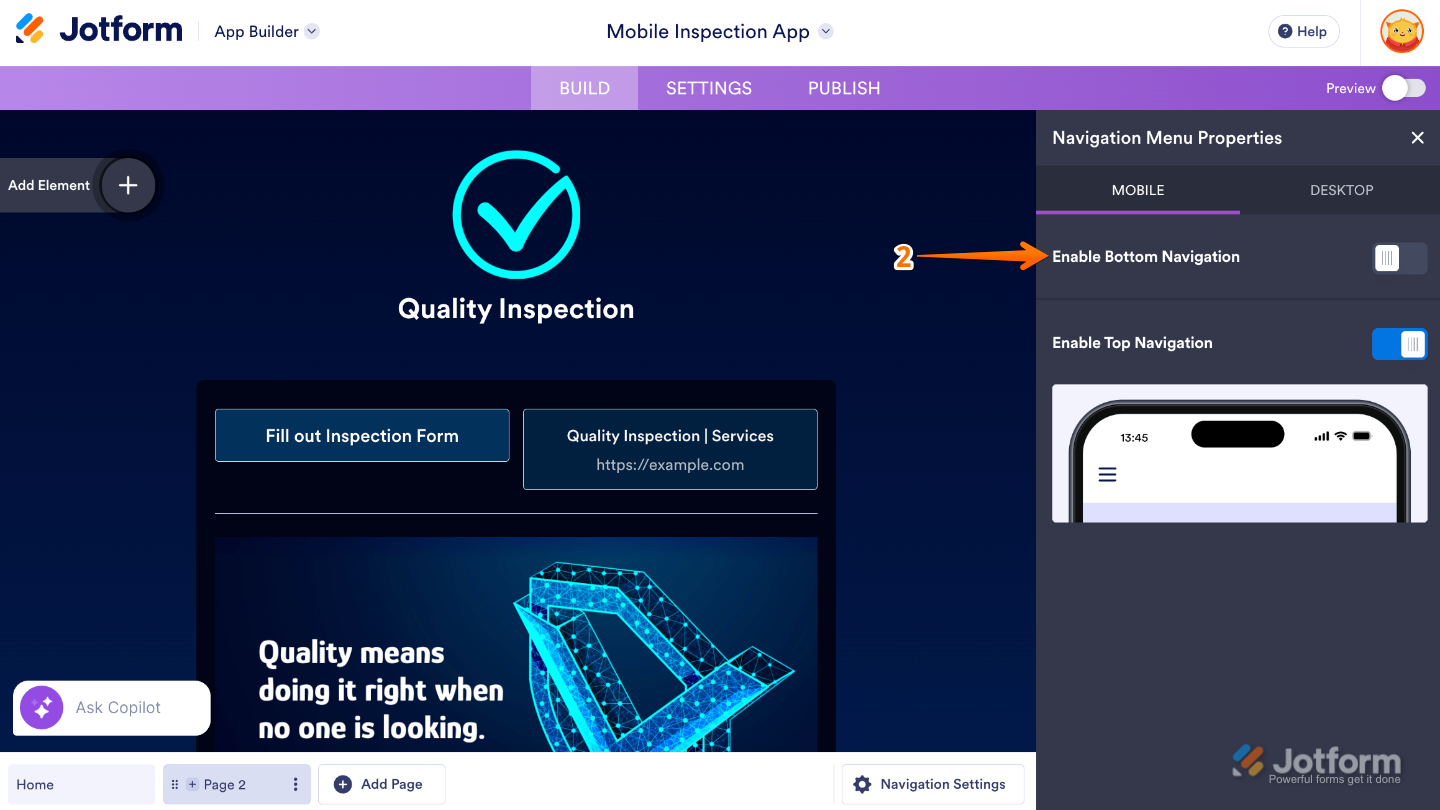
- Next, choose a Display Style to control how your navigation items appear. You can show both the Icon and Text for extra clarity, or keep things clean and minimal by displaying the Icon Only.
If needed, you can rearrange your pages by dragging them up or down in the list. The order from top to bottom determines how the pages appear from left to right in the bottom navigation menu, making it easy to place your most important pages exactly where you want them. Also, clicking on the Plus icon lets you change a page’s icon.
Note
While Top Navigation is visible on both mobile and desktop devices, Bottom Navigation only appears on mobile. This means if you’ve enabled Bottom Navigation, your users will see it when accessing your app on a phone. On a desktop, however, only the Top Navigation will show—provided it’s enabled—so your app stays easy to navigate no matter the device.

Send Comment: