Managing who can access your form doesn’t have to be complicated. With Jotform’s privacy settings, you can easily decide whether your form stays private, is shared with a select group, or is open for anyone to fill out. It gives you peace of mind and full control, so your form is always seen—and used—exactly the way you intend.
Changing the Access Settings of a Form
You can update your form’s access settings in just a few clicks. Setting it up takes no time at all—here’s how:
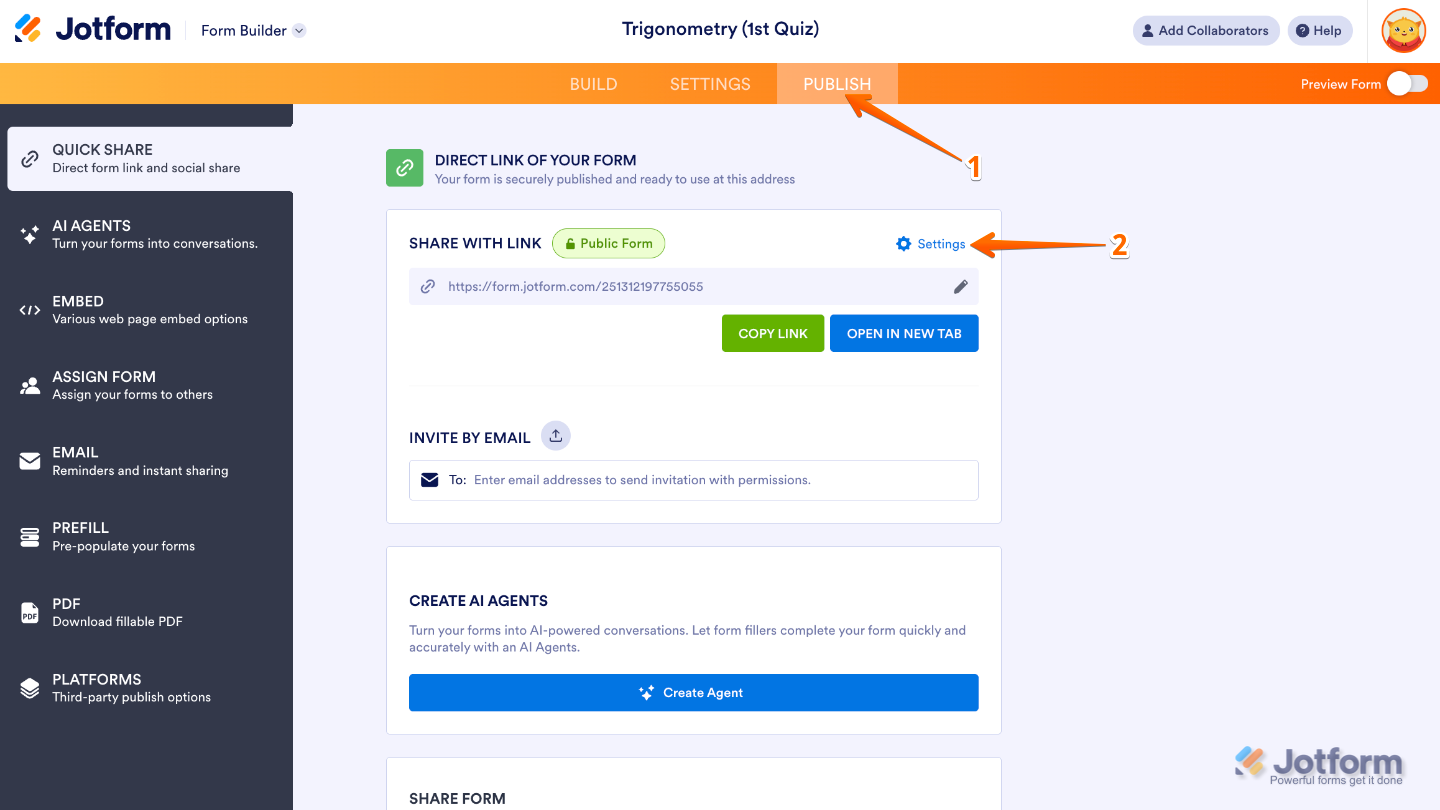
- In Form Builder, in the orange navigation bar at the top of the page, click on Publish.
- Now, in the Share With Link section, click on Settings.
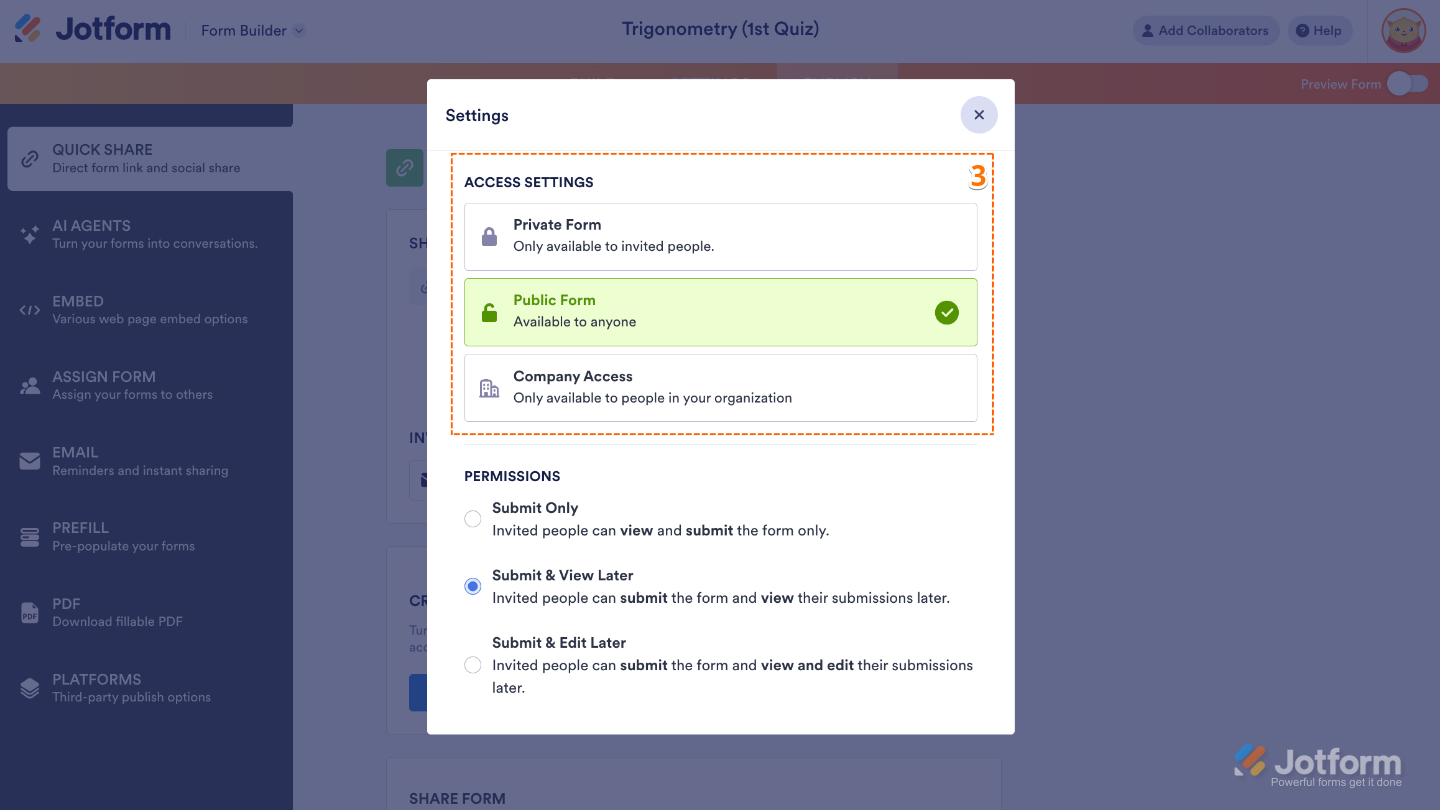
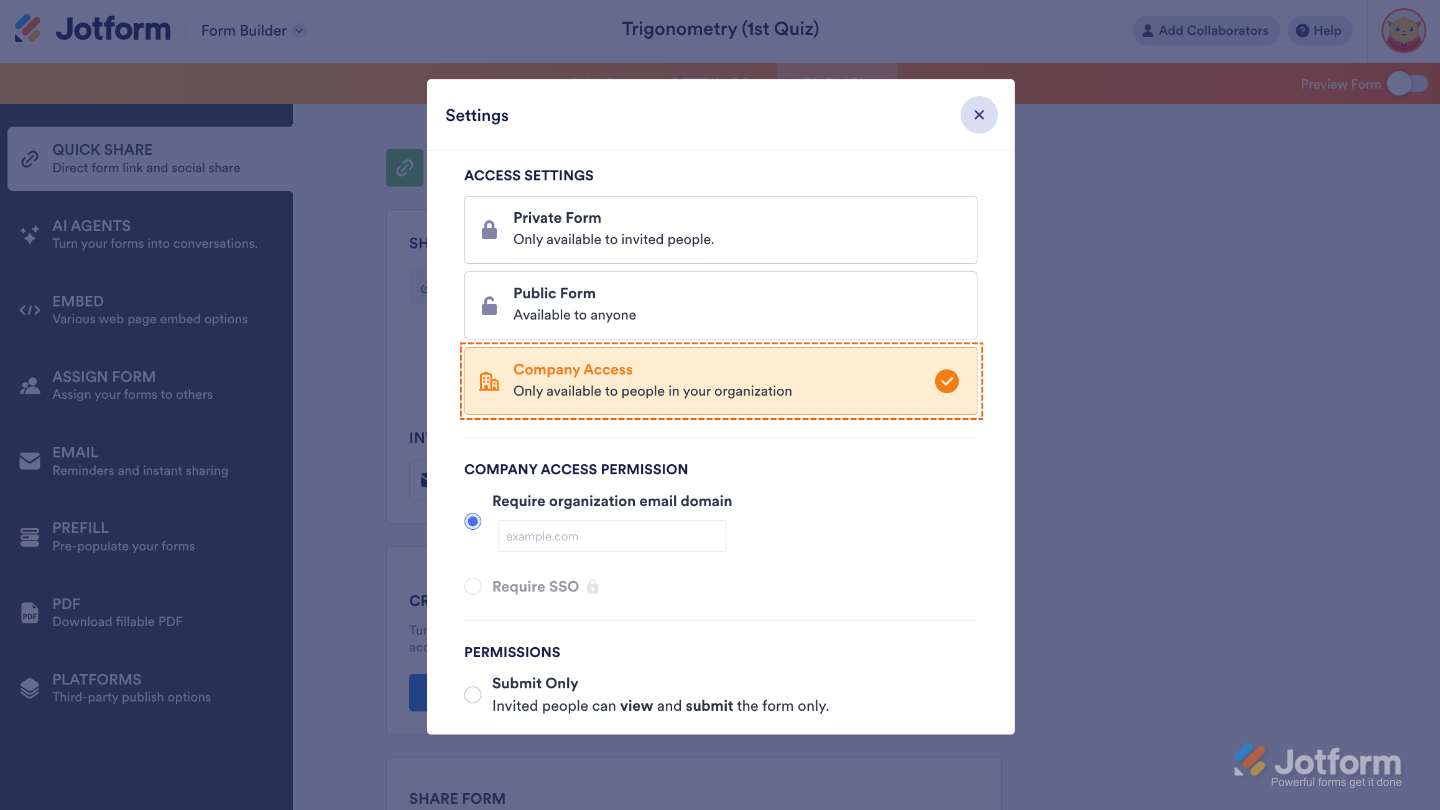
- In the Settings window that pops up, select the Access Settings you want.
Getting to Know Your Form’s Access Settings
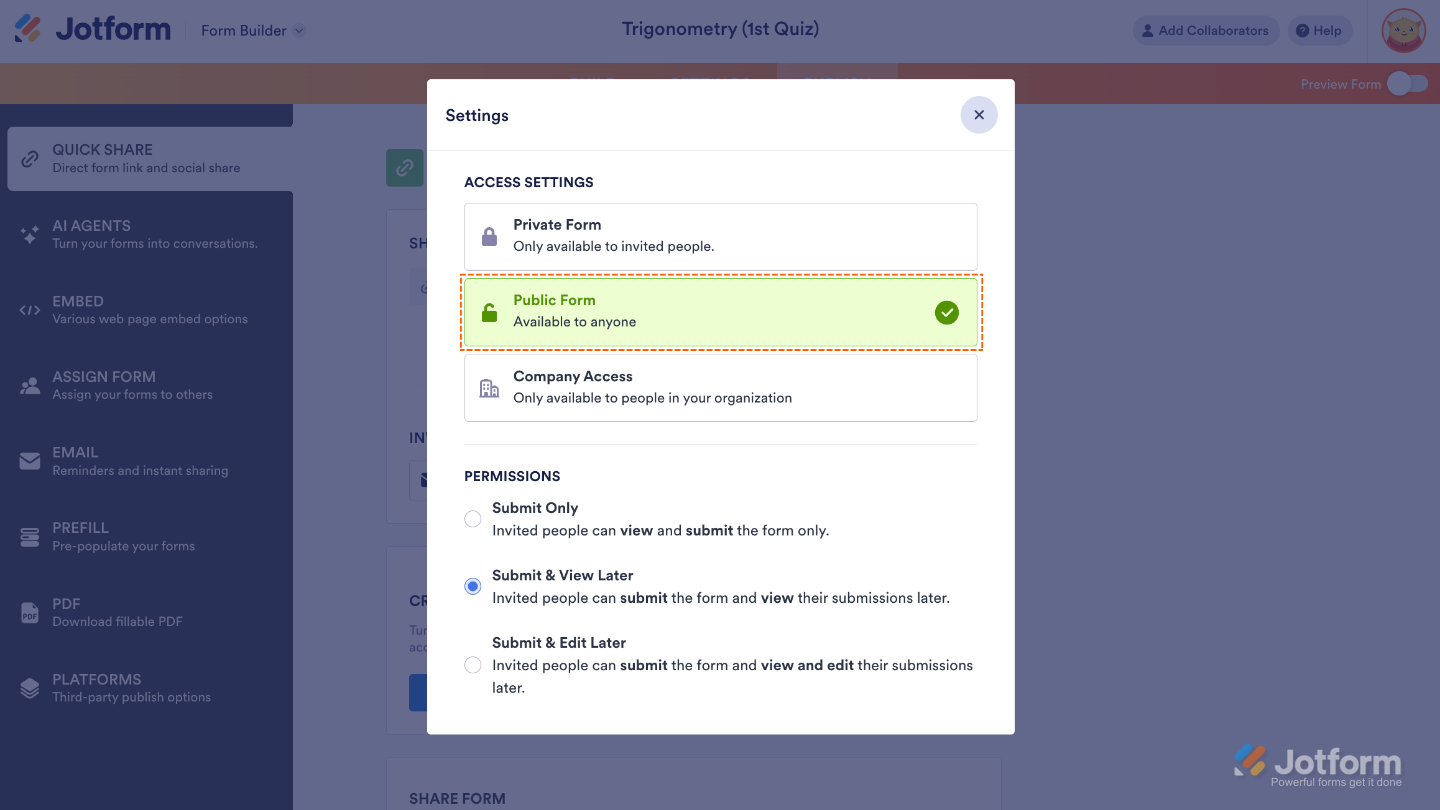
Public Form means your form is open to everyone. Anyone with the link can access it and fill it out, making it perfect for sharing widely or collecting responses from a broad audience.
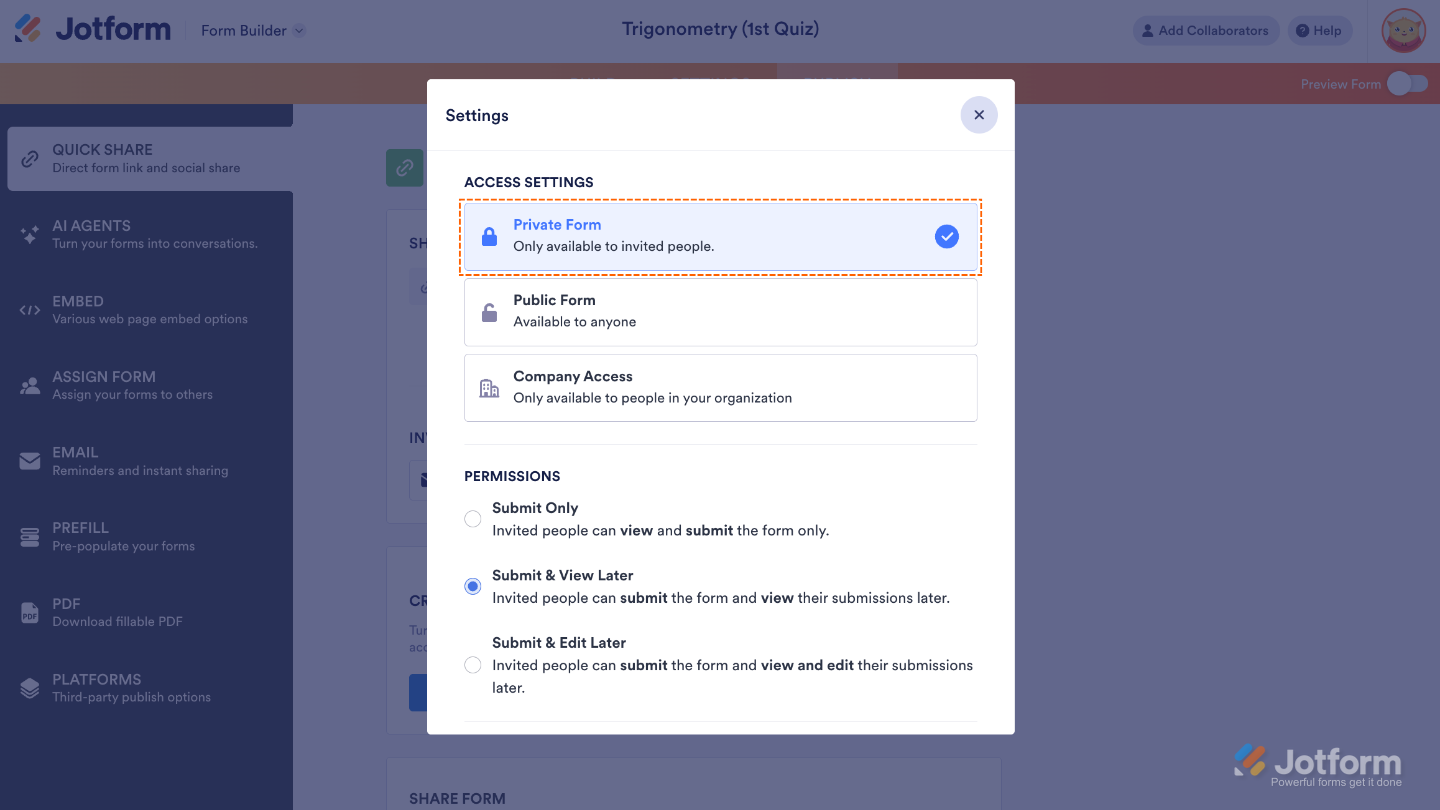
A Private Form is only accessible to people you personally invite. Once they receive and accept the invitation as assignees, they’ll need to log in (or create an account if they don’t have one yet). From there, you can decide exactly what level of access or permissions each person should have, giving you full control over who can view or work with your form.
Company Access lets you restrict your form to people who use an email address from a specific domain, such as your company or organization. You can set it so users must enter an email that matches your chosen domain before they can view or fill out the form, helping keep access limited to the right audience.
Check out our guide on Assigning Forms to Company Members Only to learn more.
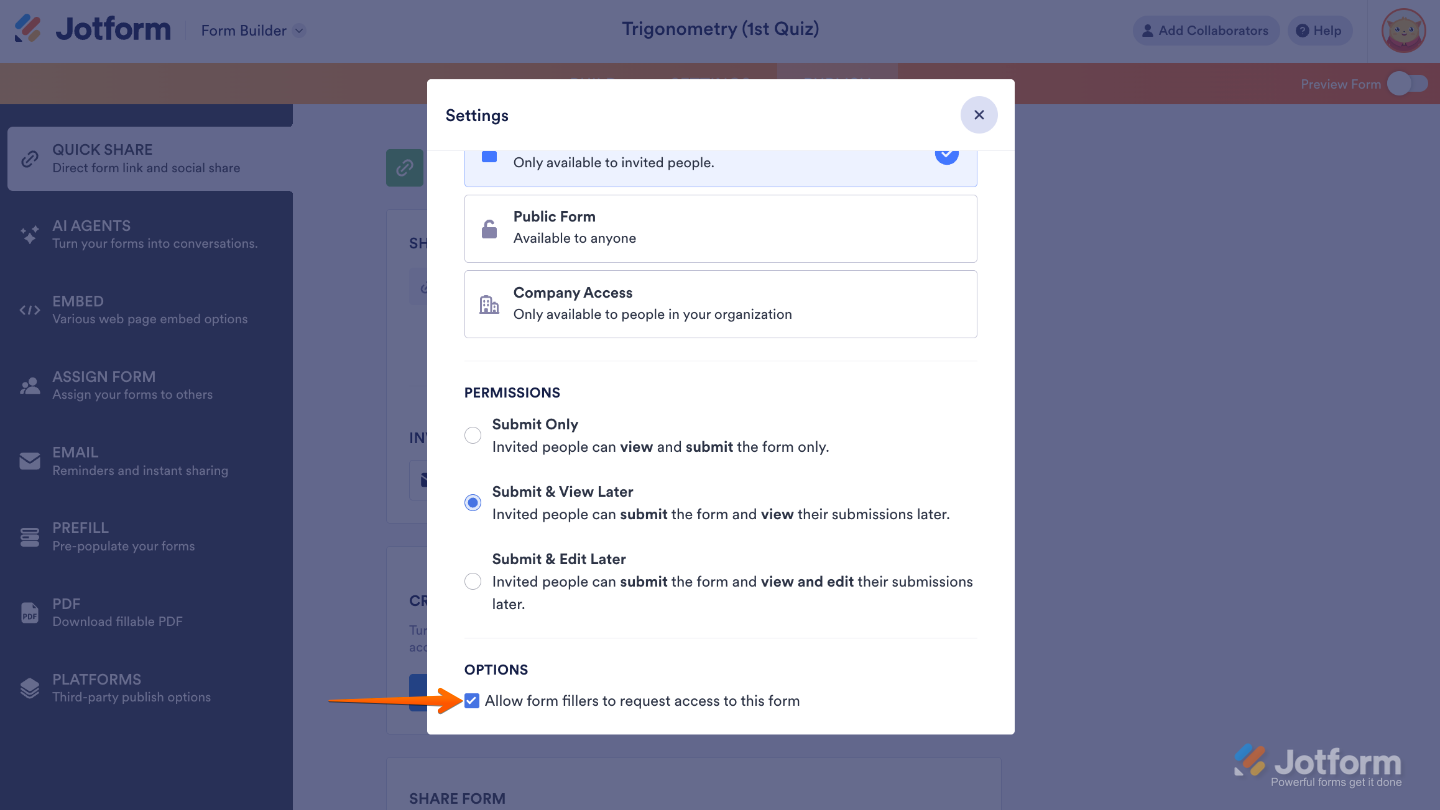
Each Access Settings gives you these permissions:
- Submit Only — Use this if you only want form fillers to view and submit the form.
- Submit & View Later — Choosing this option lets form fillers submit the form and view their submissions later. We have a guide about How to Let Users View Their Submissions that you can check out.
- Submit & Edit Later — Select this if you want to let form fillers submit the form and edit their submissions. To know how to let the form fillers edit their submission, check out the guide on How to Let Users Update Their Form Submissions at a Later Date.
For Private or Company Access forms, anyone not invited—or with an email outside your set domain can request access. To turn this off, just uncheck Allow Form Fillers to Request Access to This Form in the Settings.
You’ll find more info in our guide on How to Disable Request Access for Private and Company Access Assets.
Note
- Public Form is the default setting, meaning anyone with the link can access your form.
- People you invite can view and edit their submissions by logging into their accounts—just like form assignees do. For more details, check out our guide on Accessing Forms Assigned to You.
Sending Email Invitations with Permissions
Easily invite people to fill out your form while controlling who can access it. With email invitations, you can manage permissions, track responses, and make sure only the right people can view or submit your form. Here’s a quick how-to:
- In Form Builder, in the orange navigation bar at the top of the page, click on Publish.
- Next, in the Invite by Email section, click on the To field.
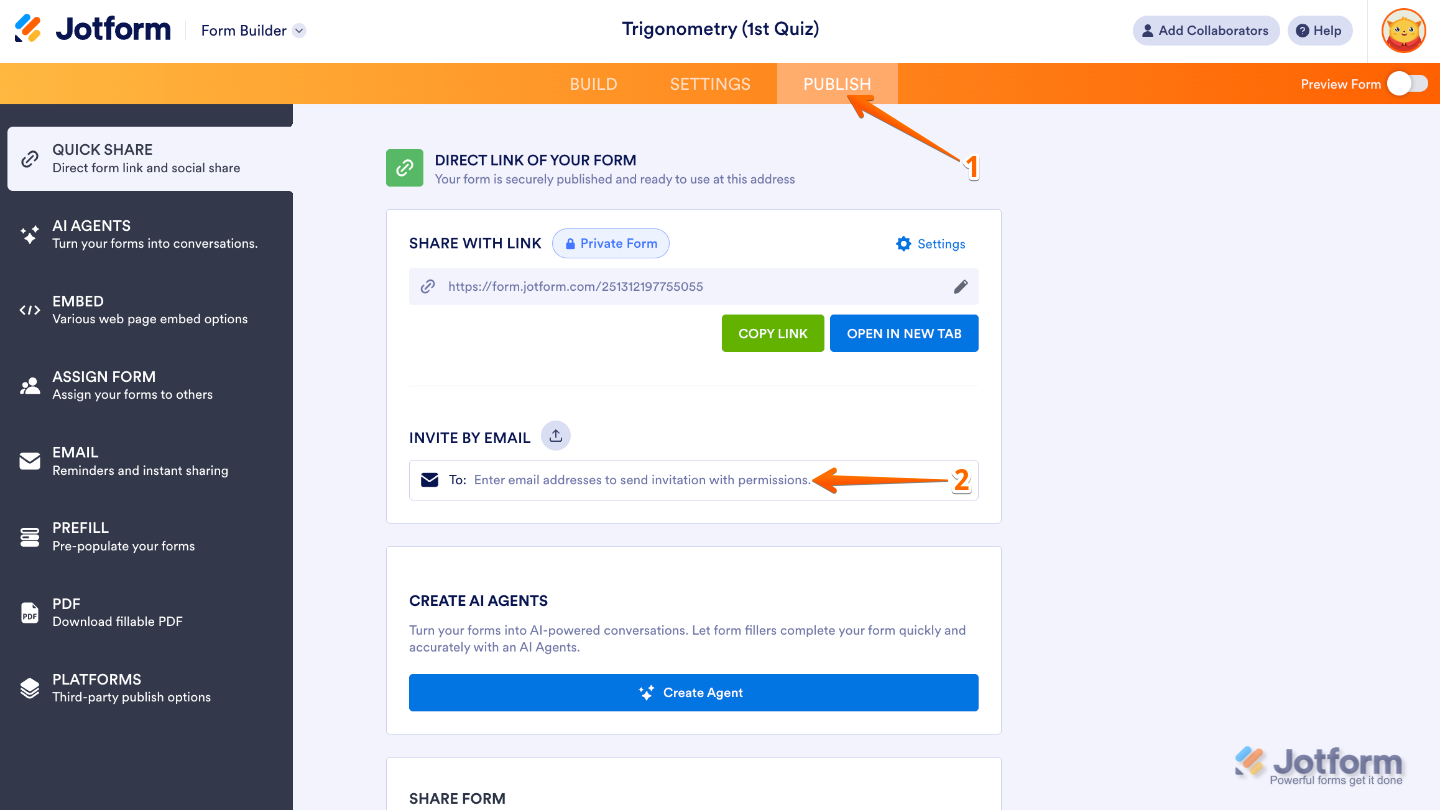
- Now, enter the email addresses of the people you want to invite, add an invitation message, and then click on Send Invitation.
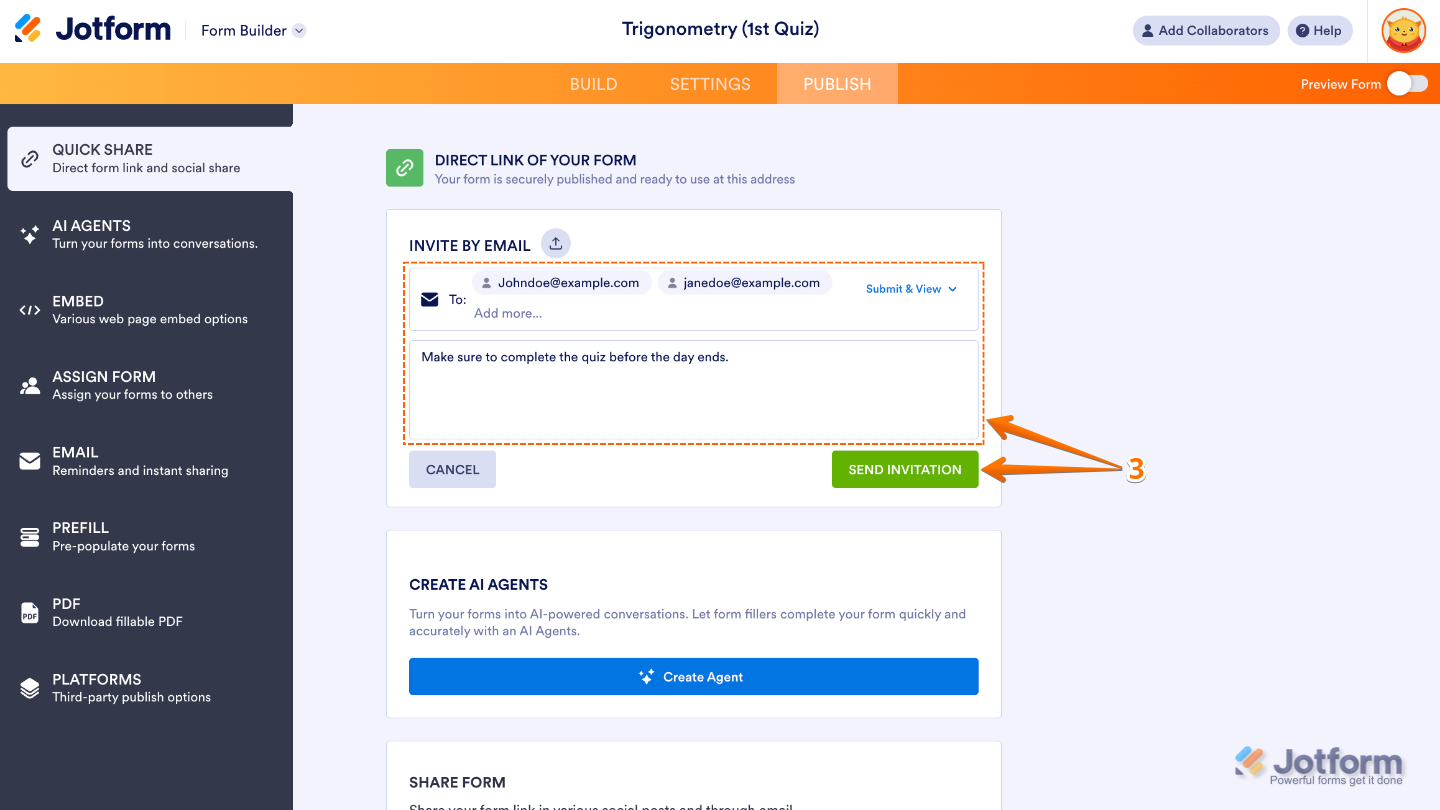
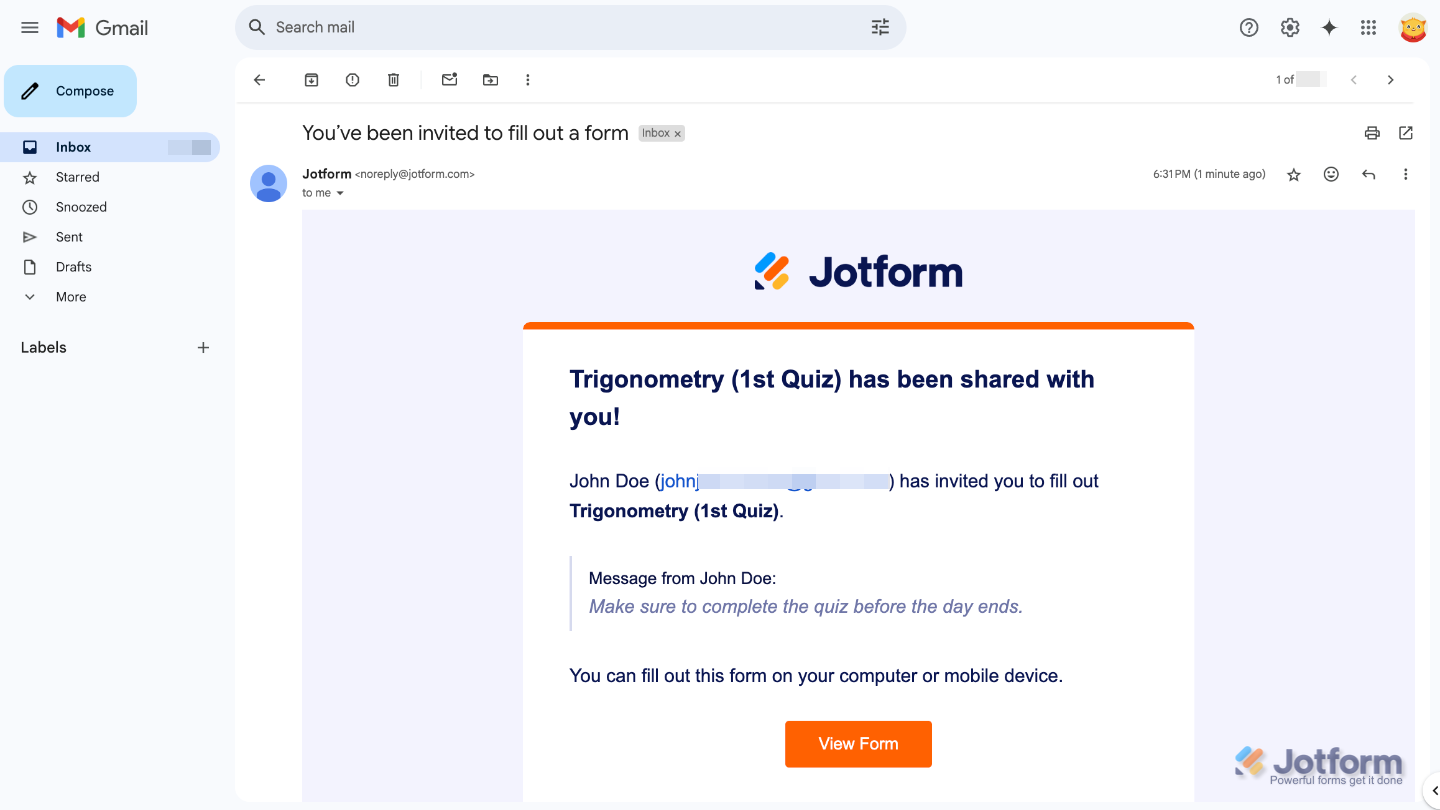
That’s it. Here’s an example of the email your invited users will receive.
Notes
- Anyone you invite to fill out your form will need to log in to the account linked to the email you sent the invitation to when they click the View Form button. This applies no matter what access settings you’ve chosen.
- Each recipient gets their own individual invitation email, so if you invite multiple people, they won’t see who else received the invite.

Send Comment:
11 Comments:
April 8, 2025
Hi,
How can I give a user access to submissions from others?
January 9, 2025
when I invite someone to complete the form it requests a google account. How do I stop this and just provide a direct link to my customers. Including text....
August 21, 2024
I have my form set to Private, and people outside of the company are still asking for access, and it's archived! How can I disable it completely without deleting it?
December 1, 2023
The login feature is so sporadic. All of our forms are public but for some reason, it asks some people (completely random) to sign in. Also if you invite them from the 'Direct links to your form' it won't let people fill it in until they log in.
Whats going on?
July 23, 2023
I’ve been contacted from someone that said there from jotform. I need to know if this is legit or a scam. They are texting me now?????
April 7, 2023
Hi, I'am trying to view / test drive my app but when I click on the link via my smartphone it requires me to optin via registration, this also happens after I followed the instruction link,
February 17, 2023
I have mine set on public but a few people have told me they are unable to access it. Others are able to. What exactly is the problem?
September 19, 2022
Hello,
I work at a high school and created a registration form using Jotform. We'd like the form to be open to students logged into their school Google Mail account, and had hoped to be able to turn on permissions for the form by using the student domain - students.d125.org. However, my school domain is @d125.org, and Jotform will not accept the student domain.
Help?
September 17, 2022
Hi there, my form is set to public but when the link is sent it still asks for login. Why is this please?
June 21, 2021
Can multiple email domains be entered or can it only be a single domain?
March 18, 2021
Inicialment el formulari era públic, però un cop vaig variar l'accés a privat i ara no em deixa tornar a fer-lo públic, podeu ajudar-me? Gràcies!