Note
This guide is for prepopulating a form with the same data previously entered, right after submission. For prepopulating the form with data from existing entries, see Tables Prefill.
Sometimes, there are cases when multiple submissions are made to a form, one after the other, and the same data (for some fields) is repeatedly typed for each submission.
You can set up the form to copy the data from the previous submission and prepopulate the fields with that data in the new submission. This way, the fields that will have the same data as the previous submission don’t need to be filled again.


The way that this work is:
- A user opens the form, fills in the data, and submits the form.
- The form filler lands on the Thank You Page where they can click a link or button back to the same form, but this time, the fields are pre-filled with the data previously entered. The users can also be redirected back to the form directly, bypassing the Thank You Page, after submission.
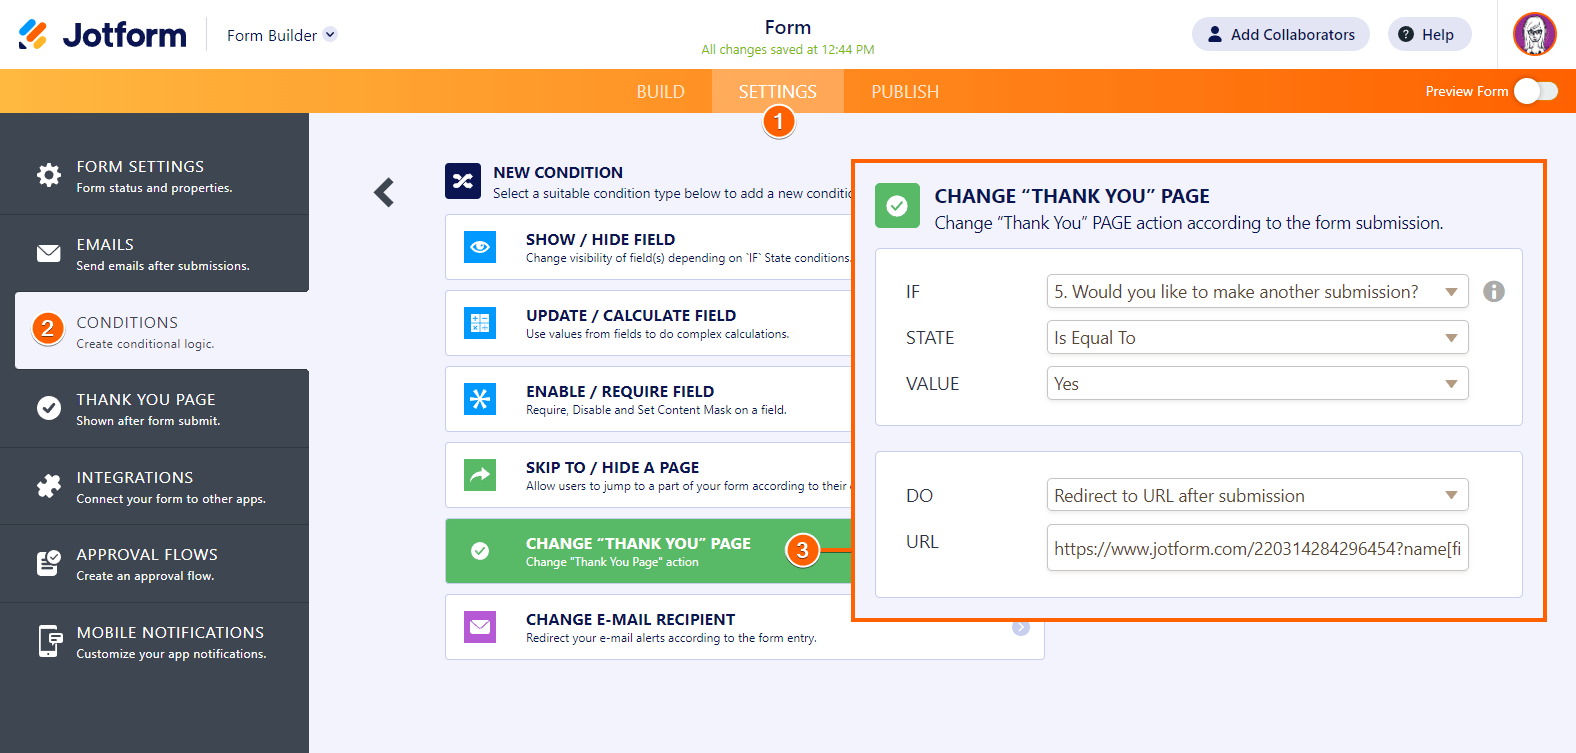
You can achieve this using the Fill Again Action Button or by adding a link or redirecting the users to the same form after submission and prepopulating the form via URL parameters.
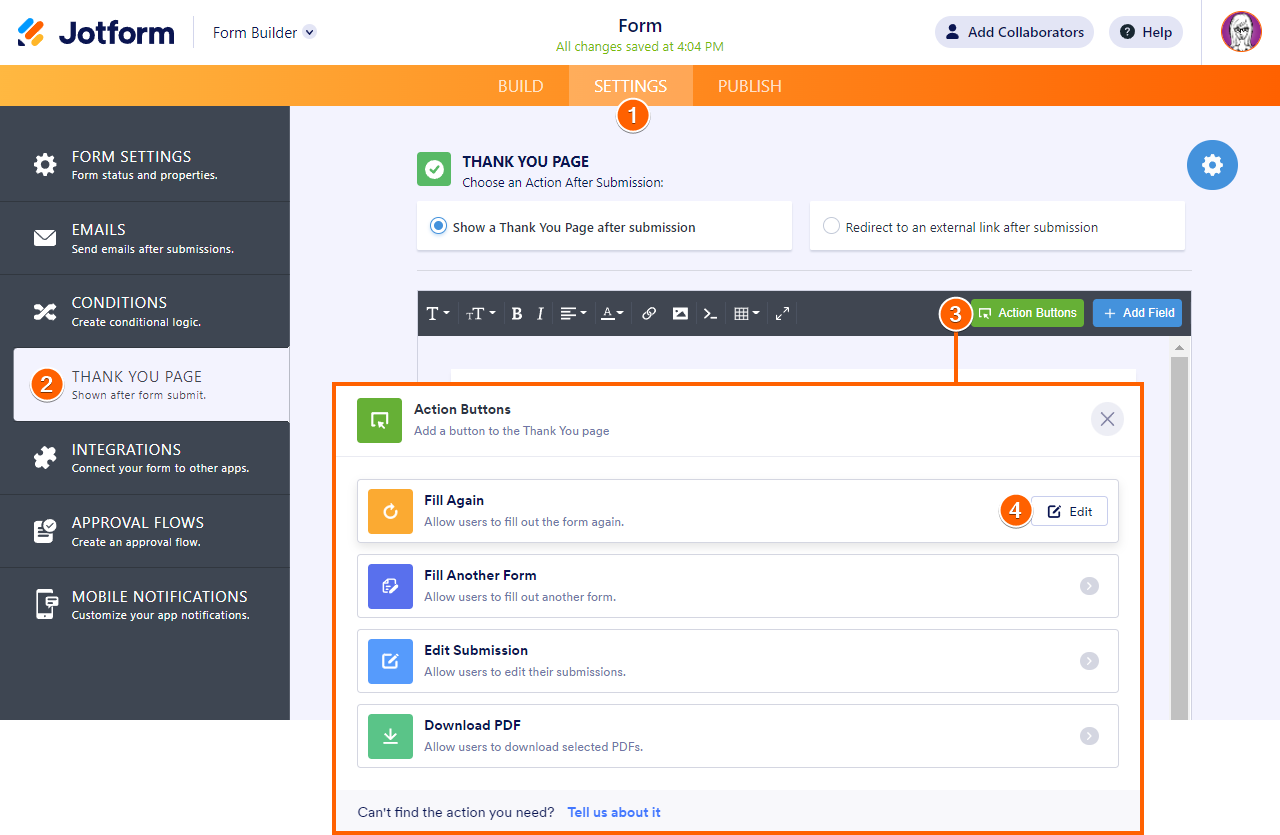
How to Set Up the Fill Again Action Button
- Open the Settings tab in the Form Builder.
- Choose Thank You Page on the left.
- Make sure that the Show a Thank You Page after submission option is selected.
- Click Action Buttons in the editor.
- Select the Fill Again option.
- Change the button name if needed.
- Click the Set Prefill button.
- Set the Prefill Form Fields option to “On”.
- Select the form fields to prefill.
- Click the Save button to save the changes.
- Finally, click the Save button again to complete the setup.
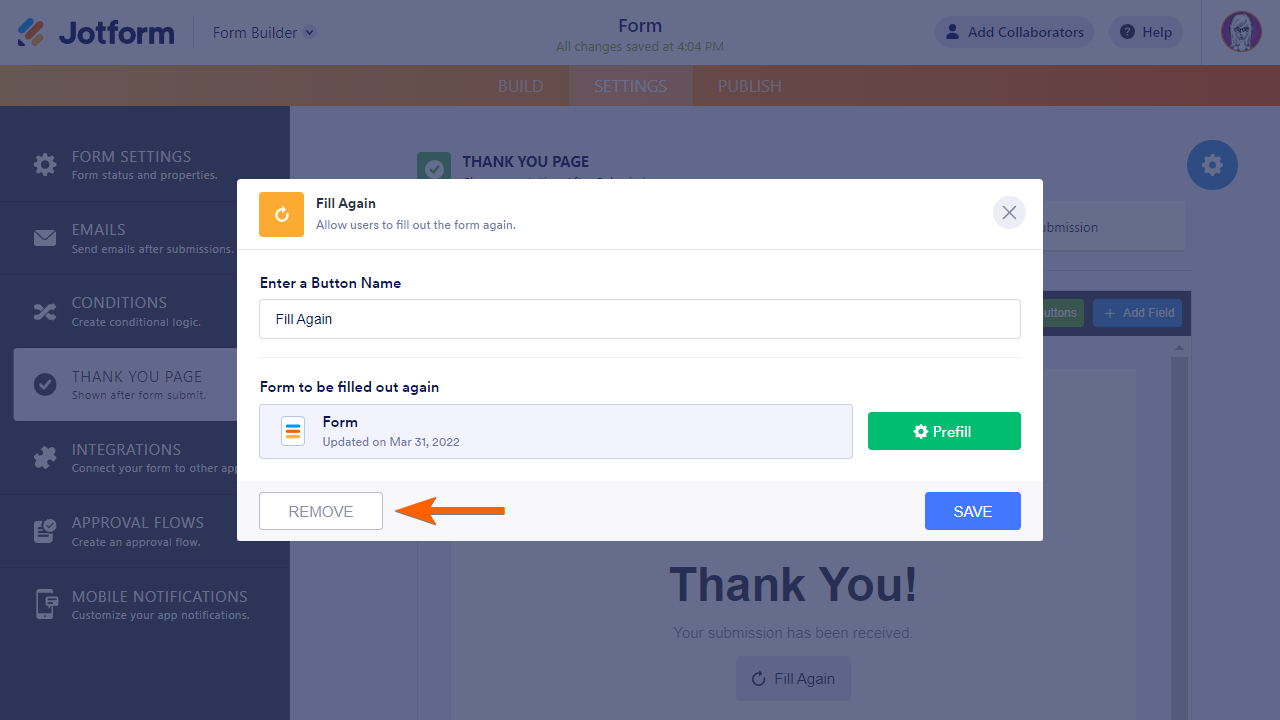
How to Remove the Fill Again Action Button
- Go to the Settings tab in the Form Builder.
- Choose Thank You Page on the left.
- Click Action Buttons in the editor.
- Hover on Fill Again and click Edit.
- Click Remove.
How to Create a Fill Again Link or Redirection
In this demo form, the fields that will be prepopulated after clicking the link on the Thank You Page are First Name, Last Name, and Email using the following URL:
https://www.jotform.com/220350738927055?name[first]={name:first}&name[last]={name:last}&email={email}The tag or unique name of a field can be found under its advanced properties. You can also check the valid URL parameters on your form using the Field Prepopulator app.
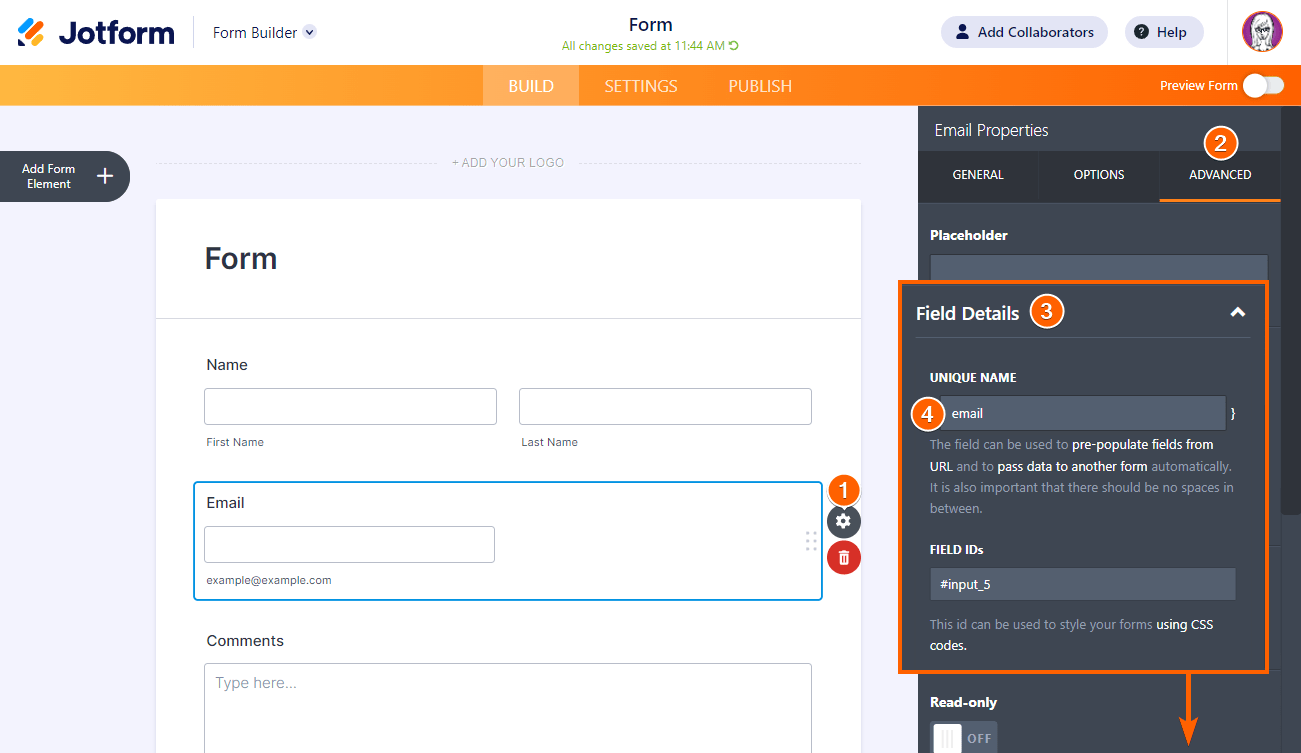
Check out the “Prepopulating Fields to Your Jotform via URL Parameters” guide to learn more.
Note
The File Upload element and some widgets cannot be prepopulated via URL parameters.
Adjust the redirection with the URL of your form and the field names of your form and you should be good to go.
Once you have the URL with query parameters, you can show it as a link on the Thank You Page or redirect the users to the target URL after submission:
Show the Link on the Thank You Page after Submission
- Go to the Form Builder’s Settings tab.
- Click Thank You Page on the left.
- Create a new line in the editor and click on the Insert/edit link icon.
- Input the URL and the Text to display.
- Click Ok.
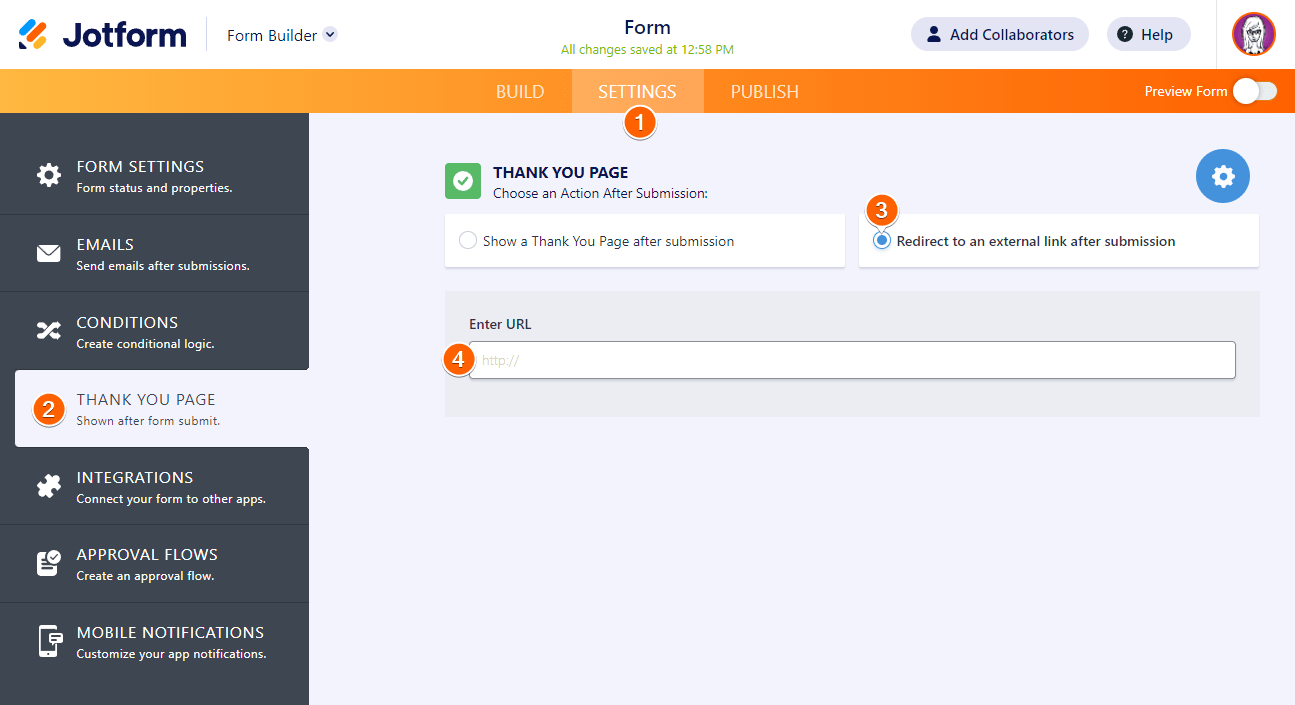
Redirect to the Same Form after Submission
- Edit your form’s Thank You Page.
- Select the Redirect to an external link after submission option.
- Input the target URL.
For more information, visit the “Redirecting Users to a Different Page” guide.
The form fillers can also be redirected conditionally.
Demo form: https://www.jotform.com/220350738927055

Send Comment:
4 Comments:
April 2, 2022
I have a form where most of the field should be prefilled when the form is used again after the click on the thank you page.
I have tried both this method and via URL parameters, but some fields can't be filled, ie the time in the arrival date field. I have the date it self filled, but the time is not and in the method mention here the field is not selectable.
February 3, 2022
The demo form opens to an error page that says "form over quota".
September 22, 2021
I am looking to use this, but the form is 'overquota' when viewing. Can you please fix.
September 5, 2021
Hi.
Teo questions:
1. Whats is the difference between prepopulate and prefill?
I have a form that prepopulates via url. If I embed this form in my website how do I send user to my website page containing the prefilled form?