Jotform’s Social Media Follower Count widget helps you display your follower count from popular social media platforms on your website. It’s a simple way to show your online presence and encourage visitors to follow your social media accounts.
Whether you’re growing your brand, promoting your business, or building an online community, the Social Media Follower Count widget helps visitors discover your social profiles and stay connected with your latest updates.
Adding a Social Media Follower Counter to your website only takes a few steps. Here’s how to set it up:
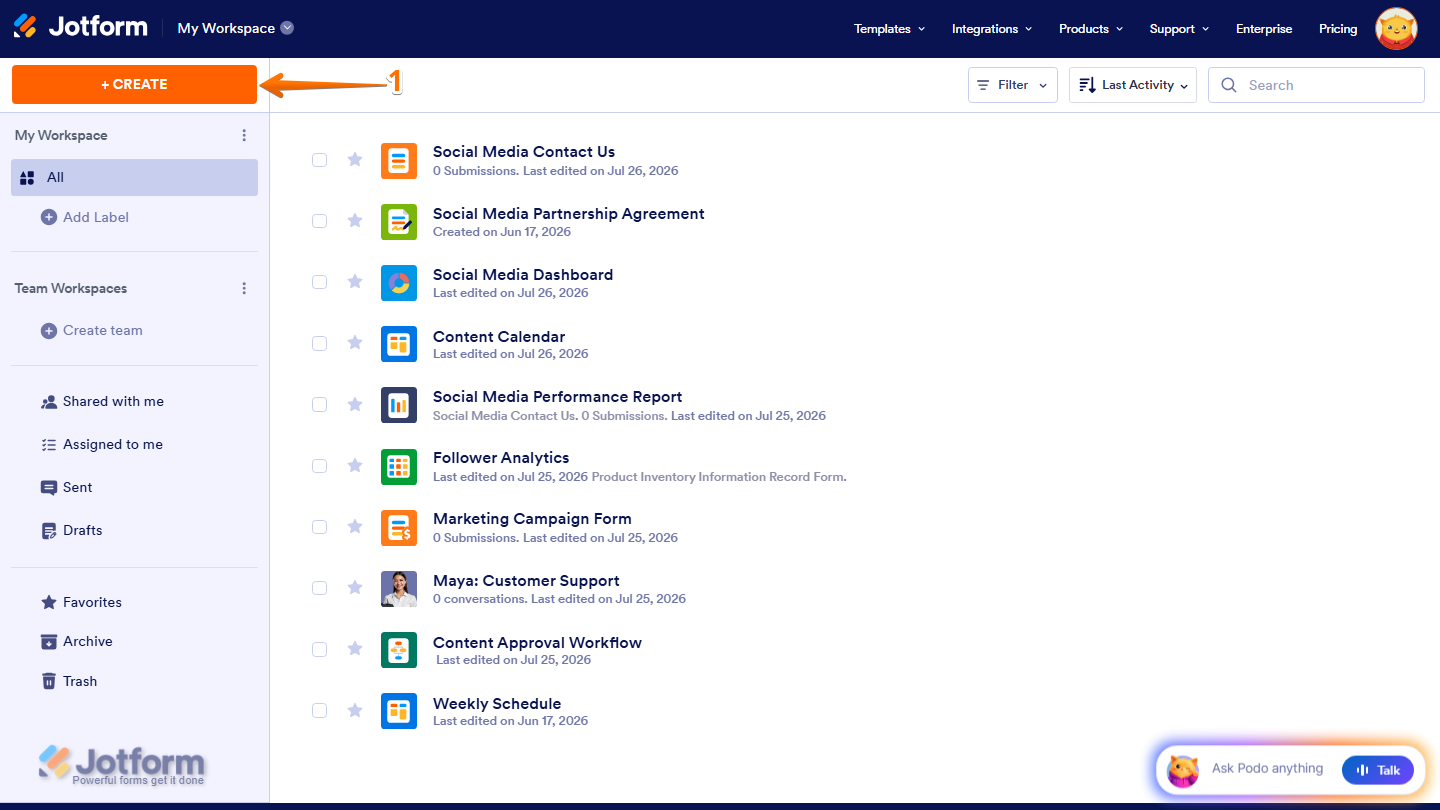
- On the top-left side of your Workspace page, click on Create.
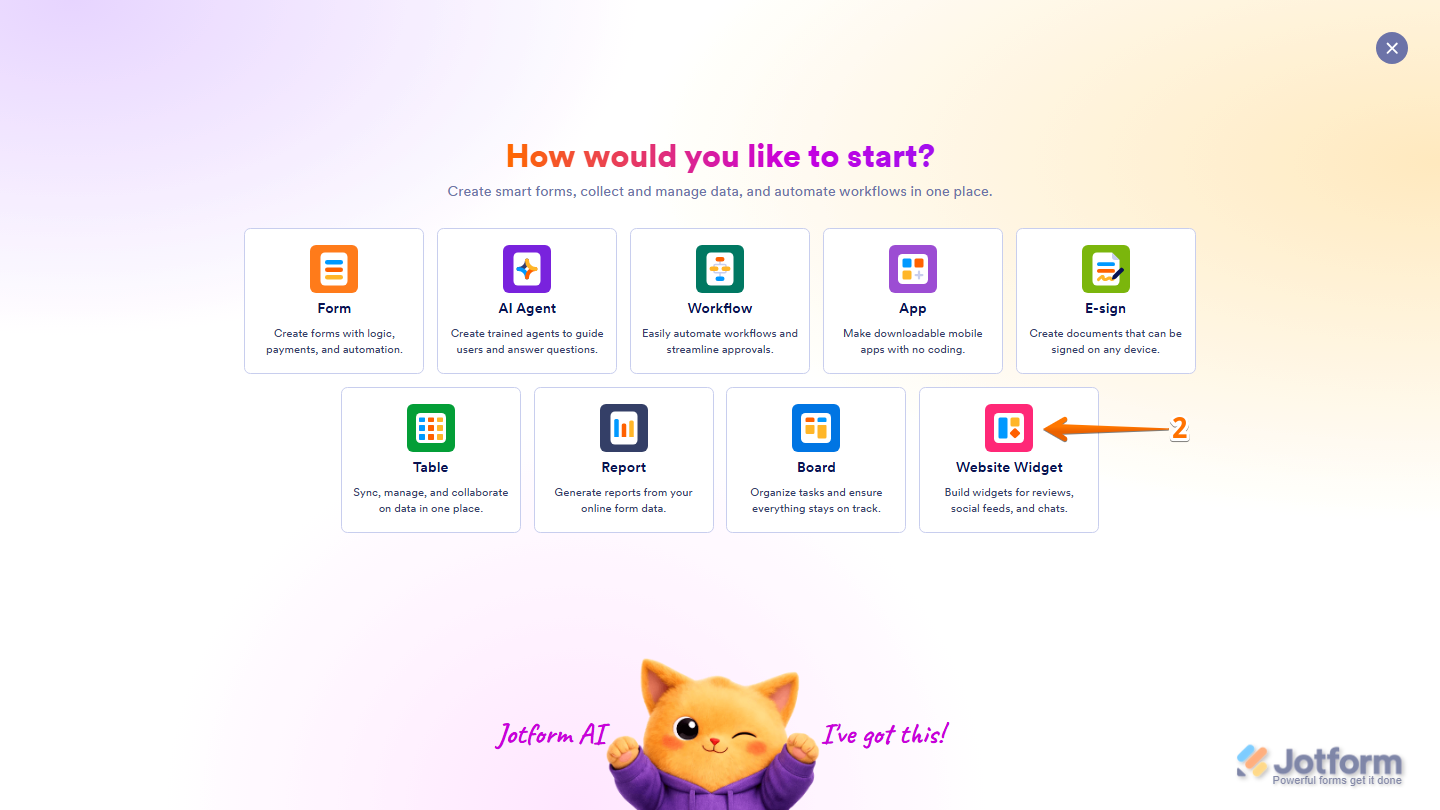
- Then, in the menu that opens up, select Website Widget.
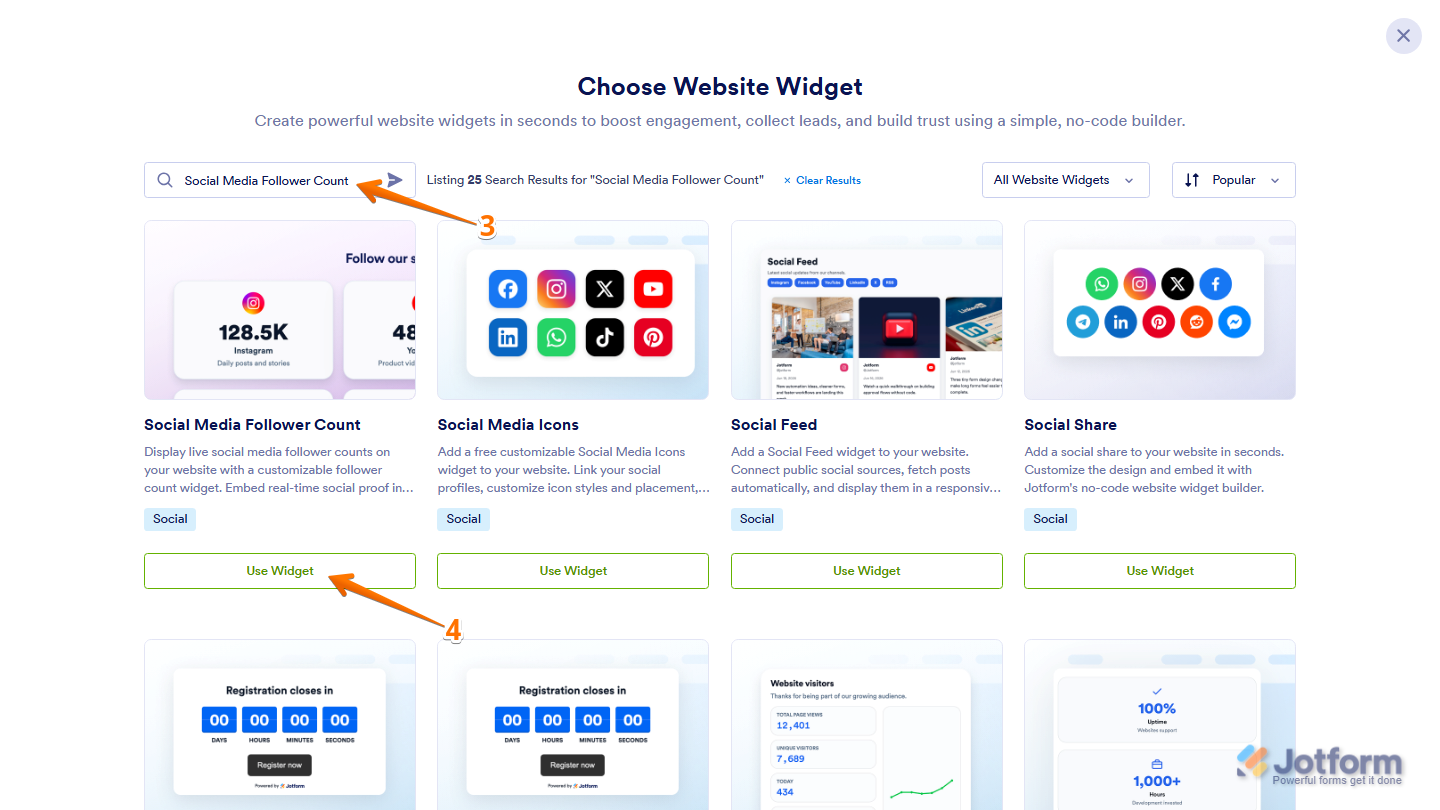
- Next, in the Search bar in the upper-left corner of the Choose Website Widget menu, enter Social Media Follower Count.
- Then, at the bottom of the Social Media Follower Count widget in the search results, click on Use Widget.
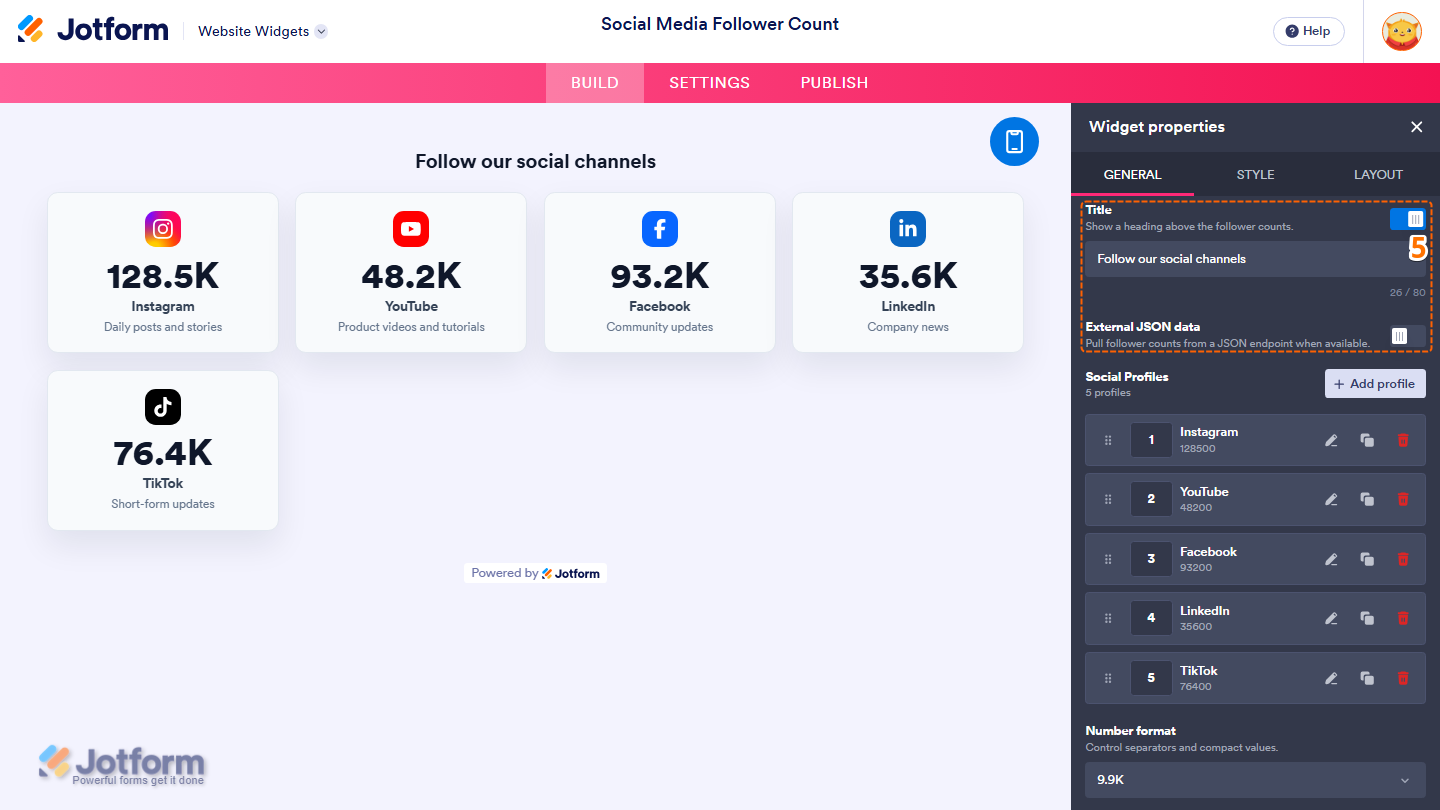
- Now, in the Widget Properties menu that opens on the right side of Website Widgets, under the General tab, set up these properties:
- Title — Toggle this off to hide the heading above the follower counts, or leave it enabled and, in the input box below it, delete the existing title and enter the title you want to display.
- External JSON Data — Toggle this on to pull follower counts from a JSON endpoint.
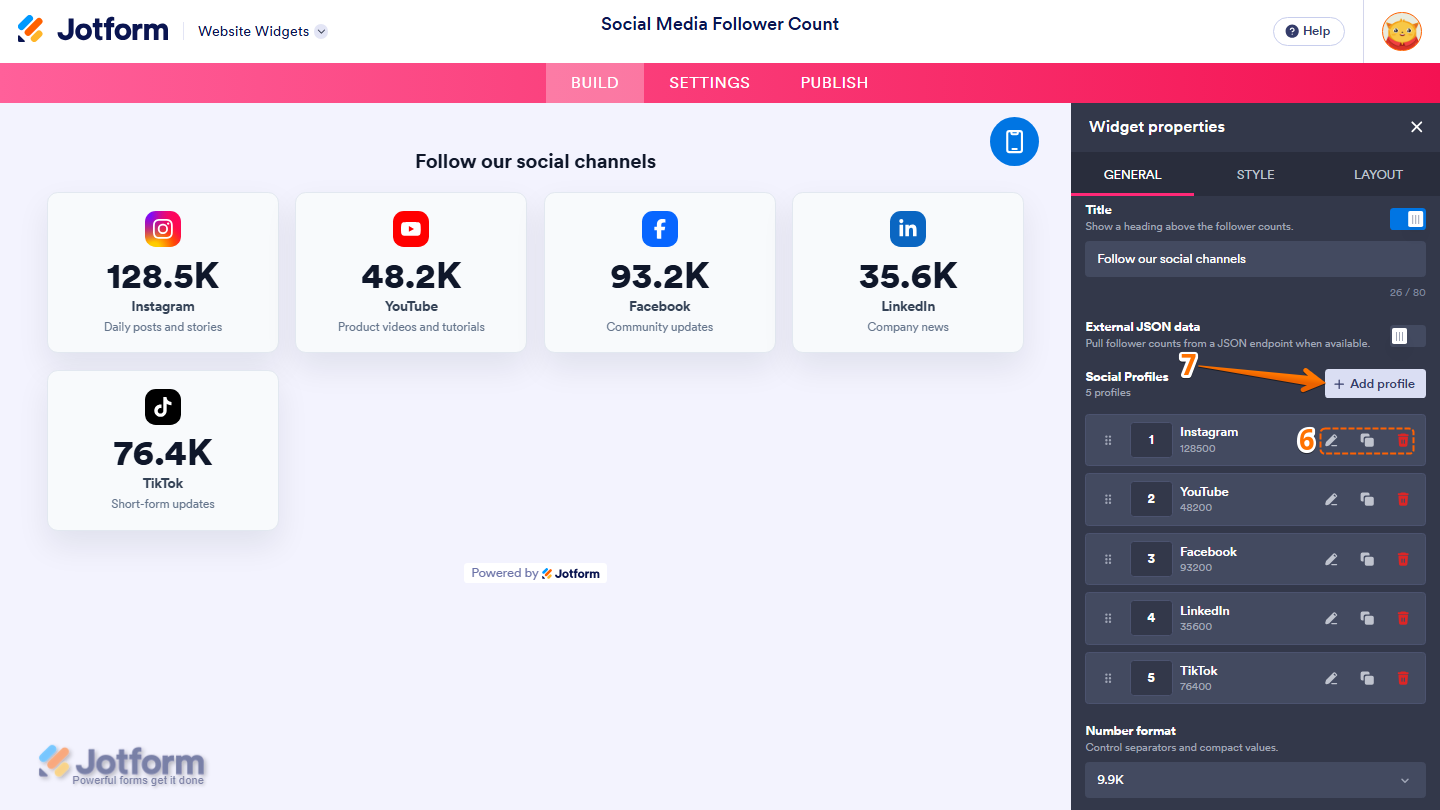
- Then, under the Social Profiles section, you’ll find sample social profiles that you can manage using these action icons:
- Pencil icon — Click on the Pencil icon to edit the social link.
- Duplicate icon — Click on the Duplicate icon to create a copy of the social link.
- Trash Can icon — Click on the Trash Can icon to delete the social link.
- To add another social profile, click on Add Profile.
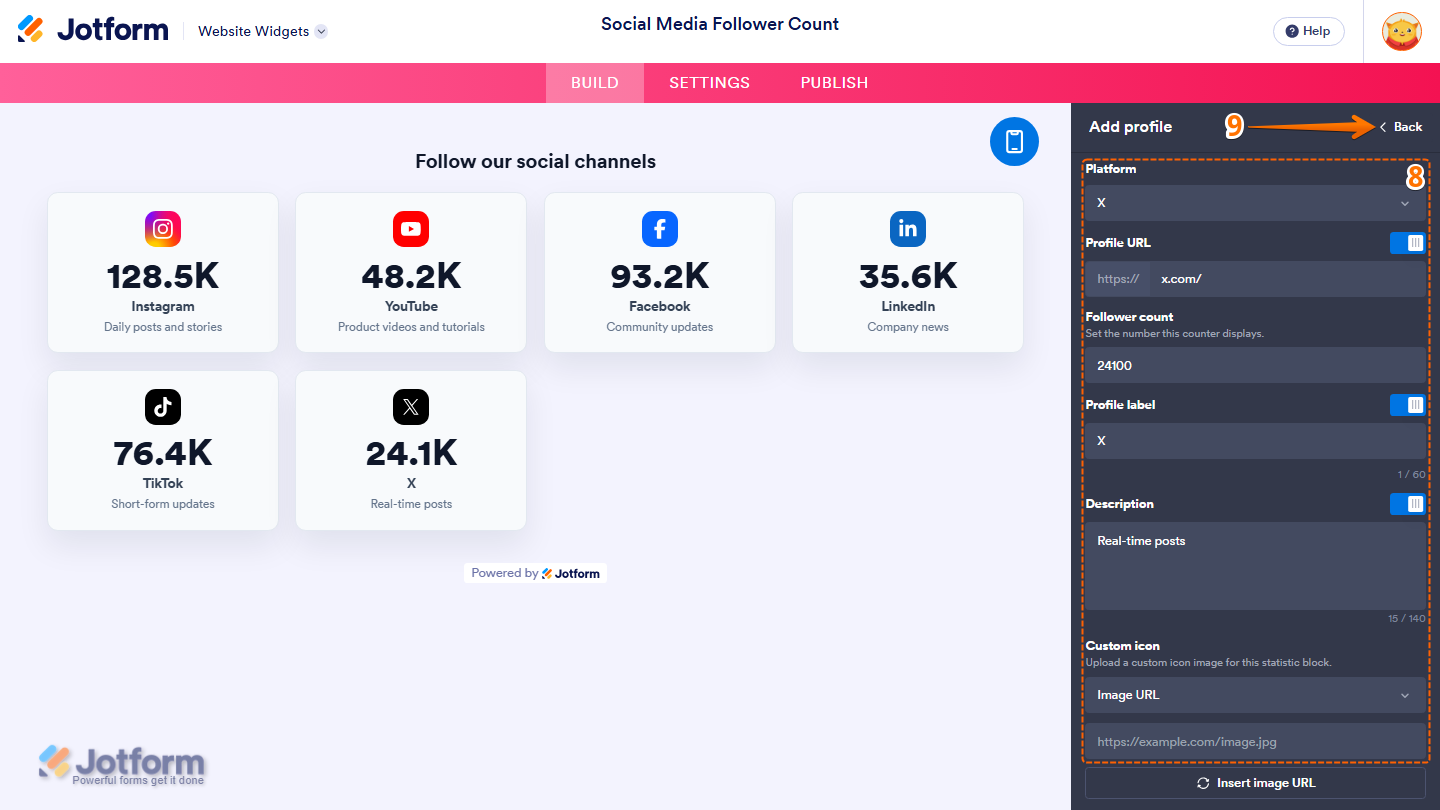
- Then, in the Add Profile menu that appears, configure these things:
- Platform — Click on the Dropdown menu and select the social media platform you want to display.
- Profile URL — Enter the URL of the social media profile you want to link to in the input box.
- Follower Count — Enter the number of followers you want to display in the input box.
- Profile Label — Delete the existing label in the input box and enter the label you want to display below the follower count.
- Description — Enter the description you want to display below the profile label in the input box.
- Custom Icon — Click on the Dropdown menu and select how you want to add a custom icon.
- Once you’re done, in the upper-right corner, click on Back to return to the Widget Properties menu under the General tab.
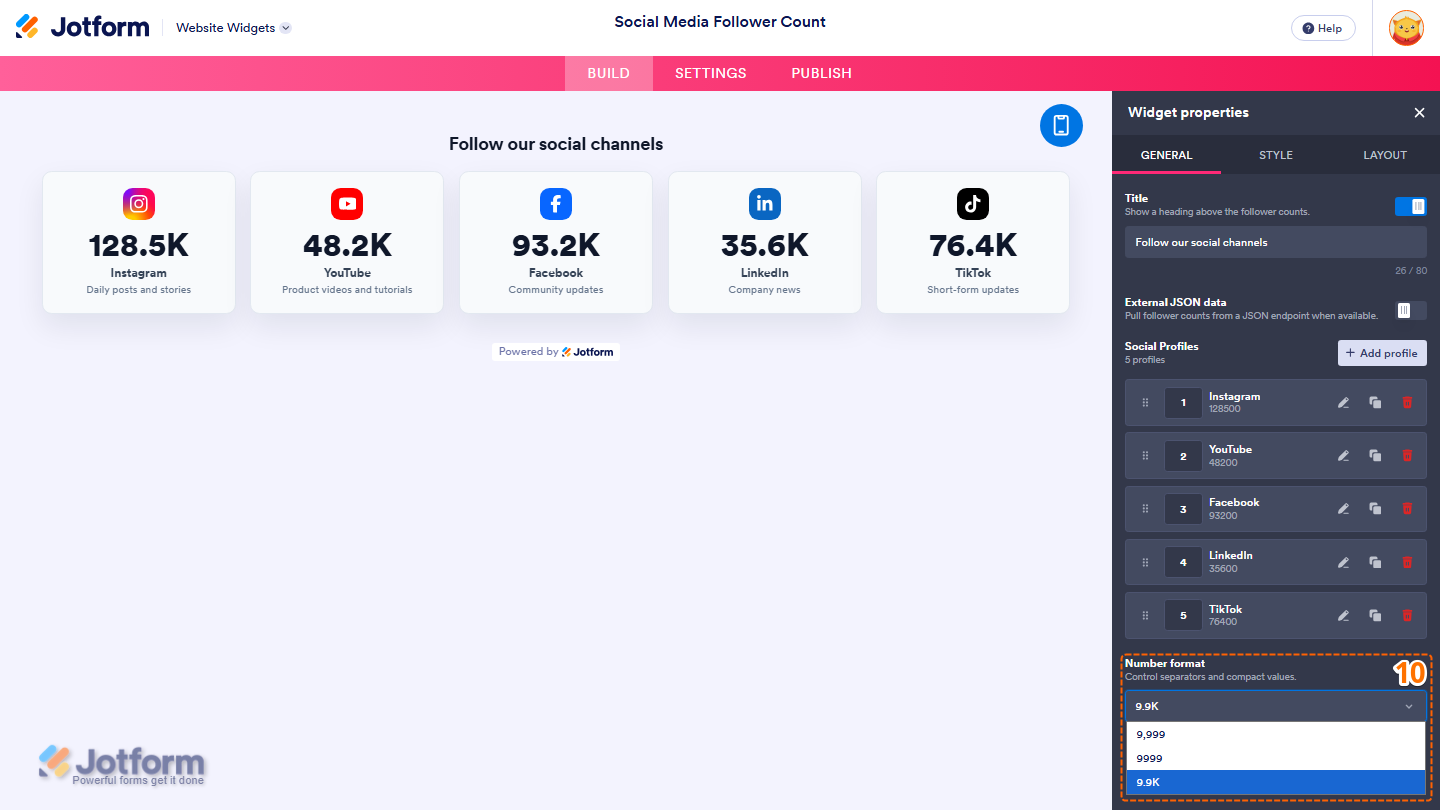
- Then, under the Number Format section, click on the Downward Arrow icon and select how you want your follower counts to be displayed from the Dropdown menu.
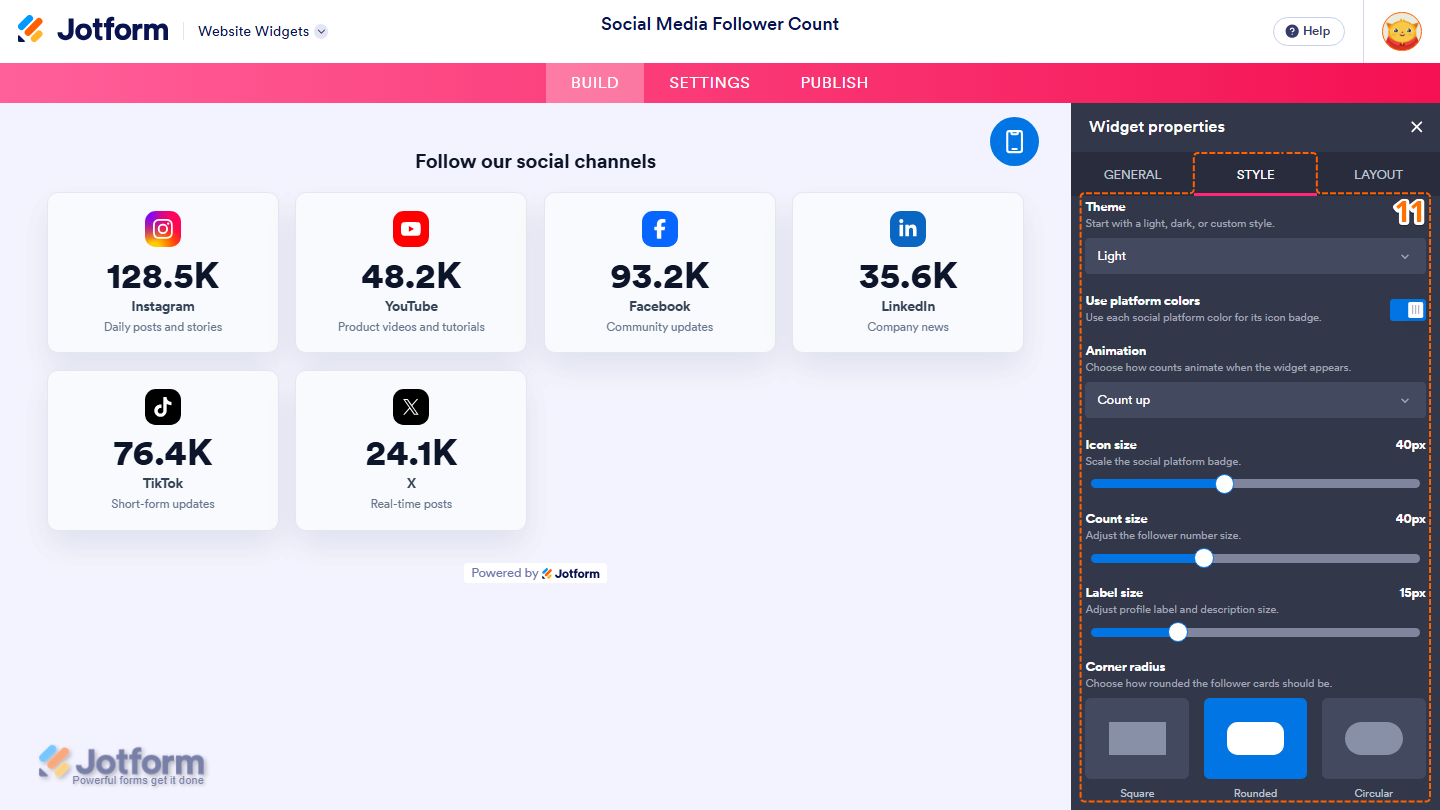
- Now, under the Style tab, customize these properties:
- Theme — Keep the default Light option selected, or click on the Dropdown menu and select a different theme to change the appearance of the follower cards.
- Use Platform Colors — Keep this on to display each platform badge using its official brand color, or toggle it off to apply the selected theme colors instead.
- Animation — Click on the Dropdown menu and select how the follower counts animate when the website widget appears.
- Icon Size — Keep the default 40px value, or click on and hold the slider handle, then drag it to adjust the size of the platform badges.
- Count Size — Keep the default 40px value, or click on and hold the slider handle, then drag it to adjust the follower count size.
- Label Size — Keep the default 15px value, or click on and hold the slider handle, then drag it to adjust the size of the profile labels and descriptions.
- Corner Radius — Select one of the following options to choose how rounded the follower cards are:
- Square — Display the follower cards with square corners.
- Rounded — Display the follower cards with rounded corners.
- Circular — Display the follower cards with fully rounded corners.
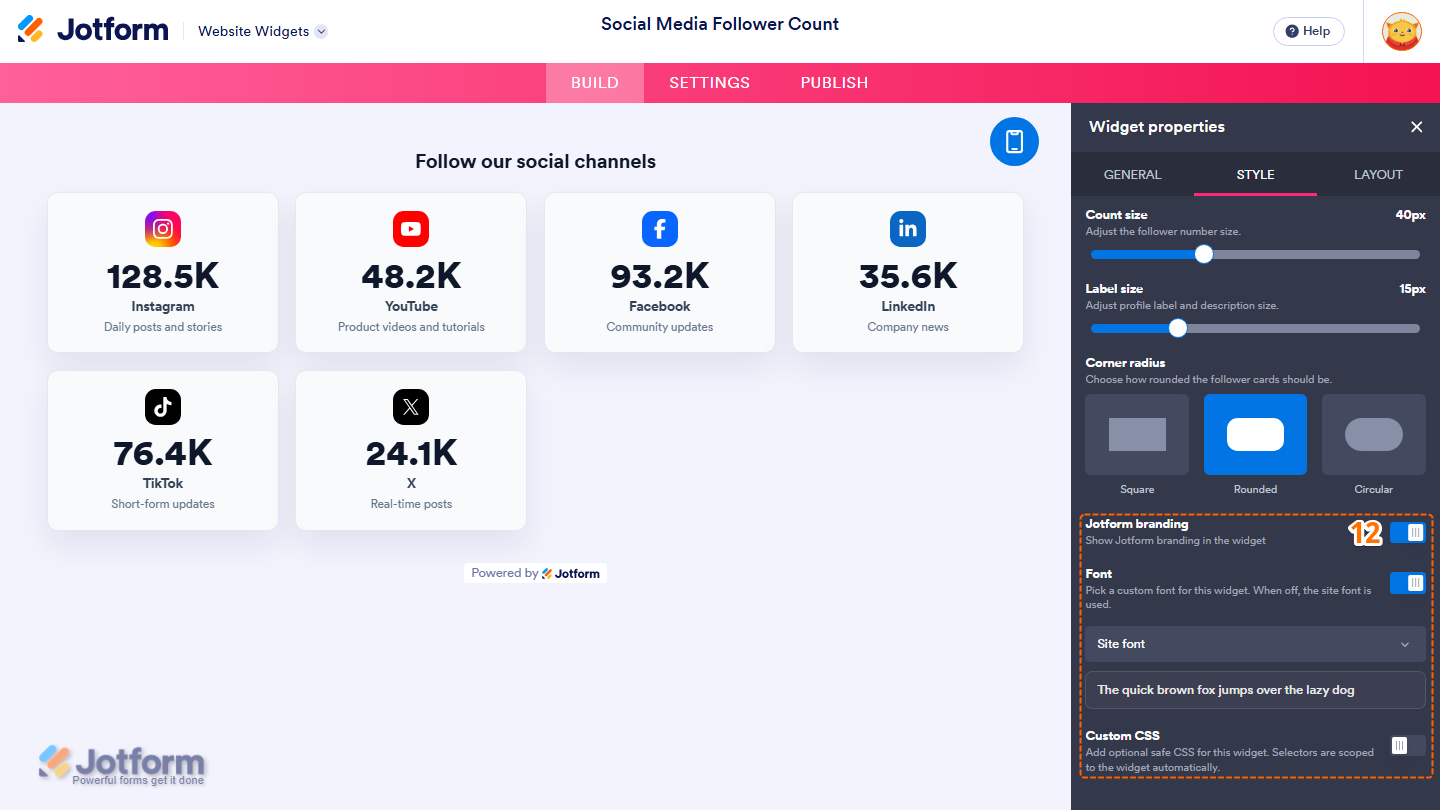
- Next, scroll down and adjust these settings:
- Jotform Branding — Keep this on to display Jotform branding in the website widget, or toggle it off to hide it.
- Font — Toggle this on, then click on the button that appears to select a custom font for the website widget. When this option is off, the website’s font is used.
- Custom CSS — Toggle this on, then enter your custom CSS in the input box that appears to apply advanced styling to the website widget.
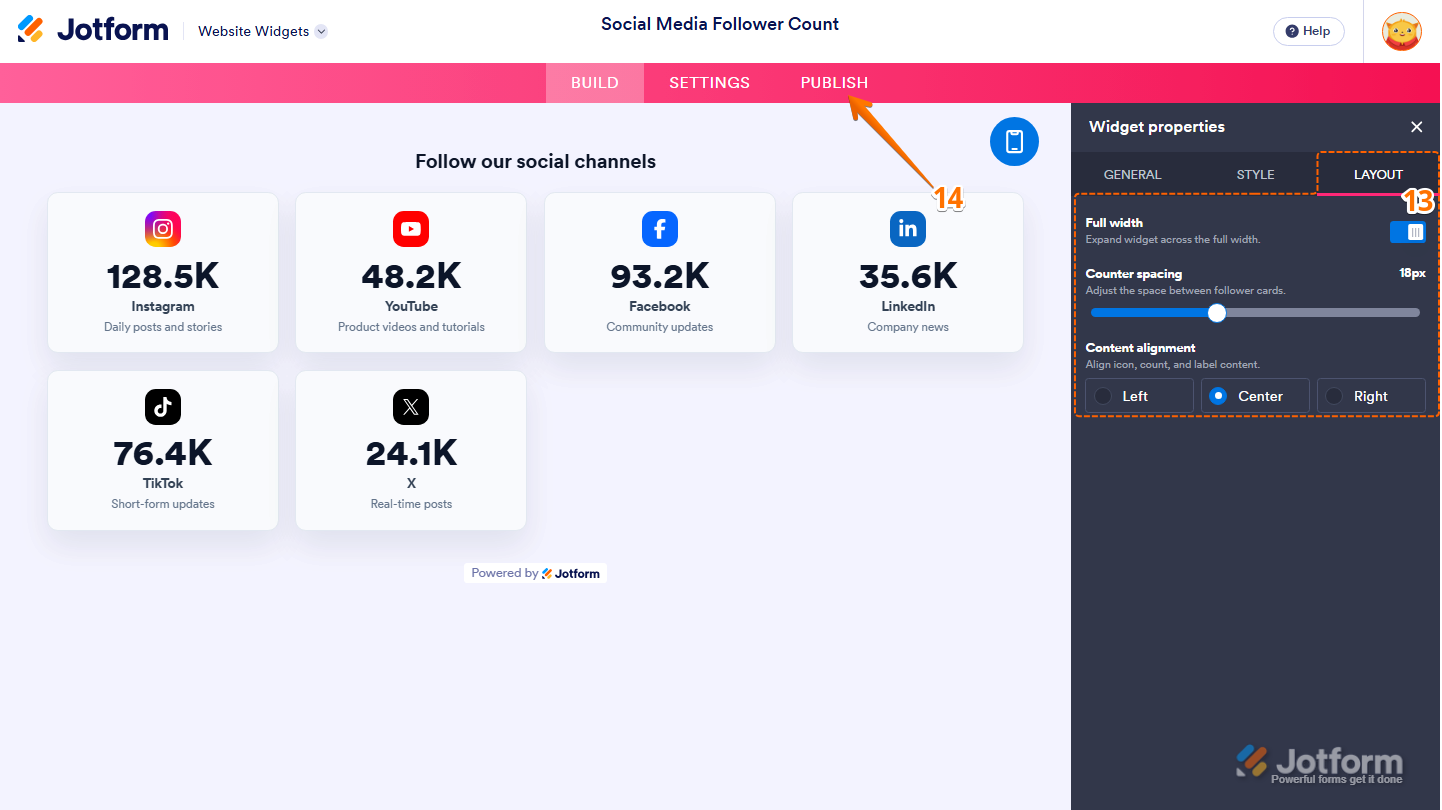
- Now, under the Layout tab, configure these properties:
- Full Width — Keep this on to expand the website widget across the full width of its container, or toggle it off to display it using its default width.
- Counter Spacing — Keep the default 18px value, or click on and hold the slider handle, then drag it to adjust the spacing between the follower cards.
- Content Alignment — Select one of the following options to choose how the content inside each follower card is aligned:
- Left — Align the icon, follower count, label, and description to the left.
- Center — Center the icon, follower count, label, and description.
- Right — Align the icon, follower count, label, and description to the right.
- Once everything’s set, in the pink navigation bar at the top of the page, click on Publish.
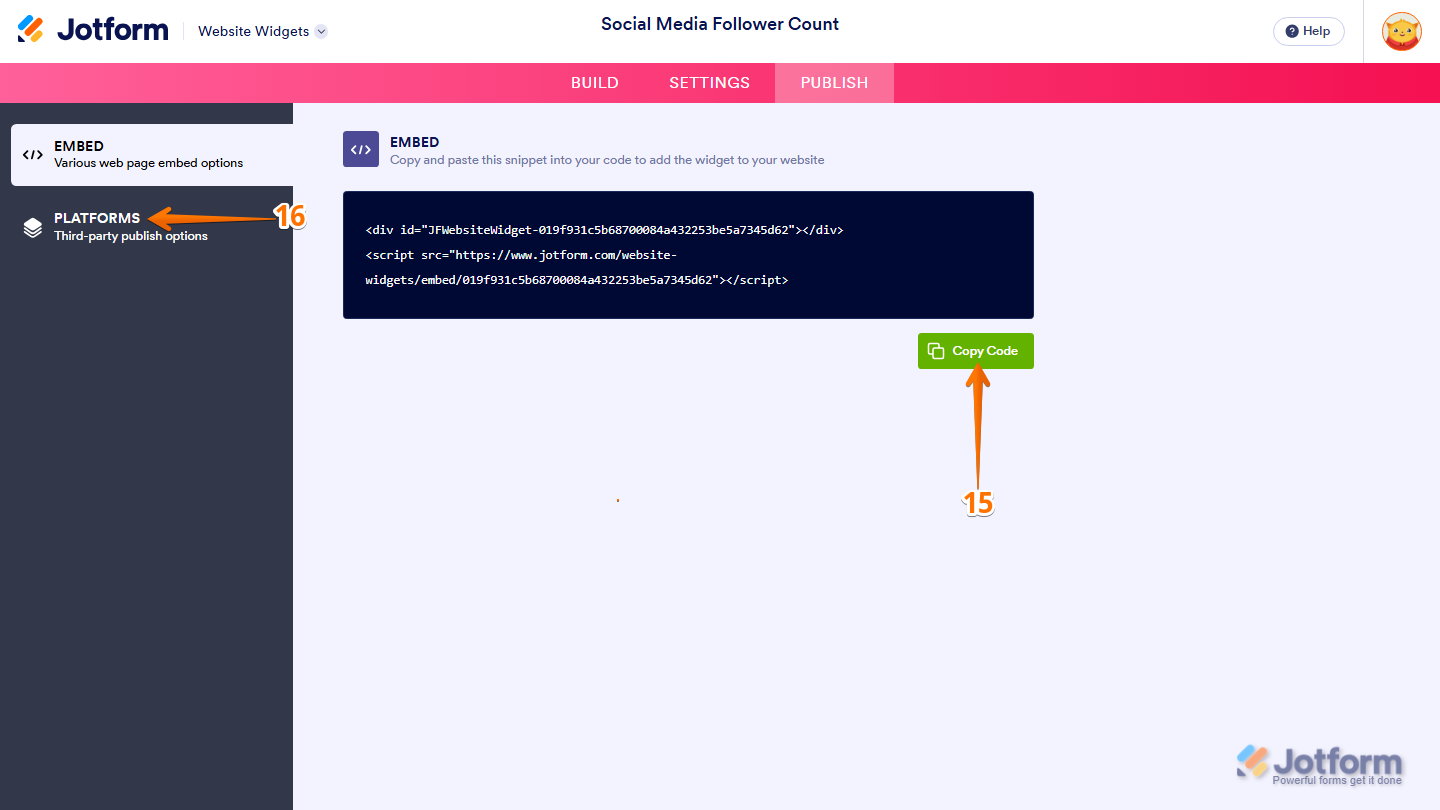
- Then, in the Embed section, click on Copy Code, and, if you already know how, paste that into the Embed section on your platform, and you’re good to go.
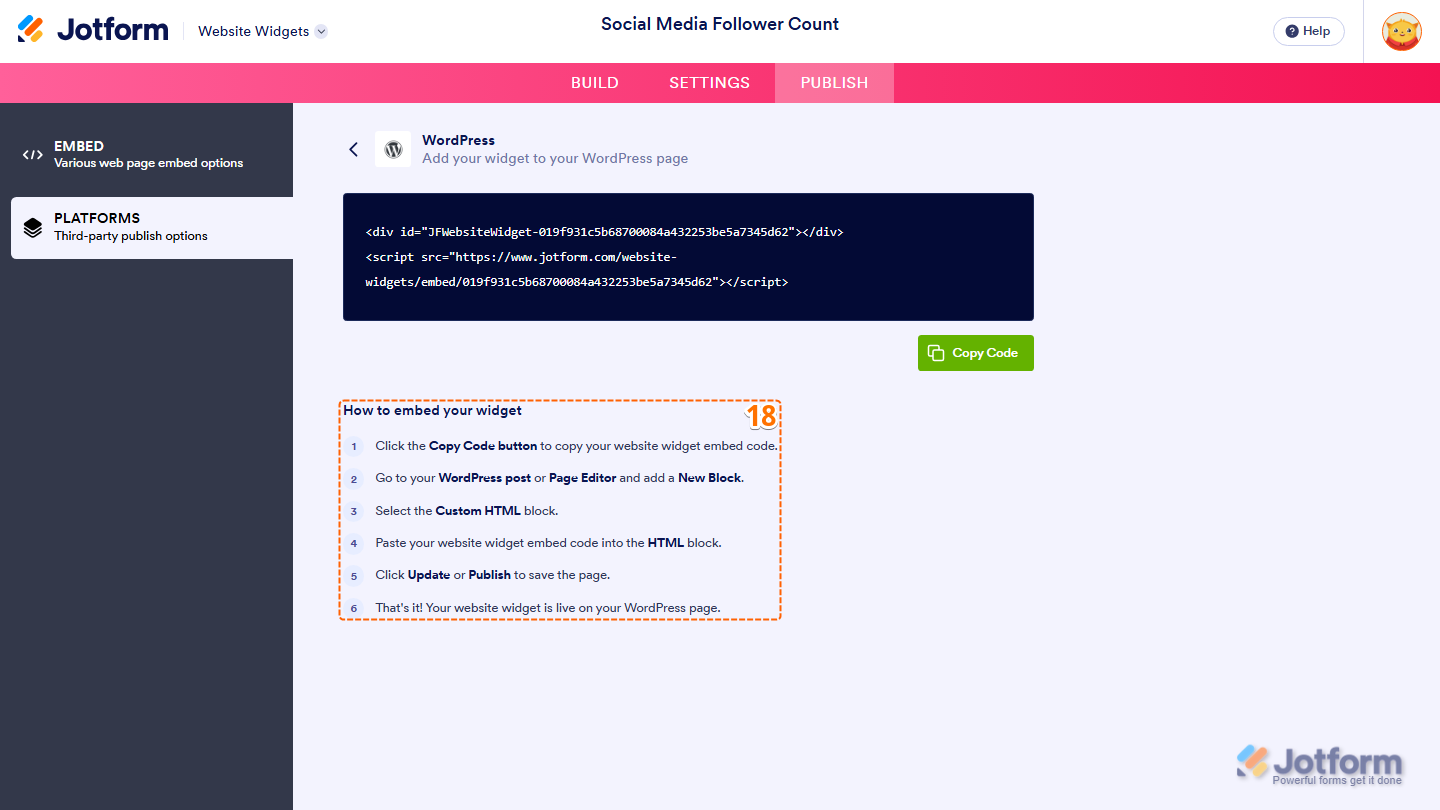
- To view embedding instructions for your widget, click on Platforms in the menu on the left side of the page.
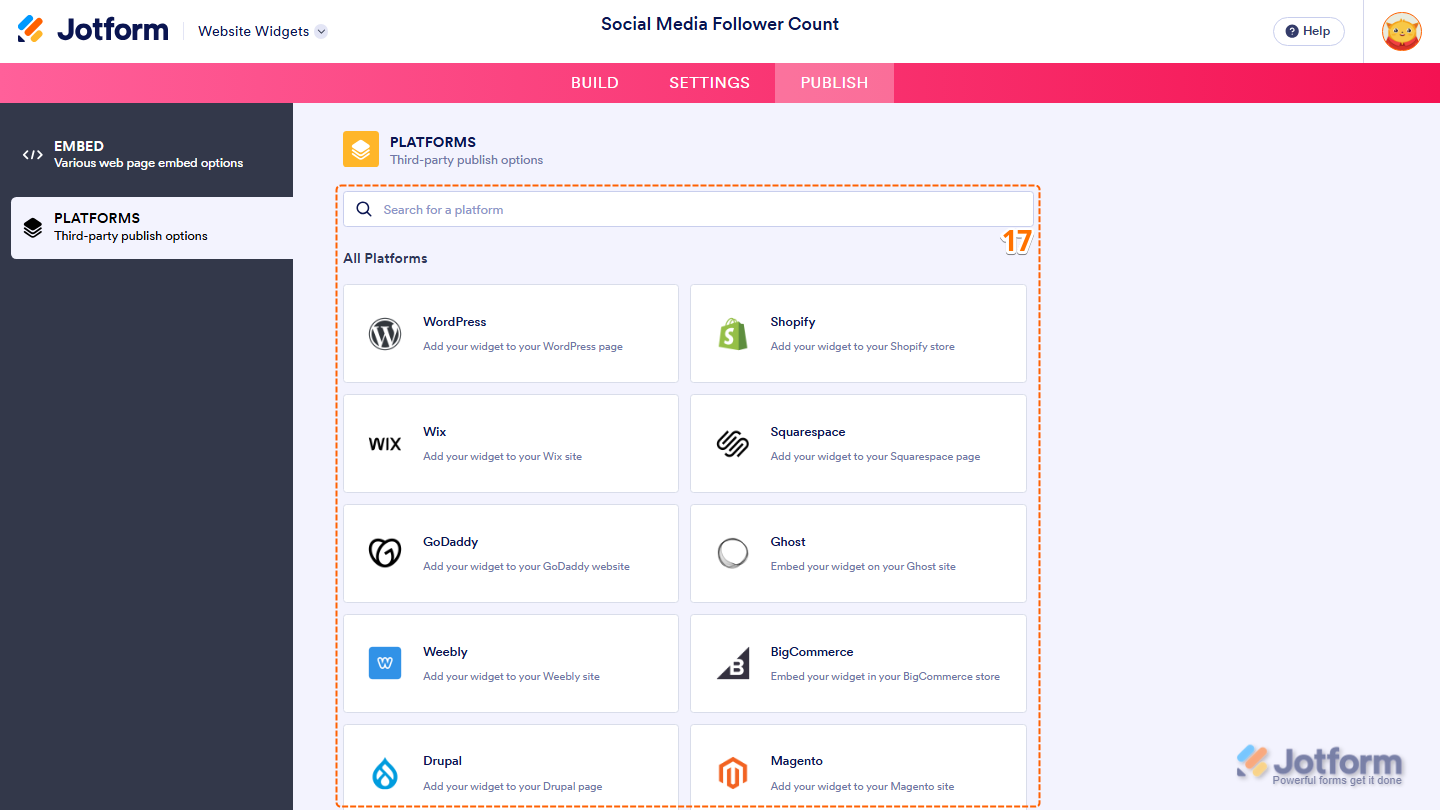
- Next, in the Platforms section on the right, select the platform you want to view embedding instructions for. Or, use the Search bar at the top of the section to find it easily.
- Then, follow the steps in the How to Embed Your Widget section to add it to your website.
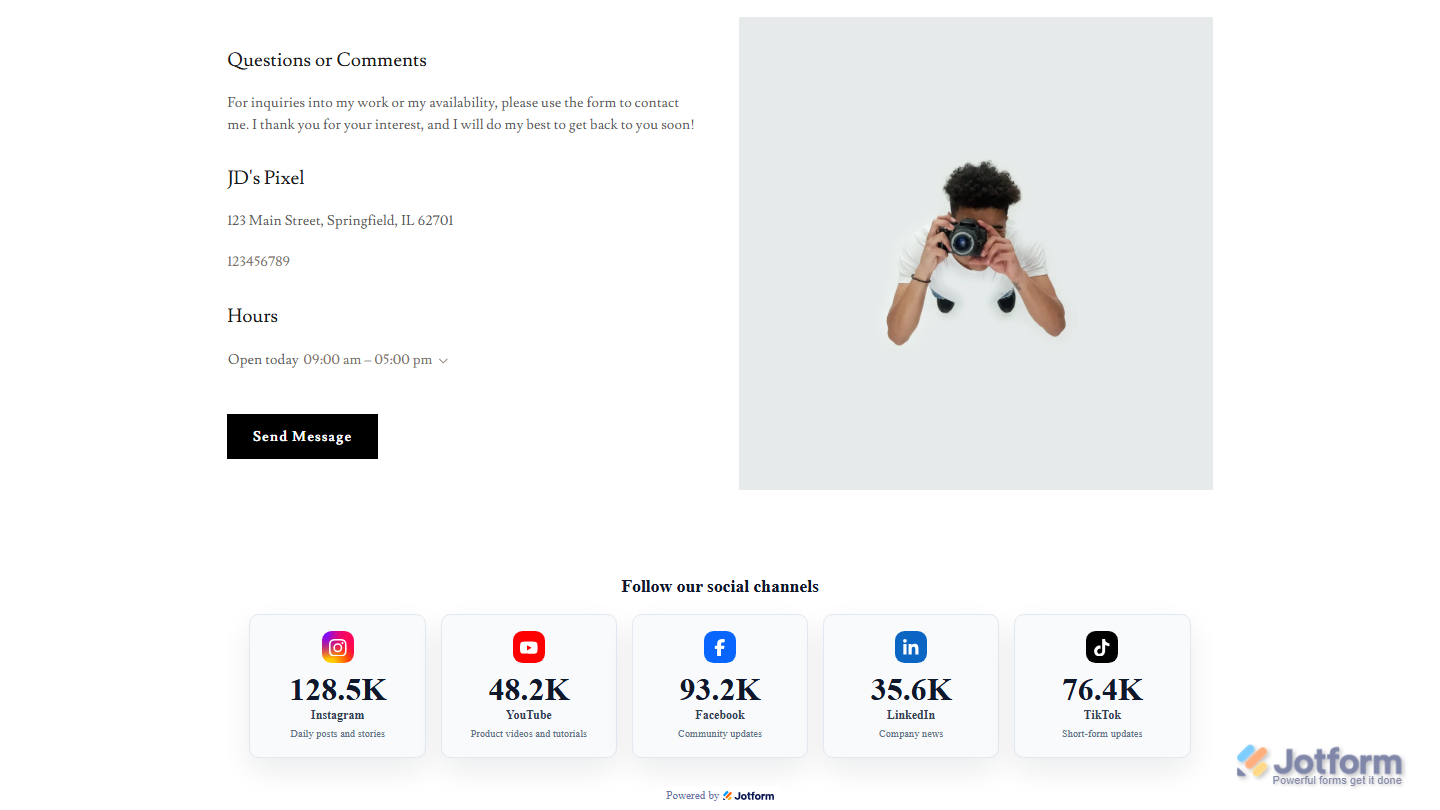
That’s it! Your Social Media Follower Count widget will appear on your website just as you set it up. Take a look at the example below to see how it’ll look on a website.
Note
You can manage the website widgets you’ve created at any time from your account. For a full breakdown of how to do it, head over to our guide on How to Manage Website Widgets.


Send Comment: