Jotform makes it easy to showcase customer feedback on your website with the Google Reviews widget. Display reviews from your Google Business Profile to help visitors learn more about your business and build confidence before they contact you or make a purchase.
Whether you’re running a local business, restaurant, salon, retail store, or professional service, this helps you highlight real customer experiences and build trust with potential customers.
Before You Begin
Make sure your business already has an active Google Business Profile with at least one review.
Creating Your Google Reviews Widget and Getting the Embed Code for it
To embed a Google Review on your website, you’ll first need to set up the Google Reviews widget and copy the embed code for it. Here’s how to get going:
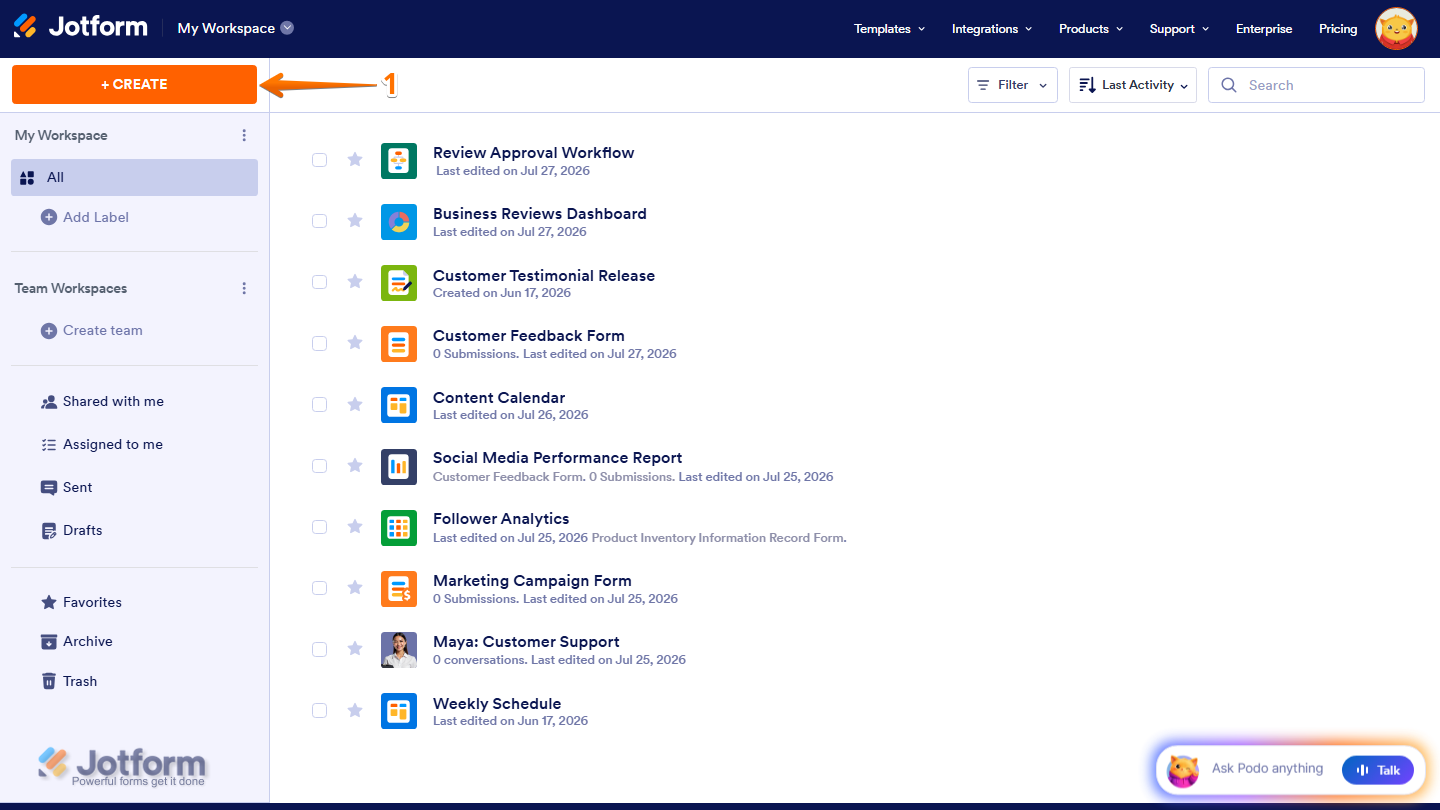
- On the top-left side of your Workspace page, click on Create.
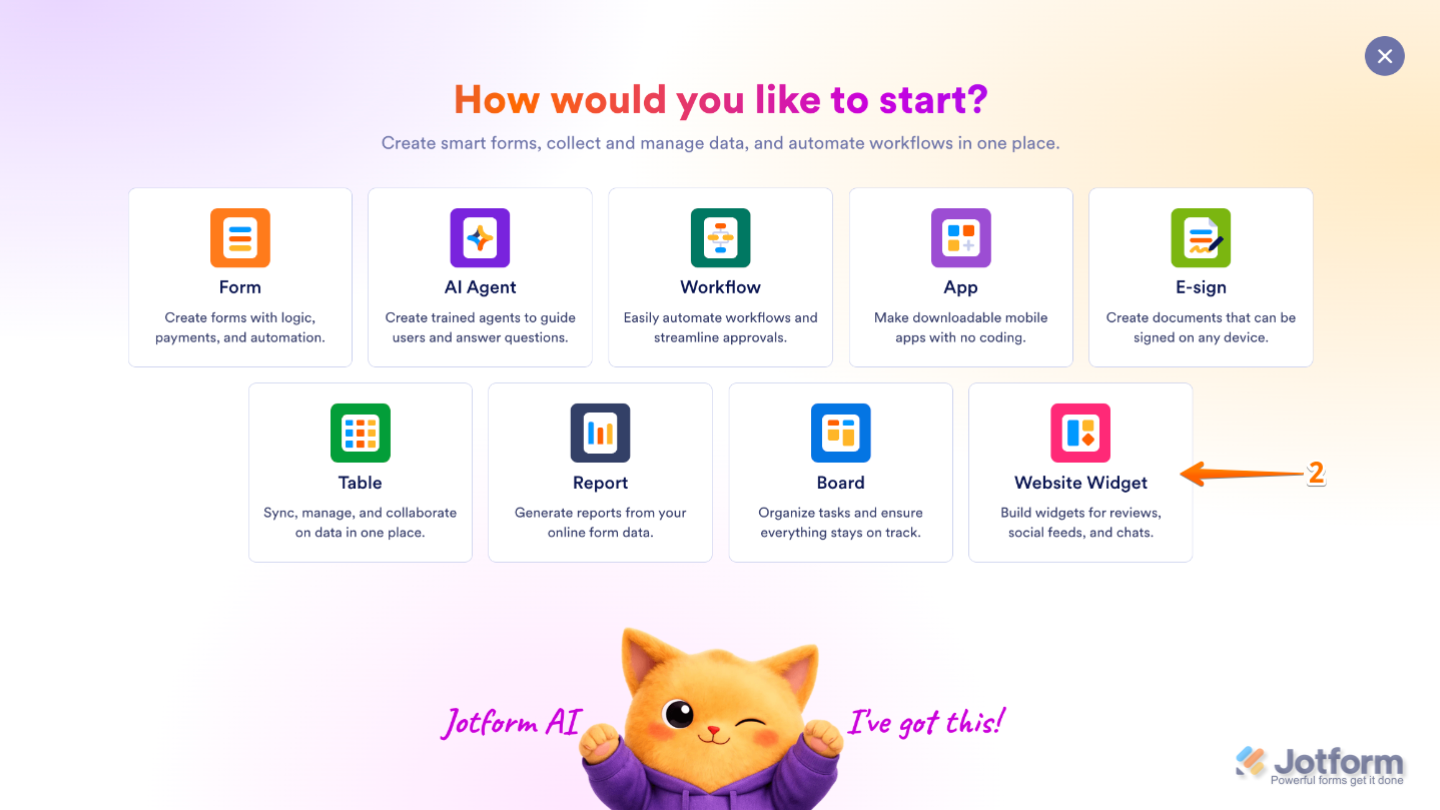
- Then, in the menu that opens up, select Website Widget.
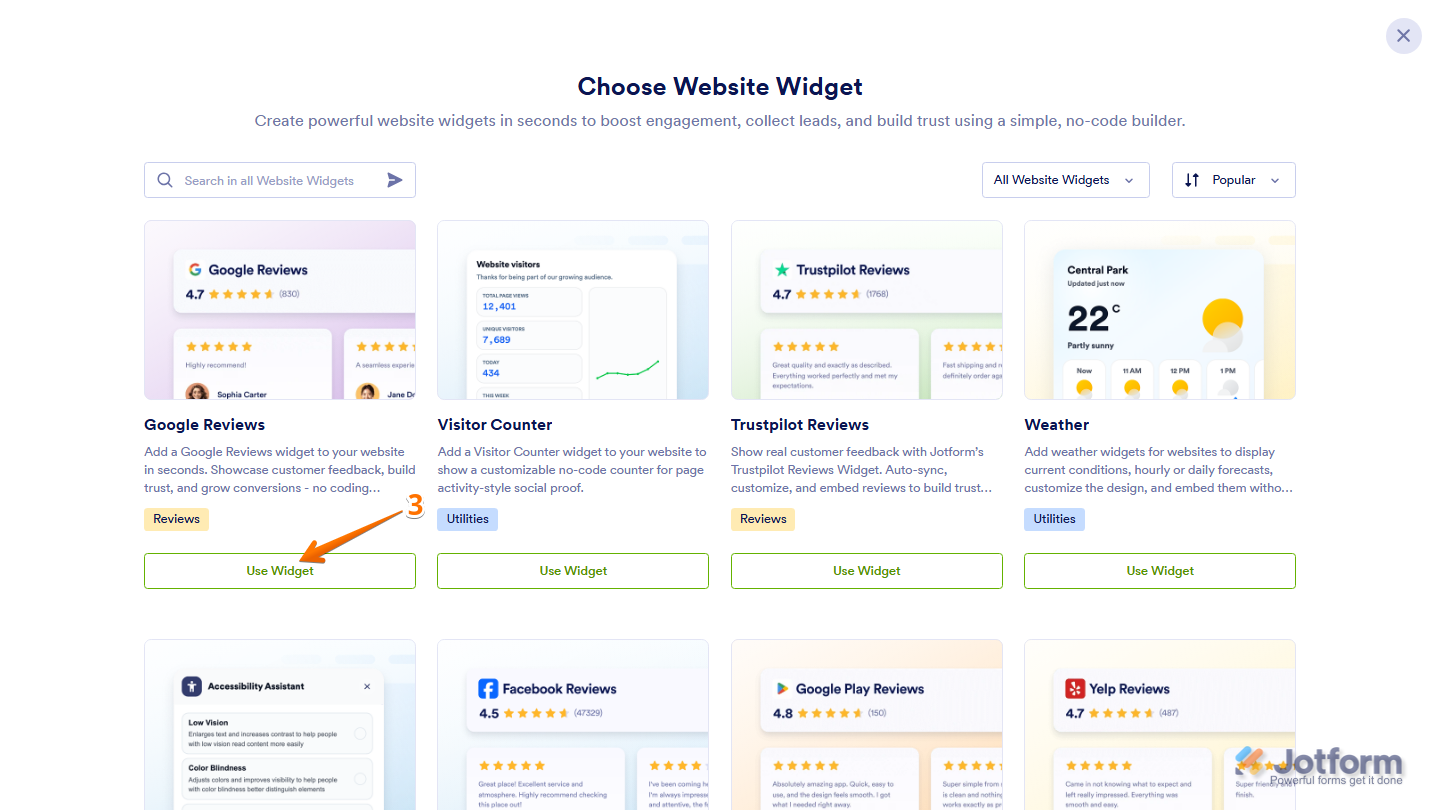
- Next, at the bottom of Google Reviews widget in the Choose Website Widget menu, click on Use Widget.
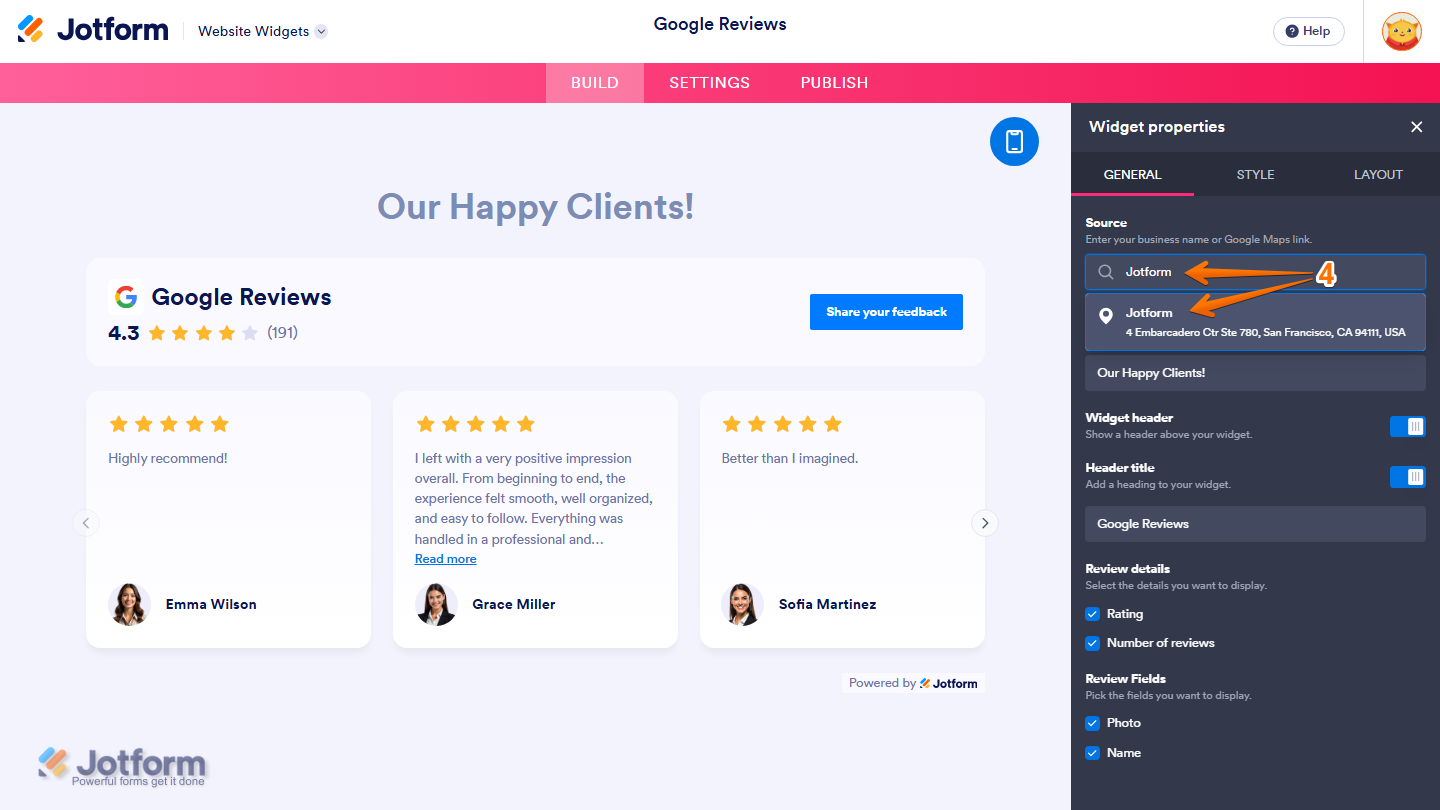
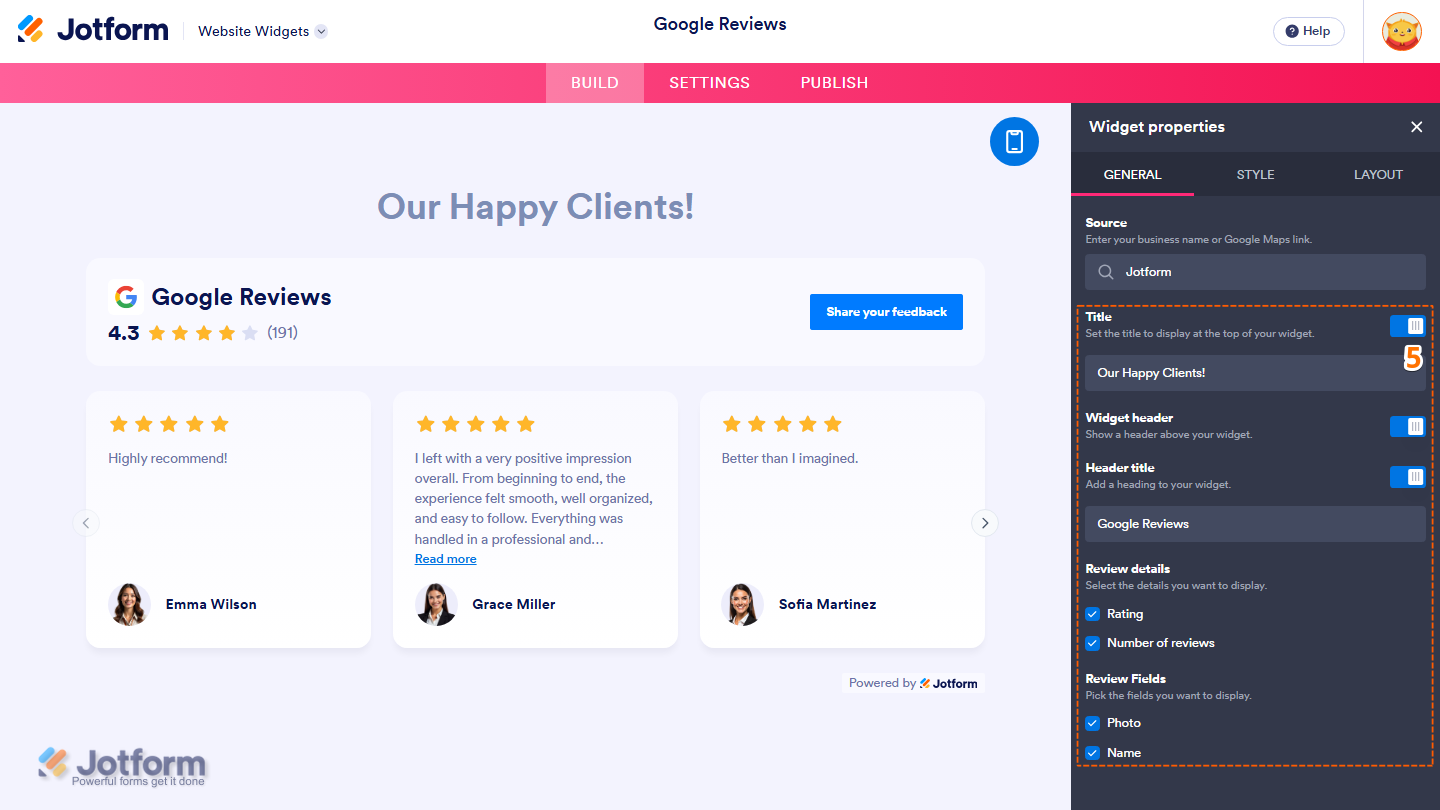
- Now, in the Widget Properties menu that opens on the right side of Website Widgets, under the General tab, in the Source search bar, enter your Business Name or Google Maps link, then select your business from the search results.
- Then, set up these properties:
- Title — Toggle this off to hide the title above the widget, or leave it enabled and, in the input box below it, delete the existing title and enter the title you want to display.
- Widget Header — Toggle this off to hide the header above the reviews, or leave it enabled and customize it with these properties:
- Header Title — Delete the existing title in the input box and enter the title you want to display in the widget header.
- Review Details — Select the review details you want to display:
- Rating — Display the business’s overall Google rating.
- Number of Reviews — Display the total number of Google reviews.
- Review Fields — Select the review fields you want to display:
- Photo — Display each reviewer’s profile photo.
- Name — Display each reviewer’s name.
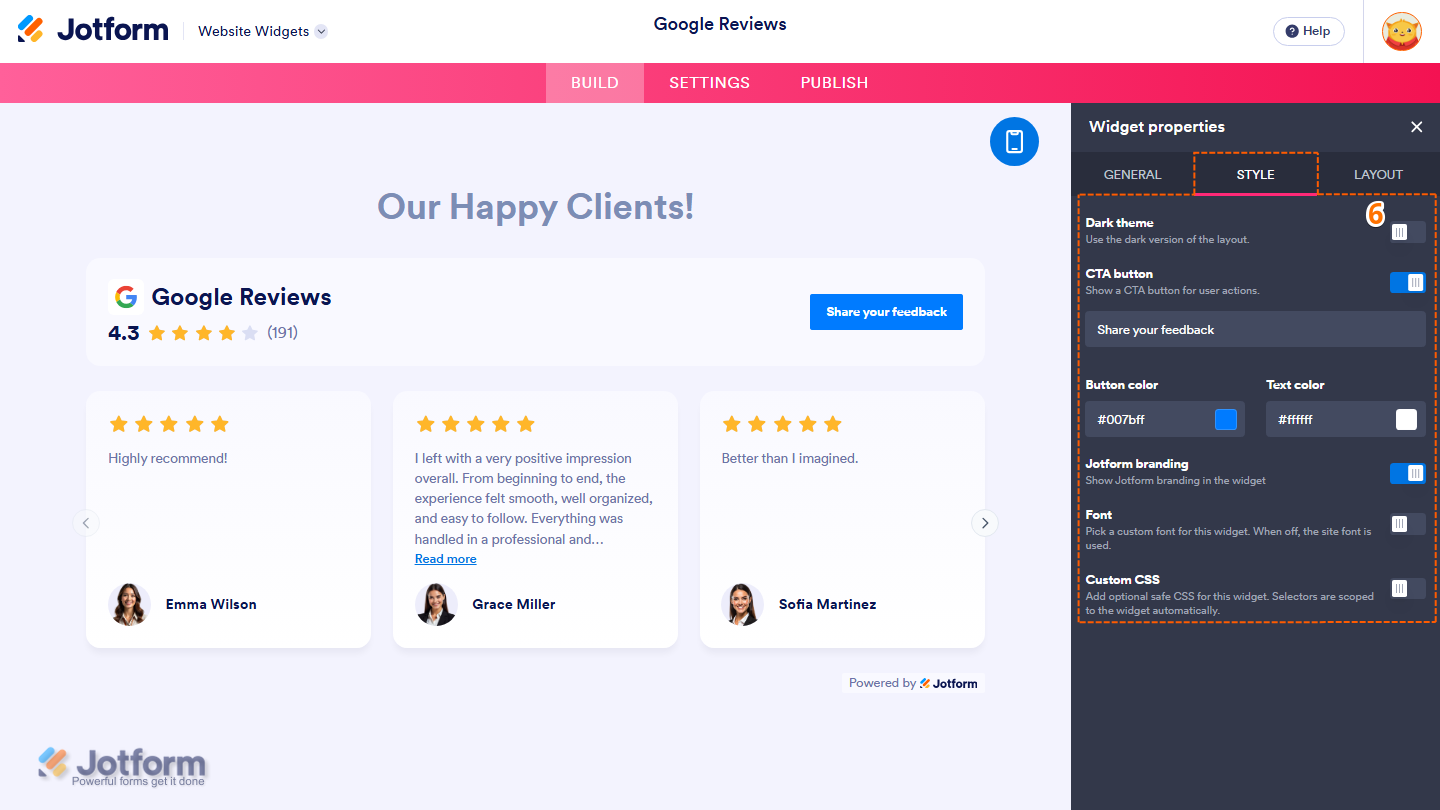
- Next, under the Style tab, customize these properties:
- Dark Theme — Toggle this on to use the dark version of the widget layout.
- CTA Button — Toggle this off to hide the call-to-action button, or leave it enabled and customize it with these properties:
- Button Label — Delete the existing button label in the input box and enter the text you want to display.
- Button Color — Keep the default color, or enter the name, hex code, or RGB value in the input box, or click on the color box to choose a new button background color.
- Text Color — Leave the default color as is, or enter the name, hex code, or RGB value in the input box, or click on the color box to choose a new button text color.
- Jotform Branding — Keep this on to display Jotform branding in the website widget, or toggle it off to hide it.
- Font — Toggle this on, then click on the Dropdown menu and select the font you want to use for the website widget. The preview below updates to show how the selected font will appear. When this option is off, the website’s font is used.
- Custom CSS — Toggle this on, then enter your custom CSS in the input box that appears to apply advanced styling to the website widget.
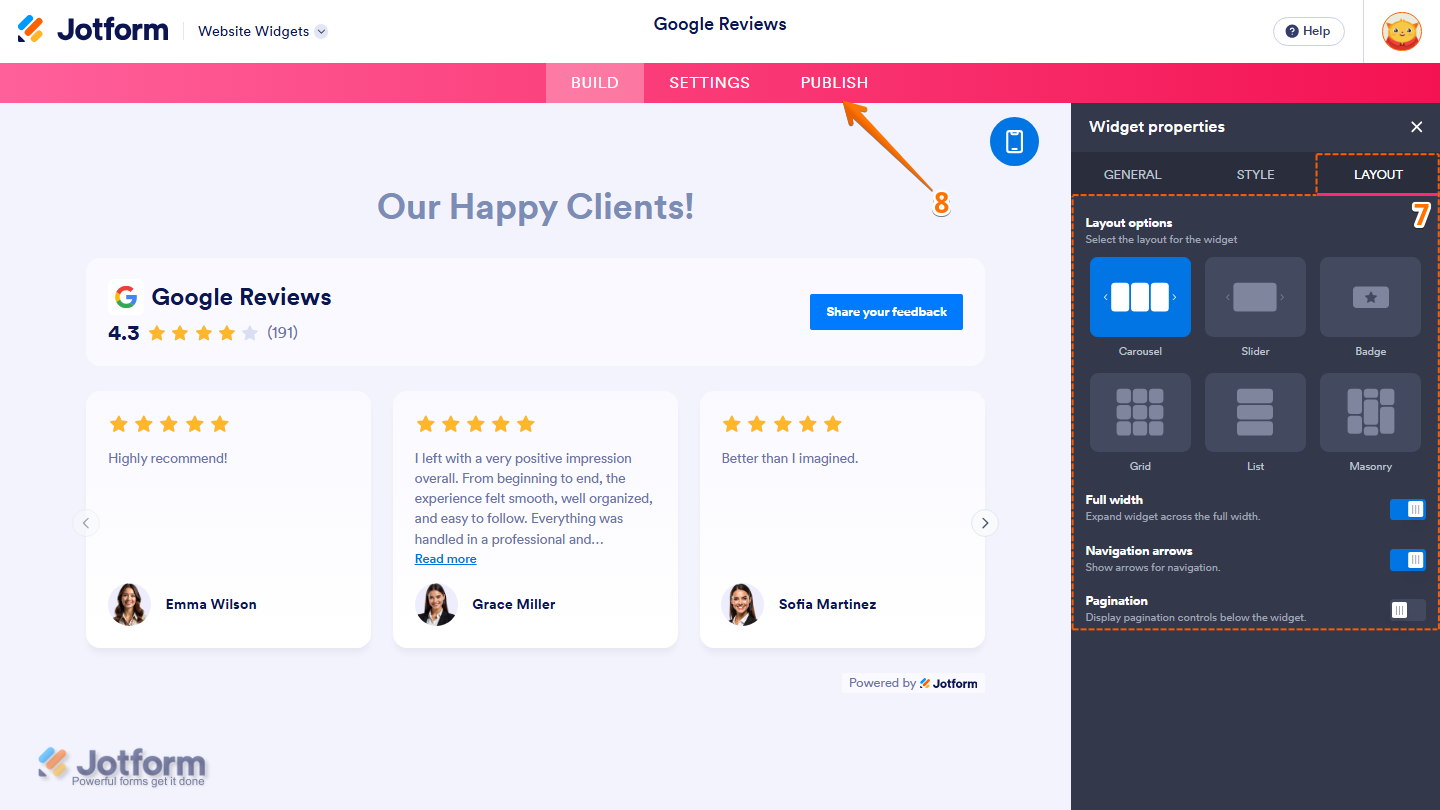
- Now, under the Layout tab, configure these properties:
- Layout Options — Select one of the following layout options to choose how your Google reviews are displayed:
- Carousel — Display reviews in a horizontal carousel that visitors can browse.
- Slider — Display one review at a time in a slider.
- Badge — Display a compact Google Reviews badge.
- Grid — Display reviews in a grid layout.
- List — Display reviews in a vertical list.
- Masonry — Display reviews in a masonry layout with automatically arranged review cards.
- Full Width — Keep this on to expand the website widget across the full width of its container, or toggle it off to display it using its default width.
- Navigation Arrows — Keep this on to display navigation arrows for browsing reviews, or toggle it off to hide them.
- Pagination — Toggle this on to display pagination controls below the website widget.
- Layout Options — Select one of the following layout options to choose how your Google reviews are displayed:
- Once everything’s set, in the pink navigation bar at the top of the page, click on Publish.
Note
You’ll be asked to log in to your Jotform account or sign up for one before you can continue using your widgets.
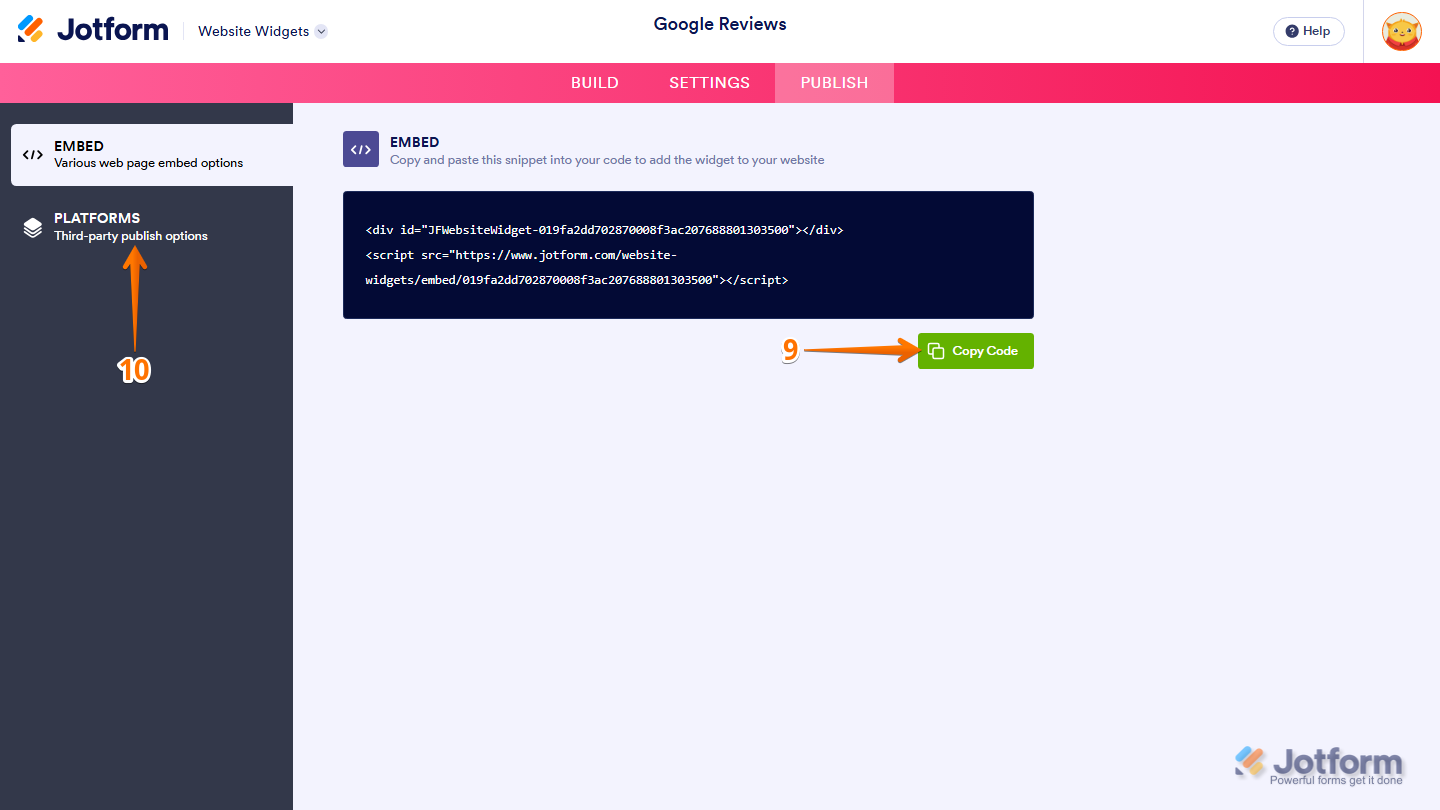
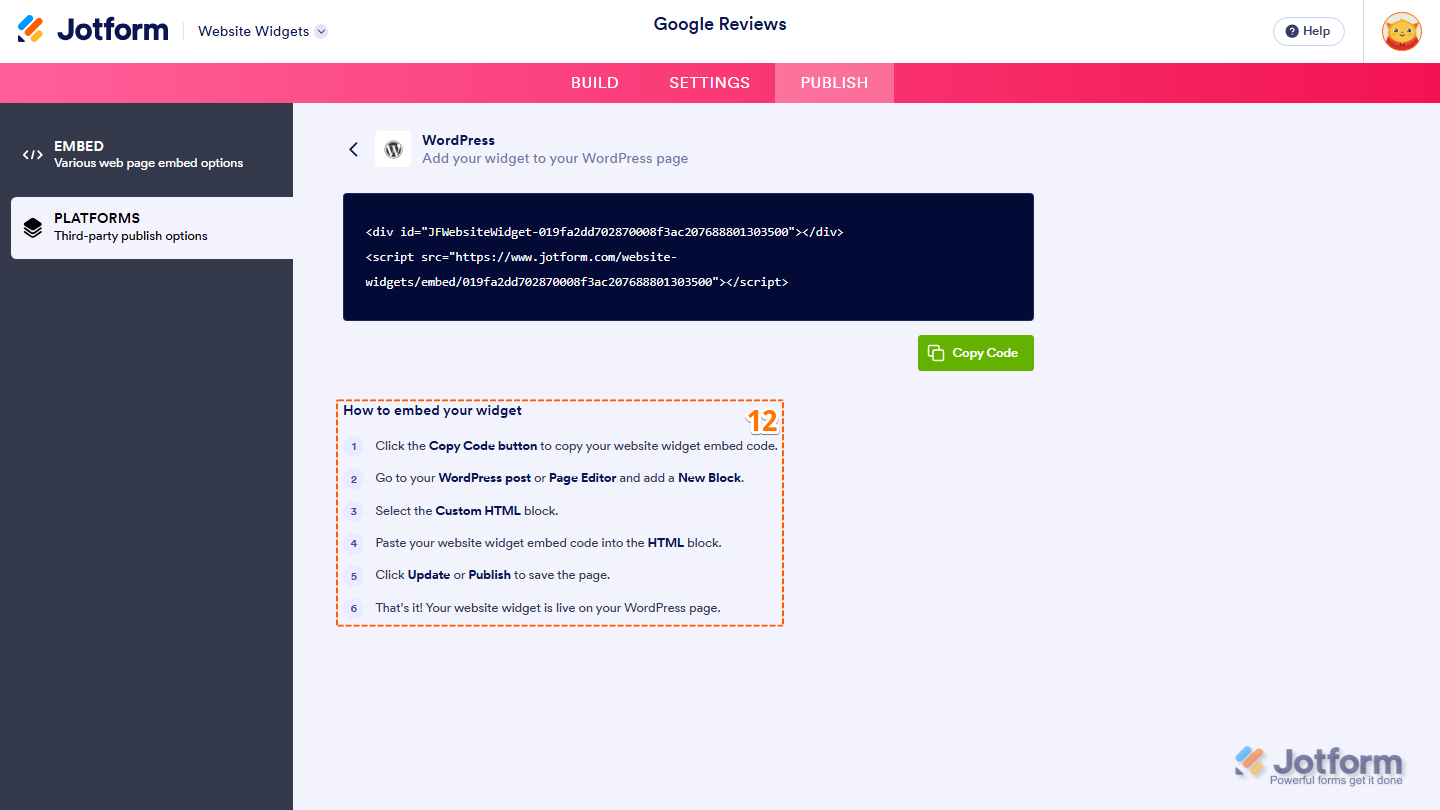
- Then, in the Embed section, click on Copy Code, and, if you already know how, paste that into the Embed section on your platform, and you’re good to go.
- To view embedding instructions for your widget, click on Platforms in the menu on the left side of the page.
- Next, in the Platforms section on the right, select the platform you want to view embedding instructions for. Or, use the Search bar at the top of the section to find it easily.
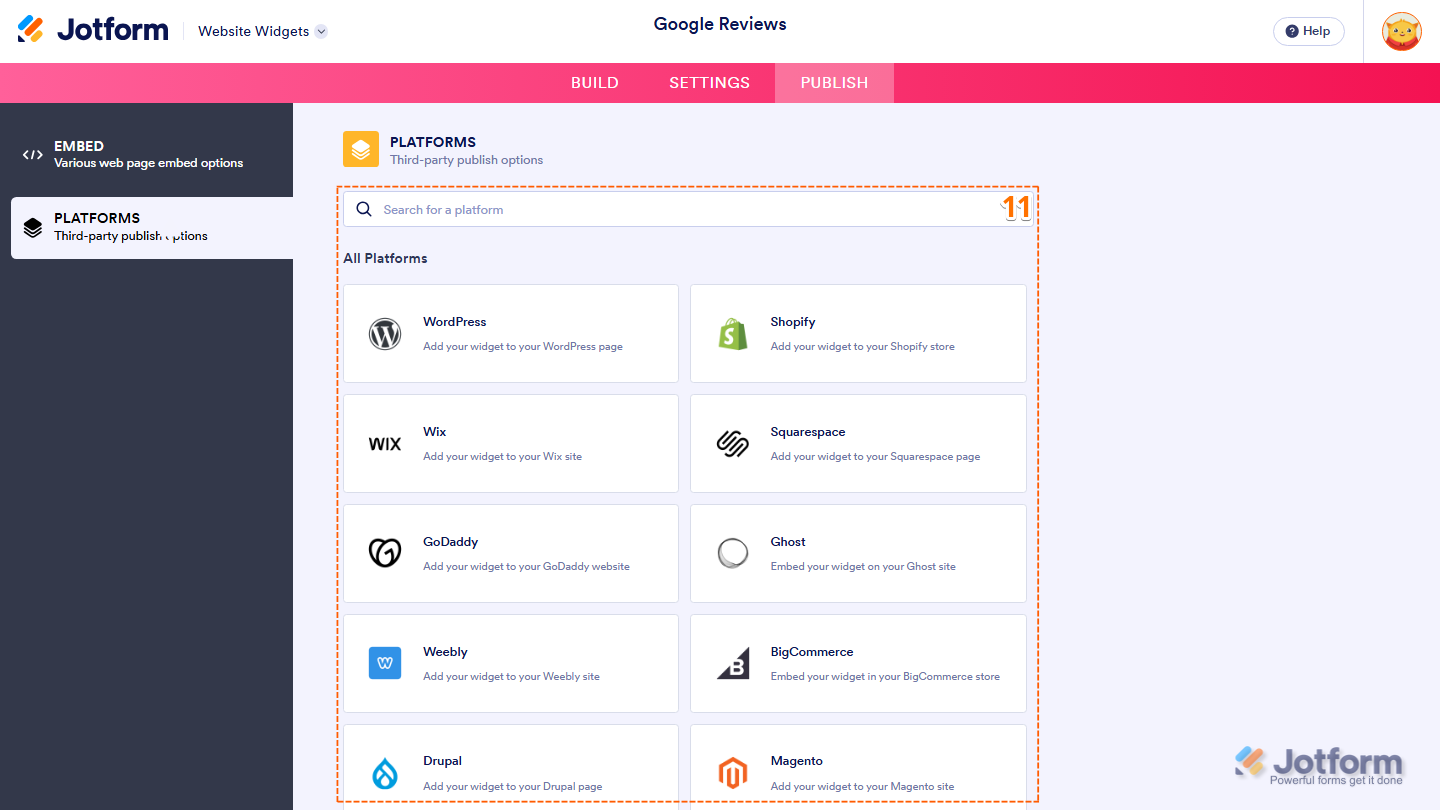
- Then, follow the steps in the How to Embed Your Widget section to add it to your website.
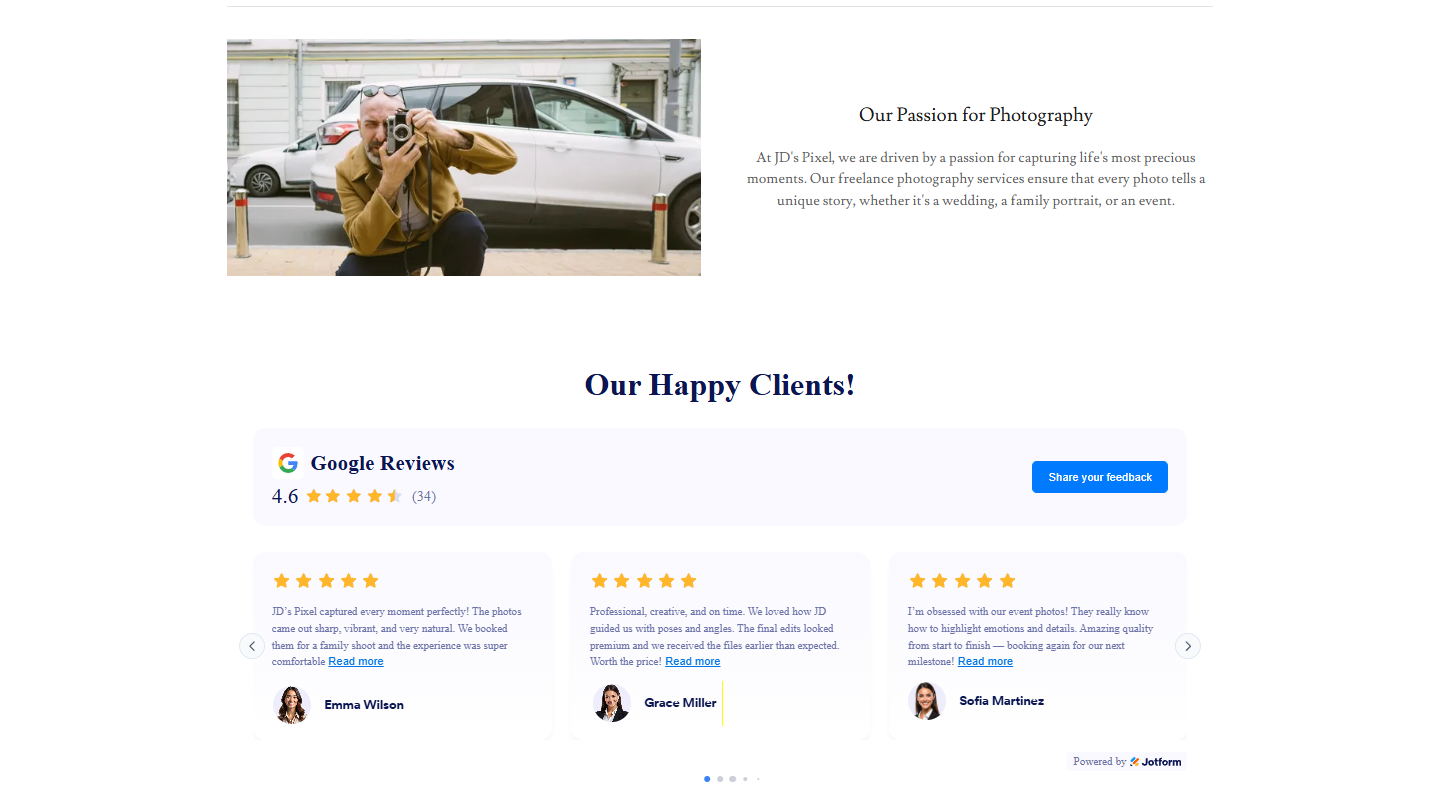
That’s it! Your Google Reviews widget will appear on your website based on how you set it up. Take a look at the screenshot below to see how it looks on a website.
Note
You can manage the website widgets you’ve created at any time from your account. For a full breakdown of how to do it, head over to our guide on How to Manage Website Widgets.
Pro Tip
- Make sure your website allows third-party scripts.
- If the widget doesn’t appear right away, clear your website cache.
Getting Your Google Maps URL Link
If you don’t have your Google Maps URL link yet or aren’t sure how to get one, it’s easy to do. Here’s how:
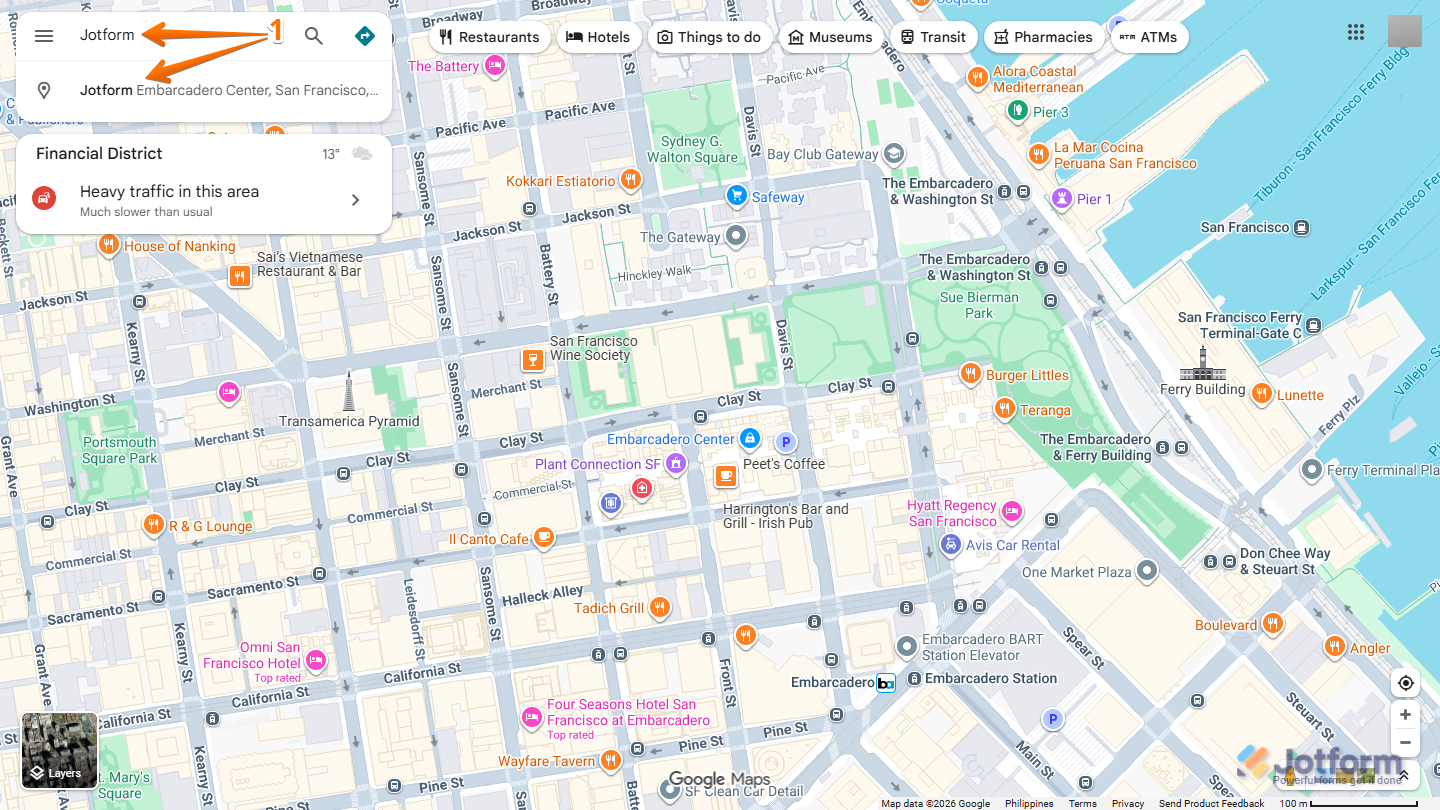
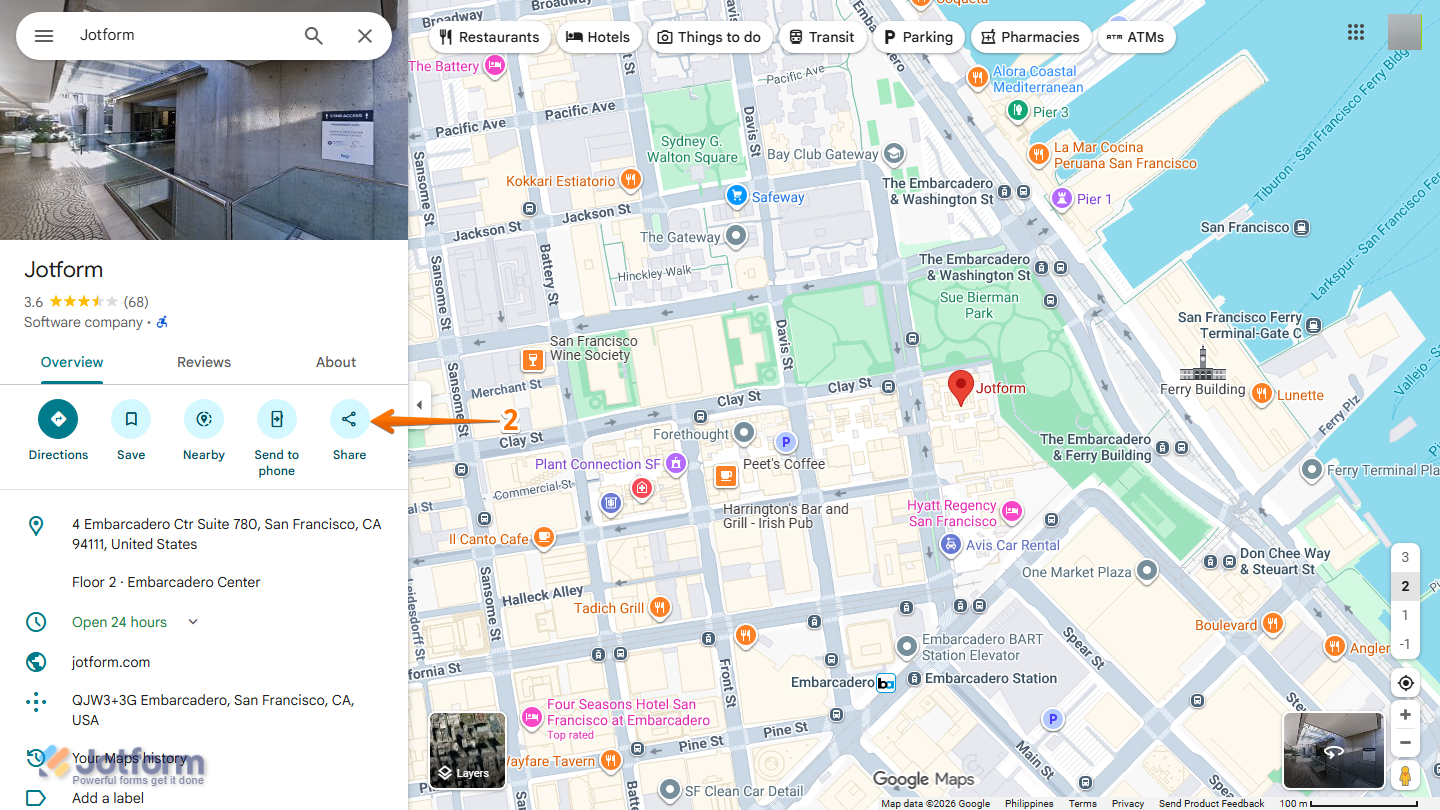
- Go to Google Maps, and in the top-left corner of the page, in the Search Bar, enter your business name or address and select your business from the results.
- Next, in the menu on the left, under the Overview tab, click on Share icon.
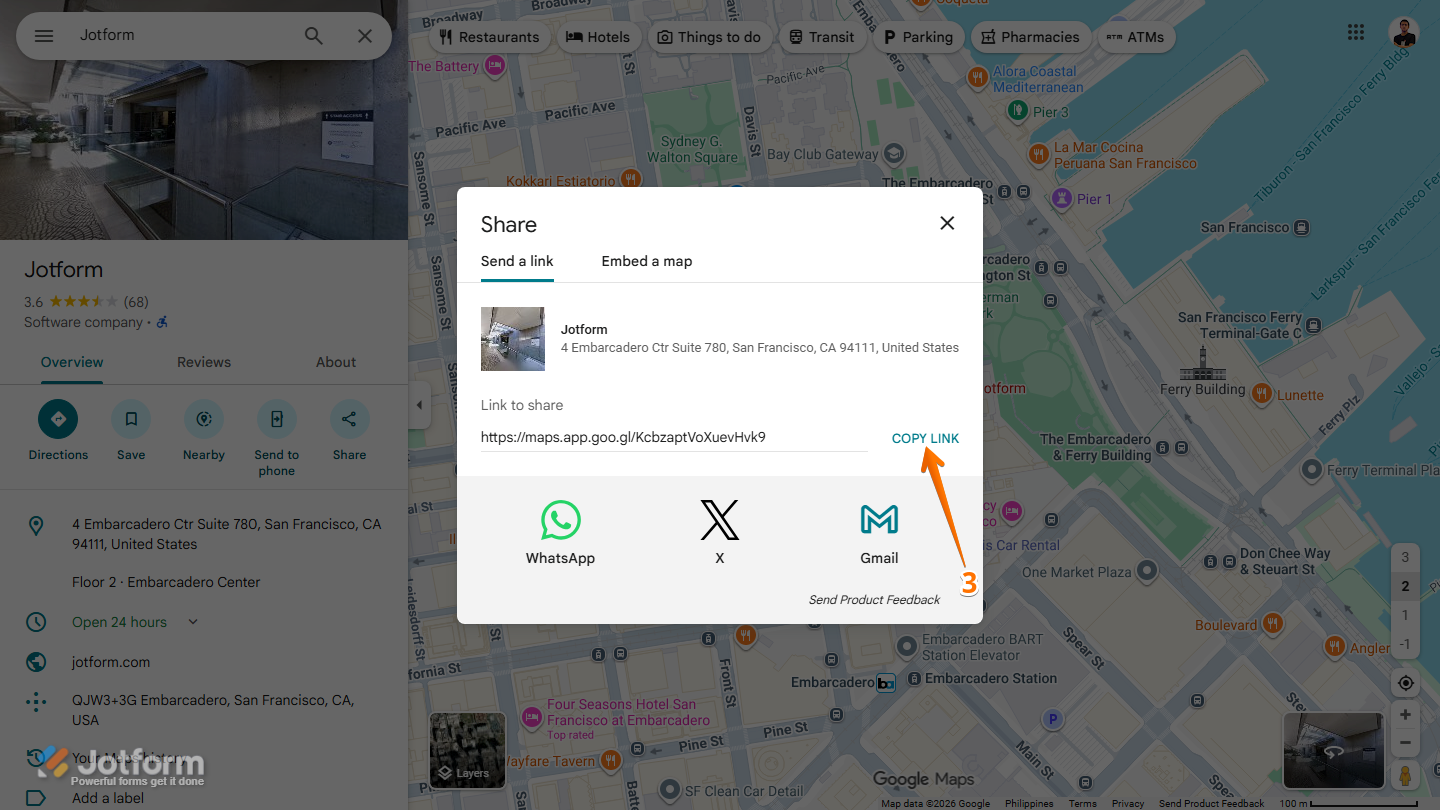
- Now, in the window that comes up, click on the Copy Link to get your Google Maps URL link, then you’re done.


Send Comment: