Jotform makes it easy to manage all your website widgets from one place. You can edit them, copy the embed codes for them, and organize your widget library directly from your Workspace. If you’ve got one already embedded on your website, any changes you publish will automatically be applied on your website without the need for a new embed code.
In this guide, you’ll learn how to:
- Accessing Your Website Widgets
- Editing Your Website Widget
- Getting Your Widget Embed Code
- Using More Actions
Accessing Your Website Widgets
Your website widgets are stored alongside your other assets in the Workspace page. To display only them, here’s what to do:
- At the top of your Workspace page, click on Filter.
- Then, in the Dropdown menu that opens, hover your mouse over Website Widgets, and on the right side of it, click on Only.
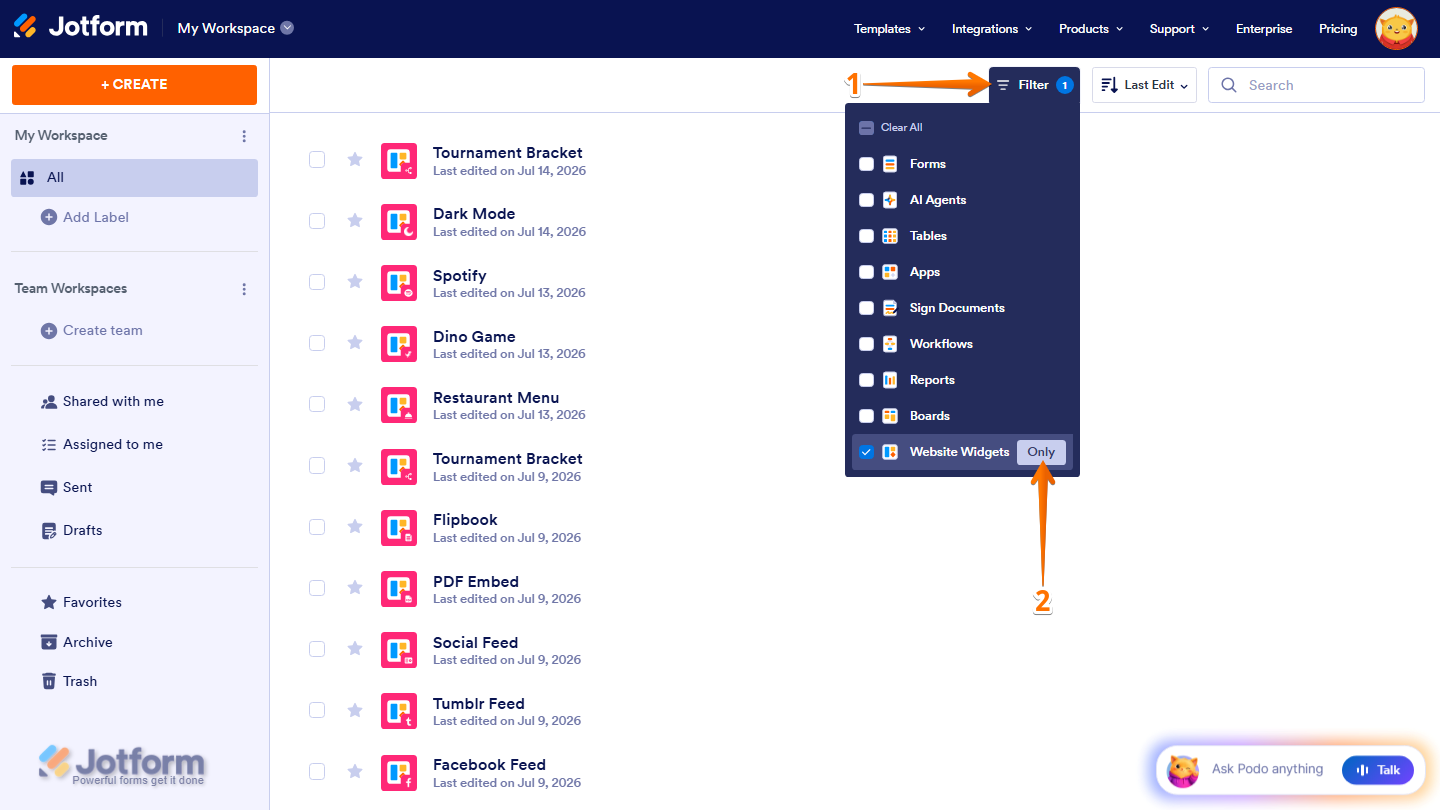
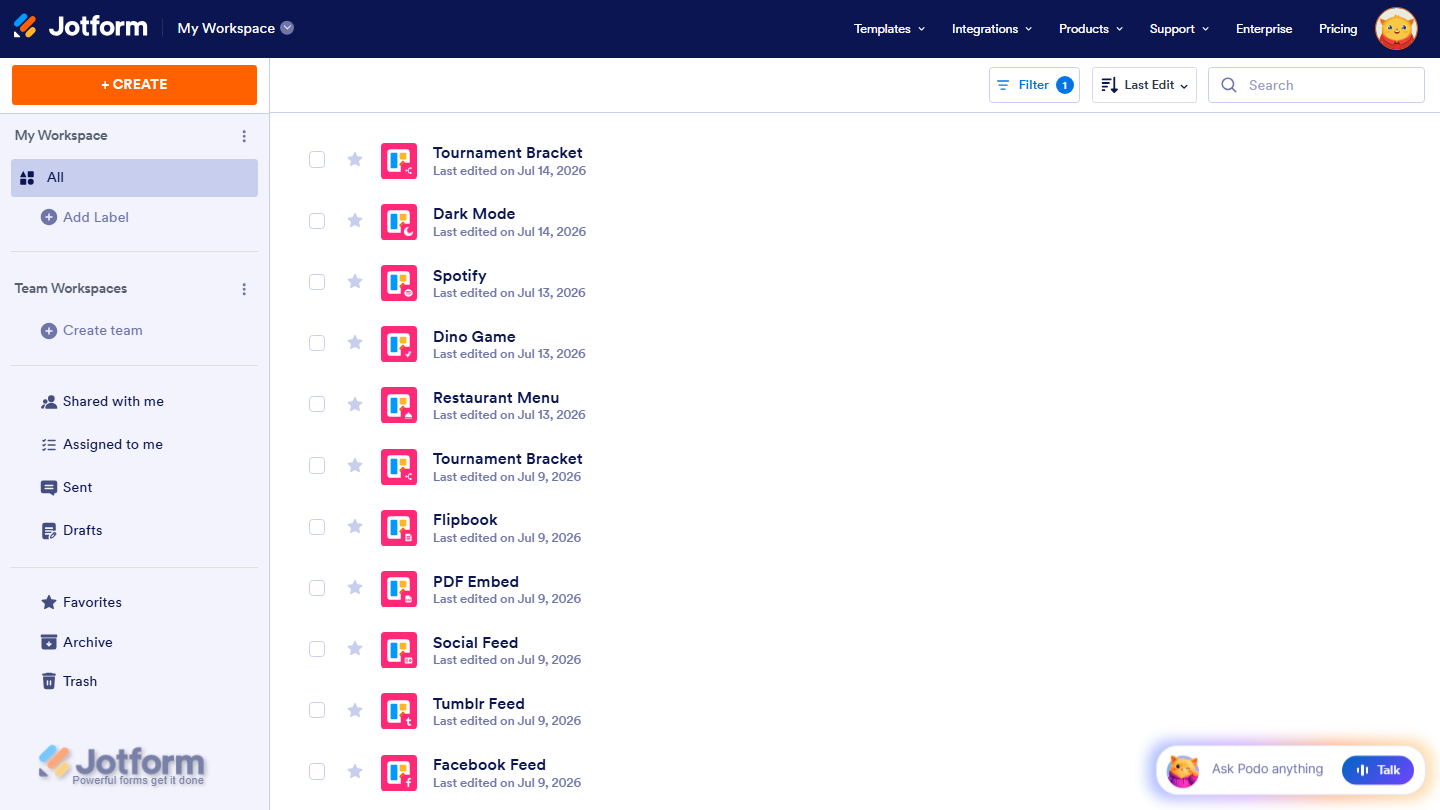
That’s it! Your Workspace will now display only your Website Widgets.
Note
Website widgets can be managed from either your Workspace page or the Website Widgets page. Both give you access to the same widget management options, including editing, embedding, and organizing them.
Editing Your Website Widget
You can edit your Website Widget anytime to update the content, appearance, and layout. This is how it’s done:
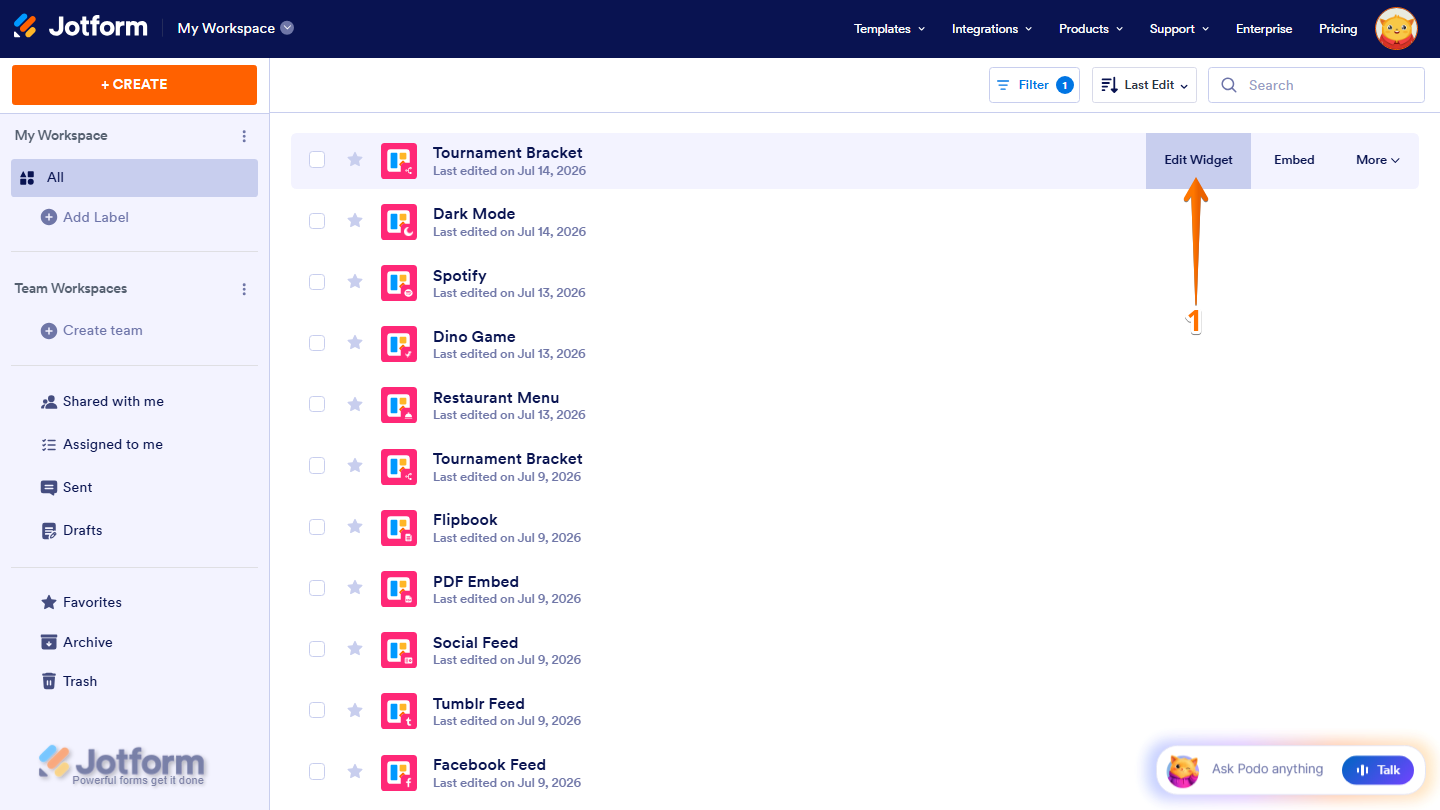
- On your Workspace page, hover your mouse over the Website Widget you want to edit and then click on Edit Widget on the right side of the page. For example, the Tournament Bracket.
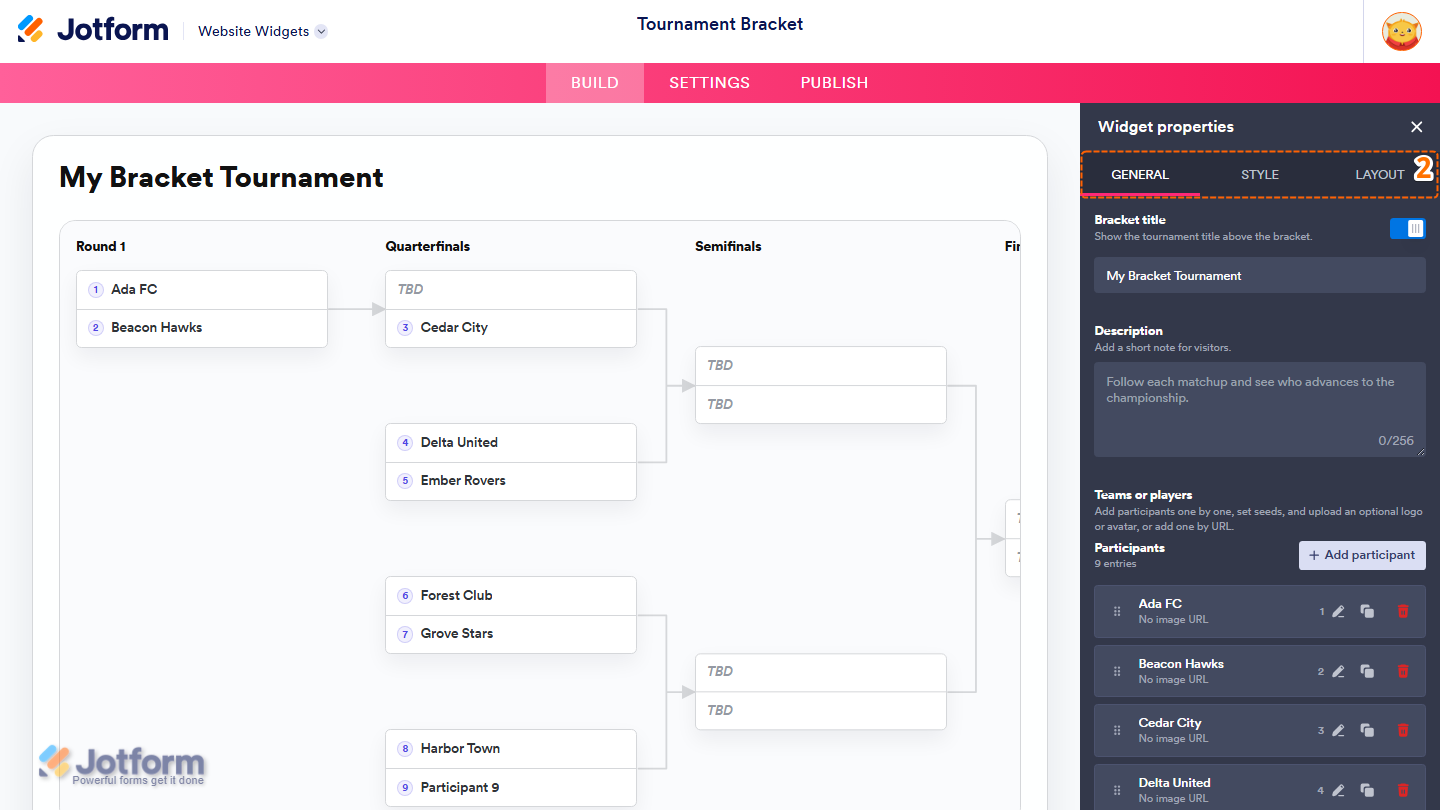
- Now, in the Widget Properties menu that opens on the right side of Website Widgets, under the General, Style, and Layout tabs, edit the properties you want to change.
Note
If your widget is already embedded on your website, any changes you make will automatically be reflected in it without the need to get a new embed code.
Getting Your Widget Embed Code
You can copy your widget’s embed code anytime to add it to another website or supported platform. Here’s how to get it:
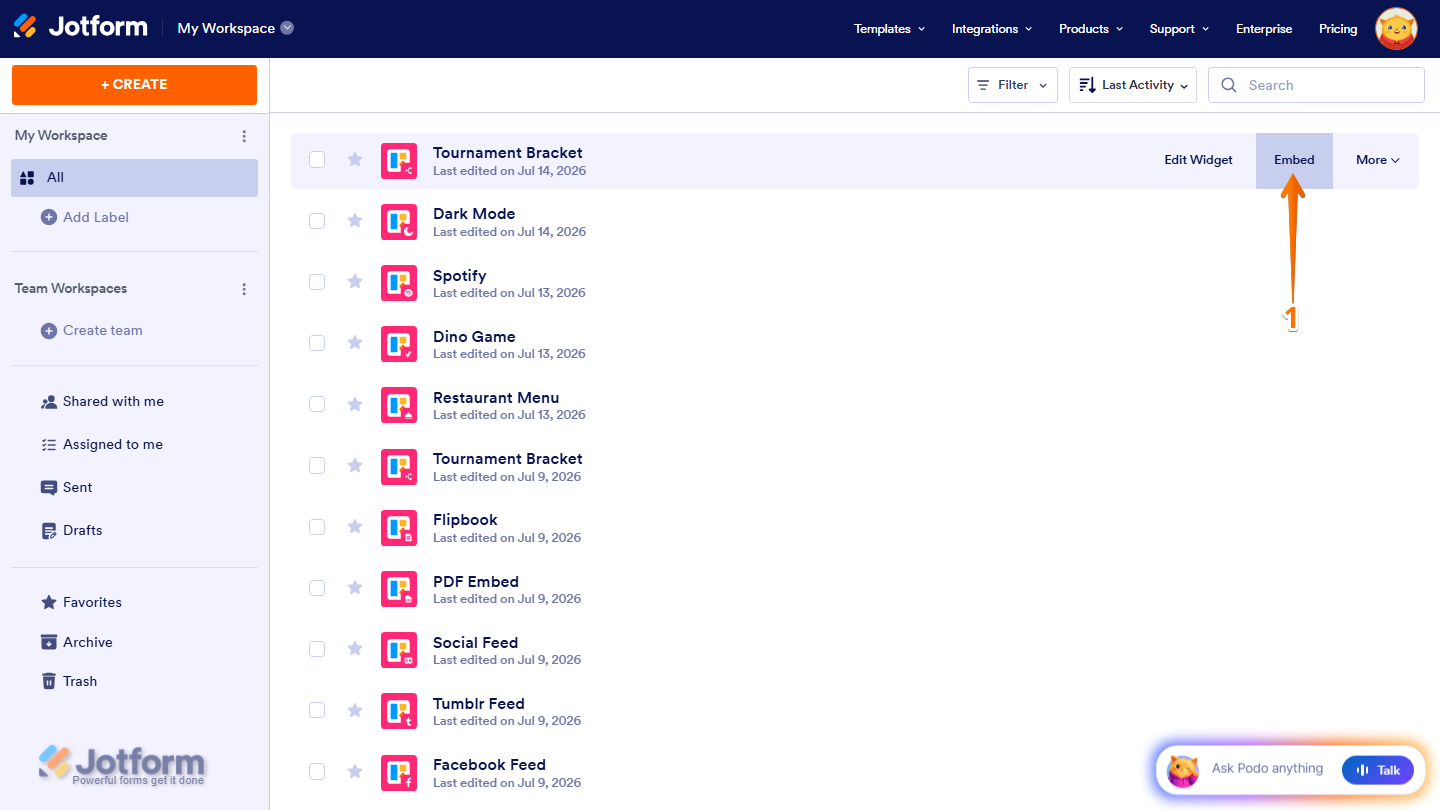
- On your Workspace page, hover your mouse over the Website Widget you want to get the embed code for and then click on Embed on the right side of the page.
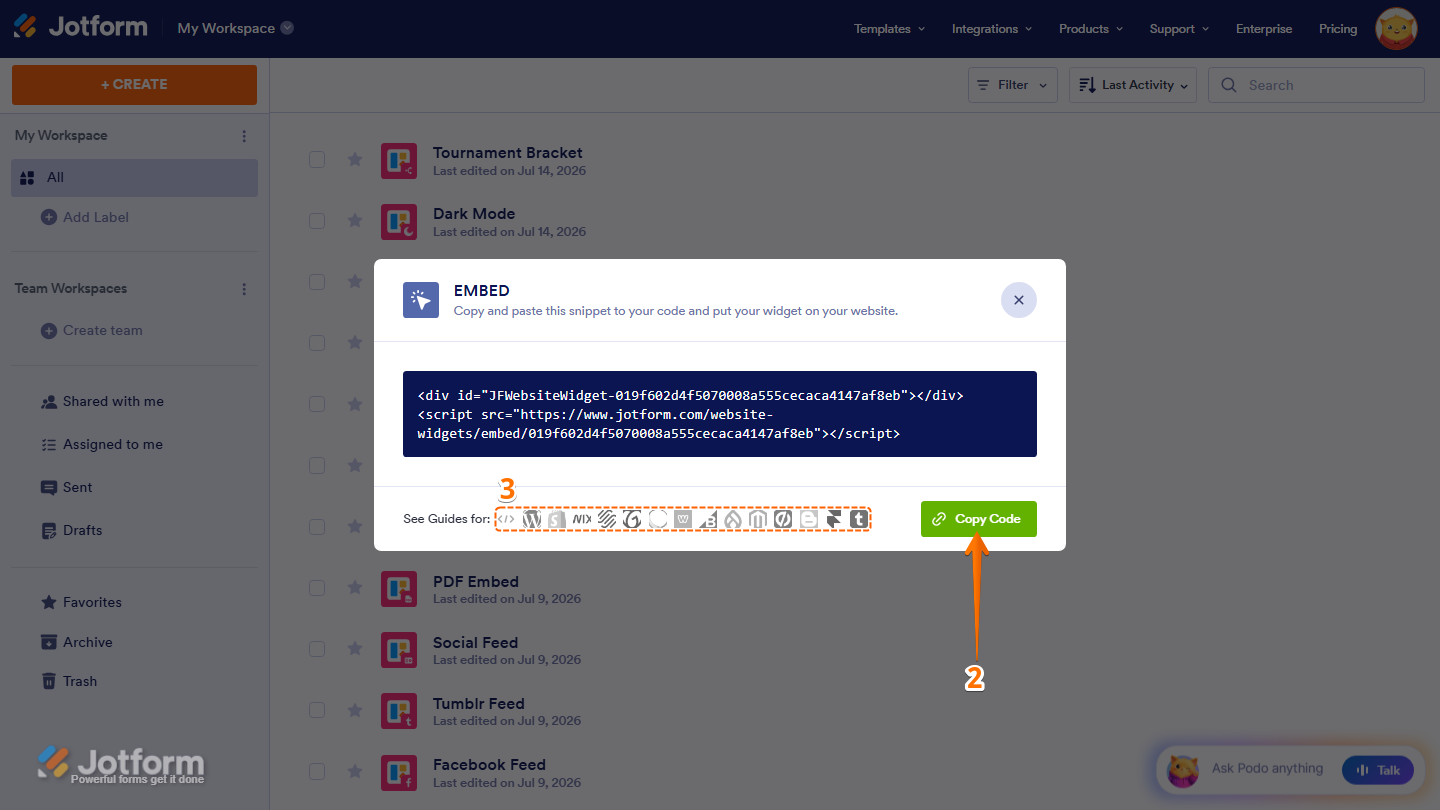
- Then, in the Embed window that comes up, click on Copy Code, and, if you already know how, paste that into the Embed section on your platform, and you’re good to go.
- Or, if your website is built on a supported platform, click on the icon for it in the bottom-left corner of the Embed window to view platform-specific embedding instructions.
Note
You’ll be asked to log in to your Jotform account or sign up for one. Once you’ve done that, you’ll be able to get the embed code for your widget.
Using More Actions
The More menu gives you additional options for organizing and managing your website widgets. Here’s what to do next:
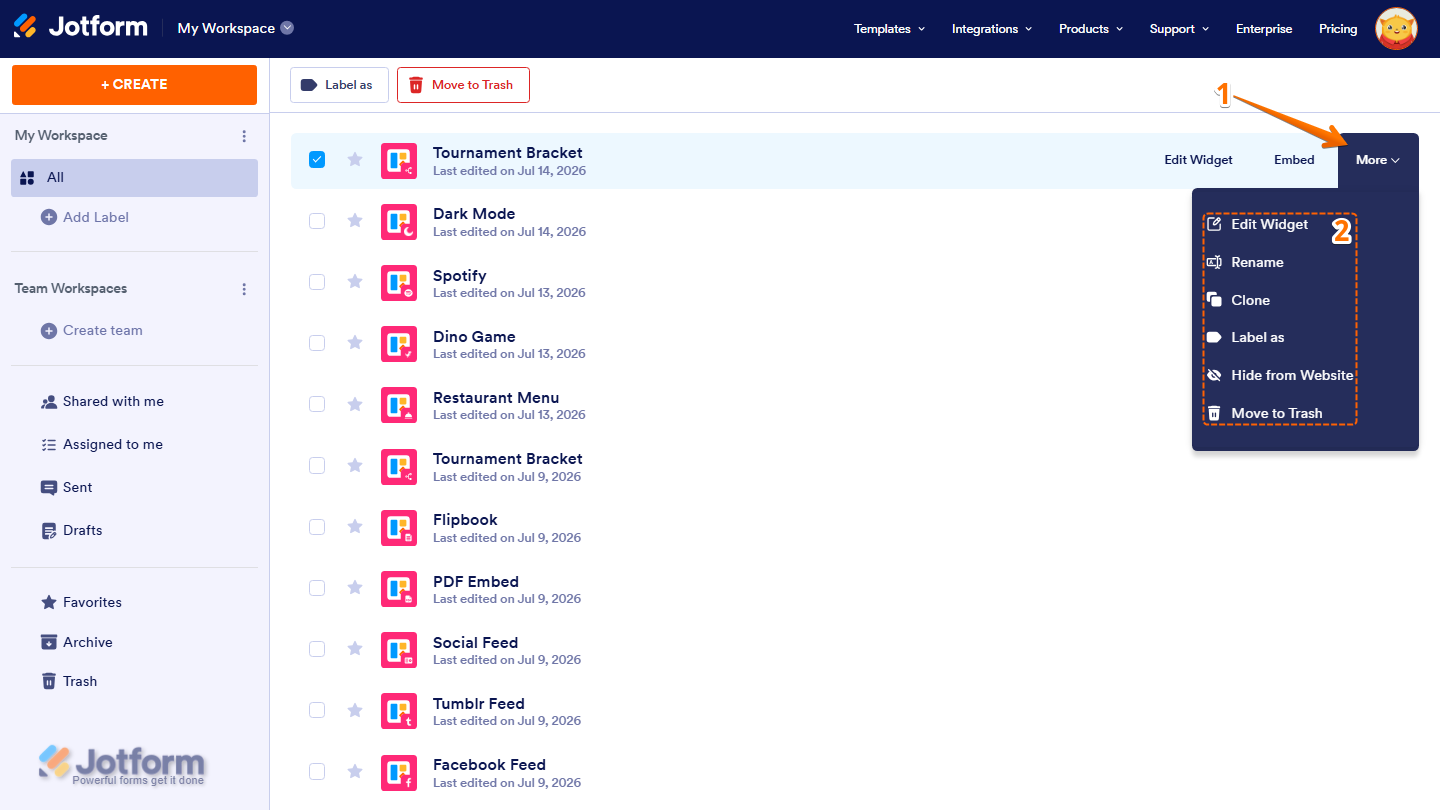
- On your Workspace page, hover over the Website Widget you want to manage, and then click on More on the right side of the widget.
- Then, in the Dropdown menu that opens, you can do these things:
- Edit Widget — Open Website Widgets to modify the widget’s content, appearance, or layout.
- Rename — Change the widget’s name to make it easier to identify.
- Clone — Create a duplicate of the widget.
- Label as — Assign one or more labels to organize the widget.
- Hide from Website — Hide the widget from your website without deleting it.
- Move to Trash — Move the widget to the Trash if you no longer need it.
You’re all set! You can now manage your website widgets anytime, making it easy to keep them organized and up to date.


Send Comment: