The Calorie Calculator widget helps visitors estimate their daily calorie needs based on personal details, including age, height, weight, activity level, and fitness goals. Using the widely recognized Mifflin-St Jeor equation, it calculates basal metabolic rate (BMR), maintenance calories, and a recommended daily calorie target, all within a responsive, easy-to-use widget that you can add to your website without coding.
Whether you run a fitness website, nutrition blog, gym, or wellness coaching business, the Calorie Calculator widget gives visitors instant, personalized insights to support healthier lifestyle decisions. It makes your content more interactive, encourages users to engage with your site, and helps them better understand their daily calorie requirements before planning meals, workouts, or nutrition programs.
Creating and Getting the Embed Code of Your Calorie Calculator Widget
To embed a Calorie Calculator on your website, you’ll first need to configure the Calorie Calculator widget and copy the embed code for it. Here’s how to get going:
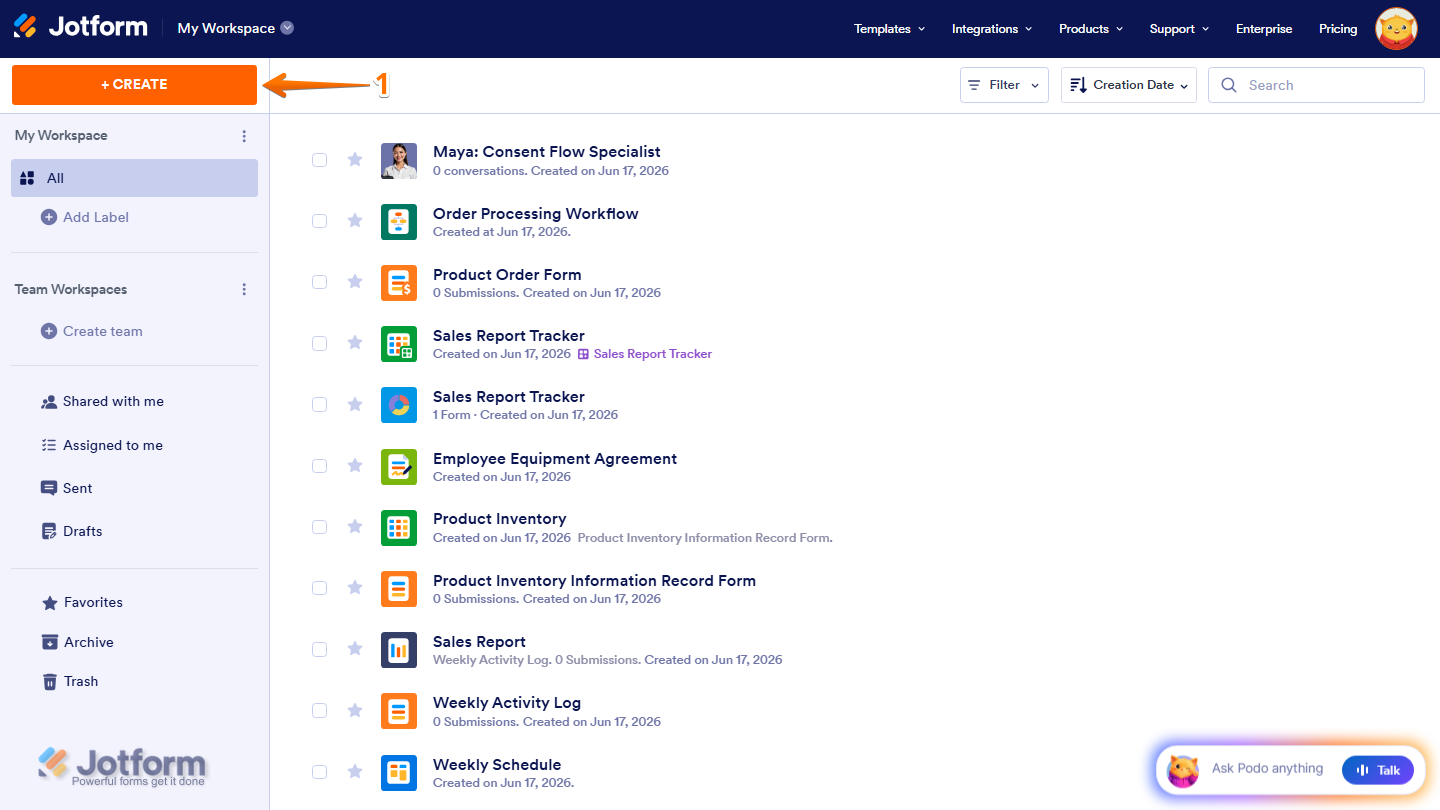
- On the top-left side of your Workspace page, click on Create.
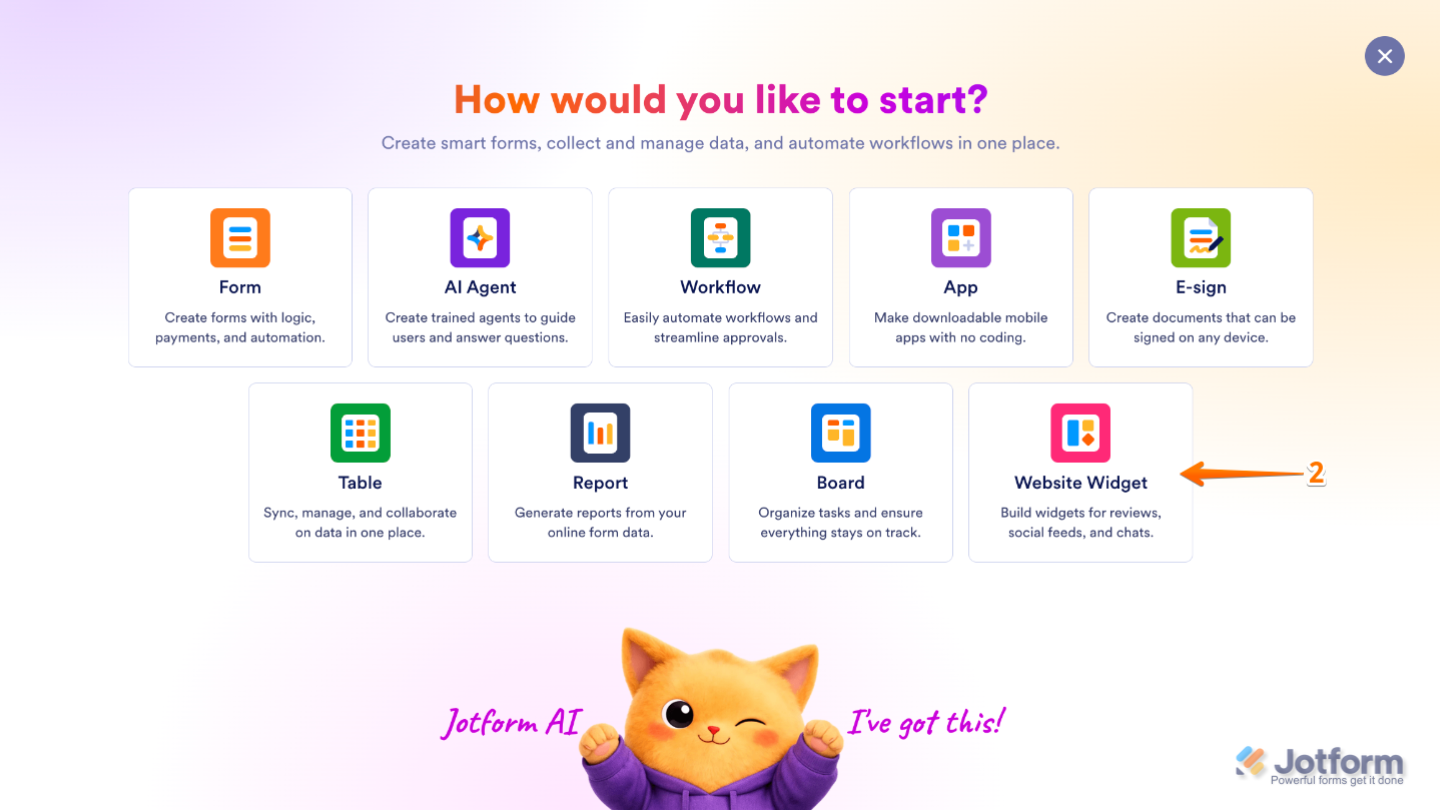
- Then, in the menu that opens up, select Website Widget from the assets.
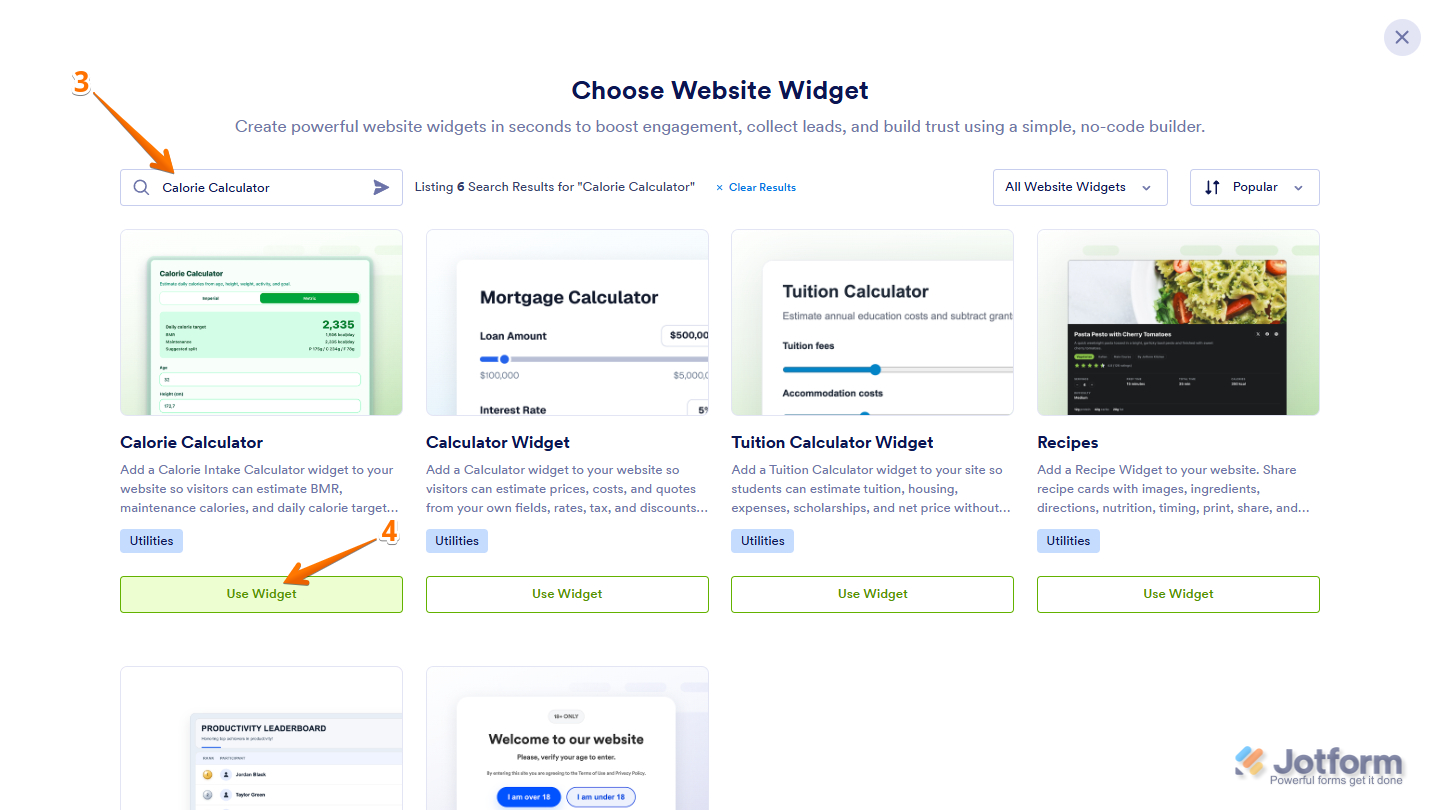
- Next, in the Search bar in the upper-left corner of the Choose Website Widget menu, enter Calorie Calculator.
- Then, at the bottom of the Calorie Calculator in the Choose Website Widget menu, click on Use Widget.
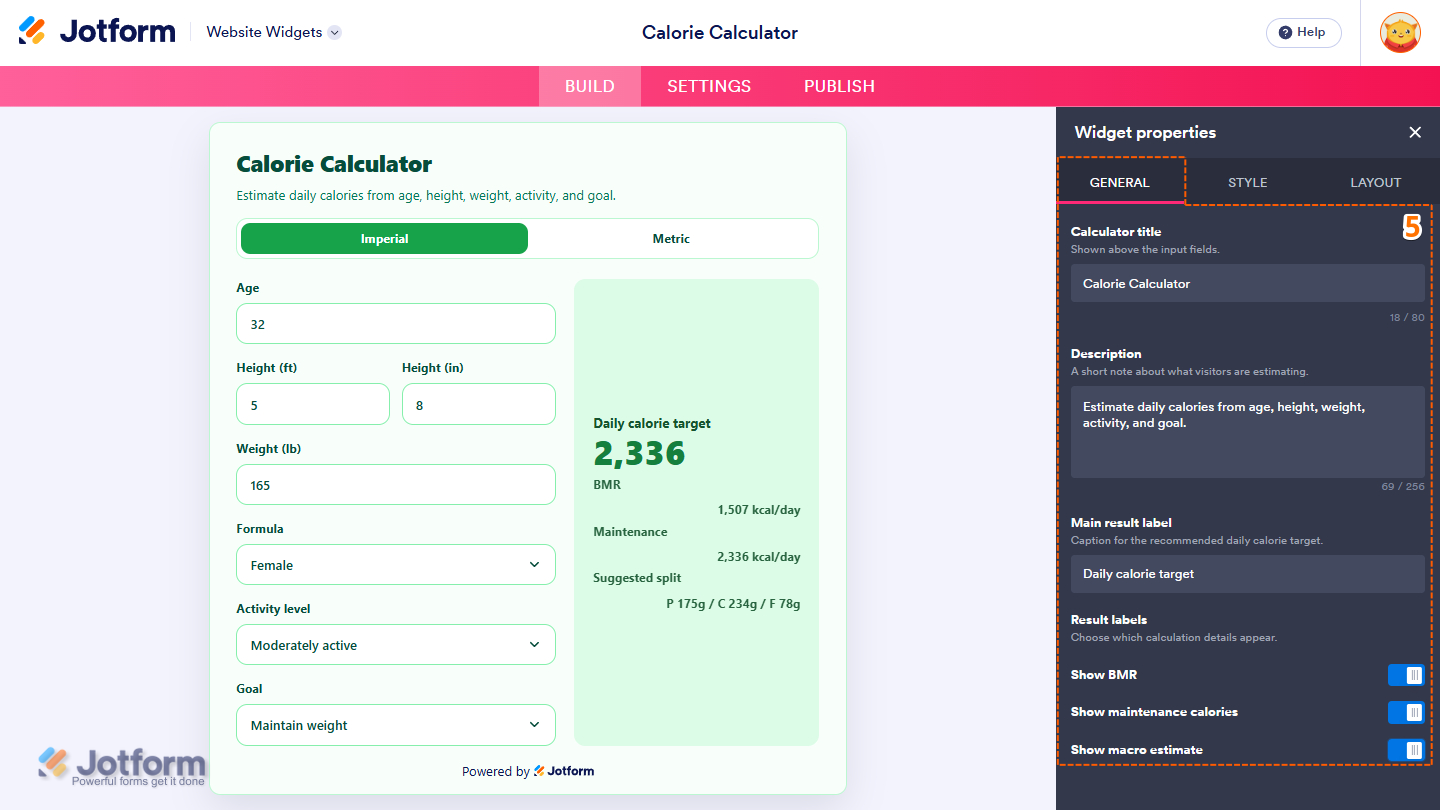
- Now, in the Widget Properties menu that opens on the right side of Website Widgets, under the General tab, set up these properties:
- Calculator Title — Keep the default Calorie Calculator or enter a new one in the input box to customize your title.
- Description — Keep or enter a new short description to display below the calculator title.
- Main Result Label — Delete the existing label in the input box and enter the label you want to display in the result section.
- Show BMR — Keep this on to show the BMR text just below the main result, or toggle it off to hide it.
- Show Maintenance Calories — Keep this toggled on to display maintenance calories, or toggle it off to hide this section from the results.
- Show Macro Estimate — Keep this on to show the suggested split of required calories, or toggle it off to hide it.
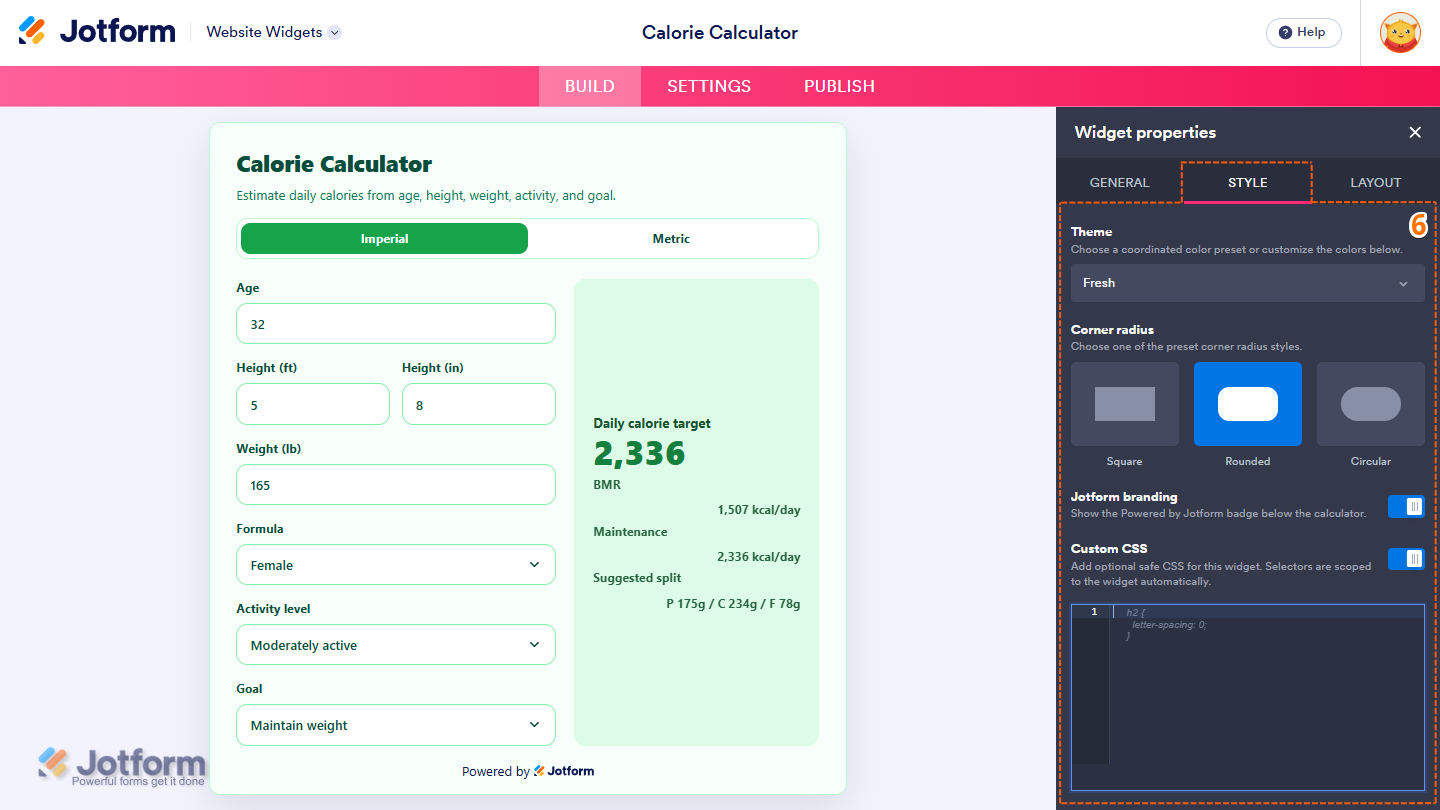
- Next, under the Style tab, customize these properties:
- Theme — Click on the Dropdown menu and select Light, Dark, Fresh, Energy, Clinical, Midnight, or Custom to change the overall appearance of your calculator.
- Corner Radius — Keep the default Rounded corner or change it to Square or Circular.
- Jotform Branding — Keep this on to display the Powered by Jotform badge below the calculator.
- Custom CSS — Toggle this on, then enter your custom CSS in the Custom CSS box that appears below it.
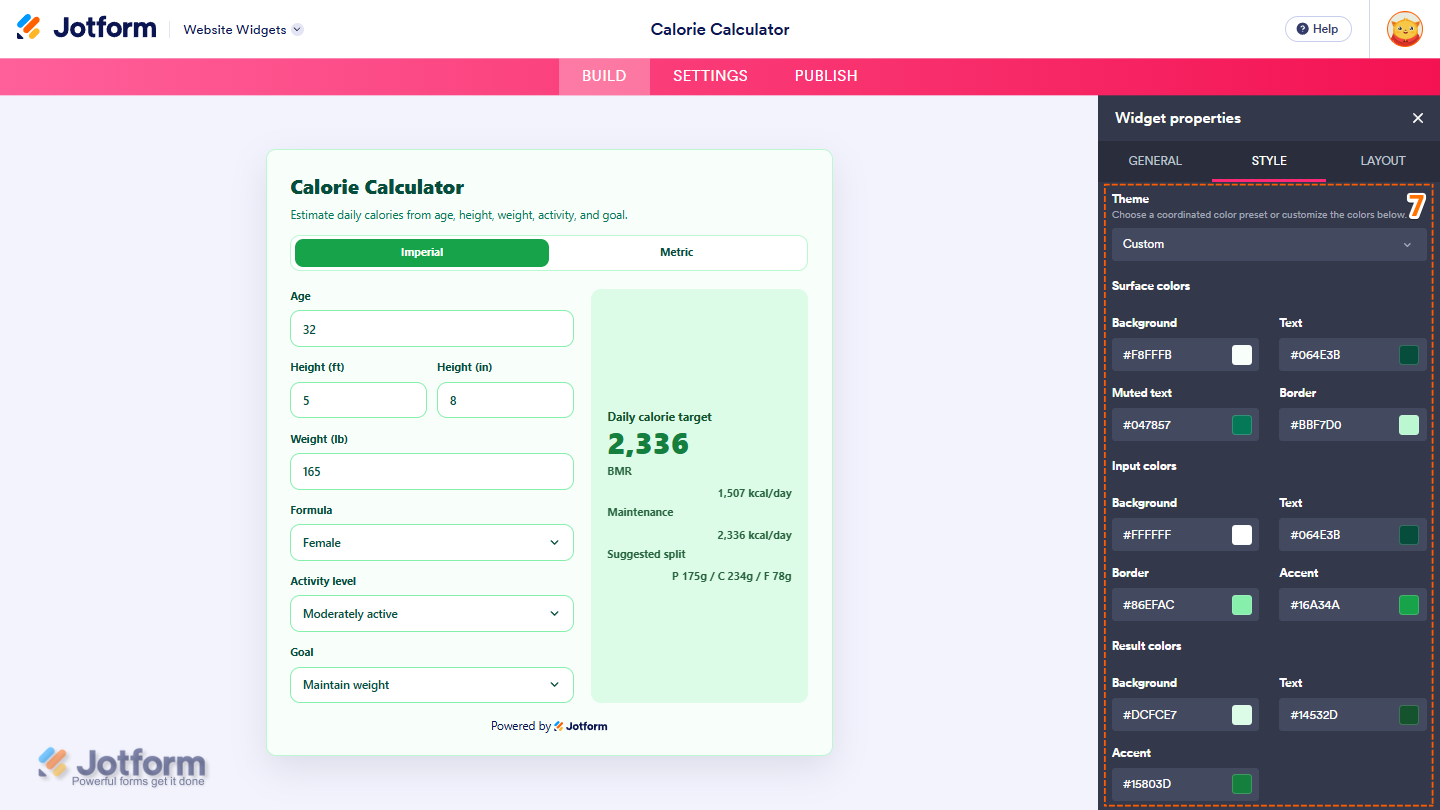
- If you select the Custom theme option, configure the following color properties for the Background, Text, Muted Text, Accent, and Border:
- Surface Colors — Used throughout the widget.
- Input Colors — Used for the calculator’s input fields.
- Result Colors — Used for calculation results.
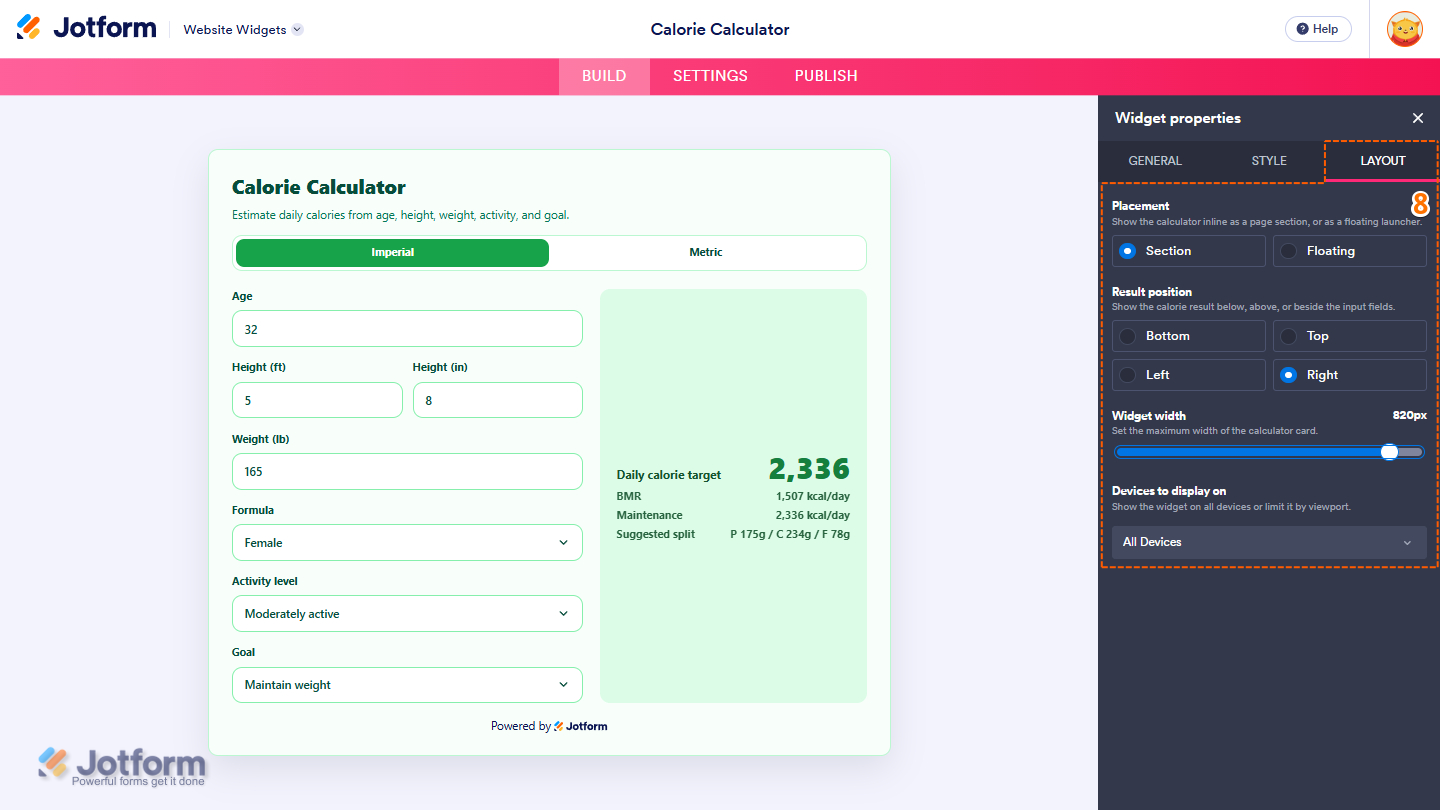
- Then, under the Layout tab, configure these properties:
- Placement — Select to place the calculator as a page section or as a floating launcher.
- Result Position — Select to show the calorie result below, above, left, or right of the input fields.
- Widget Width — Click on and hold the slider handle, then drag it to change the width of the calculator.
- Devices to Display On — Click on the Dropdown menu and select All Devices to display the calculator on both desktop and mobile devices, Desktop Only to display it only on desktop screens, or Mobile Only to display it only on mobile and tablet devices.
Note
The Left and Right Result Position options are available only when the widget width is greater than 450px. The Width also updates dynamically based on the selected Placement.
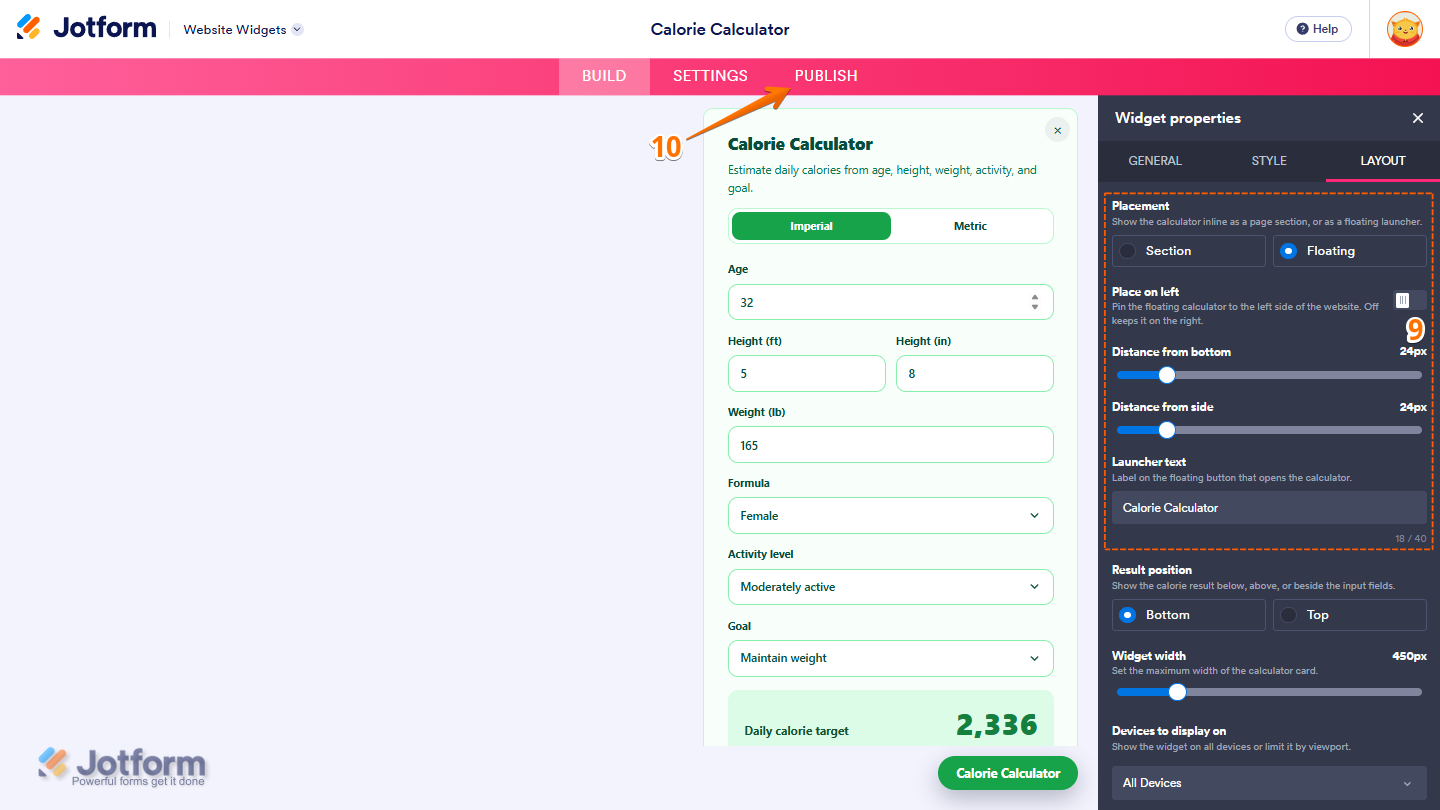
- If you select the Floating placement option, configure these additional properties:
- Place on Left — Toggle this on to place the floating calculator on the left side of the website, or toggle it off to keep it on the right.
- Distance from Bottom — Click on and hold the slider handle, then drag it to change the distance of the calculator from the bottom.
- Distance from Side — Click on and hold the slider handle, then drag it to adjust the calculator’s distance from the left or right side of the page.
- Launcher Text — Keep the default or enter a new one in the input box to change the text that triggers the calculation to pop out.
- Once everything’s set, in the pink navigation bar at the top of the page, click on Publish.
Note
If you’re not logged in, you’ll be asked to log in to your Jotform account or sign up for one. Once you’ve done that, you’ll be able to get the embed code for your widget.
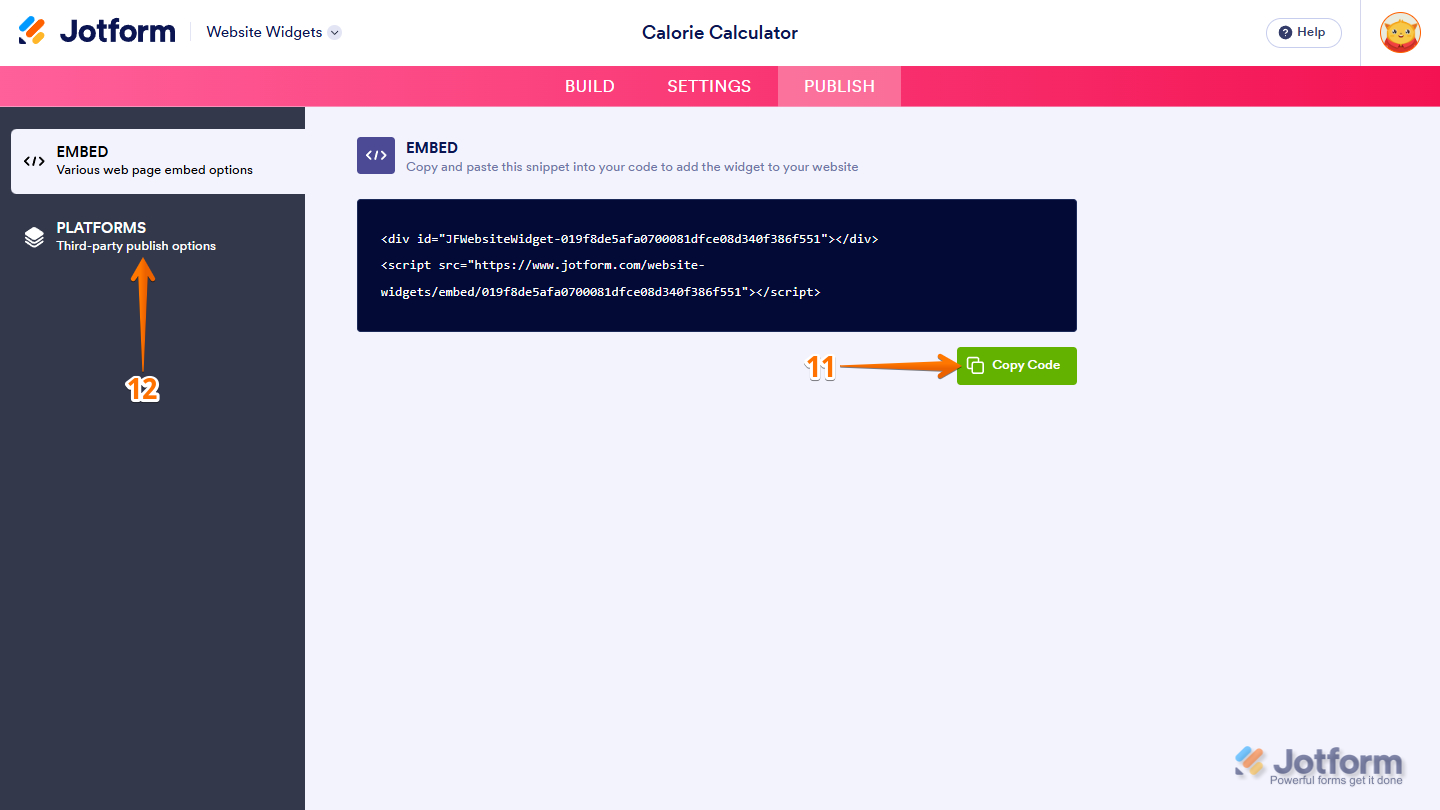
- Then, in the Embed section, click on Copy Code, and, if you already know how, paste that into the Embed section on your platform.
- To view embedding instructions for your widget, click on Platforms in the menu on the left side of the page.
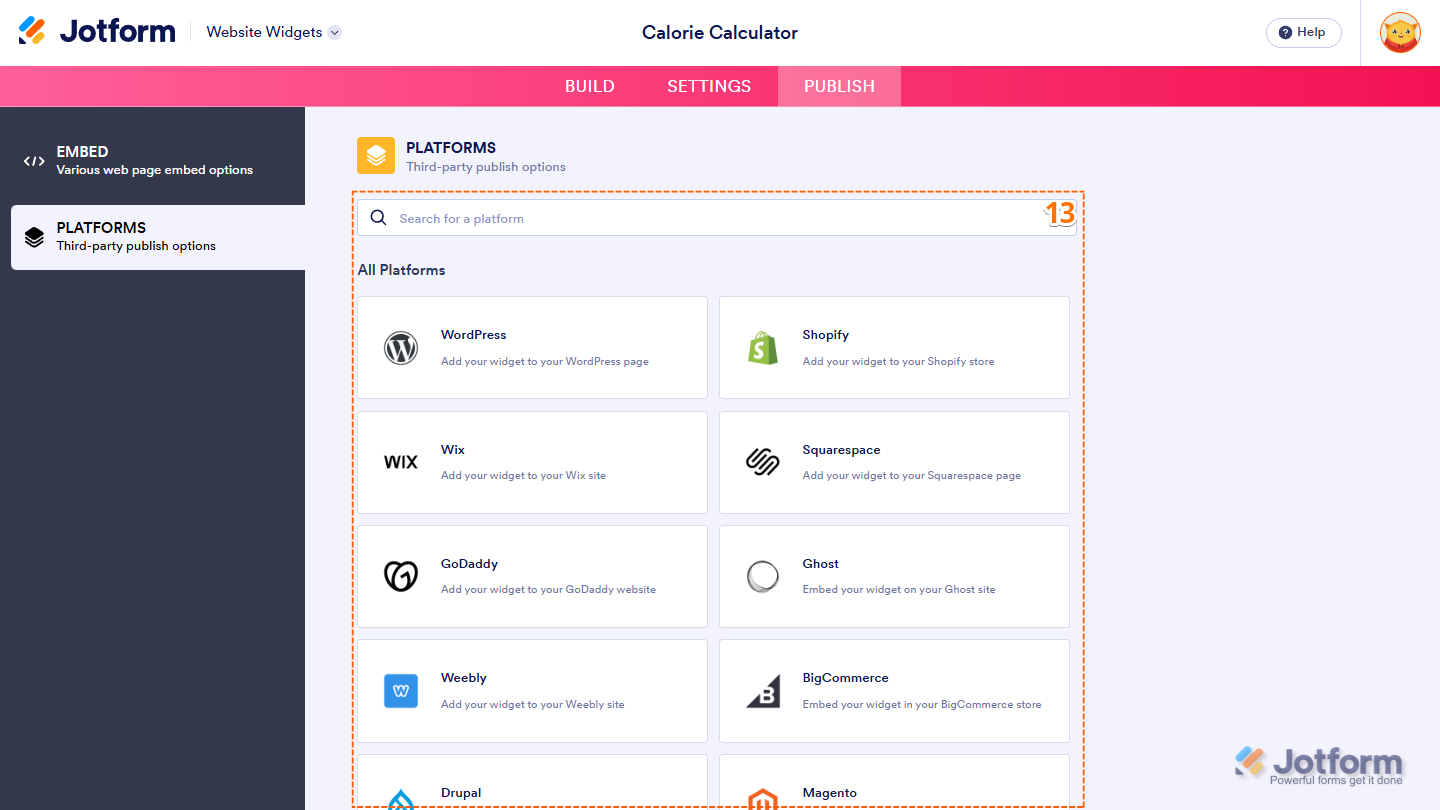
- Next, in the Platforms section on the right, select the platform you want to view embedding instructions for. Or, use the Search bar at the top of the section to find it easily.
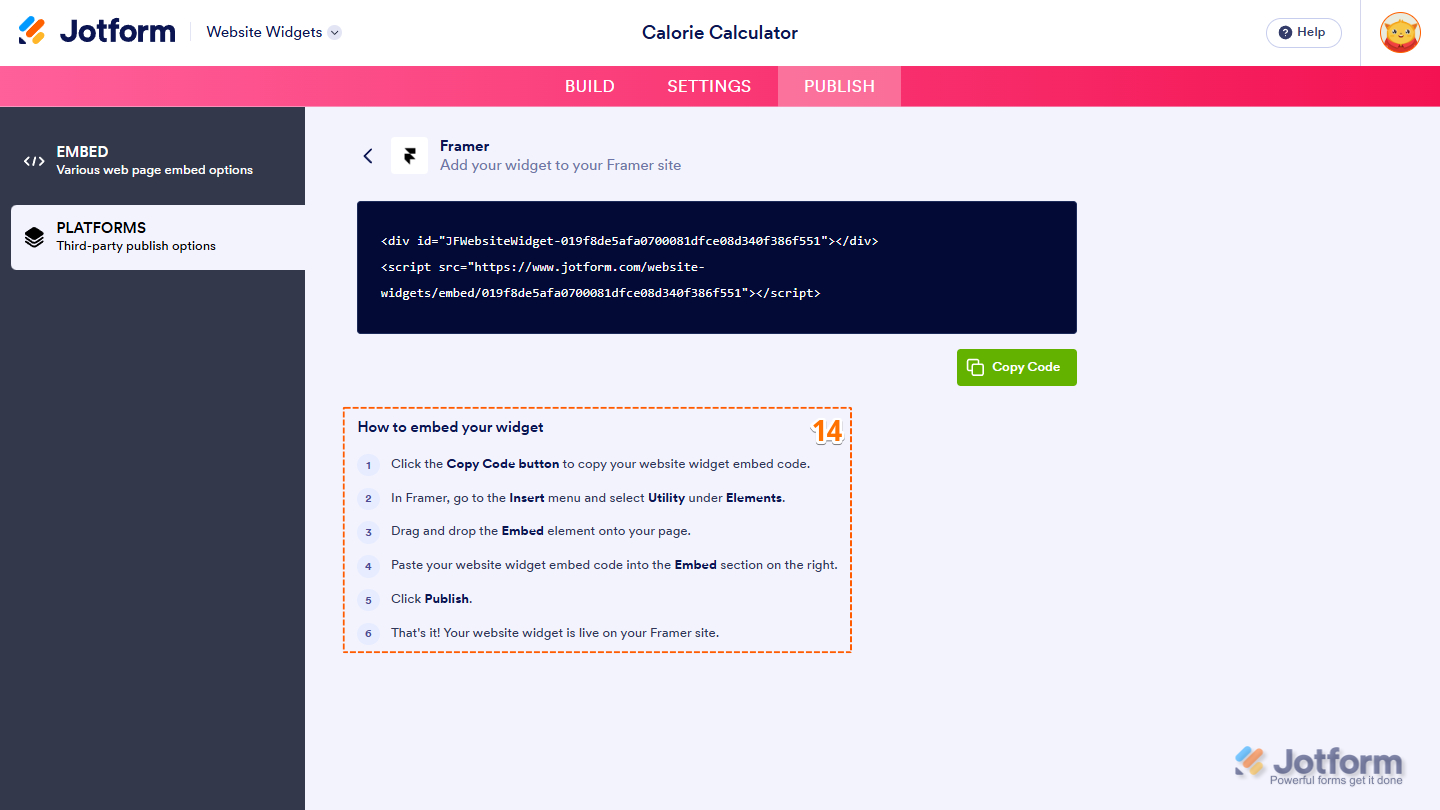
- Then, follow the steps in the How to Embed Your Widget section to add it to your website.
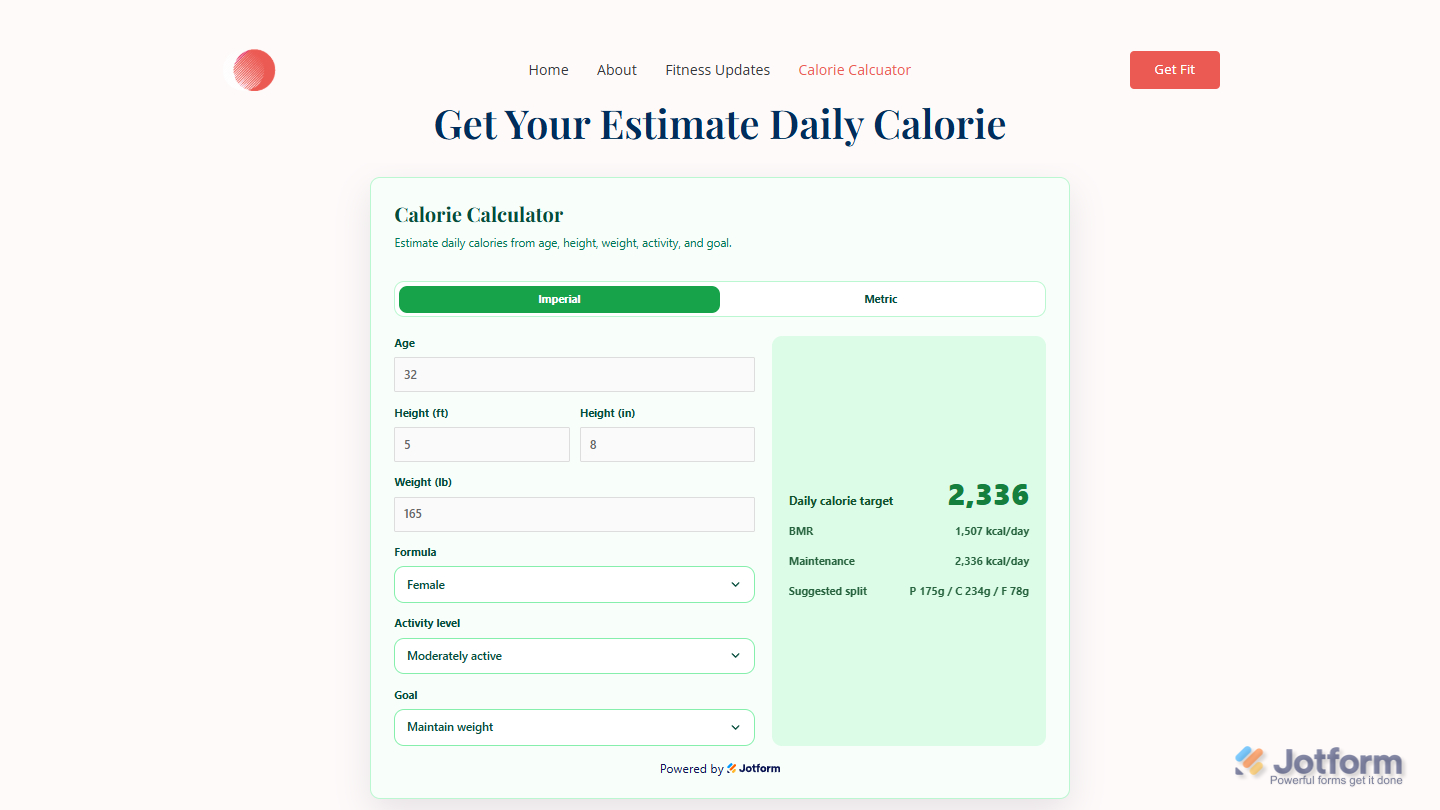
That’s it! Your Calorie Calculator widget will appear on your website just as you customized it. Take a look at the screenshot below to see how it looks on a website.
Note
You can manage the website widgets you’ve created at any time from your account. For a full breakdown of how to do it, head over to our guide on How to Manage Website Widgets.


Send Comment: