With Jotform’s Photo Gallery Widget, you can showcase your photos in a beautiful, organized gallery that visitors can browse directly on your website. Simply upload your images, customize the gallery’s layout and style, and embed it into your website in just a few steps.
A photo gallery is a great way to highlight your products, portfolio, events, travel photos, or other visual content. Whether you’re building a personal website or promoting your business, displaying your images in an attractive gallery helps capture visitors’ attention and create a more engaging browsing experience.
Creating Your Photo Gallery Widget and Getting the Embed Code
Before you can add the Photo Gallery Widget to your website, you’ll first need to upload your images, customize the gallery, and copy its embed code. Here’s what to do:
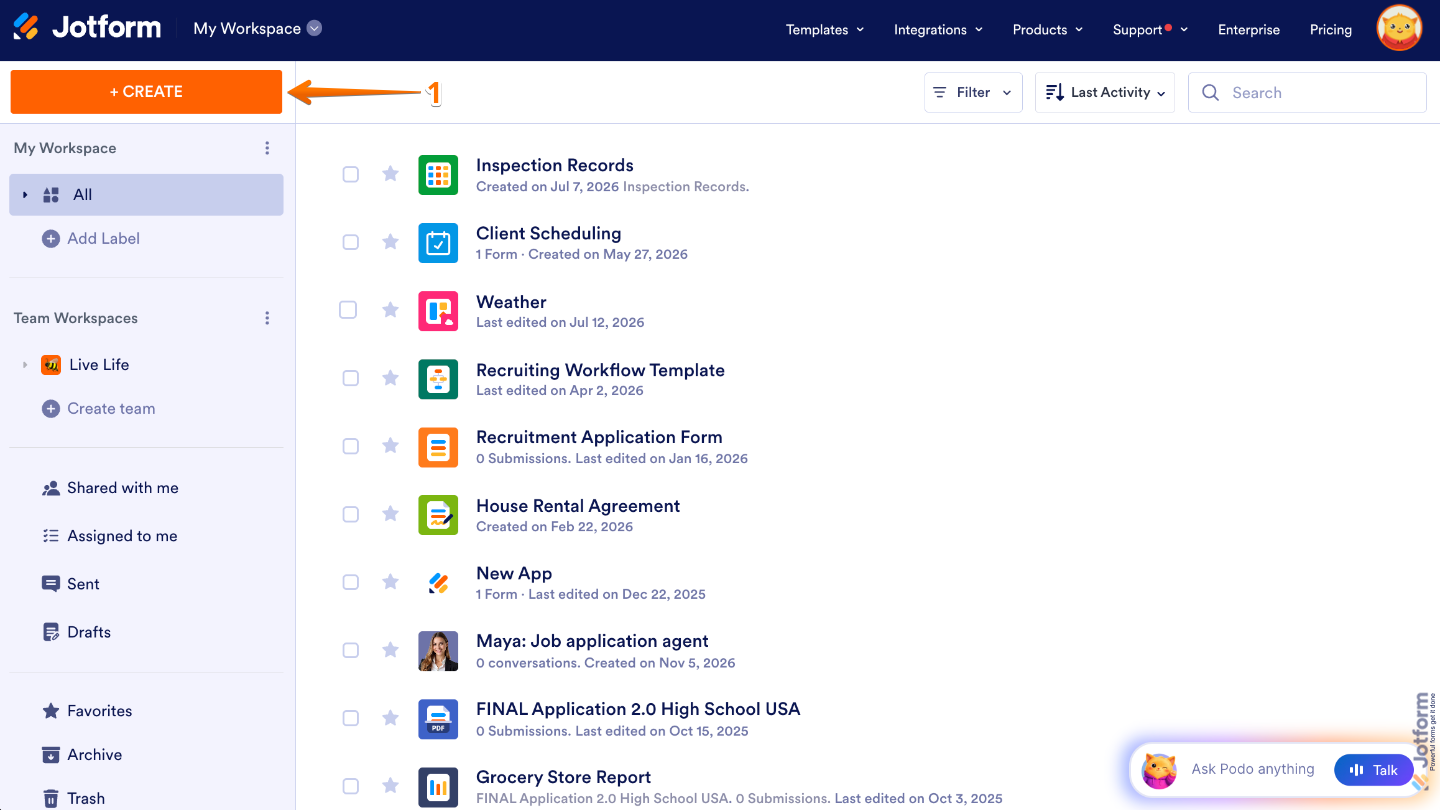
- On your Workspace page, click on Create on the top-left side of the screen.
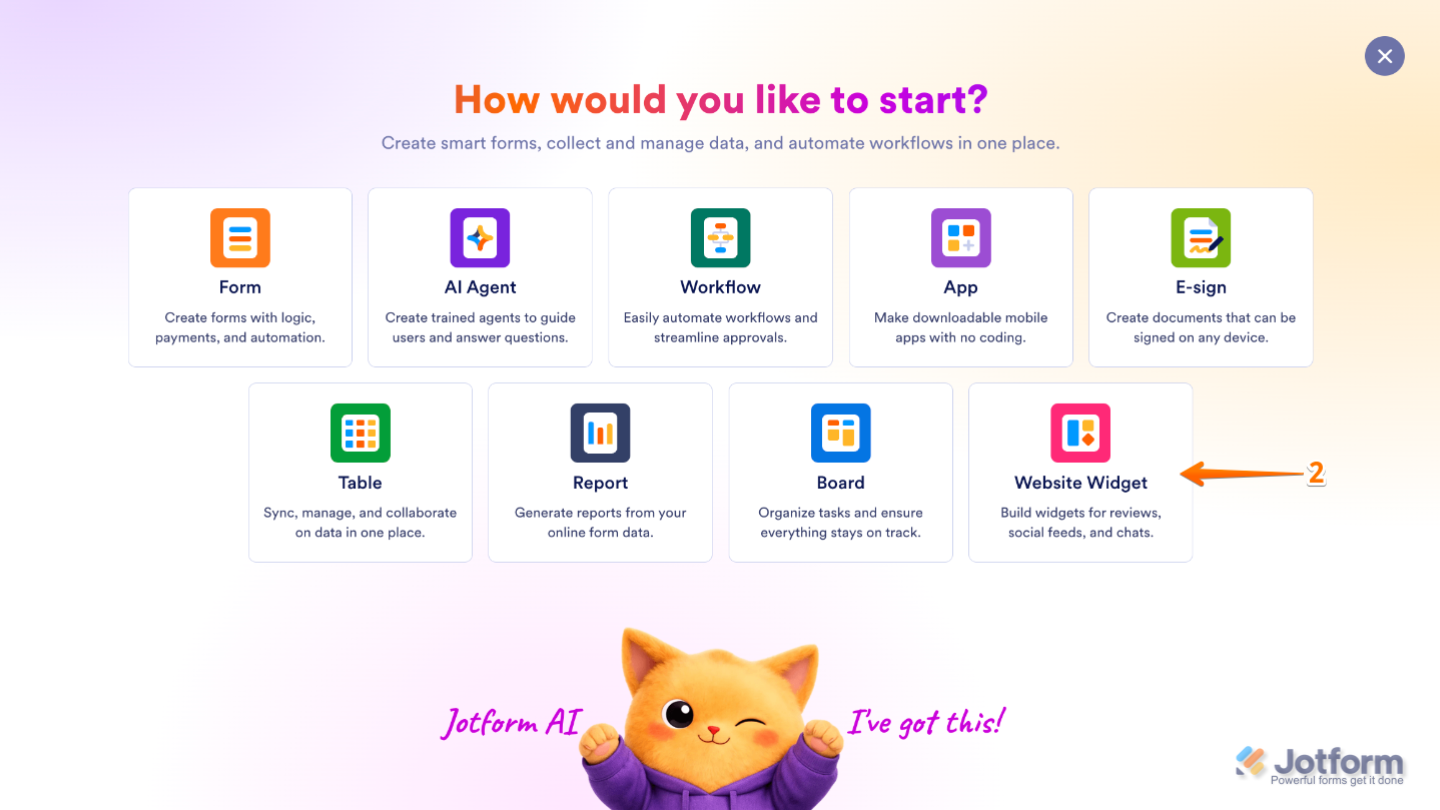
- In the menu that opens up, click on Website Widget.
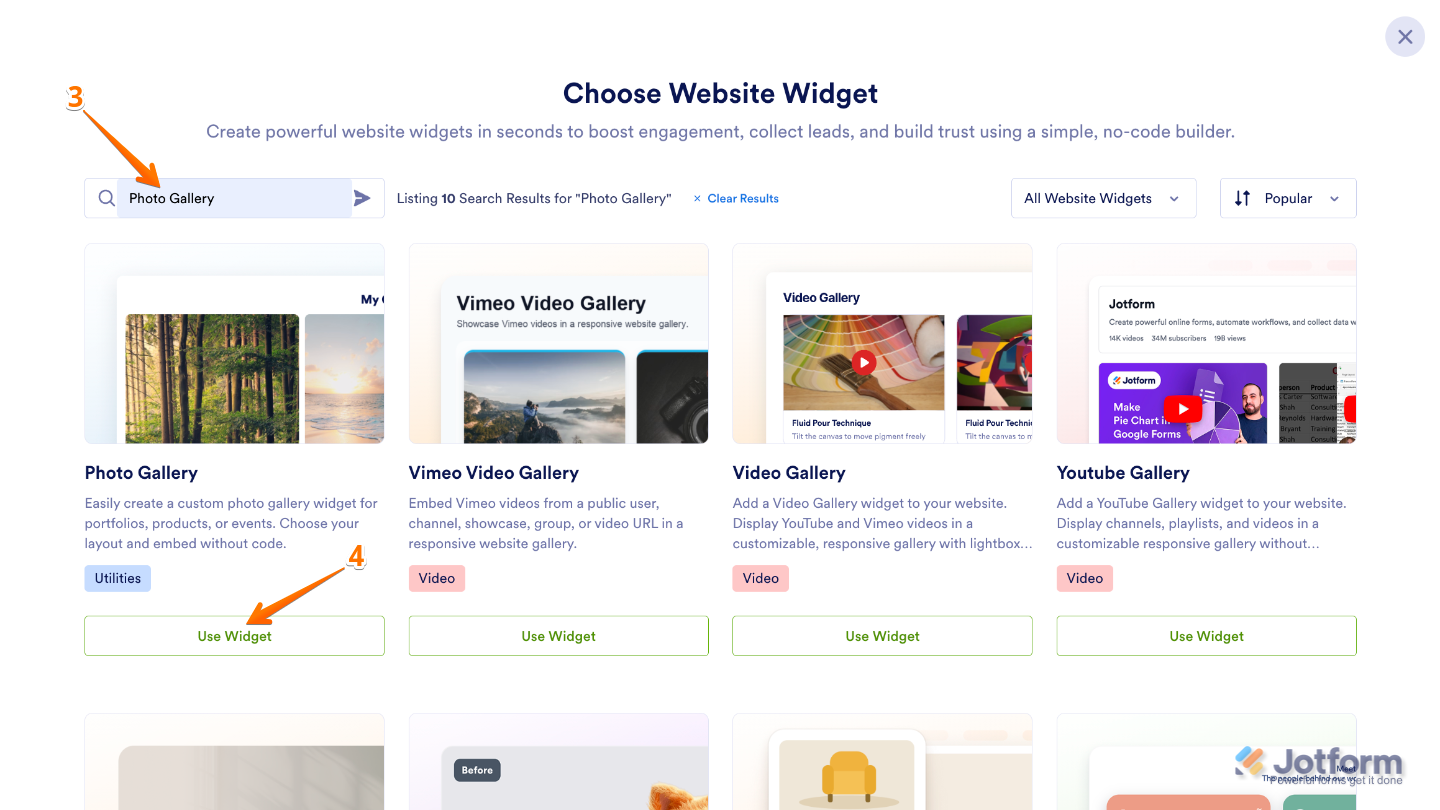
- Next, in the Search bar in the upper-left corner of Choose Website Widget, enter Photo Gallery.
- Then, in the search results, click on Use Widget.
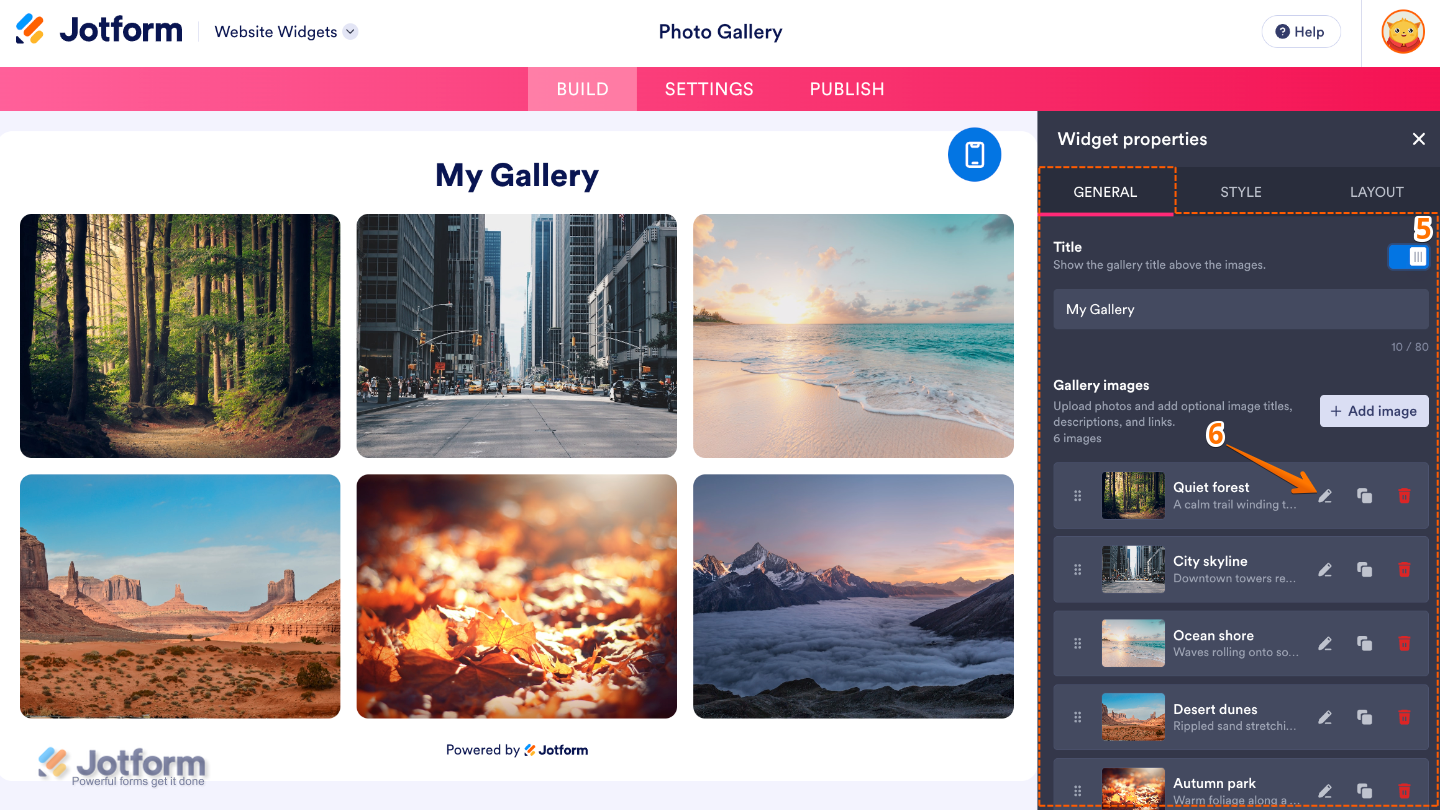
- Now, in the Widget Properties menu that opens on the right side of Website Widgets, under the General tab, set up these properties:
- Title — Add a title to introduce your photo gallery and let visitors know what it’s about.
- Gallery Images
- Add Image — Use this to upload a new image to include in your gallery.
- Edit Image (Pencil Icon) — Lets you modify an existing image’s settings, such as its caption, description, or link.
- Duplicate Image (Duplicate Icon) — Creates a copy of an existing image and its settings to save time when adding similar entries.
- Delete Image (Trash Can Icon) — Click this to remove an image from your gallery.
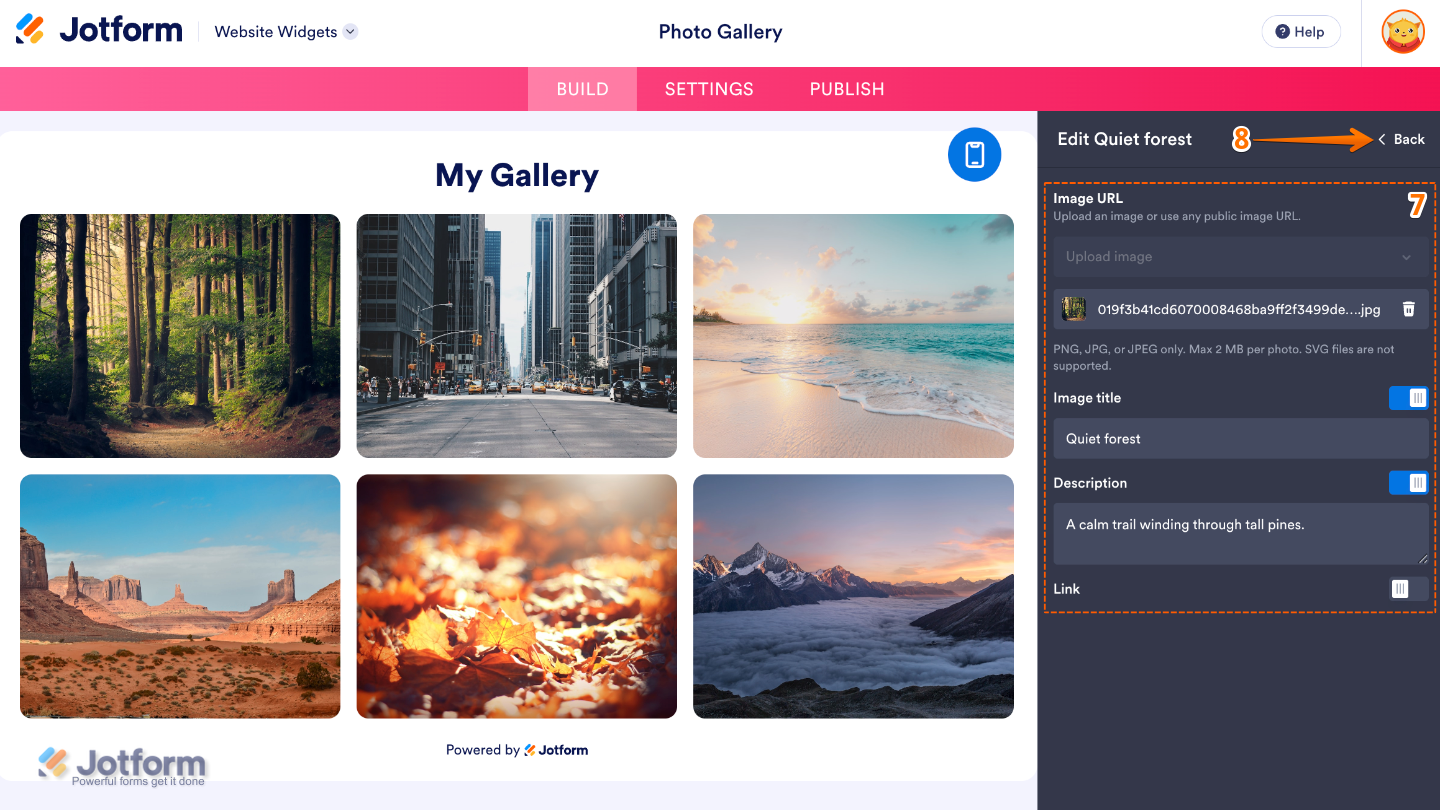
- To show you an example, click on the Pencil icon to edit the Quiet Forest settings.
- Then, configure the Image settings below:
- Image URL — Add the URL of the image you want to display in the photo gallery.
- Image Title — Enter a title for the image to help visitors identify or understand it.
- Description — Add a short description or caption to provide more information about the image.
- Link — Enter a URL to make the image clickable, allowing visitors to open a webpage when they select the image.
- Once everything’s set, in the upper-right corner of the Edit Image menu, click on Back.
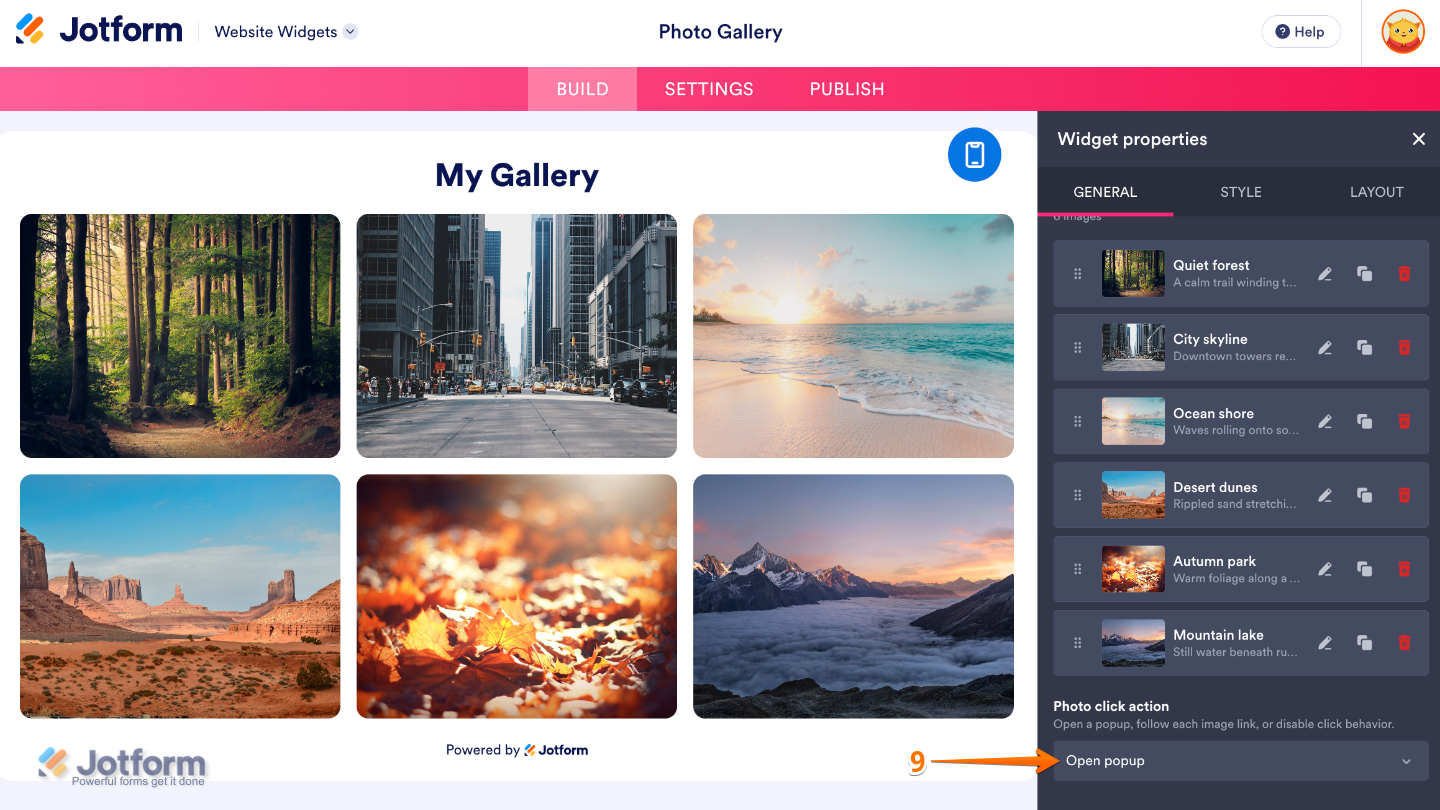
- Next, scroll down and adjust the Photo Click Action option by choosing what happens when visitors click a photo, such as opening the full-size image or following the link you’ve assigned to it.
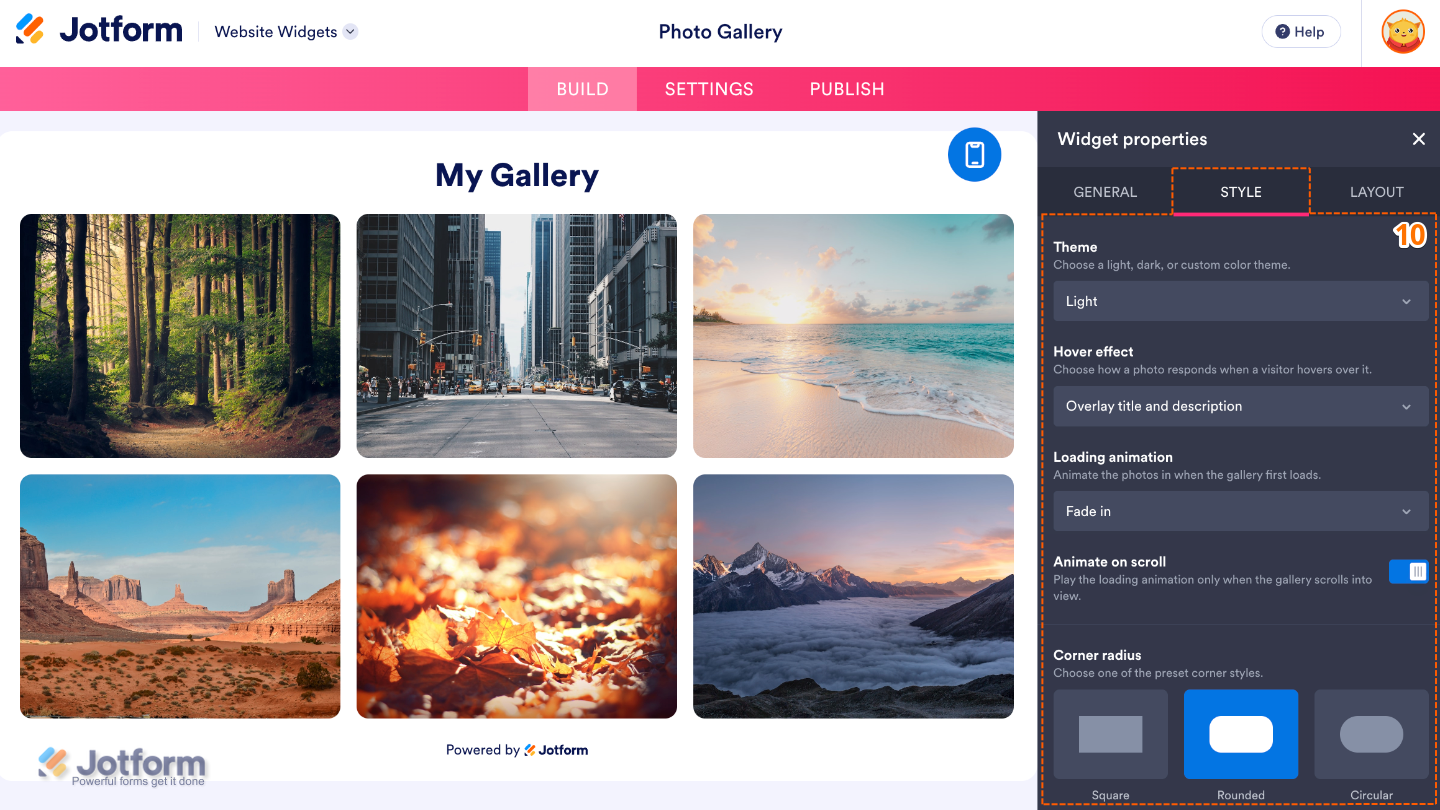
- Now, under the Style tab, customize these properties:
- Theme — Choose a visual theme that matches your website’s design and overall style.
- Hover Effect — Choose the animation or visual effect that appears when visitors hover over an image.
- Loading Animation — Select how images are displayed or animated when the gallery loads.
- Animate on Scroll — Enable animations that trigger as visitors scroll down the page.
- Corner Radius — Control how rounded the corners of the image cards appear.
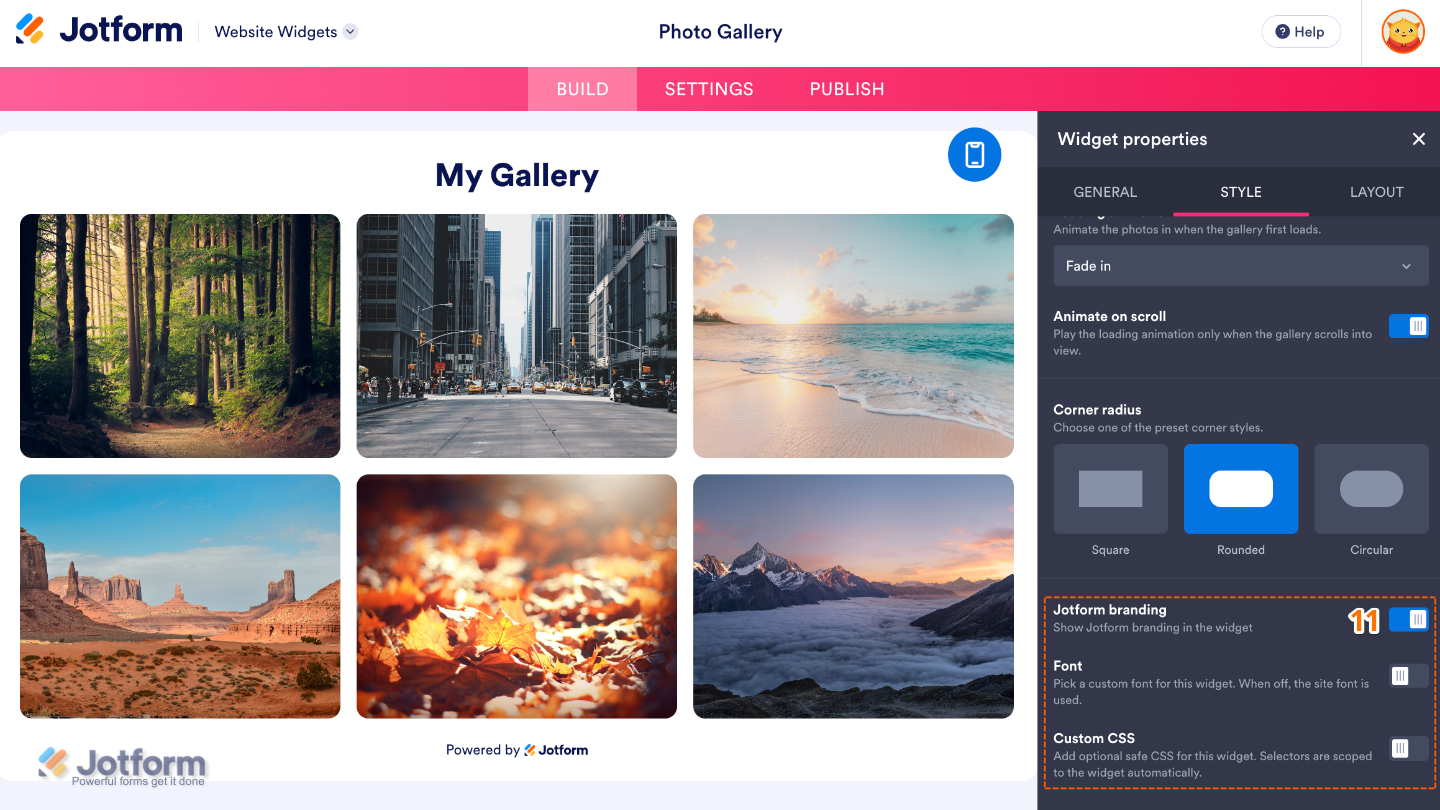
- Then, scroll down and configure these other options:
- Jotform Branding — Show or hide Jotform branding on the widget, depending on your plan and preferences.
- Font — Select the font used for the image titles and descriptions.
- Custom CSS — Apply your own CSS styles for advanced customization beyond the built-in settings.
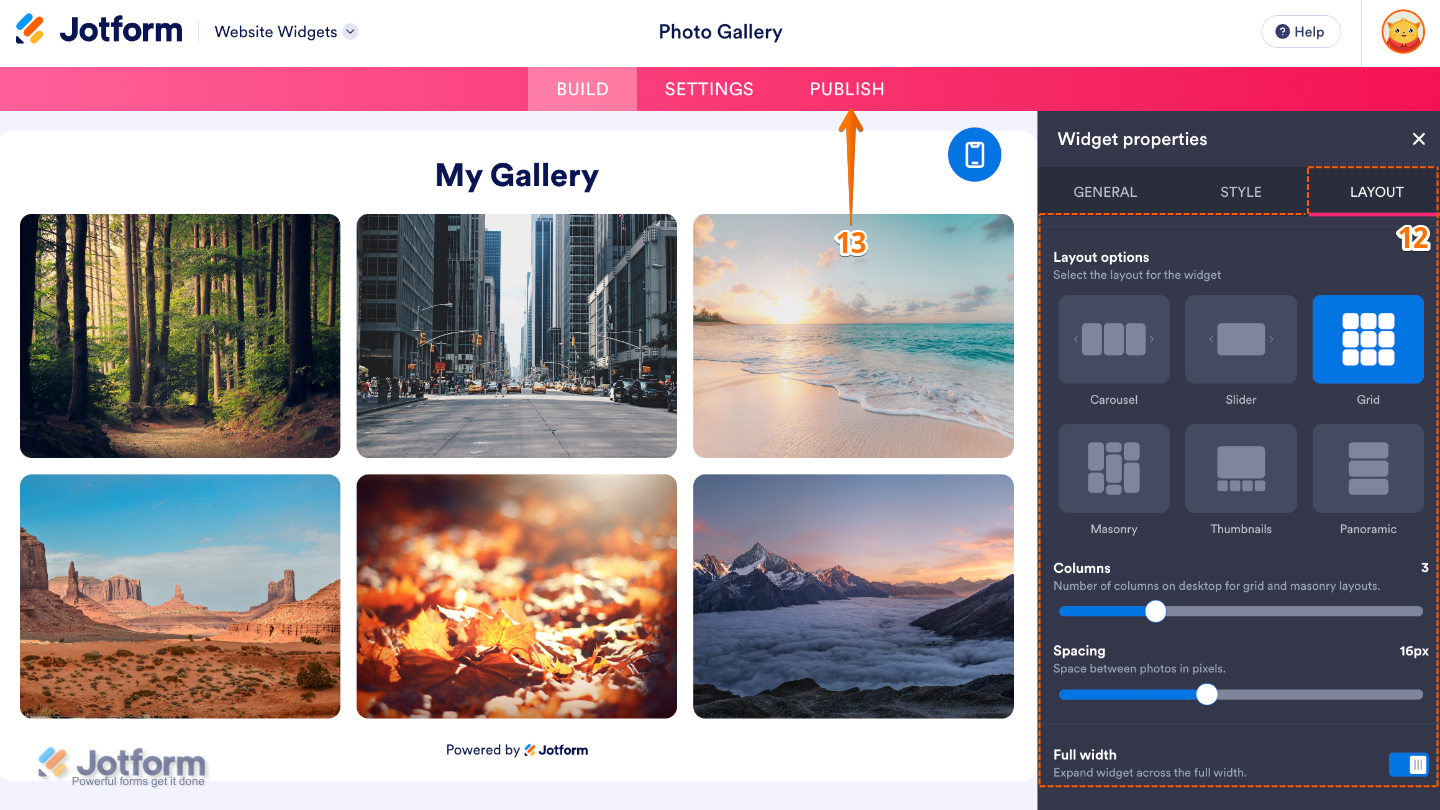
- Next, under the Layout tab, configure these properties:
- Layout Options — Choose how images are arranged within the gallery.
- Columns — Set the number of image columns displayed in the gallery.
- Spacing — Adjust the amount of space between images.
- Full Width — Expand the photo gallery to fill the entire width of its container for a more immersive display.
- Once you’ve finished configuring the widget, in the pink navigation bar at the top of the page, click on Publish.
Note
If you’re not logged in, you’ll be asked to log in to your Jotform account or sign up for a Jotform account before you can continue using your widgets.
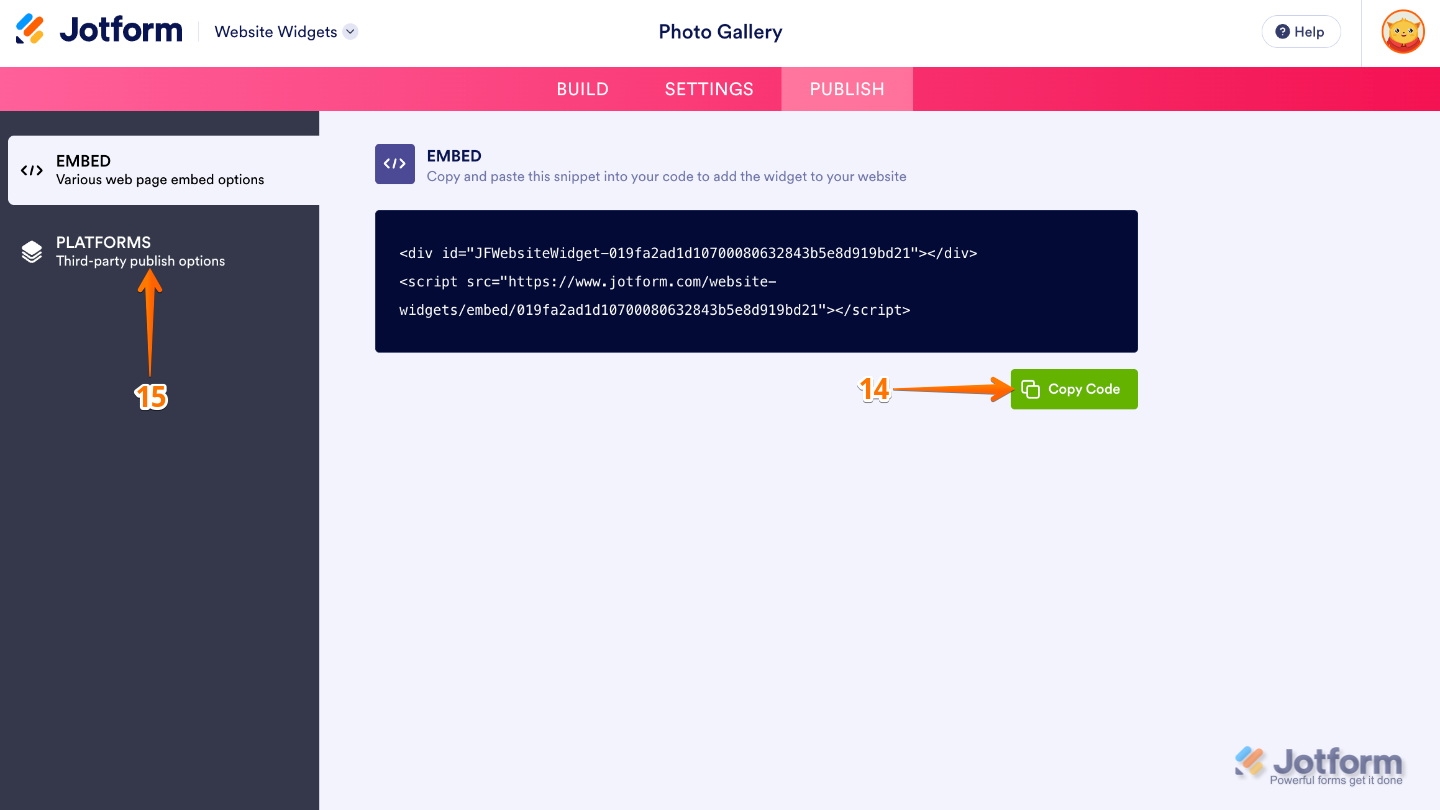
- Then, in the Embed section, click on Copy Code, and, if you already know how, paste that into the Embed section on your platform, and you’re good to go.
- To view embedding instructions for your widget, click on Platforms in the menu on the left side of the page.
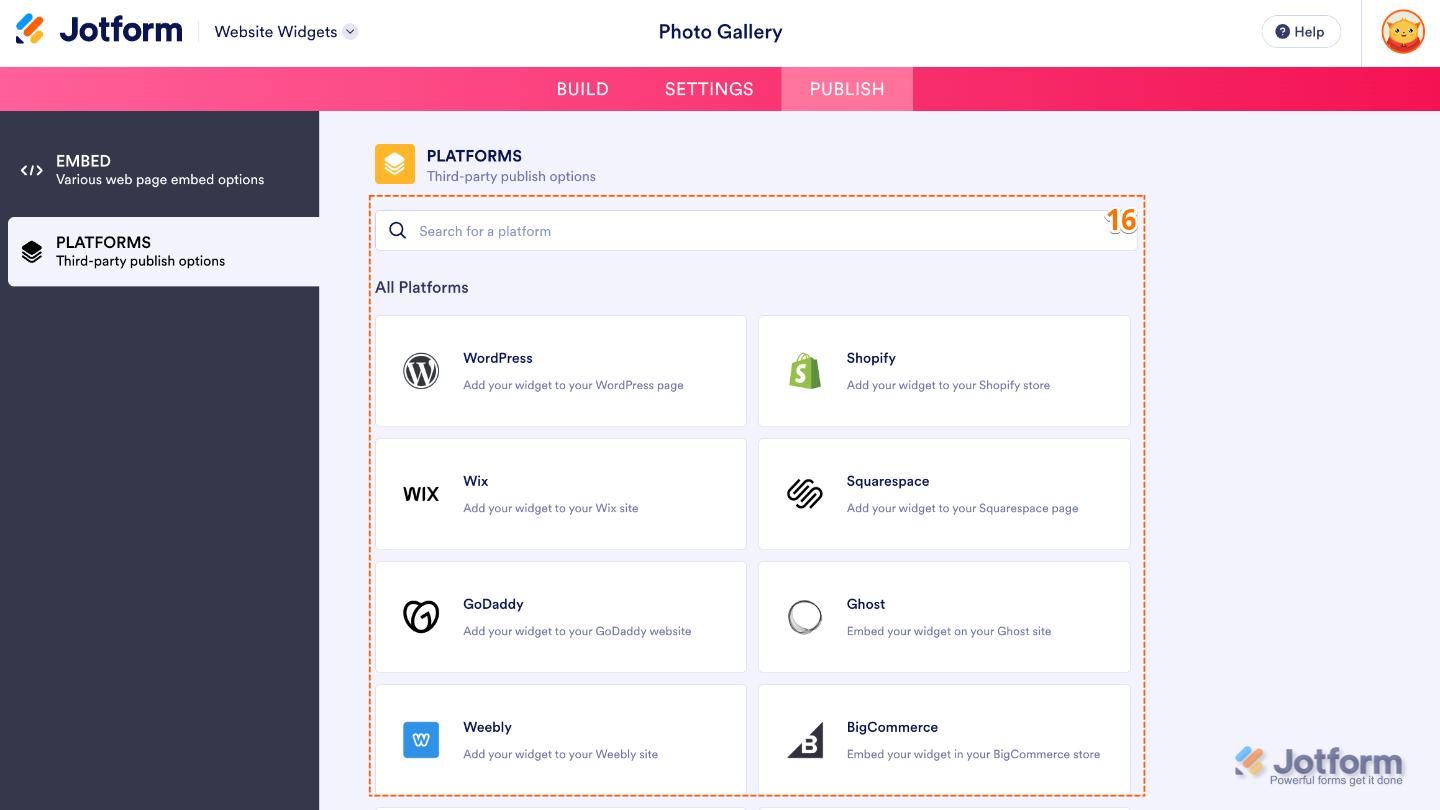
- Next, in the Platforms section on the right, select the platform you want to view embedding instructions for. Or, use the Search bar at the top of the section to find it easily.
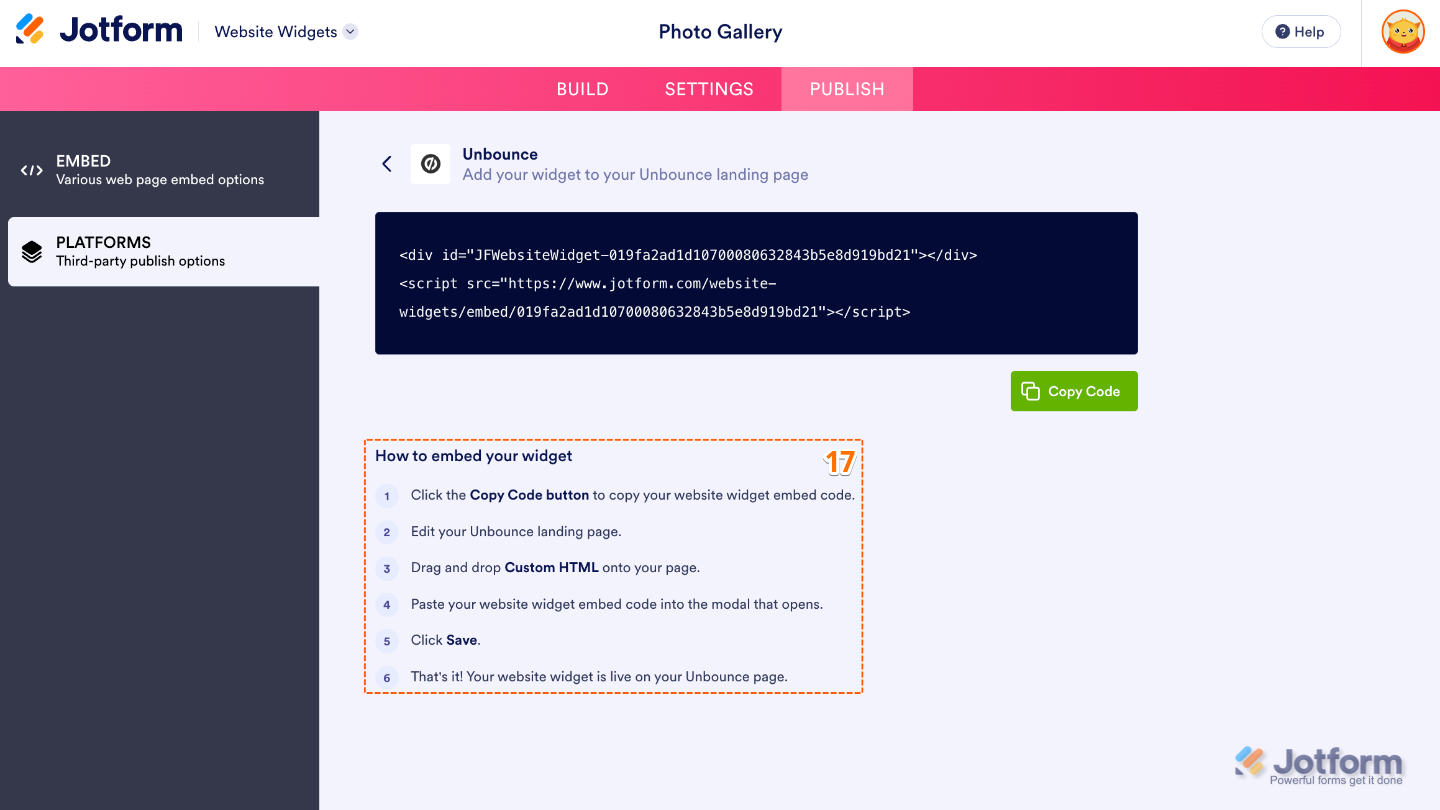
- Then, follow the steps in the How to Embed Your Widget section to add it to your website.
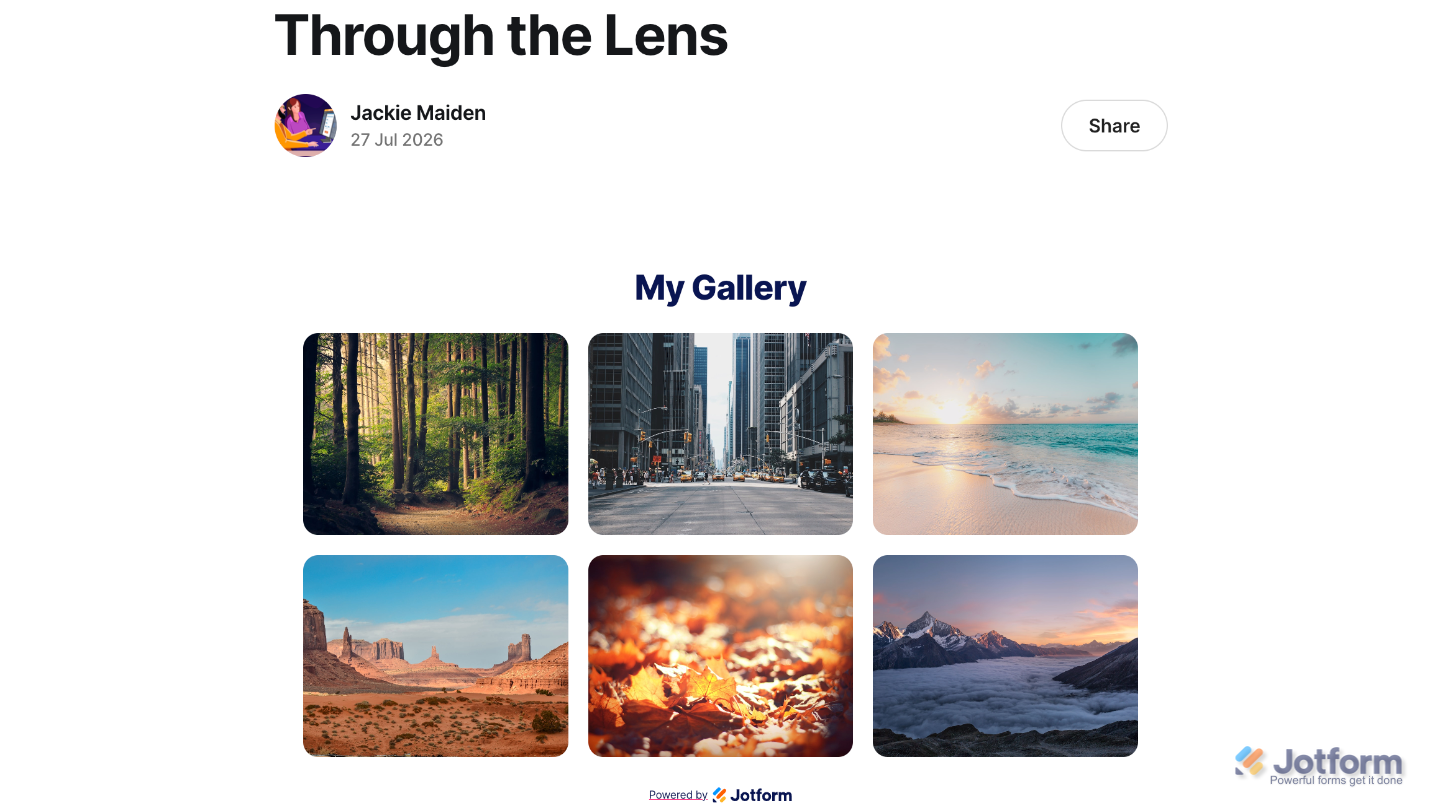
That’s it! Your Photo Gallery widget will appear on your website with the design and settings you selected for it. See the screenshot below for an example of how it looks on a website.
Note
You can manage the website widgets you’ve created at any time from your account. For a full breakdown of how to do it, head over to our guide on How to Manage Website Widgets.
Pro Tips
- Use clear, high-resolution images to create a professional-looking gallery and give visitors the best viewing experience.
- Choose a layout and number of columns that work well with your website’s design and make your images easy to browse on both desktop and mobile devices.


Send Comment: