Jotform makes it easy to add a Restaurant Menu to your website so visitors can browse your food and drink options directly from your site. It’s a simple way to showcase your menu in an organized and easy-to-browse format.
Whether you’re sharing your daily specials, showcasing your full menu, or highlighting specific dishes and drinks, the Restaurant Menu widget helps you keep your menu accessible and easy for visitors to explore.
Setting Up Your Restaurant Menu Widget
To embed a Restaurant Menu on your website, you’ll first need to set up the Restaurant Menu widget and copy the embed code for it. Here’s how to get going:
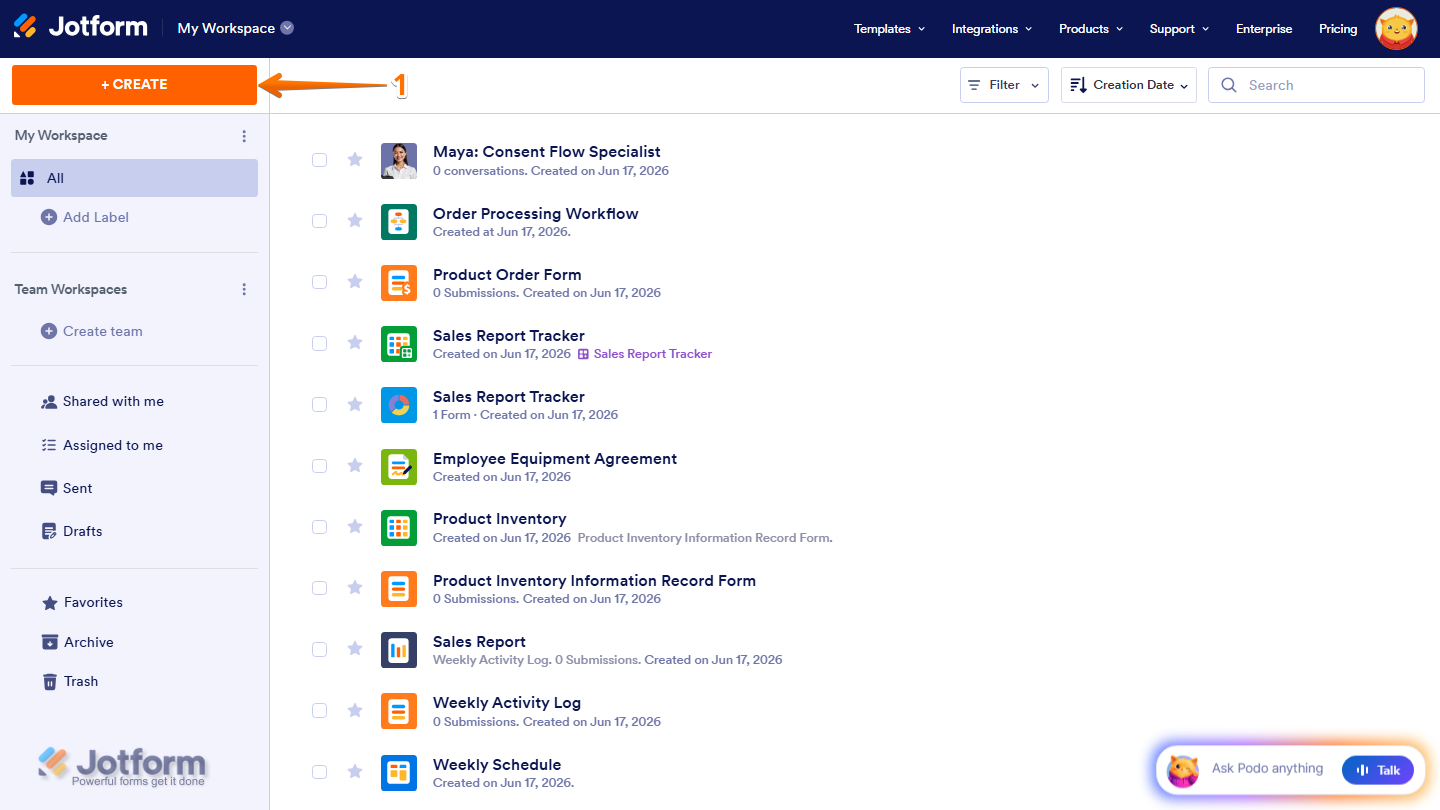
- On the top-left side of your Workspace page, click on Create.
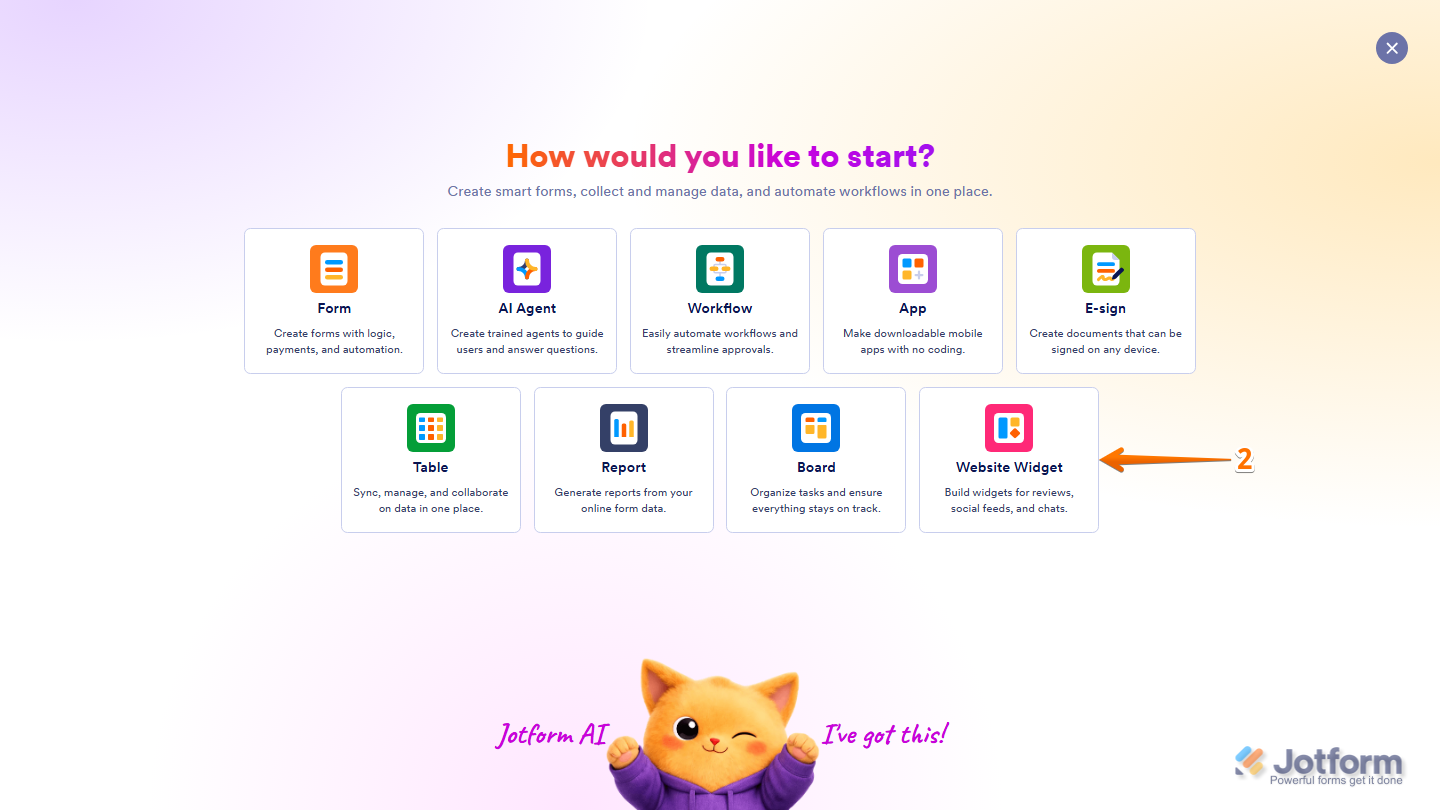
- Then, in the menu that opens up, select Website Widget.
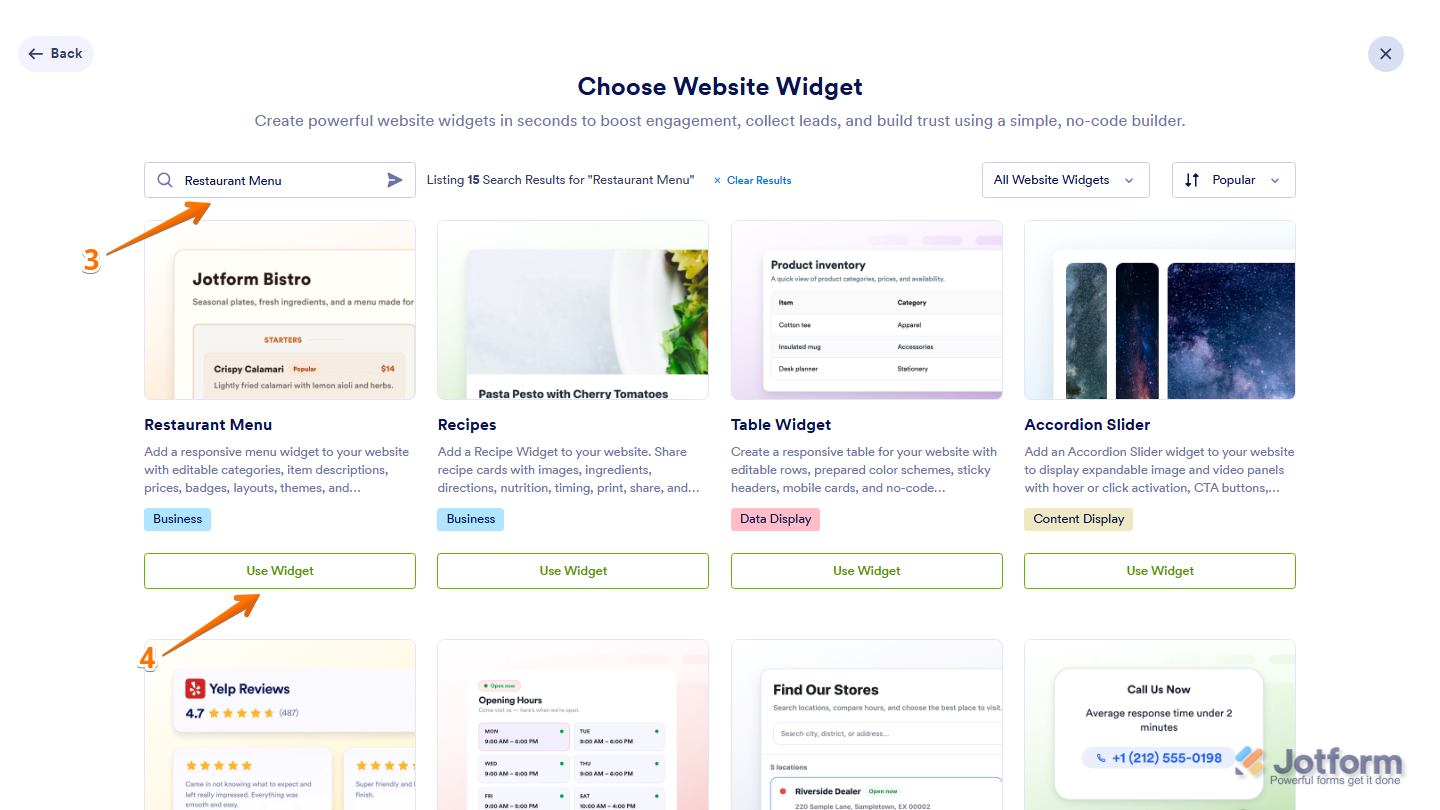
- Next, in the Search bar in the upper-left corner of the Choose Website Widget menu, enter Restaurant Menu.
- Then, in the search results, click on Use Widget at the bottom of it.
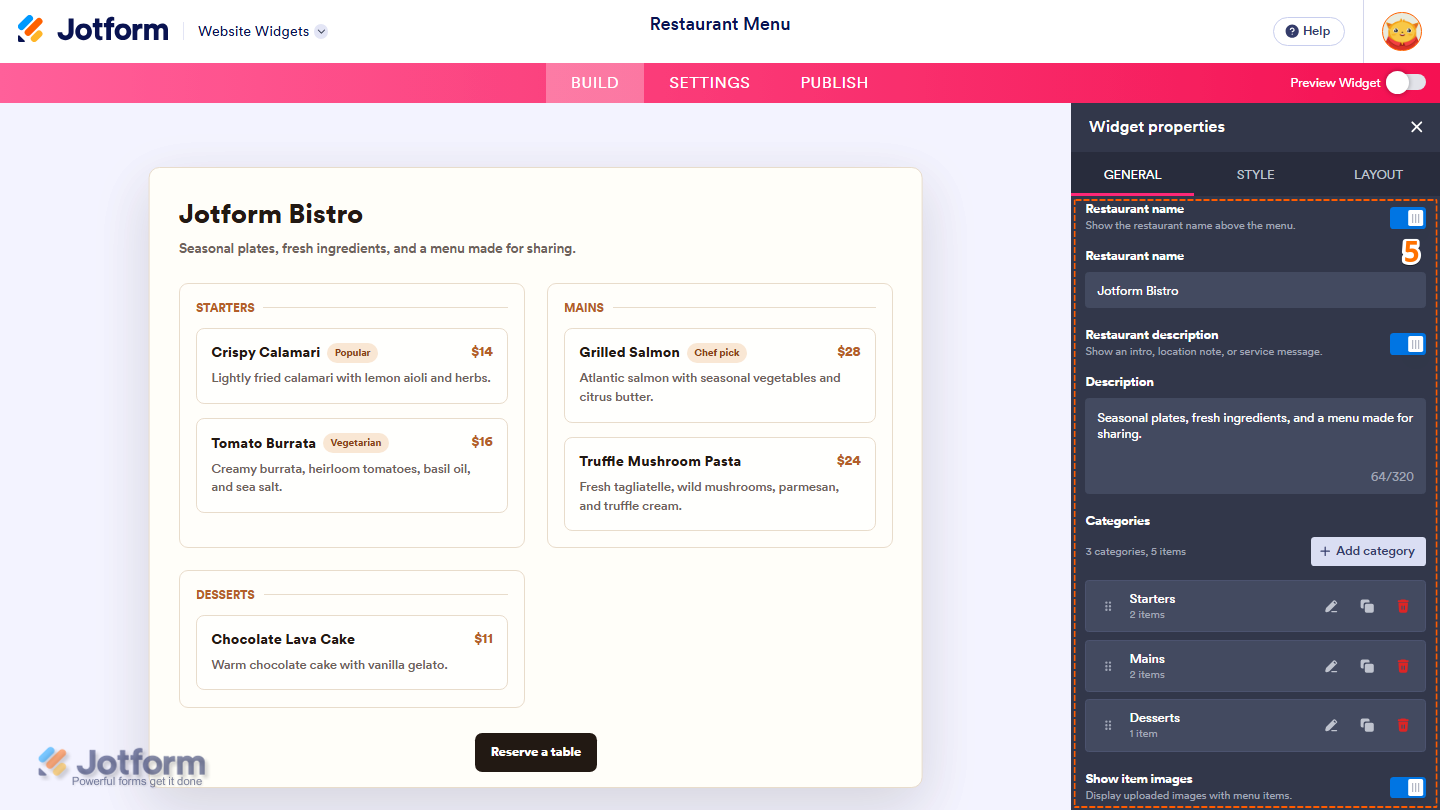
- Now, in the Widget Properties menu that opens on the right side of Website Widgets, set up these properties:
- Restaurant Name — Show or hide the restaurant name displayed above the menu. Once enabled, enter the name you want to display in the Restaurant Name field.
- Restaurant Description — Show or hide a description below the restaurant name.
- Description — Add a short introduction, location note, or service message for your restaurant.
- Categories — Add and organize menu categories, such as Starters, Mains, and Desserts. You can also edit, duplicate, or delete existing categories.
- Show Item Images — Show or hide images for your menu items.
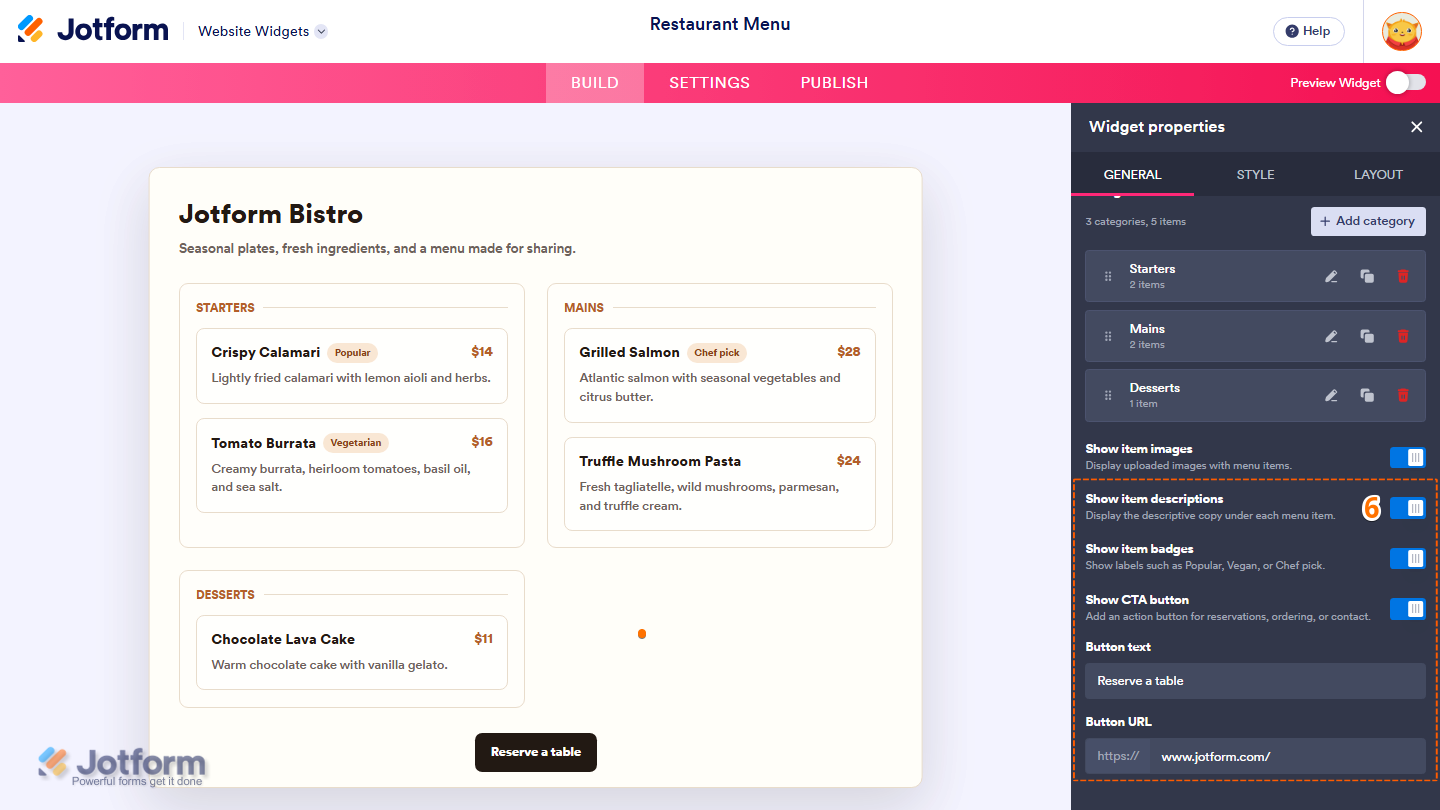
- Next, scroll down and continue to set up these properties:
- Show Item Descriptions — Show or hide the descriptions displayed below each menu item.
- Show Item Badges — Show or hide labels such as Popular, Vegetarian, or Chef Pick.
- Show CTA Button — Show or hide an action button for reservations, ordering, or contact.
- Button Text — Enter the text to display on the CTA button.
- Button URL — Enter the URL that visitors will be directed to when they click the CTA button.
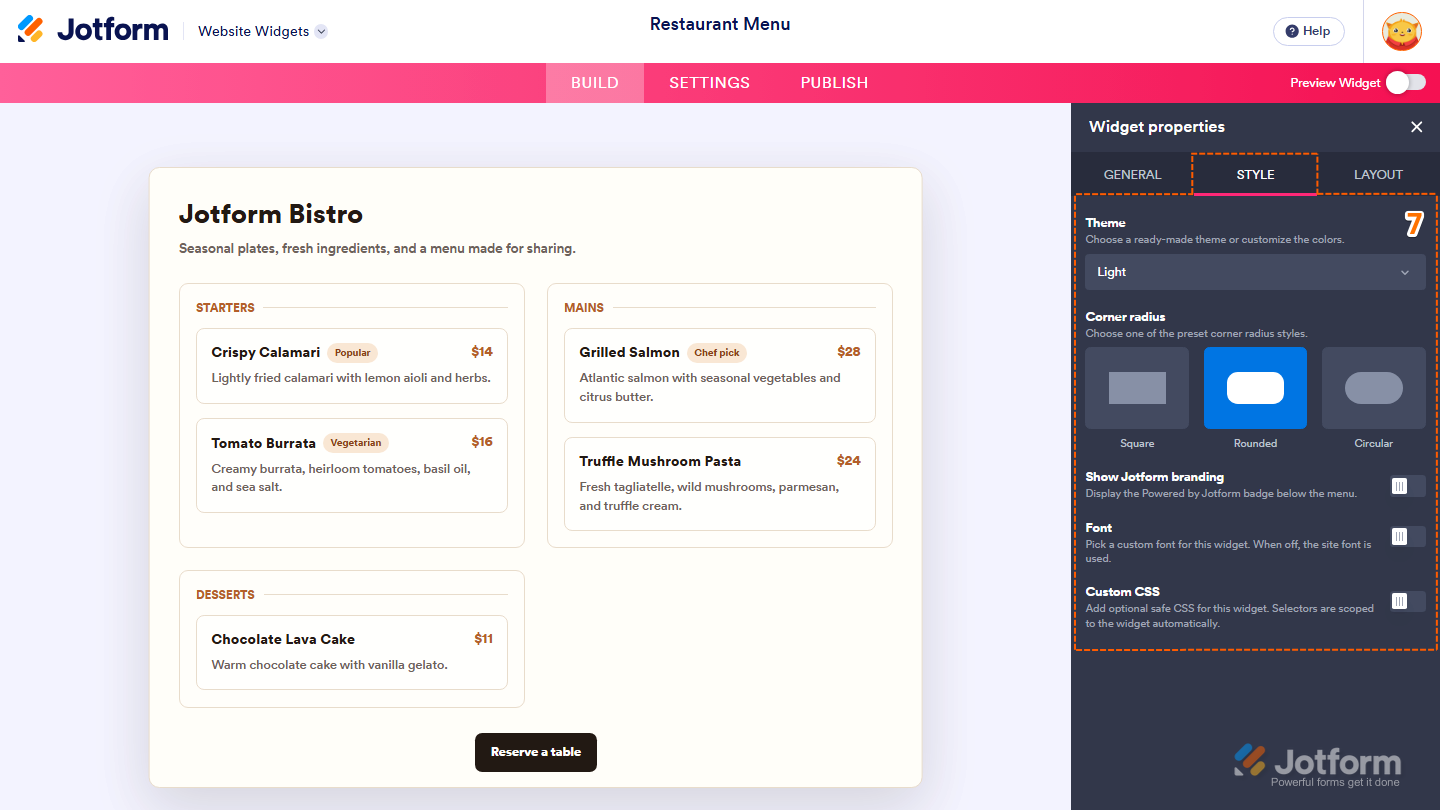
- Now, under the Style tab, customize these properties:
- Theme — Click on the Downward Arrow icon and select a preset theme to apply to the widget.
- Corner Radius — Choose the corner style of the widget elements: Square, Rounded, or Circular.
- Show Jotform Branding — Show or hide Powered by Jotform in the widget.
- Font — Toggle this on, click on the Downward Arrow icon below it, and in the Dropdown menu, select Site Font to match your website’s font, System to use each visitor’s device font, or another available font.
- Custom CSS — Toggle this on, and then in the Code Editor below it, enter custom CSS code to apply advanced styling to the widget.
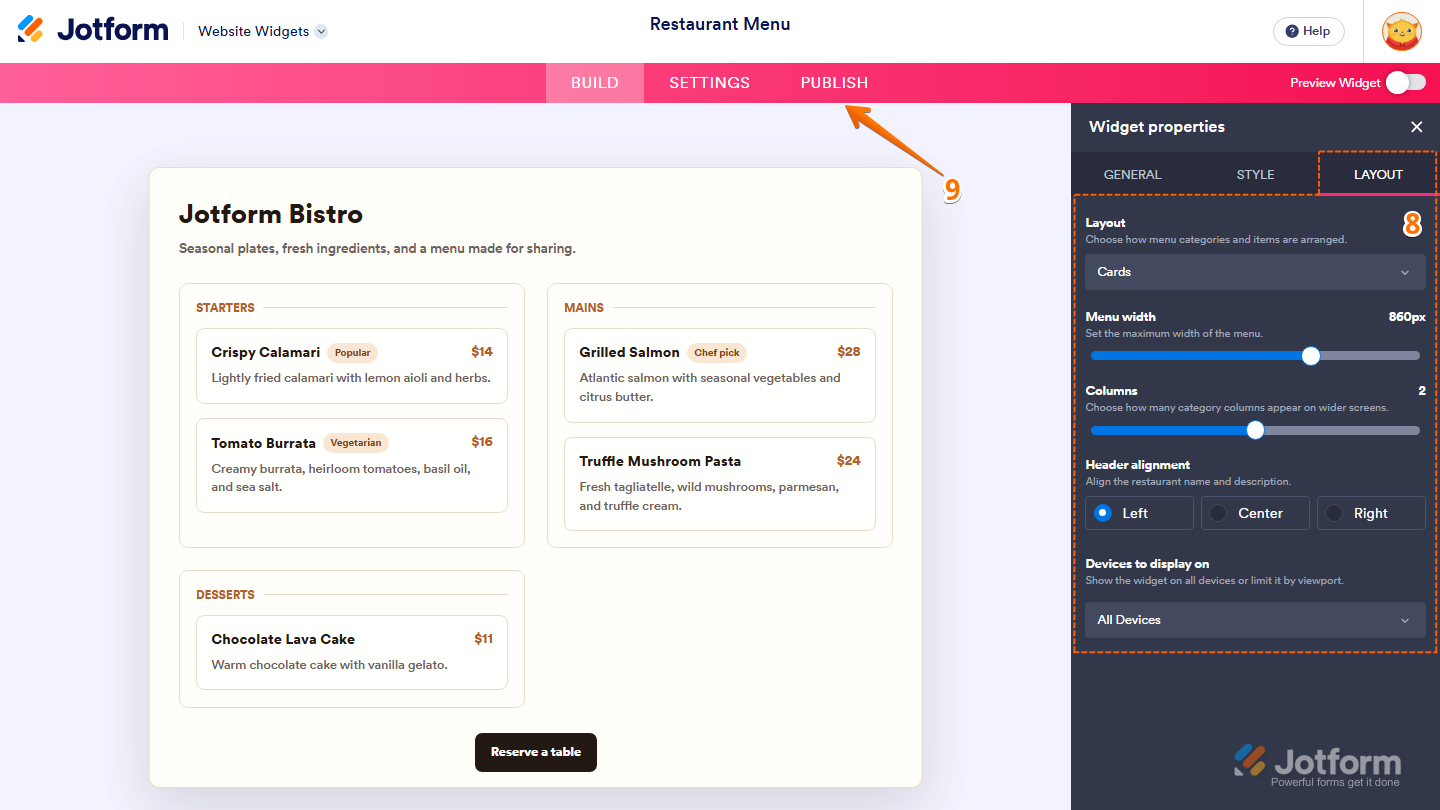
- Next, under the Layout tab, configure these options:
- Layout — Click on the Downward Arrow icon and select how the menu categories and items are arranged.
- Menu Width — Set the maximum width of the menu.
- Columns — Choose how many category columns appear on wider screens.
- Header Alignment — Align the restaurant name and description to the left, center, or right.
- Devices to Display On — Choose which devices the widget is displayed on, or limit it by viewport.
- Once everything’s set, in the pink navigation bar at the top of the page, click on Publish.
Note
You’ll be asked to log in to your Jotform account, if you’re not already, or sign up for one. Once you’ve done that, you’ll be able to get the embed code for your widget.
- Then, in the Embed section, click on Copy Code, and, if you already know how, paste that into the Embed section on your platform, and you’re good to go.
- To view embedding instructions for your widget, click on Platforms in the menu on the left side of the page.
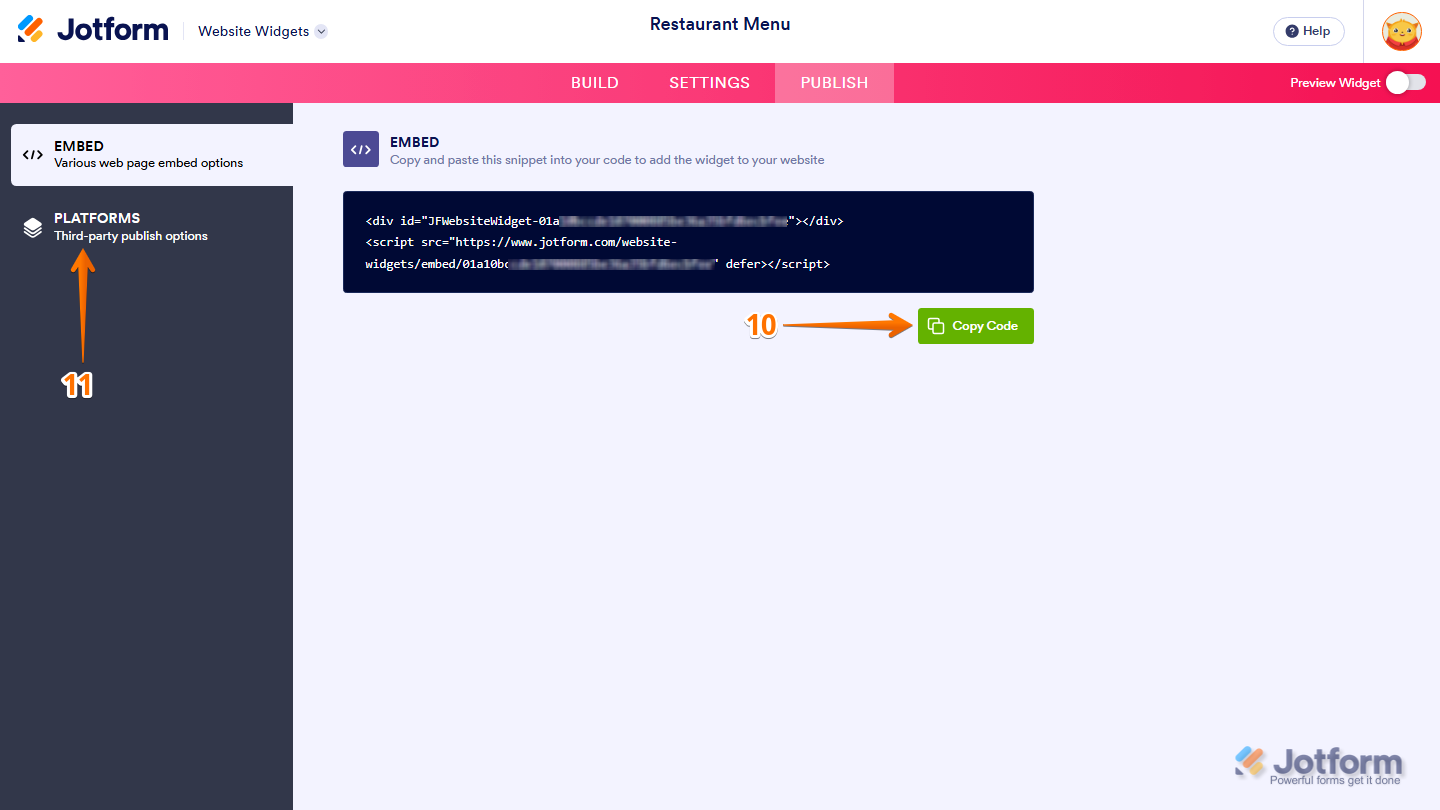
- Next, in the Platforms section on the right, select the platform you want to view embedding instructions for. Or, use the Search bar at the top of the section to find it easily.
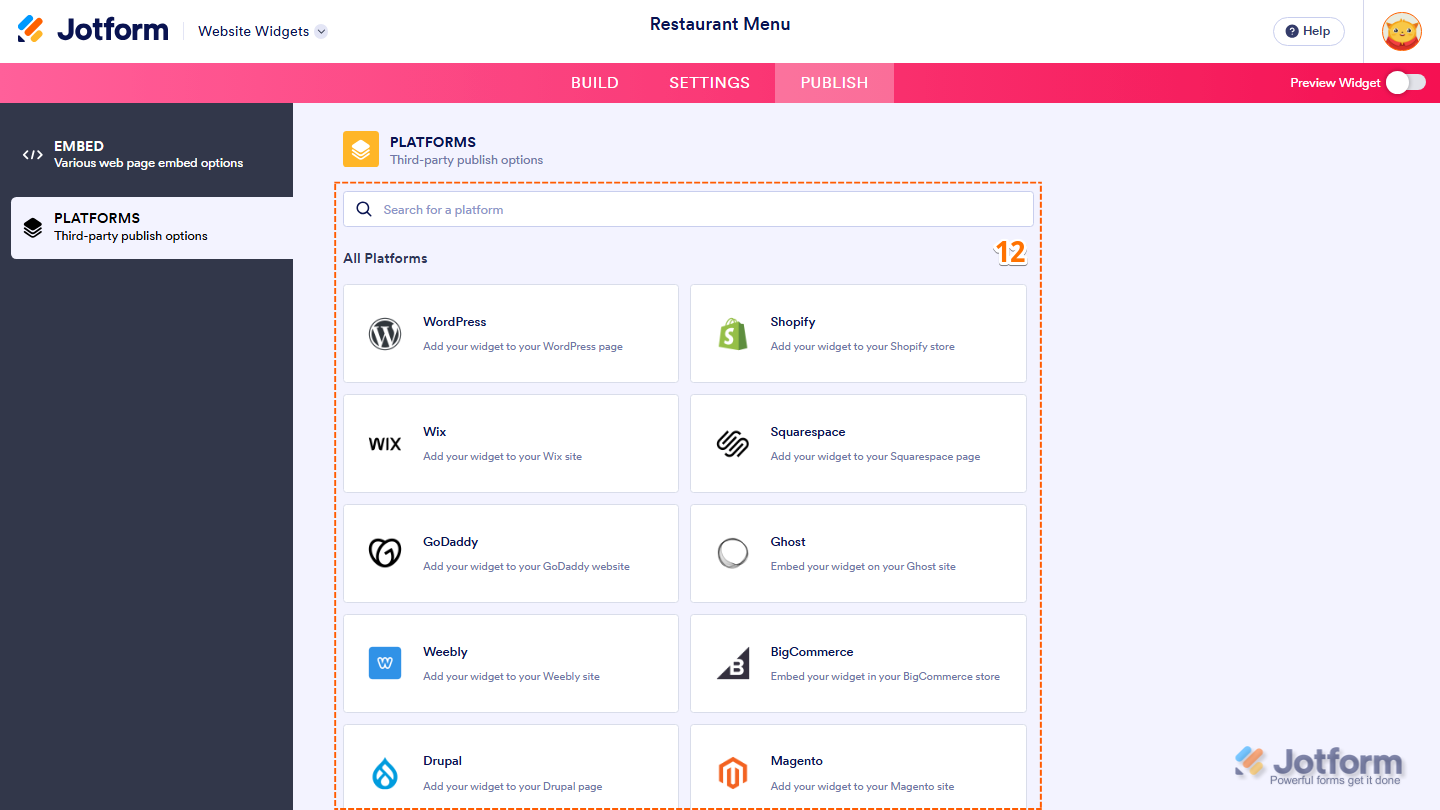
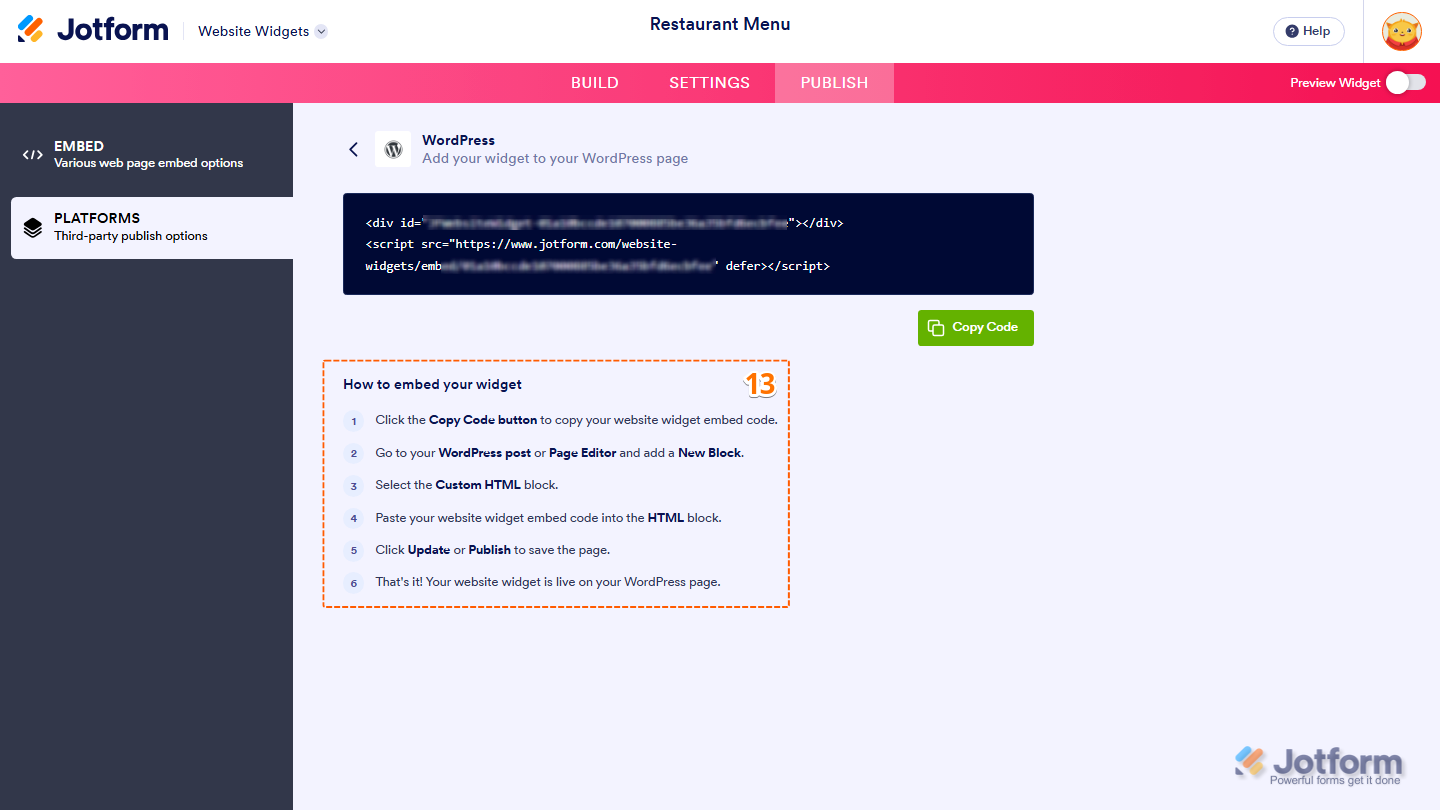
- Then, follow the steps in the How to Embed Your Widget section to add it to your website.
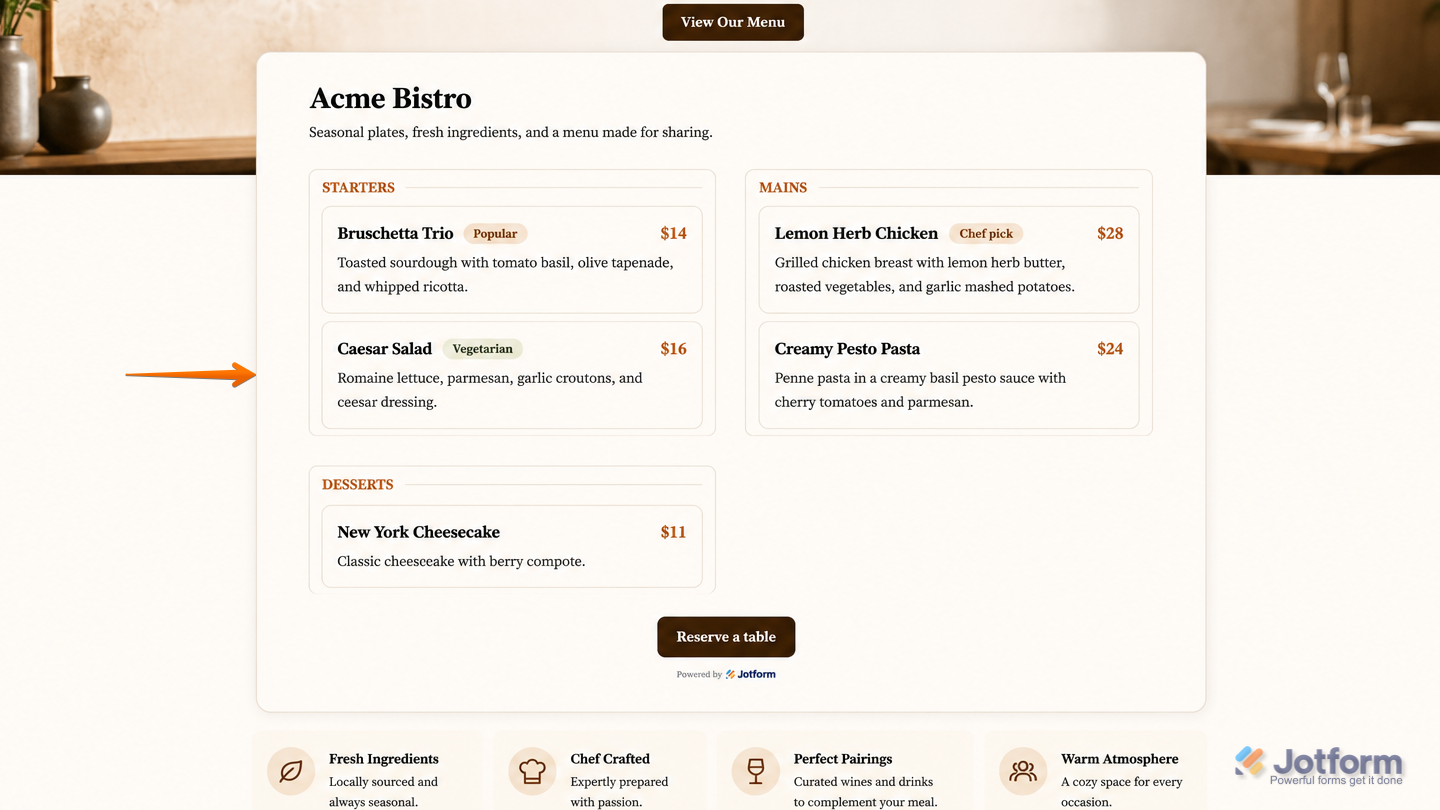
That’s it! Your Restaurant Menu widget will appear on your website based on how you set it up. Take a look at the screenshot below to see how it’ll look:

Send Comment: